turn signal bulb MINI Paceman 2013 Owner's Manual
[x] Cancel search | Manufacturer: MINI, Model Year: 2013, Model line: Paceman, Model: MINI Paceman 2013Pages: 275, PDF Size: 4.23 MB
Page 56 of 275
DrivingCONTROLS
55
The extractor hook is in the onboard
document holder or in the pouch for
the tire-changing set, page 232.<
4. Pull the loop up.
5. Move the selector le ver into the desired
position by pressing the button on the front
of the selector lever.
Before manually unlocking the selector
lever lock, firmly set the parking brake to
prevent the vehicle from rolling away. <
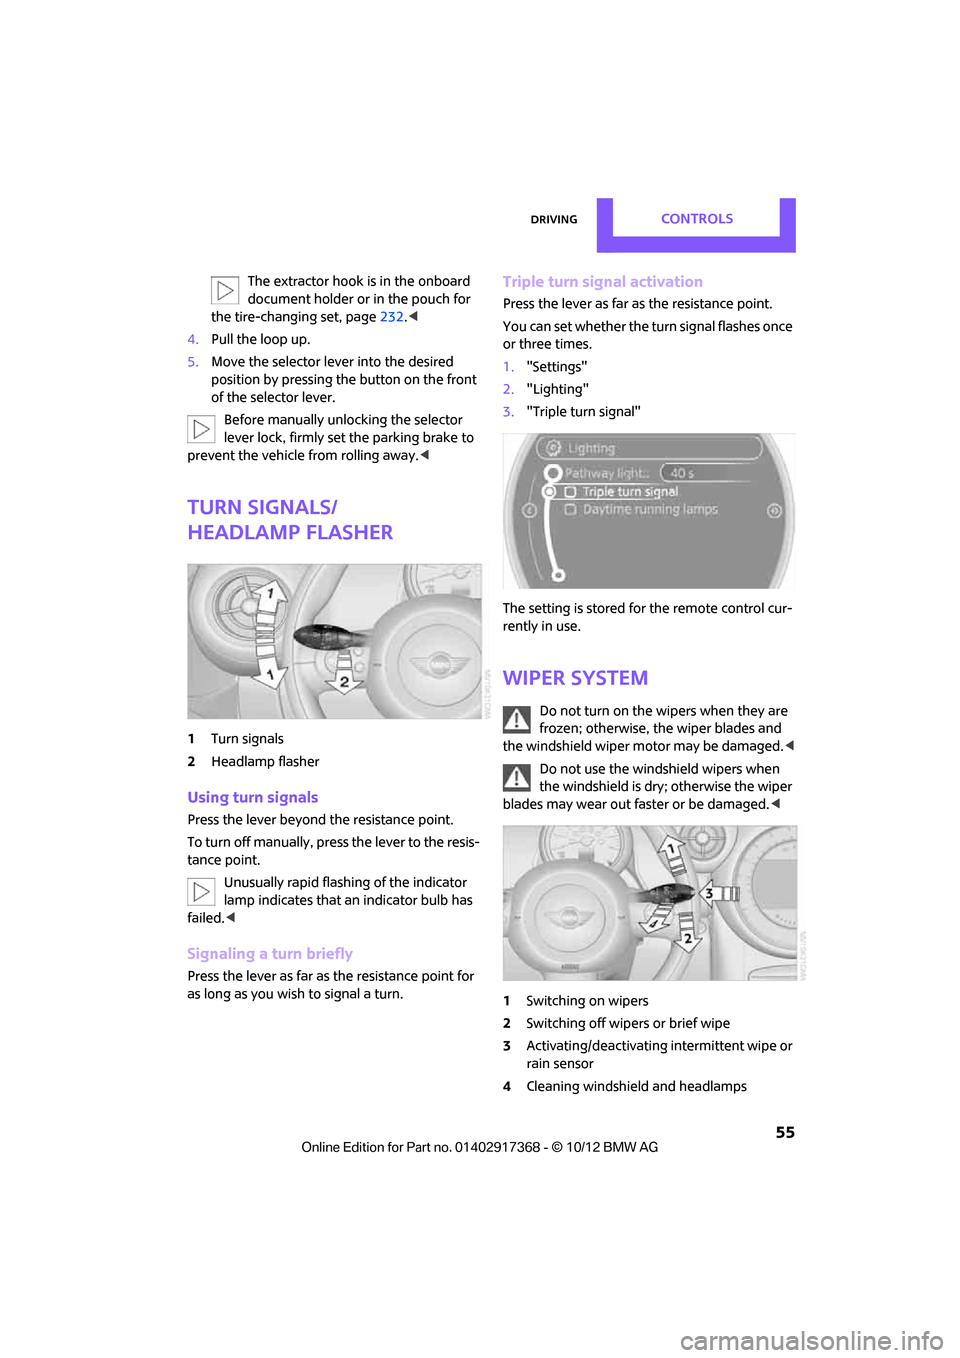
Turn signals/
headlamp flasher
1Turn signals
2 Headlamp flasher
Using turn signals
Press the lever beyond the resistance point.
To turn off manually, pre ss the lever to the resis-
tance point.
Unusually rapid flashi ng of the indicator
lamp indicates that an indicator bulb has
failed. <
Signaling a turn briefly
Press the lever as far as the resistance point for
as long as you wish to signal a turn.
Triple turn signal activation
Press the lever as far as the resistance point.
You can set whether the turn signal flashes once
or three times.
1. "Settings"
2. "Lighting"
3. "Triple turn signal"
The setting is stored for the remote control cur-
rently in use.
Wiper system
Do not turn on the wipers when they are
frozen; otherwise, the wiper blades and
the windshield wiper motor may be damaged. <
Do not use the windshield wipers when
the windshield is dry; otherwise the wiper
blades may wear out faster or be damaged. <
1 Switching on wipers
2 Switching off wipers or brief wipe
3 Activating/deactivating intermittent wipe or
rain sensor
4 Cleaning windshield and headlamps
00320051004F004C00510048000300280047004C0057004C005200510003
Page 227 of 275
MOBILITYReplacing components
226
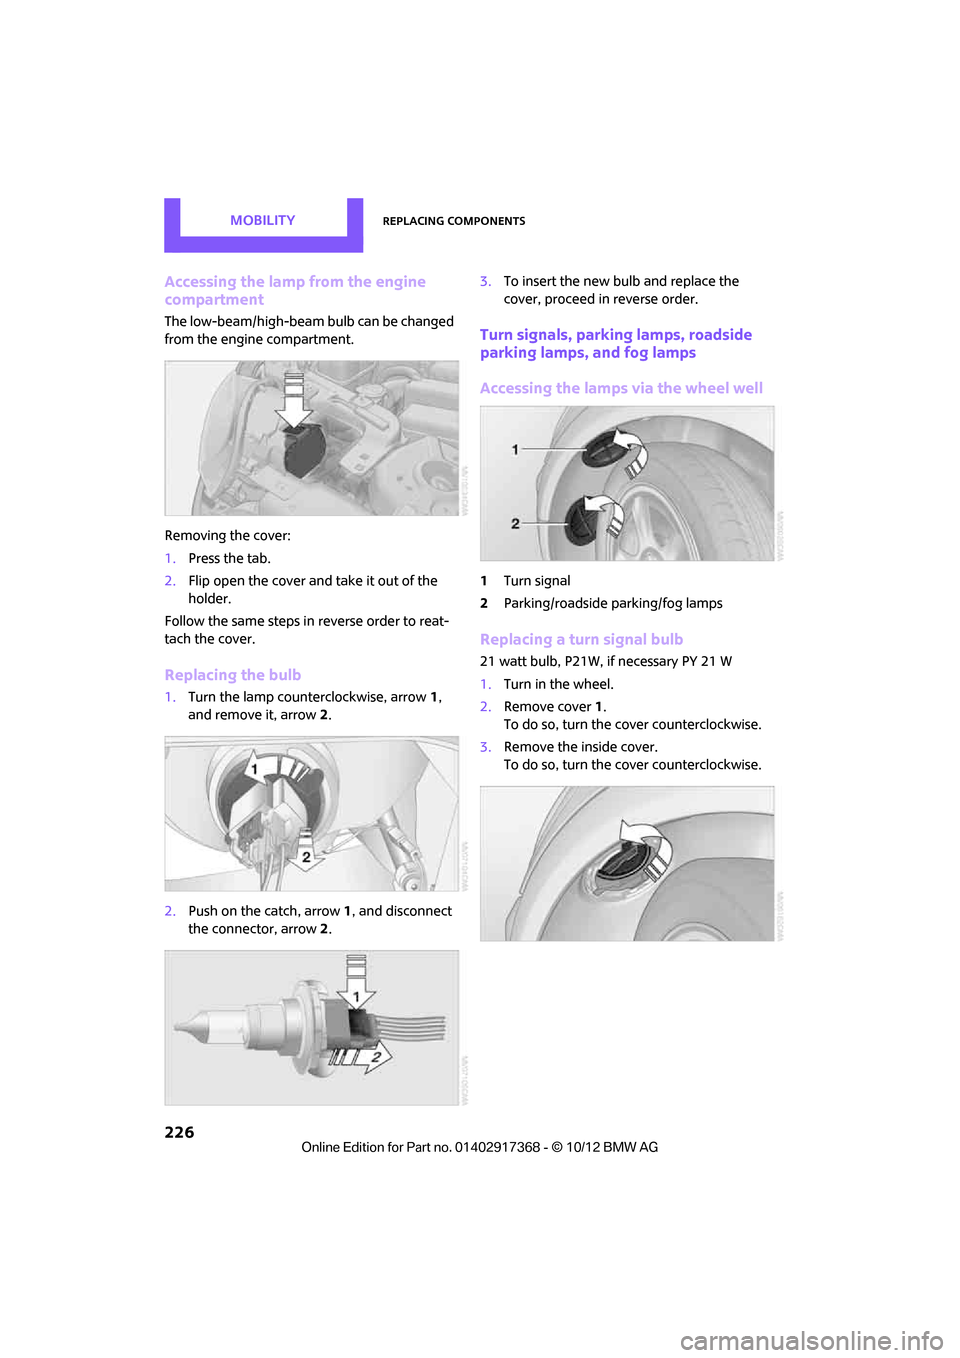
Accessing the lamp from the engine
compartment
The low-beam/high-beam bulb can be changed
from the engine compartment.
Removing the cover:
1.Press the tab.
2. Flip open the cover and take it out of the
holder.
Follow the same steps in reverse order to reat-
tach the cover.
Replacing the bulb
1. Turn the lamp counterclockwise, arrow 1,
and remove it, arrow 2.
2. Push on the catch, arrow 1, and disconnect
the connector, arrow 2. 3.
To insert the new bulb and replace the
cover, proceed in reverse order.
Turn signals, parking lamps, roadside
parking lamps, and fog lamps
Accessing the lamps via the wheel well
1Turn signal
2 Parking/roadside parking/fog lamps
Replacing a turn signal bulb
21 watt bulb, P21W, if necessary PY 21 W
1.Turn in the wheel.
2. Remove cover 1.
To do so, turn the cover counterclockwise.
3. Remove the inside cover.
To do so, turn the cover counterclockwise.
00320051004F004C00510048000300280047004C0057004C005200510003
Page 228 of 275
Replacing componentsMOBILITY
227
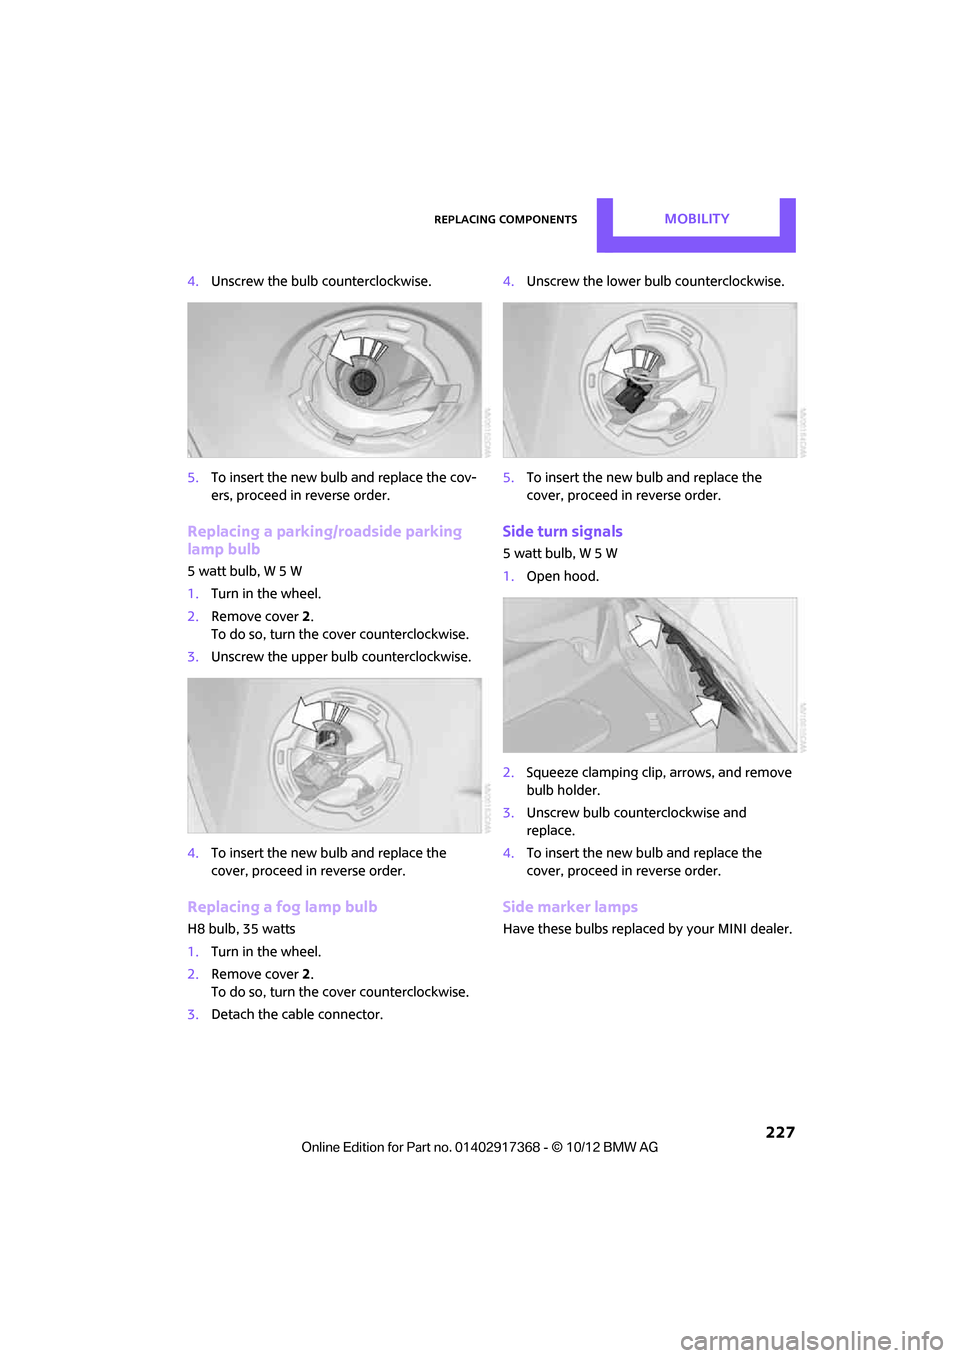
4.Unscrew the bulb counterclockwise.
5. To insert the new bulb and replace the cov-
ers, proceed in reverse order.
Replacing a parking/roadside parking
lamp bulb
5watt bulb, W5W
1.Turn in the wheel.
2. Remove cover 2.
To do so, turn the cover counterclockwise.
3. Unscrew the upper bulb counterclockwise.
4. To insert the new bulb and replace the
cover, proceed in reverse order.
Replacing a fog lamp bulb
H8 bulb, 35 watts
1.Turn in the wheel.
2. Remove cover 2.
To do so, turn the cover counterclockwise.
3. Detach the cable connector. 4.
Unscrew the lower bulb counterclockwise.
5. To insert the new bulb and replace the
cover, proceed in reverse order.
Side turn signals
5watt bulb, W5W
1.Open hood.
2. Squeeze clamping clip, arrows, and remove
bulb holder.
3. Unscrew bulb counterclockwise and
replace.
4. To insert the new bulb and replace the
cover, proceed in reverse order.
Side marker lamps
Have these bulbs replaced by your MINI dealer.
00320051004F004C00510048000300280047004C0057004C005200510003
Page 229 of 275

MOBILITYReplacing components
228
Tail lamps
Bulb P 21 W
MINI Countryman:
1Brake/tail lamp
2 Turn signal
3 Brake/tail lamp
4 Backup lamps
5 Backup lamps
MINI Paceman:
1 Brake light
2 Rear lamp
3 Turn signal
4 Backup lamps
Changing
All bulbs are integrated in a central bulb holder.
MINI Countryman:
1.Switch off the light and remove the infrared
remote control from the ignition lock.
2. Open the tailgate, 3.
Push the cover panel out from the rear of the
cargo area side trim panel and remove it.
4. Open emergency release for the fuel filler
flap, see page 200, and then push to the
side with the foam insert.
Ensure that the emergency release is not
damaged.
5. Disengage the bulb holder by pressing down
on the clamping clip, arrow 1.
6. Take out bulb holder and pull out cable,
arrow 2.
7. Exerting gentle pressure, turn bulb to the left
and remove.
8. To insert the new bulb and install the bulb
holder, proceed in reverse order. Ensure that
the lamp holder engages in all the fasteners.
9. Put foam insert in its original position and
install the emergency fuel flap release.
10. Install cover.
00320051004F004C00510048000300280047004C0057004C005200510003
Page 271 of 275
REFERENCEEverything from A to Z
270
Shuffled, refer to Random
– CD player152
Side airbags 81
Side marker lamps, replacing
bulbs 227
Side turn signal
– replacing bulb 227
Side windows, refer to Windows 36
Signal horn, refer to Horn 10
Sitting safely 38
– airbags 38
– safety belts 38
– with head restraint 38
Size, refer to Dimensions 246
Sliding/tilt sunroof
– refer to Glass roof, electric 35
Slot for remote control 50
Smokers' package, refer to
Ashtray 100
Snap-in adapter
– inserting/removing 185
– use 174
Snap-in adapter, refer to Center armrest storage
compartment 97
Snow chains 213
Socket, refer to Connecting
electrical appliances 101
Socket for On-Board Diagnosis
OBD 219
Software update 161
Speaking, refer to Voice
instructions from navigation
system 133
Special destinations 124
Special oils, refer to Approved engine oils 216
Speed 244
– with winter tires 213
Speed limit 69
– setting 69
Speed limit warning, refer to Speed limit 69 Speedo, refer to
Speedometer 12
Speedometer 12
Speed volume 141
Split rear seat backrest, refer to Expanding the cargo
area 106
Sport button 74
Stability contro l, refer to
Driving stability control
systems 72
Start/Stop button 50
– starting the engine 51
– switching off the engine 51
Starting, refer to Starting the engine 51
Starting assistance, refer to Jump-starting 236
Starting route guidance 129
Sta rting th
e
engine 51
– Start/Stop button 50
Start-off assistance, refer to
– DSC 72
– Hill Assist 74
State/province, for
navigation 120
Station, selecting
– radio 143
Status information on the Control Display 19
Status of this Owner's Manual at time of printing 4
Steering wheel 45
– adjustment 45
– buttons on steering wheel 11
– lock 50
– shift paddles 54
Steptronic, refer to Automatic transmission with
Steptronic 52
Storage area
– cargo area 106
Storage compartments 98
Storage space
– storage compartments 98Storing a destination in the
address book 122
Storing the vehicle 223
Storing tires 213
Stowage, refer to Storage compartments 98
Summer tires, refer to Wheels
and tires 203
SW, waveband 143
Switches, refer to Cockpit 10
Switching off
– engine 51
Switching off the engine 51
– Start/Stop button 50
Switching on
– audio 140
– CD player 140
– radio 140
Switching radio on/off 140
Switching the cooling function on and off 91
Symbols 4
– status information 19
T
Tachometer60
Tailgate 31
– Comfort Access 34
– opening/closing 31
– opening from outside 31
– unlocking with remote control 28
Tail lamp, refer to Tail lamps 228
– replacing bulb 228
Tail lamps 228
Tank volume, refer to Capacities 251
Target cursor for navigation 125
Tasks 192
Technical data 244
Technical modifications 4
00320051004F004C00510048000300280047004C0057004C005200510003
Page 273 of 275
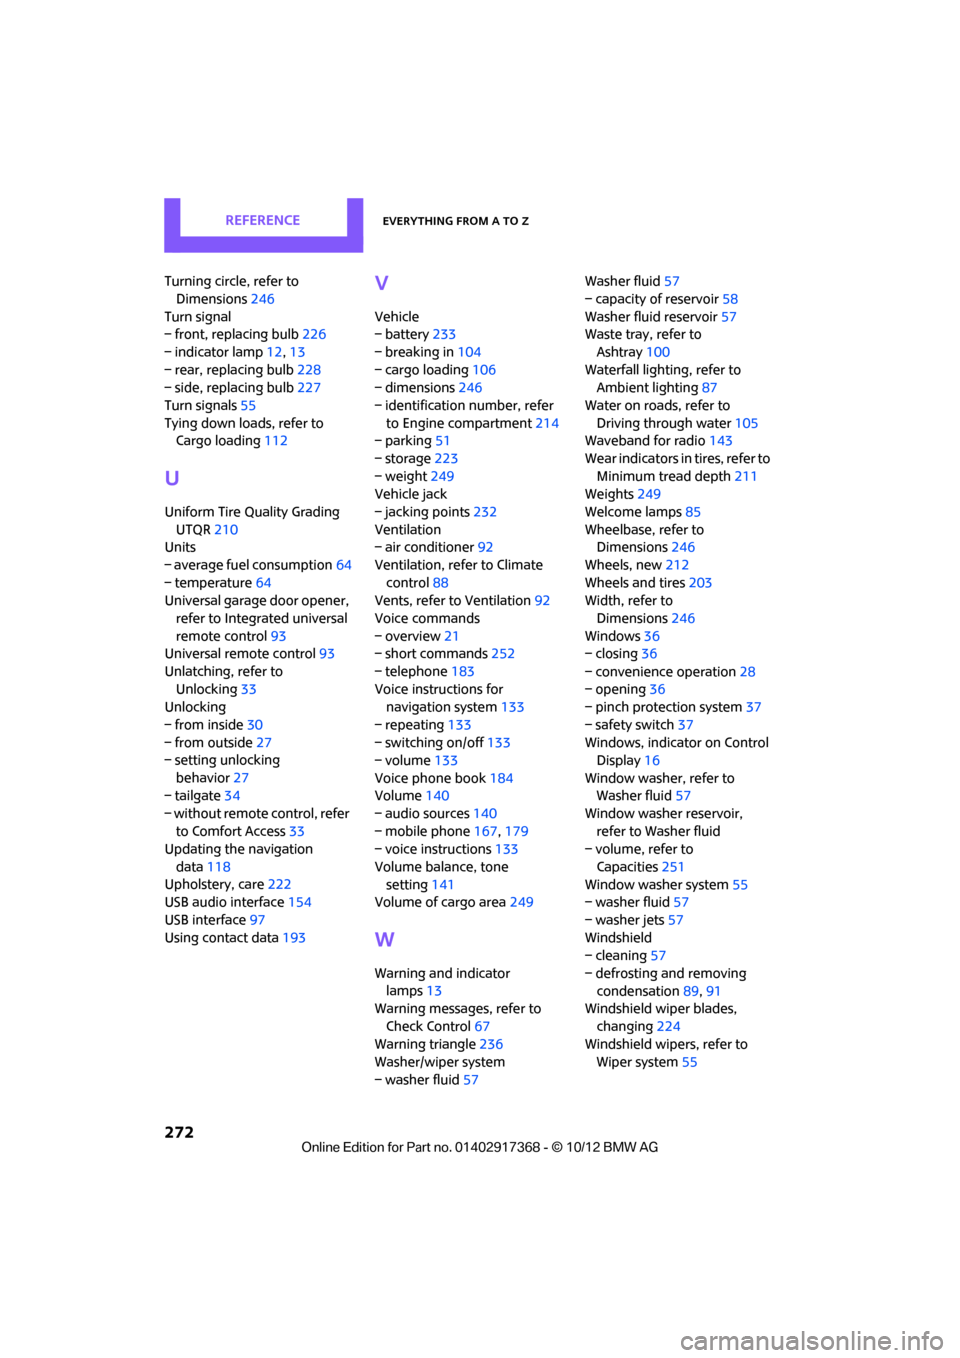
REFERENCEEverything from A to Z
272
Turning circle, refer to Dimensions 246
Turn signal
– front, replacing bulb 226
– indicator lamp 12,13
– rear, replacing bulb 228
– side, replacing bulb 227
Turn signals 55
Tying down load s, refer to
Cargo loading 112
U
Uniform Tire Quality Grading
UTQR 210
Units
– average fuel consumption 64
– temperature 64
Universal garage door opener,
refer to Integrated universal
remote control 93
Universal remote control 93
Unlatching, refer to Unlocking 33
Unlocking
– from inside 30
– from outside 27
– setting unlocking
behavior 27
– tailgate 34
– without remote control, refer to Comfort Access 33
Updating the navigation
data 118
Upholstery, care 222
USB audio interface 154
USB interface 97
Using contact data 193
V
Vehicle
– battery233
– breaking in 104
– cargo loading 106
– dimensions 246
– identification number, refer to Engine compartment 214
– parking 51
– storage 223
– weight 249
Vehicle jack
– jacking points 232
Ventilation
– air conditioner 92
Ventilation, refer to Climate control 88
Vents, refer to Ventilation 92
Voice commands
– overview 21
– short commands 252
– telephone 183
Voice instructions for navigation system 133
– repeating 133
– switching on/off 133
– volume 133
Voice phone book 184
Volume 140
– audio sources 140
– mobile phone 167,179
– voice instructions 133
Volume balance, tone setting 141
Volume of cargo area 249
W
Warning and indicator
lamps 13
Warning messages, refer to
Check Control 67
Warning triangle 236
Washer/wiper system
– washer fluid 57 Washer fluid
57
– capacity of reservoir 58
Washer fluid reservoir 57
Waste tray, refer to
Ashtray 100
Waterfall lighti ng, refer to
Ambient lighting 87
Water on roads, refer to Driving through water 105
Waveband for radio 143
Wear indicators in tires, refer to Minimum tread depth 211
Weights 249
Welcome lamps 85
Wheelbase, refer to Dimensions 246
Wheels, new 212
Wheels and tires 203
Width, refer to
Dimensions 246
Windows 36
– closing 36
– convenience operation 28
– opening 36
– pinch protection system 37
– safety switch 37
Windows, indicator on Control Display 16
Window washer, refer to Washer fluid 57
Window washer reservoir, refer to Washer fluid
– volume, refer to
Capacities 251
Window washer system 55
– washer fluid 57
– washer jets 57
Windshield
– cleaning 57
– defrosting and removing condensation 89,91
Windshield wiper blades,
changing 224
Windshield wipers, refer to Wiper system 55
00320051004F004C00510048000300280047004C0057004C005200510003