display MITSUBISHI 380 2005 Repair Manual
[x] Cancel search | Manufacturer: MITSUBISHI, Model Year: 2005, Model line: 380, Model: MITSUBISHI 380 2005Pages: 1500, PDF Size: 47.87 MB
Page 190 of 1500
SYMPTOM PROCEDURES
SIMPLIFIED WIRING SYSTEM (SWS)54B-190
KEYLESS ENTRY HAZARD ANSWERBACK AND
HORN ANSWERBACK FUNCTION
.
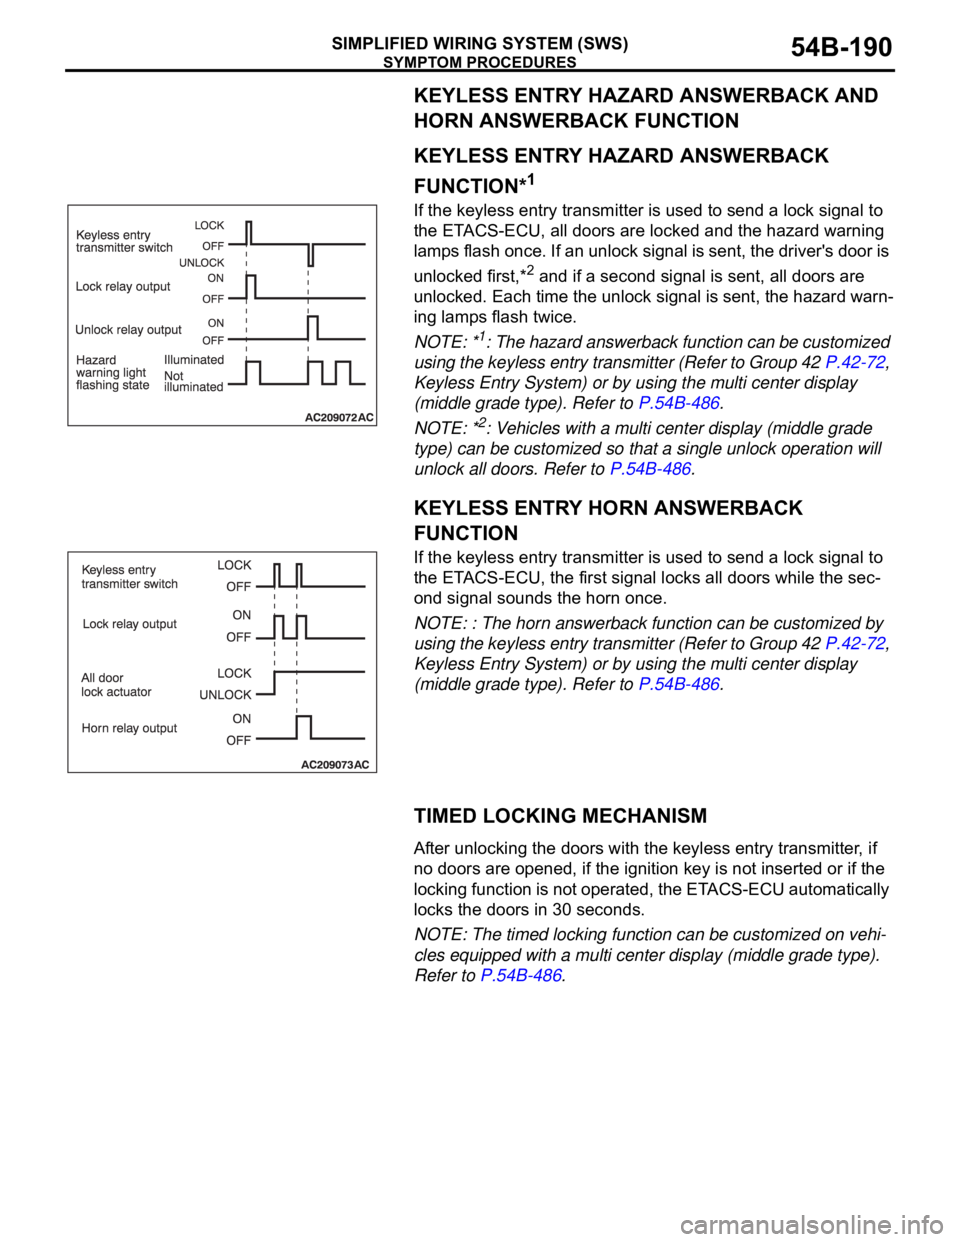
KEYLESS ENTRY HAZARD ANSWERBACK
FUNCTION*
1
If the keyless entry transmitter is used to send a lock signal to
the ETACS-ECU, all doors are locked and the hazard warning
lamps flash once. If an unlock signal is sent, the driver's door is
unlocked first,*
2 and if a second signal is sent, all doors are
unlocked. Each time the unlock signal is sent, the hazard warn-
ing lamps flash twice.
NOTE: *
1: The hazard answerback function can be customized
using the keyless entry transmitter (Refer to Group 42 P.42-72,
Keyless Entry System) or by using the multi center display
(middle grade type). Refer to P.54B-486.
NOTE: *
2: Vehicles with a multi center display (middle grade
type) can be customized so that a single unlock operation will
unlock all doors. Refer to P.54B-486.
.
KEYLESS ENTRY HORN ANSWERBACK
FUNCTION
If the keyless entry transmitter is used to send a lock signal to
the ETACS-ECU, the first signal locks all doors while the sec-
ond signal sounds the horn once.
NOTE: : The horn answerback function can be customized by
using the keyless entry transmitter (Refer to Group 42 P.42-72,
Keyless Entry System) or by using the multi center display
(middle grade type). Refer to P.54B-486.
TIMED LOCKING MECHANISM
.After unlocking the doors with the keyless entry transmitter, if
no doors are opened, if the ignition key is not inserted or if the
locking function is not operated, the ETACS-ECU automatically
locks the doors in 30 seconds.
NOTE: The timed locking function can be customized on vehi-
cles equipped with a multi center display (middle grade type).
Refer to P.54B-486.
Page 192 of 1500
SYMPTOM PROCEDURES
SIMPLIFIED WIRING SYSTEM (SWS)54B-192
STEP 2. Check the input signal (by using the pulse check
mode of the monitor).
Check input signals from the transmitter.
To prevent damage to diagnostic tool MB991958, always
turn the ignition switch to the "LOCK" (OFF) position
before connecting or disconnecting diagnostic tool
MB991958.
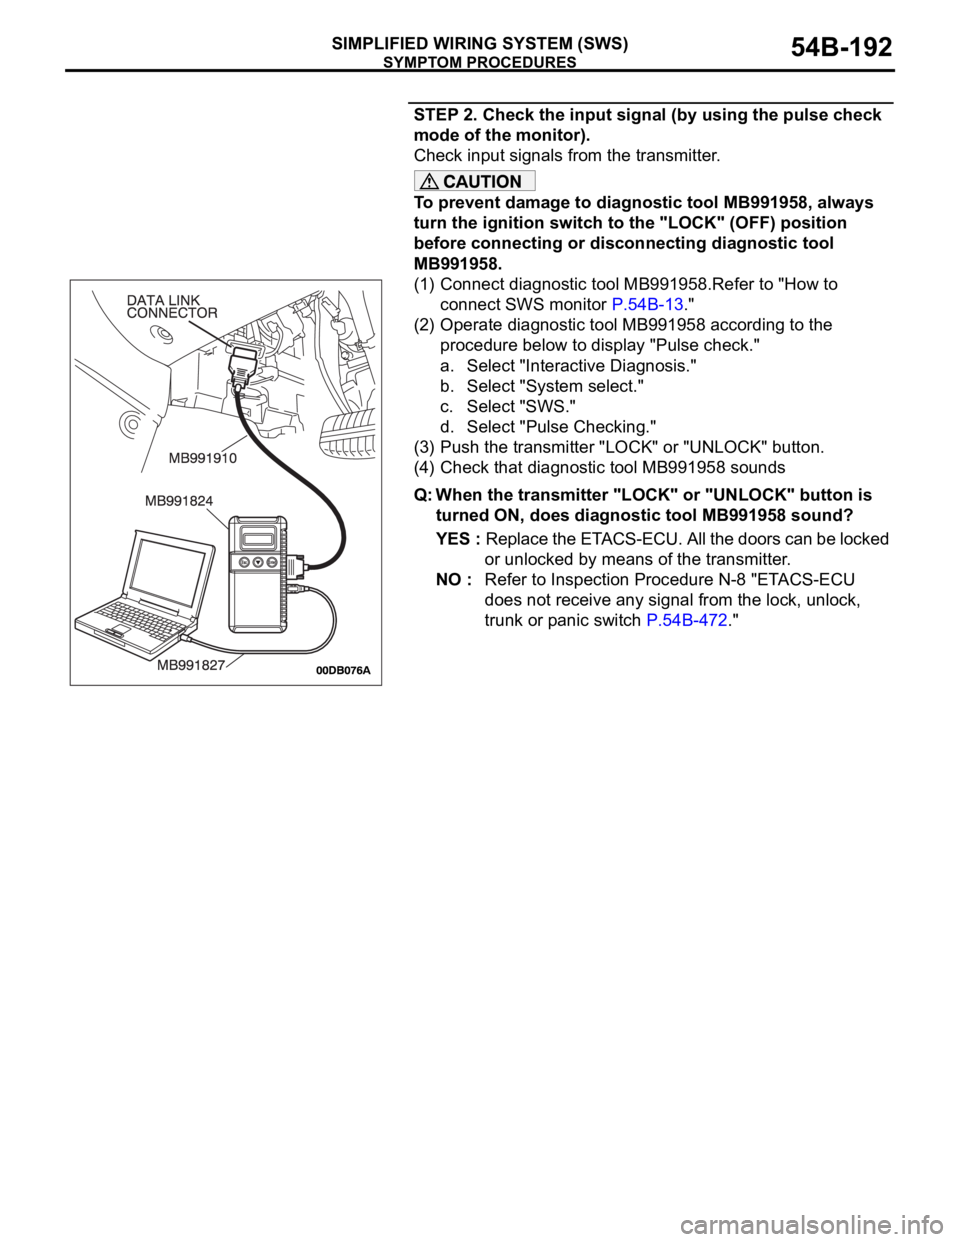
(1) Connect diagnostic tool MB991958.Refer to "How to
connect SWS monitor P.54B-13."
(2) Operate diagnostic tool MB991958 according to the
procedure below to display "Pulse check."
a. Select "Interactive Diagnosis."
b. Select "System select."
c. Select "SWS."
d. Select "Pulse Checking."
(3) Push the transmitter "LOCK" or "UNLOCK" button.
(4) Check that diagnostic tool MB991958 sounds
Q: When the transmitter "LOCK" or "UNLOCK" button is
turned ON, does diagnostic tool MB991958 sound?
YES : Replace the ETACS-ECU. All the doors can be locked
or unlocked by means of the transmitter.
NO : Refer to Inspection Procedure N-8 "ETACS-ECU
does not receive any signal from the lock, unlock,
trunk or panic switch P.54B-472."
Page 203 of 1500

SYMPTOM PROCEDURES
SIMPLIFIED WIRING SYSTEM (SWS)54B-203
STEP 2. Check the input signal (by using the pulse check
mode of the monitor).
Check the input signals from the following switches:
Key reminder switch
Hazard warning lamp switch
To prevent damage to diagnostic tool MB991958, always
turn the ignition switch to the "LOCK" (OFF) position
before connecting or disconnecting diagnostic tool
MB991958.
(1) Connect diagnostic tool MB991958.Refer to "How to
connect SWS monitor P.54B-13."
(2) Operate diagnostic tool MB991958 according to the
procedure below to display "Pulse check."
a. Select "Interactive Diagnosis."
b. Select "System select."
c. Select "SWS."
d. Select "Pulse Checking."
(3) Check the switches (see table below) applicable for the
input signal check are operated.
(4) Check diagnostic tool MB991958 sounds or not.
Q: When the key reminder switch and the hazard warning
lamp switch are operated, does diagnostic tool
MB991958 sound in each case?
Buzzer of diagnostic tool MB991958 sounds normally. :
Replace the ETACS-ECU. Verify that the encrypted
code can be registered in the transmitter.
diagnostic tool MB991958 does not sound when the
ignition key is removed and reinserted : Refer to
Inspection Procedure N-1 "ETACS-ECU does not
receive any signal from the key reminder switch
P.54B-432."
diagnostic tool MB991958 does not sound when the
hazard warning lamp switch is turned from "OFF" to
"ON" : Refer to Inspection Procedure N-2 "ETACS-ECU
does not receive any signal from the hazard warning
lamp switch P.54B-436." ITEM NAME CHECK CONDITION
Key reminder switch Remove and reinsert the
ignition key
Hazard warning lamp switch Turn the hazard warning lamp
switch from "OFF" to "ON"
position.
Page 206 of 1500
SYMPTOM PROCEDURES
SIMPLIFIED WIRING SYSTEM (SWS)54B-206
STEP 2. Check the input signal (by using the pulse check
mode of the monitor).
Check input signals from the transmitter.
To prevent damage to diagnostic tool MB991958, always
turn the ignition switch to the "LOCK" (OFF) position
before connecting or disconnecting diagnostic tool
MB991958.
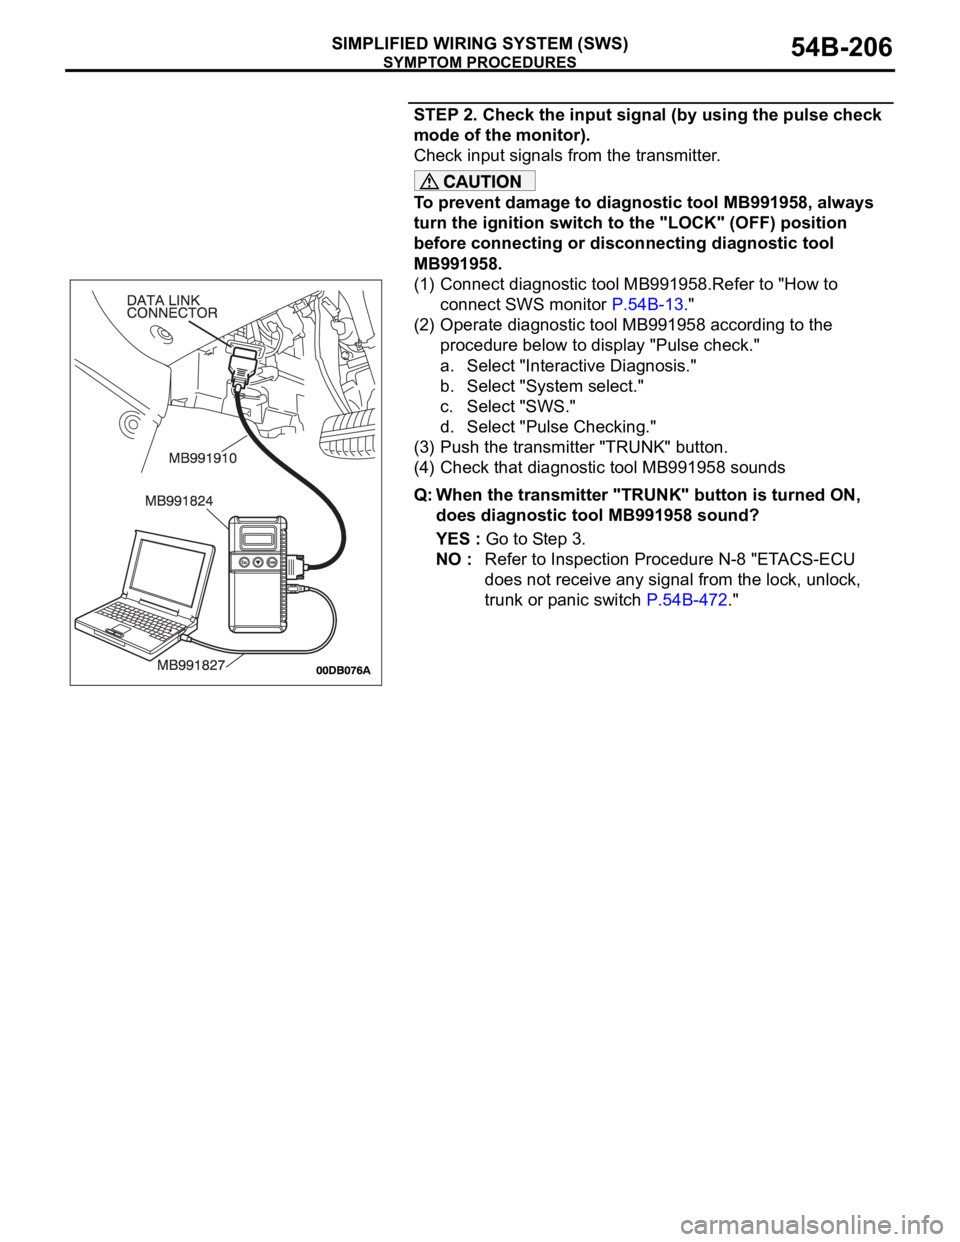
(1) Connect diagnostic tool MB991958.Refer to "How to
connect SWS monitor P.54B-13."
(2) Operate diagnostic tool MB991958 according to the
procedure below to display "Pulse check."
a. Select "Interactive Diagnosis."
b. Select "System select."
c. Select "SWS."
d. Select "Pulse Checking."
(3) Push the transmitter "TRUNK" button.
(4) Check that diagnostic tool MB991958 sounds
Q: When the transmitter "TRUNK" button is turned ON,
does diagnostic tool MB991958 sound?
YES : Go to Step 3.
NO : Refer to Inspection Procedure N-8 "ETACS-ECU
does not receive any signal from the lock, unlock,
trunk or panic switch P.54B-472."
Page 219 of 1500
SYMPTOM PROCEDURES
SIMPLIFIED WIRING SYSTEM (SWS)54B-219
INSPECTION PROCEDURE F-2: Sunroof: Any of the sunroof switch positions is defective.
.
TECHNICAL DESCRIPTION (COMMENT)
The sunroof switch or the sunroof motor assembly
may be defective.
.
TROUBLESHOOTING HINTS
Refer to circuit diagrams GROUP-90
Refer to configuration diagrams GROUP-80
The sunroof switch may be defective
The sunroof motor assembly may be defective
The wiring harness or connectors may have
loose, corroded, or damaged terminals, or termi-
nals pushed back in the connector
DIAGNOSIS
Required Special Tools:
MB991223: Harness Set
MB991958: diagnostic tool (MUT-III Sub Assembly)
MB991824: Vehicle Communication Interface (V.C.I.)
MB991827: MUT-III USB Cable
MB991910: MUT-III Main Harness A
Check the input signal (by using the pulse check mode of
the monitor).
Check the input signals from the sunroof switch.
To prevent damage to diagnostic tool MB991958, always
turn the ignition switch to the "LOCK" (OFF) position
before connecting or disconnecting diagnostic tool
MB991958.
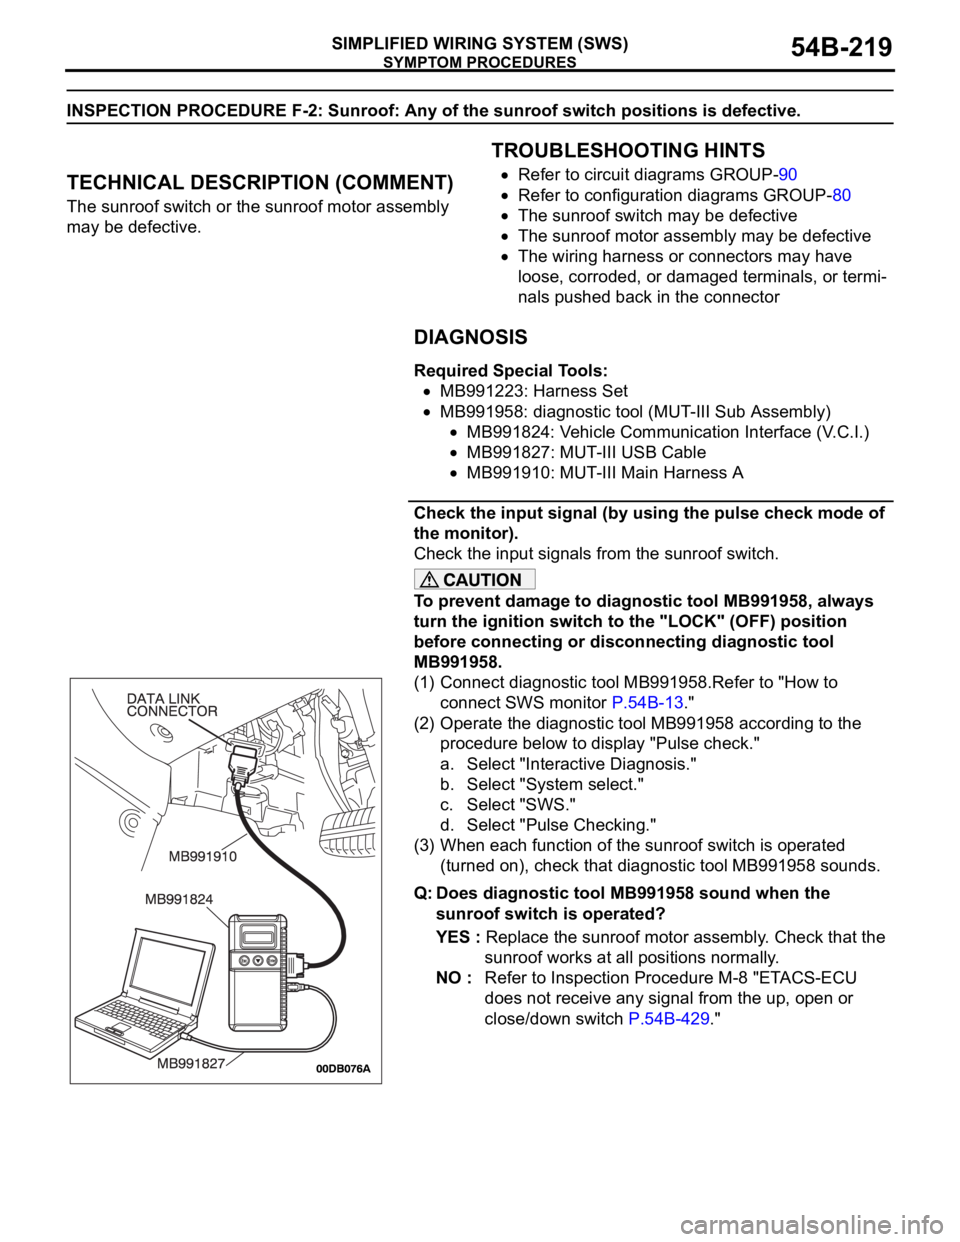
(1) Connect diagnostic tool MB991958.Refer to "How to
connect SWS monitor P.54B-13."
(2) Operate the diagnostic tool MB991958 according to the
procedure below to display "Pulse check."
a. Select "Interactive Diagnosis."
b. Select "System select."
c. Select "SWS."
d. Select "Pulse Checking."
(3) When each function of the sunroof switch is operated
(turned on), check that diagnostic tool MB991958 sounds.
Q: Does diagnostic tool MB991958 sound when the
sunroof switch is operated?
YES : Replace the sunroof motor assembly. Check that the
sunroof works at all positions normally.
NO : Refer to Inspection Procedure M-8 "ETACS-ECU
does not receive any signal from the up, open or
close/down switch P.54B-429."
Page 221 of 1500
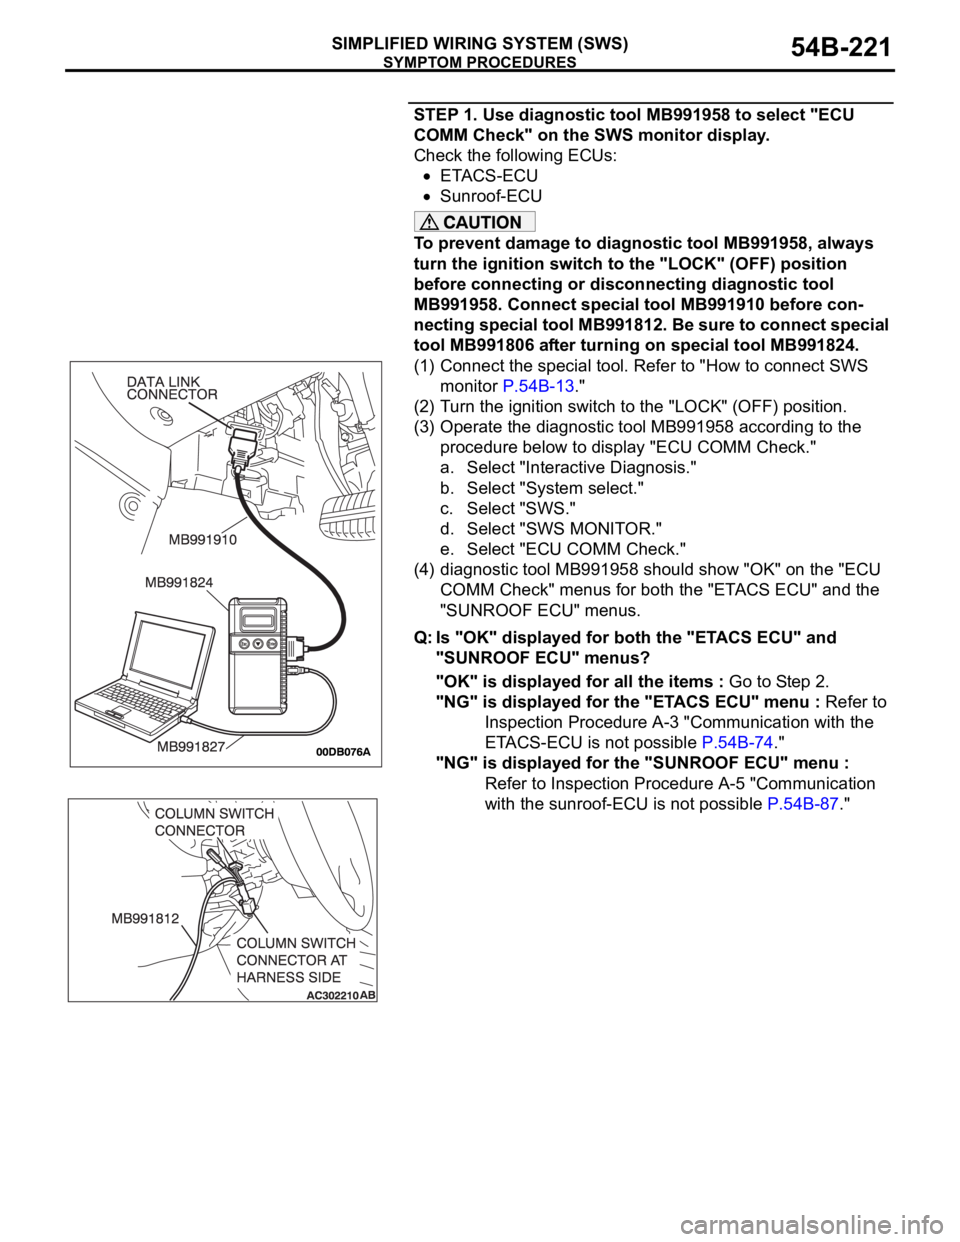
SYMPTOM PROCEDURES
SIMPLIFIED WIRING SYSTEM (SWS)54B-221
STEP 1. Use diagnostic tool MB991958 to select "ECU
COMM Check" on the SWS monitor display.
Check the following ECUs:
ETACS-ECU
Sunroof-ECU
To prevent damage to diagnostic tool MB991958, always
turn the ignition switch to the "LOCK" (OFF) position
before connecting or disconnecting diagnostic tool
MB991958. Connect special tool MB991910 before con-
necting special tool MB991812. Be sure to connect special
tool MB991806 after turning on special tool MB991824.
(1) Connect the special tool. Refer to "How to connect SWS
monitor P.54B-13."
(2) Turn the ignition switch to the "LOCK" (OFF) position.
(3) Operate the diagnostic tool MB991958 according to the
procedure below to display "ECU COMM Check."
a. Select "Interactive Diagnosis."
b. Select "System select."
c. Select "SWS."
d. Select "SWS MONITOR."
e. Select "ECU COMM Check."
(4) diagnostic tool MB991958 should show "OK" on the "ECU
COMM Check" menus for both the "ETACS ECU" and the
"SUNROOF ECU" menus.
Q: Is "OK" displayed for both the "ETACS ECU" and
"SUNROOF ECU" menus?
"OK" is displayed for all the items : Go to Step 2.
"NG" is displayed for the "ETACS ECU" menu : Refer to
Inspection Procedure A-3 "Communication with the
ETACS-ECU is not possible P.54B-74."
"NG" is displayed for the "SUNROOF ECU" menu :
Refer to Inspection Procedure A-5 "Communication
with the sunroof-ECU is not possible P.54B-87."
Page 222 of 1500
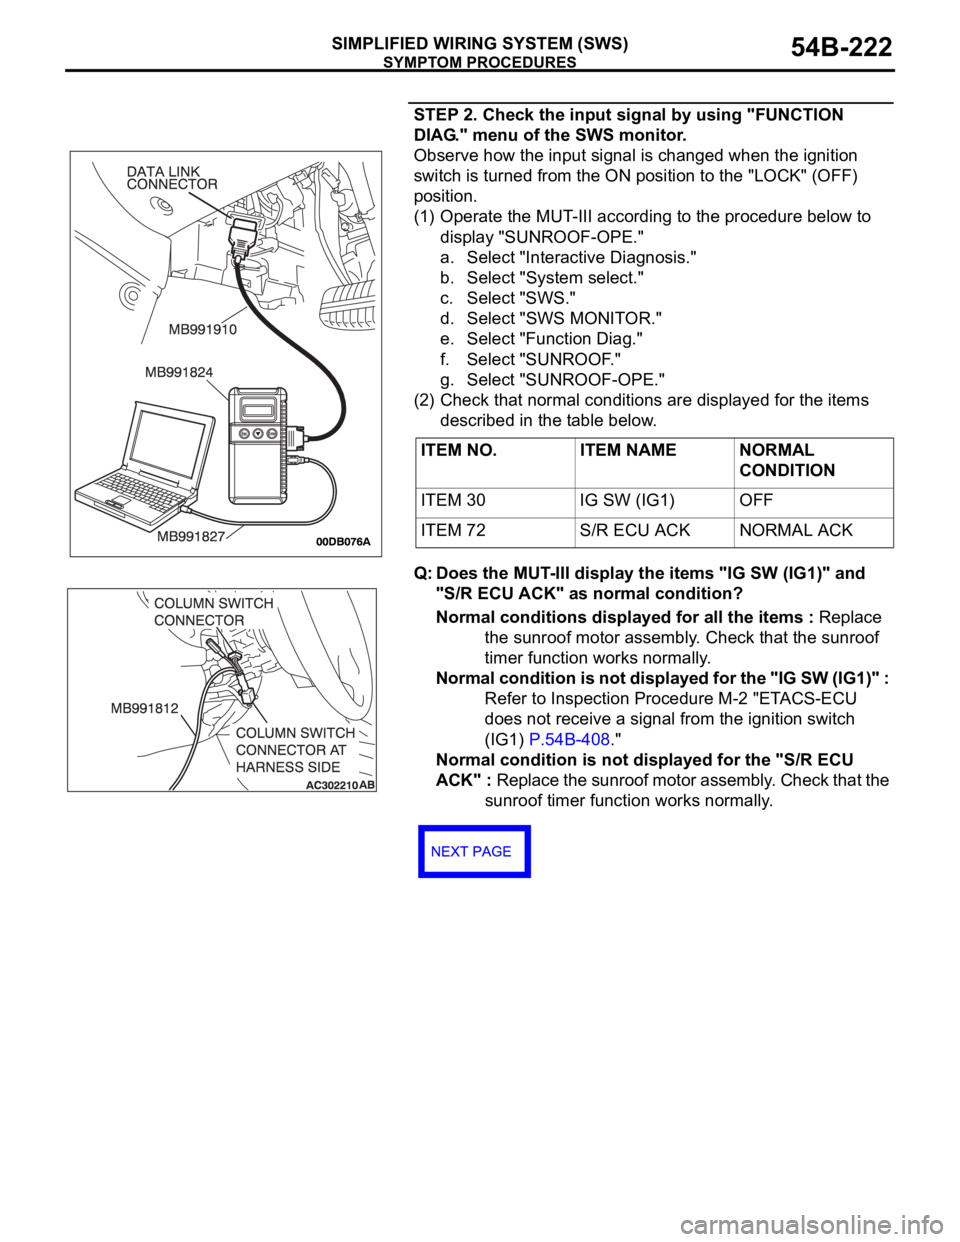
SYMPTOM PROCEDURES
SIMPLIFIED WIRING SYSTEM (SWS)54B-222
STEP 2. Check the input signal by using "FUNCTION
DIAG." menu of the SWS monitor.
Observe how the input signal is changed when the ignition
switch is turned from the ON position to the "LOCK" (OFF)
position.
(1) Operate the MUT-III according to the procedure below to
display "SUNROOF-OPE."
a. Select "Interactive Diagnosis."
b. Select "System select."
c. Select "SWS."
d. Select "SWS MONITOR."
e. Select "Function Diag."
f. Select "SUNROOF."
g. Select "SUNROOF-OPE."
(2) Check that normal conditions are displayed for the items
described in the table below.
Q: Does the MUT-III display the items "IG SW (IG1)" and
"S/R ECU ACK" as normal condition?
Normal conditions displayed for all the items : Replace
the sunroof motor assembly. Check that the sunroof
timer function works normally.
Normal condition is not displayed for the "IG SW (IG1)" :
Refer to Inspection Procedure M-2 "ETACS-ECU
does not receive a signal from the ignition switch
(IG1) P.54B-408."
Normal condition is not displayed for the "S/R ECU
ACK" : Replace the sunroof motor assembly. Check that the
sunroof timer function works normally. ITEM NO. ITEM NAME NORMAL
CONDITION
ITEM 30 IG SW (IG1) OFF
ITEM 72 S/R ECU ACK NORMAL ACK
Page 223 of 1500
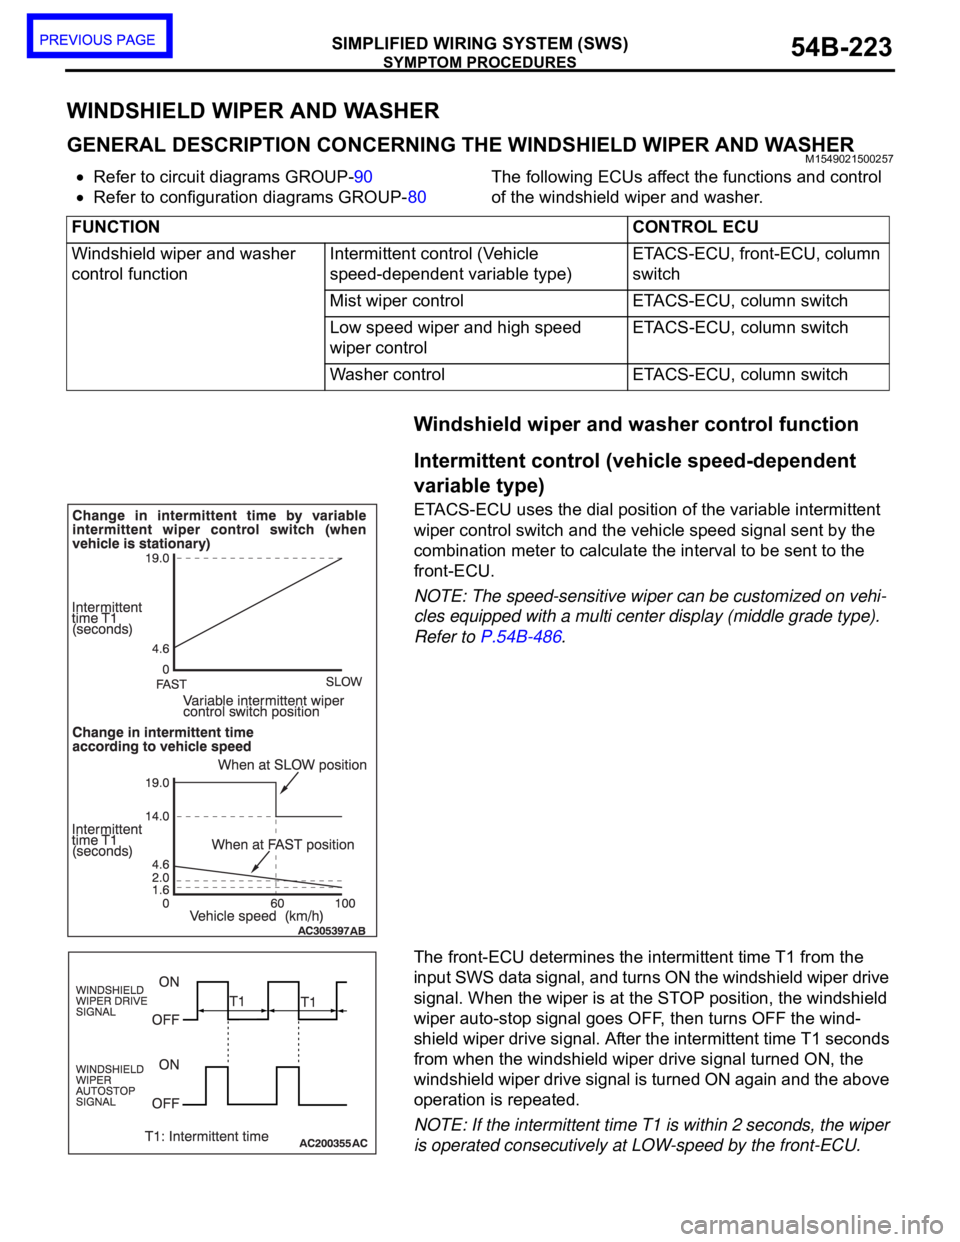
SYMPTOM PROCEDURES
SIMPLIFIED WIRING SYSTEM (SWS)54B-223
54B
WINDSHIELD WIPER AND WASHER
GENERAL DESCRIPTION CONCERNING THE WINDSHIELD WIPER AND WASHERM1549021500257
Refer to circuit diagrams GROUP-90
Refer to configuration diagrams GROUP-80The following ECUs affect the functions and control
of the windshield wiper and washer.
Windshield wiper and washer control function
.
Intermittent control (vehicle speed-dependent
variable type)
ETACS-ECU uses the dial position of the variable intermittent
wiper control switch and the vehicle speed signal sent by the
combination meter to calculate the interval to be sent to the
front-ECU.
NOTE: The speed-sensitive wiper can be customized on vehi-
cles equipped with a multi center display (middle grade type).
Refer to P.54B-486.
The front-ECU determines the intermittent time T1 from the
input SWS data signal, and turns ON the windshield wiper drive
signal. When the wiper is at the STOP position, the windshield
wiper auto-stop signal goes OFF, then turns OFF the wind-
shield wiper drive signal. After the intermittent time T1 seconds
from when the windshield wiper drive signal turned ON, the
windshield wiper drive signal is turned ON again and the above
operation is repeated.
NOTE: If the intermittent time T1 is within 2 seconds, the wiper
is operated consecutively at LOW-speed by the front-ECU.
.
FUNCTION CONTROL ECU
Windshield wiper and washer
control functionIntermittent control (Vehicle
speed-dependent variable type)ETACS-ECU, front-ECU, column
switch
Mist wiper control ETACS-ECU, column switch
Low speed wiper and high speed
wiper controlETACS-ECU, column switch
Washer control ETACS-ECU, column switch
Page 228 of 1500
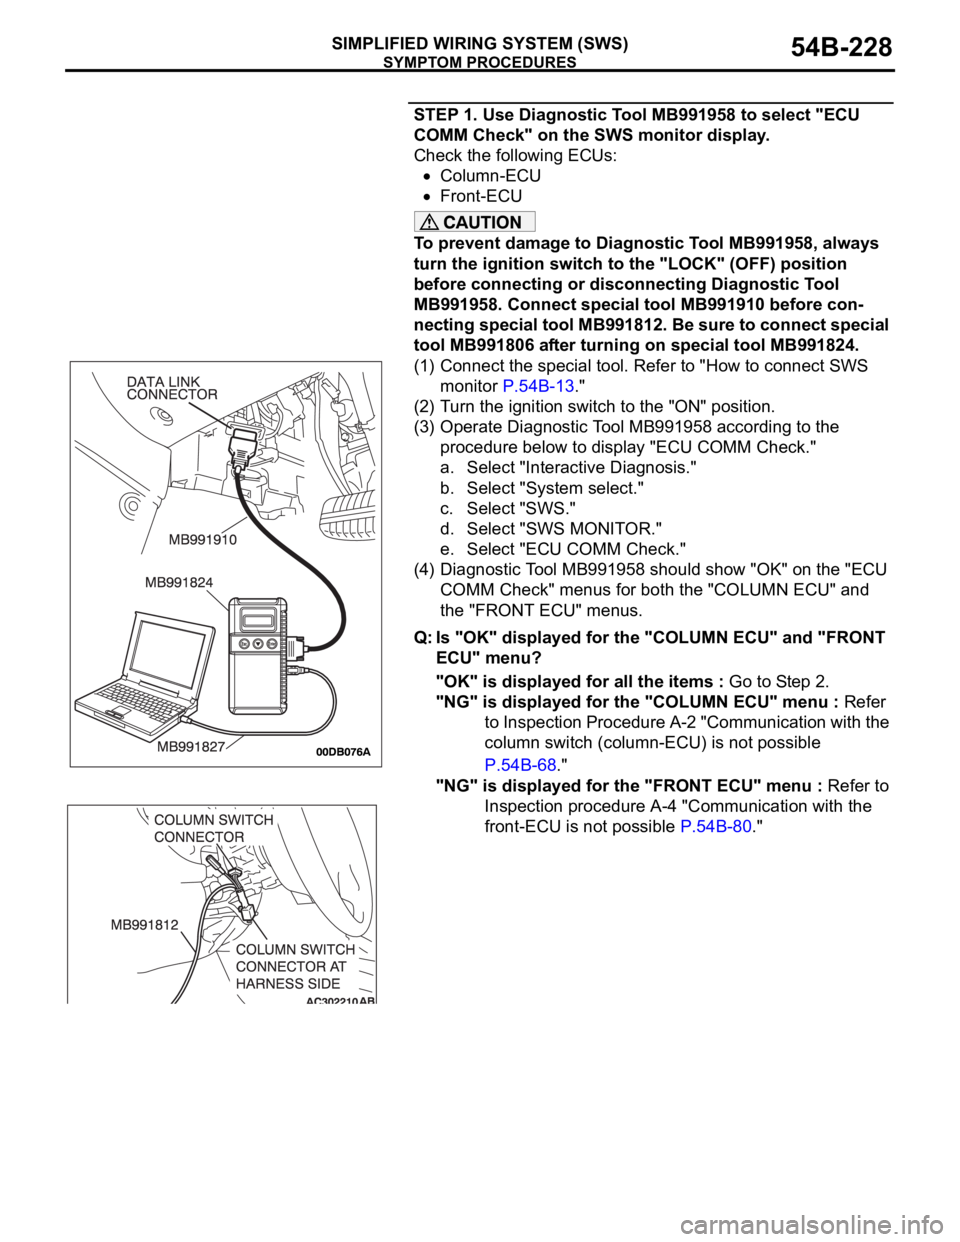
SYMPTOM PROCEDURES
SIMPLIFIED WIRING SYSTEM (SWS)54B-228
STEP 1. Use Diagnostic Tool MB991958 to select "ECU
COMM Check" on the SWS monitor display.
Check the following ECUs:
Column-ECU
Front-ECU
To prevent damage to Diagnostic Tool MB991958, always
turn the ignition switch to the "LOCK" (OFF) position
before connecting or disconnecting Diagnostic Tool
MB991958. Connect special tool MB991910 before con-
necting special tool MB991812. Be sure to connect special
tool MB991806 after turning on special tool MB991824.
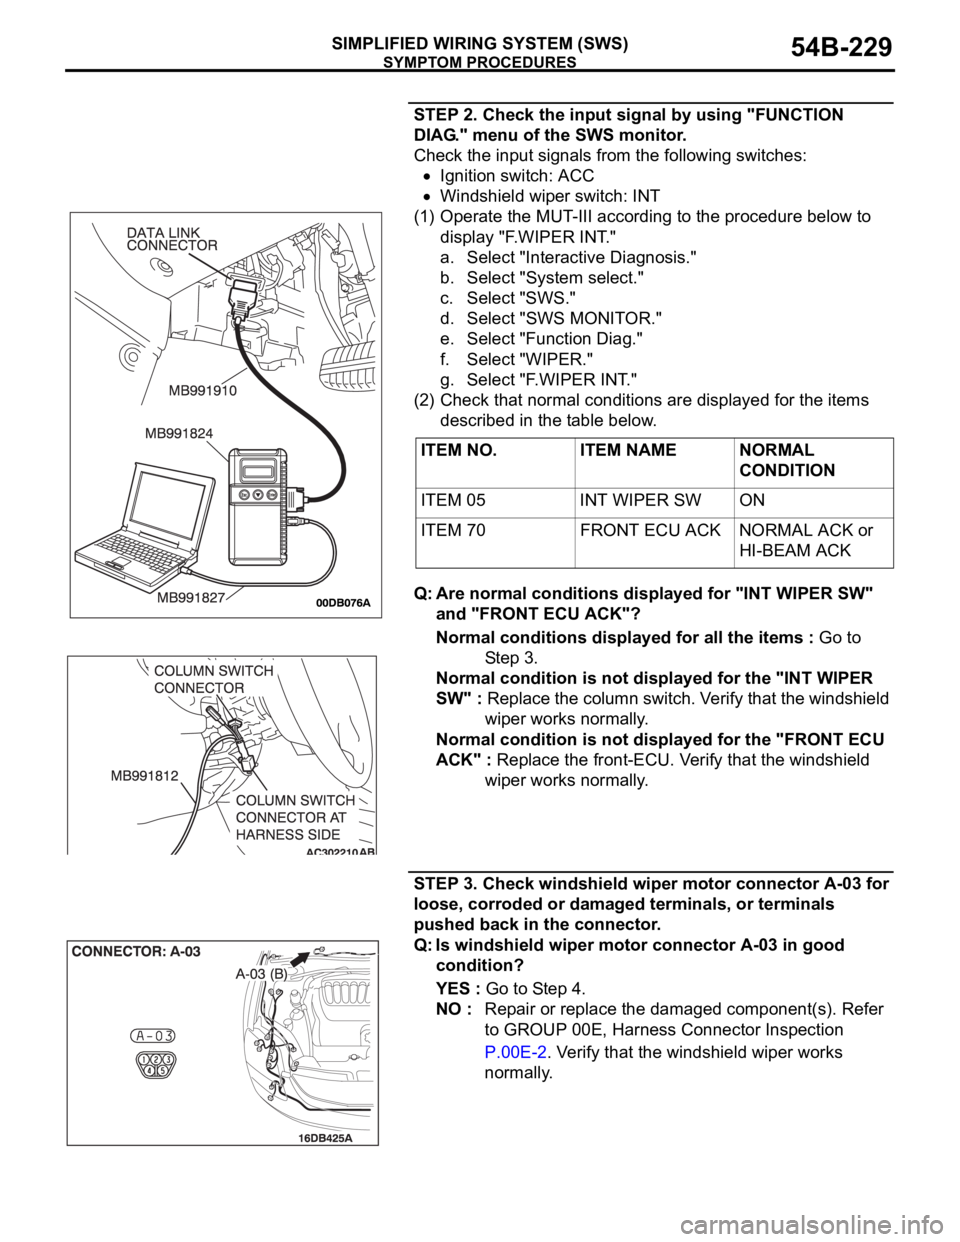
(1) Connect the special tool. Refer to "How to connect SWS
monitor P.54B-13."
(2) Turn the ignition switch to the "ON" position.
(3) Operate Diagnostic Tool MB991958 according to the
procedure below to display "ECU COMM Check."
a. Select "Interactive Diagnosis."
b. Select "System select."
c. Select "SWS."
d. Select "SWS MONITOR."
e. Select "ECU COMM Check."
(4) Diagnostic Tool MB991958 should show "OK" on the "ECU
COMM Check" menus for both the "COLUMN ECU" and
the "FRONT ECU" menus.
Q: Is "OK" displayed for the "COLUMN ECU" and "FRONT
ECU" menu?
"OK" is displayed for all the items : Go to Step 2.
"NG" is displayed for the "COLUMN ECU" menu : Refer
to Inspection Procedure A-2 "Communication with the
column switch (column-ECU) is not possible
P.54B-68."
"NG" is displayed for the "FRONT ECU" menu : Refer to
Inspection procedure A-4 "Communication with the
front-ECU is not possible P.54B-80."
Page 229 of 1500
SYMPTOM PROCEDURES
SIMPLIFIED WIRING SYSTEM (SWS)54B-229
STEP 2. Check the input signal by using "FUNCTION
DIAG." menu of the SWS monitor.
Check the input signals from the following switches:
Ignition switch: ACC
Windshield wiper switch: INT
(1) Operate the MUT-III according to the procedure below to
display "F.WIPER INT."
a. Select "Interactive Diagnosis."
b. Select "System select."
c. Select "SWS."
d. Select "SWS MONITOR."
e. Select "Function Diag."
f. Select "WIPER."
g . S e l e c t " F. W I P E R I N T. "
(2) Check that normal conditions are displayed for the items
described in the table below.
Q: Are normal conditions displayed for "INT WIPER SW"
and "FRONT ECU ACK"?
Normal conditions displayed for all the items : Go to
St e p 3 .
Normal condition is not displayed for the "INT WIPER
SW" : Replace the column switch. Verify that the windshield
wiper works normally.
Normal condition is not displayed for the "FRONT ECU
ACK" : Replace the front-ECU. Verify that the windshield
wiper works normally.
STEP 3. Check windshield wiper motor connector A-03 for
loose, corroded or damaged terminals, or terminals
pushed back in the connector.
Q: Is windshield wiper motor connector A-03 in good
condition?
YES : Go to Step 4.
NO : Repair or replace the damaged component(s). Refer
to GROUP 00E, Harness Connector Inspection
P.00E-2. Verify that the windshield wiper works
normally. ITEM NO. ITEM NAME NORMAL
CONDITION
ITEM 05 INT WIPER SW ON
ITEM 70 FRONT ECU ACK NORMAL ACK or
HI-BEAM ACK