keyless MITSUBISHI ASX 2017 (in English) Service Manual
[x] Cancel search | Manufacturer: MITSUBISHI, Model Year: 2017, Model line: ASX, Model: MITSUBISHI ASX 2017Pages: 458, PDF Size: 22.98 MB
Page 91 of 458
The SRS airbags are designed to supplementthe primary protection of the driver and front
passenger side seat belt systems by providing those occupants with protection against headand chest injuries in certain moderate-to-se- vere frontal collisions.
The SRS driver’s knee airbag (if so equip-
ped) is designed to supplement the primary
protection of the driver’s seat belt system. It can reduce the forward movement of the
driver’s lower legs and provide increased overall body protection in certain moderate-
to-severe frontal collisions.
The SRS side airbags (if so equipped) are de- signed to supplement properly worn seat belts and provide the driver and front passen-
ger with protection against chest and abdo-
men injuries in certain moderate-to-severe side impact collisions.
The SRS curtain airbags (if so equipped) are
designed to supplement properly worn seat belts and provide the driver and passenger with protection against head injuries in cer-
tain moderate-to-severe side impact colli- sions.
The SRS is NOT a substitute for the seat
belts. To ensure the maximum protection dur-
ing all types of collisions and accidents, all occupants, including the passengers as well
as the driver, must wear their seat belts.How the Supplemental Re-
straint System works
E00407302883
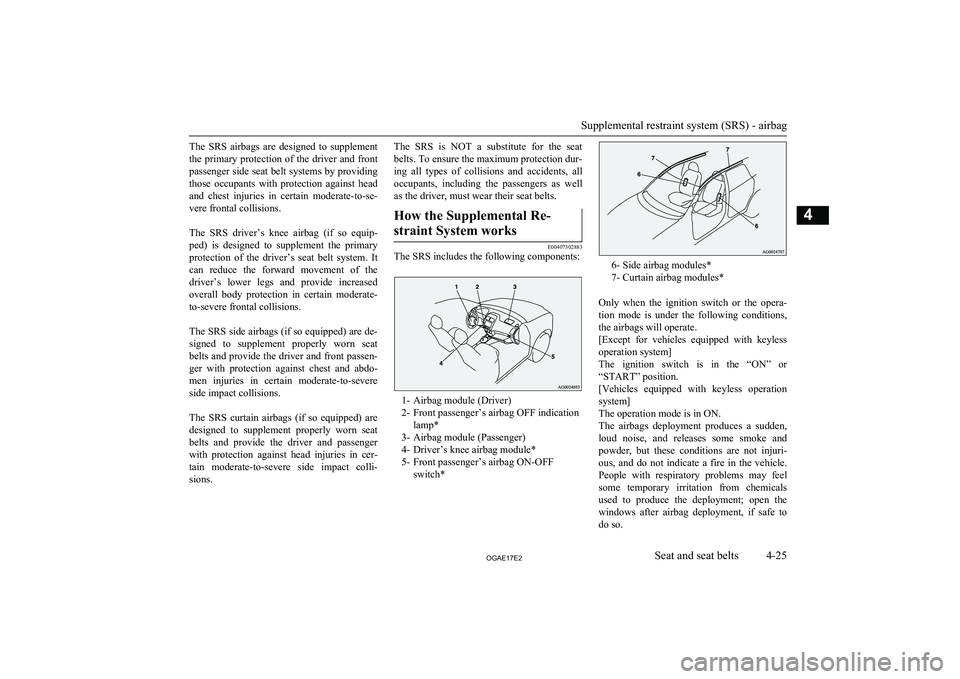
The SRS includes the following components:
1- Airbag module (Driver)
2- Front passenger’s airbag OFF indication lamp*
3- Airbag module (Passenger)
4- Driver’s knee airbag module*
5- Front passenger’s airbag ON-OFF switch*
6- Side airbag modules*
7- Curtain airbag modules*
Only when the ignition switch or the opera- tion mode is under the following conditions,
the airbags will operate.
[Except for vehicles equipped with keyless
operation system]
The ignition switch is in the “ON” or “START” position.
[Vehicles equipped with keyless operation
system]
The operation mode is in ON.
The airbags deployment produces a sudden,
loud noise, and releases some smoke andpowder, but these conditions are not injuri-
ous, and do not indicate a fire in the vehicle. People with respiratory problems may feel
some temporary irritation from chemicals
used to produce the deployment; open the
windows after airbag deployment, if safe to do so.
Supplemental restraint system (SRS) - airbag
4-25OGAE17E2Seat and seat belts4
Page 116 of 458
NOTElThe display setting can be changed to the
preferred units (km or miles).
Refer to “Changing the function settings (when the ignition switch or the operationmode is ON)” on page 5-19.Average speed display
E00568600048
This displays the average speed from the last
reset to the present time.
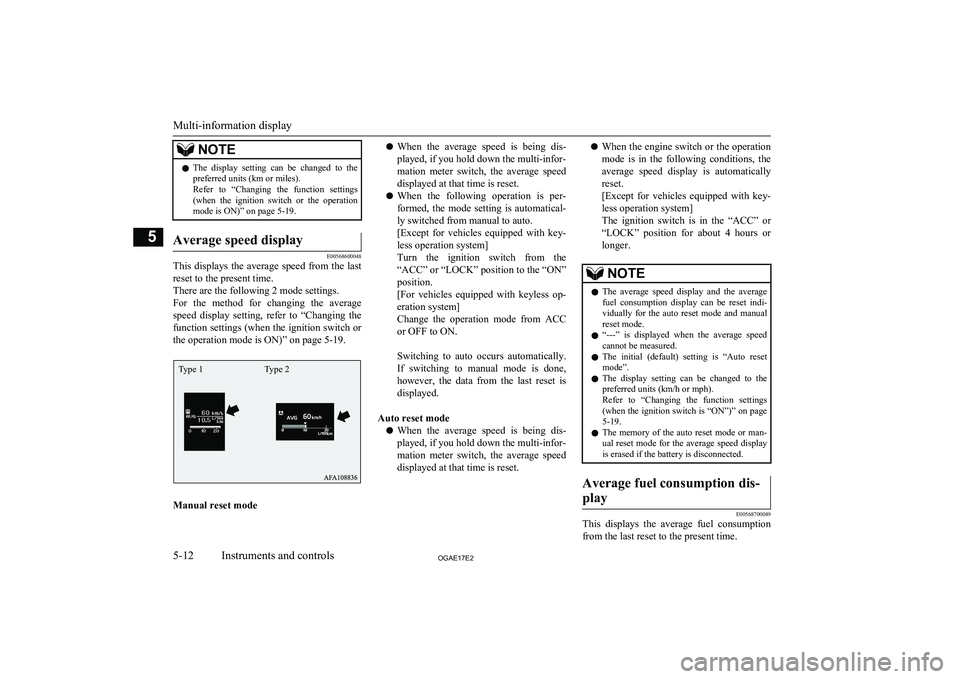
There are the following 2 mode settings.
For the method for changing the average speed display setting, refer to “Changing the
function settings (when the ignition switch or
the operation mode is ON)” on page 5-19.
Manual reset mode
l When the average speed is being dis-
played, if you hold down the multi-infor-
mation meter switch, the average speed
displayed at that time is reset.
l When the following operation is per-
formed, the mode setting is automatical-
ly switched from manual to auto.
[Except for vehicles equipped with key-
less operation system]
Turn the ignition switch from the
“ACC” or “LOCK” position to the “ON” position.
[For vehicles equipped with keyless op-
eration system]
Change the operation mode from ACC or OFF to ON.
Switching to auto occurs automatically.
If switching to manual mode is done,
however, the data from the last reset is
displayed.
Auto reset mode l When the average speed is being dis-
played, if you hold down the multi-infor-
mation meter switch, the average speed displayed at that time is reset.l When the engine switch or the operation
mode is in the following conditions, the
average speed display is automatically
reset.
[Except for vehicles equipped with key-
less operation system]
The ignition switch is in the “ACC” or “LOCK” position for about 4 hours or
longer.NOTEl The average speed display and the average
fuel consumption display can be reset indi-vidually for the auto reset mode and manual
reset mode.
l “---” is displayed when the average speed
cannot be measured.
l The initial (default) setting is “Auto reset
mode”.
l The display setting can be changed to the
preferred units (km/h or mph).
Refer to “Changing the function settings (when the ignition switch is “ON”)” on page
5-19.
l The memory of the auto reset mode or man-
ual reset mode for the average speed display is erased if the battery is disconnected.Average fuel consumption dis-
play
E00568700049
This displays the average fuel consumption from the last reset to the present time.
Multi-information display
5-12OGAE17E2Instruments and controls5 Type 1 Type 2
Page 117 of 458
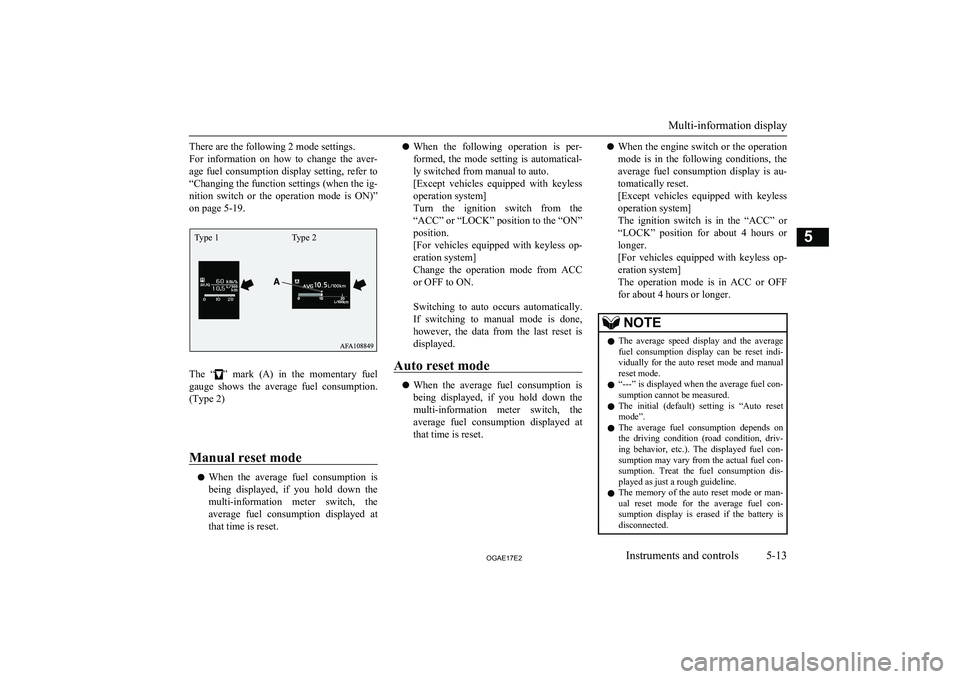
There are the following 2 mode settings.
For information on how to change the aver- age fuel consumption display setting, refer to
“Changing the function settings (when the ig- nition switch or the operation mode is ON)”
on page 5-19.
The “” mark (A) in the momentary fuel
gauge shows the average fuel consumption. (Type 2)
Manual reset mode
l When the average fuel consumption is
being displayed, if you hold down the
multi-information meter switch, the average fuel consumption displayed atthat time is reset.
l When the following operation is per-
formed, the mode setting is automatical-
ly switched from manual to auto.
[Except vehicles equipped with keyless
operation system]
Turn the ignition switch from the
“ACC” or “LOCK” position to the “ON” position.
[For vehicles equipped with keyless op- eration system]
Change the operation mode from ACC or OFF to ON.
Switching to auto occurs automatically.
If switching to manual mode is done,
however, the data from the last reset is
displayed.
Auto reset mode
l When the average fuel consumption is
being displayed, if you hold down the multi-information meter switch, the average fuel consumption displayed at
that time is reset.
l When the engine switch or the operation
mode is in the following conditions, the
average fuel consumption display is au-
tomatically reset.
[Except vehicles equipped with keyless
operation system]
The ignition switch is in the “ACC” or “LOCK” position for about 4 hours or
longer.
[For vehicles equipped with keyless op- eration system]
The operation mode is in ACC or OFF
for about 4 hours or longer.NOTEl The average speed display and the average
fuel consumption display can be reset indi-vidually for the auto reset mode and manual
reset mode.
l “---” is displayed when the average fuel con-
sumption cannot be measured.
l The initial (default) setting is “Auto reset
mode”.
l The average fuel consumption depends on
the driving condition (road condition, driv- ing behavior, etc.). The displayed fuel con-
sumption may vary from the actual fuel con- sumption. Treat the fuel consumption dis-played as just a rough guideline.
l The memory of the auto reset mode or man-
ual reset mode for the average fuel con-sumption display is erased if the battery isdisconnected.
Multi-information display
5-13OGAE17E2Instruments and controls5Type 1 Type 2
Page 124 of 458
Refer to “Returning to the factory set-tings” on page 5-25.Changing the reset mode for
average fuel consumption and average speed
E00522900845
The mode conditions for the average fuel consumption and average speed display can
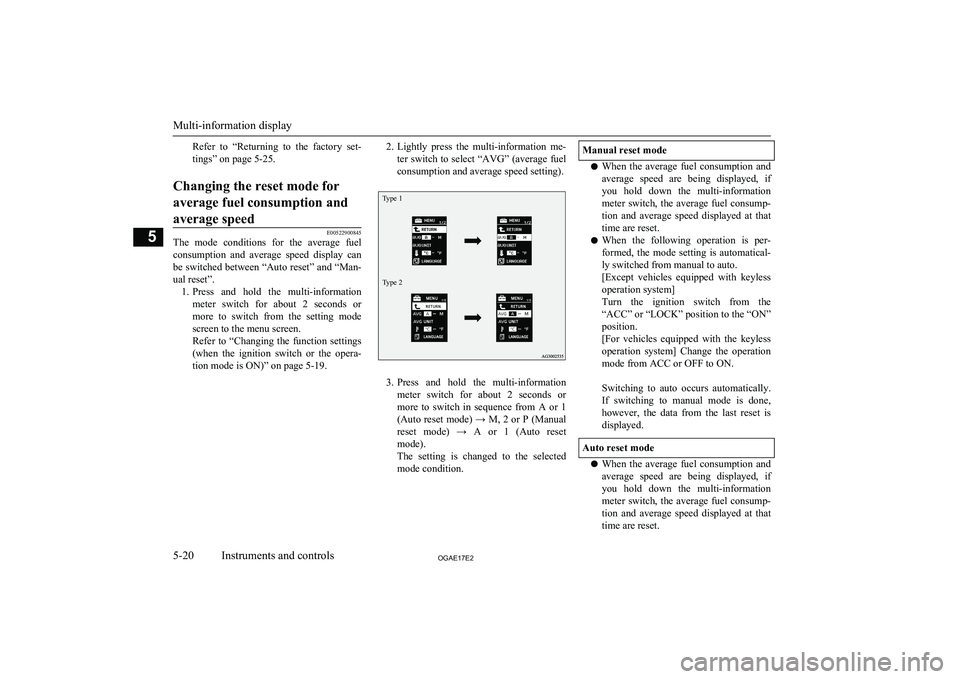
be switched between “Auto reset” and “Man- ual reset”. 1. Press and hold the multi-information
meter switch for about 2 seconds or more to switch from the setting mode
screen to the menu screen.
Refer to “Changing the function settings (when the ignition switch or the opera-
tion mode is ON)” on page 5-19.
2. Lightly press the multi-information me-
ter switch to select “AVG” (average fuel
consumption and average speed setting).Type 1Type 2
3. Press and hold the multi-information
meter switch for about 2 seconds or more to switch in sequence from A or 1 (Auto reset mode) → M, 2 or P (Manual
reset mode) → A or 1 (Auto reset mode).
The setting is changed to the selected
mode condition.
Manual reset mode
l When the average fuel consumption and
average speed are being displayed, if
you hold down the multi-information
meter switch, the average fuel consump- tion and average speed displayed at that time are reset.
l When the following operation is per-
formed, the mode setting is automatical- ly switched from manual to auto.
[Except vehicles equipped with keyless
operation system]
Turn the ignition switch from the
“ACC” or “LOCK” position to the “ON” position.
[For vehicles equipped with the keyless
operation system] Change the operation
mode from ACC or OFF to ON.
Switching to auto occurs automatically. If switching to manual mode is done,
however, the data from the last reset is
displayed.
Auto reset mode
l When the average fuel consumption and
average speed are being displayed, if
you hold down the multi-information meter switch, the average fuel consump-tion and average speed displayed at that
time are reset.
Multi-information display
5-20OGAE17E2Instruments and controls5
Page 125 of 458
lWhen the engine switch or the operation
mode is in the following conditions, the
average fuel consumption display and
average speed display are automatically
reset.
[Except vehicles equipped with keyless
operation system]
The ignition switch is in the “ACC” or “LOCK” position for about 4 hours or
longer.
[For vehicles equipped with keyless op- eration system]
The operation mode is in ACC or OFF
for about 4 hours or longer.NOTEl The average fuel consumption display and
average speed display can be reset individu- ally for the auto reset mode and manual reset
mode.
l The memory of the auto reset mode or man-
ual reset mode for the average fuel con-sumption display and average speed display
is erased if the battery is disconnected.
l The initial (default) setting is “Auto reset
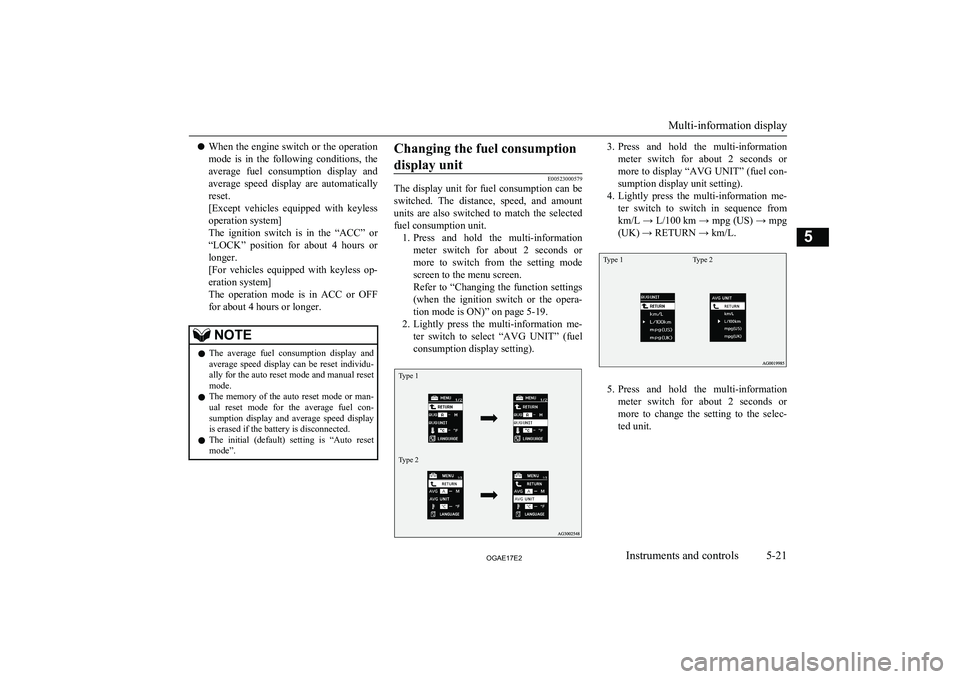
mode”.Changing the fuel consumption
display unit
E00523000579
The display unit for fuel consumption can be
switched. The distance, speed, and amount units are also switched to match the selected
fuel consumption unit. 1. Press and hold the multi-information
meter switch for about 2 seconds or more to switch from the setting mode
screen to the menu screen.
Refer to “Changing the function settings (when the ignition switch or the opera-
tion mode is ON)” on page 5-19.
2. Lightly press the multi-information me-
ter switch to select “AVG UNIT” (fuelconsumption display setting).
Type 1Type 23. Press and hold the multi-information
meter switch for about 2 seconds or more to display “AVG UNIT” (fuel con-
sumption display unit setting).
4. Lightly press the multi-information me-
ter switch to switch in sequence from
km/L → L/100 km → mpg (US) → mpg
(UK) → RETURN → km/L.Type 1Type 2
5. Press and hold the multi-information
meter switch for about 2 seconds or more to change the setting to the selec-
ted unit.
Multi-information display
5-21OGAE17E2Instruments and controls5
Page 134 of 458
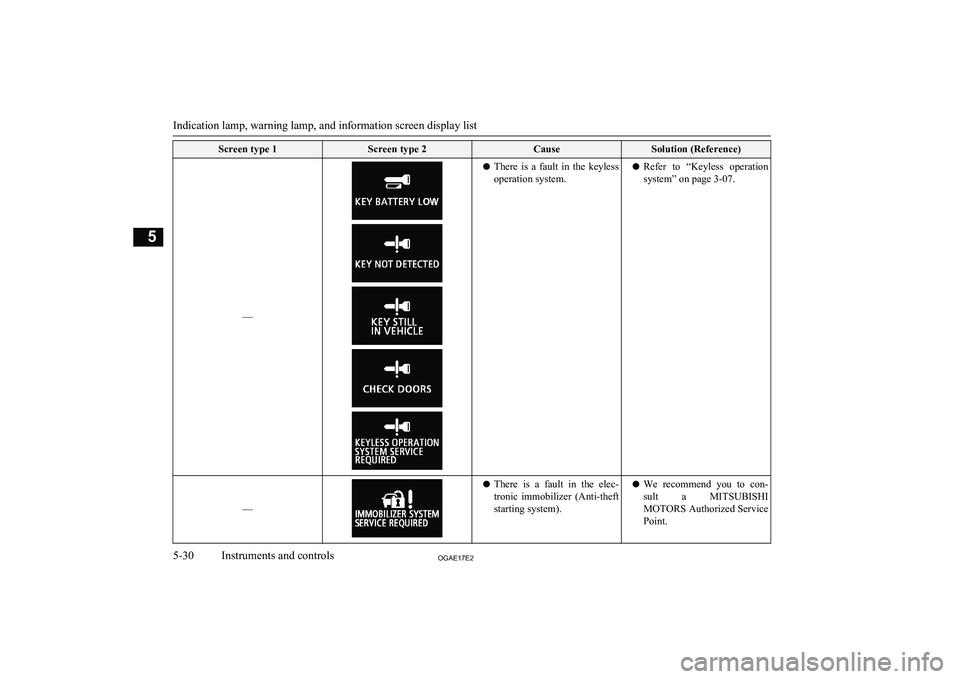
Screen type 1Screen type 2CauseSolution (Reference)
––
lThere is a fault in the keyless
operation system.l Refer to “Keyless operation
system” on page 3-07.
––
l There is a fault in the elec-
tronic immobilizer (Anti-theft
starting system).l We recommend you to con-
sult a MITSUBISHI
MOTORS Authorized Service
Point.
Indication lamp, warning lamp, and information screen display list
5-30OGAE17E2Instruments and controls5
Page 135 of 458
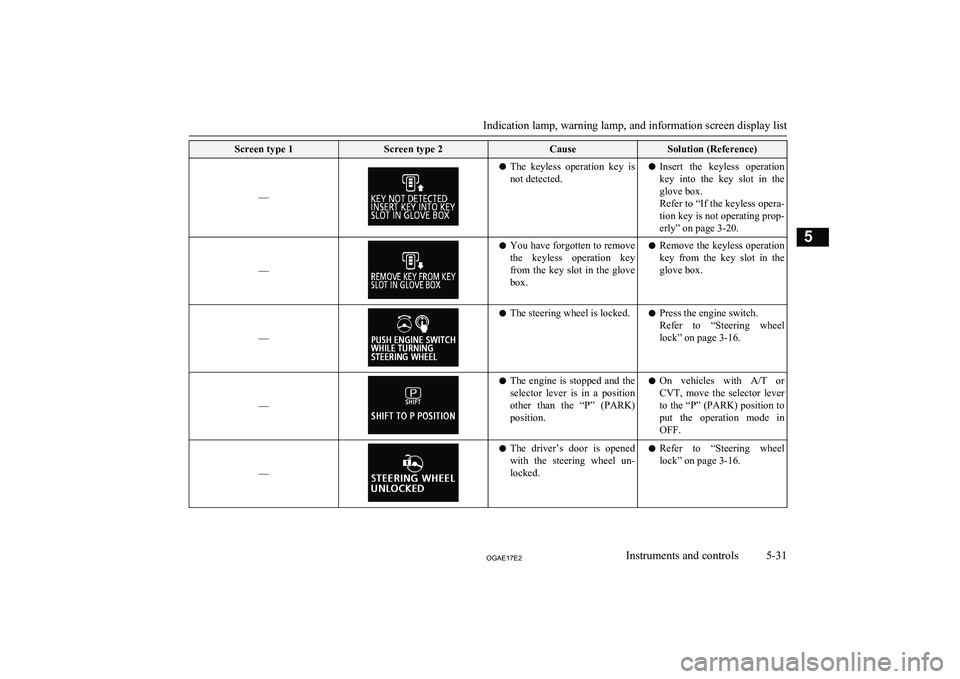
Screen type 1Screen type 2CauseSolution (Reference)
––
lThe keyless operation key is
not detected.l Insert the keyless operation
key into the key slot in the
glove box.
Refer to “If the keyless opera-
tion key is not operating prop- erly” on page 3-20.
––
l You have forgotten to remove
the keyless operation key
from the key slot in the glove box.l Remove the keyless operation
key from the key slot in the glove box.
––
l The steering wheel is locked.l Press the engine switch.
Refer to “Steering wheel
lock” on page 3-16.
––
l The engine is stopped and the
selector lever is in a position
other than the “P” (PARK)
position.l On vehicles with
A/T or
CVT, move the selector lever
to the “P” (PARK) position to
put the operation mode in
OFF.
––
l The driver’s door is opened
with the steering wheel un- locked.l Refer to “Steering wheel
lock” on page 3-16.
Indication lamp, warning lamp, and information screen display list
5-31OGAE17E2Instruments and controls5
Page 137 of 458
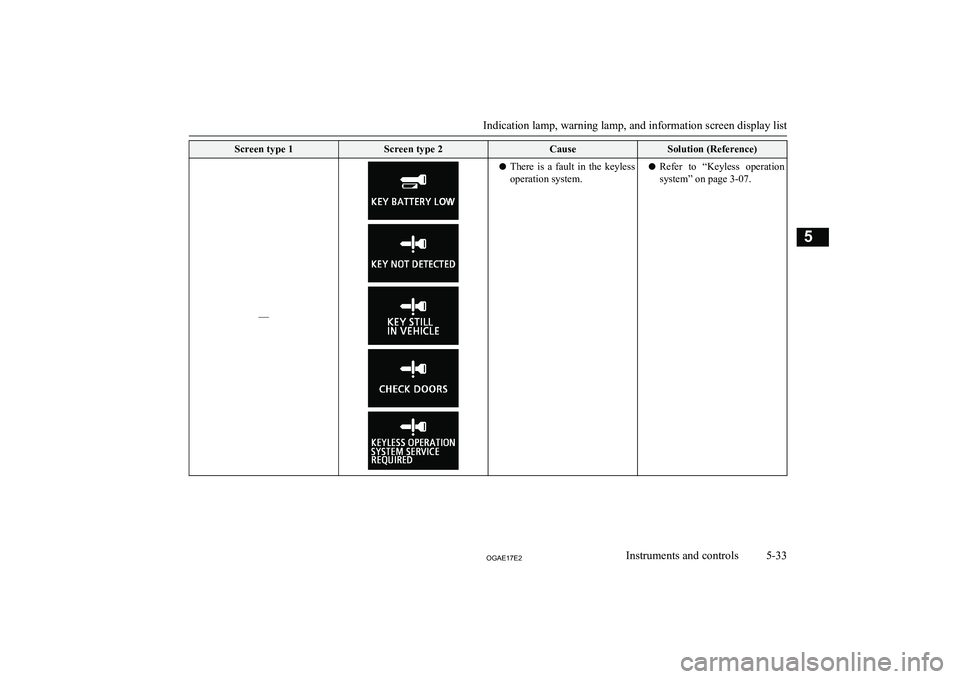
Screen type 1Screen type 2CauseSolution (Reference)
––
lThere is a fault in the keyless
operation system.l Refer to “Keyless operation
system” on page 3-07.
Indication lamp, warning lamp, and information screen display list
5-33OGAE17E2Instruments and controls5
Page 148 of 458
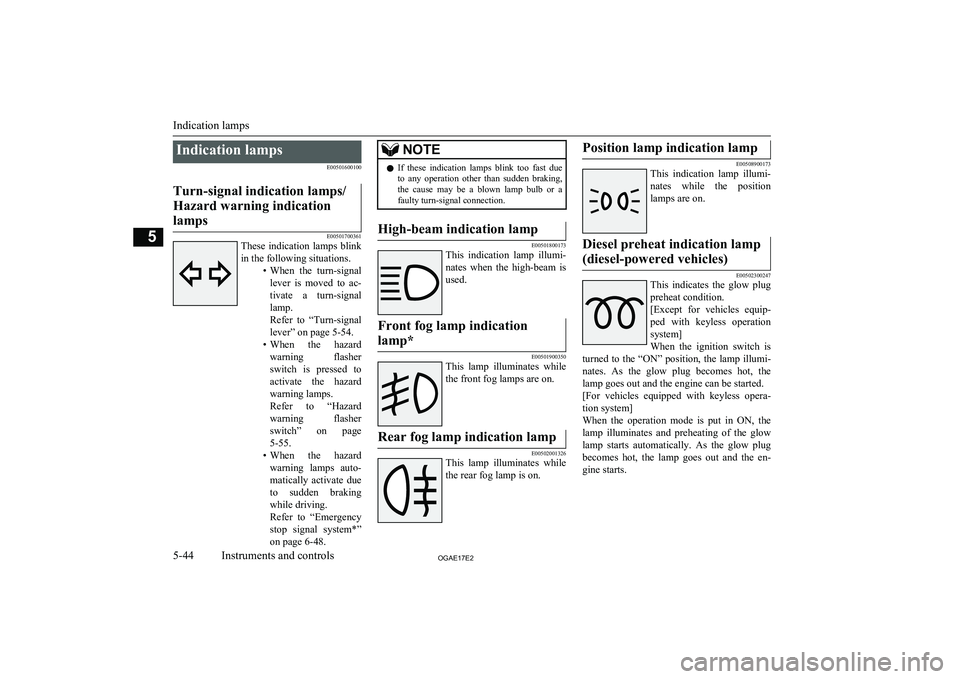
Indication lampsE00501600100Turn-signal indication lamps/
Hazard warning indication lamps
E00501700361
These indication lamps blink
in the following situations. •When the turn-signal
lever is moved to ac- tivate a turn-signal
lamp.
Refer to “Turn-signal
lever” on page 5-54.
• When the hazard
warning flasher switch is pressed toactivate the hazard
warning lamps.
Refer to “Hazard
warning flasher switch” on page
5-55.
• When the hazard
warning lamps auto- matically activate due
to sudden braking while driving.
Refer to “Emergency
stop signal system*”
on page 6-48.
NOTEl If these indication lamps blink too fast due
to any operation other than sudden braking,
the cause may be a blown lamp bulb or a faulty turn-signal connection.High-beam indication lamp
E00501800173
This indication lamp illumi-
nates when the high-beam is used.
Front fog lamp indication
lamp*
E00501900350
This lamp illuminates while the front fog lamps are on.
Rear fog lamp indication lamp
E00502001326
This lamp illuminates while
the rear fog lamp is on.
Position lamp indication lamp
E00508900173
This indication lamp illumi-
nates while the position lamps are on.
Diesel preheat indication lamp
(diesel-powered vehicles)
E00502300247
This indicates the glow plug
preheat condition.
[Except for vehicles equip-
ped with keyless operation system]
When the ignition switch is
turned to the “ON” position, the lamp illumi-
nates. As the glow plug becomes hot, the lamp goes out and the engine can be started.
[For vehicles equipped with keyless opera- tion system]
When the operation mode is put in ON, the
lamp illuminates and preheating of the glow lamp starts automatically. As the glow plugbecomes hot, the lamp goes out and the en-
gine starts.
Indication lamps
5-44OGAE17E2Instruments and controls5
Page 154 of 458
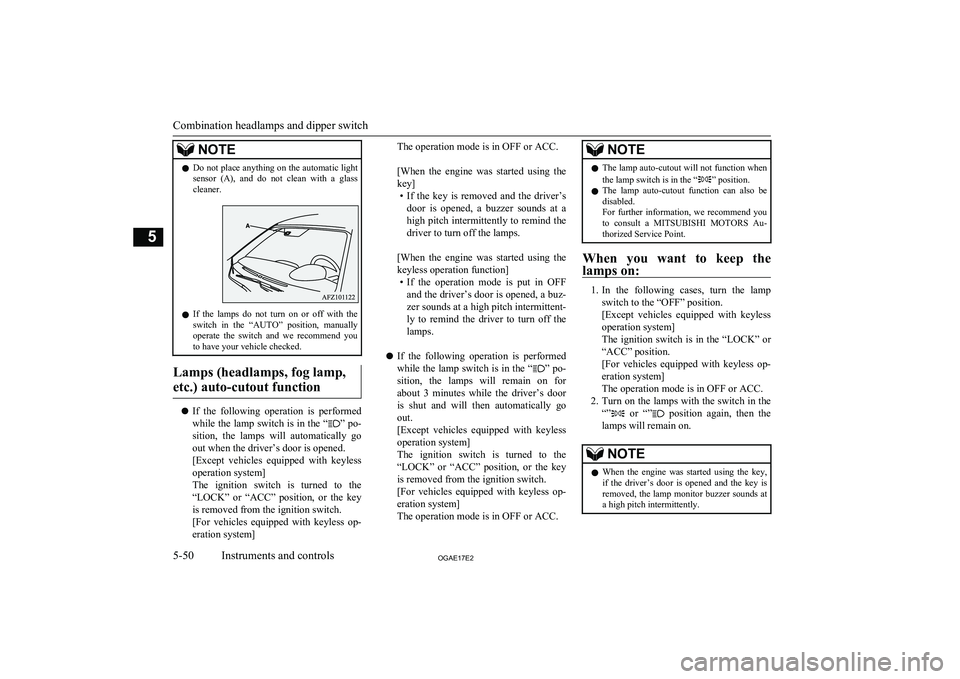
NOTElDo not place anything on the automatic light
sensor (A), and do not clean with a glass cleaner.
l If the lamps do not turn on or off with the
switch in the “AUTO” position, manually
operate the switch and we recommend you
to have your vehicle checked.
Lamps (headlamps, fog lamp,
etc.) auto-cutout function
l If the following operation is performed
while the lamp switch is in the “” po-
sition, the lamps will automatically go
out when the driver’s door is opened.
[Except vehicles equipped with keyless
operation system]
The ignition switch is turned to the
“LOCK” or “ACC” position, or the key is removed from the ignition switch.
[For vehicles equipped with keyless op- eration system]
The operation mode is in OFF or ACC.
[When the engine was started using the
key] • If the key is removed and the driver’s
door is opened, a buzzer sounds at a high pitch intermittently to remind the driver to turn off the lamps.
[When the engine was started using the
keyless operation function] • If the operation mode is put in OFF
and the driver’s door is opened, a buz-
zer sounds at a high pitch intermittent-
ly to remind the driver to turn off the lamps.
l If the following operation is performed
while the lamp switch is in the “
” po-
sition, the lamps will remain on for
about 3 minutes while the driver’s door
is shut and will then automatically go out.
[Except vehicles equipped with keyless
operation system]
The ignition switch is turned to the
“LOCK” or “ACC” position, or the key is removed from the ignition switch.
[For vehicles equipped with keyless op- eration system]
The operation mode is in OFF or ACC.
NOTEl The lamp auto-cutout will not function when
the lamp switch is in the “” position.
l The lamp auto-cutout function can also be
disabled.
For further information, we recommend you
to consult a MITSUBISHI MOTORS Au-
thorized Service Point.
When you want to keep the
lamps on:
1. In the following cases, turn the lamp
switch to the “OFF” position.
[Except vehicles equipped with keyless
operation system]
The ignition switch is in the “LOCK” or
“ACC” position.
[For vehicles equipped with keyless op- eration system]
The operation mode is in OFF or ACC.
2. Turn on the lamps with the switch in the
“”
or “” position again, then the
lamps will remain on.
NOTEl When the engine was started using the key,
if the driver’s door is opened and the key is
removed, the lamp monitor buzzer sounds at a high pitch intermittently.
Combination headlamps and dipper switch
5-50OGAE17E2Instruments and controls5