engine MITSUBISHI L200 2015 (in English) Owner's Guide
[x] Cancel search | Manufacturer: MITSUBISHI, Model Year: 2015, Model line: L200, Model: MITSUBISHI L200 2015Pages: 418, PDF Size: 25.8 MB
Page 120 of 418

2.Press the “SET” function button. The
display will flash twice and the barome- ter indication will return to the factory
settings.NOTEl Although the barometer value is changed to
the factory setting, a barometer unit you have selected is unchanged.
l You can return to the previous display by
pressing the “BACK” function button.3. After setting the barometer default, press
the “INFO” button to return to the infor-
mation display.Care of the monitor
E00519700012
If the monitor becomes covered in finger-
prints or otherwise dirty, clean it with a soft and dry cloth.
NOTEl Don’t use a wet cloth or abrasive cleaner as
this may cause damage.Combination headlamps
and dipper switch E00506003533
HeadlampsNOTEl Do not leave the headlamps and other lamps
on for a long time while the engine is sta-tionary (not running). A run-down batterycould result.
l When it rains or when the vehicle has been
washed, the inside of the lens sometimes be-
comes foggy. This is the same phenomenon as when window glass mists up on a humid
day, and does not indicate a functional prob- lem. When the lamp is switched on, the heat
will remove the fog. However, if water gath-
ers inside the lamp, we recommend you to have it checked.
Combination headlamps and dipper switch
5-32OKTE15E3Instruments and controls5
Page 125 of 418
NOTElIf the lamp flashes unusually quickly, the
bulb in a turn-signal lamp may have burned out. We recommend you to have the vehicle
inspected.
l It is possible to activate the following func-
tions. For further information, we recom-
mend you to consult a MITSUBISHI
MOTORS Authorized Service Point.
• Flashing of the turn-signal lamps and the
indication lamp in the instrument clusterwhen the lever is operated with the igni-
tion switch in the “ACC” position
• Flashing of the turn-signal lamps and the
indication lamp in the instrument cluster three times when you move the lever to (2) slightly then release it
• The time required to operate the lever for
the 3-flash function can be adjusted.Hazard warning flasher
switch E00506602066
Use the hazard warning flasher switch when
the vehicle has to be parked on the road for
any emergency.
The hazard warning flashers can always be operated, regardless of the position of the ig-
nition key.
Push the switch to turn on the hazard warning
flashers; push the switch again to turn them off.
When this switch is operated, all turn-signal
lamps flash continuously, as do the turn-sig- nal indication lamps in the instrument cluster.NOTEl If the lamps are kept flashing for a long
time, the battery will be discharged, result-
ing in hard engine starting or no start condi- tion.
l If the lamp flashes unusually quickly, the
bulb in a turn-signal lamp may have burned
out.
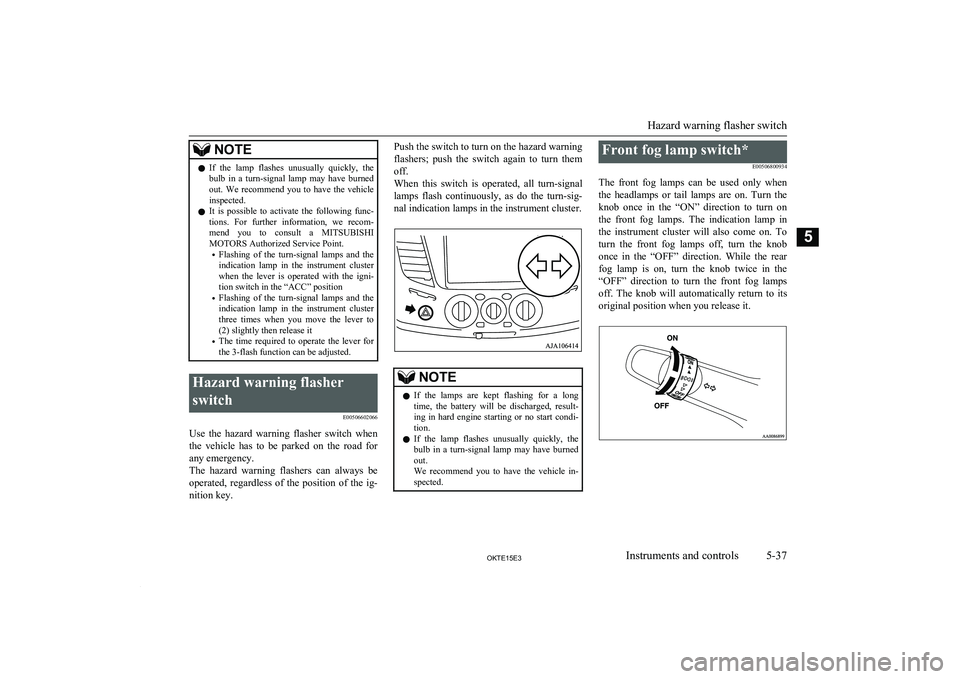
We recommend you to have the vehicle in- spected.Front fog lamp switch*
E00506800934
The front fog lamps can be used only when the headlamps or tail lamps are on. Turn the knob once in the “ON” direction to turn on
the front fog lamps. The indication lamp in
the instrument cluster will also come on. To turn the front fog lamps off, turn the knobonce in the “OFF” direction. While the rear fog lamp is on, turn the knob twice in the
“OFF” direction to turn the front fog lamps off. The knob will automatically return to its
original position when you release it.
Hazard warning flasher switch
5-37OKTE15E3Instruments and controls5
Page 132 of 418
NOTElThe demister switch is not to melt snow but
to clear mist. Remove snow before use of
the demister switch.
l To avoid unnecessary discharge of the bat-
tery, do not use the rear window demister during starting of the engine or when the en-
gine is not running. Turn the demister off
immediately after the window is clear.
l When cleaning the inside of the rear win-
dow, use a soft cloth and wipe gently along
the heater wires, being careful not to damage the wires.
l Do not allow objects to touch the inside of
the rear window glass, or damaged or broken
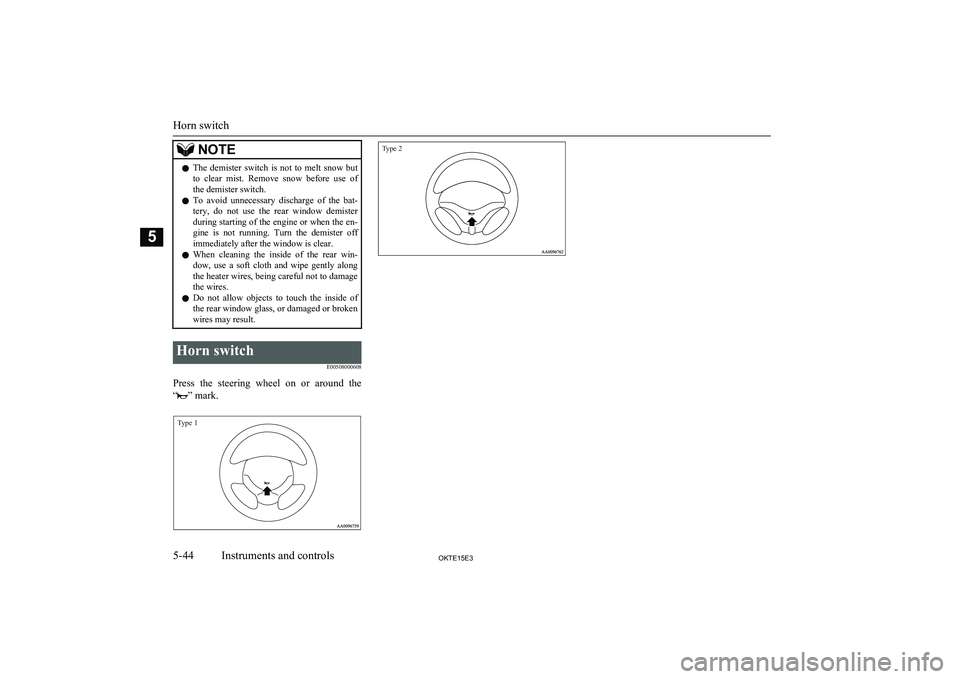
wires may result.Horn switch
E00508000608
Press the steering wheel on or around the
“
” mark.
Type 1Type 2
Horn switch
5-44OKTE15E3Instruments and controls5
Page 134 of 418
Economical drivingE00600100620
For economical driving, there are some tech- nical requirements that have to be met. Theprerequisite for low fuel consumption is a
properly adjusted engine. In order to achieve longer life of the vehicle and the most eco- nomical operation, we recommend you tohave the vehicle checked at regular intervals in accordance with the service standards.
Fuel economy and generation of exhaust gas
and noise are highly influenced by personal
driving habits as well as the particular operat- ing conditions. The following points shouldbe observed in order to minimize wear of
brakes, tyres and engine as well as to reduce
environmental pollution.
Starting
Avoid rapid acceleration and sudden starts;
such operation will result in higher fuel con-
sumption.
Shifting
Shift only at an appropriate speed and engine speed. Always use the highest gear possible.
The transfer shift lever should be set to “2H” when driving 4WD vehicles on normal roads
and express ways to obtain best possible fuel economy.
City traffic
Frequent starting and stopping increases the
average fuel consumption. Use roads with smooth traffic flow whenever possible. When driving on congested roads, avoid use of a
low gear at high engine speeds.
Idling
The vehicle consumes fuel even during
idling. Avoid extended idling whenever pos- sible.
Speed
The higher the vehicle speed, the more fuel
consumed. Avoid driving at full speed. Even a slight release of the accelerator pedal will
save a significant amount of fuel.
Tyre inflation pressure
Check the tyre inflation pressures at regularintervals. Low tyre inflation pressure increa-ses road resistance and fuel consumption. In addition, low tyre pressures adversely affect tyre wear and driving stability.
Load
Do not drive with unnecessary articles in the
cargo area. Especially during city driving where frequent starting and stopping is nec-
essary, the increased weight of the vehicle will greatly affect fuel consumption.
Cold engine starting
Starting of a cold engine consumes morefuel.
Unnecessary fuel consumption is also caused by keeping a hot engine running. After the
engine is started, commence driving as soon
as possible.
Air conditioning*
The use of the air conditioning will increase the fuel consumption.
Driving, alcohol and drugs
E00600200012
Driving after drinking alcohol is one of the
most frequent causes of accidents.
Your driving ability can be seriously im- paired even with blood alcohol levels far be-
low the legal minimum. If you have been drinking, don’t drive. Ride with a designated non-drinking driver, call a cab or a friend, or
use public transportation.
Economical driving
6-02OKTE15E3Starting and driving6
Page 136 of 418
Running-in recommendationsE00600403679
During the running-in period for the first 1,000 km (620 miles), it is advisable to drive your new vehicle using the following precautions as a guideline to aid long life as well as future economy and performance.
l Do not race the engine at high speeds.
l Avoid rapid starting, accelerating, braking and prolonged high-speed running.
l Keep to the running-in speed limit shown below.
Please note that the legal speed limits displayed must be adhered to.
l Do not exceed loading limits.
l Refrain from towing a trailer.Vehicles with manual transmission2WDShift pointSpeed limitVehicles with 15 inch tyreVehicles with 16 inch tyre1st
gear20 km/h (12 mph)20 km/h (12 mph)2nd
gear40 km/h (25 mph)45 km/h (28 mph)3rd
gear65 km/h (40 mph)70 km/h (43 mph)4th
gear95 km/h (59 mph)105 km/h (65 mph)5th
gear120 km/h (74 mph)135 km/h (84 mph)
Running-in recommendations
6-04OKTE15E3Starting and driving6
Page 140 of 418
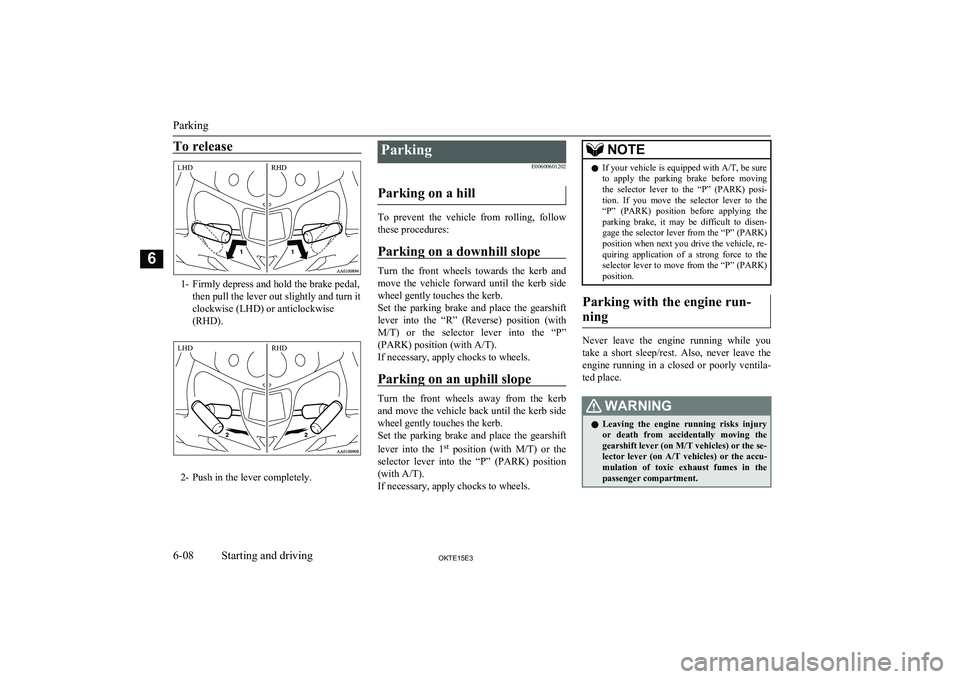
To release
1- Firmly depress and hold the brake pedal,then pull the lever out slightly and turn itclockwise (LHD) or anticlockwise
(RHD).
2- Push in the lever completely.
Parking
E00600601202
Parking on a hill
To prevent the vehicle from rolling, follow these procedures:
Parking on a downhill slope
Turn the front wheels towards the kerb andmove the vehicle forward until the kerb side wheel gently touches the kerb.
Set the parking brake and place the gearshift lever into the “R” (Reverse) position (with
M/T ) or the selector lever into the “P”
(PARK) position (with A/T).
If necessary, apply chocks to wheels.
Parking on an uphill slope
Turn the front wheels away from the kerb and move the vehicle back until the kerb side
wheel gently touches the kerb.
Set the parking brake and place the gearshift
lever into the 1 st
position (with M/T) or the
selector lever into the “P” (PARK) position (with A/T).
If necessary, apply chocks to wheels.
NOTEl If your vehicle is equipped with
A/T, be sure
to apply the parking brake before moving the selector lever to the “P” (PARK) posi-
tion. If you move the selector lever to the “P” (PARK) position before applying theparking brake, it may be difficult to disen-
gage the selector lever from the “P” (PARK)
position when next you drive the vehicle, re- quiring application of a strong force to the selector lever to move from the “P” (PARK)
position.
Parking with the engine run-
ning
Never leave the engine running while you
take a short sleep/rest. Also, never leave the engine running in a closed or poorly ventila-
ted place.
WARNINGl Leaving the engine running risks injury
or death from accidentally moving the
gearshift lever (on M/T vehicles) or the se- lector lever (on A/T vehicles) or the accu-
mulation of toxic exhaust fumes in the
passenger compartment.
Parking
6-08OKTE15E3Starting and driving6LHD RHD LHD RHD
Page 144 of 418
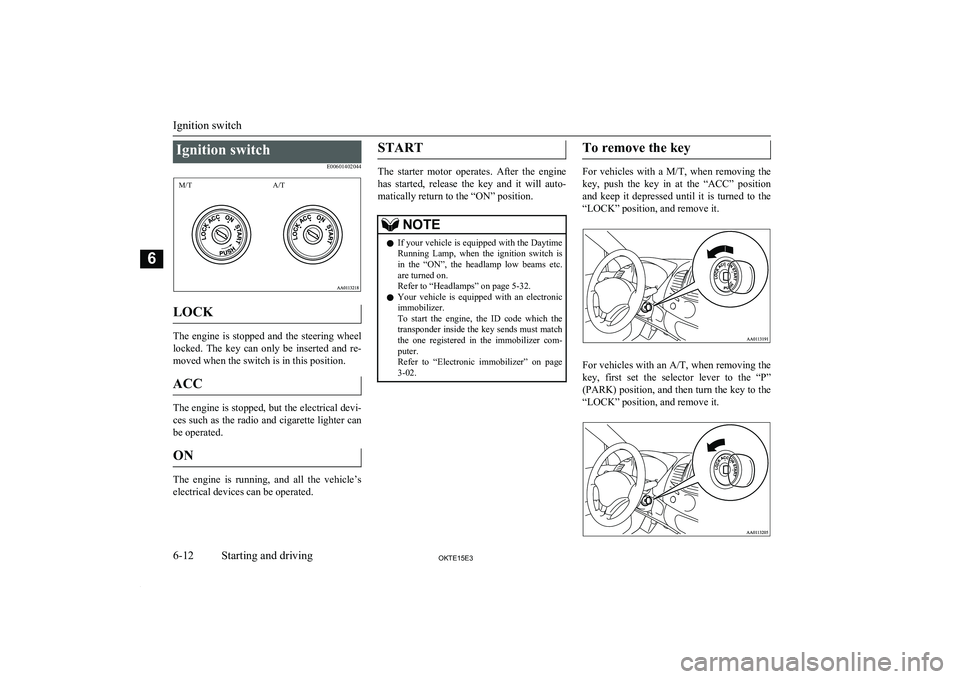
Ignition switchE00601402044
M/TA/T
LOCK
The engine is stopped and the steering wheel
locked. The key can only be inserted and re- moved when the switch is in this position.
ACC
The engine is stopped, but the electrical devi- ces such as the radio and cigarette lighter can
be operated.
ON
The engine is running, and all the vehicle’selectrical devices can be operated.
START
The starter motor operates. After the engine
has started, release the key and it will auto-
matically return to the “ON” position.
NOTEl If your vehicle is equipped with the Daytime
Running Lamp, when the ignition switch is
in the “ON”, the headlamp low beams etc. are turned on.
Refer to “Headlamps” on page 5-32.
l Your vehicle is equipped with an electronic
immobilizer.
To start the engine, the ID code which the transponder inside the key sends must match
the one registered in the immobilizer com- puter.
Refer to “Electronic immobilizer” on page 3-02.To remove the key
For vehicles with a M/T, when removing the
key, push the key in at the “ACC” position
and keep it depressed until it is turned to the “LOCK” position, and remove it.
For vehicles with an A/T, when removing the
key, first set the selector lever to the “P”
(PARK) position, and then turn the key to the “LOCK” position, and remove it.
Ignition switch
6-12OKTE15E3Starting and driving6
Page 145 of 418
CAUTIONlDo not remove the ignition key from the ig-
nition switch while driving. The steeringwheel will lock, causing loss of control.
l If the engine is stopped while driving, the
brake servomechanism will cease to function and braking efficiency will deteriorate. Also,
the power steering system will not function
and it will require greater manual effort to
operate the steering.
l Do not leave the key in the “ON” position
for a long time when the engine is not run- ning, doing so will cause the battery to be
discharged.
l Do not turn the key to the “START” position
when the engine is running, doing so could damage the starter motor.NOTEl For vehicles with an
A/T, when the selector
lever is in the “P” (PARK) position, do not operate the lock button of selector lever re-
peatedly for more than 30 seconds. You may
not be able to remove the key from the igni-
tion switch, because the protection circuit is
activated. If this occurs, wait a few moments before removing the key.
Refer to “Selector lever operation” on page
6-19.Steering wheel lock
E00601500227
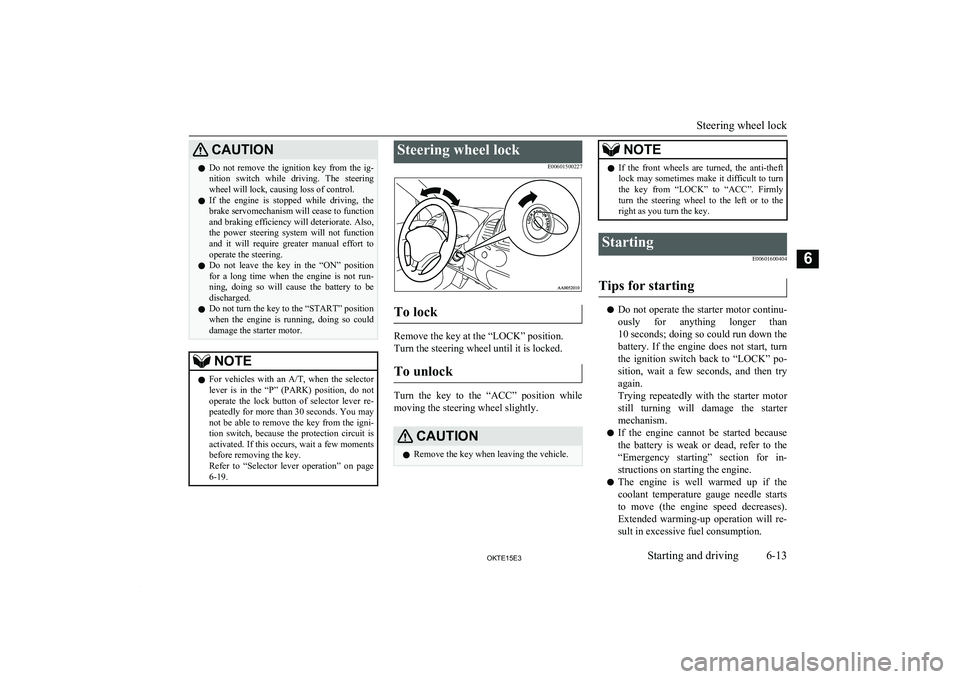
To lock
Remove the key at the “LOCK” position.
Turn the steering wheel until it is locked.
To unlock
Turn the key to the “ACC” position while
moving the steering wheel slightly.
CAUTIONl Remove the key when leaving the vehicle.NOTElIf the front wheels are turned, the anti-theft
lock may sometimes make it difficult to turnthe key from “LOCK” to “ACC”. Firmly
turn the steering wheel to the left or to the right as you turn the key.Starting
E00601600404
Tips for starting
lDo not operate the starter motor continu-
ously for anything longer than10 seconds ; doing so could run down the
battery. If the engine does not start, turn
the ignition switch back to “LOCK” po-
sition, wait a few seconds, and then try again.
Trying repeatedly with the starter motor still turning will damage the starter
mechanism.
l If the engine cannot be started because
the battery is weak or dead, refer to the“Emergency starting” section for in- structions on starting the engine.
l The engine is well warmed up if the
coolant temperature gauge needle starts
to move (the engine speed decreases).
Extended warming-up operation will re-
sult in excessive fuel consumption.
Steering wheel lock
6-13OKTE15E3Starting and driving6
Page 146 of 418
WARNINGlNever run the engine in a closed or poorly
ventilated area any longer than is needed
to move your vehicle in or out of the area. Carbon monoxide gases are odourless and can be fatal.CAUTIONl Never attempt to start the engine by pushing
or pulling the vehicle. Especially the auto-matic transmission, since the structure is dif-
ferent from a manual transmission, it is not possible to start the engine by using this
technique. Never attempt this or it could damage the automatic transmission.
l Do not run the engine at high rpm or drive
the vehicle at high speed until the engine has had a chance to warm up.
l Release the ignition key as soon as the en-
gine starts to avoid damaging the starter mo-
tor.
l Do not stop the engine immediately after
high-speed or uphill driving. First allow the
engine to idle to give the turbocharger a
chance to cool down.Starting the engine
E00601702223
1. Insert the ignition key and fasten the seat
belt.
2. Make sure the parking brake is applied.
3. Depress and hold the brake pedal.
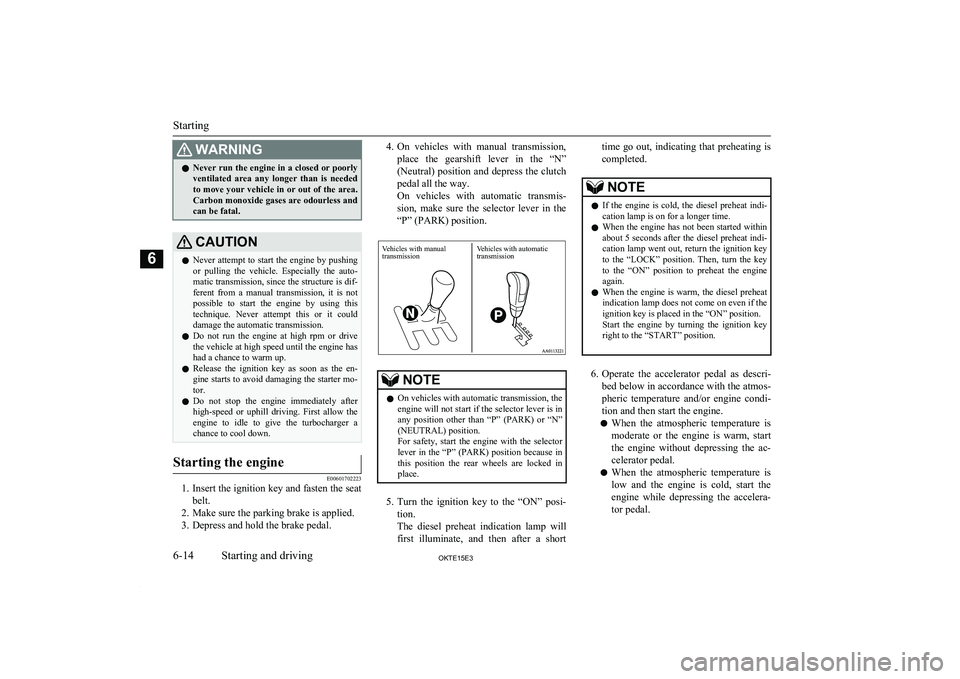
4. On vehicles with manual transmission,
place the gearshift lever in the “N” (Neutral) position and depress the clutch
pedal all the way.
On vehicles with automatic transmis- sion, make sure the selector lever in the “P” (PARK) position.NOTEl On vehicles with automatic transmission, the
engine will not start if the selector lever is inany position other than “P” (PARK) or “N”
(NEUTRAL) position.
For safety, start the engine with the selector lever in the “P” (PARK) position because in
this position the rear wheels are locked in place.
5. Turn the ignition key to the “ON” posi-
tion.
The diesel preheat indication lamp will first illuminate, and then after a short
time go out, indicating that preheating is
completed.NOTEl If the engine is cold, the diesel preheat indi-
cation lamp is on for a longer time.
l When the engine has not been started within
about 5 seconds after the diesel preheat indi- cation lamp went out, return the ignition key
to the “LOCK” position. Then, turn the key
to the “ON” position to preheat the engine
again.
l When the engine is warm, the diesel preheat
indication lamp does not come on even if the
ignition key is placed in the “ON” position.
Start the engine by turning the ignition key
right to the “START” position.
6. Operate the accelerator pedal as descri-
bed below in accordance with the atmos- pheric temperature and/or engine condi-
tion and then start the engine.
l When the atmospheric temperature is
moderate or the engine is warm, start
the engine without depressing the ac-
celerator pedal.
l When the atmospheric temperature is
low and the engine is cold, start the
engine while depressing the accelera- tor pedal.
Starting
6-14OKTE15E3Starting and driving6 Vehicles with manual transmissionVehicles with automatictransmission
Page 147 of 418
Fuel injection amount learningprocess
E00616000028
To keep exhaust emissions and engine noise
low, the engine very occasionally performs a
learning process for the fuel injection
amount.
The engine sounds slightly different from
usual while the learning process is taking place. The change in the engine sound does
not indicate a fault.
Diesel particulate filter
(DPF)* E00619800232
The diesel particulate filter (DPF) is a devicethat captures most of the particulate matter
(PM) in the exhaust emissions of the diesel engine. The DPF automatically burns away trapped PM during vehicle operation. Under
certain driving conditions, however, the DPF is not able to burn away all of the trapped PM
and, as a result, an excessive amount of PM accumulates inside it.
WARNINGl The DPF reaches very high temperatures.
Do not park your vehicle in areas where
combustible materials such as dry grass
or leaves can come in contact with a hot exhaust system since a fire could occur.CAUTIONl Do not use any type of fuel or engine oil that
is not specified for your vehicle. Also, do not use any moisture-removing agent or oth-
er fuel additive. Such substances could have a detrimental effect on the DPF.
Refer to “Fuel selection” on page 2-02 and
“Engine oil” on page 10-04.NOTEl To minimize the likelihood of excessive ac-
cumulation of PM, try to avoid driving for long periods at low speeds and repeatedly
driving short distances.DPF warning lamp
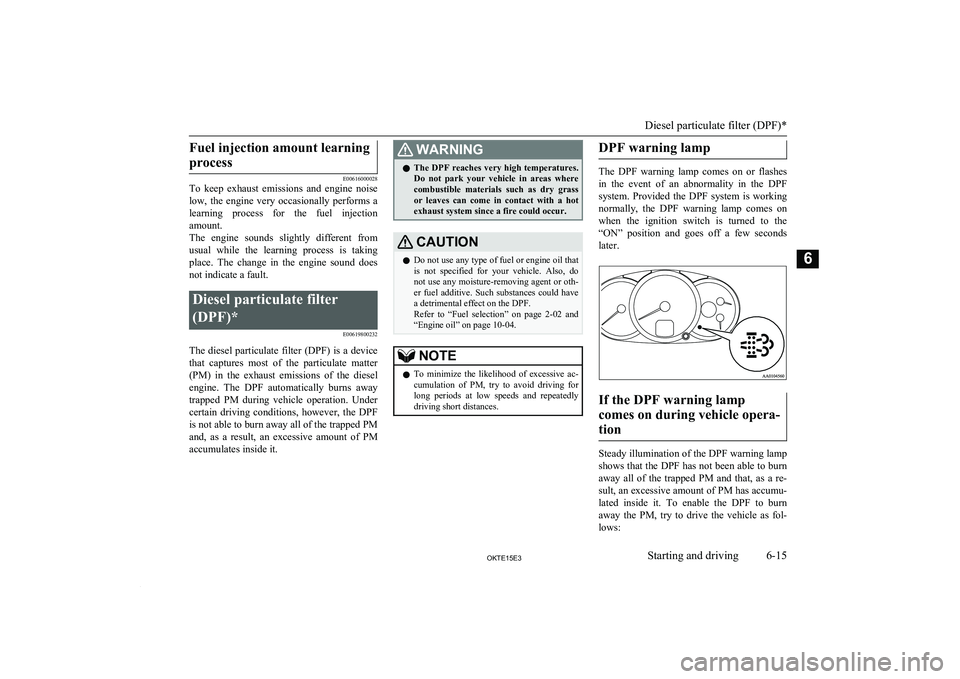
The DPF warning lamp comes on or flashes
in the event of an abnormality in the DPF system. Provided the DPF system is workingnormally, the DPF warning lamp comes on
when the ignition switch is turned to the “ON” position and goes off a few seconds
later.
If the DPF warning lamp
comes on during vehicle opera- tion
Steady illumination of the DPF warning lamp shows that the DPF has not been able to burn
away all of the trapped PM and that, as a re-
sult, an excessive amount of PM has accumu- lated inside it. To enable the DPF to burn
away the PM, try to drive the vehicle as fol-
lows:
Diesel particulate filter (DPF)*
6-15OKTE15E3Starting and driving6