ECO mode MITSUBISHI OUTLANDER 2020 (in English) Owners Manual
[x] Cancel search | Manufacturer: MITSUBISHI, Model Year: 2020, Model line: OUTLANDER, Model: MITSUBISHI OUTLANDER 2020Pages: 443, PDF Size: 60.03 MB
Page 333 of 443
Trailer towing 6-12 Driving safety
6
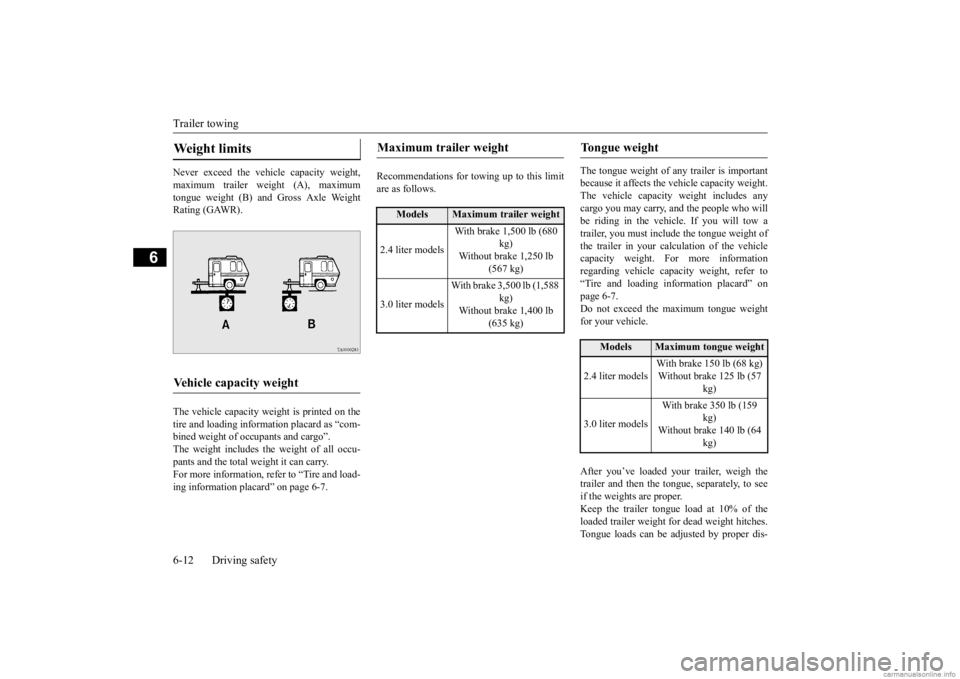
Never exceed the vehicle capacity weight, maximum trailer weight (A), maximum tongue weight (B) and Gross Axle Weight Rating (GAWR). The vehicle capacity weight is printed on the tire and loading inform
ation placard as “com-
bined weight of oc
cupants and cargo”.
The weight includes the weight of all occu- pants and the total weight it can carry.For more information, refer to “Tire and load- ing information plac
ard” on page 6-7.
Recommendations for to
wing up to this limit
are as follows.
The tongue weight of a
ny trailer is important
because it affects the ve
hicle capacity weight.
The vehicle capacity weight includes any cargo you may carry, a
nd the people who will
be riding in the vehi
cle. If you will tow a
trailer, you must include the tongue weight of the trailer in your calculation of the vehiclecapacity weight. For more information regarding vehicle capa
city weight, refer to
“Tire and loading information placard” on page 6-7. Do not exceed the maximum tongue weightfor your vehicle. After you’ve loaded your trailer, weigh the trailer and then the to
ngue, separately, to see
if the weights are proper. Keep the trailer tongue load at 10% of theloaded trailer weight fo
r dead weight hitches.
Tongue loads can be adjusted by proper dis-
Weight limits Vehicle capacity weight
Maximum trailer weight
Models
Maximum trailer weight
2.4 liter models
With brake 1,500 lb (680
kg)
Without brake 1,250 lb
(567 kg)
3.0 liter models
With brake 3,500 lb (1,588
kg)
Without brake 1,400 lb
(635 kg)
Tongue weight
Models
Maximum tongue weight
2.4 liter models
With brake 150 lb (68 kg) Without brake 125 lb (57
kg)
3.0 liter models
With brake 350 lb (159
kg)
Without brake 140 lb (64
kg)
BK0278200US.book 12 ページ 2019年4月10日 水曜日 午前10時59分
Page 334 of 443
Trailer towing
Driving safety 6-13
6
tribution of the load in the trailer. This can be checked by separately
weighing the loaded
trailer and then the tongue. The GAWRs are printed on the certification label which is riveted on the door sill on the driver’s side. Refer to “Vehicle labeling” on page 11-2. Choose a proper hitch and ball, and make sure it is installed at a height that is compati- ble with the trailer. Use a good equalizing hitch which uniformlydistributes the trailer tongue load throughout the frame.
A safety chain must al
ways be used between
the towing vehicle and the trailer. Leave suf-ficient slack in the chain for turns. The chain should cross under the trailer tongue to pre- vent the tongue from dropping to the groundin case it becomes damaged or separated. For correct safety chai
n procedures, consult
your authorized Mitsub
ishi Motors dealer.
Your vehicle will need service more often when you’re towing a trailer. Refer to “WAR-RANTY AND MAINTENANCE MAN- UAL”. Especially important in trailer operation are automatic transaxle fluid,engine oil, rear axle
oil, belt, c
ooling system
and brake system. Each
of these is covered in
this manual. For details, please refer to the “Vehicle care and maintenance” section.Check periodically to see that all hitch nuts and bolts are tight. Mitsubishi Motors recommends that any trailer having a total we
ight of 1,250 lb (567
kg) or more (2.4 liter models), 1,400 lb (635kg) or more (3.0 lite
r models) be equipped
with its own electric or surge-type brakes. If you choose electric br
akes, be sure they are
electrically actuated. Do not attempt to tapinto your vehicle’s hydraulic system. No mat- ter how successful it
may seem, any attempt
to attach trailer brakes to your vehicle’shydraulic system will lower braking effec- tiveness and create a potential hazard.
Gross axle weight rating (GAWR) Trailer hitches
WA R N I N G If you make any holes in the body of your vehicle for installing
a trailer hitch, be
sure to seal the holes later when you remove the hitch. If
you don’t seal them,
deadly carbon monoxide (CO) from yourexhaust can enter your vehicle. Refer to “Exhaust system” on page 9-26.
NOTE
Mitsubishi Motors recommends that sway control be used whenever you are towing, toimprove towing stability.For further informati
on, please contact your
authorized Mitsubishi Motors dealer.
Safety chains
CAUTION Never tow a trailer wi
thout using a safety
chain securely attached to both the trailer and the vehicle. If the
coupling unit or hitch
ball experiences a probl
em, the trailer may
separate from
your vehicle.
Maintenance when trailer tow- ing Trailer brakes
BK0278200US.book 13 ページ 2019年4月10日 水曜日 午前10時59分
Page 340 of 443
Vents
Comfort controls 7-3
7
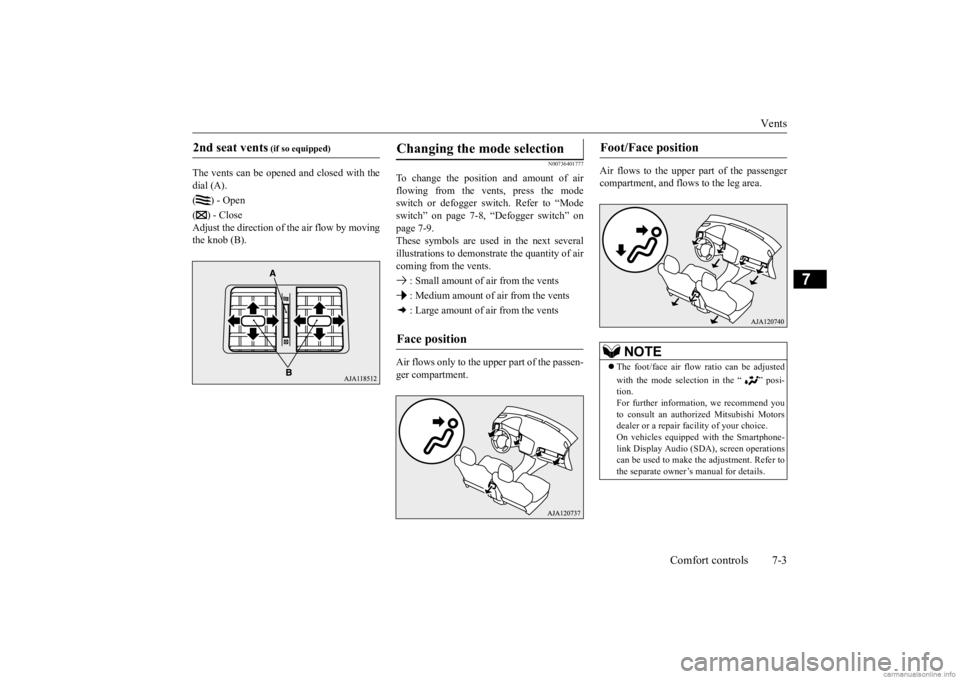
The vents can be opened and closed with the dial (A). () - Open( ) - Close Adjust the direction of the air flow by movingthe knob (B).
N00736401777
To change the position and amount of air flowing from the vents, press the mode switch or defogger switch. Refer to “Modeswitch” on page 7-8, “Defogger switch” on page 7-9. These symbols are used in the next severalillustrations to demonstrate the quantity of air coming from the vents. : Small amount of air from the vents : Medium amount of air from the vents : Large amount of air from the vents Air flows only to the upper part of the passen- ger compartment.
Air flows to the upper part of the passenger compartment, and flows to the leg area.
2nd seat vents
(if so equipped)
Changing the mode selection Face position
Foot/Face position
NOTE
The foot/face air flow
ratio can be adjusted
with the mode selection in the “ ” posi- tion. For further information, we recommend you to consult an authorized Mitsubishi Motorsdealer or a repair fa
cility of your choice.
On vehicles equipped with the Smartphone- link Display Audio (SDA
), screen operations
can be used to make the adjustment. Refer to the separate owner’
s manual for details.
BK0278200US.book 3 ページ 2019年4月10日 水曜日 午前10時59分
Page 341 of 443
Vents 7-4 Comfort controls
7
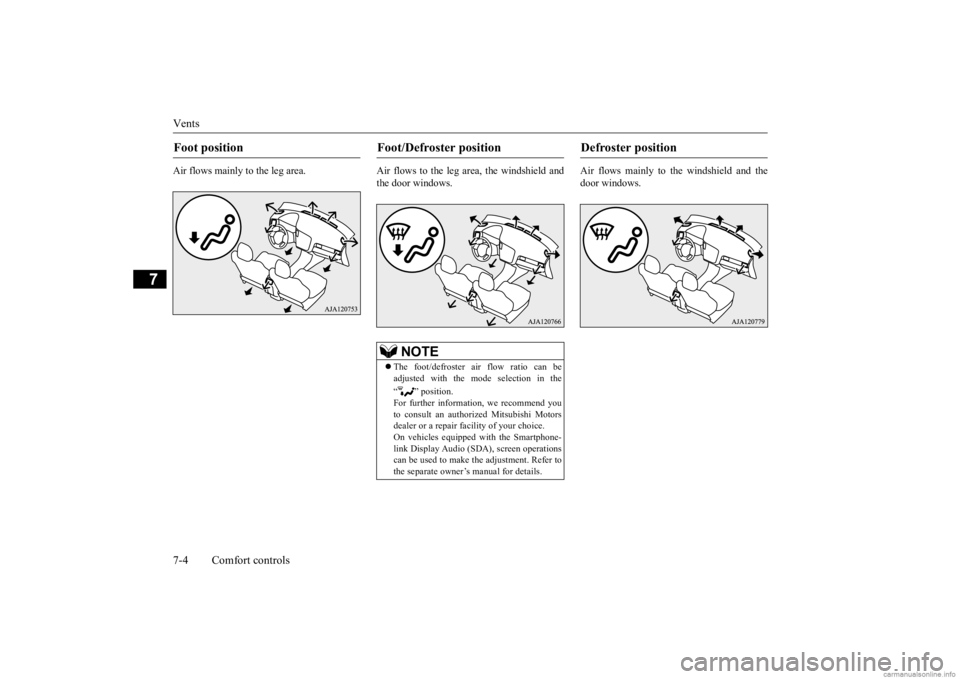
Air flows mainly to the leg area. Air flows to the leg area, the windshield and
the door windows.
Air flows mainly to the windshield and the door windows.
Foot position
Foot/Defroster position
NOTE
The foot/defroster ai
r flow ratio can be
adjusted with the mode selection in the “ ” position. For further information, we recommend you to consult an authorized Mitsubishi Motorsdealer or a repair facility of your choice. On vehicles equipped with the Smartphone- link Display Audio (SDA
), screen operations
can be used to make the adjustment. Refer to the separate owner’
s manual for details.
Defroster position
BK0278200US.book 4 ページ 2019年4月10日 水曜日 午前10時59分
Page 343 of 443
Dual-zone automatic climate
control air conditioner
7-6 Comfort controls
7
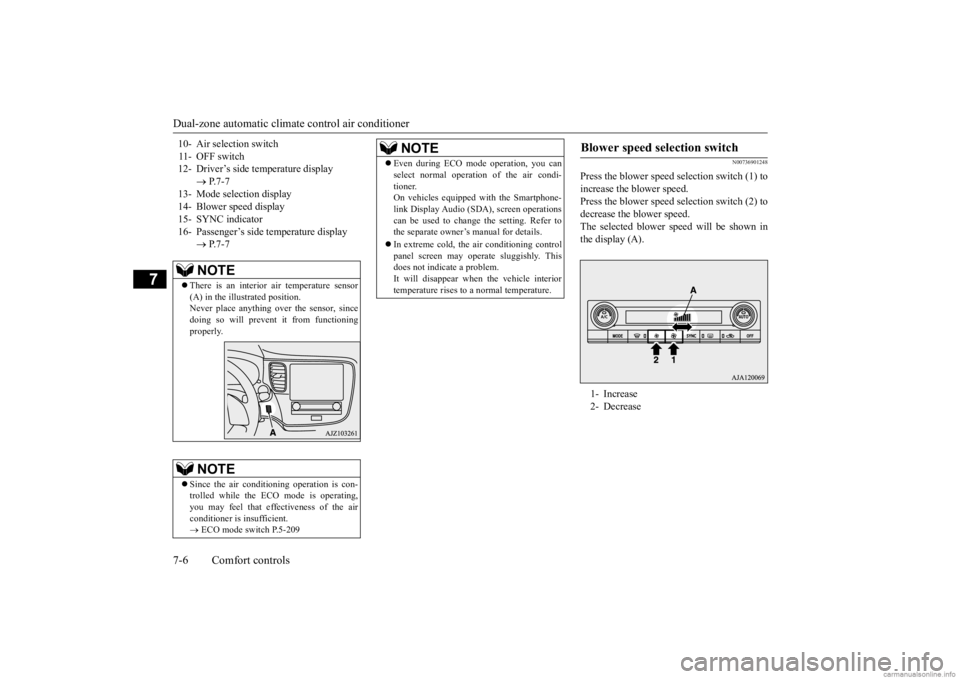
N00736901248
Press the blower speed selection switch (1) to increase the blower speed. Press the blower speed selection switch (2) todecrease the blower speed. The selected blower sp
eed will be shown in
the display (A).
10- Air selection switch 11- OFF switch 12- Driver’s side temperature display
P.7-7
13- Mode selection display 14- Blower speed display 15- SYNC indicator 16- Passenger’s side temperature display
P.7-7NOTE
There is an interior air temperature sensor (A) in the illustrated position. Never place anything ove
r the sensor, since
doing so will prevent it from functioningproperly.NOTE
Since the air conditi
oning operation is con-
trolled while the ECO mode is operating,you may feel that effectiveness of the air conditioner is insufficient. ECO mode switch P.5-209
Even during ECO mode operation, you can select normal operati
on of the air condi-
tioner.On vehicles equipped with the Smartphone- link Display Audio (SDA
), screen operations
can be used to change
the setting. Refer to
the separate owner’
s manual for details.
In extreme cold, the air conditioning control panel screen may ope
rate sluggishly. This
does not indicate a problem. It will disappear when the vehicle interiortemperature rises to a normal temperature.NOTE
Blower speed selection switch 1- Increase 2- Decrease
BK0278200US.book 6 ページ 2019年4月10日 水曜日 午前10時59分
Page 344 of 443
Dual-zone automatic climat
e control air conditioner Comfort controls 7-7
7
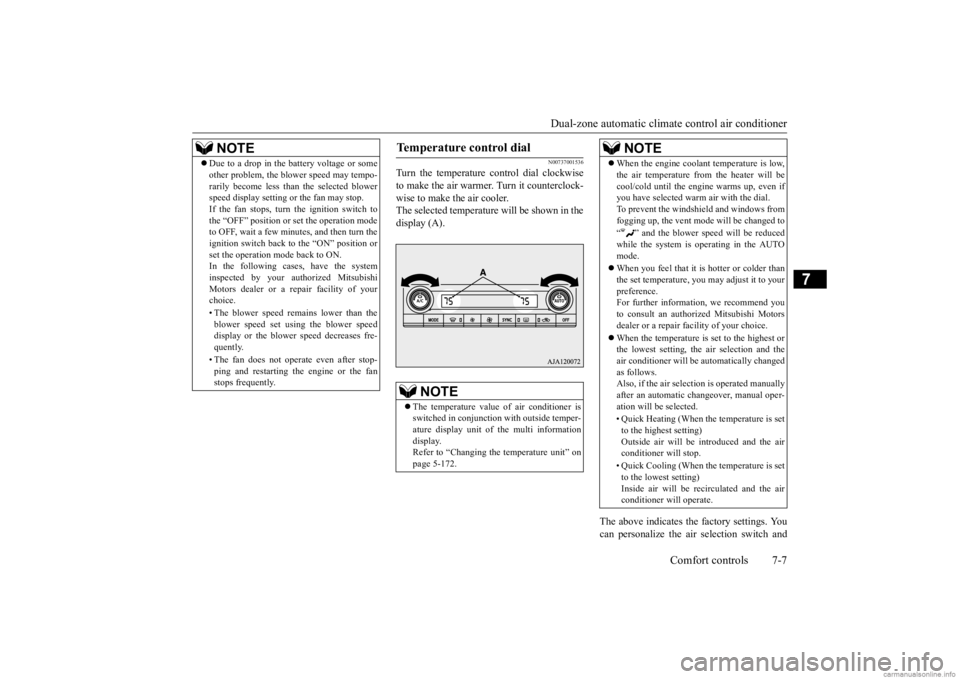
N00737001536
Turn the temperature control dial clockwise to make the air warmer. Turn it counterclock- wise to make the air cooler.The selected temperature will be shown in the display (A).
The above indicates th
e factory settings. You
can personalize the air selection switch and
NOTE
Due to a drop in the battery voltage or some other problem, the blower speed may tempo-rarily become less than the selected blowerspeed display setting or the fan may stop. If the fan stops, turn the ignition switch to the “OFF” position or
set the operation mode
to OFF, wait a few minutes, and then turn the ignition switch back to
the “ON” position or
set the operation m
ode back to ON.
In the following cases, have the system inspected by your authorized Mitsubishi Motors dealer or a repair facility of yourchoice. • The blower speed remains lower than the blower speed set using the blower speed display or the blower
speed decreases fre-
quently. • The fan does not operate even after stop- ping and restarting the engine or the fanstops frequently.
Temperature control dial
NOTE
The temperature value
of air conditioner is
switched in conjunction
with outside temper-
ature display unit of
the multi information
display. Refer to “Changing the temperature unit” onpage 5-172.
When the engine coolant temperature is low, the air temperature from the heater will becool/cold until the engine warms up, even ifyou have selected warm
air with the dial.
To prevent the windshield and windows from fogging up, the vent mode
will be changed to
“ ” and the blower sp
eed will be reduced
while the system is operating in the AUTO mode. When you feel that it is hotter or colder than the set temperature, you may adjust it to yourpreference. For further information, we recommend you to consult an authorized Mitsubishi Motorsdealer or a repair fa
cility of your choice.
When the temperature is set to the highest or the lowest setting, the air selection and the air conditioner will be
automatically changed
as follows.Also, if the air select
ion is operated manually
after an automatic ch
angeover, manual oper-
ation will be
selected.
• Quick Heating (When the temperature is set to the highest setting)Outside air will be introduced and the air conditioner will stop. • Quick Cooling (When th
e temperature is set
to the lowest setting) Inside air will be re
circulated and the air
conditioner will operate.NOTE
SC00000700-5.fm 7 ページ 2019年4月15日 月曜日 午後2時0分
Page 348 of 443
Dual-zone automatic climat
e control air conditioner Comfort controls 7-11
7
N00712200107
You can change the following functions to match your preference. Enable automatic ai
r conditioning control:
When the AUTO switch is pressed, orwhen the temperature control dial has been set to the minimum temperature, the air conditioning switch
is automatically
controlled. Disable automatic air conditioning con- trol: The air conditioning switch is not auto-matically controlled, unless the air condi- tioning switch is used. Changing the settings Press the air condi
tioning switch for
approximately 10 seconds or longer.
When the setting has changed, the system will beep and the i
ndicator light (A) will
flash. • When the setting has changed from enabled to disabled, the system will beepthree times and the indicator light (A) will flash three times. • When the setting has changed from dis-abled to enabled, the system will beep two times and the indi
cator light (A) will
flash three times. On vehicles equipped with the Smart- phone-link Display Audio (SDA), screen operations can also be used to change thesetting. Refer to the separate owner’s manual for details.
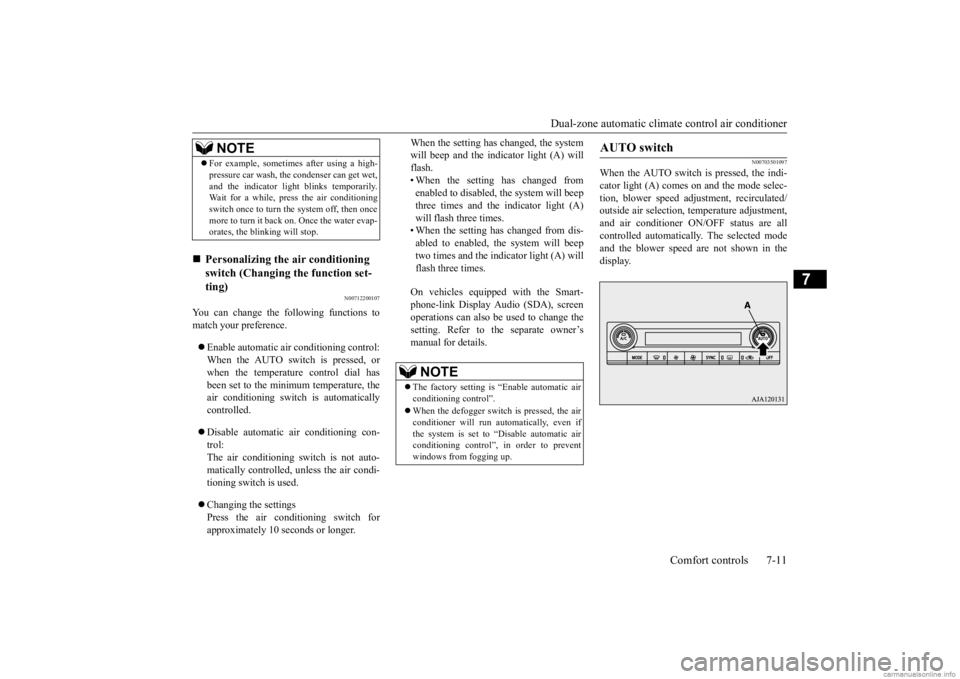
N00703501097
When the AUTO switch is pressed, the indi-cator light (A) comes on and the mode selec- tion, blower speed adju
stment, reci
rculated/
outside air selection, temperature adjustment, and air conditioner ON/
OFF status are all
controlled automatically. The selected modeand the blower speed are not shown in the display.
For example, sometimes after using a high- pressure car wash, the
condenser can get wet,
and the indicator light
blinks temporarily.
Wait for a while, pres
s the air conditioning
switch once to turn the system off, then once more to turn it back on. Once the water evap-orates, the blinking will stop.
Personalizing the
air conditioning
switch (Changing the function set-ting) NOTE
NOTE
The factory setting is “Enable automatic air conditioning control”. When the defogger switch is pressed, the air conditioner will run automatically, even ifthe system is set to “Disable automatic air conditioning control”, in order to prevent windows from fogging up.
AUTO switch
BK0278200US.book 11 ページ 2019年4月10日 水曜日 午前10時59分
Page 349 of 443
Dual-zone automatic climate
control air conditioner
7-12 Comfort controls
7
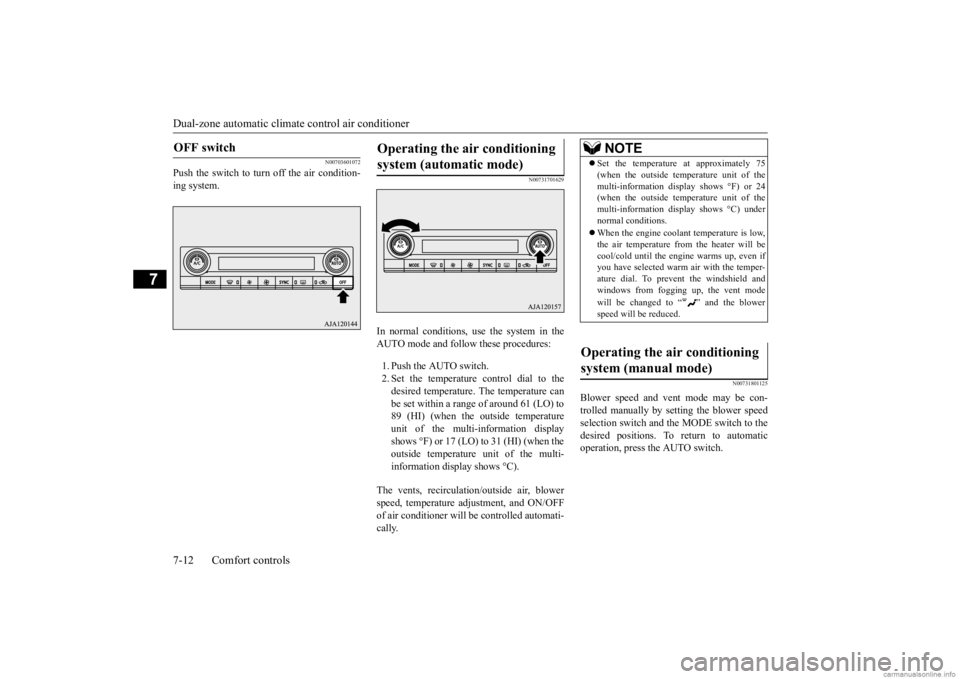
N00703601072
Push the switch to turn off the air condition- ing system.
N00731701629
In normal conditions, use the system in the AUTO mode and follow these procedures: 1. Push the AUTO switch. 2. Set the temperature control dial to the desired temperature. The temperature can be set within a range of around 61 (LO) to89 (HI) (when the outside temperature unit of the multi-information display shows °F) or 17 (LO) to 31 (HI) (when theoutside temperature unit of the multi- information display shows °C).
The vents, recirculati
on/outside air, blower
speed, temperature ad
justment, and ON/OFF
of air conditioner will be
controlled automati-
cally.
N00731801125
Blower speed and vent mode may be con- trolled manually by setting the blower speedselection switch and the MODE switch to the desired positions. To
return to automatic
operation, press the AUTO switch.
OFF switch
Operating the air conditioning system (automatic mode)
NOTE
Set the temperature at approximately 75 (when the outside temp
erature unit of the
multi-information display shows °F) or 24(when the outside temp
erature unit of the
multi-information display shows °C) under normal conditions. When the engine coolan
t temperature is low,
the air temperature from the heater will becool/cold until the engi
ne warms up, even if
you have selected warm
air with th
e temper-
ature dial. To prevent the windshield andwindows from fogging up, the vent mode will be changed to “ ” and the blower speed will be reduced.
Operating the air conditioning system (manual mode)
BK0278200US.book 12 ページ 2019年4月10日 水曜日 午前10時59分
Page 351 of 443
Air purifier 7-14 Comfort controls
7
3. When running the air conditioner, make sure the air intake, which is located infront of the windshield, is free of obstruc- tions such as leaves. Leaves collected in the air-intake chamber may reduce airflow and plug the water drains.
If the air conditioner seem
s less effective than
usual, the cause might
be a refrigerant leak.
Have the system inspected by your authorized Mitsubishi Motors dealer
or a repair facility
of your choice.
The air conditioner should be operated for at least five minutes each week, even in cold weather. This includes the quick defrostingmode. Operating the
air condition system
weekly maintains lubrication of the compres- sor internal parts to keep the air conditionerin the best operating condition.
N00733801190
The air conditioning syst
em is equipped with
an air filter to remove pollen and dust.
The air filter’s ability to collect pollen and dirt is reduced as it be
comes dirty, so replace
it periodically. For the maintenance interval, refer to the “WARRANTY AND MAINTE- NANCE MANUAL”.
N00733901540
Your vehicle’s radio receives both AM andFM stations.The quality of your re
ception is affected by
distance, obstacles, an
d signal interference.
This radio complies wi
th Part 15 of Federal
Communications Commission (FCC) Rules(for vehicles sold in U.S.A.). Operation is subject to the following conditions:
Air conditioning system refrig- erant and lubricant recommen- dations
CAUTION The air conditioning system in your vehicle must be charged with the refrigerant HFO-1234yf and the lubricant SUN-PAG46A.Use of any other refrigerant or lubricant will cause severe damage a
nd may require replac-
ing your vehicle’s en
tire air conditioning
system. The release of refrigerant into the atmo- sphere is not recommended.The new refrigerant HFO-1234yf in your vehicle is designed not
to harm the earth’s
ozone layer. Additionall
y, it has a signifi-
cantly reduced global
warming impact on the
environment, compared to the refrigerant HFC-134a.
During a long period of disuse Air purifier
NOTE
Operation in certain conditions such as driv- ing on a dusty road and frequent use of the air conditioner ca
n lead to reduction of ser-
vice life of the filter. When you feel that theair flow is lower than normal or when the windshield or windows st
art to fog up easily,
replace the air filter.Contact your Mitsubishi
Motors dealer or a
repair facility of your
choice for assistance.
General information about your radio
BK0278200US.book 14 ページ 2019年4月10日 水曜日 午前10時59分
Page 362 of 443
Tire repair kit (if so equipped)
For emergencies 8-9
8
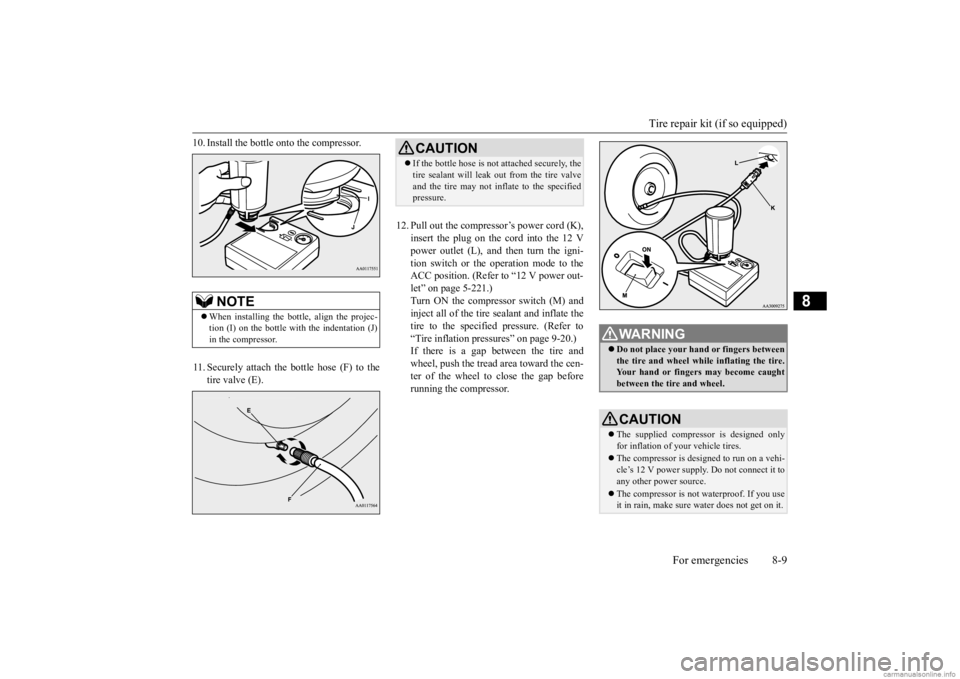
10. Install the bottle onto the compressor. 11. Securely attach the bottle hose (F) to the
tire valve (E).
12. Pull out the compressor’s power cord (K),
insert the plug on the cord into the 12 Vpower outlet (L), and then turn the igni- tion switch or the operation mode to the ACC position. (Refer to “12 V power out-let” on page 5-221.) Turn ON the compressor switch (M) and inject all of the tire sealant and inflate thetire to the specified pressure. (Refer to “Tire inflation pressures” on page 9-20.) If there is a gap between the tire andwheel, push the tread area toward the cen- ter of the wheel to close the gap before running the compressor.
NOTE
When installing the bottle, align the projec- tion (I) on the bottle with the indentation (J) in the compressor.
CAUTION If the bottle hose is not attached securely, the tire sealant will leak out from the tire valveand the tire may not inflate to the specifiedpressure.
WA R N I N G Do not place your hand or fingers between the tire and wheel while inflating the tire. Your hand or fingers may become caughtbetween the tire and wheel.CAUTION The supplied compressor is designed only for inflation of
your vehicle tires.
The compressor is designed to run on a vehi- cle’s 12 V power supply.
Do not connect it to
any other power source. The compressor is not waterproof. If you use it in rain, make sure wa
ter does not get on it.
BK0278200US.book 9 ページ 2019年4月10日 水曜日 午前10時59分