NISSAN ARMADA 2004 1.G Navigation Manual
Manufacturer: NISSAN, Model Year: 2004, Model line: ARMADA, Model: NISSAN ARMADA 2004 1.GPages: 184, PDF Size: 4.16 MB
Page 41 of 184
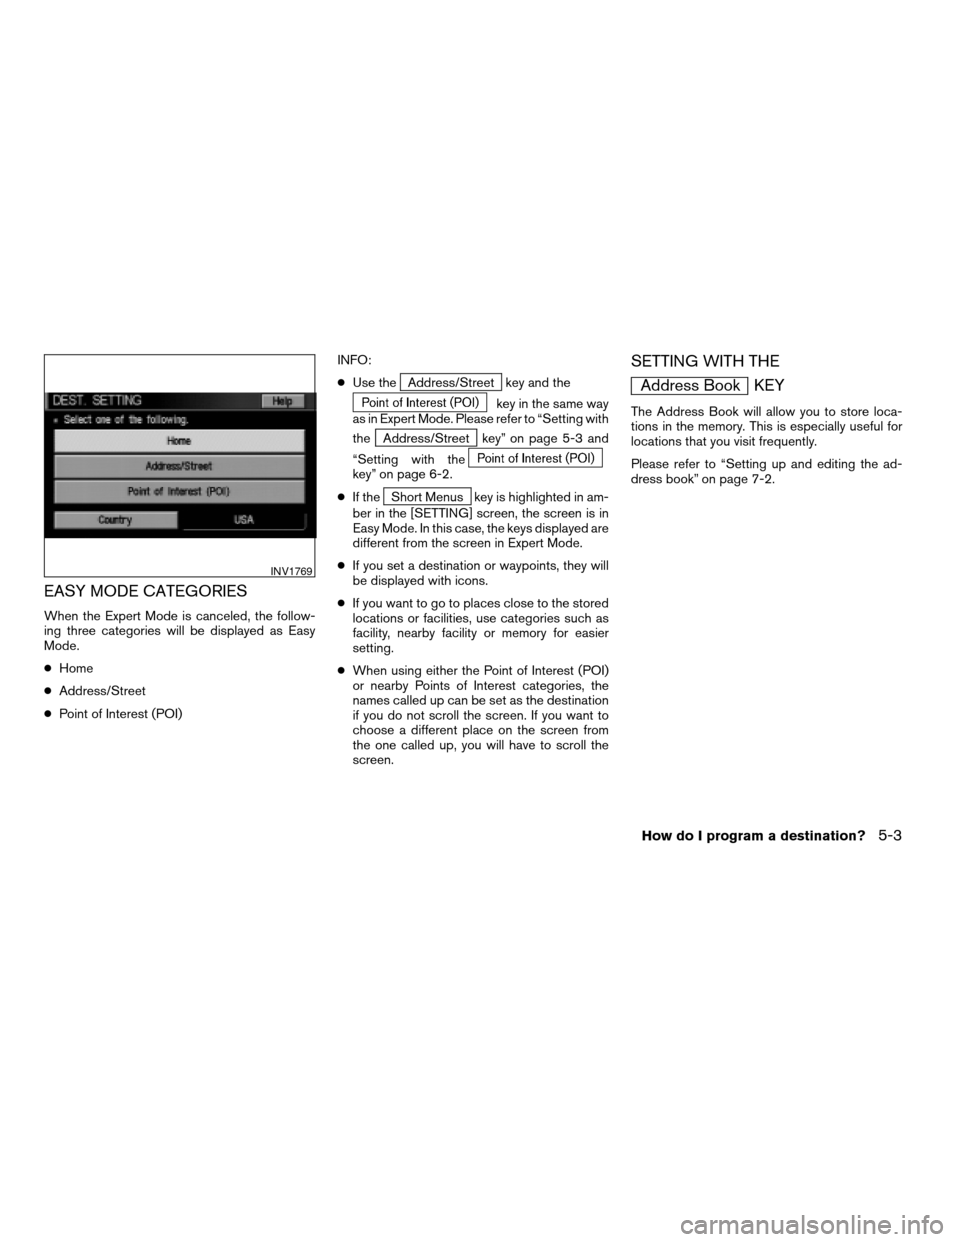
EASY MODE CATEGORIES
When the Expert Mode is canceled, the follow-
ing three categories will be displayed as Easy
Mode.
cHome
cAddress/Street
cPoint of Interest (POI)INFO:
cUse the
Address/Street key and the
key in the same way
as in Expert Mode. Please refer to “Setting with
the
Address/Street key” on page 5-3 and
“Setting with the
key” on page 6-2.
cIf the
Short Menus key is highlighted in am-
ber in the [SETTING] screen, the screen is in
Easy Mode. In this case, the keys displayed are
different from the screen in Expert Mode.
cIf you set a destination or waypoints, they will
be displayed with icons.
cIf you want to go to places close to the stored
locations or facilities, use categories such as
facility, nearby facility or memory for easier
setting.
cWhen using either the Point of Interest (POI)
or nearby Points of Interest categories, the
names called up can be set as the destination
if you do not scroll the screen. If you want to
choose a different place on the screen from
the one called up, you will have to scroll the
screen.
SETTING WITH THE
Address Book KEY
The Address Book will allow you to store loca-
tions in the memory. This is especially useful for
locations that you visit frequently.
Please refer to “Setting up and editing the ad-
dress book” on page 7-2.
INV1769
How do I program a destination?5-3
ZREVIEW COPY:Ð2004 Pathfinder Armada(wzw)
Navigation System OM(navi)ÐUSA English(nna)
02/23/04Ðdebbie
X
Page 42 of 184
![NISSAN ARMADA 2004 1.G Navigation Manual 1. Press the DEST button.
2. Select the
Address Book key on the
[DEST. SETTING] screen.
The [DEST. SETTING (Address Book)] screen
will be displayed.3. Select the item key of your destination (way-
poi NISSAN ARMADA 2004 1.G Navigation Manual 1. Press the DEST button.
2. Select the
Address Book key on the
[DEST. SETTING] screen.
The [DEST. SETTING (Address Book)] screen
will be displayed.3. Select the item key of your destination (way-
poi](/img/5/671/w960_671-41.png)
1. Press the DEST button.
2. Select the
Address Book key on the
[DEST. SETTING] screen.
The [DEST. SETTING (Address Book)] screen
will be displayed.3. Select the item key of your destination (way-
points) on the [DEST. SETTING (Address
Book)] screen.4. To set the destination (waypoints) , refer to
“Making the system guide the route with de-
tailed options” on page 5-31.
INV1768INV1787INV1788
5-4How do I program a destination?
ZREVIEW COPY:Ð2004 Pathfinder Armada(wzw)
Navigation System OM(navi)ÐUSA English(nna)
02/23/04Ðdebbie
X
Page 43 of 184
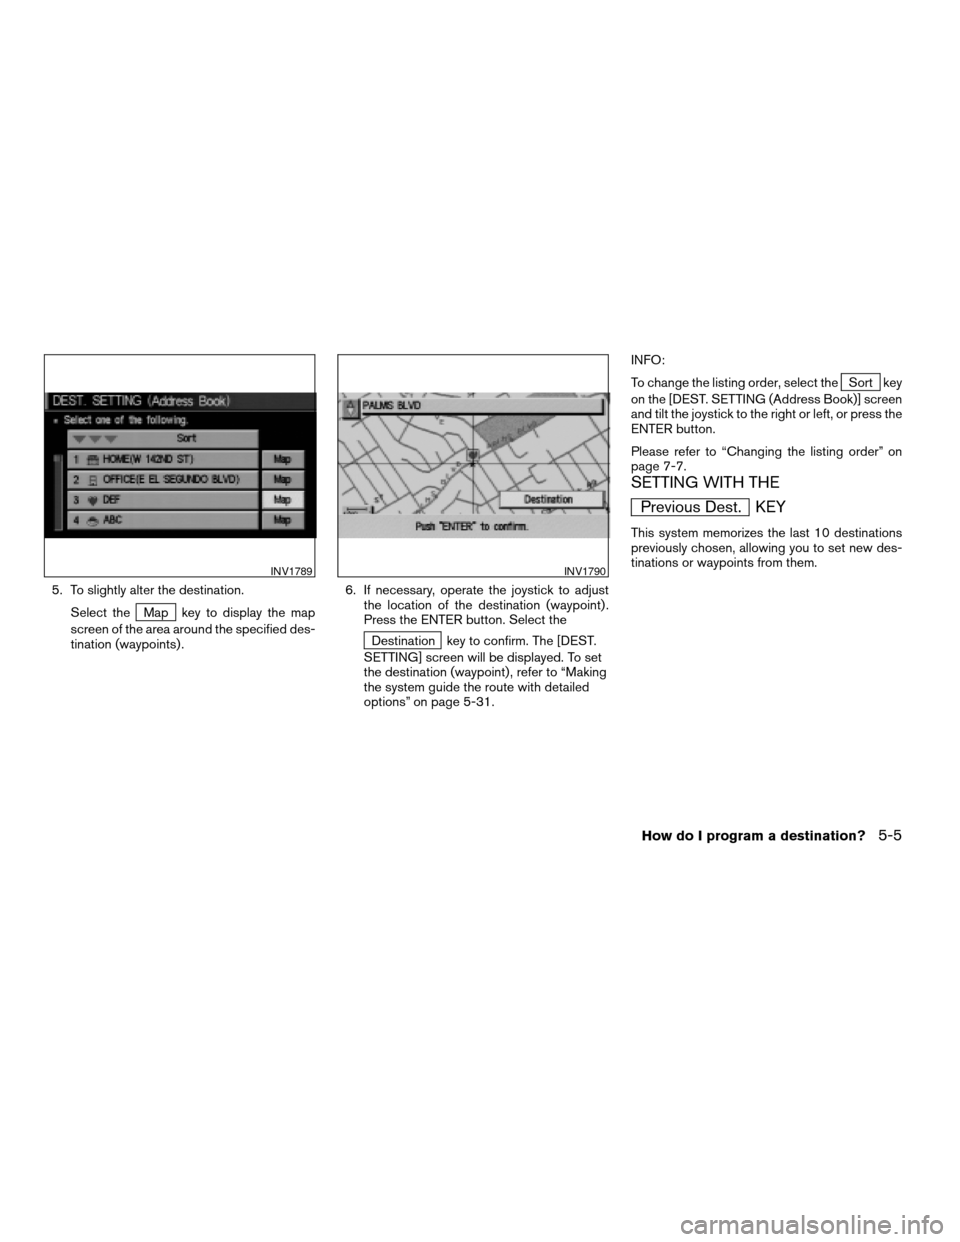
5. To slightly alter the destination.
Select the
Map key to display the map
screen of the area around the specified des-
tination (waypoints) .6. If necessary, operate the joystick to adjust
the location of the destination (waypoint) .
Press the ENTER button. Select the
Destination key to confirm. The [DEST.
SETTING] screen will be displayed. To set
the destination (waypoint) , refer to “Making
the system guide the route with detailed
options” on page 5-31.INFO:
To change the listing order, select the
Sort key
on the [DEST. SETTING (Address Book)] screen
and tilt the joystick to the right or left, or press the
ENTER button.
Please refer to “Changing the listing order” on
page 7-7.
SETTING WITH THE
Previous Dest. KEY
This system memorizes the last 10 destinations
previously chosen, allowing you to set new des-
tinations or waypoints from them.
INV1789INV1790
How do I program a destination?5-5
ZREVIEW COPY:Ð2004 Pathfinder Armada(wzw)
Navigation System OM(navi)ÐUSA English(nna)
02/23/04Ðdebbie
X
Page 44 of 184
![NISSAN ARMADA 2004 1.G Navigation Manual 1. Press the DEST button.
2. Select the
Previous Dest. key on the
[DEST. SETTING] screen.
A total of 10 destinations and locations previ-
ously set can be stored and displayed.3. Select the item key o NISSAN ARMADA 2004 1.G Navigation Manual 1. Press the DEST button.
2. Select the
Previous Dest. key on the
[DEST. SETTING] screen.
A total of 10 destinations and locations previ-
ously set can be stored and displayed.3. Select the item key o](/img/5/671/w960_671-43.png)
1. Press the DEST button.
2. Select the
Previous Dest. key on the
[DEST. SETTING] screen.
A total of 10 destinations and locations previ-
ously set can be stored and displayed.3. Select the item key of your destination (way-
points) on the [DEST. SETTING (Previous
Dest.)] screen.4. To set the destination (waypoints) , refer to
“Making the system guide the route with de-
tailed options” on page 5-31.
INV1791INV1792INV1793
5-6How do I program a destination?
ZREVIEW COPY:Ð2004 Pathfinder Armada(wzw)
Navigation System OM(navi)ÐUSA English(nna)
02/23/04Ðdebbie
X
Page 45 of 184
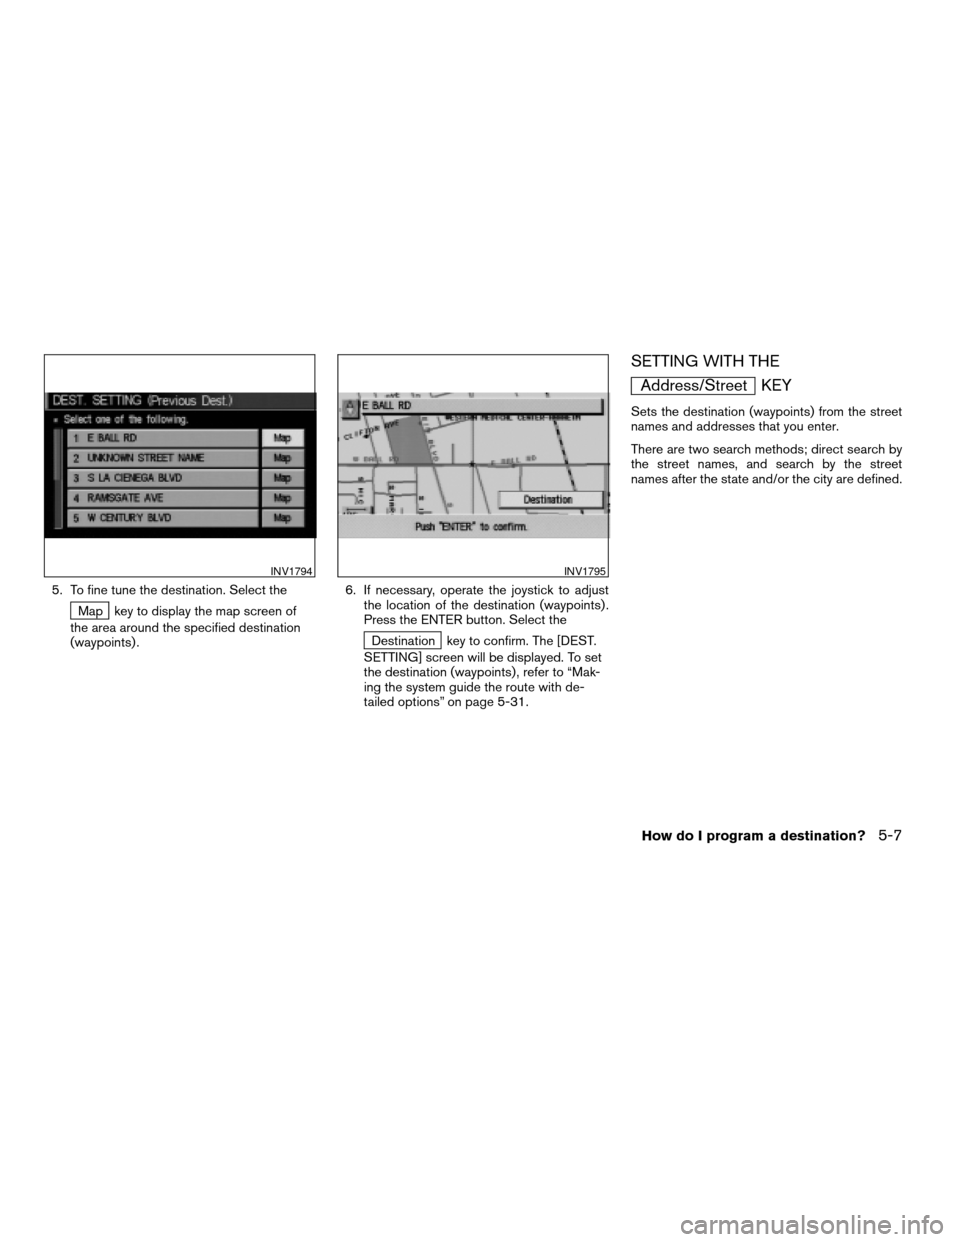
5. To fine tune the destination. Select the
Map key to display the map screen of
the area around the specified destination
(waypoints) .6. If necessary, operate the joystick to adjust
the location of the destination (waypoints) .
Press the ENTER button. Select the
Destination key to confirm. The [DEST.
SETTING] screen will be displayed. To set
the destination (waypoints) , refer to “Mak-
ing the system guide the route with de-
tailed options” on page 5-31.
SETTING WITH THE
Address/Street KEY
Sets the destination (waypoints) from the street
names and addresses that you enter.
There are two search methods; direct search by
the street names, and search by the street
names after the state and/or the city are defined.
INV1794INV1795
How do I program a destination?5-7
ZREVIEW COPY:Ð2004 Pathfinder Armada(wzw)
Navigation System OM(navi)ÐUSA English(nna)
02/23/04Ðdebbie
X
Page 46 of 184
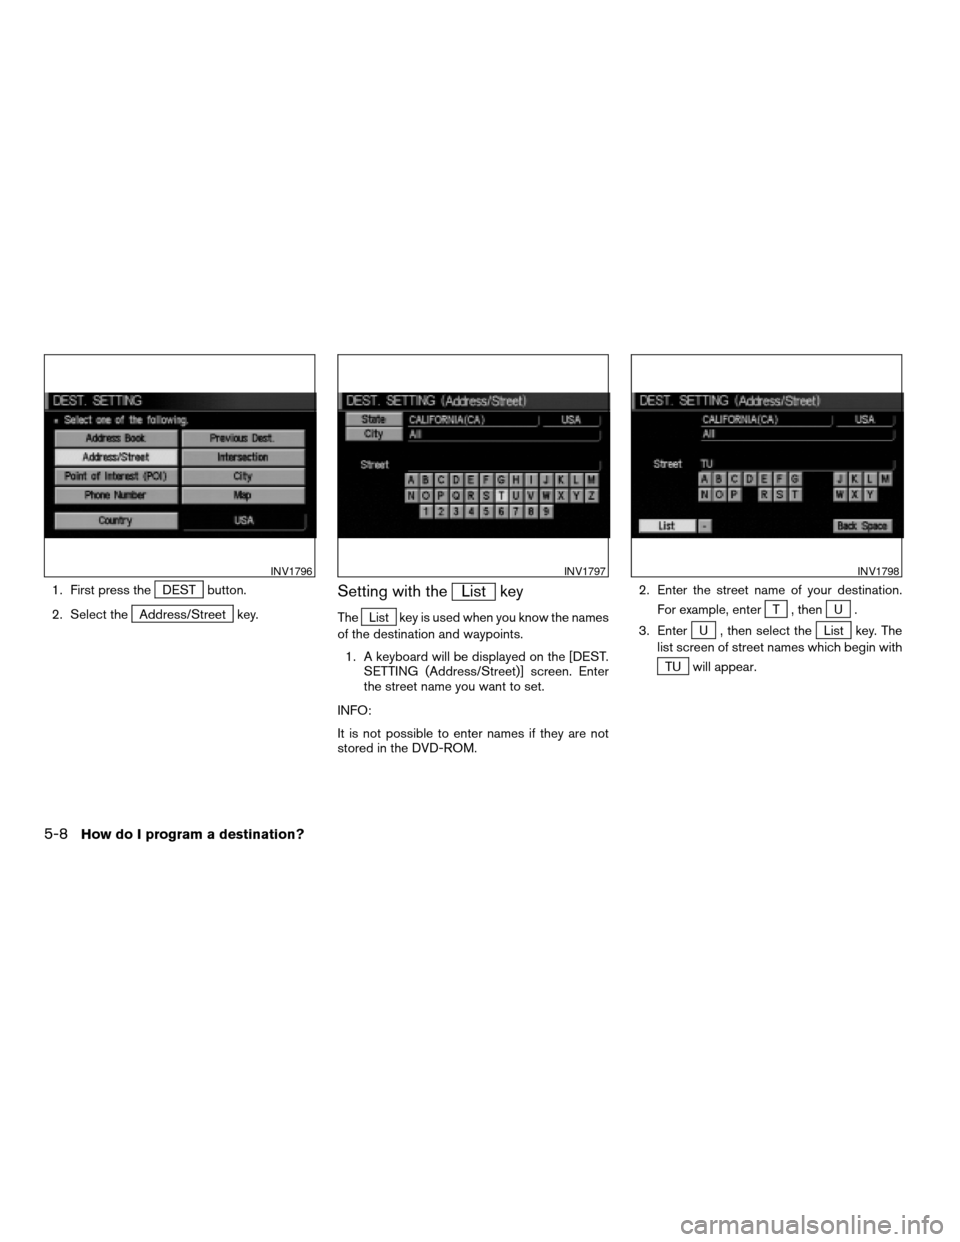
1. First press theDEST button.
2. Select the
Address/Street key.
Setting with theList key
TheList key is used when you know the names
of the destination and waypoints.
1. A keyboard will be displayed on the [DEST.
SETTING (Address/Street)] screen. Enter
the street name you want to set.
INFO:
It is not possible to enter names if they are not
stored in the DVD-ROM.2. Enter the street name of your destination.
For example, enterT , thenU.
3. Enter
U , then select theList key. The
list screen of street names which begin with
TU will appear.
INV1796INV1797INV1798
5-8How do I program a destination?
ZREVIEW COPY:Ð2004 Pathfinder Armada(wzw)
Navigation System OM(navi)ÐUSA English(nna)
02/23/04Ðdebbie
X
Page 47 of 184
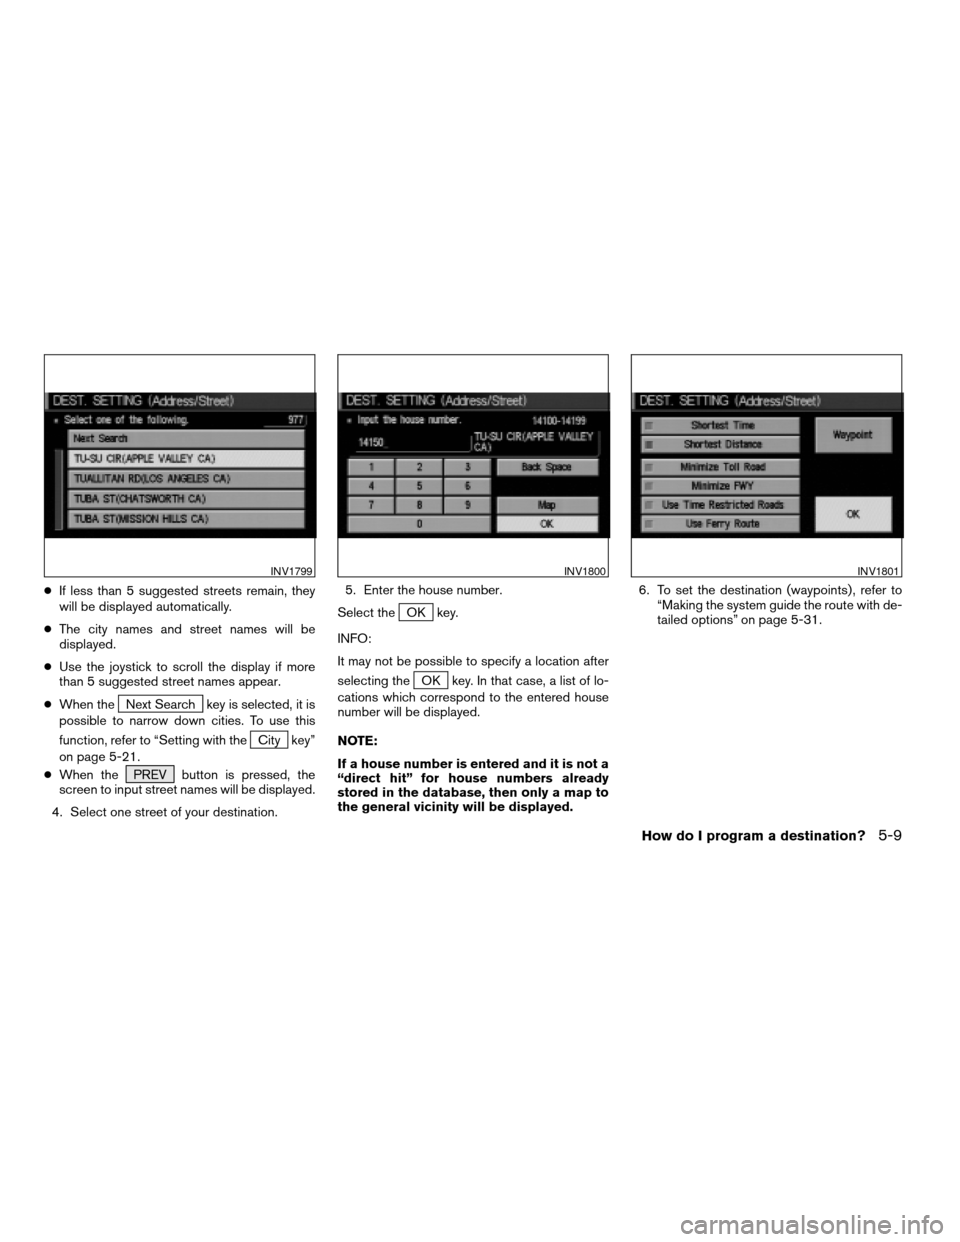
cIf less than 5 suggested streets remain, they
will be displayed automatically.
cThe city names and street names will be
displayed.
cUse the joystick to scroll the display if more
than 5 suggested street names appear.
cWhen the
Next Search key is selected, it is
possible to narrow down cities. To use this
function, refer to “Setting with the
City key”
on page 5-21.
cWhen the PREV button is pressed, the
screen to input street names will be displayed.
4. Select one street of your destination.5. Enter the house number.
Select the
OK key.
INFO:
It may not be possible to specify a location after
selecting the
OK key. In that case, a list of lo-
cations which correspond to the entered house
number will be displayed.
NOTE:
If a house number is entered and it is not a
“direct hit” for house numbers already
stored in the database, then only a map to
the general vicinity will be displayed.6. To set the destination (waypoints) , refer to
“Making the system guide the route with de-
tailed options” on page 5-31.
INV1799INV1800INV1801
How do I program a destination?5-9
ZREVIEW COPY:Ð2004 Pathfinder Armada(wzw)
Navigation System OM(navi)ÐUSA English(nna)
02/23/04Ðdebbie
X
Page 48 of 184
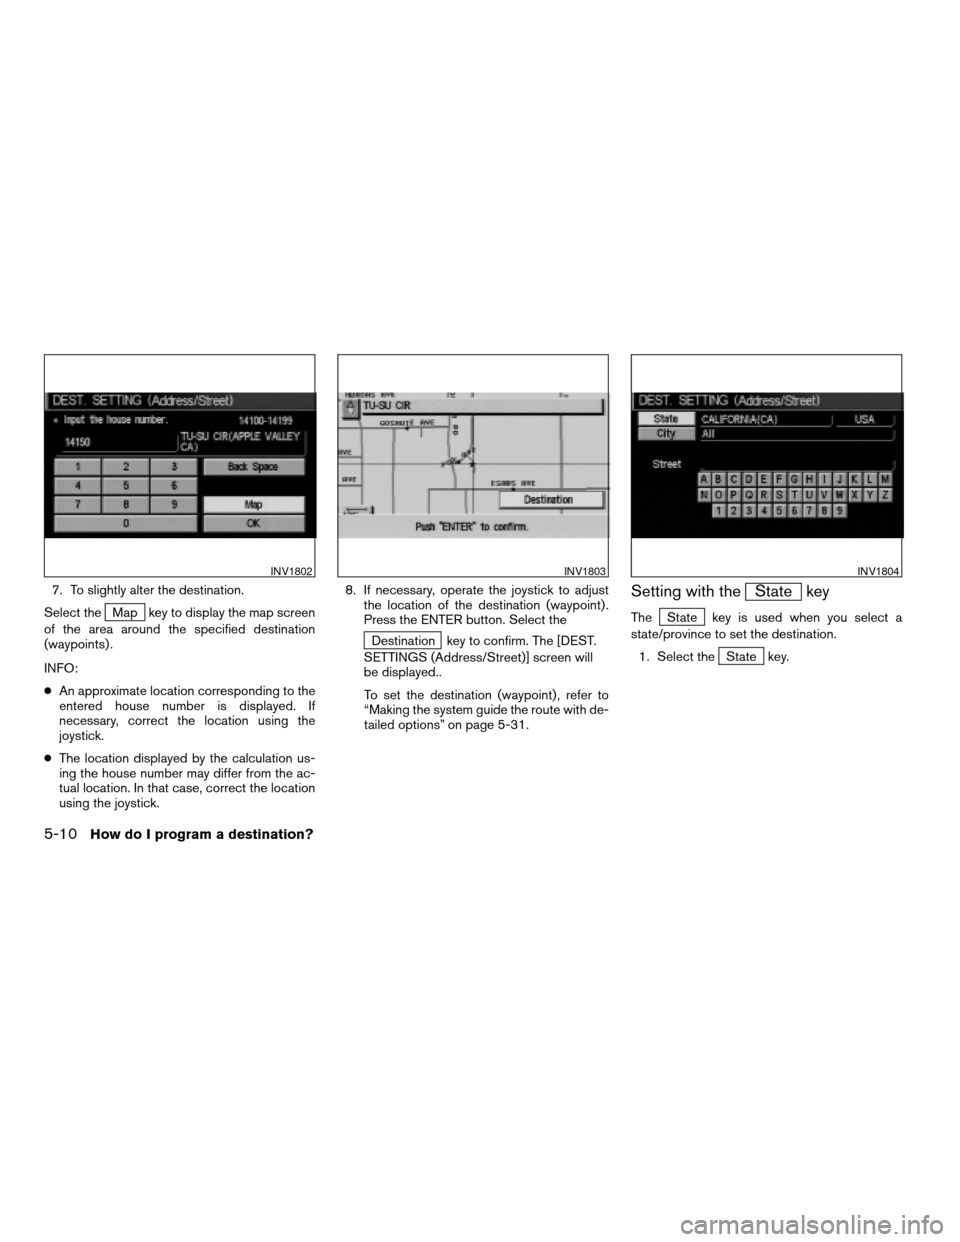
7. To slightly alter the destination.
Select the
Map key to display the map screen
of the area around the specified destination
(waypoints) .
INFO:
cAn approximate location corresponding to the
entered house number is displayed. If
necessary, correct the location using the
joystick.
cThe location displayed by the calculation us-
ing the house number may differ from the ac-
tual location. In that case, correct the location
using the joystick.8. If necessary, operate the joystick to adjust
the location of the destination (waypoint) .
Press the ENTER button. Select the
Destination key to confirm. The [DEST.
SETTINGS (Address/Street)] screen will
be displayed..
To set the destination (waypoint) , refer to
“Making the system guide the route with de-
tailed options” on page 5-31.
Setting with theState key
TheState key is used when you select a
state/province to set the destination.
1. Select the
State key.
INV1802INV1803INV1804
5-10How do I program a destination?
ZREVIEW COPY:Ð2004 Pathfinder Armada(wzw)
Navigation System OM(navi)ÐUSA English(nna)
02/23/04Ðdebbie
X
Page 49 of 184
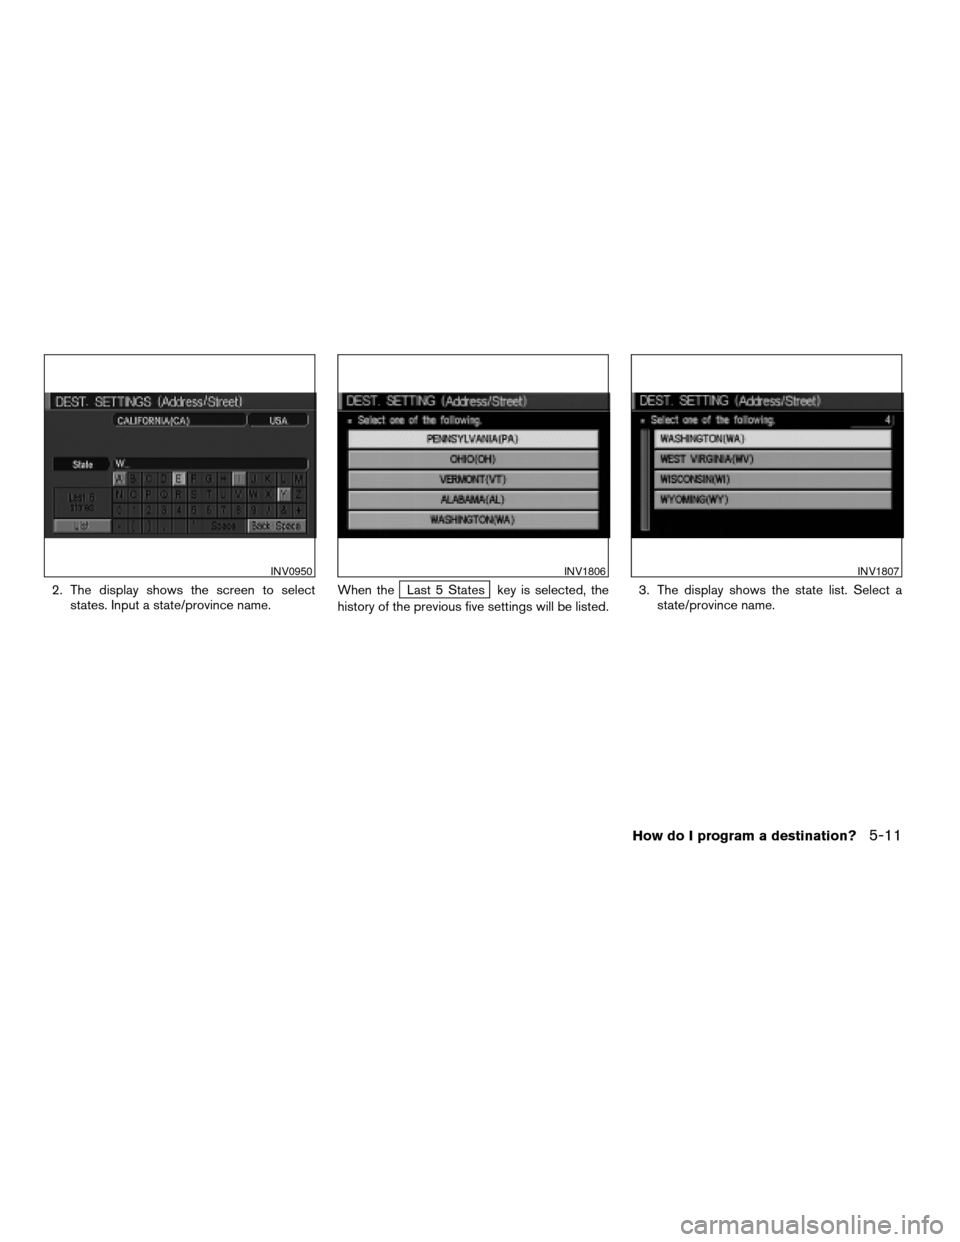
2. The display shows the screen to select
states. Input a state/province name.When theLast 5 States key is selected, the
history of the previous five settings will be listed.3. The display shows the state list. Select a
state/province name.
INV0950INV1806INV1807
How do I program a destination?5-11
ZREVIEW COPY:Ð2004 Pathfinder Armada(wzw)
Navigation System OM(navi)ÐUSA English(nna)
02/23/04Ðdebbie
X
Page 50 of 184
![NISSAN ARMADA 2004 1.G Navigation Manual 4. The screen returns to the [DEST. SETTING
(Address/Street)] screen. When the
state/province is set, the display shows the
selected state/province next to the
State key.
Input the street name.
Please NISSAN ARMADA 2004 1.G Navigation Manual 4. The screen returns to the [DEST. SETTING
(Address/Street)] screen. When the
state/province is set, the display shows the
selected state/province next to the
State key.
Input the street name.
Please](/img/5/671/w960_671-49.png)
4. The screen returns to the [DEST. SETTING
(Address/Street)] screen. When the
state/province is set, the display shows the
selected state/province next to the
State key.
Input the street name.
Please refer to “Setting with the
List key” on page 5-8.
Setting with theCity key
TheCity key is used when you select a city to
set the destination.
1. Select the
City key.
cThe display shows the screen to retrieve
cities.2. Input a city name.
INV1808INV1809INV0955
5-12How do I program a destination?
ZREVIEW COPY:Ð2004 Pathfinder Armada(wzw)
Navigation System OM(navi)ÐUSA English(nna)
02/23/04Ðdebbie
X