change time NISSAN MAXIMA 2004 A34 / 6.G Navigation Manual
[x] Cancel search | Manufacturer: NISSAN, Model Year: 2004, Model line: MAXIMA, Model: NISSAN MAXIMA 2004 A34 / 6.GPages: 186, PDF Size: 4.27 MB
Page 1 of 186

Thank you for purchasing a NISSAN automobile.
This user’s manual is for the navigation system
only.
Please read this manual carefully to ensure safe
operation of the navigation system. This manual
contains operating instructions for the NISSAN
Navigation System offered in your NISSAN ve-
hicle
cPlease read your vehicle’s owner’s manual
first.
cDo not remove this manual from the vehicle
when selling this vehicle. The next user of this
navigation system may need the manual.
cBecause of possible specification changes,
sections of this manual may not apply to your
vehicle.
cAll information, specifications and illustrations
in this manual are those in effect at the time of
printing. NISSAN reserves the right to change
specifications or design at any time without
notice.
FOREWORD
ZREVIEW COPYÐ2004 Maxima(max)
Navigation System OM(navi)ÐUSA_English(nna)
04/27/04Ðtbrooks
X
Page 21 of 186

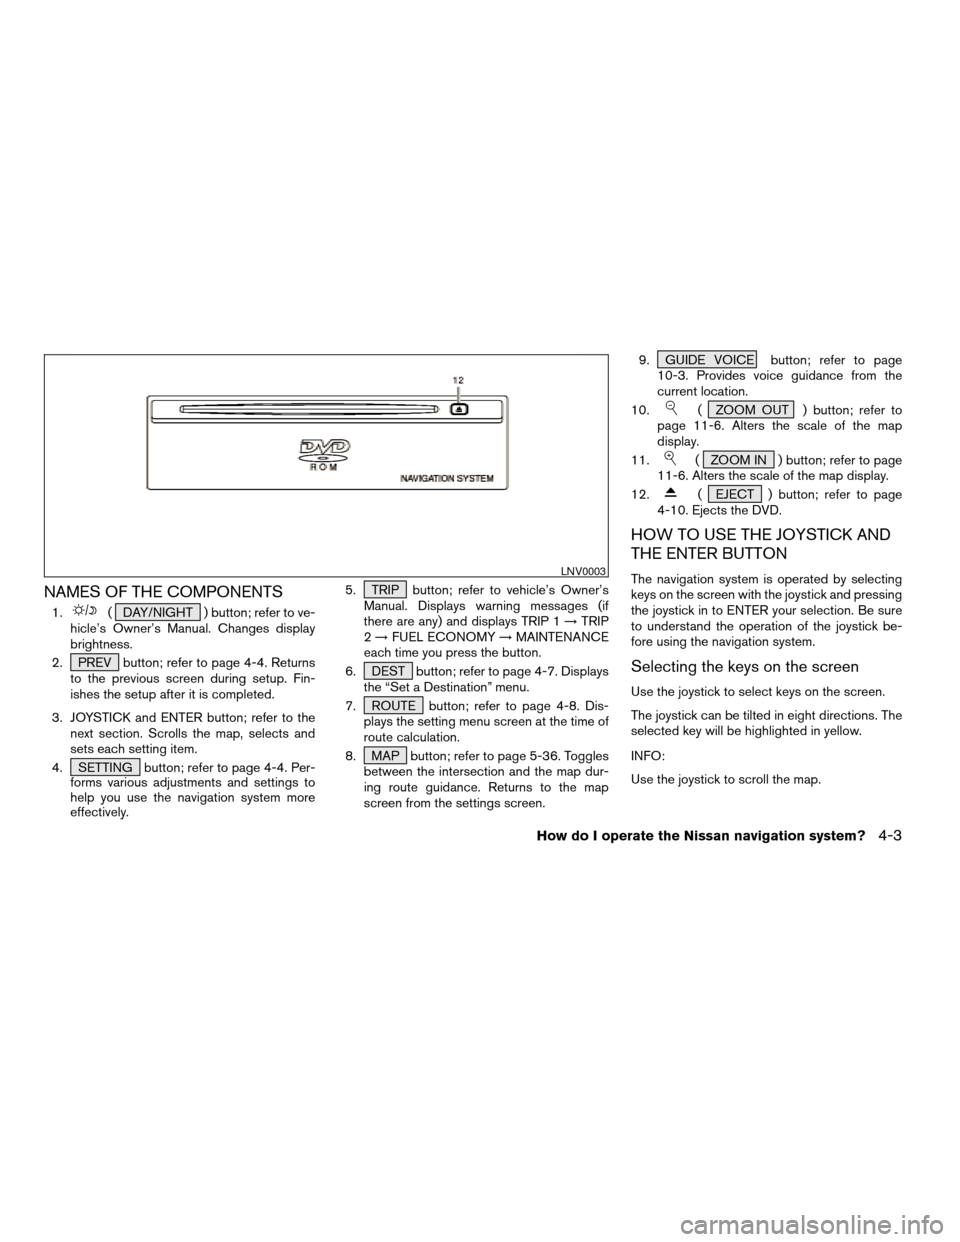
NAMES OF THE COMPONENTS
1.( DAY/NIGHT ) button; refer to ve-
hicle’s Owner’s Manual. Changes display
brightness.
2. PREV button; refer to page 4-4. Returns
to the previous screen during setup. Fin-
ishes the setup after it is completed.
3. JOYSTICK and ENTER button; refer to the
next section. Scrolls the map, selects and
sets each setting item.
4. SETTING button; refer to page 4-4. Per-
forms various adjustments and settings to
help you use the navigation system more
effectively.5. TRIP button; refer to vehicle’s Owner’s
Manual. Displays warning messages (if
there are any) and displays TRIP 1!TRIP
2!FUEL ECONOMY!MAINTENANCE
each time you press the button.
6. DEST button; refer to page 4-7. Displays
the “Set a Destination” menu.
7. ROUTE button; refer to page 4-8. Dis-
plays the setting menu screen at the time of
route calculation.
8. MAP button; refer to page 5-36. Toggles
between the intersection and the map dur-
ing route guidance. Returns to the map
screen from the settings screen.9. GUIDE VOICE button; refer to page
10-3. Provides voice guidance from the
current location.
10.
( ZOOM OUT ) button; refer to
page 11-6. Alters the scale of the map
display.
11.
( ZOOM IN ) button; refer to page
11-6. Alters the scale of the map display.
12.
( EJECT ) button; refer to page
4-10. Ejects the DVD.
HOW TO USE THE JOYSTICK AND
THE ENTER BUTTON
The navigation system is operated by selecting
keys on the screen with the joystick and pressing
the joystick in to ENTER your selection. Be sure
to understand the operation of the joystick be-
fore using the navigation system.
Selecting the keys on the screen
Use the joystick to select keys on the screen.
The joystick can be tilted in eight directions. The
selected key will be highlighted in yellow.
INFO:
Use the joystick to scroll the map.
LNV0003
How do I operate the Nissan navigation system?4-3
ZREVIEW COPYÐ2004 Maxima(max)
Navigation System OM(navi)ÐUSA_English(nna)
04/27/04Ðtbrooks
X
Page 24 of 186

Avoid Area Settingkey:
Defines areas to avoid when calculating a route.
Please refer to “Setting avoid areas” on page
8-2.
Clear Memorykey:
Clears all the stored memory (Address Book,
Avoid Area, Previous Dest.) .
Please refer to “Clearing the memory” on page
4-16.
Edit Address Bookkey:
Changes the names and positions of the regis-
tered locations.
Please refer to “Setting up and editing the ad-
dress book” on page 7-2.
GPS Informationkey:
GPS information will be displayed.
Please refer to “GPS information display” on
page 11-17.
Quick Stop Customer Settingkey:
Sets the user-defined [Quick Stop] POI (Point
Of Interest) .
Please refer to “Quick stop” on page 5-41.
Set Average Speed for Estimated Journey Time
key:
Please refer to “Setting the average speed” on
page 4-18.
Tracking On/Offkey:
You can choose whether to display the path from
the start to the current position.
Please refer to “Displaying the track” on page
11-15.
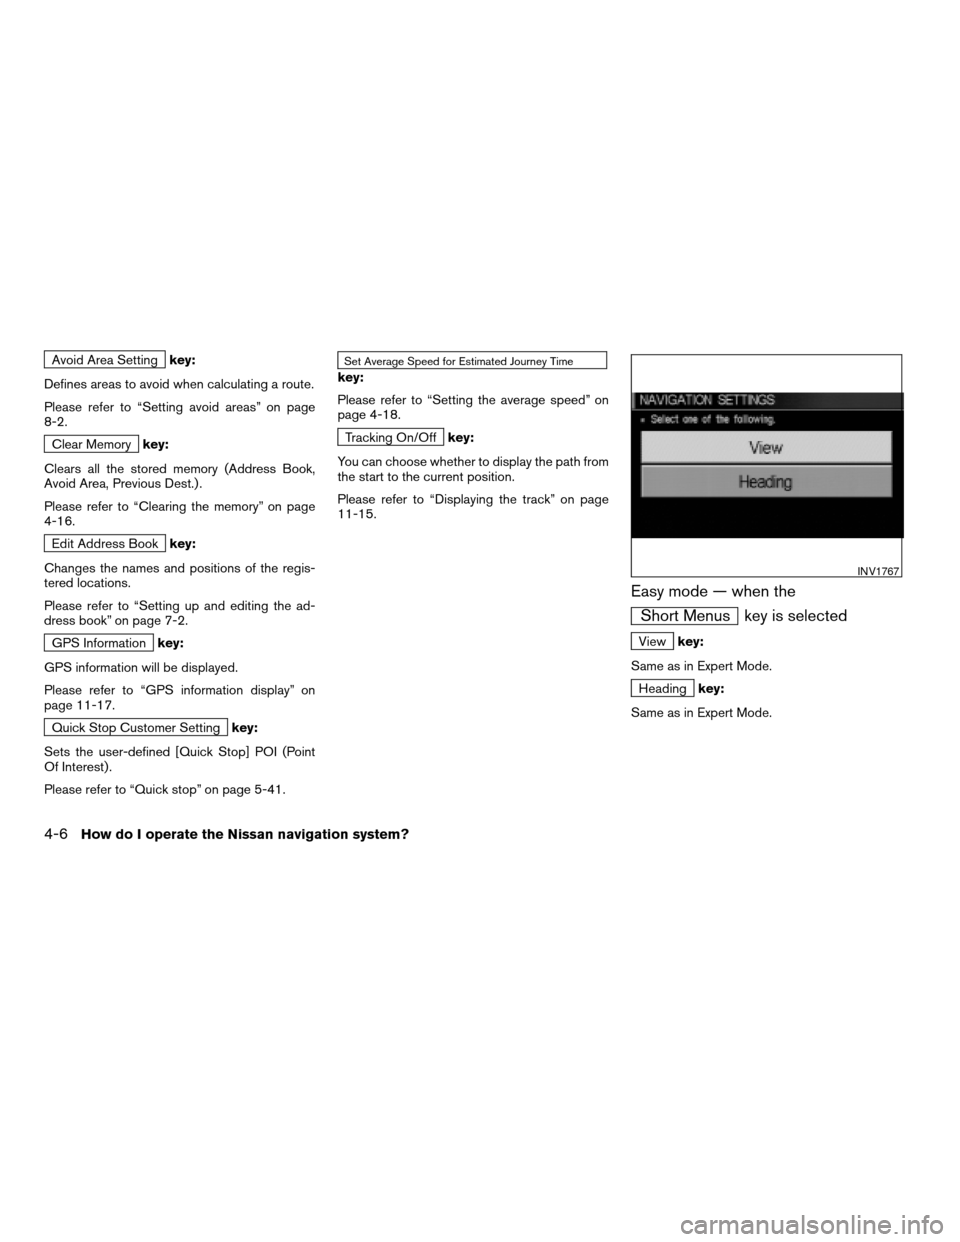
Easy mode — when the
Short Menus key is selected
Viewkey:
Same as in Expert Mode.
Headingkey:
Same as in Expert Mode.
INV1767
4-6How do I operate the Nissan navigation system?
ZREVIEW COPYÐ2004 Maxima(max)
Navigation System OM(navi)ÐUSA_English(nna)
04/27/04Ðtbrooks
X
Page 37 of 186
![NISSAN MAXIMA 2004 A34 / 6.G Navigation Manual 3. Select the
Set Average Speed for Estimated Journey Time
key on the [NAVIGATION SETTINGS]
screen.4. Move the joystick upward or downward to
select an item you want to change.
5. Move the joystick le NISSAN MAXIMA 2004 A34 / 6.G Navigation Manual 3. Select the
Set Average Speed for Estimated Journey Time
key on the [NAVIGATION SETTINGS]
screen.4. Move the joystick upward or downward to
select an item you want to change.
5. Move the joystick le](/img/5/674/w960_674-36.png)
3. Select the
Set Average Speed for Estimated Journey Time
key on the [NAVIGATION SETTINGS]
screen.4. Move the joystick upward or downward to
select an item you want to change.
5. Move the joystick left or right and set an av-
erage vehicle speed.
INFO:
cIt is possible to set the item illuminated in
yellow.
cWhen the
Return All Settings to Default key
is selected, all settings return to default.cThe NISSAN Navigation System may not
calculate routes longer than about 1,100
miles (1,770 km) . If your trip is longer
than 1,100 miles (1,770 km) , please di-
vide your trip by selecting one or two in-
termediate destinations. Set your desti-
nation as the first intermediate
destination. Once you pass the interme-
diate destination, you may set your final
destination as your destination if it is
within 1,100 miles (1,770 km) .
Otherwise, set your destination using
your second intermediate destination.
NOTE:
The navigation system does not take driv-
ing in “CAR-POOL LANES” into consider-
ation for the guidance especially when
car-pool lanes are separated from other
road lanes.
NOTES ON ROUTE GUIDANCE
cThe route selected by the system may not be
the shortest, nor are other circumstances
such as traffic jams considered.
cBecause of the inevitable difference in road
conditions and circumstances between the
time you use this system and the time the in-
formation was produced from the DVD, there
may be discrepancies in roads and
INV1785INV1786
ABOUT ROUTE GUIDANCE
How do I operate the Nissan navigation system?4-19
ZREVIEW COPYÐ2004 Maxima(max)
Navigation System OM(navi)ÐUSA_English(nna)
04/27/04Ðtbrooks
X
Page 39 of 186

careful about the traffic direction, espe-
cially when the lanes with different travel
directions are shown separately. Such
places are interchanges and service
areas.
– This system makes no distinction be-
tween limited traffic control and total
control (blockage) . It may show a de-
toured route even if the road is usable.
– Even if the freeway preference is set to
OFF, the route may be set on them. To
avoid this, set a waypoint on another
road type and request calculation.
– Even if the preference is set as OFF for a
ferry line, the route may be set on it. To
avoid this, set a waypoint on a road and
request calculation.
– Ferry lines, except those which accept
only pedestrians, bicycles and
motorcycles, are stored in this system.
When using them, take into consider-
ation the travel time required and opera-
tional condition to decide whether to use
them or not.ABOUT THE DISPLAY ERROR
The following cases may affect the display accu-
racy of the vehicle’s position or travel direction.
The accuracy will return to normal if the driving
conditions return to normal:
– When there is a similar road nearby.
– When the vehicle is traveling on a long stretch
of straight road or series of curves with a large
radius.
– When the vehicle is traveling in an area with a
checkerboard road system.
– When the vehicle is making consecutive S
curves.
– When the vehicle is at a large Y-shaped
junction.
– When the vehicle is on a loop bridge.
– When the vehicle is on a snow-covered or un-
paved road.
– When the vehicle has made several consecu-
tive turns or zigzags.
– When the vehicle is rotated on a parking lot
turntable while the ignition switch is OFF.
– Immediately after the vehicle is driven out of a
parking garage or underground parking lot.– When the vehicle has different sizes of tires or
tire chains.
– When the vehicle is moved immediately after
the engine is started.
How do I operate the Nissan navigation system?4-21
ZREVIEW COPYÐ2004 Maxima(max)
Navigation System OM(navi)ÐUSA_English(nna)
04/27/04Ðtbrooks
X
Page 142 of 186

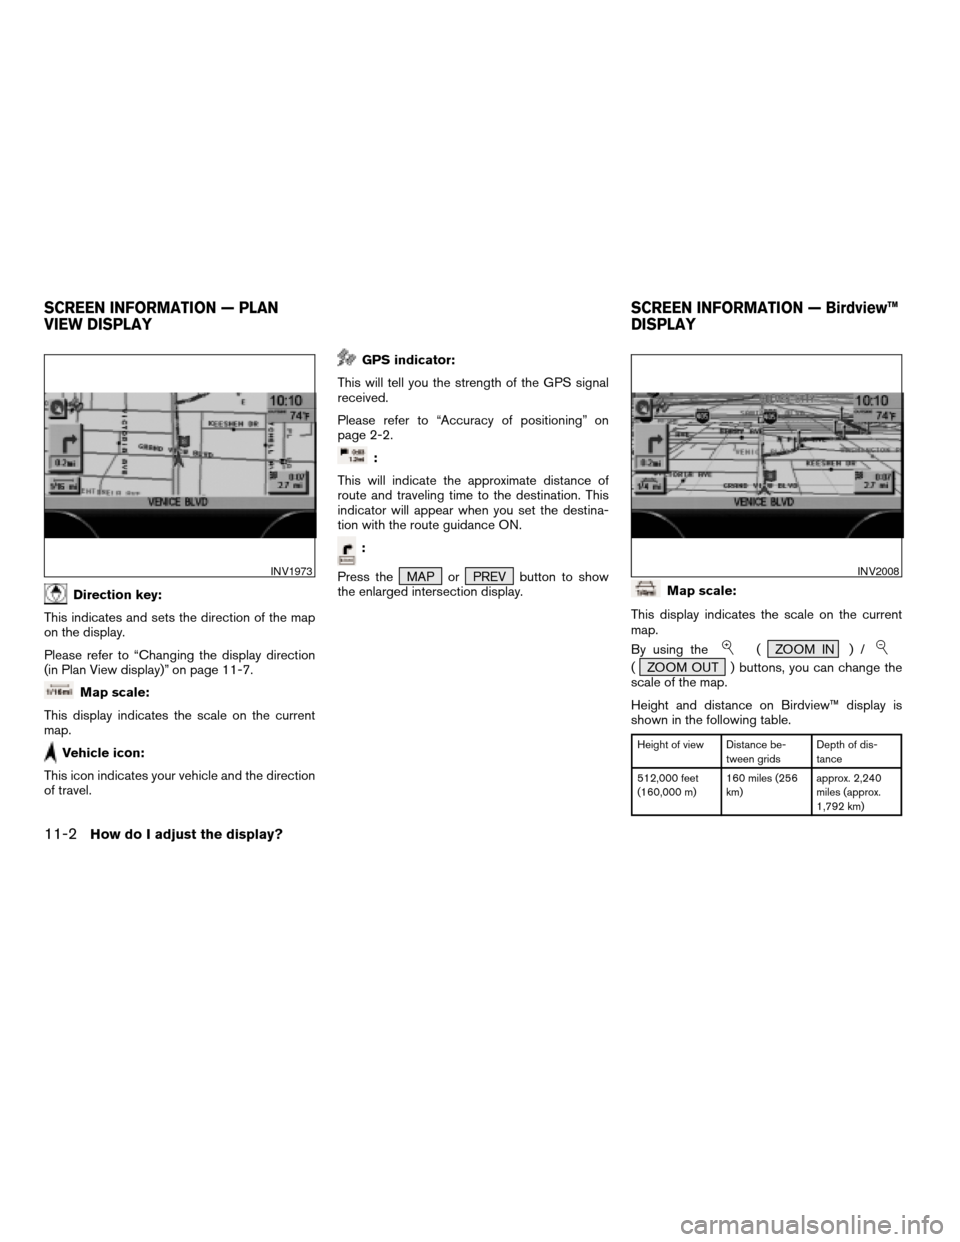
Direction key:
This indicates and sets the direction of the map
on the display.
Please refer to “Changing the display direction
(in Plan View display)” on page 11-7.
Map scale:
This display indicates the scale on the current
map.
Vehicle icon:
This icon indicates your vehicle and the direction
of travel.
GPS indicator:
This will tell you the strength of the GPS signal
received.
Please refer to “Accuracy of positioning” on
page 2-2.
:
This will indicate the approximate distance of
route and traveling time to the destination. This
indicator will appear when you set the destina-
tion with the route guidance ON.
:
Press the MAP or PREV button to show
the enlarged intersection display.
Map scale:
This display indicates the scale on the current
map.
By using the
( ZOOM IN ) /
( ZOOM OUT ) buttons, you can change the
scale of the map.
Height and distance on Birdview™ display is
shown in the following table.
Height of view Distance be-
tween gridsDepth of dis-
tance
512,000 feet
(160,000 m)160 miles (256
km)approx. 2,240
miles (approx.
1,792 km)
INV1973INV2008
SCREEN INFORMATION — PLAN
VIEW DISPLAYSCREEN INFORMATION — Birdview™
DISPLAY
11-2How do I adjust the display?
ZREVIEW COPYÐ2004 Maxima(max)
Navigation System OM(navi)ÐUSA_English(nna)
04/27/04Ðtbrooks
X
Page 146 of 186

cWhen the system is re-drawing the display in
Birdview™ display, the distance the vehicle
travels becomes longer, and/or the degree
the vehicle turns becomes larger than in the
Planview display in order to complete
re-drawing.
cThe names of the roads and locations may
differ, depending on where the names appear
on the screen.
cIn order to avoid having too much detail on the
map, all road names are not always shown on
the screen. When the display re-draws the
map, a road name which is shown on the pre-
vious screen may not appear on the new
screen.Use the( ZOOM IN ) /
( ZOOM OUT ) buttons to change the scale of
the display and height view.
Nine map scales are available from the most de-
tailed (1 : 10,000) to the widest view (1 : 20.48
million) .
Each time the
( ZOOM IN ) button is
pressed, the map scale will change one level to
display a more detailed map.
Each time the
( ZOOM OUT ) button is
pressed, the map scale will change one level to
display a map that shows a wider area.
The chosen map scale will be displayed on the
left side of the screen.
INFO:
By pressing the button repeatedly, you can skip
the levels to reach the map of desired scale.
Scale level on the Plan View display
Map scale Actual distance
1 : 20.48 million 160 miles (256 km)
1 : 5.12 million 40 miles (64 km)
1 : 1.28 million 10 miles (16 km)
1 : 320,000 2.5 miles (4 km)
1 : 160,000 1 mile (2 km)
1 : 80,000 1/2 mile (1 km)
Map scale Actual distance
1 : 40,000 1/4 mile (500 m)
1 : 20,000 1/8 mile (200 m)
1 : 10,000 1/16 mile (100 m)
Scales on the Birdview™ are listed on page
11-2.
ZOOMING IN AND OUT OF THE MAP
11-6How do I adjust the display?
ZREVIEW COPYÐ2004 Maxima(max)
Navigation System OM(navi)ÐUSA_English(nna)
04/27/04Ðtbrooks
X