light NISSAN MAXIMA 2014 A35 / 7.G 08IT Navigation Manual
[x] Cancel search | Manufacturer: NISSAN, Model Year: 2014, Model line: MAXIMA, Model: NISSAN MAXIMA 2014 A35 / 7.GPages: 252, PDF Size: 2.86 MB
Page 59 of 252
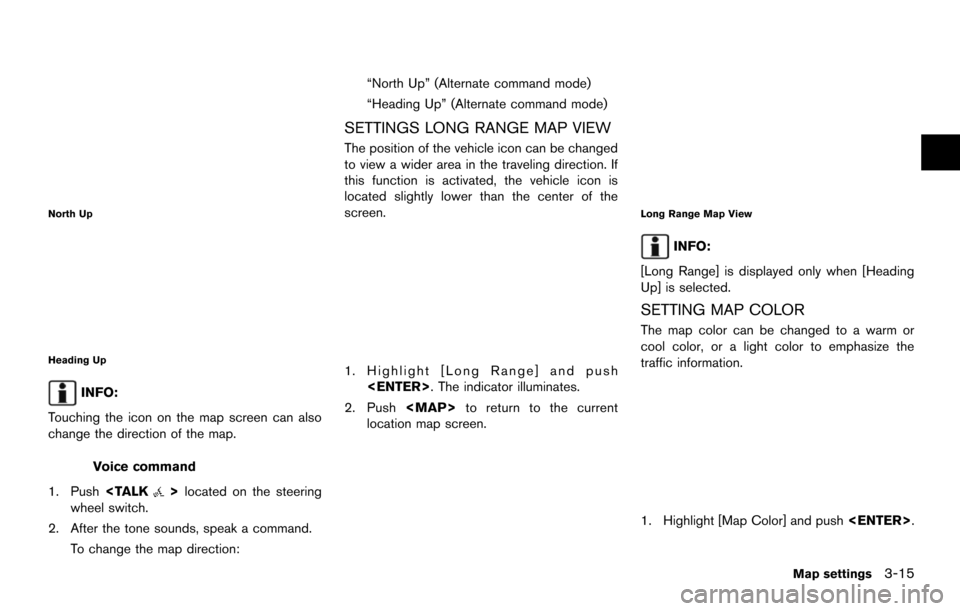
North Up
Heading Up
INFO:
Touching the icon on the map screen can also
change the direction of the map.
Voice command
1. Push
wheel switch.
2. After the tone sounds, speak a command.
To change the map direction: “North Up” (Alternate command mode)
“Heading Up” (Alternate command mode)
SETTINGS LONG RANGE MAP VIEW
The position of the vehicle icon can be changed
to view a wider area in the traveling direction. If
this function is activated, the vehicle icon is
located slightly lower than the center of the
screen.
1. Highlight [Long Range] and push
2. Push
Page 60 of 252
![NISSAN MAXIMA 2014 A35 / 7.G 08IT Navigation Manual 3-16Map settings
2. Highlight the preferred map color and push<ENTER>. The indicator light of the se-
lected color illuminates.
Available map colors
.[Warm]:
Set warm colors for the map coloring.
. [C NISSAN MAXIMA 2014 A35 / 7.G 08IT Navigation Manual 3-16Map settings
2. Highlight the preferred map color and push<ENTER>. The indicator light of the se-
lected color illuminates.
Available map colors
.[Warm]:
Set warm colors for the map coloring.
. [C](/img/5/348/w960_348-59.png)
3-16Map settings
2. Highlight the preferred map color and push
lected color illuminates.
Available map colors
.[Warm]:
Set warm colors for the map coloring.
. [Cool]:
Set cool colors for the map coloring.
. [Traffic Emphasis]:
Set light colors for the map coloring to
emphasize the traffic information.
INFO:
The effect of setting changes can be confirmed
on the preview displayed on the right side of the
screen.
CHANGING BirdviewTMANGLE
The BirdviewTMangle can be changed.
This setting is available only in the BirdviewTM
map or 2D/BirdviewTMsplit map.
1. Highlight [Birdview Angle] and push
2. Adjust the BirdviewTMangle using the multi-
function controller.
3. Push
Page 61 of 252
![NISSAN MAXIMA 2014 A35 / 7.G 08IT Navigation Manual SETTING LEFT SCREEN DISPLAY
When the split screen is displayed, the map
settings of the left screen can be changed.
1. Highlight [Left Split Map Settings] and push<ENTER>.
2. Highlight the preferred m NISSAN MAXIMA 2014 A35 / 7.G 08IT Navigation Manual SETTING LEFT SCREEN DISPLAY
When the split screen is displayed, the map
settings of the left screen can be changed.
1. Highlight [Left Split Map Settings] and push<ENTER>.
2. Highlight the preferred m](/img/5/348/w960_348-60.png)
SETTING LEFT SCREEN DISPLAY
When the split screen is displayed, the map
settings of the left screen can be changed.
1. Highlight [Left Split Map Settings] and push
2. Highlight the preferred map view and push
3. Push
Page 62 of 252
3-18Map settings
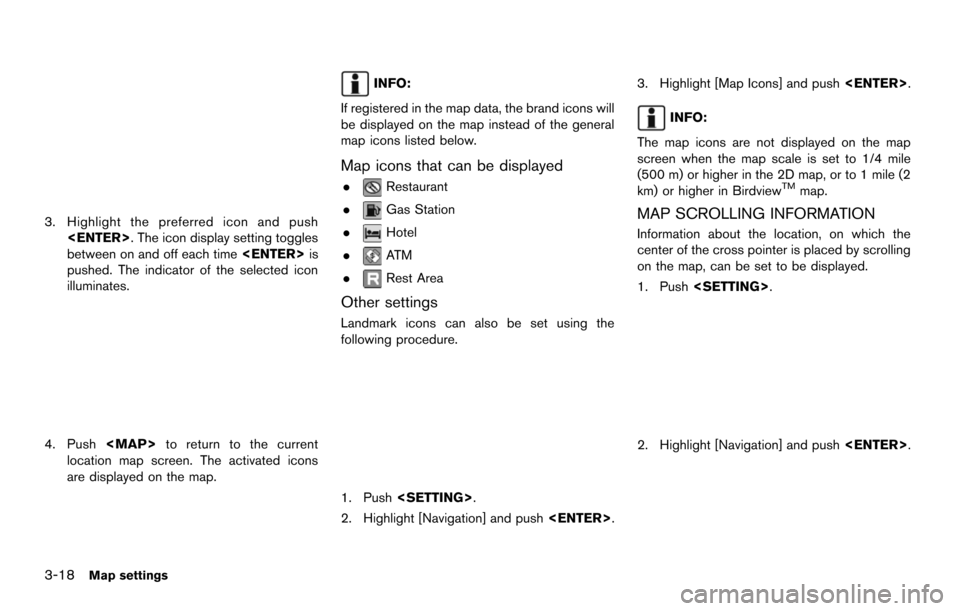
3. Highlight the preferred icon and push
between on and off each time
pushed. The indicator of the selected icon
illuminates.
4. Push
Page 63 of 252
![NISSAN MAXIMA 2014 A35 / 7.G 08IT Navigation Manual 3. Highlight [Others] and push<ENTER>.
4. Highlight [Map Scrolling Information] and
push <ENTER>.
5. Highlight the preferred information item and
push <ENTER>. The indicator of the
selected informatio NISSAN MAXIMA 2014 A35 / 7.G 08IT Navigation Manual 3. Highlight [Others] and push<ENTER>.
4. Highlight [Map Scrolling Information] and
push <ENTER>.
5. Highlight the preferred information item and
push <ENTER>. The indicator of the
selected informatio](/img/5/348/w960_348-62.png)
3. Highlight [Others] and push
4. Highlight [Map Scrolling Information] and
push
5. Highlight the preferred information item and
push
selected information item illuminates.
Available information items:
.[Address Book Icons]
.[Destination/Waypoint Icons]
.[Latitude/Longitude Info.]
6. Push
Page 65 of 252
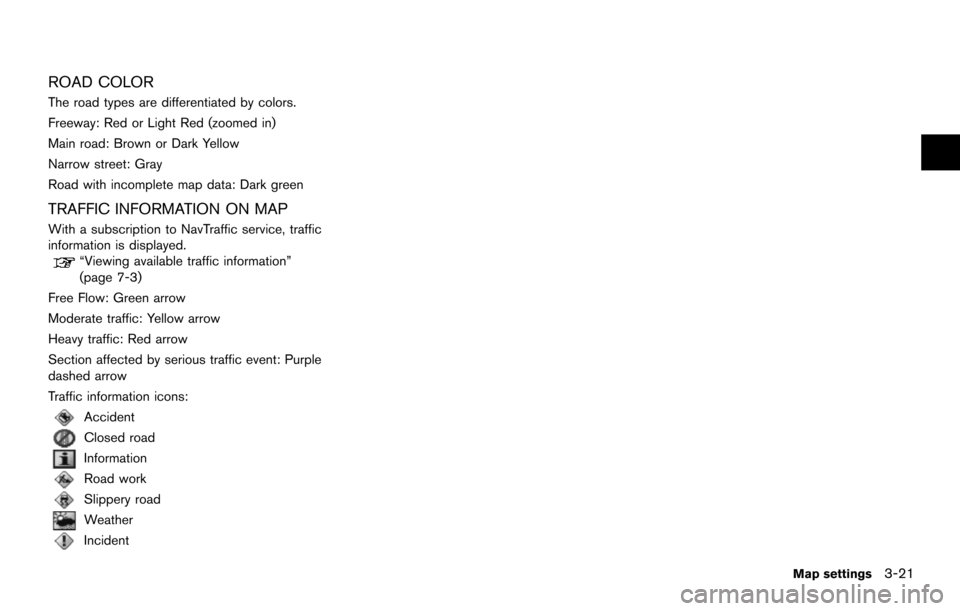
ROAD COLOR
The road types are differentiated by colors.
Freeway: Red or Light Red (zoomed in)
Main road: Brown or Dark Yellow
Narrow street: Gray
Road with incomplete map data: Dark green
TRAFFIC INFORMATION ON MAP
With a subscription to NavTraffic service, traffic
information is displayed.
“Viewing available traffic information”
(page 7-3)
Free Flow: Green arrow
Moderate traffic: Yellow arrow
Heavy traffic: Red arrow
Section affected by serious traffic event: Purple
dashed arrow
Traffic information icons:
Accident
Closed road
Information
Road work
Slippery road
Weather
Incident
Map settings3-21
Page 68 of 252
4-2Setting destination
There are several methods available to set a
destination. Understand the advantages of each
method and select the best method for finding
and setting a preferred destination.
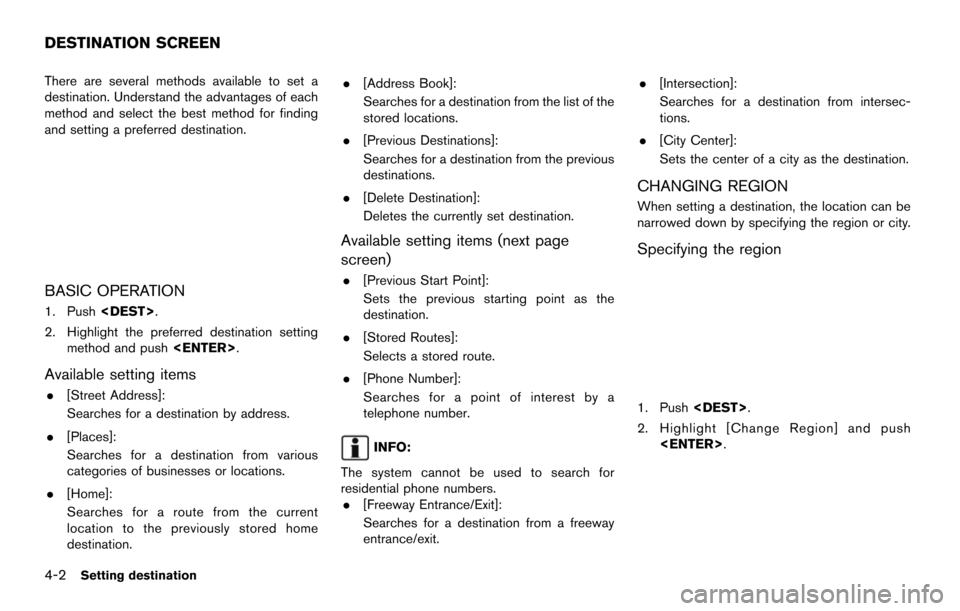
BASIC OPERATION
1. Push
2. Highlight the preferred destination setting method and push
Available setting items
.[Street Address]:
Searches for a destination by address.
. [Places]:
Searches for a destination from various
categories of businesses or locations.
. [Home]:
Searches for a route from the current
location to the previously stored home
destination. .
[Address Book]:
Searches for a destination from the list of the
stored locations.
. [Previous Destinations]:
Searches for a destination from the previous
destinations.
. [Delete Destination]:
Deletes the currently set destination.
Available setting items (next page
screen)
.[Previous Start Point]:
Sets the previous starting point as the
destination.
. [Stored Routes]:
Selects a stored route.
. [Phone Number]:
Searches for a point of interest by a
telephone number.
INFO:
The system cannot be used to search for
residential phone numbers. . [Freeway Entrance/Exit]:
Searches for a destination from a freeway
entrance/exit. .
[Intersection]:
Searches for a destination from intersec-
tions.
. [City Center]:
Sets the center of a city as the destination.
CHANGING REGION
When setting a destination, the location can be
narrowed down by specifying the region or city.
Specifying the region
1. Push
2. Highlight [Change Region] and push
DESTINATION SCREEN
Page 69 of 252
3. Highlight the preferred region and push
Available setting items: . US1: CA, NV
. US2: AZ, CO, ID, MT, NM, OR, UT, WA, WY
. US3: IA, KS, MN, MO, ND, NE, SD
. US4: AR, LA, MS, OK, TX
. US5: IL, IN, MI, WI
. US6: DC, DE, KY, MD, OH, PA, VA, WV
. US7: CT, MA, ME, NH, NJ, NY, RI, VT
. US8: AL, FL, GA, NC, SC, TN
. US9: AK
. US10: HI
. Canada .
Puerto Rico
. Virgin Islands
INFO:
. It is also possible to select a region by
touching the map on the right side of the
screen.
. It is not possible to search for a route from
the continental United States to Hawaii,
Puerto Rico and Virgin Islands.
Specifying city
When searching for a destination with “Places”,
“Freeway Entrance/Exit”, “Intersection” or “City
Center”, the search can be narrowed down by
specifying the city.
1. Highlight [Select a City] and push
2. Enter the name of the city, highlight [List]and push
A list screen is displayed.
INFO:
.The same screen will be displayed when a location is searched from a street
address, and when [City] is highlighted
and
“Finding address” (page 4-4)
.Highlight [Last 5 Cities] and push
set as destinations.
Setting destination4-3
Page 70 of 252
4-4Setting destination
3. Highlight the city of the destination from thelist and push
INFO:
In some cases, when a city name has been
entered, the number of matching destinations in
the “Matches” column may be different from the
number displayed on the list screen. If this
occurs, enter more characters to further reduce
the number of matches.
FINDING ADDRESS
When the address of the destination is available,
use this method to enter the address and then
have the system calculate a route. A location
near the preferred destination can also be
searched for by entering the house number if
the map data contains the relevant data.
1. Push
and push
screen is displayed.
2. Enter the house number, highlight [OK] and push
available, highlight [No House #] and push
displayed.
3. Enter the name of the street. After finishing the entry, highlight [List] and push
INFO:
When [City] is highlighted and
pushed, a city can be specified by typing the
city name.
“Specifying city” (page 4-3)
4. Highlight the correct street of the destina- tion from the list and push
Page 71 of 252
INFO:
In some cases, when a street name has
been entered, the number of matching
destinations in the “Matches” column may
be different from the number displayed on
the list screen. If this occurs, enter more
characters to further reduce the number of
matches.
5. The entire route is shown on the map. Highlight [Start] after confirming the location
of the displayed destination, and push
to the selected location and starts calculat-
ing a route.
INFO:
Even after setting a destination, the location
of the destination can be adjusted, the route
can be stored, etc.
“Procedures after setting destination” (page 5-2)
Voice command
1. Push
wheel switch.
2. After the tone sounds, speak a command.
To set the destination from a street address:
“Navigation” “Address” (Standard mode)
“Address” (Alternate command mode)
INFO:
When using a voice command to set a street
name, the complete street name is recom-
mended to be stated.
Examples:
Correct input – North Elm Street East Jefferson Boulevard
Incorrect input – Elm Street East Jefferson
FINDING PLACE
There are 3 methods to set the destination to
places of interest: typing the name, choosing a
category or selecting a Zagat reviewed location.
To help improve searching, different start points
can be chosen to search from such as Near
Current Location, Near the Destination, or a City
Center.
Finding nearby place
1. Push
2. Highlight [Places] and push
3. Highlight the preferred nearby category from
the list and push
A list screen is displayed.
INFO:
Highlight [Customize Nearby Places] to
customize the nearby places list to show
categories that are frequently used.
Setting destination4-5