climate settings NISSAN PATHFINDER 2015 R52 / 4.G Quick Reference Guide
[x] Cancel search | Manufacturer: NISSAN, Model Year: 2015, Model line: PATHFINDER, Model: NISSAN PATHFINDER 2015 R52 / 4.GPages: 32, PDF Size: 2.33 MB
Page 9 of 32

7
CLOCK SET/ADJUSTMENT
To adjust the time and the appearance of the clock on the display:
1. Press the SETTING button on the control panel.
2. Touch the Others key.
3. Touch the Clock key.
The following settings can be adjusted:
• On-screen Clock: The clock in the upper right
corner of the display can be turned ON or off
based on the indicator light.
• Clock Format (24h): The clock can be set to
12 hours or 24 hours.
• Offset (hour): The time can be adjusted by increasing or decreasing per hour.
• Offset (min): The time can be adjusted by increasing or decreasing per minute.
• Daylight Savings Time: The application of daylight savings time can be turned
ON or OFF.
• Time Zone: Adjust the time zone. Choose a time zone from the available list.
Press the BACK button to return to the previous screen.
For more information, refer to the “Monitor, climate, audio, phone and voice recognition systems
(section 4)” of your Owner’s Manual.
1904703_15c_Pathfinder_QRG_031315.indd 73/13/15 12:52 PM
To view detailed instructional videos regarding these and other features, please go to www.nissanownersinfo.mobi.
Page 17 of 32

15
3 ON•OFF BUTTON/FAN SPEED CONTROL DIAL
Turn the fan speed control dial left to decrease fan speed or right to in\
crease fan speed.
Push the ON•OFF button to turn the system on or off.
4 MODE BUTTON
Push the MODE button to cycle through the following air flow outlets:
Air flows from the center and side vents.
Air flows from the center, side and foot vents.
Air flows mainly from the foot vents.
Air flows from the defroster and foot vents.
5 AIR RECIRCULATION BUTTON
Press the air recirculation button to recirculate interior air inside the vehicle. The
indicator light on the button will illuminate. This system is used to avoid certain outside
odors and to help adjust the inside vehicle temperature more effectively\
.
The air recirculation mode cannot be activated when the climate control s\
ystem is in the
front defroster mode .
6 REAR AIR CONDITIONER
To control the rear automatic air conditioning
system with the front air conditioner control panel:
• Turn on the front climate control system by
pressing the ON•OFF button.
• Press the REAR button.
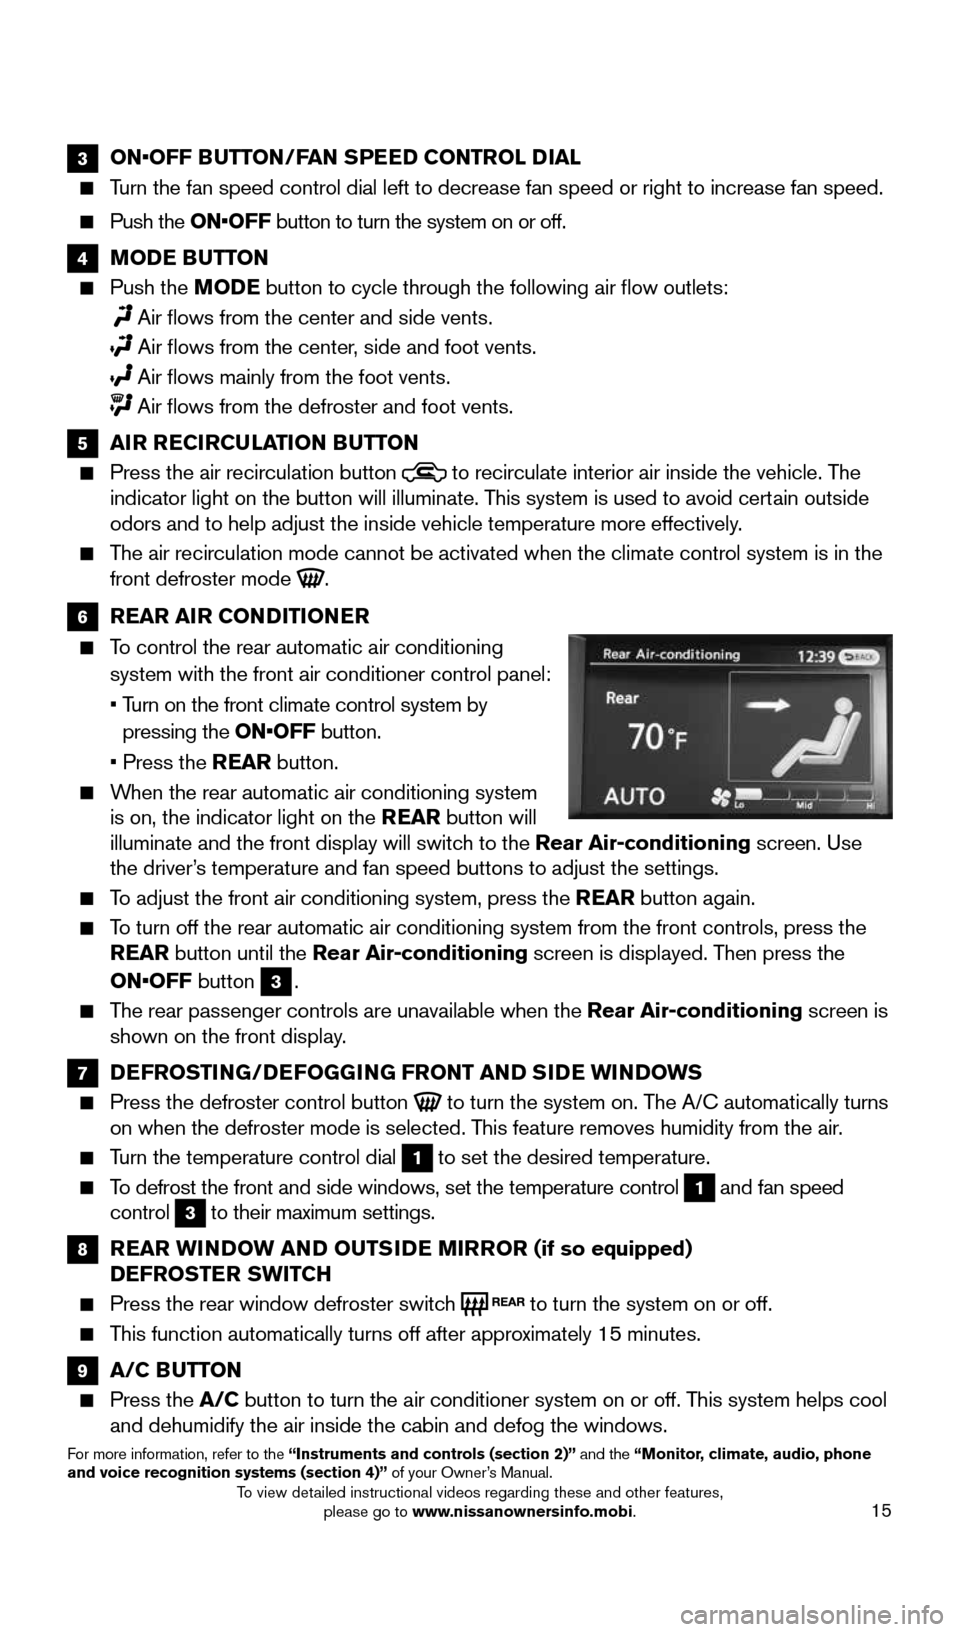
When the rear automatic air conditioning system
is on, the indicator light on the REAR button will
illuminate and the front display will switch to the Rear Air-conditioning screen. Use
the driver’s temperature and fan speed buttons to adjust the settings.
To adjust the front air conditioning system, press the REAR button again.
To turn off the rear automatic air conditioning system from the front con\
trols, press the
REAR button until the Rear Air-conditioning screen is displayed. Then press the
ON•OFF button
3.
The rear passenger controls are unavailable when the Rear Air-conditioning screen is
shown on the front display.
7 DEFROSTING/DEFOGGING FRONT AND SIDE WINDOWS
Press the defroster control button to turn the system on. The A/C automatically turns
on when the defroster mode is selected. This feature removes humidity from the air.
Turn the temperature control dial 1 to set the desired temperature.
To defrost the front and side windows, set the temperature control 1 and fan speed
control 3 to their maximum settings.
8 REAR WINDOW AND OUTSIDE MIRROR (if so equipped)
DEFROSTER SWITCH
Press the rear window defroster switch to turn the system on or off.
This function automatically turns off after approximately 15 minutes.
9 A/C BUTTON
Press the A/C button to turn the air conditioner system on or off. This system helps cool
and dehumidify the air inside the cabin and defog the windows.
For more information, refer to the “Instruments and controls (section 2)” and the “Monitor, climate, audio, phone
and voice recognition systems (section 4)” of your Owner’s Manual.
1904703_15c_Pathfinder_QRG_031315.indd 153/13/15 12:52 PM
To view detailed instructional videos regarding these and other features, please go to www.nissanownersinfo.mobi.
Page 19 of 32

17
2 SEEK •CAT AND TRACK BUTTONS
To scan quickly and stop at the previous or next broadcast station, press the
SEEK•CAT
button or the TRACK
button.
For satellite radio to switch to the previous or next category, press the
SEEK•CAT
button or the TRACK
button.
To change tracks on a CD, press the
SEEK•CAT
button or the TRACK
button.
To rewind or fast forward a track on a CD, press and hold the
SEEK•CAT
button or
the TRACK
button.
3
AUDIO BUTTON/TUNE/FOLDER CONTROL KNOB
To manually tune the radio, turn the TUNE/FOLDER control knob left or right.
Press the AUDIO button to access the audio settings screen.
4 STATION SELECT BUTTONS
Twelve stations can be set for the FM band, 6 for the AM band and 18 for the
satellite radio.
To store a station in a preset, you must first select a radio band by pressing the
AM•FM
5 or
S AT
button 6 then tune to the desired AM, FM or satellite radio station.
Then press and hold the desired station preset button (1-6) until the preset number is
updated on the display and the sound is briefly muted. The channel indicator will then
display, and the sound will resume. Programing is now complete.
To retrieve a previously set station, select the radio band where the preset was stored
then press the corresponding station select button (1-6).
For more information, refer to the “Monitor, climate, audio, phone and voice recognition systems (section 4)” of
your Owner’s Manual.
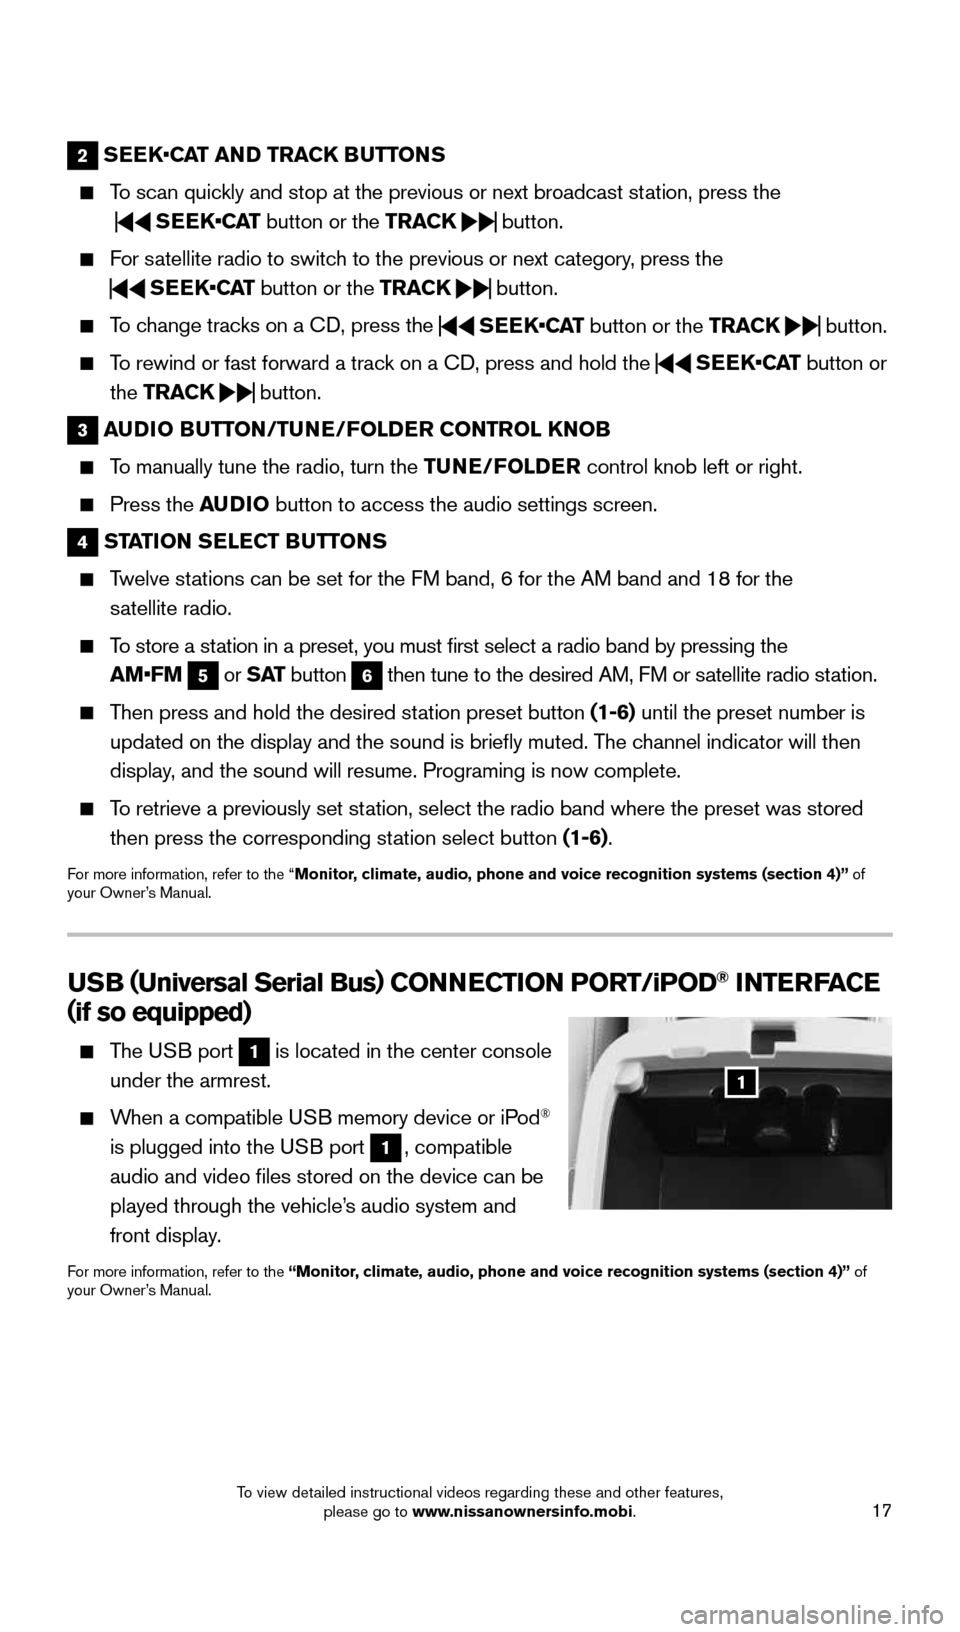
USB ( Universal Serial Bus) CONNECTION PORT/ iPOD® INTERFACE
( if so equipped)
The USB port 1 is located in the center console
under the armrest.
When a compatible USB memory device or iPod®
is plugged into the USB port
1, compatible
audio and video files stored on the device can be
played through the vehicle’s audio system and
front display.
For more information, refer to the “Monitor, climate, audio, phone and voice recognition systems (section 4)” of
your Owner’s Manual.
1
1904703_15c_Pathfinder_QRG_031315.indd 173/13/15 12:52 PM
To view detailed instructional videos regarding these and other features, please go to www.nissanownersinfo.mobi.
Page 23 of 32

21
BLUETOOTH® STREAMING AUDIO WITH NAVIGATION
(if so equipped)
If you have a compatible Bluetooth® device with streaming audio (A2DP & AVRCP
profiles), you can set up the wireless connection between your Blueto\
oth® device and
your vehicle’s audio system. This connection allows you to listen to audio from the
Bluetooth
® device using your vehicle’s speakers.
A cellular phone should not be used while driving so full attention may \
be given to
vehicle operation.*
CONNECTING PROCEDURE FOR A BLUETOOTH
® DEVICE
Use the below procedure to connect your Bluetooth
audio device to the vehicle:
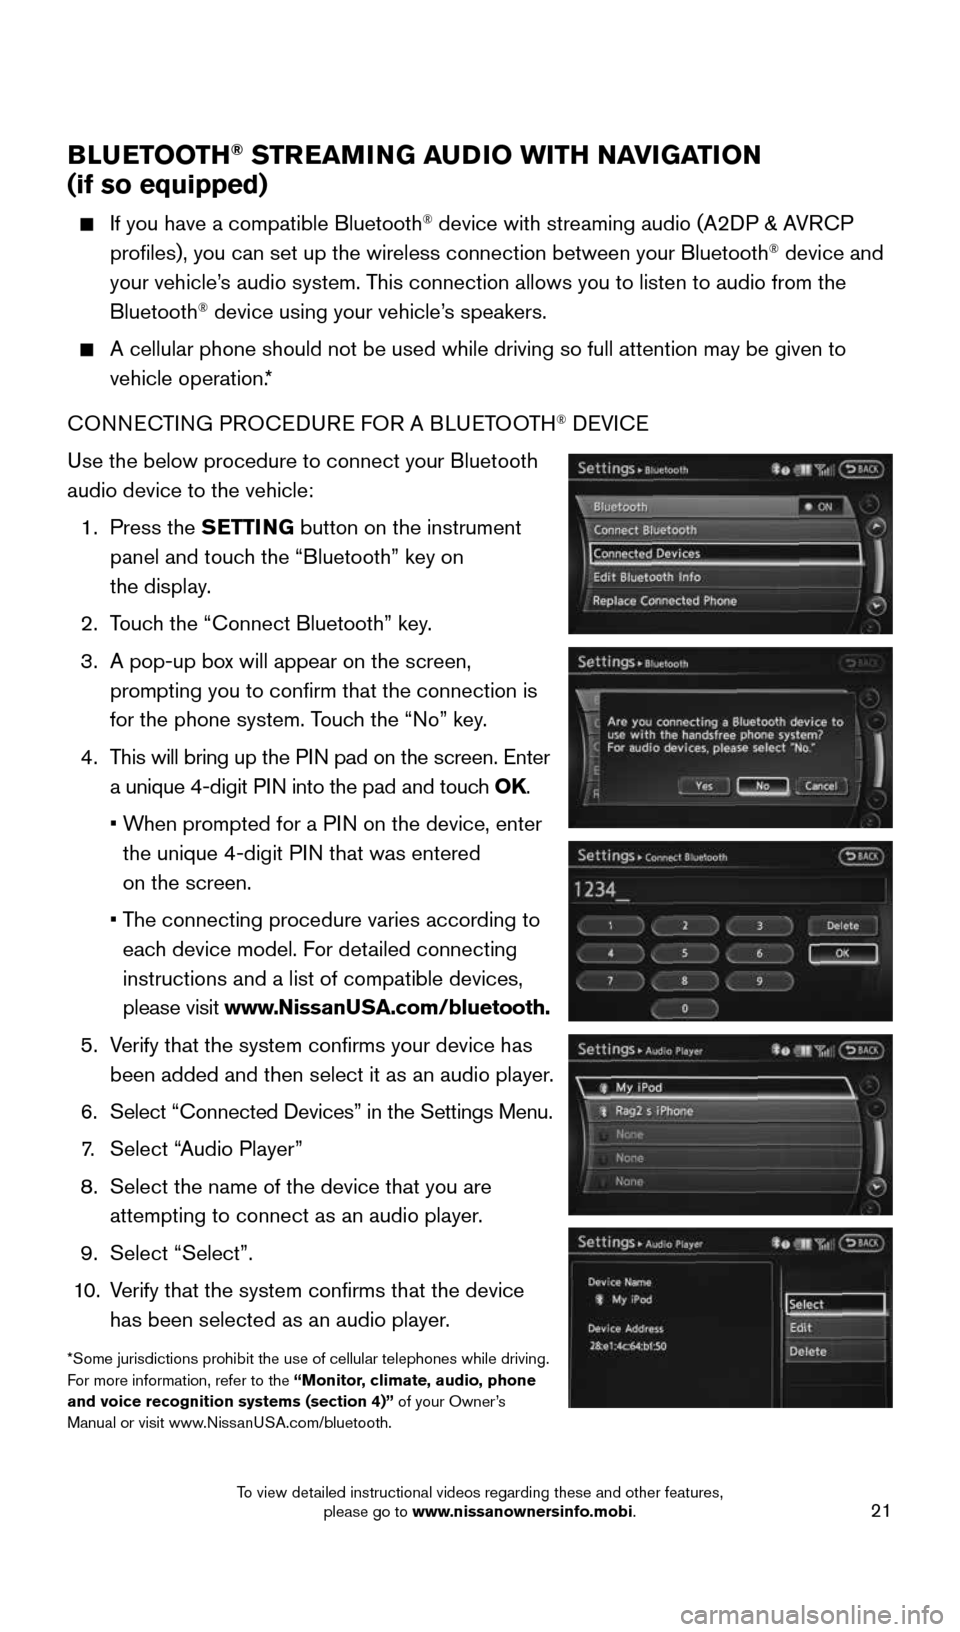
1. Press the SETTING button on the instrument
panel and touch the “Bluetooth” key on
the display.
2. Touch the “Connect Bluetooth” key.
3. A pop-up box will appear on the screen,
prompting you to confirm that the connection is
for the phone system. Touch the “No” key.
4. This will bring up the PIN pad on the screen. Enter
a unique 4-digit PIN into the pad and touch OK.
• When prompted for a PIN on the device, enter
the unique 4-digit PIN that was entered
on the screen.
• The connecting procedure varies according to
each device model. For detailed connecting
instructions and a list of compatible devices,
please visit www.NissanUSA.com/bluetooth.
5. Verify that the system confirms your device has
been added and then select it as an audio player.
6. Select “Connected Devices” in the Settings Menu.
7. Select “Audio Player”
8. Select the name of the device that you are
attempting to connect as an audio player.
9. Select “Select”.
10. Verify that the system confirms that the device
has been selected as an audio player.
*Some jurisdictions prohibit the use of cellular telephones while drivin\
g.
For more information, refer to the “Monitor, climate, audio, phone
and voice recognition systems (section 4)” of your Owner’s
Manual or visit www.NissanUSA.com/bluetooth.
1904703_15c_Pathfinder_QRG_031315.indd 213/13/15 12:52 PM
To view detailed instructional videos regarding these and other features, please go to www.nissanownersinfo.mobi.