trunk Oldsmobile Aurora 1997 s User Guide
[x] Cancel search | Manufacturer: OLDSMOBILE, Model Year: 1997, Model line: Aurora, Model: Oldsmobile Aurora 1997Pages: 404, PDF Size: 20.75 MB
Page 112 of 404
Convenience Net
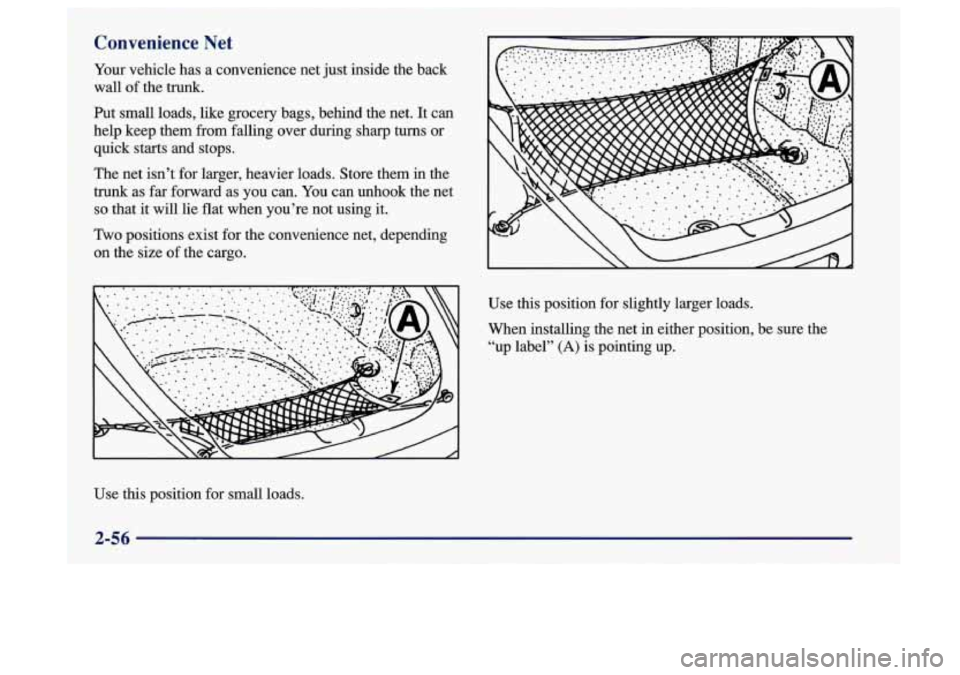
l Your vehicle has a convenience net just inside the back 1 wall of the trunk.
Put small loads, like grocery bags, behind the net. It can
help keep them from falling over during sharp
turns or
quick starts and stops.
The net isn’t for larger, heavier loads. Store them in the
trunk as far forward as you can. You can unhook the net
so that it will lie flat when you’re not using it.
Two positions exist for the convenience net, depending
on the size of the cargo.
Use this position for slightly larger loads.
When installing the net in either position, be sure the
“up label”
(A) is pointing up.
Use
this position for small loads.
2-56
Page 121 of 404
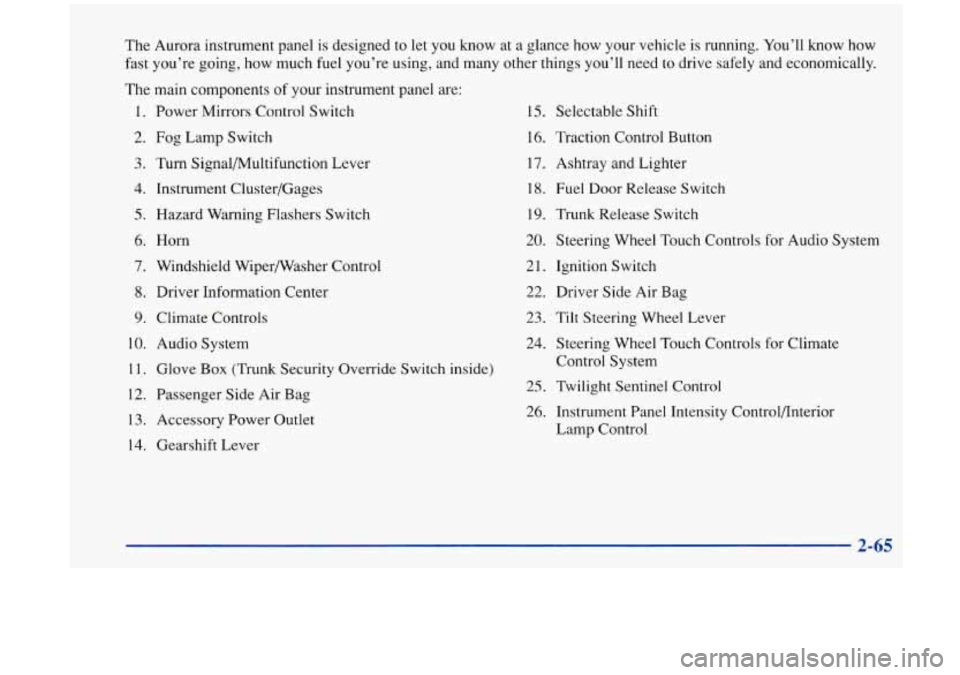
The Aurora instrument panel is designed to let you know at a glance how your vehicle is running. You’ll know how
fast you’re going, how much fuel you’re using, and many other things you’ll need to drive safely and economically.
The main components
of your instrument panel are:
1. Power Mirrors Control Switch
2.
Fog Lamp Switch
3. Turn Signal/Multifunction Lever
4. Instrument Cluster/Gages
5. Hazard Warning Flashers Switch
6.
Horn
7. Windshield Wipermasher Control
8. Driver Information Center
9. Climate Controls
10. Audio System
11. Glove Box (Trunk Security Override Switch inside)
12. Passenger Side Air Bag
13. Accessory Power Outlet
14. Gearshift Lever
15. Selectable Shift
16. Traction Control Button
17. Ashtray and Lighter
18. Fuel Door Release Switch
19. Trunk Release Switch
20. Steering Wheel Touch Controls for Audio System
21. Ignition Switch
22. Driver Side Air Bag
23. Tilt Steering Wheel Lever
24. Steering Wheel Touch Controls for Climate
Control System
25. Twilight Sentinel Control
26. Instrument Panel Intensity Control/Interior
Lamp Control
Page 145 of 404
@ Section 3 Comfort Controls and Audio Systems
In this section, you’ll find out how to operate the comfort control and audio systems offered with your Aurora. Be
sure to read about the particular systems supplied with your vehicle.
3-2 3-2 3-6
3
-7
3-7
3-9
3 -9
3-10
3-10
3-1
1
3-1 1
Comfort Controls
Automatic Electronic Climate Control
Air Conditioning
Heating
Ventilation System
Defogging and Defrosting
Rear Window Defogger
Passenger Temperature Control
Steering Wheel Controls for Climate Control
Setting the Clock
AM-FM Stereo with Cassette
Tape and
Compact Disc Player with Automatic
Tone Control 3-
17
3-22
3-25
3-28
3-29
3-29
3-30
3-30
3-3 1
Delco-Bose@ AM-FM Stereo with Cassette
Tape and Compact Disc Player with
Automatic Tone Control
Trunk Mounted CD Changer
Theft-Deterrent Feature Steering Wheel Controls for-Audio System
Understanding Radio Reception
Tips About Your Audio System
Care of Your Cassette Tape Player
Care
of Your Compact Discs
Power Antenna Mast Care
3-1
Page 166 of 404
RCL: Press this button to see which track is playing.
Press it again within five seconds to
see how long it has
been playing.
To change what is normally shown on the
display (track or elapsed time), press the button until
you see the display you want, then hold
the button until
the display flashes. While elapsed time
is showing, EL
TM will appear on the display.
AM-FM: Press this button to play the radio when a disc
is in the player.
TAPE-CD: Press this button to change to the tape or
disc function when the radio is on and either a tape or
CD is inserted. Press AM-FM to return to the radio
while a CD or tape is playing. The inactive tape or CD
will remain safely inside the radio for future listening.
EJECT Press this button to remove the compact disc or
cassette tape.
The item with the box around it on the
display will eject and the radio will play. EJECT may be
activated with either the ignition or radio off. Cassettes
and compact discs may be loaded with the radio and
ignition off if this button is pressed first.
If you leave a
compact disc in the player while listening
to the radio, it
may become warm.
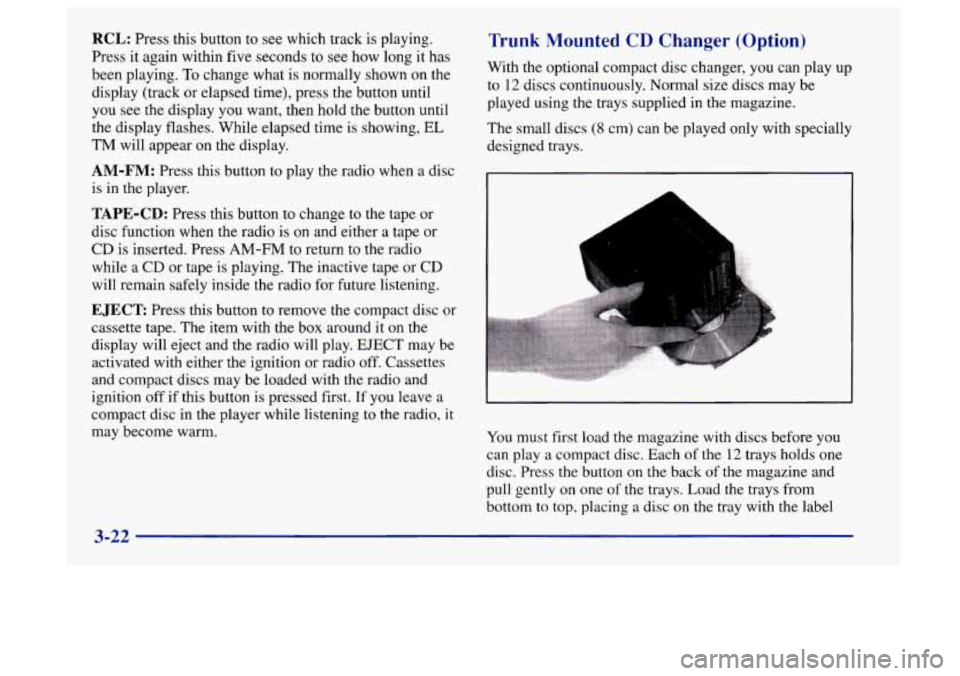
Trunk Mounted CD Changer (Option)
With the optional compact disc changer, you can play up
to
12 discs continuously. Normal size discs may be
played using
the trays supplied in the magazine.
The small discs
(8 cm) can be played only with specially
designed trays.
A
L
L
You must first load the magazine with discs before you
can play a compact disc. Each of the
12 trays holds one
disc. Press the button on the back
of the magazine and
pull gently on one of the trays. Load the trays from
bottom to top, placing a disc
on the tray with the label
3-22
Page 202 of 404

Winter Driving
Here are some tips for winter driving:
Have your Aurora in good shape for winter.
You may want to put winter emergency supplies in
your trunk. Include
an ice scraper, a small brush or broom, a supply
of windshield washer fluid, a rag, some winter outer
clothing, a small shovel, a flashlight, a red cloth and a
couple
of reflective warning triangles. And, if you will
be driving under severe conditions, include
a small bag
of sand, a piece of old carpet or a couple of burlap bags
to help provide traction. Be sure you properly secure
these items in your vehicle.
Page 206 of 404
Loadine You- Veh :le
i"
TIRE-LOADING INFORMATION
OCCUPANTS VEHICLE CAP. WT.
FRT. CTR.
RR. TOTAL LBS. KG
MAX. LOADING & GVWR SAME AS VEHICLE
CAPACITY WEIGHT XXX COLD TIRE
TIRE
SIZE SPEED PRESSURE
RTG
PSI/KPa
FRT.
RR.
SPA.
IF TIRES ARE HOT, ADD 4PS1;28KPa
SEE OWNER'S MANUAL FOR ADDITIONAL
INFORMATION
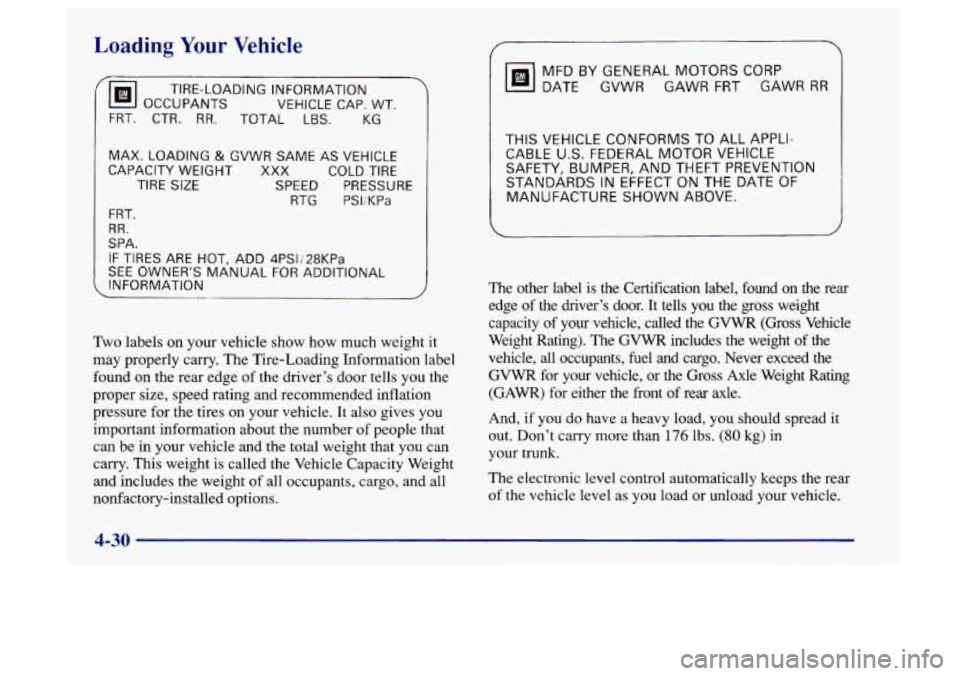
Two labels on your vehicle show how much weight it
may properly carry. The Tire-Loading Information label
found on the rear edge of the driver's door tells you the
proper size, speed rating and recommended inflation
pressure for the tires
on your vehicle. It also gives you
important information about the number
of people that
can be in your vehicle and
the total weight that you can
carry. This weight is called the Vehicle Capacity Weight
and includes the weight of all occupants, cargo, and all
nonfactory-installed options.
MFD BY GENERAL MOTORS CORP
DATE GVWR GAWR FRT GAWR
RR
THIS VEHICLE CONFORMS TO ALL APPLI-
CABLE
US. FEDERAL MOTOR VEHICLE
SAFETY, BUMPER, AND THEFT PREVENTION
STANDARDS IN EFFECT ON
THE DATE OF
MANUFACTURE SHOWN ABOVE.
I
4-30
The other label is the Certification label, found on the rear
edge
of the driver's door. It tells you the gross weight
capacity of your vehicle, called the GVWR (Gross Vehicle
Weight Rating). The
GVWR includes the weight of the
vehicle, all occupants, fuel and cargo. Never exceed the
GVWR for your vehicle, or the Gross Axle Weight Rating
(GAWR) for either the front of rear axle.
And,
if you do have a heavy load, you should spread it
out. Don't carry more than 176 lbs. (80 kg) in
your trunk.
The electronic level control automatically keeps the rear
of the vehicle level as you load or unload your vehicle.
Page 207 of 404
A CAUTION:
Do not load your vehicle any heavier than the
GVWR, or either the maximum front or rear
GAWR.
If you do, parts on your vehicle can
break, or it can change the way your vehicle
handles. These could cause you to lose control.
Also, overloading can shorten the life of
your vehicle.
I NOTICE:
Your warranty does not cover parts or
components that
fail because of overloading.
A CAUTION:
Things you put inside your vehicle can strike and
injure people in
a sudden stop or turn, or in
a crash.
Put things in the trunk of your vehicle. In a
trunk, put them as far forward as you can.
Try to spread the weight evenly.
Never stack heavier things, like suitcases,
inside the vehicle
so that some of them are
above the tops
of the seats.
Don’t leave an unsecured child restraint in
your vehicle.
When you carry something inside the
vehicle, secure it whenever you can.
If you put things inside your vehicle- like suitcases,
tools, packages,
or anything else ~ they will go as fast
as the vehicle goes.
If you have to stop or turn quickly,
or if there is a crash, they’ll keep going.
Electronic Level Control
This feature keeps the rear of your vehicle level as the
load changes. It
is automatic -- you don’t need to
adjust anything.
Page 241 of 404
Removing the Spare Tire and Tools
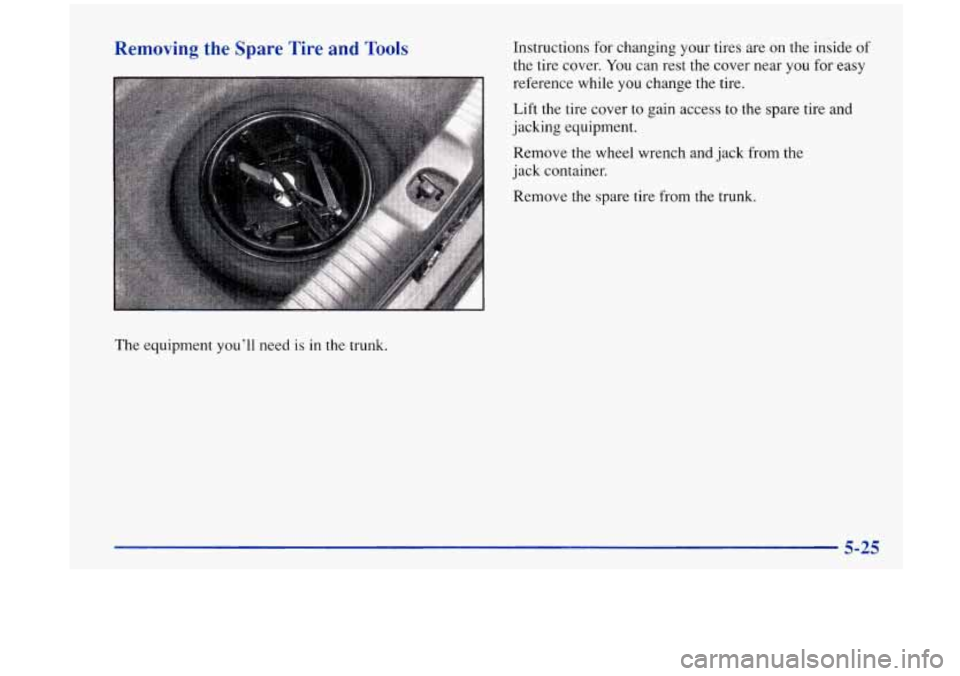
The equipment you’ll need is in the trunk. Instructions for
changing your tires are on the inside
of
the tire cover. You can rest the cover near you for easy
reference while
you change the tire.
Lift the tire cover to gain access to the spare tire and
jacking equipment.
Remove the wheel wrench and jack from the
jack container.
Remove
the spare tire from the trunk.
5-25
Page 247 of 404
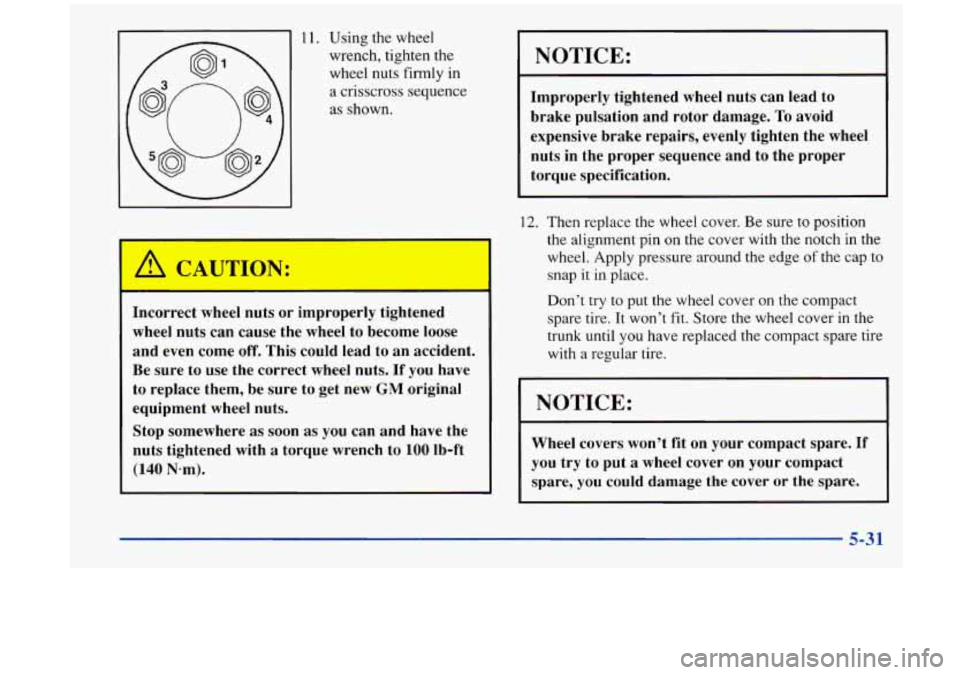
11. Using the wheel
wrench, tighten the
wheel nuts firmly in
a crisscross sequence
as shown.
Incorrect wheel nuts or improperly tightened
wheel nuts can cause the wheel to become loose
and even come
off. This could lead to an accident.
Be sure to use the correct wheel nuts.
If you have
to replace them, be sure to get new
GM original
equipment wheel nuts.
Stop somewhere
as soon as you can and have the
nuts tightened with
a torque wrench to 100 Ib-ft
(140 N-m).
NOTICE:
Improperly tightened wheel nuts can lead to
brake pulsation and rotor damage.
To avoid
expensive brake repairs, evenly tighten the wheel
nuts in the proper sequence and to the proper torque specification.
12. Then replace the wheel cover. Be sure to position
the alignment pin
on the cover with the notch in the
wheel. Apply pressure around the edge
of the cap to
snap it in place.
Don’t try
to put the wheel cover on the compact
spare tire. It won’t
fit. Store the wheel cover in the
trunk until you have replaced the compact spare tire
with a regular tire.
I NOTICE:
Wheel covers won’t fit on your compact spare. If
you try to put a wheel cover on your compact
spare,
you could damage the cover or the spare.
5-31
Page 248 of 404

Storing the Flat Tire and Tools
Storing a jack, a tire or other equipment in the
passenger compartment
of the vehicle could
cause injury. In a sudden stop or collision, loose
equipment could strike someone. Store
all these
in the proper place.
Store the flat tire as far forward in the trunk as possible.
Store the jack and wheel wrench in their compartment in
the trunk.
For storage, the jack must be raised until the
screw end
is flush with the edge of the jack.
5-32