fold seats OLDSMOBILE SILHOUETTE 1998 Owners Manual
[x] Cancel search | Manufacturer: OLDSMOBILE, Model Year: 1998, Model line: SILHOUETTE, Model: OLDSMOBILE SILHOUETTE 1998Pages: 444, PDF Size: 23.2 MB
Page 14 of 444

Seats and Seat Controls
This section tells you about the seats -- how to adjust
them, take them out, put them back in and fold and
unfold them.
Driver’s 4-Way Manual Seat
To raise the seat, pull up on the lever on the front right
side
of the seat. To lower the seat, push the lever down.
Use the lever on the front left side
of the seat to adjust the
seat forward or reatward.
Pull up the lever on the front of
the seat to unlock it. Slide the seat to where you want it. \
To make sure the seat is locked into place, release the
lever and
try to move the seat with your body.
- -- ii
You can lose control of the vehicle if you try to
adjust a manual driver’s seat while the vehicle is
moving. The sudden movement could startle and confuse you,
or make you push a pedal when you
don’t want to. Adjust the driver’s seat only when the vehicle
is not moving.
1-2
ProCarManuals.com
Page 15 of 444
6-Way Power Seats (Option) Folding Driver’s Seatback
A B C
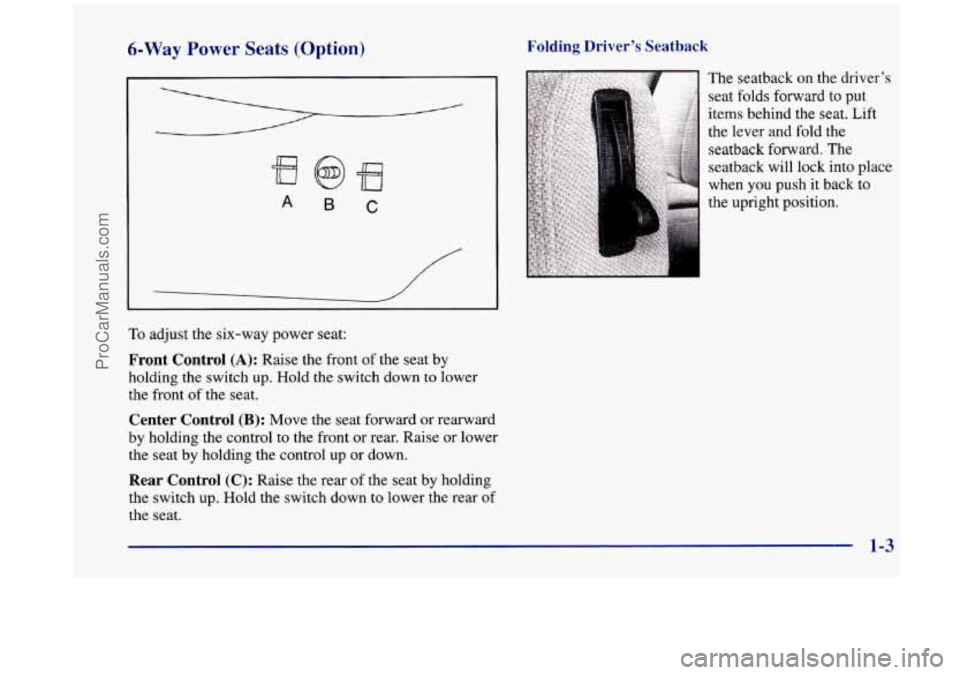
To adjust the six-way power seat:
Front Control (A): Raise the front of the seat by
holding the switch up. Hold the switch down to lower
the front of
the seat.
Center Control (B): Move the seat forward or rearward
by holding the control to the front or rear. Raise or lower
the seat by holding the control up or down.
Rear Control (C): Raise the rear of the seat by holding
the switch up. Hold the switch down to lower the rear of
the seat. The
seatback on the driver’s
seat
folds forward to put
items behind the seat. Lift
the lever
and fold the
seatback forward. The
seatback will lock into place
when
you push it back to
the upright position.
1-3
ProCarManuals.com
Page 19 of 444
Second Row Safety Belt Stowage
If your vehicle has seats in the third row, there is a
sleeve on the second row outside safety belt to store the
safety belt while entering and exiting the third
row of
the vehicle.
If your vehicle has a bench seat in the second row,
follow this procedure:
0 Pull the belt out and slide the sleeve along the belt
until it reaches the patch of Velcro@ on the roof.
Simply press the sleeve against the Velcro patch to
bo not have the second row outside safety belt stored if
someone is sitting in the second row outside position.
To release the second row outside safety belt, just pull
the sleeve away from the Velcro patch and use the safety
belt as usual. The sleeve should slide freely when not
in use. secure it
in place.
There is
also a clip on the safety belt used to secure the
belt after it is disconnected
from the mini-buckle. When
removing the second row bench seat, secure the loose end
of the safety belt in this clip.
This will keep the safety belt
from dangling and possibly striking something.
Dump and Stow Feature
The rear seats in your vehicle, except the captain’s
chairs, can be folded forward. Use this feature for
exiting and entering third row seats.
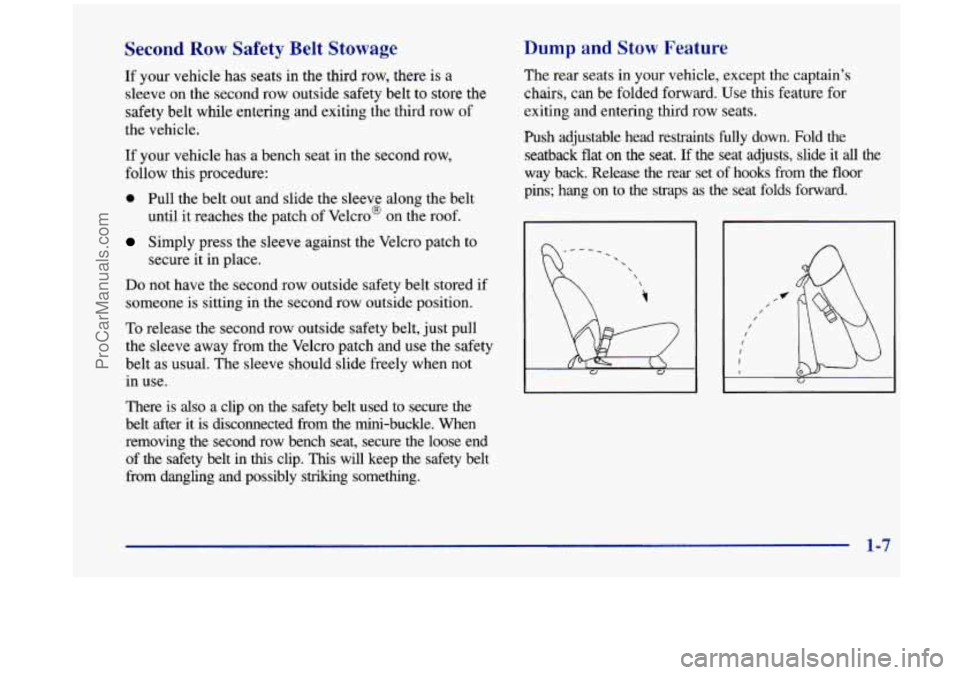
Push adjustable head restraints fully down. Fold the seatback
flat on the seat. If the seat adjusts, slide it all the
way back. Release the rear set of hooks from the floor
pins; hang on to the straps as the seat folds forward.
I I I I I U
1-7
ProCarManuals.com
Page 20 of 444
Split Bench Seats
If you have the split bench seat (50/50 or 40/60>, the
seatbacks can be folded down individually and the
sections can be removed individually. The sections can
also be adjusted forward or rearward individually.
The second row
(40/60) split bench may be equipped
with built-in child restraint(s). See “Built-In Child
Restraint” in the index.
Folding or Reclining the Seatbacks
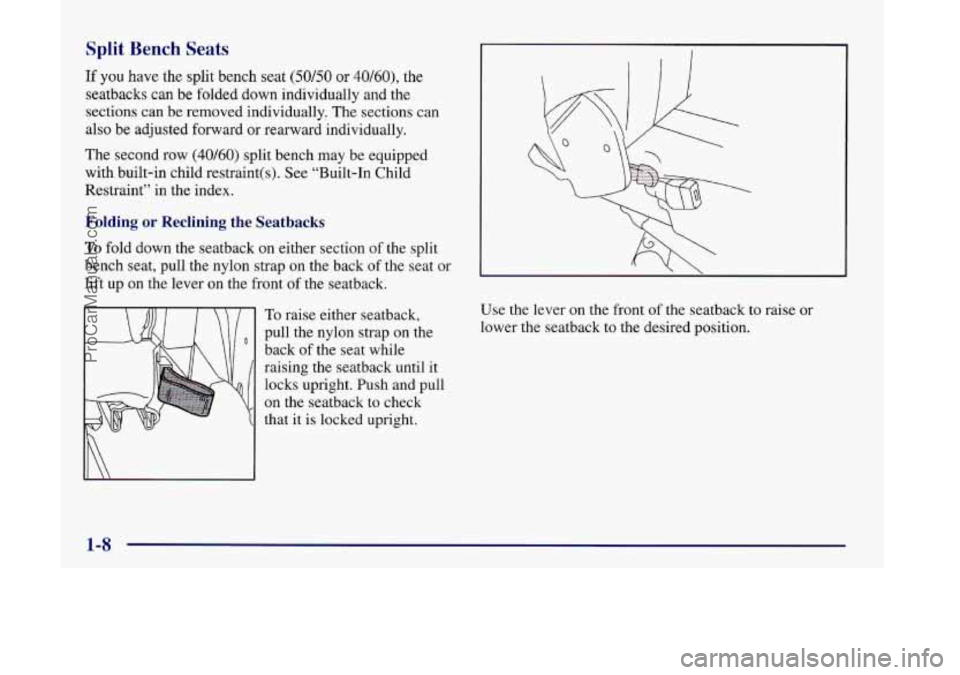
To fold down the seatback on either section of the split
bench seat, pull the nylon strap
on the back of the seat or
lift up on the lever on the front
of the seatback.
To raise either seatback,
pull the nylon strap
on the
back
of the seat while
raising the seatback until
it
locks upright. Push and pull
on the seatback to check
that it is locked upright.
/ 0
0 7 ....... ...... ......... ........ ........... .......... .......... :-. ....... ”~ i -
Use the lever on the front of the seatback to raise or
lower the seatback to the desired position.
1-8
ProCarManuals.com
Page 27 of 444
Bucket Seats
There are three types of rear bucket seats: RIGHT
ONLY, CENTER
OR LEFT and LEFT ONLY.
RIGHT ONLY and LEFT ONLY seats may be equipped
with the built-in child restraint option.
The
rear bucket seats can be removed to provide extra
storage. Each seat that has the built-in child restraint
option
fits in only one location in your vehicle, but seats
that don't have the built-in child restraint option can be
moved to different rows.
Folding or Reclining the Seatbacks
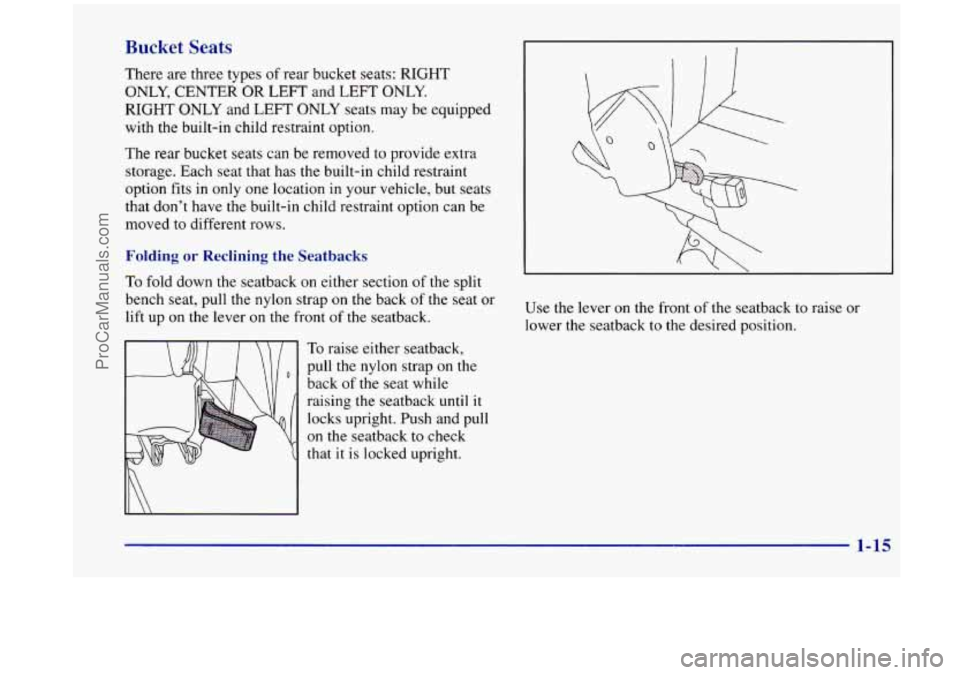
To fold down the seatback on either section of the split
bench seat, pull the nylon strap on the back of the seat or
lift up on the lever on the front
of the seatback.
To raise either seatback,
pull the nylon strap on the
back of the seat while
raising the seatback until it
locks upright. Push and pull
on the seatback to check
that
it is locked upright. Use
the lever
on the front of the seatback to raise or
lower the seatback to the desired position.
1-15
ProCarManuals.com
Page 28 of 444
Adjusting the Bucket Seats
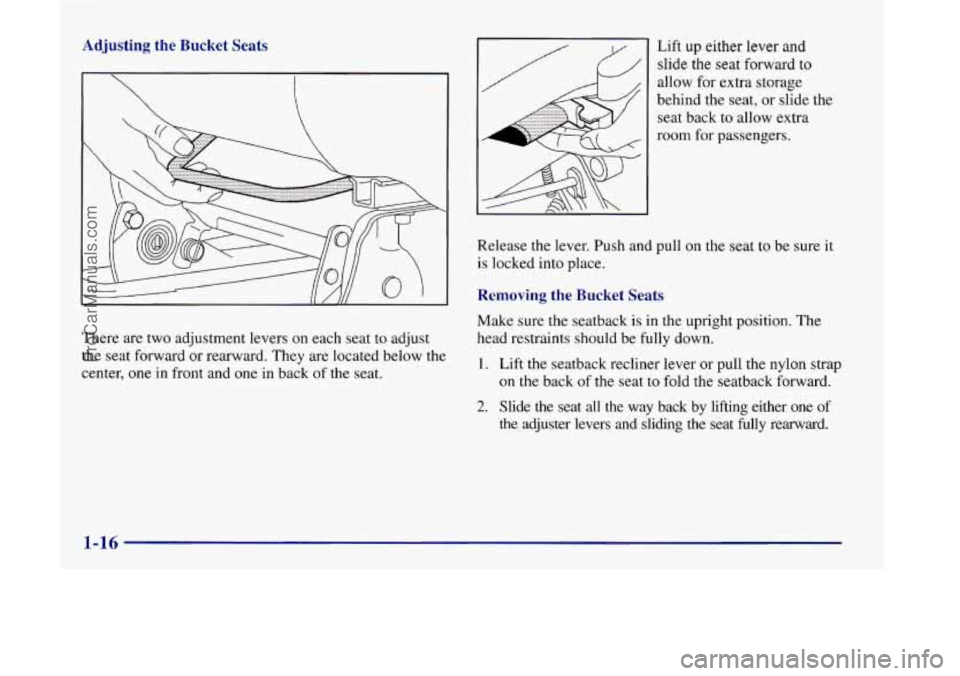
There are two adjustment levers on each seat to adjust
the seat forward or rearward. They are located below the
center,
one in front and one in back of the seat. Lift
up either lever and
slide
the seat forward to
allow for extra storage
behind the seat, or slide the
seat back
to allow extra
room for passengers.
Release the lever. Push and pull on the seat to be sure it
is locked into place.
Removing the Bucket Seats
Make sure the seatback is in the upright position. The
head restraints should be fully down.
1. Lift the seatback recliner lever or pull the nylon strap
on the back of the seat to fold the seatback forward.
2. Slide the seat all the way back by lifting either one of
the adjuster levers and sliding the seat fully rearward.
1-16
ProCarManuals.com
Page 31 of 444

Replacing the Bucket Seats
Don’t put the seats in so they face rearward because they
won’t latch that way. If you want more storage room
behind the seat, adjust the seat by sliding it forward.
The bucket seats have seat position labels, located on the
back
of the seat, showing where the seat must go. Follow
that diagram. See “Seat Controls” in the beginning of
this
section for more details. The seat must be placed in the
proper location for the legs
to attach correctly.
RIGHT
ONLY seats that don’t have the built-in child
restraint option fit only in the right location of either
row, the
E and F or I and J sets of floor cups.
The CENTER
OR LEFT seat fits in the center location
or in either left location, the
A and B, C and D or G
and H sets of floor cups.
The
LEFT ONLY seats that don’t have the built-in child
restraint option fit only in the left location of either row,
the
A and B or G and H sets of floor cups.
RIGHT ONLY seats that have the built-in child restraint
option fit only
in the right location of the second row,
the
E and F sets of floor cups.
LEFT ONLY seats that have the built-in child restraint
option fit only
in the left location of the second row, the
A and B sets of floor cups.
Make sure the seat is in the full rear position before
beginning this procedure.
1. With the seat folded, squeeze the angled gray bar
toward the solid gray crossbar while placing the
front hooks of the bench seat
onto the front two
floor pins.
To do this,
the seat will
need to be angled
so that
the front hooks clear the
floor pins.
1-19
ProCarManuals.com
Page 167 of 444
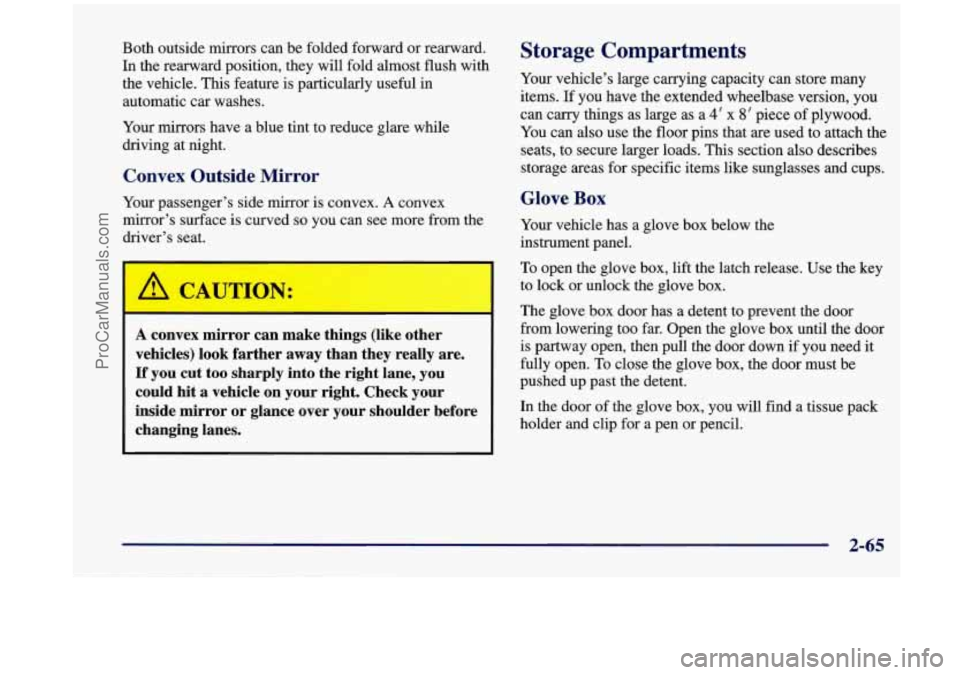
Both outside mirrors can be folded forward or rearward.
In the rearward position, they will fold almost flush with
the vehicle. This feature is particularly useful in
automatic car washes.
Your mirrors have a blue tint to reduce glare while
driving at night.
Convex Outside Mirror
Your passenger’s side mirror is convex. A convex
mirror’s surface is curved
so you can see more from the
driver’s seat.
A convex mirror can make things (like other
vehicles) look farther away than they really are.
If you cut too sharply into the right lane, you
could hit a vehicle on your right. Check your
inside mirror or glance over
your shoulder before
changing lanes.
Storage Compartments
Your vehicle’s large carrying capacity can store many
items.
If you have the extended wheelbase version, you
can carry things as large as a
4‘ x 8’ piece of plywood.
You can
also use the floor pins that are used to attach the
seats, to secure larger loads. This section
also describes
storage areas for specific items like sunglasses and cups.
Glove Box
Your vehicle has a glove box below the
instrument panel.
To open the glove box, lift the latch release. Use the key
to lock or unlock the glove box.
The glove box door has a detent to prevent the door
from lowering too far. Open the glove box until the door
is partway open, then pull the door down if you need it
fully open. To close the glove box, the door must be
pushed up past the detent.
In the door of the glove box, you will find a tissue pack
holder and clip for a pen
or pencil.
2-65
ProCarManuals.com
Page 171 of 444

Cupholders Storage Bin
There are cupholders on the inboard side of the front
passenger’s seat and the right side
of the second row
bench seat.
To use the cupholders, simply pull down the tray. Keep
the trays up when not in use.
Your vehicle has storage compartments and cupholders
on either side of the vehicle, next to the third row seats.
The seatbacks have cupholders that can be used when
the seatbacks are folded down. At
the base
of the center instrument panel console, there
is a storage bin. To open the bin, lift the latch release
and the door will fold down.
Inside the bin, you will find a tray that slides out. Slide
the tray all the way toward the rear of the vehicle until
the tray locks onto the plastic tabs at the end of the guide
rails. The tray holds
CDs or cassettes in the center area.
You can also store cassettes in the left side area. The
right side area can hold either the coinholder, which lifts
out, or another cassette. The tray can be removed for
cleaning or when you want to replace the selection
of
CDs or cassettes. Slide the tray back into the storage bin
before closing the bin door. The tray can also be placed
in the glove box for locked storage if desired.
2-69
ProCarManuals.com
Page 264 of 444

/I CAL TION:
Things you put inside your vehicle can strike
and injure people in a sudden stop or turn, or in
a crash.
0 Put things in the cargo area of your vehicle.
Try to spread the weight evenly.
0 Never stack heavier things, like suitcases,
inside the vehicle
so that some of them are
above the tops
of the seats.
0 Don’t leave an unsecured child restraint in
your vehicle.
0 When you carry something inside the
vehicle, secure it whenever you can.
0 Don’t leave a seat folded down unless you
need to.
Electronic Level Control (Option)
On vehicles equipped with the optional electronic level
control, the rear of the vehicle is automatically kept
level as you load or unload your vehicle. However, you
should still not exceed the
GVWR or the GAWR.
You may hear the compressor operating when you load
or unload your vehicle, and periodically as the system
self-adjusts. This is normal.
The compressor should operate for brief periods
of time.
If the sound continues for an extended period of time,
your vehicle needs service.
To keep your battery from
being drained, you may want to remove the
ELC fuse in
the fuse control panel until you can have your vehicle
serviced (see “Fuses and Circuit Breakers” in the Index.)
Using heavier suspension components to get added
durability might not change your weight ratings. Ask
your retailer to help you load your vehicle the right way.
4-32
ProCarManuals.com