glove box OLDSMOBILE SILHOUETTE 1998 Owners Manual
[x] Cancel search | Manufacturer: OLDSMOBILE, Model Year: 1998, Model line: SILHOUETTE, Model: OLDSMOBILE SILHOUETTE 1998Pages: 444, PDF Size: 23.2 MB
Page 124 of 444

Theft Parking at Night
Vehicle theft is big business, especially in some cities.
Although your vehicle has a number of theft-deterrent
features, we know that nothing we put on it can make it
impossible to steal. However, there are ways you
can help.
Key in the Ignition
If you leave your vehicle with the keys inside, it’s an
easy target for joy riders or professional thieves
-- so
don’t do it.
When you park your Oldsmobile and open the driver’s
door, you’ll hear a chime reminding you to remove your
key from the ignition and take it with you. Always do
this. Your steering wheel will be locked, and so will
your ignition and transaxle. And remember
to lock
the doors. Park
in a lighted spot,
close all windows and lock your
vehicle. Remember to keep your valuables out of sight.
Put them in a storage area, or take them with you.
Parking Lots
If you park in a lot where someone will be watching
your vehicle, it’s best to lock it
up and take your key.
But what
if you have to leave your key? What if you
have to leave something valuable in your vehicle?
Put your valuables in a storage area, like your
glove box.
Lock all the doors except the driver’s.
2-22
ProCarManuals.com
Page 143 of 444

Entering Programming Mode
To program features, your vehicle must be in the
programming mode. Follow these steps:
1.
2.
3.
4.
5.
The Content Theft-Deterrent system (if equipped)
must be disarmed. See “Content Theft-Deterrent
System” in this section.
Remove the BCM PRGRM fuse from the instrument
panel fuse block, located to the right
of the glove
box. (See “Fuses and Circuit Breakers” in the Index.)
Close the driver’s door.
Turn the ignition switch towards you to
ACCESSORY.
Count the number of chimes you hear.
You will hear
two
to four chimes depending on the features your
vehicle is equipped with. Refer to the chart
shown previously.
You can now program your choices.
10 exit the programming mode, follow the steps
listed under “Exiting Programming Mode” later in
this section.
Delayed Illumination and Exit Lighting
With Delayed Illumination, the interior lamps will stay
on for about
25 seconds after all the doors and the
liftgate are closed.
With Exiting Lighting, the interior lamps will come on
and stay on for about
25 seconds whenever you remove
the key from the ignition.
To customize these features to your preference, see
“Programmable Modes” following.
Programmable Modes
Your vehicle can be programmed to one of the
following modes.
Mode 1: Both Features Off (The interior lamps will turn on
or
off at the same instant that a door is opened or closed.)
Mode 2: Delayed Illumination Only (The interior lamps
will stay
on for about 25 seconds after all the doors and
liftgate are closed, or until you lock the doors.)
2-41
ProCarManuals.com
Page 163 of 444

Interior Lamps
Instrument Panel Intensity Control
Turn the control, located below the headlamps switch, to
the right to increase the brightness of the instrument
panel lights, and to the left to decrease the brightness.
Turn the control all the way to the left to turn them off.
Interior Lamps Control
Turn the dial all the way to the right to turn on the
interior lamps,
if the interior lamps override switch is
off. Turn the dial to the left to turn the lamps off.
Interior Lamps Override Switch
--
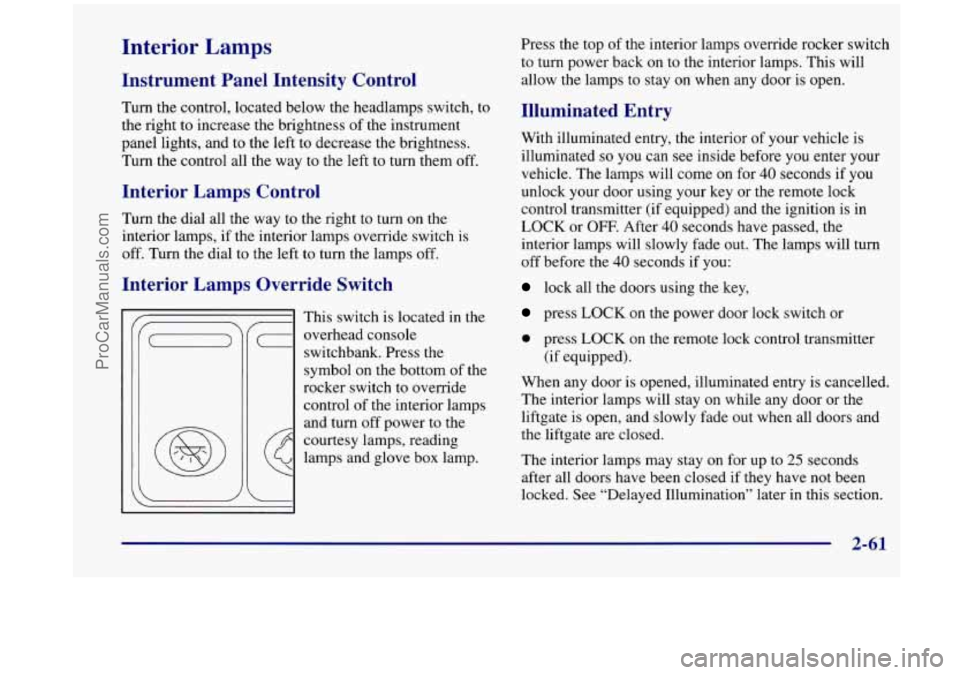
I This switch is located in the
c- overhead console
switchbank. Press the
symbol on the bottom
of the
rocker switch to override control of the interior lamps
and turn off power to the
courtesy lamps, reading
lamps and glove box lamp. Press the top
of the interior
lamps override rocker switch
to turn power back on to the interior lamps. This will
allow the lamps to
stay on when any door is open.
Illuminated Entry
With illuminated entry, the interior of your vehicle is
illuminated
so you can see inside before you enter your
vehicle. The lamps will come on for
40 seconds if you
unlock your door using your key or the remote lock
control transmitter (if equipped) and the ignition is in
LOCK
or OFF. After 40 seconds have passed, the
interior lamps will slowly fade out. The lamps will turn
off before the 40 seconds if you:
lock all the doors using the key,
press LOCK on the power door lock switch or
0 press LOCK on the remote lock control transmmer
(if equipped).
When any door is opened, illuminated entry is cancelled.
The interior lamps will stay on while any door or the
liftgate
is open, and slowly fade out when all doors and
the liftgate are closed.
The interior lamps may stay on for up to
25 seconds
after all doors have been closed if they have not been
locked. See “Delayed Illumination’’ later
in this section.
ProCarManuals.com
Page 167 of 444

Both outside mirrors can be folded forward or rearward.
In the rearward position, they will fold almost flush with
the vehicle. This feature is particularly useful in
automatic car washes.
Your mirrors have a blue tint to reduce glare while
driving at night.
Convex Outside Mirror
Your passenger’s side mirror is convex. A convex
mirror’s surface is curved
so you can see more from the
driver’s seat.
A convex mirror can make things (like other
vehicles) look farther away than they really are.
If you cut too sharply into the right lane, you
could hit a vehicle on your right. Check your
inside mirror or glance over
your shoulder before
changing lanes.
Storage Compartments
Your vehicle’s large carrying capacity can store many
items.
If you have the extended wheelbase version, you
can carry things as large as a
4‘ x 8’ piece of plywood.
You can
also use the floor pins that are used to attach the
seats, to secure larger loads. This section
also describes
storage areas for specific items like sunglasses and cups.
Glove Box
Your vehicle has a glove box below the
instrument panel.
To open the glove box, lift the latch release. Use the key
to lock or unlock the glove box.
The glove box door has a detent to prevent the door
from lowering too far. Open the glove box until the door
is partway open, then pull the door down if you need it
fully open. To close the glove box, the door must be
pushed up past the detent.
In the door of the glove box, you will find a tissue pack
holder and clip for a pen
or pencil.
2-65
ProCarManuals.com
Page 171 of 444

Cupholders Storage Bin
There are cupholders on the inboard side of the front
passenger’s seat and the right side
of the second row
bench seat.
To use the cupholders, simply pull down the tray. Keep
the trays up when not in use.
Your vehicle has storage compartments and cupholders
on either side of the vehicle, next to the third row seats.
The seatbacks have cupholders that can be used when
the seatbacks are folded down. At
the base
of the center instrument panel console, there
is a storage bin. To open the bin, lift the latch release
and the door will fold down.
Inside the bin, you will find a tray that slides out. Slide
the tray all the way toward the rear of the vehicle until
the tray locks onto the plastic tabs at the end of the guide
rails. The tray holds
CDs or cassettes in the center area.
You can also store cassettes in the left side area. The
right side area can hold either the coinholder, which lifts
out, or another cassette. The tray can be removed for
cleaning or when you want to replace the selection
of
CDs or cassettes. Slide the tray back into the storage bin
before closing the bin door. The tray can also be placed
in the glove box for locked storage if desired.
2-69
ProCarManuals.com
Page 181 of 444

Inflating something too much can make it explode, and you or others could
be injured. Be
sure to read the inflator instructions, and inflate
any object only to its recommended pressure.
The air inflator kit is stored in the glove box. It includes
a 20-foot
(6 m) hose with an air pressure gage and
nozzle adapters.
2-79
ProCarManuals.com
Page 182 of 444

To use your air inflator system, attach the appropriate
nozzle adapter, if required, to the end of the hose that
has the pressure gage. Then attach that end of the hose
to the object you wish to inflate. Remove the protective
cap covering the outlet. Attach the other end of the hose
to the outlet. Press the ON switch. The
ON switch will
work even with the ignition
off.
2-80
If the air inflator system does not turn on, the fuse may
be blown or installed incorrectly. See “Fuses and Circuit
Breakers” in the Index or see your retailer for service.
Your air inflator will automatically shut off after about
10 minutes. To reset, press the ON switch again.
Don’t run your air inflator for longer than
30 minutes at
one time.
If you do, you may damage the system. After
30 minutes, wait at least 10 minutes before restarting the
air inflator.
To turn off the inflator, press OFF and detach the hose,
first from the inflated object, then from the outlet.
Replace the protective cap. Place the inflator kit tools
in
the pouch, and store in the glove box.
To replace the cover, line up the tabs at the back of the
cover and put it in place. Push down the tab to secure
the cover.
ProCarManuals.com
Page 185 of 444

Your instrument panel is designed to let you know at a glance how your vehicle is running. You’ll know how fast
you’re going, how much fuel you’re using, and many other things you’ll need to drive safely
and economically.
Refer to the accompanying diagram of your instrument panel to locate the components listed below.
A. Side Vents
B. Front Vent
C. Turn SignalMultifunction Lever
D. Hazard Warning Flashers Switch
E. Instrument Cluster
F. Center Vents
G. Audio System
H. Side Vents
I. Lamps Switch
J. Hood Release
K. Steering Wheel Touch Controls (Option)
L. Horn
M. Ignition Switch
N. Steering Wheel Touch Controls (Option)
0. Climate Controls
P. Rear Fan Controls (Option)
Q. Accessory Power Outlet
R. Storage Bin
S. Remote CD Player (Option)
T. Instrument Panel Switchbank
U. LightedAshtray
V. Glove Box
W. Front Vents
X, Fuse Panel
2-83
ProCarManuals.com
Page 326 of 444

Checking or Replacing the Air Cleaner
1. Unlatch the two hooks on top of the air
cleaner housing.
2. Turn back the air inlet panel and rest it on top of the
housing. The air intake tube is designed to flex back;
you do not need to disconnect it.
3. After replacing the air cleaner filter, seat the tabs on
the bottom of the panel into the slots at the bottom.
4. Latch the hooks to secure the panel in place. If the
panel moves easily, check that the tabs
are seated
correctly in the slots.
NOTICE:
If the air cleaner is off, a backfire can cause a
damaging engine fire. And, dirt can easily get
into your engine, which will damage it. Always
have the air cleaner in place when you’re driving.
Passenger Cornparti .t Air
Filter Replacemem
Passenger compartment air, both outside and
I recirculated air, is routed through a passenger
compartment filter, which is part of
a two-piece filter
system. The filter removes certain contaminants from
the air, including pollen and dust particles. Reductions
Operating the engine with the air cleaner off can in airflow, which may occur more quickly in dusty
cause you or others to be burned. The air cleaner areas, indicate that the filter needs to be replaced early.
not only cleans the air, it stops flame if the engine For how often to change the passenger compartment air
backfires. If it isn’t there, and the engine
backfires, you could be burned. Don’t drive with
The access panel for the passenger compartment air
it off, and be careful working on the engine with filter is in the back of the glove box.
the air cleaner off.
filter, see “Maintenance Schedule” in the Index.
6-16
ProCarManuals.com
Page 328 of 444

5. Close the inner access door, while squeezing the tab,
6. Snap the outer access panel into the back of the
to be sure it is
tightly closed.
glove box.
Automatic Transaxle Fluid
r--- In to Check and Change
A good time to check your automatic transaxle fluid
level is when the engine oil is changed.
Change both
the fluid and filter every 50,000 miles
(83 000 km) if the vehicle is mainly driven under one
or more of these conditions:
0 In heavy city traffic where the outside temperature
regularly reaches
90°F (32°C) or higher.
In hilly or mountainous terrain.
0 When doing frequent trailer towing.
0 Uses such as found in taxi, police or delivery service.
If you do not use your vehicle under any
of these
conditions, the fluid and filter do not require changing.
See “Scheduled Maintenance Services” in the Index.
How to Check
Because this operation can be a little difficult, you may
choose to have this done at your Oldsmobile retail
facility Service Department.
If you do it yourself, be sure to follow all the
instructions here, or
you could get a false reading
on the dipstick.
NOTICE:
Too much or too little fluid can damage your
transaxle.
Too much can mean that some of the
fluid could come out and fall on hot engine parts
or exhaust system parts, starting a fire. Be sure to
get an accurate reading if you check your
transaxle fluid.
6-18
ProCarManuals.com