brake OPEL ANTARA 2017.5 Owner's Manual
[x] Cancel search | Manufacturer: OPEL, Model Year: 2017.5, Model line: ANTARA, Model: OPEL ANTARA 2017.5Pages: 225, PDF Size: 6.2 MB
Page 13 of 225

In brief111Side air vents .....................119
2 Fixed air vents .................... 120
3 High beam .......................... 106
Headlight flash ...................106
Turn and lane-change
signals ................................ 108
Exit lighting ......................... 112
Parking lights .....................109
Cruise control ....................... 91
4 Remote control on
steering wheel ......................72
Trip computer .....................100
5 Horn ..................................... 72
6 Instruments .......................... 78
Driver Information Centre ...... 91
7 Windscreen wiper and
washer system, headlight
washer system .....................73
Rear window wiper and
washer system .....................748Info-Display .......................... 94
Check control, tyre
pressure monitoring
system ................................ 183
Trip computer .....................100
9 Centre air vents .................. 119
10 Hazard warning flashers ....107
Parking assist ..................... 148
Electronic Stability Control . 145
Descent control system ...... 146
Status LED for anti-theft
alarm system ........................ 26
Folding exterior mirrors ........29
Fuel economy mode ...........122
11 Infotainment system .............10
12 Front passenger airbag ........48
13 Status LEDs for front
passenger airbag .................50
Control indicator for front
passenger seat belt .............42
14 Glovebox .............................. 57
15 Fuse box ............................ 17616Climate control system ....... 114
17 Ignition switch with
steering wheel lock ............125
18 Accelerator pedal ...............124
19 Driver airbag ........................ 48
20 Brake pedal ........................ 142
21 Clutch pedal ....................... 123
22 Steering wheel adjustment ..72
23 Bonnet release ...................158
24 Coin storage ......................... 56
25 Card holder .......................... 56
26 Light switch ........................ 105
Automatic light control .......106
Instrument illumination .......110
Rear fog light ...................... 109
Front fog lights ...................108
Headlight range
adjustment ......................... 106
Page 19 of 225
![OPEL ANTARA 2017.5 Owners Manual In brief17Automatic transmissionP:parkR:reverseN:neutralD:drive
Manual mode: move selector lever
from D to the left.
<:higher gear]:lower gear
The selector lever can only be moved
out of P when the OPEL ANTARA 2017.5 Owners Manual In brief17Automatic transmissionP:parkR:reverseN:neutralD:drive
Manual mode: move selector lever
from D to the left.
<:higher gear]:lower gear
The selector lever can only be moved
out of P when the](/img/37/18759/w960_18759-18.png)
In brief17Automatic transmissionP:parkR:reverseN:neutralD:drive
Manual mode: move selector lever
from D to the left.
<:higher gear]:lower gear
The selector lever can only be moved
out of P when the ignition is on and
the foot brake is applied. To engage
P or R, push the release button.
Automatic transmission 3 136.
Starting off
Check before starting off ● Tyre pressure and condition 3 182, 3 212.
● Engine oil level and fluid levels 3 159.
● All windows, mirrors, exterior lighting and number plates are
free from dirt, snow and ice and
are operational.
● Proper position of mirrors, seats, and seat belts 3 28, 3 36,
3 42.
● Brake function at low speed, particularly if the brakes are wet.Starting the engine
● Turn key to position ACC
● move the steering wheel slightly to release the steering wheel lock
● manual transmission in neutral
● operate clutch and brake pedals ● automatic transmission in P or N
● do not accelerate
● diesel engines: turn key to ON for
preheating and wait until control
indicator ! extinguishes
● turn key to START and release
Starting the engine 3 125.
Page 20 of 225

18In briefStop-start system
If the vehicle is at a low speed or at astandstill and certain conditions are
fulfilled, activate an Autostop as
follows:
● Depress the clutch pedal
● shift the selector lever to N
● release the clutch pedal
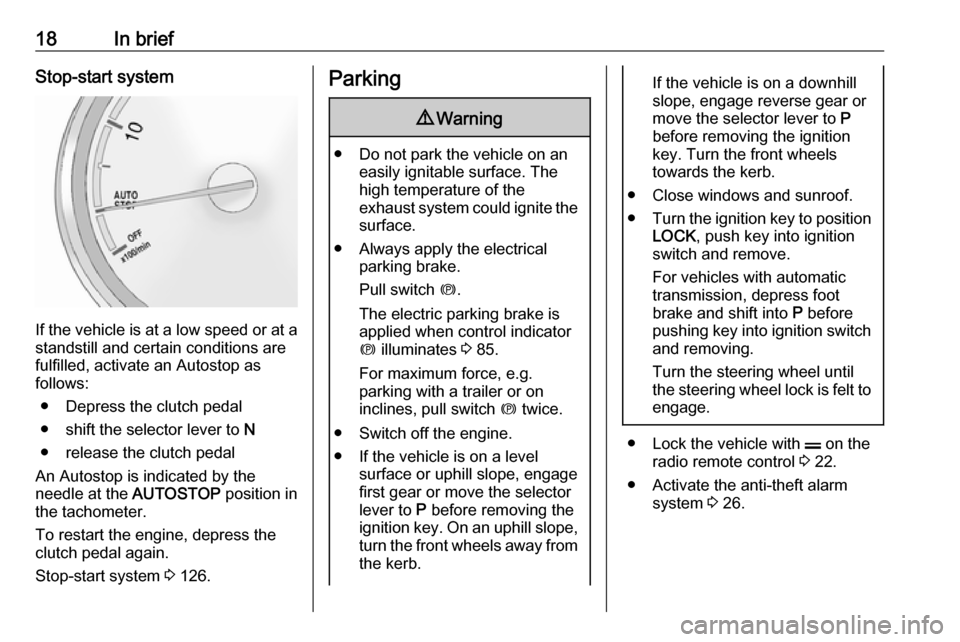
An Autostop is indicated by the
needle at the AUTOSTOP position in
the tachometer.
To restart the engine, depress the clutch pedal again.
Stop-start system 3 126.
Parking9 Warning
● Do not park the vehicle on an
easily ignitable surface. The
high temperature of the
exhaust system could ignite the
surface.
● Always apply the electrical parking brake.
Pull switch m.
The electric parking brake is
applied when control indicator
m illuminates 3 85.
For maximum force, e.g.
parking with a trailer or on
inclines, pull switch m twice.
● Switch off the engine. ● If the vehicle is on a level surface or uphill slope, engage
first gear or move the selector
lever to P before removing the
ignition key. On an uphill slope, turn the front wheels away from
the kerb.
If the vehicle is on a downhill
slope, engage reverse gear or
move the selector lever to P
before removing the ignition
key. Turn the front wheels
towards the kerb.
● Close windows and sunroof.
● Turn the ignition key to position
LOCK , push key into ignition
switch and remove.
For vehicles with automatic
transmission, depress foot
brake and shift into P before
pushing key into ignition switch and removing.
Turn the steering wheel until
the steering wheel lock is felt to
engage.
● Lock the vehicle with p on the
radio remote control 3 22.
● Activate the anti-theft alarm system 3 26.
Page 25 of 225

Keys, doors and windows23Note
For safety reasons, the vehicle
cannot be locked or unlocked via the remote control (and the anti-theft
systems will not be activated) if the
key is in the ignition switch.
If the driver's door is not closed
properly, the central locking system
will not work.
Unlocking the tailgate
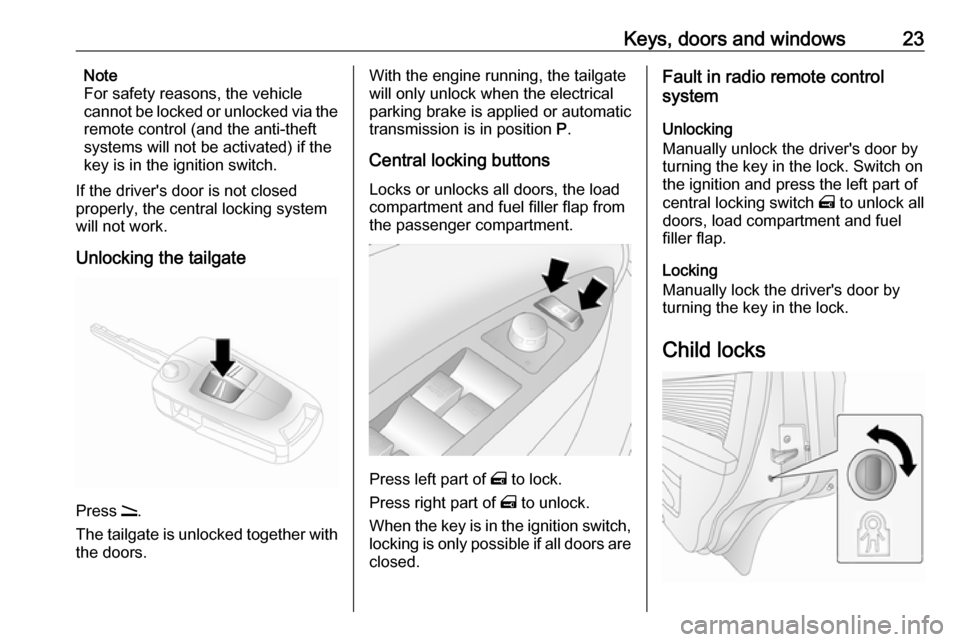
Press q.
The tailgate is unlocked together with the doors.
With the engine running, the tailgate
will only unlock when the electrical
parking brake is applied or automatic
transmission is in position P.
Central locking buttons Locks or unlocks all doors, the load
compartment and fuel filler flap from
the passenger compartment.
Press left part of m to lock.
Press right part of m to unlock.
When the key is in the ignition switch,
locking is only possible if all doors are closed.
Fault in radio remote control
system
Unlocking
Manually unlock the driver's door by
turning the key in the lock. Switch on
the ignition and press the left part of
central locking switch m to unlock all
doors, load compartment and fuel
filler flap.
Locking
Manually lock the driver's door by
turning the key in the lock.
Child locks
Page 38 of 225

36Seats, restraintsStow head restraints securely in load
compartment.
Active head restraints
In the event of a rear-end impact, the active head restraints automatically
tilt forwards. Thus the head is
supported so that the risk of whiplash
injury is reduced.
Note
Do not attach objects or components that are not approved for your
vehicle to the head restraints. These
affect the protective effect of the
head restraints and can be propelled
through the vehicle in an
uncontrolled manner if the driver
brakes hard or an accident occurs.
Note
Approved accessories may only be
attached if the seat is not in use.Front seats
Seat position9 Warning
Only drive with the seat correctly
adjusted.
9 Danger
Do not sit nearer than 25 cm from
the steering wheel, to permit safe
airbag deployment.
9 Warning
Never adjust seats while driving as
they could move uncontrollably.
9 Warning
Never store any objects under the
seats.
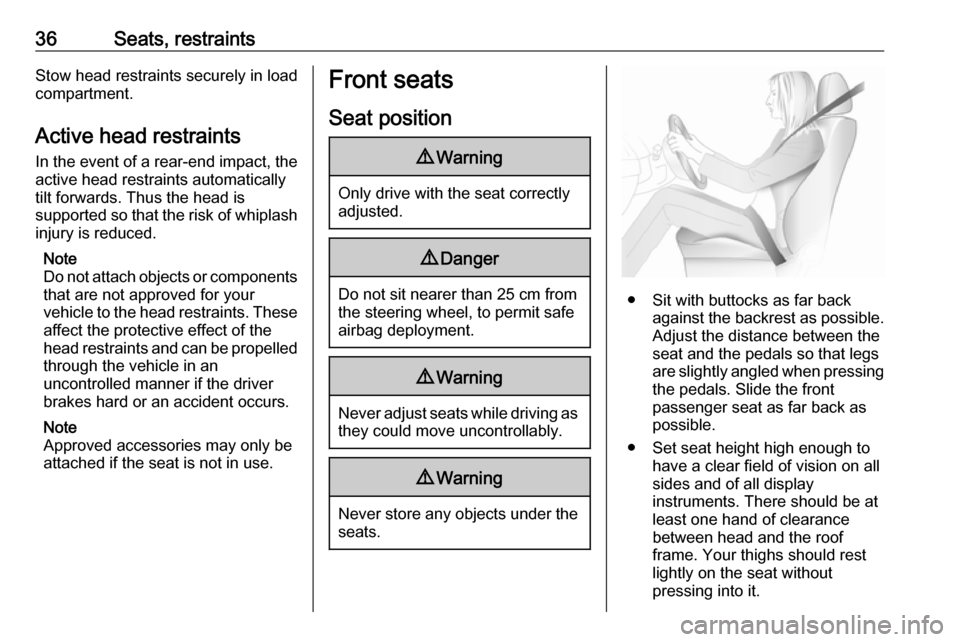
● Sit with buttocks as far back against the backrest as possible.
Adjust the distance between the
seat and the pedals so that legs
are slightly angled when pressing the pedals. Slide the front
passenger seat as far back as
possible.
● Set seat height high enough to have a clear field of vision on allsides and of all display
instruments. There should be at
least one hand of clearance
between head and the roof
frame. Your thighs should rest
lightly on the seat without
pressing into it.
Page 72 of 225

70StorageLoading information● Heavy objects in the load compartment should be evenlydistributed and placed as far
forward as possible. Ensure the
backrests are securely engaged.
If objects can be stacked, the
heavier objects should be placed
at the bottom.
With rear seats in the folded position, objects must not be stacked higher than the seat
backrests.
● Secure objects with lashing straps attached to lashing eyes
3 69.
● Secure loose objects in the load compartment, e.g. with a luggagefloor net, to prevent sliding.
● When transporting objects in the load compartment, the backrests
of the rear seats must not be
angled forward.
● Do not allow the load to protrude above the upper edge of the
backrests.● Do not place any objects on the load compartment cover or the
instrument panel, and do not cover the sensor on top of the
instrument panel.
● The load must not obstruct the operation of the pedals, electricalparking brake and gear selector,
or hinder the freedom of
movement of the driver. Do not
place any unsecured objects in
the interior.
● Do not drive with an open load compartment.9Warning
Always make sure that the load in
the vehicle is securely stowed.
Otherwise objects can be thrown
around inside the vehicle and
cause personal injury or damage
to the load or vehicle.
● The payload is the difference
between the permitted gross
vehicle weight (see identification
plate 3 205) and the EC kerb
weight.
To calculate the EC kerb weight,
enter the data for your vehicle in
the weights table at the front of
this manual.
The EC kerb weight includes
weights for the driver (68 kg),
luggage (7 kg) and all fluids (fuel
tank 90% full).
Optional equipment and
accessories increase the kerb
weight.
● Driving with a roof load increases
the sensitivity of the vehicle to
cross-winds and has a
detrimental effect on vehicle
handling due to the vehicle's
higher centre of gravity.
Distribute the load evenly and
secure it properly with retaining
straps. Adjust the tyre pressure
and vehicle speed according to
the load conditions. Check and
retighten the straps frequently.
Do not drive faster than
120 km/h.
The permissible roof load is
100 kg. The roof load is the
combined weight of the roof rack and the load.
Page 73 of 225

Instruments and controls71Instruments and
controlsControls ....................................... 72
Steering wheel adjustment ........72
Steering wheel controls .............72
Horn ........................................... 72
Windscreen wiper/washer .........73
Rear window wiper/washer .......74
Outside temperature ..................75
Clock ......................................... 75
Power outlets ............................. 77
Warning lights, gauges and indi‐ cators ........................................... 78
Instrument cluster ......................78
Speedometer ............................. 78
Odometer .................................. 78
Trip odometer ............................ 79
Tachometer ............................... 79
Fuel gauge ................................ 79
Service display .......................... 80
Transmission display .................80
Control indicators ......................80
Turn signal ................................. 83
Seat belt reminder .....................83
Airbag and belt tensioners .........83
Airbag deactivation ....................83Charging system .......................84
Malfunction indicator light ..........84
Service vehicle soon .................84
Brake system ............................. 85
Electrical parking brake .............85
Electrical parking brake fault .....85
Antilock brake system (ABS) .....85
Upshift ....................................... 86
All wheel drive ........................... 86
Sport mode ................................ 86
Descent control system .............86
Power steering .......................... 86
Ultrasonic parking assist ...........87
Electronic Stability Control ........87
Electronic Stability Control off ...87
Engine coolant temperature ......87
Preheating ................................. 87
Diesel particle filter ....................88
AdBlue ....................................... 88
Tyre pressure monitoring system ...................................... 88
Engine oil pressure ....................88
Change engine oil .....................89
Low engine oil level ...................89
Fuel economy mode ..................89
Low fuel ..................................... 89
Drain fuel filter ........................... 90
Immobiliser ................................ 90
Reduced engine power .............90
Apply footbrake ......................... 90High beam................................. 90
Automatic headlight levelling system ...................................... 90
Fog light ..................................... 90
Rear fog light ............................. 91
Cruise control ............................ 91
Speed warning .......................... 91
Trailer indicator .......................... 91
Door open .................................. 91
Anti-theft alarm system ..............91
Information displays .....................91
Driver Information Centre ..........91
Board-Info-Display .....................92
Graphic-Info-Display, Colour- Info-Display .............................. 94
Vehicle messages ........................99
Warning chimes .........................99
Tyre pressure ............................ 99
Trip computer ............................. 100
Trip computer in Board-Info- Display .................................... 100
Trip computer in Graphic-Info- Display or Colour-Info-
Display .................................... 102
Page 84 of 225

82Instruments and controlsOverviewOTurn signal 3 83XDriver's seat belt reminder
3 83kFront passenger seat belt
reminder 3 83vAirbag and belt tensioners
3 83*Airbag activation 3 83pCharging system 3 84ZMalfunction indicator light
3 84gService vehicle soon 3 84RBrake system 3 85mElectrical parking brake
3 85pElectrical parking brake fault
3 85uAntilock brake system (ABS)
3 85[Upshift 3 86BAll wheel drive 3 86SSport mode 3 86uDescent control system
3 862Power steering 3 86rUltrasonic parking assist
3 87RElectronic Stability Control
3 87tElectronic Stability Control
off 3 87WEngine coolant temperature
3 87!Preheating 3 87%Diesel particle filter 3 88YAdBlue 3 88wTyre pressure monitoring
system 3 88IEngine oil pressure 3 88¢Change engine oil 3 89SLow engine oil level 3 89sFuel economy mode 3 89YLow fuel 3 89UDrain fuel filter 3 90dImmobiliser 3 90#Reduced engine power
3 90-Apply footbrake 3 90CHigh beam 3 90qAutomatic headlight levelling
system 3 90>Fog light 3 90øRear fog light 3 91mCruise control 3 91àSpeed warning 3 91áTrailer indicator 3 91
Page 86 of 225

84Instruments and controls9Danger
Risk of fatal injury for a child using
a child restraint system together
with activated front passenger
airbag.
Risk of fatal injury for an adult
person with deactivated front
passenger airbag.
Airbag deactivation 3 50.
Charging system p illuminates red.
Illuminates when the ignition is
switched on and extinguishes shortly after the engine starts. If it does not
illuminate, seek the assistance of a
workshop.
Illuminates when the engine is
running
Stop vehicle and switch off engine.
Battery is not charging. Engine
cooling may be interrupted. The
brake servo unit may cease to be
effective.
Interrupt your journey immediately.
Remove key and check drive belt
condition and tensioning before
seeking the assistance of a
workshop.
Malfunction indicator light Z illuminates or flashes yellow.
Illuminates when the ignition is
switched on and extinguishes shortly
after the engine starts. If it does not
illuminate, seek the assistance of a
workshop.
Can illuminate briefly when driving;
this is normal and does not indicate a system fault.
Illuminates when the engine is
running
Fault in the emission control system.
The permitted emission limits may be exceeded. Fuel economy and vehicle
driveability may be impaired. Seek
the assistance of a workshop
immediately.
Control indicator Z also illuminates if
there is a fault in the diesel particle
filter 3 129 or with the automatictransmission 3 138. Seek the
assistance of a workshop as soon as
possible.
Ensure the fuel filler cap is screwed in completely 3 150.
Flashes when the engine is
running
Fault that could lead to catalytic
converter damage 3 130 . Ease up on
the accelerator until the flashing
stops. Seek the assistance of a
workshop immediately.
Service vehicle soon g illuminates yellow.
Illuminates when the engine is
running to indicate a fault in the
engine or transmission electronics.
The electronics switch to an
emergency running programme, fuel
consumption may be increased and
vehicle handling may be impaired.
In some cases, the fault can be
eliminated by switching the engine off
and back on again. If g illuminates
again after restarting the engine, the vehicle may need a service.
Page 87 of 225

Instruments and controls85Have the cause of the fault eliminated
by a workshop.
Brake system
R illuminates red.
Illuminates when the ignition is
switched on and extinguishes shortly
after the engine starts. If it does not
illuminate, stop and seek the
assistance of a workshop.
Control indicator R illuminates if the
electrical parking brake is applied and
extinguishes when it is released
3 143.
If it stays lit while the engine is
running, the brakes do not operate as normal, or leaks are found in the
brake system, do not attempt to drive
the vehicle. Have the vehicle towed to a workshop for inspection and repair.9 Warning
Stop. Do not continue your
journey. Consult a workshop.
Illuminates when engine is running if
the fluid level for brake hydraulics is
too low 3 162.
Brake system 3 142.
Electrical parking brake
m illuminates or flashes red.
When the engine is started, m
illuminates briefly. If it does not
illuminate, seek the assistance of a
workshop.
Illuminates
Electrical parking brake is applied
3 143.
Flashes
Electrical parking brake is not fully
applied or released.
Switch on ignition, depress brake
pedal and attempt to reset the system by first releasing and then re-applying
the electrical parking brake.
If m remains flashing, do not drive
and seek the assistance of a
workshop.Electrical parking brake
fault
p illuminates yellow.
When the ignition is switched on, p
illuminates briefly. If it does not
illuminate, seek the assistance of a
workshop.
Illuminates
Electrical parking brake is operating
with degraded performance 3 143.9 Warning
Have the cause of the fault
remedied immediately by a
workshop.
Antilock brake system
(ABS)
u illuminates yellow.
Illuminates for a few seconds after the ignition is switched on. The system is
ready for operation when the control
indicator extinguishes.