check engine OPEL ASTRA J 2014 Manual user
[x] Cancel search | Manufacturer: OPEL, Model Year: 2014, Model line: ASTRA J, Model: OPEL ASTRA J 2014Pages: 331, PDF Size: 10.13 MB
Page 170 of 331

168Driving and operating
Conditions for an Autostop
The stop-start system checks if each
of the following conditions is fulfilled:
■ The stop-start system is not manually deactivated
■ the bonnet is fully closed
■ the driver's door is closed or the driver's seat belt is fastened
■ the vehicle battery is sufficiently charged and in good condition
■ the engine is warmed up
■ the engine coolant temperature is not too high
■ the engine exhaust temperature is not too high, e.g. after driving with
high engine load
■ the ambient temperature is above -5° C
■ the climate control system allows an Autostop
■ the brake vacuum is sufficient
■ the self-cleaning function of the diesel particle filter is not active
■ the vehicle was driven at least at walking speed since the last
AutostopOtherwise an Autostop will be
inhibited.
Certain settings of the climate control
system may inhibit an Autostop. See
Climate control chapter for more
details 3 158.
Immediately after motorway driving
an Autostop may be inhibited.
New vehicle running-in 3 165.
Vehicle battery discharge protection
To ensure reliable engine restarts, several battery discharge protection
features are implemented as part of
the stop-start system.
Power saving measures
During an Autostop, several electric
features, e.g. auxiliary electric heater
or rear window heating are disabled
or switched into a power saving
mode. The fan speed of the climate
control system is reduced to save
power.Restart of the engine by the
driver
Depress the clutch pedal to restart the
engine.
The engine start is indicated by the
needle at the idle speed position in
the tachometer.
If the selector lever is shifted out of
neutral before depressing the clutch
first, control indicator - illuminates
or is shown as a symbol in the Driver
Information Centre.
Control indicator - 3 116.
Restart of the engine by the
stop-start system The selector lever has to be in neutral
to enable an automatic restart.
If one of the following conditions occurs during an Autostop, the
engine will be restarted automatically by the stop-start system:
■ The stop-start system is manually deactivated
■ the bonnet is opened
Page 179 of 331

Driving and operating177
Electric parking brake
Applying when vehicle is stationary
Pull switch m for approx.
one second, the electric parking
brake operates automatically with an adequate force. For maximum force,
e.g. parking with trailer or on inclines,
pull switch m twice.
The electric parking brake is applied
when control indicator m illuminates
3 117.
The electric parking brake can always
be activated, even if the ignition is off.
Do not operate electric parking brake
system too often without engine
running because this will discharge
the vehicle battery.
Before leaving the vehicle, check the
electric parking brake status. Control
indicator m 3 117.
Releasing
Switch on ignition. Keep brake pedal
depressed and then push switch m.
Drive away function
Depressing clutch pedal (manual
transmission) or engaging drive gear
(automatic transmission) and then
depressing the accelerator pedal
releases the electric parking brake
automatically. This is not possible
when the switch is pulled at the same
time.
This function also helps driving away
on inclines.
Aggressive drive away may reduce life time of wear parts.Dynamic braking when vehicle is
moving
When the vehicle is moving and the
switch m is kept pulled, the electric
parking brake system will decelerate
the vehicle, but will not apply
statically.
As soon as the switch m is released,
dynamic braking will be stopped.
Fault
Failure mode of electric parking brake
is indicated by control indicator j and
by a code number or a vehicle message which is displayed in the
Driver Information Centre. Vehicle
messages 3 128.
Apply electric parking brake: pull and
hold the switch m for more than
5 seconds. If control indicator m
illuminates, electric parking brake is
applied.
Release electric parking brake: push
and hold the switch m for more than
2 seconds. If control indicator m
extinguishes, electric parking brake is released.
Page 216 of 331

214Driving and operating
The boiling point depends on the
pressure and mixing ratio. At ambient pressure, it is between -42 °C (pure
propane) and -0.5 °C (pure butane).Caution
The system works at an ambient
temperature of approx. -8 °C to
100 °C.
Full function of the LPG system can
only be guaranteed with liquid gas
which complies with the minimum
requirements of DIN EN 589.
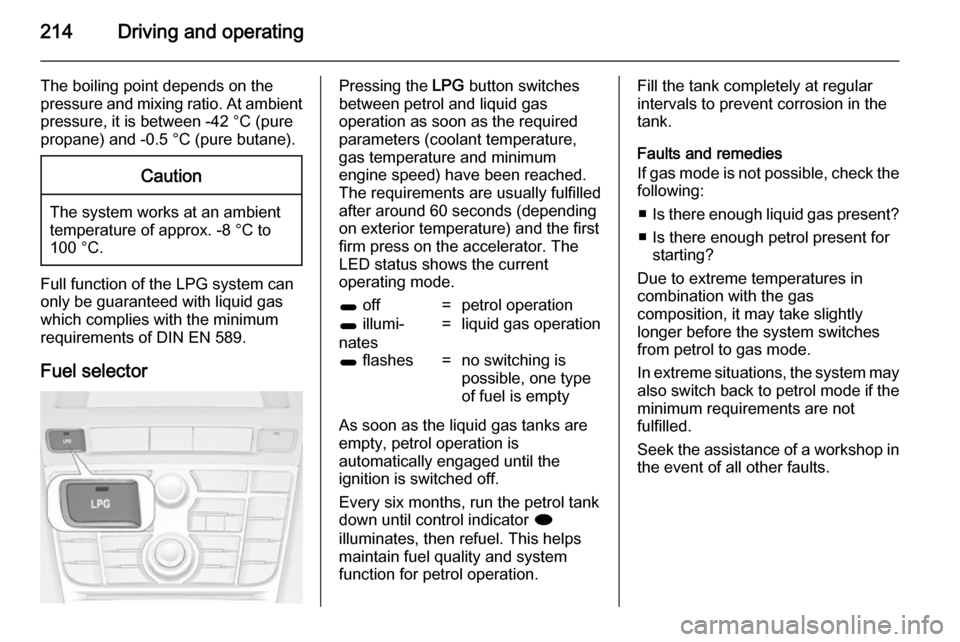
Fuel selector
Pressing the LPG button switches
between petrol and liquid gas
operation as soon as the required
parameters (coolant temperature,
gas temperature and minimum
engine speed) have been reached.
The requirements are usually fulfilled
after around 60 seconds (depending
on exterior temperature) and the first
firm press on the accelerator. The
LED status shows the current
operating mode.1 off=petrol operation1 illumi‐
nates=liquid gas operation1 flashes=no switching is
possible, one type
of fuel is empty
As soon as the liquid gas tanks are
empty, petrol operation is
automatically engaged until the
ignition is switched off.
Every six months, run the petrol tank
down until control indicator i
illuminates, then refuel. This helps
maintain fuel quality and system
function for petrol operation.
Fill the tank completely at regular
intervals to prevent corrosion in the
tank.
Faults and remedies
If gas mode is not possible, check the following:
■ Is there enough liquid gas present?
■ Is there enough petrol present for starting?
Due to extreme temperatures in
combination with the gas
composition, it may take slightly
longer before the system switches
from petrol to gas mode.
In extreme situations, the system may
also switch back to petrol mode if the
minimum requirements are not
fulfilled.
Seek the assistance of a workshop in the event of all other faults.
Page 225 of 331

Driving and operating223
Eye for break-away stopping cable
Attach breakaway stopping cable to
eye.
Check that the coupling ball bar is correctly installed
■ Green marking on rotary knob must
point towards green marking on
coupling ball bar.
■ There must be no gap between the
rotary handle and the coupling ball
bar.
■ The coupling ball bar must be firmly
engaged in the opening.
■ The coupling ball bar must be locked and the key removed.9 Warning
Towing a trailer is permitted only
when a coupling ball bar is fitted correctly. If the coupling ball bardoes not engage correctly, seekthe assistance of a workshop.
Dismounting the coupling ball
bar
Open the protective flap and turn the
key to position c to unlock the
coupling ball bar.
Pull out rotary handle and turn
clockwise as far as it will go. Pull out coupling ball bar downwards.
Insert sealing plug in opening. Fold away socket.
Replace cover, except 3-door
hatchback.
Trailer stability assist If the system detects snaking
movements, engine power is reduced
and the vehicle/trailer combination is selectively braked until the snaking
ceases. While system is working keep
steering wheel as still as possible.
Trailer stability assist (TSA) is a
function of the Electronic Stability
Control 3 179.
Page 226 of 331

224Vehicle careVehicle careGeneral Information...................224
Vehicle checks ........................... 225
Bulb replacement .......................232
Electrical system ........................252
Vehicle tools .............................. 258
Wheels and tyres .......................260
Jump starting ............................. 276
Towing ....................................... 278
Appearance care .......................280General Information
Accessories and vehicle
modifications
We recommend the use of genuine parts and accessories and factory
approved parts specific for your
vehicle type. We cannot assess or
guarantee reliability of other products
- even if they have a regulatory or
otherwise granted approval.
Do not make any modifications to the electrical system, e.g. changes of
electronic control units (chip tuning).Caution
When transporting the vehicle on
a train or on a recovery vehicle, the
mud flaps might be damaged.
Vehicle storage
Storage for a long period of time
If the vehicle is to be stored for several months:
■ Wash and wax the vehicle.
■ Have the wax in the engine compartment and underbody
checked.
■ Clean and preserve the rubber seals.
■ Fill up fuel tank completely.
■ Change the engine oil.
■ Drain the washer fluid reservoir.
■ Check the coolant antifreeze and corrosion protection.
■ Adjust tyre pressure to the value specified for full load.
■ Park the vehicle in a dry, well ventilated place. Engage first orreverse gear or set selector lever to P . Prevent the vehicle from rolling.
■ Do not apply the parking brake.
Page 227 of 331

Vehicle care225
■ Open the bonnet, close all doorsand lock the vehicle.
■ Disconnect the clamp from the negative terminal of the vehicle
battery. Beware that all systems are
not functional, e.g. anti-theft alarm
system.
Putting back into operation
When the vehicle is to be put back into
operation:
■ Connect the clamp to the negative terminal of the vehicle battery.
Activate the electronics of the
power windows.
■ Check tyre pressure.
■ Fill up the washer fluid reservoir.
■ Check the engine oil level.
■ Check the coolant level.
■ Fit the number plate if necessary.
End-of-life vehicle
recovery
Information on end-of-life vehicle
recovery centres and the recycling of
end-of-life vehicles is available on ourwebsite, where legally required. Only
entrust this work to an authorised
recycling centre.
Gas vehicles must be recycled by a
service centre authorised for gas
vehicles.Vehicle checks
Performing work9 Warning
Only perform engine compartment
checks when the ignition is off.
The cooling fan may start
operating even if the ignition is off.
Page 228 of 331

226Vehicle care9Danger
The ignition system and Xenon
headlights use extremely high
voltage. Do not touch.
Bonnet
Opening
Pull the release lever and return it to
its original position.
Move the safety catch sideways to the left vehicle side and open the bonnet.
Secure the bonnet support.
If the bonnet is opened during an
Autostop, the engine will be restarted automatically for safety reasons.
Closing Before closing the bonnet, press the
support into the holder.
Lower the bonnet and let it fall into the
latch from a low height (20-25 cm).
Check that the bonnet is engaged.Caution
Do not press the bonnet into the
latch to avoid dents.
Engine oil
Check the engine oil level manually on a regular basis to prevent damage
to the engine. Ensure that the correct
specification of oil is used.
Recommended fluids and lubricants
3 285.
Check with the vehicle on a level
surface. The engine must be at
operating temperature and switched
off for at least 5 minutes.
Page 230 of 331

228Vehicle care
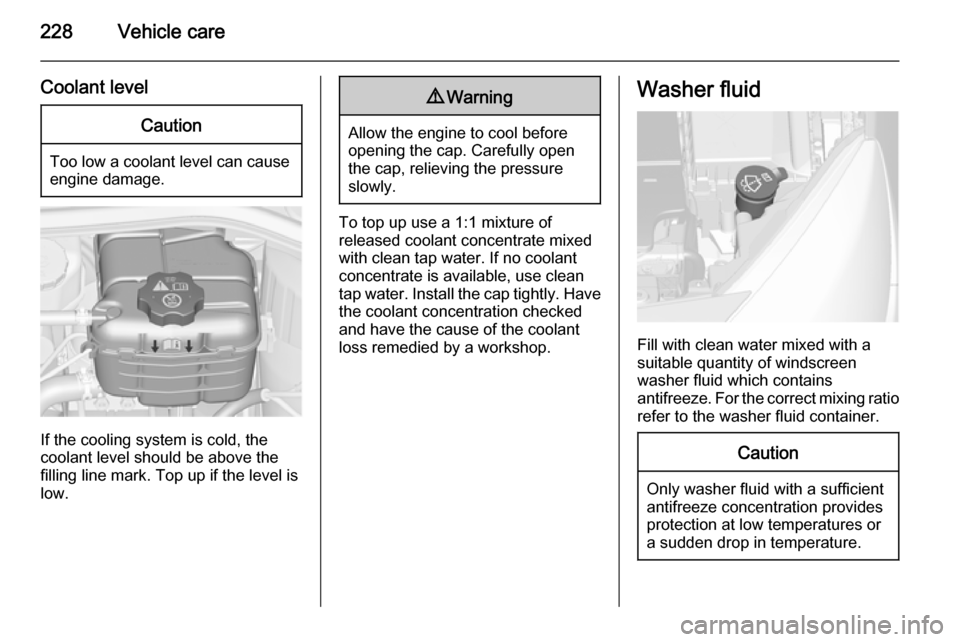
Coolant levelCaution
Too low a coolant level can causeengine damage.
If the cooling system is cold, the
coolant level should be above the
filling line mark. Top up if the level is
low.
9 Warning
Allow the engine to cool before
opening the cap. Carefully open
the cap, relieving the pressure
slowly.
To top up use a 1:1 mixture of
released coolant concentrate mixed
with clean tap water. If no coolant
concentrate is available, use clean
tap water. Install the cap tightly. Have
the coolant concentration checked
and have the cause of the coolant
loss remedied by a workshop.
Washer fluid
Fill with clean water mixed with a
suitable quantity of windscreen
washer fluid which contains
antifreeze. For the correct mixing ratio refer to the washer fluid container.
Caution
Only washer fluid with a sufficient
antifreeze concentration provides
protection at low temperatures or
a sudden drop in temperature.
Page 234 of 331

232Vehicle care
Wiper blade on the rear window
Lift wiper arm. Disengage wiper bladeas shown in illustration and remove.
Attach the wiper blade slightly angled
to the wiper arm and push until it
engages.
Lower wiper arm carefully.
Bulb replacement
Switch off the ignition and switch off
the relevant switch or close the doors.
Only hold a new bulb at the base! Do not touch the bulb glass with bare
hands.
Use only the same bulb type for
replacement.
Replace headlight bulbs from within
the engine compartment.
Bulb check After a bulb replacement switch on
the ignition, operate and check the
lights.Halogen headlights
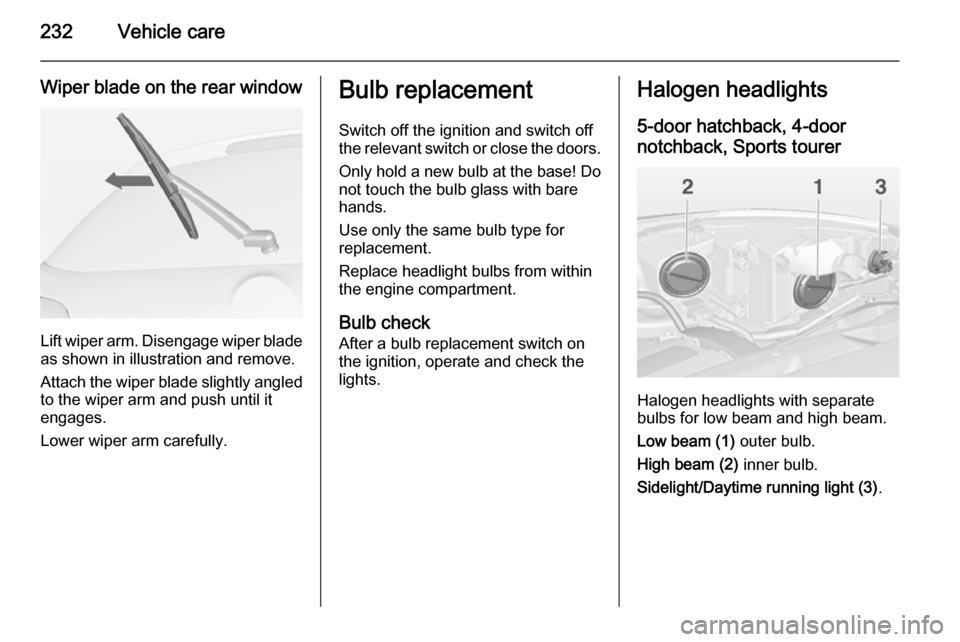
5-door hatchback, 4-door
notchback, Sports tourer
Halogen headlights with separate
bulbs for low beam and high beam.
Low beam (1) outer bulb.
High beam (2) inner bulb.
Sidelight/Daytime running light (3) .
Page 263 of 331

Vehicle care261
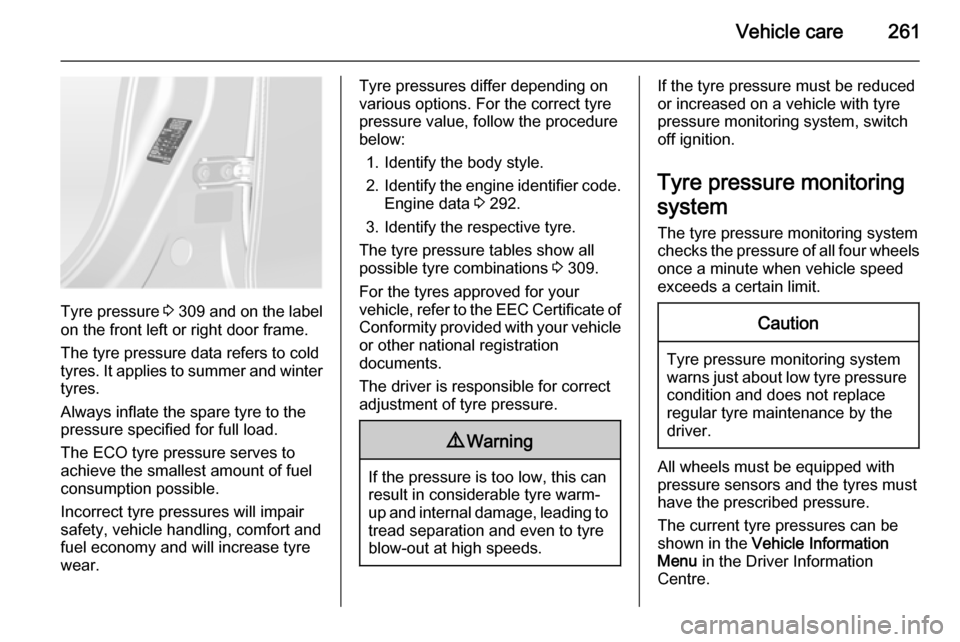
Tyre pressure 3 309 and on the label
on the front left or right door frame.
The tyre pressure data refers to cold
tyres. It applies to summer and winter tyres.
Always inflate the spare tyre to the
pressure specified for full load.
The ECO tyre pressure serves to
achieve the smallest amount of fuel
consumption possible.
Incorrect tyre pressures will impair
safety, vehicle handling, comfort and
fuel economy and will increase tyre
wear.
Tyre pressures differ depending on
various options. For the correct tyre
pressure value, follow the procedure
below:
1. Identify the body style.
2. Identify the engine identifier code.
Engine data 3 292.
3. Identify the respective tyre.
The tyre pressure tables show all
possible tyre combinations 3 309.
For the tyres approved for your
vehicle, refer to the EEC Certificate of Conformity provided with your vehicle
or other national registration
documents.
The driver is responsible for correct
adjustment of tyre pressure.9 Warning
If the pressure is too low, this can
result in considerable tyre warm-
up and internal damage, leading to tread separation and even to tyre
blow-out at high speeds.
If the tyre pressure must be reduced
or increased on a vehicle with tyre
pressure monitoring system, switch
off ignition.
Tyre pressure monitoring system The tyre pressure monitoring system
checks the pressure of all four wheels
once a minute when vehicle speed
exceeds a certain limit.Caution
Tyre pressure monitoring system
warns just about low tyre pressure
condition and does not replace
regular tyre maintenance by the
driver.
All wheels must be equipped with
pressure sensors and the tyres must
have the prescribed pressure.
The current tyre pressures can be
shown in the Vehicle Information
Menu in the Driver Information
Centre.