turn signal OPEL ASTRA K 2018.5 Manual user
[x] Cancel search | Manufacturer: OPEL, Model Year: 2018.5, Model line: ASTRA K, Model: OPEL ASTRA K 2018.5Pages: 317, PDF Size: 9.58 MB
Page 213 of 317
Driving and operating211will start a parking manoeuvre. Take
care regarding the availability of the
suggested parking slot.
Surface irregularities, e.g. on
construction zones, are not detected
by the system. The driver accepts
responsibility.
Note
After production, the system
requires a calibration. For optimal
parking guidance, a driving distance of at least 10 km, including a number
of bends, is required.
Side blind spot alert
The Side blind spot alert system detects and reports objects on either
side of the vehicle, within a specified
"blind spot" zone. The system
displays a visual alert in each exterior mirror, when detecting objects that
may not be visible in the interior and
exterior mirrors.
Side blind spot alert uses some of the
advanced parking assist sensors
which are located in the front and rear bumper on both sides of the vehicle.9 Warning
Side blind spot alert does not
replace driver vision.
The system does not detect:
● vehicles outside the side blind zones which may be rapidly
approaching
● pedestrians, cyclists or animals
Before changing a lane, always
check all mirrors, look over the
shoulder and use the turn signal.
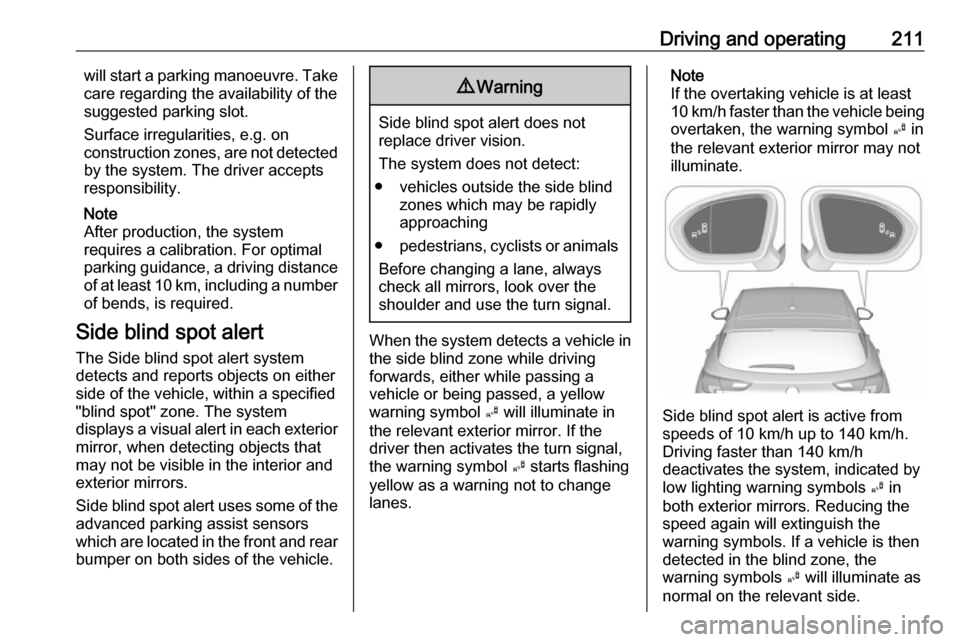
When the system detects a vehicle in the side blind zone while driving
forwards, either while passing a
vehicle or being passed, a yellow
warning symbol B will illuminate in
the relevant exterior mirror. If the
driver then activates the turn signal,
the warning symbol B starts flashing
yellow as a warning not to change
lanes.
Note
If the overtaking vehicle is at least
10 km/h faster than the vehicle being
overtaken, the warning symbol B in
the relevant exterior mirror may not
illuminate.
Side blind spot alert is active from
speeds of 10 km/h up to 140 km/h.
Driving faster than 140 km/h
deactivates the system, indicated by
low lighting warning symbols B in
both exterior mirrors. Reducing the speed again will extinguish the
warning symbols. If a vehicle is then
detected in the blind zone, the
warning symbols B will illuminate as
normal on the relevant side.
Page 218 of 317
216Driving and operating
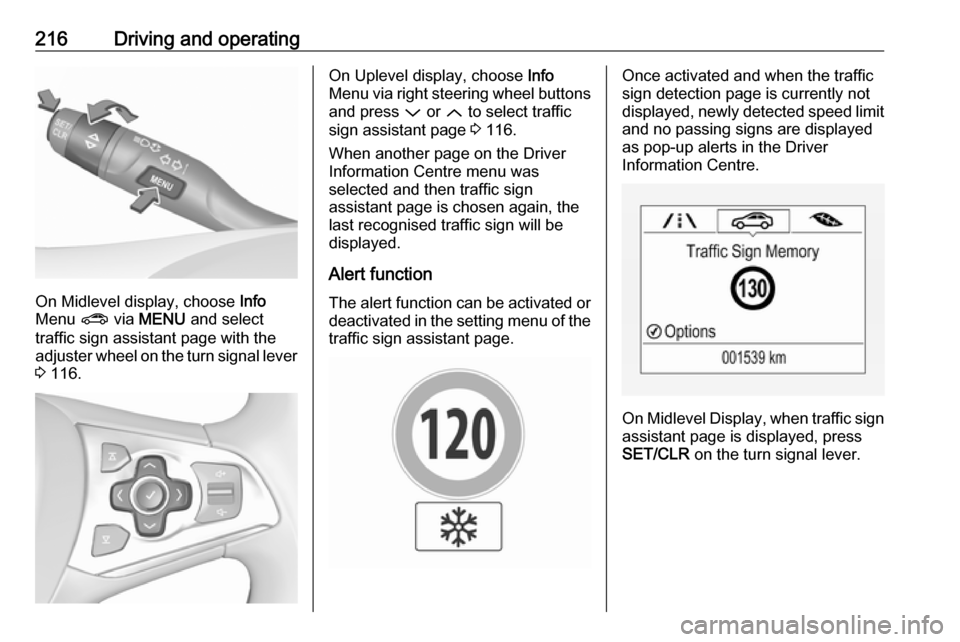
On Midlevel display, choose Info
Menu ? via MENU and select
traffic sign assistant page with the adjuster wheel on the turn signal lever
3 116.
On Uplevel display, choose Info
Menu via right steering wheel buttons
and press P or Q to select traffic
sign assistant page 3 116.
When another page on the Driver Information Centre menu was
selected and then traffic sign
assistant page is chosen again, the
last recognised traffic sign will be
displayed.
Alert function The alert function can be activated or
deactivated in the setting menu of the
traffic sign assistant page.Once activated and when the traffic
sign detection page is currently not
displayed, newly detected speed limit
and no passing signs are displayed
as pop-up alerts in the Driver
Information Centre.
On Midlevel Display, when traffic sign assistant page is displayed, press
SET/CLR on the turn signal lever.
Page 219 of 317
Driving and operating217
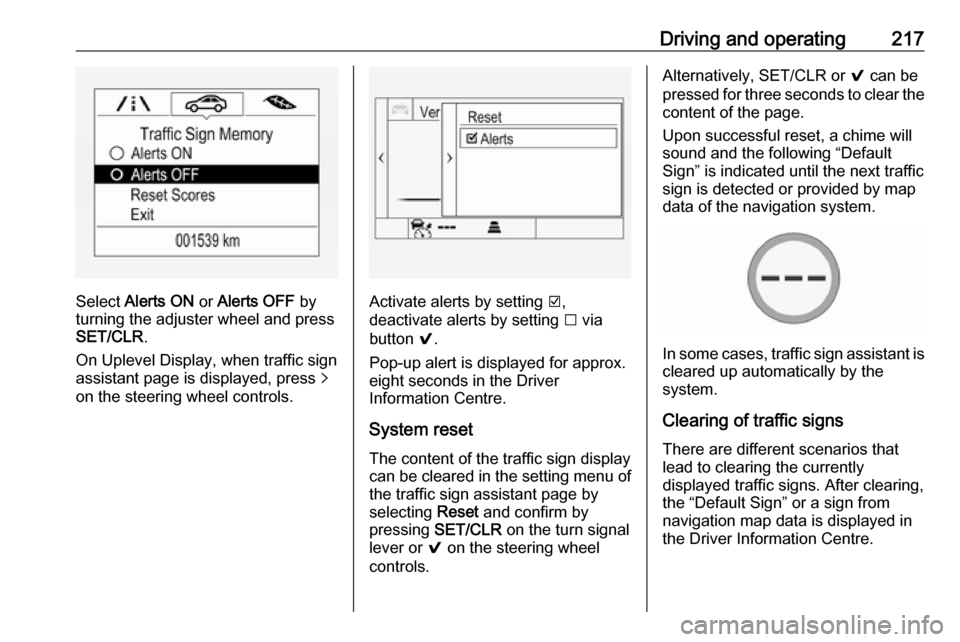
Select Alerts ON or Alerts OFF by
turning the adjuster wheel and press
SET/CLR .
On Uplevel Display, when traffic sign
assistant page is displayed, press q
on the steering wheel controls.Activate alerts by setting J,
deactivate alerts by setting I via
button 9.
Pop-up alert is displayed for approx.
eight seconds in the Driver
Information Centre.
System reset The content of the traffic sign display
can be cleared in the setting menu of
the traffic sign assistant page by
selecting Reset and confirm by
pressing SET/CLR on the turn signal
lever or 9 on the steering wheel
controls.
Alternatively, SET/CLR or 9 can be
pressed for three seconds to clear the
content of the page.
Upon successful reset, a chime will
sound and the following “Default
Sign” is indicated until the next traffic
sign is detected or provided by map
data of the navigation system.
In some cases, traffic sign assistant is
cleared up automatically by the
system.
Clearing of traffic signs
There are different scenarios that
lead to clearing the currently
displayed traffic signs. After clearing,
the “Default Sign” or a sign from
navigation map data is displayed in
the Driver Information Centre.
Page 221 of 317
Driving and operating219sufficient. Turn steering wheel gently
into opposite direction, if lane change
is intended.
When crossing a lane marking
significantly, lane keep assist starts a
visual and acoustic warning.
Unintended lane departure is
assumed
● without using turn signal
● using the turn signal in the opposite direction of the lane
departure
● without braking
● without acceleration
● without active steering.
Note
The system is switched off during
detection of ambiguous lane
markings, e.g. in construction areas.
Note
The system may be switched off if it
detects lanes which are too narrow,
too wide or too curved.Activation
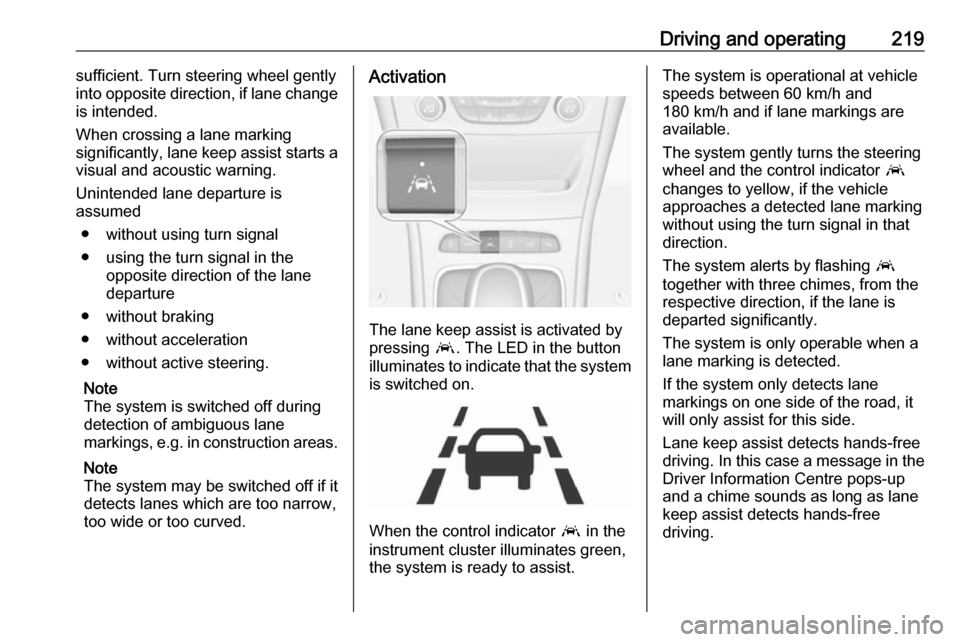
The lane keep assist is activated by
pressing a. The LED in the button
illuminates to indicate that the system
is switched on.
When the control indicator a in the
instrument cluster illuminates green,
the system is ready to assist.
The system is operational at vehicle
speeds between 60 km/h and
180 km/h and if lane markings are
available.
The system gently turns the steering
wheel and the control indicator a
changes to yellow, if the vehicle
approaches a detected lane marking
without using the turn signal in that
direction.
The system alerts by flashing a
together with three chimes, from the
respective direction, if the lane is
departed significantly.
The system is only operable when a
lane marking is detected.
If the system only detects lane
markings on one side of the road, it
will only assist for this side.
Lane keep assist detects hands-free
driving. In this case a message in the
Driver Information Centre pops-up
and a chime sounds as long as lane
keep assist detects hands-free
driving.
Page 243 of 317
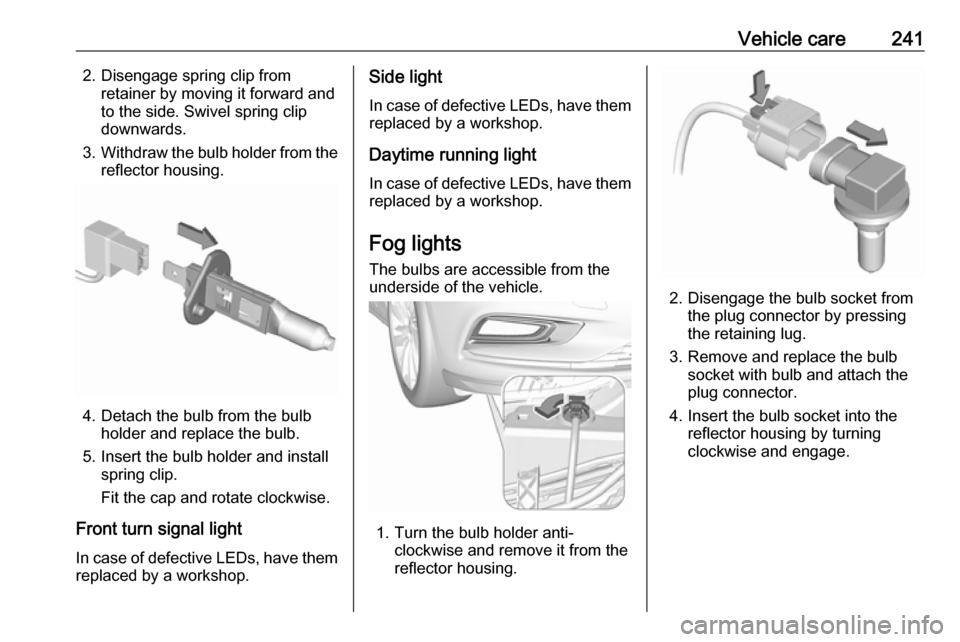
Vehicle care2412. Disengage spring clip fromretainer by moving it forward and
to the side. Swivel spring clip
downwards.
3. Withdraw the bulb holder from the
reflector housing.
4. Detach the bulb from the bulb holder and replace the bulb.
5. Insert the bulb holder and install spring clip.
Fit the cap and rotate clockwise.
Front turn signal light
In case of defective LEDs, have them replaced by a workshop.
Side light
In case of defective LEDs, have them
replaced by a workshop.
Daytime running light In case of defective LEDs, have them
replaced by a workshop.
Fog lights
The bulbs are accessible from the
underside of the vehicle.
1. Turn the bulb holder anti- clockwise and remove it from the
reflector housing.
2. Disengage the bulb socket from the plug connector by pressing
the retaining lug.
3. Remove and replace the bulb socket with bulb and attach the
plug connector.
4. Insert the bulb socket into the reflector housing by turning
clockwise and engage.
Page 245 of 317
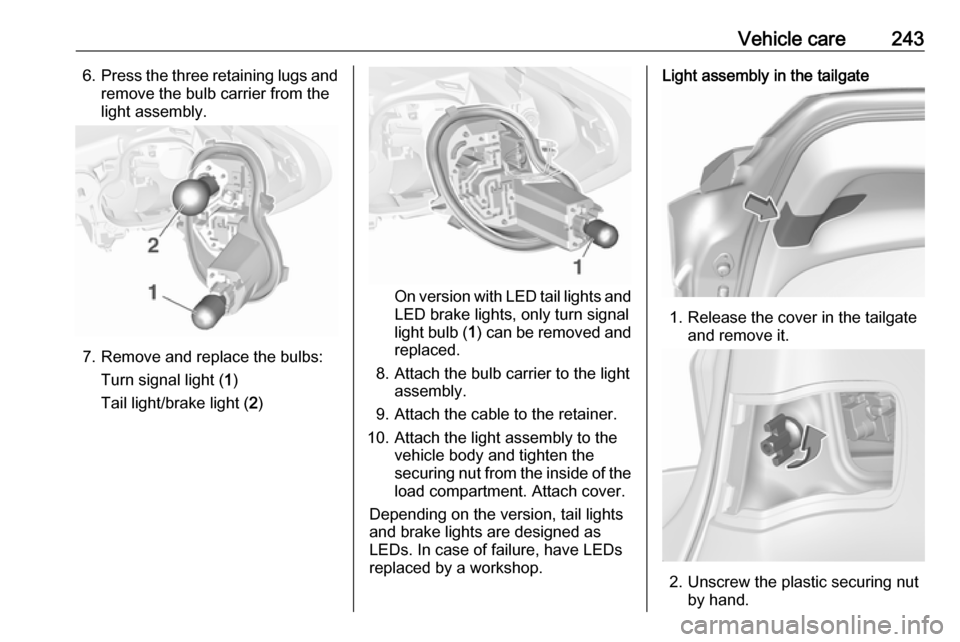
Vehicle care2436.Press the three retaining lugs and
remove the bulb carrier from the
light assembly.
7. Remove and replace the bulbs:
Turn signal light ( 1)
Tail light/brake light ( 2)
On version with LED tail lights and
LED brake lights, only turn signal
light bulb ( 1) can be removed and
replaced.
8. Attach the bulb carrier to the light assembly.
9. Attach the cable to the retainer.
10. Attach the light assembly to the vehicle body and tighten the
securing nut from the inside of the load compartment. Attach cover.
Depending on the version, tail lights
and brake lights are designed as
LEDs. In case of failure, have LEDs replaced by a workshop.
Light assembly in the tailgate
1. Release the cover in the tailgate and remove it.
2. Unscrew the plastic securing nutby hand.
Page 248 of 317
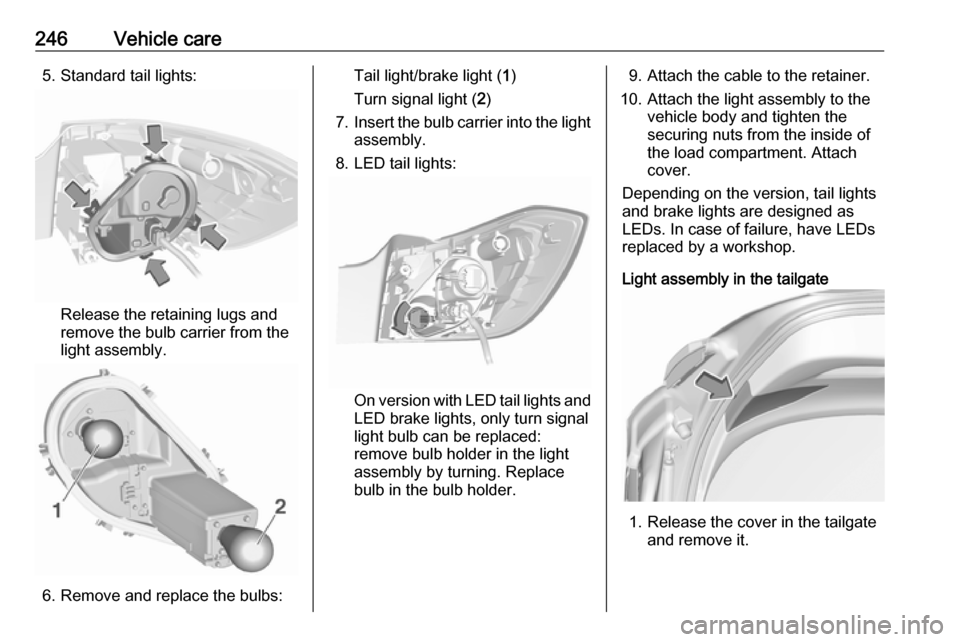
246Vehicle care5. Standard tail lights:
Release the retaining lugs and
remove the bulb carrier from the
light assembly.
6. Remove and replace the bulbs:
Tail light/brake light ( 1)
Turn signal light ( 2)
7. Insert the bulb carrier into the light
assembly.
8. LED tail lights:
On version with LED tail lights and
LED brake lights, only turn signal
light bulb can be replaced:
remove bulb holder in the light
assembly by turning. Replace
bulb in the bulb holder.
9. Attach the cable to the retainer.
10. Attach the light assembly to the vehicle body and tighten the
securing nuts from the inside of
the load compartment. Attach
cover.
Depending on the version, tail lights
and brake lights are designed as
LEDs. In case of failure, have LEDs
replaced by a workshop.
Light assembly in the tailgate
1. Release the cover in the tailgate and remove it.
Page 264 of 317

262Vehicle careSelect● Light for comfort pressure up to
three people.
● Eco for Eco pressure up to
three people.
● Max for full loading.
Tyre pressure sensor matching
process
Each tyre pressure sensor has a
unique identification code. The
identification code must be matched
to a new wheel position after rotating the wheels or exchanging the
complete wheel set and if one or more tyre pressure sensors were replaced.The tyre pressure sensor matching
process should also be performed
after replacing a spare wheel with a
road wheel containing the tyre
pressure sensor.
The malfunction light w and the
warning message or code should go
off at the next ignition cycle. The
sensors are matched to the wheel
positions, using a relearn tool, in the
following order: left side front wheel,
right side front wheel, right side rearwheel and left side rear wheel. The
turn signal light at the current active
position is illuminated until sensor is
matched.
Consult a workshop for service. There
are two minutes to match the first
wheel position, and five minutes
overall to match all four wheel
positions. If it takes longer, the
matching process stops and must be
restarted.
The tyre pressure sensor matching
process is:
1. Apply the parking brake.
2. Turn the ignition on.
3. On vehicles with automatic transmission: set the selector
lever to P.
On vehicles with manual
transmission: select neutral.
4. Midlevel display: Use MENU on the turn signal
lever to select the Vehicle
Information Menu ? in the
Driver Information Centre.
Uplevel display:Press p on the steering wheel to
open main menu page.
Select the Info page with Q or P.
Confirm with 9.
5. Select the tyre pressure menu. Midlevel display:
Uplevel display: