tow PONTIAC GRAND AM 1998 Owner's Manual
[x] Cancel search | Manufacturer: PONTIAC, Model Year: 1998, Model line: GRAND AM, Model: PONTIAC GRAND AM 1998Pages: 370, PDF Size: 16.11 MB
Page 124 of 370
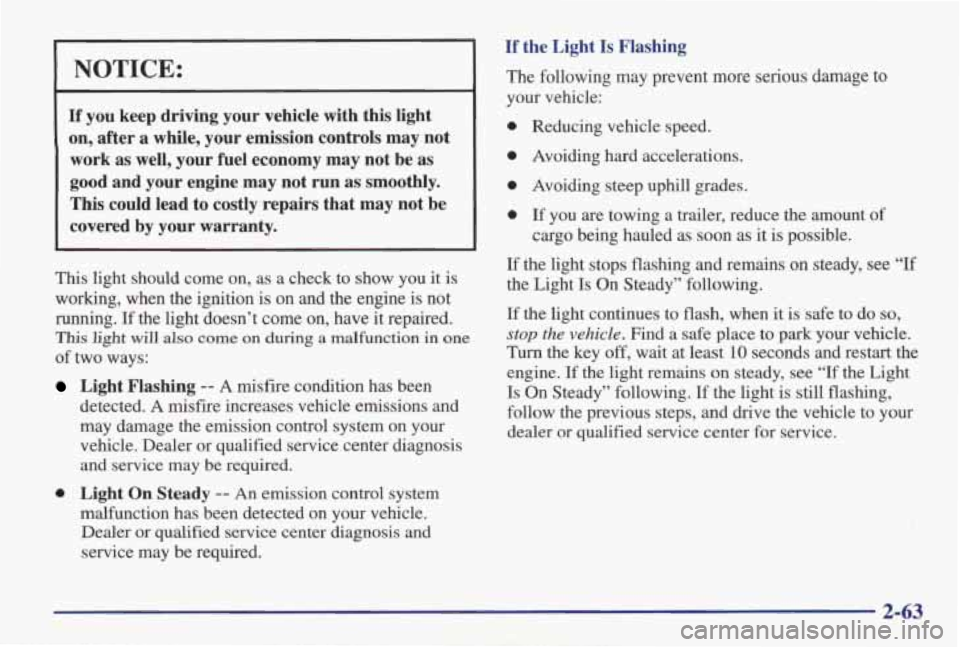
NOTICE:
If you keep driving your vehicle with this light on, after a while, your emission controls may not
work as well, your fuel economy may not be as
good and your engine may not run as smoothly.
This could lead to costly repairs that may not
be
covered by your warranty.
This light should come on, as a check to show you it is
working, when the ignition is on and the engine is not
running. If the light doesn’t come on, have it repaired.
This light will also come on during a malfunction in one
of two ways:
Light Flashing -- A misfire condition has been
detected.
A misfire increases vehicle emissions and
may damage the emission control system on your
vehicle. Dealer or qualified service center diagnosis and service may be required.
malfunction has been detected on your vehicle.
Dealer or qualified service center diagnosis and
service may be required.
0 Light On Steady -- An emission control system
If the Light Is Flashing
The following may prevent more serious damage to
your vehicle:
0 Reducing vehicle speed.
0 Avoiding hard accelerations.
0 Avoiding steep uphill grades.
0 If you are towing a trailer, reduce the amount of
cargo being hauled as
soon as it is possible.
If the light stops flashing and remains on steady, see “If
the Light Is On Steady” following.
If the light continues to flash, when it is safe to do so,
stop the vehicle. Find a safe place to park your vehicle.
Turn the key
off, wait at least 10 seconds and restart the
engine.
If the light remains on steady, see “If the Light
Is On Steady” following.
If the light is still flashing,
follow the previous steps, and drive the vehicle
to your
dealer or qualified service center for service.
2-63
Page 127 of 370
CHECK
OIL
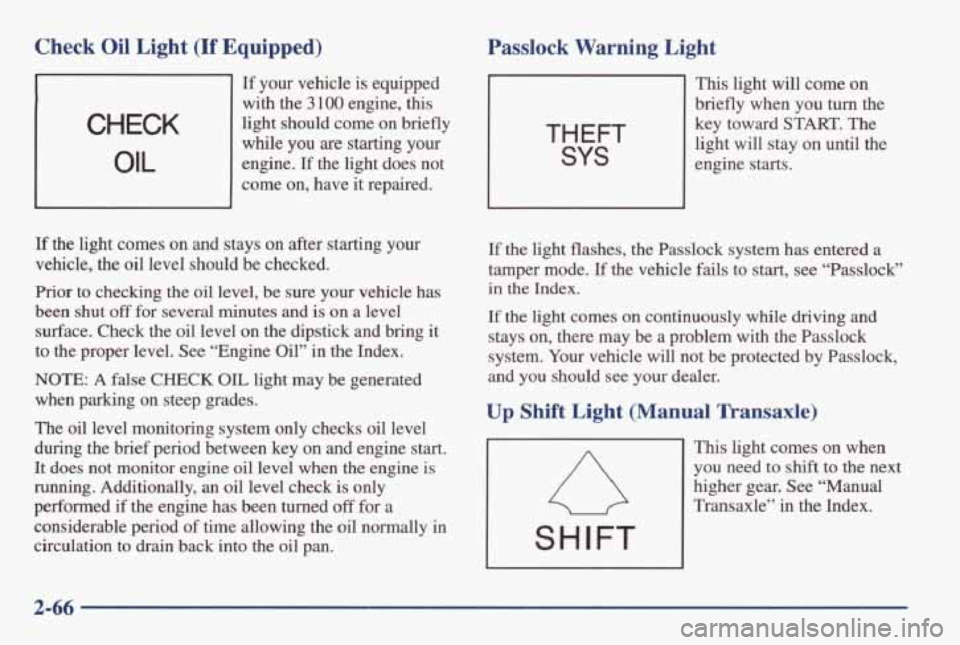
Check Oil Light (If Equipped)
If your vehicle is equipped
with the
3 100 engine, this
light should come
on briefly
while you
are starting your
engine.
If the light does not
come on, have it repaired.
A
If the light comes on and stays on after starting your
vehicle, the oil level should be checked.
Prior to checking
the oil level, be sure your vehicle has
been shut
off for several minutes and is on a level
surface. Check the oil level on the dipstick and bring
it
to the proper level. See “Engine Oil” in the Index.
NOTE: A false CHECK OIL light may be generated
when parking on steep grades.
The oil level monitoring system only checks oil level
during the brief period between key
on and engine start.
It does not monitor engine oil level when the engine
is
running. Additionally, an oil level check is only
performed if the engine
has been turned off for a
considerable period
of time allowing the oil normally in
circulation to drain back into the oil
pan.
Passlock Warning Light
THEFT
SYS
This light will come on
briefly when you
turn the
key toward
START. The
light will stay on until the
engine starts.
If the light flashes, the Passlock system has entered a
tamper mode. If the vehicle fails to start, see “Passlock”
in the Index.
If the light comes on continuously while driving and
stays
on, there may be a problem with the Passlock
system. Your vehicle will not be protected by Passlock,
and you should
see your dealer.
Up Shift Light (Manual Transaxle)
This light comes on when
you need to shift to the
next
higher gear. See “Manual
Transaxle” in the Index.
I SHIFT I
2-66
Page 135 of 370
Heating Defrosting and Defogging
Turning the right control knob to HEATER and the
center CUR^^ knob to the right sends some heated air
through the heater ducts toward your feet, and some
through the defroster
vents.
VENT and HEATER are economical positions because
the air conditioner compressor doesn’t run in these
two
settings. This reduces engine load, resulting in improved
fuel economy. If either setting fails to keep you
comfortable, or causes your windows to fog up, turn the
right control
knob to one of the air conditioning
positions,
or to DEFROST.
If you have the optional engine coolant heater (engine
block heater) and
use it during cold weather, 0°F
(- 1 8 O C) or lower, your heating system will more quickly
provide
heat because the engine coolant is already
warmed. See “Engine Coolant Heater” in the Index.
To defrost the windshield, turn all three control knobs to
the far right.
The
DEFROST setting directs air through the defroster
vents located on top
of the instrument panel.
To warm passengers while keeping the windows clean,
use
BLEND.
To defog the side windows, turn the right control knob
to
BI-LEVEL and the fan control knob to HIGH. Aim
the side vents toward the side windows. For increased
airflow
to the side vents, close the center vents.
3-4
Page 158 of 370
Section 4 Your Driving and the Road
Here you’ll find information about driving on different kinds\
of roads and in varying weather conditions. We’ve also
included many other useful tips on driving.
4-2
4-3
4-6
4-6
4- 10
4-13
4-13
4- 14
4-16
4-18
Defensive Driving
Drunken Driving
Control of a Vehicle
Braking Steering
Off-Road Recovery
Loss of Control
Driving at Night
Driving in Rain
and on Wet Roads
Passing
4-2 1
4-22
4-23
4-24
4-24
4-26
4-30
4-33
4-35
City Driving
Freeway Driving
Before Leaving on a Long Trip
Highway Hypnosis
Hill and Mountain Roads
Winter Driving
Recreational Vehicle Towing
Loading Your Vehicle
Towing a Trailer
4-1
Page 187 of 370
Run your engine only as long as you must. This saves
fuel.
When you run the engine, make it go a little faster
than just idle. That
is, push the accelerator slightly. This
uses less fuel for the heat that you get and it keeps the
battery charged. You will need a well-charged battery to
restart the vehicle, and possibly for signaling later on
with
your headlamps. Let the heater run for a while.
Then, shut the engine
off and close the window almost
all the way
to preserve the heat. Start the engine again
and repeat this only when you feel really uncomfortable
from the cold. But do it as little as possible. Preserve the
fuel
as long as you can. To help keep warm, you can get
out of the vehicle and do some fairly vigorous exercises
every half hour or
so until help comes.
Recreational Vehicle Towing
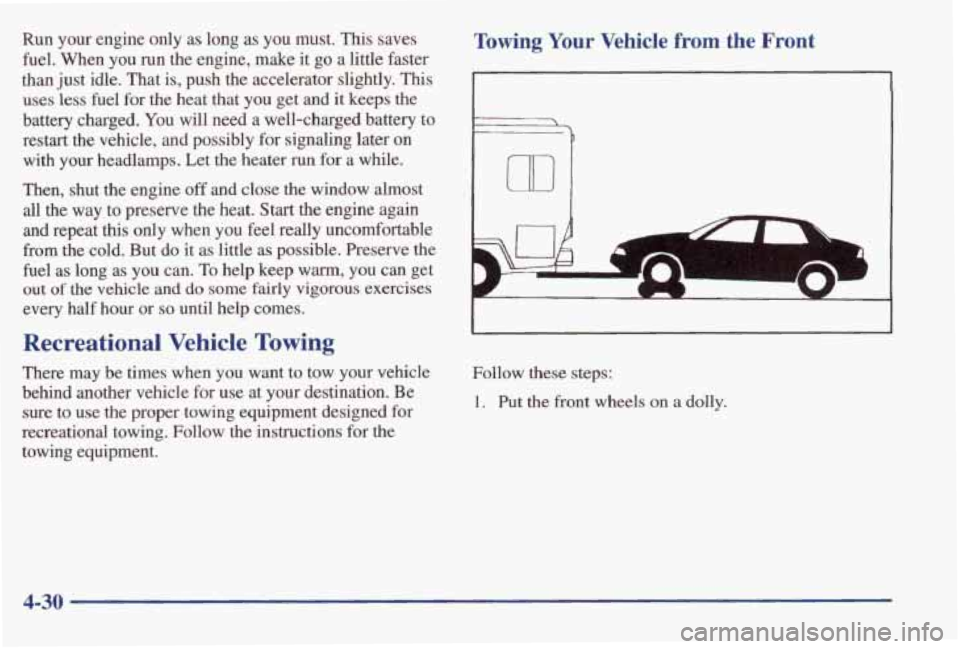
There may be times when you want to tow your vehicle
behind another vehicle for use at your destination. Be
sure to use the proper towing equipment designed for
recreational towing. Follow the instructions for the
towing equipment.
Towing Your Vehicle from the From
I
Follow these steps:
1. Put the front wheels on a dolly.
4-30
Page 188 of 370
NOTICE:
Do not tow your vehicle with the front wheels in
contact with the ground, or the automatic transaxle could be damaged.
2.
3.
4.
5.
6.
Set the parking brake.
Open the fuse panel on the driver’s side of the
instrument panel. Remove the fuse labeled
PRNDL. This will keep your battery from draining
while towing.
Turn the ignition key to OFF to unlock the steering
wheel.
See “Ignition Positions” in the Index.
Clamp the steering wheel in a straight-ahead
position, with a clamping device designed for towing.
Release the parking brake.
Towing Your Vehicle from the Front
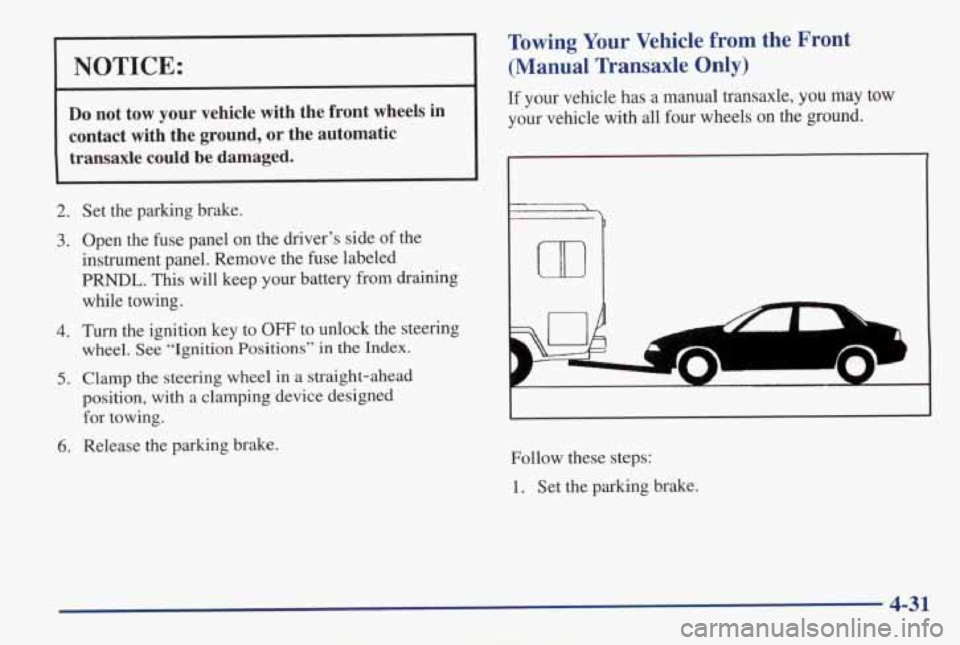
(Manual Transaxle Only)
If your vehicle has a manual transaxle, you may tow
your vehicle with all four wheels on the ground.
F
@- I
Follow these steps:
1. Set the parking brake.
4-31
Page 189 of 370
2.
3.
4.
5.
Open the fuse panel on the driver’s side of the
instrument panel. Remove the fuse labeled
PWL. This will keep your battery from draining
while towing.
Turn the ignition key to OFF to unlock the
steering wheel.
Shift your manual transaxle to NEUTRAL (N).
Release the parking brake.
.. -
NOTICE:
Make sure that the towing speed does not exceed
65 mph (110 km/h), or your vehicle could be
badly damaged.
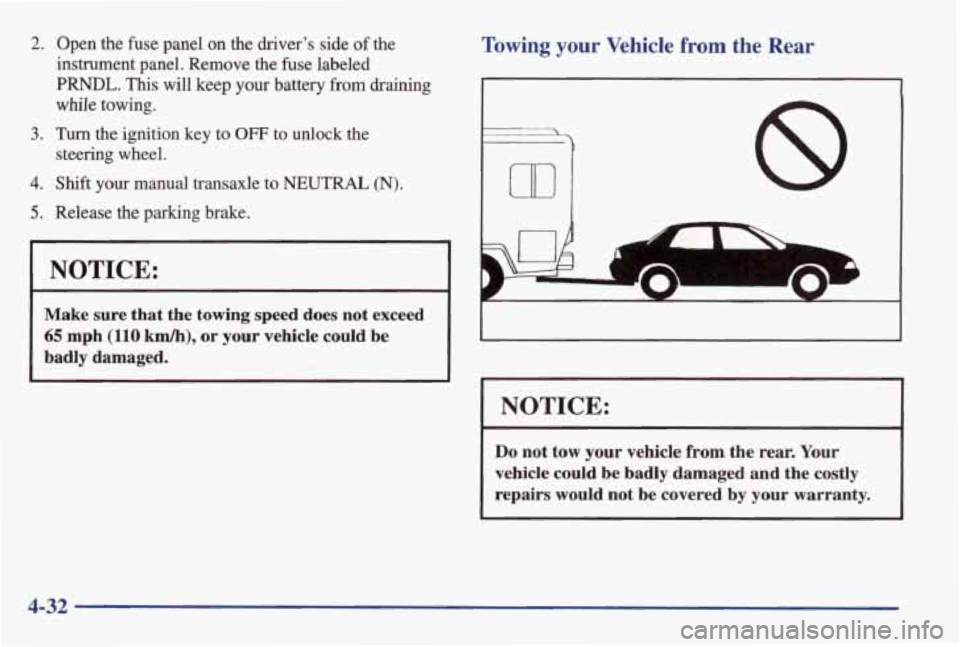
Towing your Vehicle from the Rear
b
m 8
c1
5
NOTICE:
Do not tow your vehicle from the rear. Your
vehicle could
be badly damaged and the costly
repairs would not be covered by your warranty.
4-32
Page 192 of 370
Towing a Trailer
I
If you don’t use the correct equipment and drive
properly, you can lose control when you pull a
trailer. For example,
if the trailer is too heavy, the
brakes may not work well
-- or even at all. You
and your passengers could be seriously injured.
You may also damage your vehicle; the resulting
repairs would not be covered by your warranty.
Pull a trailer only if you have followed all the
steps in this section. Ask your dealer for advice
and information about towing a trailer with
your vehicle.
>o not tow a trailer if your vehicle is equipped with a
!.4L (Code T) engine. Your
vehicle can tow a trailer if it is equipped with the
proper trailer towing equipment. To identify what the
vehicle trailering capacity is for your vehicle, you
should read the information in “Weight of the Trailer”
that appears later in this section. But trailering is
different than just driving your vehicle by itself.
Trailering means changes in handling, durability and
fuel economy. Successful, safe trailering takes correct
equipment, and it has to be used properly.
That’s the reason for
this part. In it are many
time-tested, important trailering tips and safety rules.
Many of these are important for your safety and that of
your passengers.
So please read this section carefully
before you pull a trailer.
Load-pulling
components such as the engine, transaxle,
wheel assemblies and tires are forced to work harder
against the drag of the added weight. The engine is
required to operate at relatively higher speeds and under
greater loads, generating extra heat. What’s more, the
trailer adds considerably to wind resistance, increasing
the pulling requirements.
4-35
Page 193 of 370
If You Do Decide To Pull A nailer
If you do, here are some important points:
0
0
0
0
There are many different laws, including speed limit
restrictions, having to do with trailering. Make sure
your rig
will be legal, not only where you live but
also where you’ll be driving.
A good source for this
information can be state or provincial police.
Consider using a sway control. You can
ask a hitch
dealer about sway controls.
Don’t tow
a trailer at all during the fist 1 ,O00 miles
(1 600 km) your new vehicle is driven. Your engine,
axle or other parts could be damaged.
Then, during the first
500 miles (800 km) that you
tow a trailer, don’t drive over 50 mph (80 km/h) and
don’t make starts at full throttle. This helps your
engine and other parts of your vehicle wear in at the
heavier loads.
0 Obey speed limit restrictions when towing a trailer.
Don’t
drive faster than the maximum posted speed
for trailers (or
no more than 55 mph (90 km/h)) to
save wear
on your vehicle’s parts.
Three important considerations have
to do with weight:
the weight of the trailer,
the weight of the trailer tongue
and the total weight on your vehicle’s tires.
Weight of the Trailer
How heavy can a trailer safely be?
It should never weigh more than 1,000 lbs. (450 kg). But
even that can be too heavy.
It depends on how
you plan to use your rig. For
example, speed, altitude, road grades, outside
temperature and how much your vehicle
is used to pull a
trailer are
all important. And, it can also depend on any
special equipment
that you have on your vehicle.
4-36
Page 194 of 370
You can ask your dealer for our trailering information or
advice, or you can write us at:
Pontiac Customer Assistance Center One Pontiac Plaza
Pontiac, Michigan 48340-2952
In Canada, write to: General Motors of Canada Limited
Customer Communication Centre
1908 Colonel Sam Drive
Oshawa, Ontario LlH 8P7
Weight of the Trailer Tongue
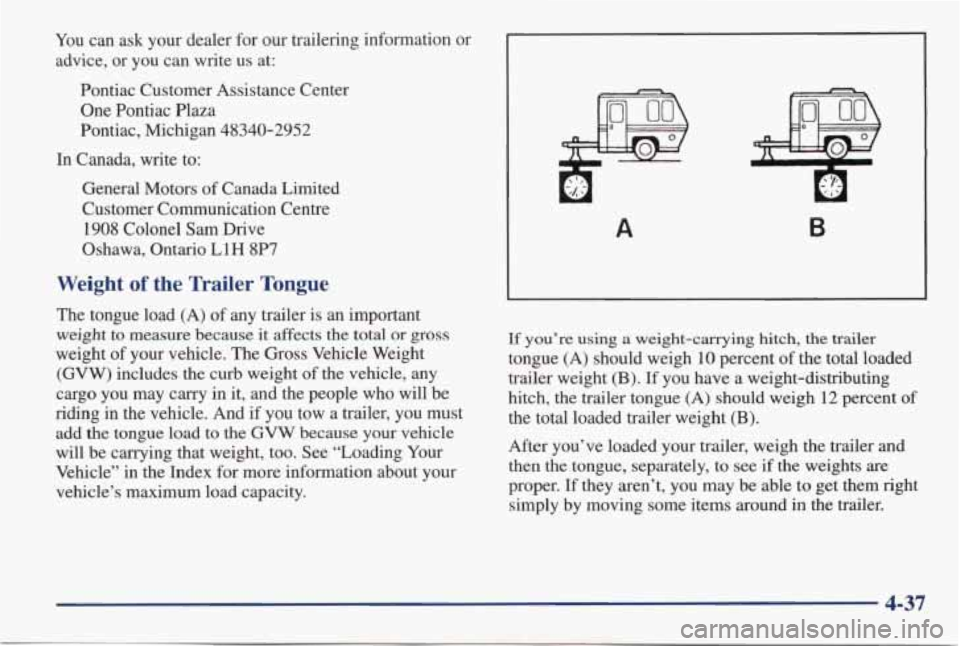
The tongue load (A) of any trailer is an important
weight
to measure because it affects the total or gross
weight of your vehicle. The Gross Vehicle Weight
(GVW) includes the curb weight of the vehicle, any
cargo you may carry
in it, and the people who will be
riding in the vehicle. And if you tow a trailer, you must
add
the tongue load to the GVW because your vehicle
will be carrying that weight, too. See “Loading Your
Vehicle” in the Index for more information about your
vehicle’s maximum load capacity.
A B
If you’re using a weight-carrying hitch, the trailer
tongue (A) should weigh 10 percent of the total loaded
trailer weight
(B). If you have a weight-distributing
hitch, the trailer tongue (A) should weigh 12 percent of
the total loaded trailer weight
(B).
After you’ve loaded your trailer, weigh the trailer and
then the tongue, separately, to
see if the weights are
proper. If they aren’t, you may be able to get them right
simply by moving some items around in the trailer.
4-37