display PONTIAC GRAND PRIX 2003 User Guide
[x] Cancel search | Manufacturer: PONTIAC, Model Year: 2003, Model line: GRAND PRIX, Model: PONTIAC GRAND PRIX 2003Pages: 378, PDF Size: 17.64 MB
Page 136 of 378
Battery Run-Down Protection
Your vehicle has a feature to help prevent you from
draining the battery in case you accidentally leave the
interior, trunk or underhood lamps
on. If you leave any of
these lamps on while the ignition is in LOCK or OFF,
they will automatically turn off after 10 minutes. The
lamps won’t come back
on again until you do one of
the following:
Turn the ignition to RUN or ACCESSORY.
Turn the interior lamps thumbwheel completely to
the right, then back slightly to the left.
Open (or close and reopen) a door that is closed.
If the vehicle has less than 15 miles (25 km) on
the odometer, the battery saver will turn
off the lamps
after only three minutes.
Head-Up Display (HUD)
.. :he HUD imag- .s too bri, It o DO high in
your field
of view, it may take you more time to
see things you need to see when it’s dark
outside. Be sure to keep the HUD image dim
and placed
low in your field of view.
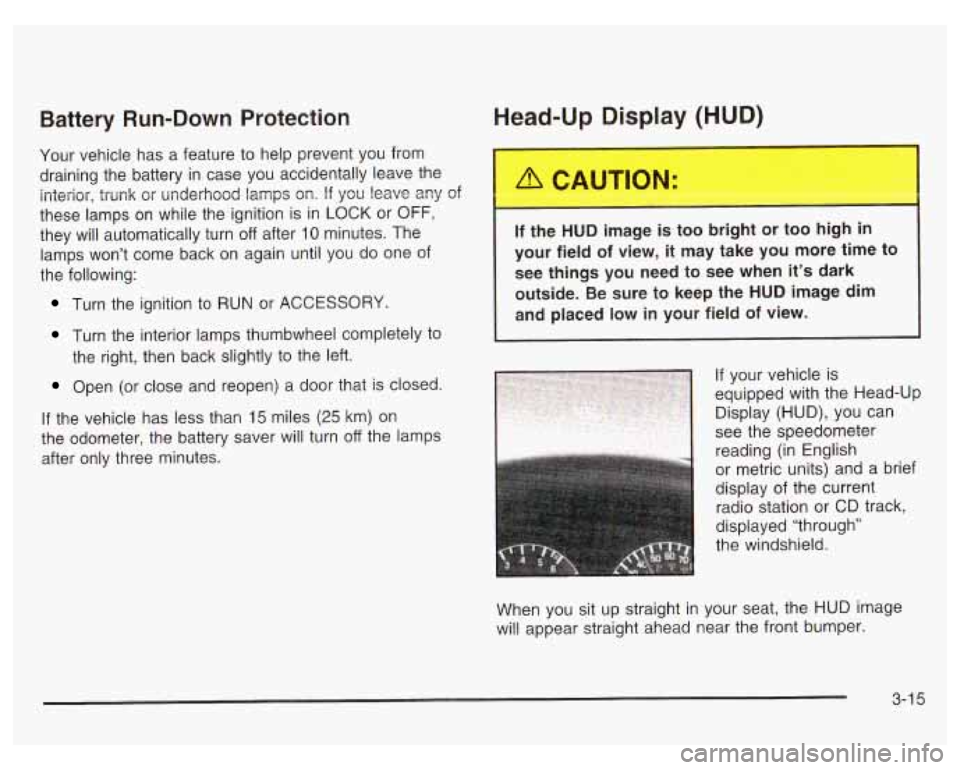
If your vehicle is
equipped with the Head-Up
Display (HUD), you can
1 see the speedometer
reading (in English
or metric units) and a brief
display of the current
radio station or CD track,
displayed “through”
the windshield.
When you sit up straight in your seat, the HUD image
will appear straight ahead near the front bumper.
3-1 5
Page 137 of 378

The HUD also shows the following lights when they are
lit on the instrument panel cluster:
Turn Signal Indicators
High-Beam Indicator Symbol
Low Fuel Symbol
The HUD will display CHECK GAGES when the
following items are lit on the instrument panel cluster:
Oil Warning Symbol
Coolant Temperature Symbol
Charging System Symbol
When the ignition key is turned to RUN, the entire HUD
image will come on. Then the Head-Up Display will
operate normally.
Notice: Although the HUD image appears to be
near the front
of the vehicle, do not use it as
a parking aid. The
HUD was not designed for that
purpose.
If you try to use it as such, you may
misjudge the distance and damage your vehicle.
When the HUD is on, the speedometer reading will be
displayed continually. The current radio station
or
CD track number will only be displayed for three
seconds after the radio or CD track status changes.
This will happen whenever one of the radio controls is
pressed, either on the radio itself or on the optional
steering wheel controls. To
adjust the HUD
so you can see it properly do the
following:
1. Adjust your seat, if necessary, to a comfortable
position.
2. Start the engine and adjust the HUD controls
located on the instrument panel, to the right
of
the steering wheel. Move the DIM thumbwheel up
or down to adjust brightness.
3-1 6
Page 138 of 378
3. Press the top of the UP/DN switch until the HUD
image stops moving. Then press the bottom of the
switch until the image is as low as possible but
in full view.
4. Move the DIM thumbwheel down ur;til the HUD
image is no brighter than necessary. To turn the
HUD off, move the DIM thumbwheel all the
way down.
If the sun comes out, it becomes cloudy, or if you turn
on your headlamps, you may need
to adjust the
HUD brightness again. The HUD will automatically dim
when the headlamps change from the
DRL mode to
full intensity. Polarized sunglasses could make the
HUD
image harder to see.
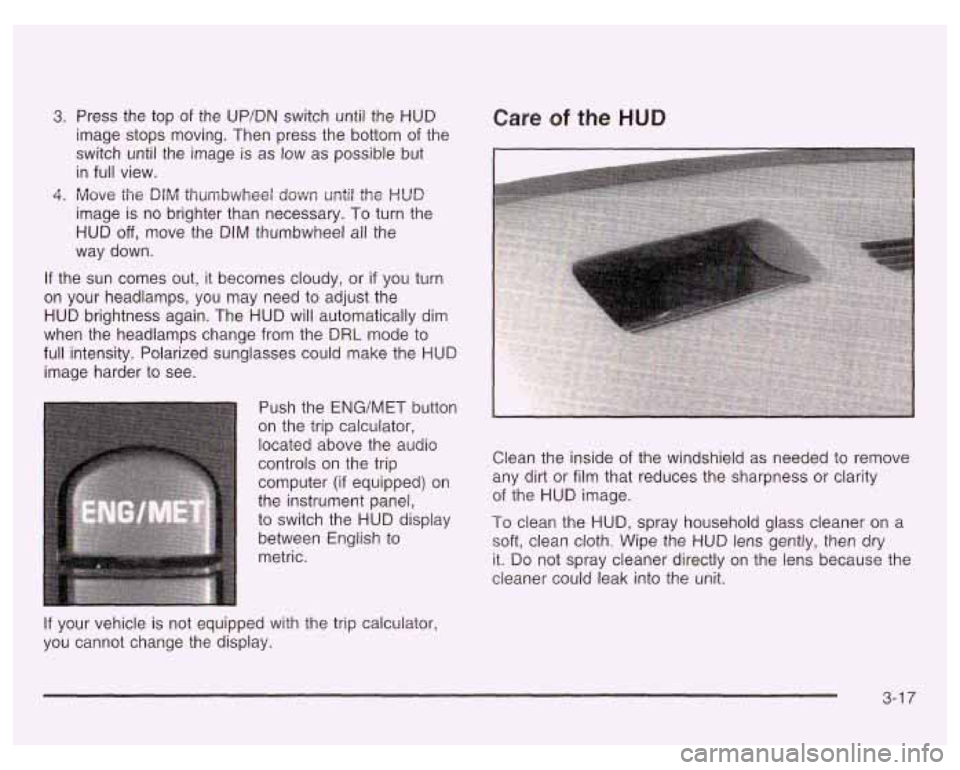
Push the
ENG/MET button
on the trip calculator,
located above the audio
controls on the trip
computer (if equipped) on
the instrument panel,
to switch the
HUD display
between English to
metric.
Care of the HUD
Clean the inside of the windshield as needed to remove
any dirt or film that reduces the sharpness or clarity
of the
HUD image.
To clean the HUD, spray household glass cleaner on a
soft, clean cloth. Wipe the
HUD lens gently, then dry
it. Do not spray cleaner directly on the lens because the
cleaner could leak into the unit.
If your vehicle is not equipped with the trip calculator,
you cannot change the display.
3-1 7
Page 146 of 378
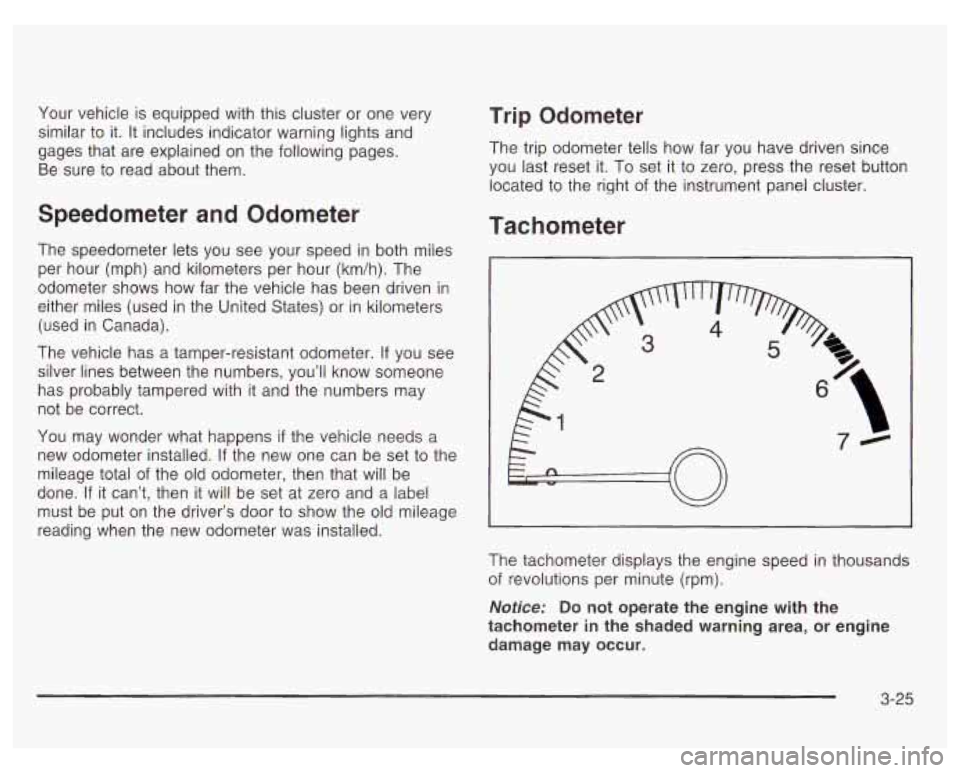
Your vehicle is equipped with this cluster or one very
similar to it. It includes indicator warning lights and
gages that are explained on the following pages.
Be sure to read about them.
Speedometer and Odometer
The speedometer lets you see your speed in both miles
per hour (mph) and kilometers per hour (km/h). The
odometer shows how far the vehicle has been driven in
either miles (used in the United States) or in kilometers
(used in Canada).
The vehicle has a tamper-resistant odometer.
If you see
silver lines between the numbers, you’ll know someone
has probably tampered with
it and the numbers may
not be correct.
You may wonder what happens
if the vehicle needs a
new odometer installed.
If the new one can be set to the
mileage total of the old odometer, then that will be
done.
If it can’t, then it will be set at zero and a label
must be put on the driver’s door to show the old mileage
reading when the new odometer was installed.
Trip Odometer
The trip odometer tells how far you have driven since
you last reset it.
To set it to zero, press the reset button
located to the right of the instrument panel cluster.
Tachometer
The tachometer displays the engine speed in thousands
of revolutions per minute (rpm).
Notice: Do not operate the engine with the
tachometer in the shaded warning area, or engine
damage may occur.
3-25
Page 157 of 378
Low Oil Level Light
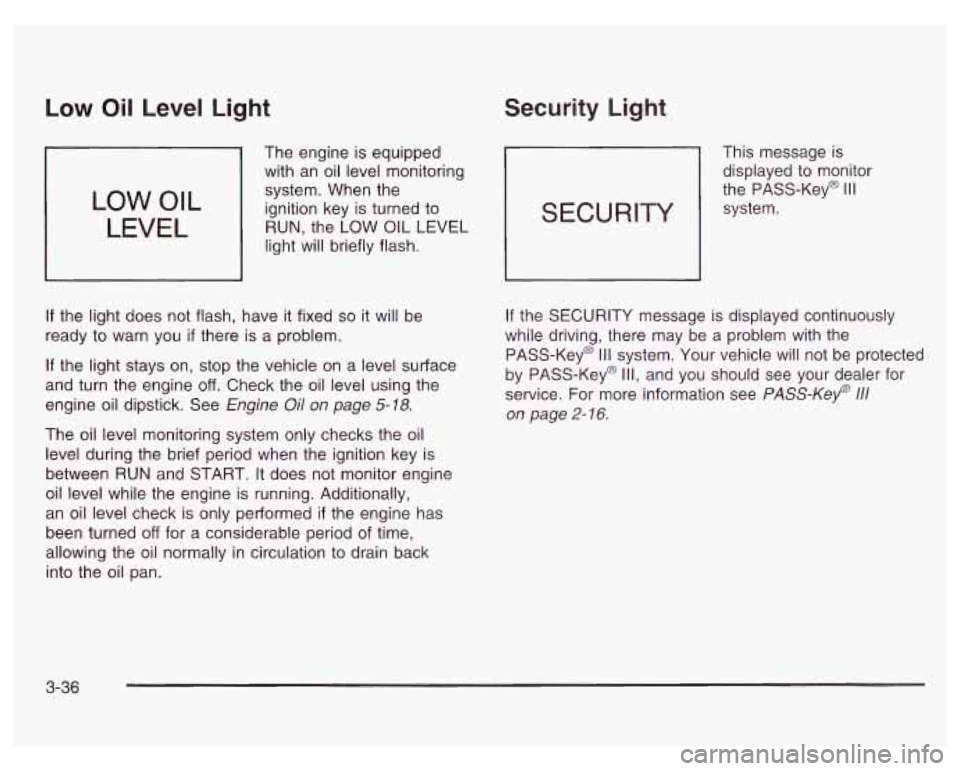
LOW OIL
LEVEL
The engine is equipped
with an oil level monitoring
system. When the
ignition key is turned to
RUN, the LOW
OIL LEVEL
light will briefly flash.
If the light does not flash, have it fixed so it will be
ready to warn you
if there is a problem.
If the light stays on, stop the vehicle on a level surface
and turn the engine
off. Check the oil level using the
engine oil dipstick. See Engine
Oil on page 5-18.
The oil level monitoring system only checks the oil
level during the brief period when the ignition key is
between
RUN and START. It does not monitor engine
oil level while the engine is running. Additionally,
an oil level check is only performed
if the engine has
been turned
off for a considerable period of time,
allowing the oil normally in circulation to drain back
into the oil pan.
Security Light
This message is
displayed to monitor
the PASS-Key@
Ill
system. SECURITY
If the SECURITY message is displayed continuously
while driving, there may be a problem with the
PASS-Key@
Ill system. Your vehicle will not be protected
by PASS-Key@
Ill, and you should see your dealer for
service. For more information see
PASS-Key 111
on page 2- 16.
3-36
Page 162 of 378
0 AVG ECON ORANGE
1
3800 V6 Supercharged Engine
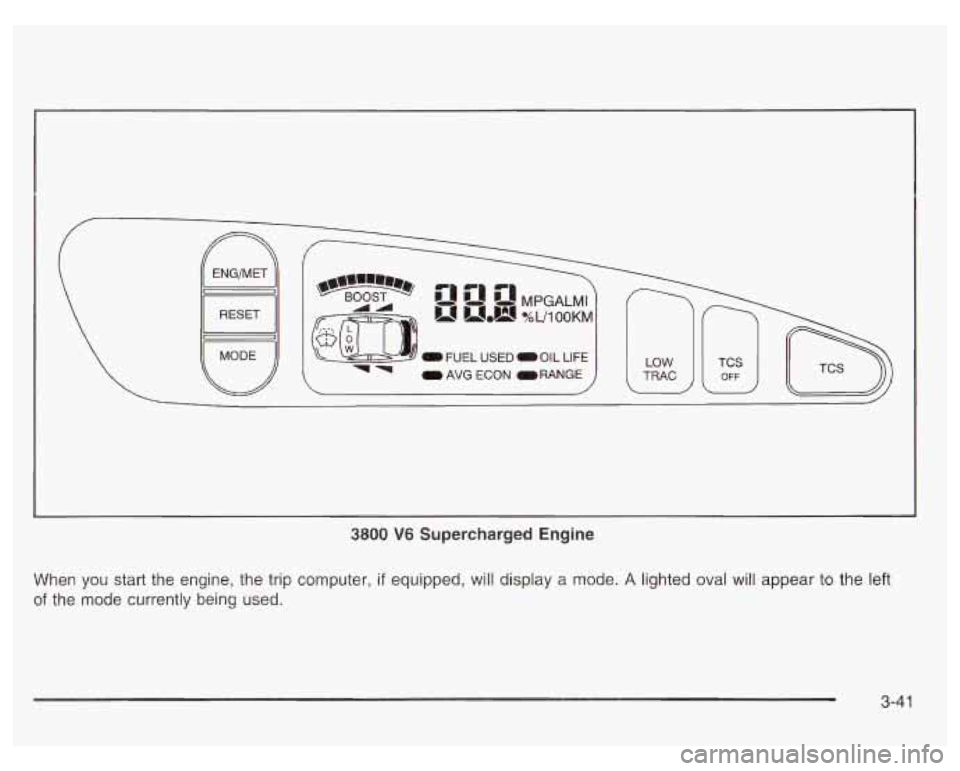
When you start the engine, the trip computer, if equipped, will display a mode. A lighted oval will appear to the left
of the mode currently being used.
3-41
Page 163 of 378

Control Buttons
The trip computer has three buttons that control its
functions.
ENG/MET (English/Metric): Press this button to
change the display from English
to metric units or metric
to English.
RESET: Press this button for two seconds to reset the
mode displayed.
MODE: Press this button to change the function mode,
(Fuel Used, AVG ECON, OIL LIFE, RANGE) being
displayed.
OIL LIFE: This shows a percentage of the engine’s oil
remaining useful life. The system predicts remaining
oil life using data from length of drives, coolant
temperature, engine rpm and vehicle speed. Each time
you get an oil change, be sure to reset this function
so that it will give you an accurate percentage. See
“How to Reset the GM Oil Life System” under Engine
Oil on page
5-18.
RANGE: This mode shows how much farther you can
travel with the fuel you have remaining in the gas
tank before refueling. When the range displays
L, for
40 to
50 miles (64.36 to 80.45 km), the display will flash
LOW continuously. The range is calculated from the
AVG ECON value multiplied by the fuel remaining in
the tank.
Functions
LOW: This light will come on the vehicle outline when
FUEL USED: This mode shows the total amount of fuel the ignition is on and the fluid in the washer fluid
used since you last reset it. The amount can be container is low.
displayed in gallons or liters.
AVG ECON (Average Economy): This mode shows
the average fuel economy since you last reset
it.
3-42
Page 165 of 378
Audio System(s) Your vehicle may have a feature called Retained
Accessory Power (RAP). With RAP, you can play your
audio system even after the ignition is turned
off.
See “Retained Accessory Power (RAP)” under Ignition
Positions on
page 2- 19.
Notice: Before you add any sound equipment to
your vehicle
- like a tape player, CB radio, mobile
telephone or two-way radio
- be sure you can
add what you want. If you can, it’s very important to
do
it properly. Added sound equipment may Setting the Time
interfere with the operation of your vehicle’s engine,
Delphi Electronics radio or other systems, and
Press RECALL, then press and hold HR or MIN for two
even damage them. Your vehicle’s systems may seconds. Then press and hold HR until the correct
interfere with the operation of sound equipment that hour appears on the display. AM or PM will also appear.
has been added improperly. Press and hold MIN until the correct minute appears ~~
So, before adding sound equipment, check with
your dealer and be sure to check federal rules
covering mobile radio and telephone units.
Your audio system has been designed to operate easily
and to give years
of listening pleasure. You will get the
most enjoyment out of it
if you acquaint yourself with it
first. Find out what your audio system can do and how to
operate all
of its controls to be sure you’re getting the
most out
of the advanced engineering that went into it. on
the display. The time can only be set with the
ignition
off.
3-44
Page 166 of 378
Radio with Cassette
Playing the Radio
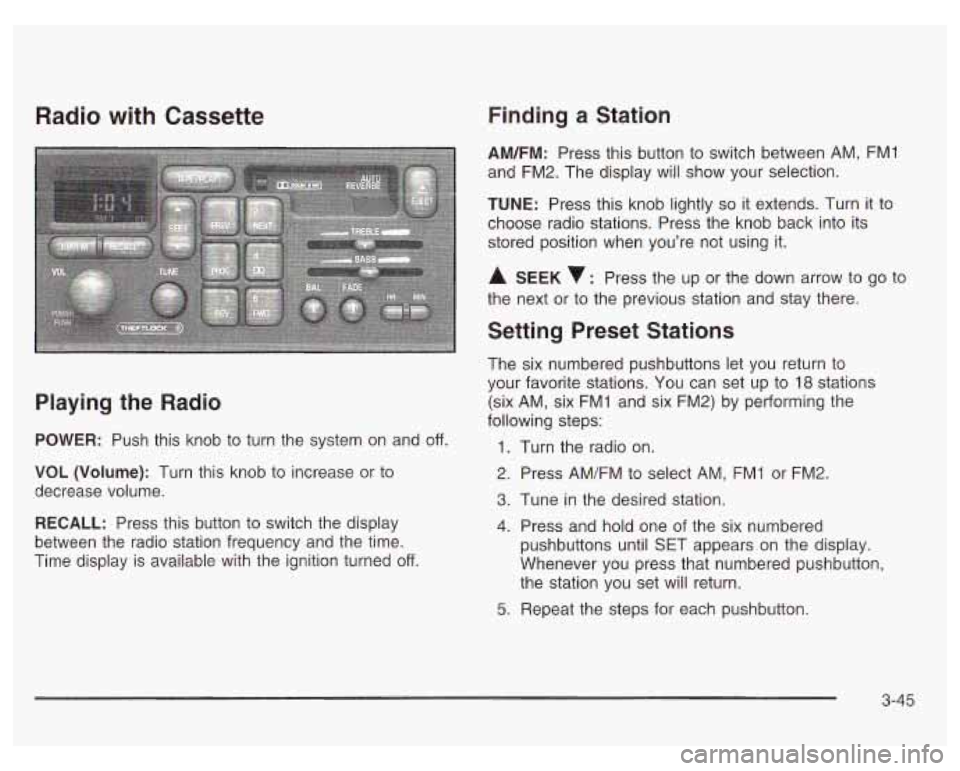
POWER: Push this knob to turn the system on and off.
VOL (Volume): Turn this knob to increase or to
decrease volume.
RECALL: Press this button to switch the display
between the radio station frequency and the time.
Time display is available with the ignition turned
off.
Finding a Station
AM/FM: Press this button to switch between AM, FMI
and FM2. The display will show your selection.
TUNE: Press this knob lightly so it extends. Turn it to
choose radio stations. Press the knob back into its
stored position when you’re not using it.
A SEEK : Press the up or the down arrow to go to
the next or to the previous station and stay there.
Setting Preset Stations
The six numbered pushbuttons let you return to
your favorite stations. You can set up to
18 stations
(six AM, six FMI and six FM2) by performing the
following steps:
1.
2.
3.
4.
5.
Turn the radio on.
Press AM/FM to select AM, FMI or FM2.
Tune
in the desired station.
Press and hold one of the six numbered
pushbuttons until SET appears on the display.
Whenever you press that numbered pushbutton,
the station you set will return.
Repeat the steps for each pushbutton.
3-45
Page 167 of 378
Setting the Tone (Bassnreble)
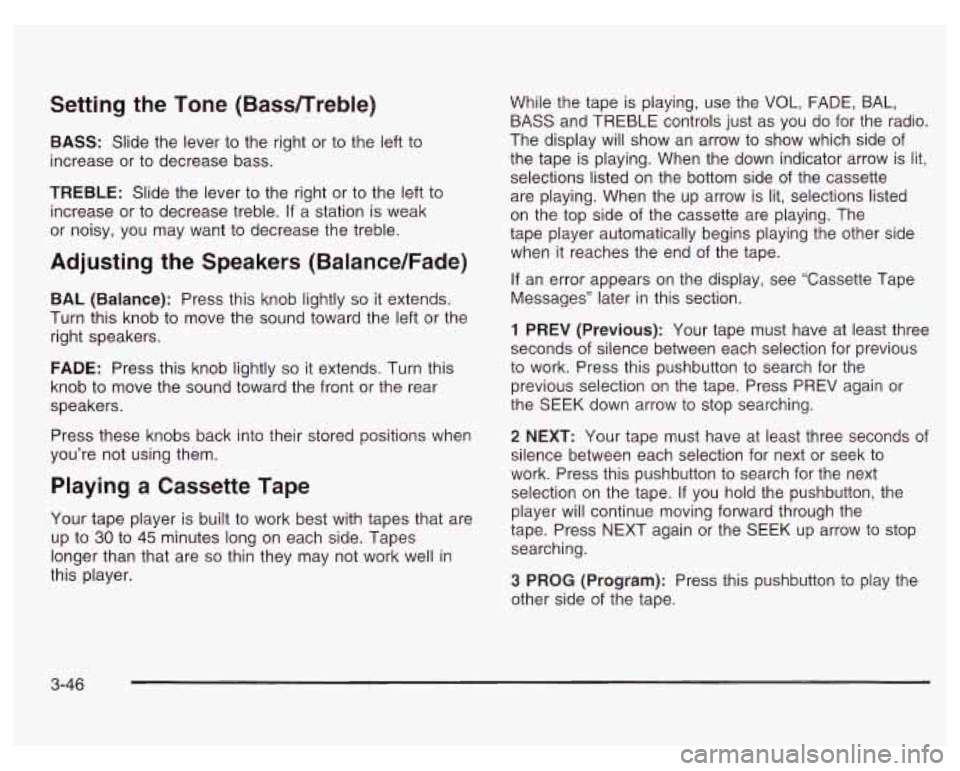
BASS: Slide the lever to the right or to the left to
increase or to decrease bass.
TREBLE: Slide the lever to the right or to the left to
increase or to decrease treble.
If a station is weak
or noisy, you may want to decrease the treble.
Adjusting the Speakers (Balance/Fade)
BAL (Balance): Press this knob lightly so it extends.
Turn this knob to move the sound toward the left or the
right speakers.
FADE: Press this knob lightly so it extends. Turn this
knob to move the sound toward the front or the rear
speakers.
Press these knobs back into their stored positions when
you’re not using them.
Playing a Cassette Tape
Your tape player is built to work best with tapes that are
up to
30 to 45 minutes long on each side. Tapes
longer than that are
so thin they may not work well in
this player. While
the tape is playing, use the VOL, FADE, BAL,
BASS and TREBLE controls just as you
do for the radio.
The display will show an arrow to show which side
of
the tape is playing. When the down indicator arrow is lit,
selections listed on the bottom side of the cassette
are playing. When the up arrow is lit, selections listed
on the top side of the cassette are playing. The
tape player automatically begins playing the other side
when it reaches the end of the tape.
If an error appears on the display, see ‘Cassette Tape
Messages” later in this section.
1 PREV (Previous): Your tape must have at least three
seconds
of silence between each selection for previous
to work. Press this pushbutton to search for the
previous selection on the tape. Press PREV again or
the SEEK down arrow to stop searching.
2 NEXT: Your tape must have at least three seconds of
silence between each selection for next or seek to
work. Press this pushbutton to search for the next
selection on the tape.
If you hold the pushbutton, the
player will continue moving forward through the
tape. Press NEXT again or the SEEK
up arrow to stop
searching.
3 PROG (Program): Press this pushbutton to play the
other side
of the tape.
3-46