tow PONTIAC GRAND PRIX 2003 User Guide
[x] Cancel search | Manufacturer: PONTIAC, Model Year: 2003, Model line: GRAND PRIX, Model: PONTIAC GRAND PRIX 2003Pages: 378, PDF Size: 17.64 MB
Page 94 of 378
Parking Brake
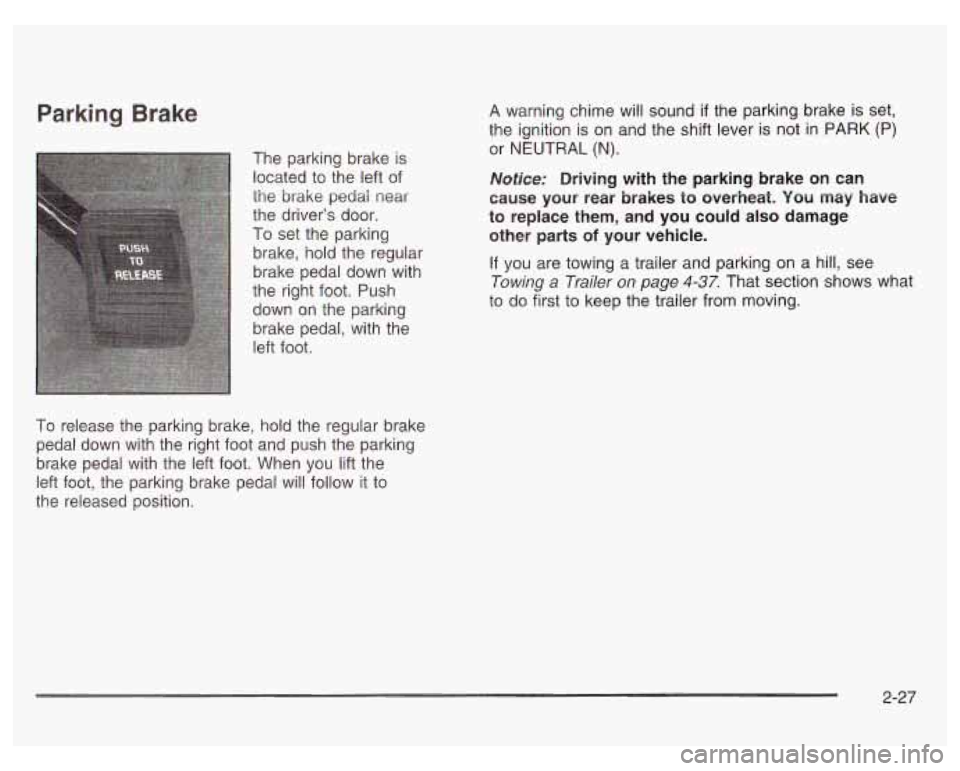
The parking brake is
located to the left of
the
brake pedai near
the driver’s door.
To set the parking
brake, hold the regular
brake pedal down with
the right foot. Push
down on the parking
brake pedal, with the
left foot.
To release the parking brake, hold the regular brake
pedal down with the right foot and push the parking
brake pedal with the left foot. When
you lift the
left foot, the parking brake pedal will follow it to
the released position. A
warning chime will sound
if the parking brake is set,
the ignition is on and the shift lever is not
in PARK (P)
or NEUTRAL (N).
Notice: Driving with the parking brake on can
cause your rear brakes
to overheat. You may have
to replace them, and you could also damage
other parts
of your vehicle.
If you are towing a trailer and parking on a hill, see
Towing a Trailer
on page 4-37. That section shows what
to do first to keep the trailer from moving.
2-27
Page 95 of 378
Shifting Into Park (P)
It can be dangerous to get out of your vehicle
if the shift lever
is not fully in PARK (P) with
the parking brake firmly set. Your vehicle can
roll. If you have left the engine running, the
vehicle can move suddenly. You or others
could be injured. To be sure your vehicle won’t move, even when you’re on fairly level ground,
use the steps that follow.
If you’re pulling a
trailer, see “Towing
a Trailer” in the Index.
1. Hold the brake pedal down with your right foot and
set the parking brake.
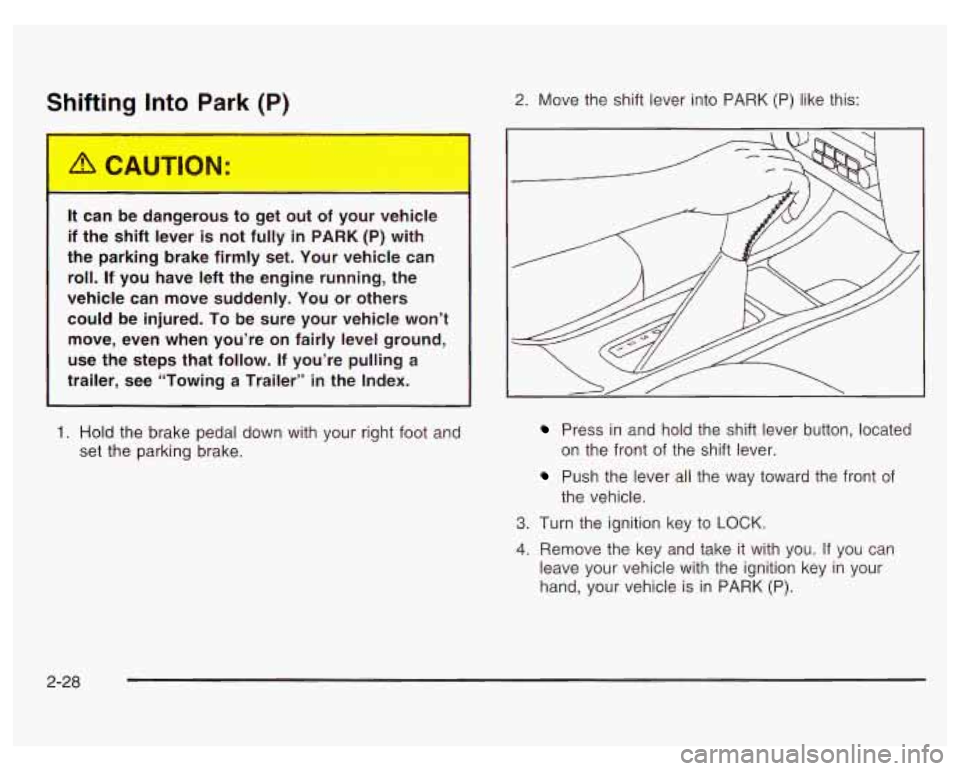
2. Move the shift lever into PARK (P) like this:
Press in and hold the shift lever button, located
on the front of the shift lever.
Push the lever all the way toward the front of
the vehicle.
3. Turn the ignition key to LOCK.
4. Remove the key and take it with you. If you can
leave your vehicle with the ignition key in your
hand, your vehicle is in PARK (P).
2-28
Page 99 of 378
Running Your Engine While You
Are Parked
It’s better not to park with the engine running. But if you
ever ha.-- to, here are som- ‘hings to know.
Idling the engine with the climate control
system
off could allow dangerous exhaust into
your vehicle. See the earlier Caution under
“Engine Exhaust.”
Also, idling
in a closed-in place can let deadly
carbon monoxide (CO) into your vehicle even
if the fan
is at the highest setting. One place
this can happen is a garage. Exhaust - with
CO - can come in easily. NEVER park in a
garage with the engine running.
Another closed-in place can be a blizzard. See “Winter Driving” in the Index.
It can be dangerous to get out of your vehicle
if the
shift lever is not fully in PARK (P) with
the parking brake firmly set. Your vehicle can
roll. Don’t leave your vehicle when the engine
is running unless you have to.
If you’ve left the
engine running, the vehicle can move
suddenly. You or others could be injured.
To
be sure your vehicle won’t move, even when
you’re on fairly level ground, always set your parking brake and move the shift lever to
PARK
(P).
Follow the proper steps to be sure your vehicle won’t
move. See Shifting
Into Park (P) on page 2-28.
If you are parking on a hill and if you’re pulling a trailer,
also see Towing a Trailer
on page 4-37.
2-32
Page 100 of 378
Mirrors
Manual Rearview Mirror
To reduce glare from lamps behind you, pull the lever
located in the center of the bottom of the mirror
toward you to the night position. To return the mirror
back
to the day position, push the lever away from you. The mirror also has an eight-point compass and
temperature display in the
upper right corner on the
mirror face and a three-button Onstar@ system.
When the automatic dimming feature is turned on,
the mirror automatically changes
to reduce glare from
headlamps behind you. A photocell
on the mirror senses
when it is becoming dark outside. Another photocell
built into the mirror face senses when headlamps
are behind you.
Automatic Dimming Rearview
Mirror with Onstar@, Compass and
a few seconds. The mirror will return to its clear,
Temperature Display
At night, when the glare is too bright, the mirror will
gradually darken to reduce glare. This change may take
daytime state when the glare is reduced.
Mirror Operation
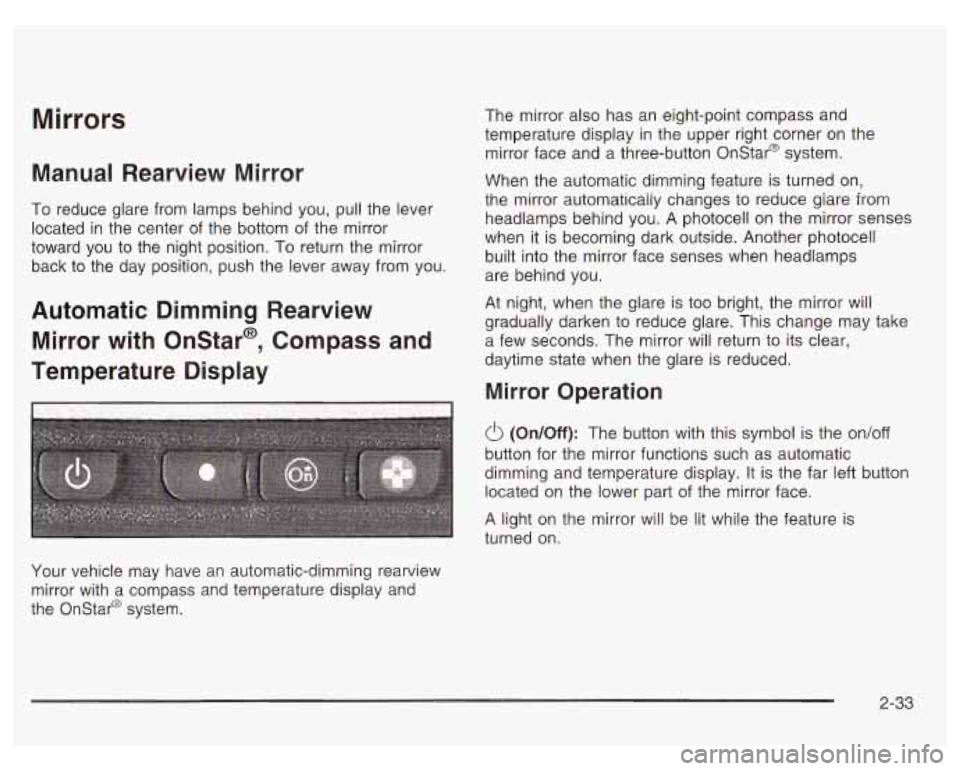
(On/Off): The button with this symbol is the on/off
button for the mirror functions such as automatic
dimming and temperature display. It is the far left button
located on the lower part of the mirror face.
A light on the mirror will be lit while the feature is
turned on.
Your vehicle may have an automatic-dimming rearview
mirror with a compass and temperature display and
the Onstar@ system.
2-33
Page 127 of 378
As you signal a turn or a lane change, if the arrow
flashes faster than normal, a signal bulb may be burned
out and other drivers won’t see your turn signal.
If a bulb is burned out, replace it to help avoid an
accident.
If the arrows don’t go on at all when you signal
a turn, check for burned-out bulbs and then check the
fuse. See Fuses and Circuit Breakers
on page 5-97.
A chime will sound if you leave the turn signal on
for more than
3/4 mile (1.2 km).
Headlamp High/Low-Beam Changer
To change the headlamps from low-beam to high-beam,
or high to low, pull the multifunction lever
all the way
toward you. Then release it.
When the high beams are
on, this light on the
instrument panel cluster
will appear. While the high-beam headlamps are
on, the fog lamps will
not illuminate.
If your vehicle is equipped with the Head-Up-Display
(HUD), an arrow will appear in the display area to
indicate that the high beams are on. See Head-Up
Display
(HUD) on page 3-75 for more information.
Flash-to-Pass
This feature lets you use the high-beam headlamps to
signal a driver in front of you that you want to pass.
It works even
if your headlamps are in the automatic or
off position.
To use it, pull the turn signal lever toward you, then
release it.
If the headlamps are in the automatic position or on
low-beam, the high-beam headlamps will turn on and the
high-beam indicator on the instrument panel cluster
will come on. They will stay on as long as you hold the
lever toward you. Release the lever to return to the
initial position.
If your vehicle is equipped with the Head-Up-Display
(HUD), an arrow will appear in the display area to
indicate that the high beams are on.
3-6
Page 141 of 378
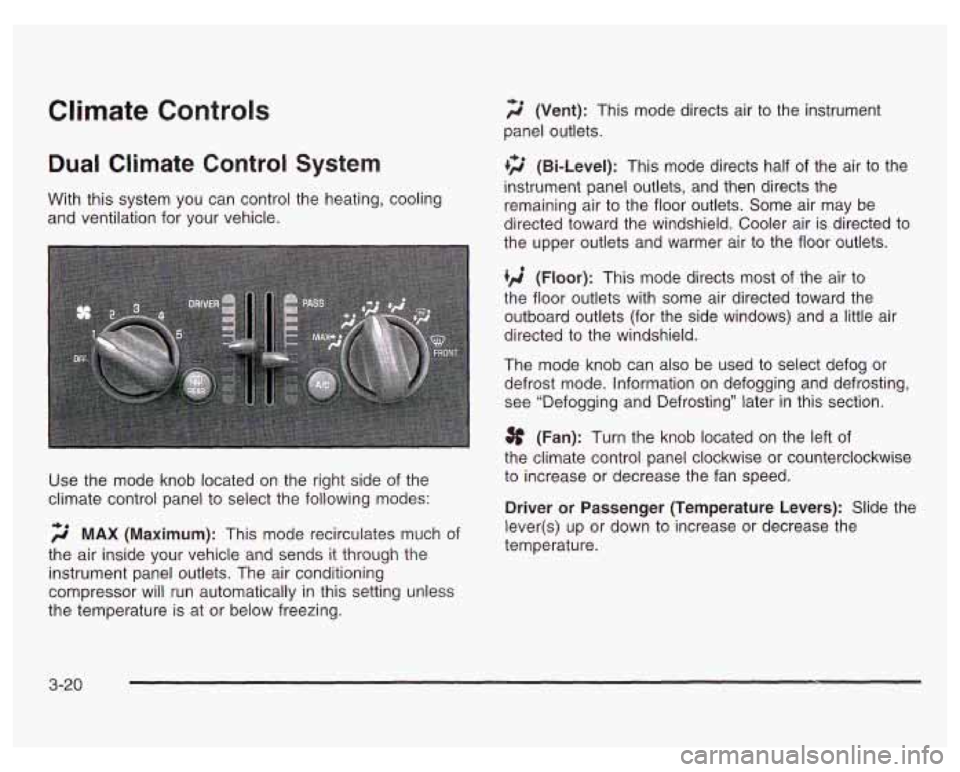
Climate Controls
Dual Climate Control System
f;' (Vent): This mode directs air to the instrument
panel outlets.
+2 (Bi-Level): This mode directs half of the air to the
instrument panel outlets, and then directs the
With this system you can control the heating, cooling
and ventilation for your vehicle. remaining air
to the floor outlets. Some air may be
directed toward the windshield. Cooler air is directed to
the upper outlets and warmer air to the floor outlets.
(Floor): This mode directs most of the air to
the floor outlets with some air directed toward the
outboard outlets (for the side windows) and a little air
directed to the windshield.
The mode knob can also be used to select defog or
defrost mode. Information on defogging and defrosting,
see "Defogging and Defrosting" later in this section.
3f (Fan): Turn the knob located on the left of
the climate control panel clockwise or counterclockwise
Use the mode knob located on the right side of the to increase or decrease the fan speed.
climate control panel to select the following modes:
Driver or Passenger (Temperature Levers): Slide the
2 MAX (Maximum): This mode recirculates much of
the air inside your vehicle and sends it through the
instrument panel outlets. The air conditioning
compressor will run automatically in this setting unless
the temperature is at or below freezing. lever(s)
up or down to increase or decrease the
temperature.
3-20
Page 149 of 378
Brake System Warning Light
Your vehicle’s hydraulic brake system is divided into
two parts.
If one part isn’t working, the other part can still
work and stop you. For good braking, though, you
need both parts working well.
If the light comes on while you are driving, carefully pull
off the road and stop. You may notice that the pedal
is harder to push. Or, the pedal may go closer to
the floor. It may take longer to stop.
If the light is still
on, have the vehicle towed for service. See Towing
Your
Vehicle on page 4-33.
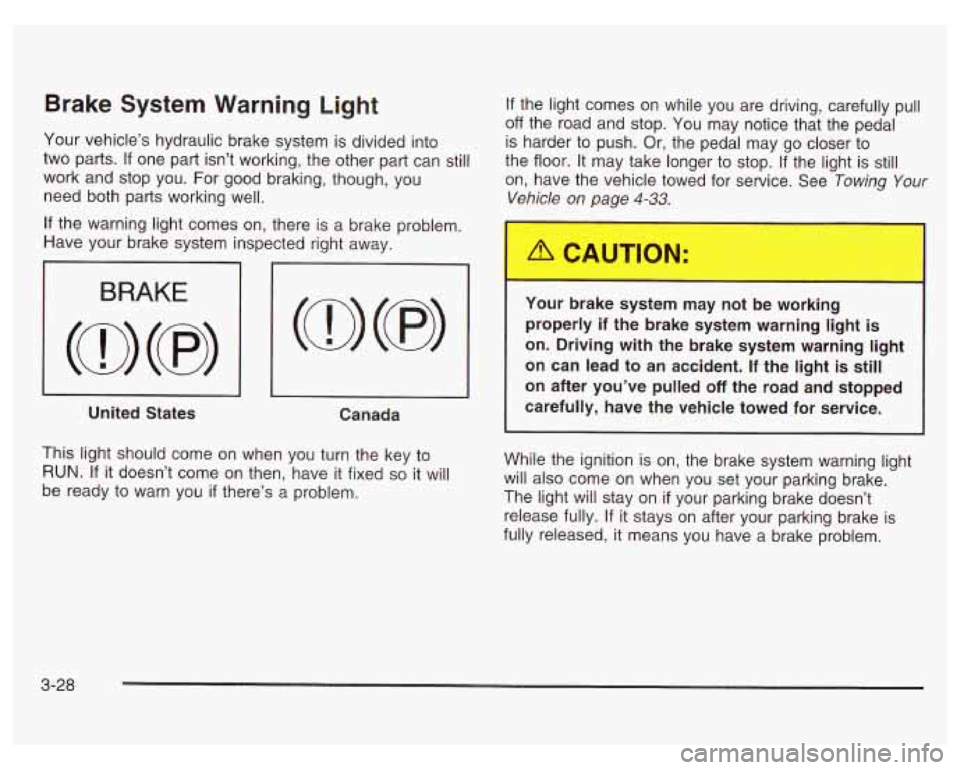
If the warning light comes on, there is a brake problem.
Have your brake system inspected right away.
I 3 I I
United States
Canada
This light should come on when you turn the key to
RUN. If it doesn’t come on then, have it fixed so it will
be ready to warn you
if there’s a problem.
Your oraKe system may not be working
properly
if the brake system warning light is
on. Driving with the brake system warning light
on can lead to an accident. If the light is still
on after you’ve pulled off the road and stopped
carefully, have the vehicle towed for service.
While the ignition is on, the brake system warning light
will also come on when you set your parking brake.
The light will stay on
if your parking brake doesn’t
release fully. If it stays on after your parking brake is
fully released, it means you have a brake problem.
3-28
Page 154 of 378
This light should come on, as a check to show you it is
working, when the ignition is on and the engine is
not running. If the light doesn’t come on, have it
repaired. This light will also come on during a
malfunction in one of two ways:
Light Flashing - A misfire condition has been
detected. A misfire increases vehicle emissions
and may damage the emission control system on
your vehicle. Dealer or qualified service center
diagnosis and service may be required.
0 Light On Steady - An emission control system
malfunction has been detected on your vehicle.
Dealer or qualified service center diagnosis
and service may be required.
If the Light Is Flashing
The following may prevent more serious damage to
your vehicle:
0 Reducing vehicle speed.
0 Avoiding hard accelerations.
Avoiding steep uphill grades.
0 If you are towing a trailer, reduce the amount of
cargo being hauled as soon as it is possible. If
the light stops flashing and remains on steady,
see “If the Light
Is On Steady” following.
If the light continues to flash, when
it is safe to do so,
stop the vehicle. Find a safe place to park your vehicle.
Turn the key
off, wait at least 10 seconds and restart the
engine. If the light remains on steady, see
“If the Light Is
On Steady” following. If the light is still flashing, follow the
previous steps, and drive the vehicle
to your dealer or
qualified service center for service.
If the Light Is On Steady
You may be able to correct the emission system
malfunction by considering the following:
Did you recently put fuel into your vehicle?
If so, reinstall the fuel cap, making sure to fully install
the cap. See Filling
Your Tank on page 5-7. The
diagnostic system can determine
if the fuel cap has
been left
off or improperly installed. A loose or missing
fuel cap will allow fuel
to evaporate into the atmosphere.
A few driving trips with the cap properly installed
should turn the light
off.
Did you just drive through a deep puddle of water?
If
so, your electrical system may be wet. The condition
will usually be corrected when the electrical system
dries out. A few driving trips should turn the light
off.
3-33
Page 167 of 378
Setting the Tone (Bassnreble)
BASS: Slide the lever to the right or to the left to
increase or to decrease bass.
TREBLE: Slide the lever to the right or to the left to
increase or to decrease treble.
If a station is weak
or noisy, you may want to decrease the treble.
Adjusting the Speakers (Balance/Fade)
BAL (Balance): Press this knob lightly so it extends.
Turn this knob to move the sound toward the left or the
right speakers.
FADE: Press this knob lightly so it extends. Turn this
knob to move the sound toward the front or the rear
speakers.
Press these knobs back into their stored positions when
you’re not using them.
Playing a Cassette Tape
Your tape player is built to work best with tapes that are
up to
30 to 45 minutes long on each side. Tapes
longer than that are
so thin they may not work well in
this player. While
the tape is playing, use the VOL, FADE, BAL,
BASS and TREBLE controls just as you
do for the radio.
The display will show an arrow to show which side
of
the tape is playing. When the down indicator arrow is lit,
selections listed on the bottom side of the cassette
are playing. When the up arrow is lit, selections listed
on the top side of the cassette are playing. The
tape player automatically begins playing the other side
when it reaches the end of the tape.
If an error appears on the display, see ‘Cassette Tape
Messages” later in this section.
1 PREV (Previous): Your tape must have at least three
seconds
of silence between each selection for previous
to work. Press this pushbutton to search for the
previous selection on the tape. Press PREV again or
the SEEK down arrow to stop searching.
2 NEXT: Your tape must have at least three seconds of
silence between each selection for next or seek to
work. Press this pushbutton to search for the next
selection on the tape.
If you hold the pushbutton, the
player will continue moving forward through the
tape. Press NEXT again or the SEEK
up arrow to stop
searching.
3 PROG (Program): Press this pushbutton to play the
other side
of the tape.
3-46
Page 170 of 378
Finding a Station
AM/FM: Press this button to switch between AM, FMl
and FM2. The display
will show your selection.
TUNE: Press this knob lightly so it extends. Turn it to
choose radio stations. Press the knob back into its
stored position when you’re not using it.
A SEEK v: Press the up or the down arrow to go to
the next or to the previous station and stay there.
Setting Preset Stations
The six numbered pushbuttons let you return to
your favorite stations. You can set up to
18 stations
(six AM, six
FMI and six FM2) by performing the
following steps:
1.
2.
3.
4.
5.
Turn the radio on.
Press AM/FM to select AM, FMI or FM2.
Tune in the desired station.
Press and hold one of the six numbered
pushbuttons until §ET appears on the display.
Whenever you press that numbered pushbutton,
the station you set will return.
Repeat the steps for each pushbutton.
Setting the Tone (BasdTreble)
BASS: Slide the lever to the right or to the left to
increase or to decrease bass.
TREBLE: Slide the lever to the right or to the left to
increase
or to decrease treble. If a station is weak
or noisy, you may want to decrease the treble.
Adjusting the Speakers (Balance/Fade)
BAL (Balance): Press this knob lightly so it extends.
Turn it to move the sound toward the left or the
right speakers.
FADE: Press this knob lightly so it extends. Turn it to
move the sound toward the front or the rear speakers.
Press these knobs back into their stored positions when
you’re not using them.
3-49