fuse PORSCHE CAYNNE TURBO 2006 1.G User Guide
[x] Cancel search | Manufacturer: PORSCHE, Model Year: 2006, Model line: CAYENNE TURBO, Model: PORSCHE CAYENNE TURBO 2006 1.GPages: 387, PDF Size: 8.44 MB
Page 217 of 387

Shifting Gear, Traction Systems
217
Kickdown
The kickdown function is active in selector lever
position D.
fFor optimum acceleration, e.g. when overtak-
ing, depress the accelerator pedal beyond the
full-throttle point (kickdown).
The transmission shifts down depending on the
speed of travel and engine speed.
Upward shifts occur at the highest possible engine
speeds.
These gear-changing speeds remain active until
the accelerator is released to approx. 80% of the
full-throttle position.D - Automatic selection mode (in the off-
road driving program)The functions of selector lever positions D and M
differ in the on-road program, High Range, and in
the off-road program, Low Range.
fUse selector lever position D for “normal” driv-
ing.
The gears are shifted automatically according
to the accelerator position and speed.
The gears are shifted automatically according to
the accelerator position and speed. The gear-
changing points have been adjusted to achieve the
best possible vehicle control on difficult terrain.Depending on the route profile, the gear-changing
points are shifted towards higher or lower engine-
speed ranges. On steep downhill stretches, up-
ward shifts are prevented until medium engine
speeds are reached (at least 2,500 rpm).
When the car is overrunning, an automatic upshift
does not occur when the engine speed limit is
reached.
Moving off
The car moves off in 1st gear.
Shifting gear on the steering wheel
By shifting gear with the rocker switches on the
steering wheel, you can temporarily change from
automatic selection mode D to manual selection
mode M.
Advantages
– Shifting down on downward slopes (engine
braking).
– Shifting down for brief spurts of acceleration.
– Selecting 1st/2nd or 3rd gear for moving off.
The manual selection mode remains engaged:
– For overrunning
– Depending on lateral acceleration
– When the vehicle is stationary (e.g. at a junc-
tion).The system leaves manual selection mode:
– Automatically after around 8 seconds
(unless car is subject to high lateral accelera-
tion, is overrunning or stationary),
– if you depress the accelerator to kickdown.
Kickdown
The kickdown function is active in selector lever
position D.
fFor optimum acceleration, e.g. when overtak-
ing, depress the accelerator pedal beyond the
full-throttle point (kickdown).
The transmission shifts down depending on the
speed of travel and engine speed.
Upward shifts occur at the highest possible engine
speeds.
These gear-changing speeds remain active until
the accelerator is released to approx. 80% of the
full-throttle position.
Tip on driving
Unlike in the on-road driving program, an auto-
matic upshift is not performed in manual selection
mode M when the engine-speed limit is reached.
Page 239 of 387

Shifting Gear, Traction Systems
239
Driving downhill
Danger!
There is a danger of serious personal injury
or death and risk of damage if the vehicle
should overturn.
fDo not drive over embankments or slopes at
steep diagonal angles.
fDrive downhill slowly, with the wheels pointing
straight ahead.
fIf the vehicle starts to tilt, immediately steer in
the direction of the tilt (line of slope).
fWhen driving downhill, never let the vehicle roll
when in idle.
fUse engine braking effect.
If the engine braking effect is not adequate, gently apply the foot brake.Note on operation
fActivate Low Range. The off-road ABS is
switched on automatically.
Tips on driving
The same general principle as for uphill driving ap-
plies to downhill driving.
fDo not perform manual gear changes when
driving, and try to avoid stopping.
fAvoid high engine speeds (max. 2,500 rpm).
A special circuit in the off-road ABS permits con-
trolled brief lock-up of the front wheels so that they
can dig into the loose surface more effectively.
Locked wheels slip and can no longer be steered.
fWhen driving down steep hills on unpaved sur-
faces, brake carefully so that vehicle does not
start to slide.
Page 243 of 387

Shifting Gear, Traction Systems
243
Driving on sandNote on operation
fActivate Low Range and engage differential
locks if necessary.
Tips on driving
Loose sand is an especially tricky surface for off-
road driving.
You can often become stuck in sand within
minutes if you do not drive correctly in such
situations.
fDrive at brisk pace and do not stop under any
circumstances. This will reduce the chance of
the car becoming bogged down.
fFollow existing tracks – provided that they
have not been covered by blown sand, are not
too deep and the car's ground clearance is
sufficient.
Please observe the chapter “GROUND CLEA-
RANCE” on Page 375.
fAvoid high engine speeds (may. 2,500 rpm).When driving on slopes with soft sand:
fUse the manual select mode M in addition to
the Low Range program.
If your vehicle becomes stuck nevertheless:
fDo not spin the wheels. Instead, use branches,
mats or similar items to provide adequate trac-
tion so that you can drive out of the critical ar-
ea.
Track rutsOther vehicles leave ruts in many off-road courses
or gravel roads.
fPlease observe the chapter “GROUND CLEA-
RANCE” on Page 375.
Caution!
Risk of damage to the vehicle floor when
driving through ruts that are too deep.
fAlways bear in mind the car's ground clear-
ance.
fDo not drive over ruts that are too deep.
Note on operation
fActivate Low Range and engage differential
locks if necessary.
Tips on driving
fIn cases of doubt, drive with one wheel on the
strip of grass between the ruts.
fAvoid high engine speeds (max. 2,500 rpm).
fDrive slowly.
Page 256 of 387

256
Maintenance, Car Care
Coolant LevelfPlease observe the chapter “EXERCISE
EXTREME CAUTION WHEN WORKING ON YOUR
VEHICLE” on Page 250.
The coolant provides year-round protection from
corrosion and freezing down to -31°F/-35°C
(Nordic countries -40°F/-40°C).
fUse only anti-freeze authorized by Porsche.
fCheck the coolant level regularly.
Further important information concerning “mainte-
nance” can be found in a separate chapter.
fPlease observe the chapter “EXERCISE
EXTREME CAUTION WHEN WORKING ON YOUR
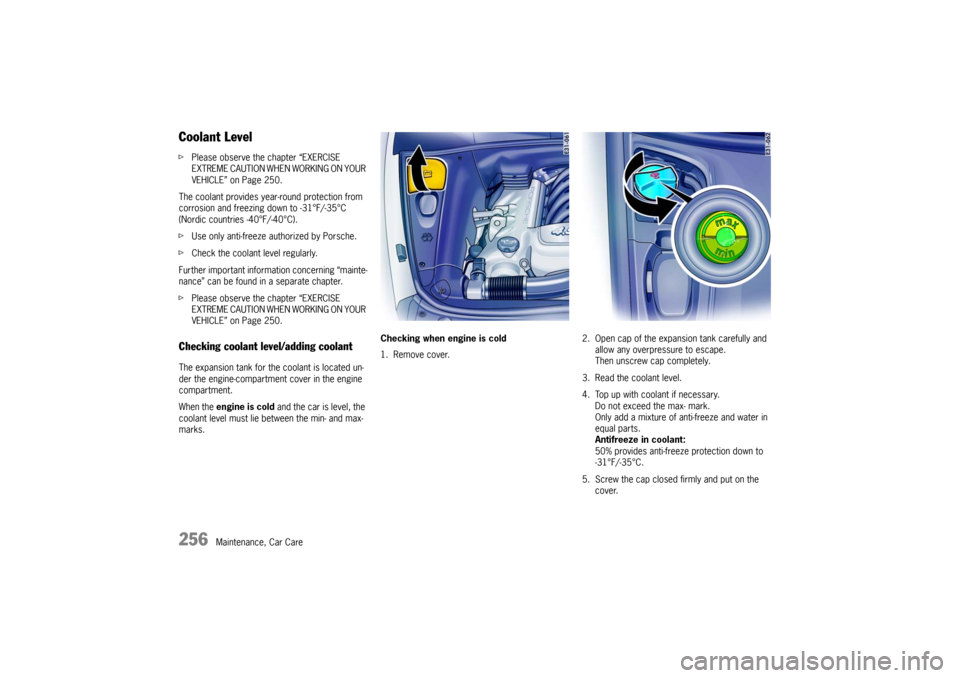
VEHICLE” on Page 250. Checking coolant level/adding coolantThe expansion tank for the coolant is located un-
der the engine-compartment cover in the engine
compartment.
When the engine is cold and the car is level, the
coolant level must lie between the min- and max-
marks.Checking when engine is cold
1. Remove cover.2. Open cap of the expansion tank carefully and
allow any overpressure to escape.
Then unscrew cap completely.
3. Read the coolant level.
4. Top up with coolant if necessary.
Do not exceed the max- mark.
Only add a mixture of anti-freeze and water in
equal parts.
Antifreeze in coolant:
50% provides anti-freeze protection down to
-31°F/-35°C.
5. Screw the cap closed firmly and put on the
cover.
Page 258 of 387

258
Maintenance, Car Care
Brake-Fluid LevelfUse only new (unused) Original Porsche brake
fluid.
Further important information concerning “mainte-
nance” can be found in a separate chapter.
fPlease observe the chapter “EXERCISE
EXTREME CAUTION WHEN WORKING ON YOUR
VEHICLE” on Page 250.
Warning!
Brake fluid is hazardous to your health, and
may be fatal if swallowed.
Brake fluid also attacks paintwork.
fKeep brake fluid out of children's reach.
fImmediately rinse off spilled brake fluid with
clean water.
fIf brake fluid gets into your eye, immediately
rinse with clean water for a few minutes. Then
see a doctor immediately.
fPlease note all the information on the refill container of the brake fluid.
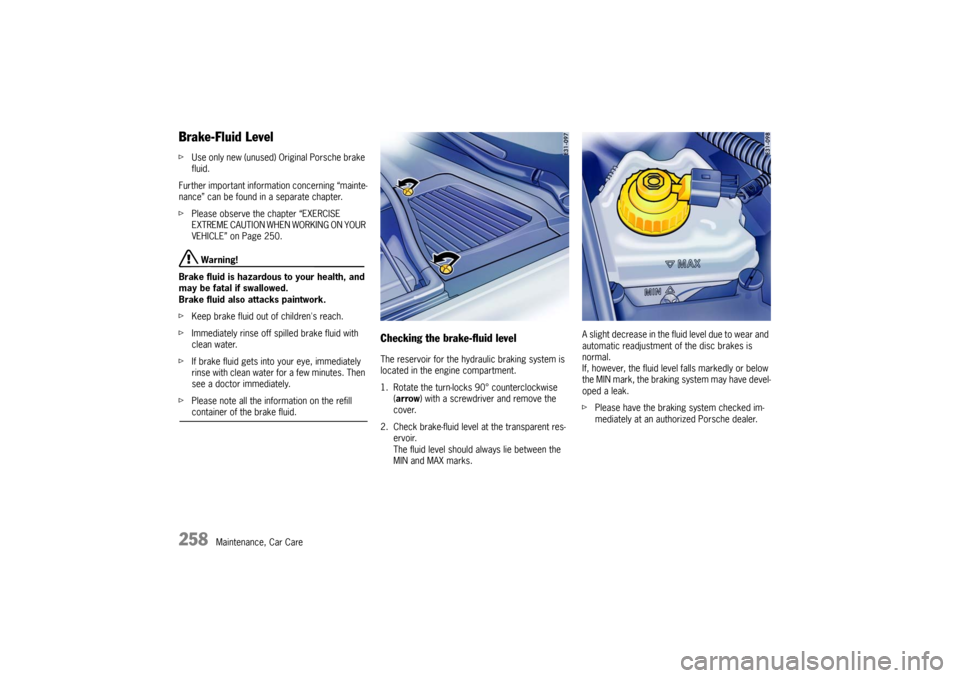
Checking the brake-fluid levelThe reservoir for the hydraulic braking system is
located in the engine compartment.
1. Rotate the turn-locks 90° counterclockwise
(arrow) with a screwdriver and remove the
cover.
2. Check brake-fluid level at the transparent res-
ervoir.
The fluid level should always lie between the
MIN and MAX marks.A slight decrease in the fluid level due to wear and
automatic readjustment of the disc brakes is
normal.
If, however, the fluid level falls markedly or below
the MIN mark, the braking system may have devel-
oped a leak.
fPlease have the braking system checked im-
mediately at an authorized Porsche dealer.
Page 259 of 387

Maintenance, Car Care
259
Changing the brake fluidBrake fluid absorbs moisture from the air over
time. This accumulation of water lowers the boil-
ing point and, under certain operating conditions,
can affect the braking action.
fTherefore, have the brake fluid changed in ac-
cordance with the change intervals stated in
the booklet “Maintenance”.
The warning light in the instrument panel and the
warning message on the multi-purpose display of
the instrument panel
– indicate the brake level fluid is too low or,
– in conjunction with large pedal travel could
indicate a braking-circuit failure.
Note on operation
fStop immediately in a suitable place.
fDo not continue driving.
Please have the fault remedied at your nearest
authorized Porsche dealer.
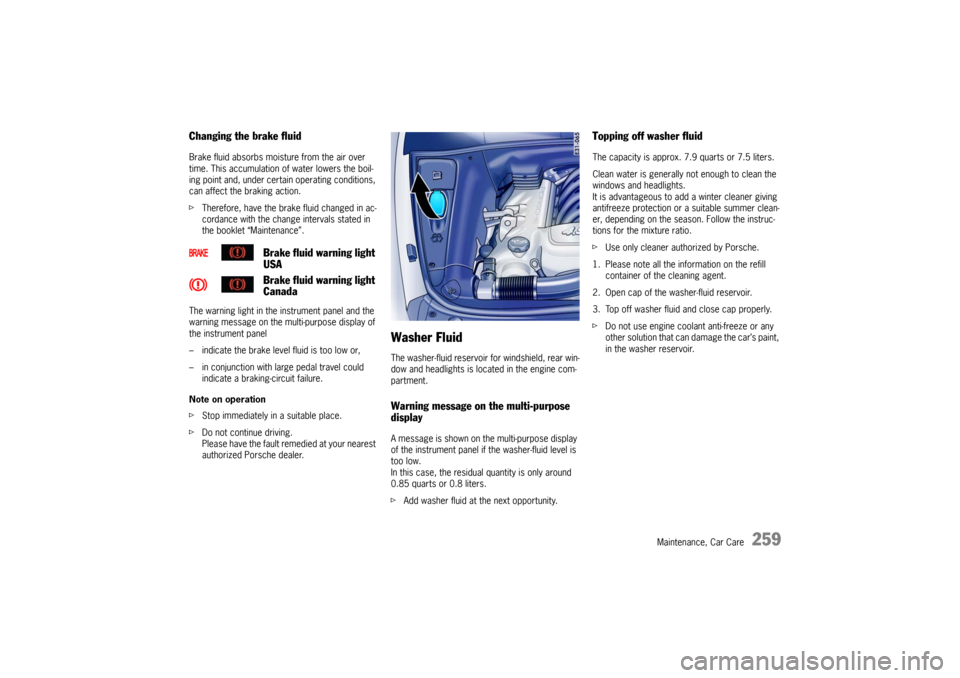
Washer FluidThe washer-fluid reservoir for windshield, rear win-
dow and headlights is located in the engine com-
partment.Warning message on the multi-purpose
displayA message is shown on the multi-purpose display
of the instrument panel if the washer-fluid level is
too low.
In this case, the residual quantity is only around
0.85 quarts or 0.8 liters.
fAdd washer fluid at the next opportunity.
Topping off washer fluidThe capacity is approx. 7.9 quarts or 7.5 liters.
Clean water is generally not enough to clean the
windows and headlights.
It is advantageous to add a winter cleaner giving
antifreeze protection or a suitable summer clean-
er, depending on the season. Follow the instruc-
tions for the mixture ratio.
fUse only cleaner authorized by Porsche.
1. Please note all the information on the refill
container of the cleaning agent.
2. Open cap of the washer-fluid reservoir.
3. Top off washer fluid and close cap properly.
fDo not use engine coolant anti-freeze or any
other solution that can damage the car’s paint,
in the washer reservoir.
Brake fluid warning light
USA
Brake fluid warning light
Canada
Page 279 of 387

Maintenance, Car Care
279
Headlights, lights, interior and exterior
plastic partsfUse only clean water and a little dishwashing
detergent to clean headlights, lights, plastic
parts and surfaces.
Do not clean when dry.
Use a soft sponge or a soft, lint-free cloth.
Gently wipe the surface without applying too
much pressure.
The Porsche inside window cleaner is also
suitable for cleaning plastic surfaces.
Follow the cleaning instructions on the
container.
Never use other chemical cleaners or
solvents.
fRinse cleaned surfaces with clear water.
Door, roof, lid and window sealsfWash dirt (e.g. abrasion, dust, road salt or grit)
from all seals regularly using warm soapy wa-
ter. Do not use any chemical cleaning agents
or solvents.
When there is a frost hazard, the outer door seals
and the lid seals can be protected against freezing
into place by a suitable care product.
In order to prevent damage to the anti-fric-
tion coating, the inner door seals must not be
treated with care products.Light alloy wheelsfPlease observe the chapter “AUTOMATIC CAR
WASHES” on Page 275.
Pitting may occur if metallic particles which cause
contact corrosion (e.g. brass or copper in brake
dust) are allowed to remain on the aluminum too
long.
fIf possible, wash the wheels with a sponge or
wash brush about every two weeks. In areas
where road salt or grit is spread on winter
roads or there is a lot of airborne industrial
dust, it is best to clean the wheels weekly.
The Porsche Light Alloy Wheel Cleaner
(ph-value 9.5) can be used for this pur-
pose.
If the ph-value of the detergent is in-
corect, the protective coating on the
wheels will be destroyed.Polishes which dissolve oxides, such as those
frequently used for other metals, or abrasive
tools or agents are unsuitable because they
break down the oxide film of the protective
coating and will cause discoloration of the
wheel.
fEvery three months, after cleaning, coat the
wheels with a car wax or non-corrosive grease
(e.g. vaseline).
Using a clean cloth thoroughly rub the grease
into the surface.
Danger!
Danger of accident if cleaning agents
(e.g. wheel cleaning agents) come into
contact with the brake discs. The resulting
film on the brake discs can impair braking
performance.
fMake sure that no cleaning agent comes into
contact with the brake discs.
fIf cleaning agent has come into contact with
the brake discs, thoroughly clean the brake
discs with a strong jet of water.
fPaying attention to any road users behind you, dry the brake discs by applying the brakes.
Page 280 of 387

280
Maintenance, Car Care
Leather careCharacteristics and special features
The natural surface markings of leather, e.g.
creases, healed scars, insect sting marks, struc-
tural differences and slight variations in shade and
grain add to the attractiveness of the natural leath-
er product.
A special mention must be made here of natural
leather. For natural leather, carefully selected
hides of the highest quality are used. It is not
covered completely with dye on production. “Na-
ture’s signature” is therefore easily recogniza-
ble.This fine material is distinguished by an out-
standing seating comfort, special suppleness and
a typical patina.Leather care and treatment
fClean all types of leather regularly to remove
fine dust using a soft, damp, white woollen
cloth or a commercially available microfibre
cloth.
fRemove heavy contamination with Porsche
leather cleaner.
Please always follow the instructions for use
given on the containers.
Caustic cleaners and hard cleaning objects
must not be used.
Perforated leather must under no circum-
stances get wet on its reverse side.
Once cleaned, leather (particularly the heavily
stressed leather seats) must be treated only with
Porsche leather care liquid.
Carpets and matsfUse only a vacuum cleaner or a medium stiff
brush.
fRemove stains and spots with Porsche stain
remover.
The Porsche range of accessories includes floor-
mats to protect the carpets in summer and winter.
Warning!
Risk of an accident.
fAlways check the movement of the pedals be-
fore driving and make sure that they are not ob-
structed by a floor mat or any other object.
fSecure the floor mat to prevent it from sliding
into positions that could interfere with the safe
operation of your vehicle - do not lay them
loosely in the vehicle.
Your Porsche dealer will be glad to offer you
floor mats of correct size including a securing possibility.
Page 281 of 387

Maintenance, Car Care
281
Airbags
Danger!
There is a danger of serious personal injury
or death if the airbag system is impaired by
improper cleaning work.
fDo not make any modifications whatsoever on
individual components such as the padded
covers of the steering wheel, the front seats,
the roof pillars and the rooflinings.
fLet your authorized Porsche dealer clean these components.
Fabric liningsFabric linings on pillars, headliner and sun visors,
etc., must be treated only using suitable cleaning
agents or a suitable dry foam and a soft brush.
AlcantarafDo not use a leather care product to clean Al-
cantara.
For regular care it is sufficient to clean the cover
with a soft brush. Strong abrasion or rubbing when
cleaning will permanently change the surface.
Cleaning when lightly soiled
fWet a soft cloth with water or a neutral soap
solution and wipe off the dirt.
Cleaning when heavily soiled
fWet a soft cloth with lukewarm water or
thinned white spirit and dab the dirt from the
outside in.
Safety beltsfUse a mild detergent to clean soiled belts.
fWhen drying, avoid direct sunlight.
fOnly use suitable cleaning agents.
fDo not tint or bleach the belts.
The belt fabric could be weakened, thus affect-
ing safety.
Page 292 of 387

292
Practical Tips, Minor Repairs
Tire replacementsfUse only tire makes and types tested by
Porsche.
Only tires with the same manufacturer and
with the same specification code (e.g. “N0“,
“N1“...) should be mounted on the vehicle.
Tires should be replaced no less than on one axle
at the time. Only tires of the same make and type
must be used. Mixed tires are not permissible and
will affect vehicle performance, safety, and can
affect vehicle warranty.
Porsche dealers can recommend the most current
replacement tire options for your vehicle.
Initially, new tires do not have their full traction.
You should therefore drive at moderate speeds
during the first 60 - 120 miles (100 - 200 km).Tires should be replaced no less than on one axle
at the time. Only tires of the same make and type
must be used. Mixed tires are not permissible.
Initially, new tires do not have their full traction.
You should therefore drive at moderate speeds
during the first 60 - 120 miles (100 - 200 km).
If new tires are installed only on one axle, a notice-
able change in handling occurs due to the different
tread depth of the other tires. This happens espe-
cially if only rear tires are replaced. However, this
condition disappears as the new tires are broken
in.
fPlease adjust your driving style accordingly.
Installation of new tires should only be done by a
qualified tire technician.
Valves
fUse only plastic valve caps.
fThe rubber valves must be replaced whenever
the tires are changed.
fThe fitting and replacement specifications
must be observed for metal valves.
fOnly use Original Porsche metal valves.
fProtect the valve inserts against soiling with
valve caps.
Soiled valve inserts can cause a gradual loss
of air.