display Ram 1500 2015 Owners Manual
[x] Cancel search | Manufacturer: RAM, Model Year: 2015, Model line: 1500, Model: Ram 1500 2015Pages: 871, PDF Size: 24.83 MB
Page 384 of 871
on the touchscreen, until a check-mark appears next to
the setting, indicating that the setting had been selected.
Press the back arrow button on the touchscreen to return
to the previous menu.
•ParkView® Backup Camera Active Guidelines
Your vehicle may be equipped with the ParkView® Rear
Back Up Camera Active Guidelines that allows you to see
Active (Dynamic) Guidelines which deflect with steering
wheel angle over the ParkView Back up Camera display
whenever the shift lever is put into REVERSE. The image
will be displayed on the radio touchscreen display along
with a caution note to “check entire surroundings” across
the top of the screen. After five seconds, this note will
disappear. To make your selection, press the “ParkView®
Backup Camera Active Guidelines” and select from on or
off. Press the back arrow button on the touchscreen to
return to the previous menu.
•ParkView® Backup Camera Delay
When this feature is enabled, it will allow the ParkView
Backup Camera display to remain on while in drive for
up to 10 seconds, or 8 mph. To make your selection, press
the “ParkView® Backup Camera Delay” button on the
touchscreen to select from on or off. Press the back arrow
button on the touchscreen to return to the previous
menu.
•Rain Sensing Auto Wipers
When this feature is selected, the system will automati-
cally activate the windshield wipers if it senses moisture
on the windshield. To make your selection, press the
“Rain Sensing” button on the touchscreen to select from
on or off. Press the back arrow button on the touchscreen
to return to the previous menu.
382 UNDERSTANDING YOUR INSTRUMENT PANEL
Page 391 of 871
Air Suspension — If Equipped
After pressing the “Suspension” button on the touch-
screen the following settings will be available.
•Sound Horn With Lower
When this feature is selected, a short horn sound will
occur when the RKE transmitter REMOTE LOWER but-
ton is pressed. Press the box next to your selection and a
check-mark appears next to the feature showing the
system has been activated or the check-mark is removed
showing the system has been deactivated.
•Flash Lights With Lower
When this feature is selected, the front and rear turn
signals will flash when the RKE transmitter REMOTE
LOWER button is pressed twice. This feature may be
selected with or without the Sound Horn on Lower
feature selected. Press the box next to your selection and
a check-mark appears next to the feature showing the
system has been activated or the check-mark is removed
showing the system has been deactivated.
•Suspension Display Messages
When “All” is selected, all the Air Suspension Alerts will
be displayed. When “Warning” is selected only the Air
Suspension Warnings will be displayed.
•Automatic Aero Mode (1500 Model Only)
When this feature is selected the Ride Height will auto-
matically be adjusted depending on the vehicle speed.
Press the box next to your selection and a check-mark
appears next to the feature showing the system has been
activated or the check-mark is removed showing the
system has been deactivated.
•Tire Jack Mode
When this feature is selected the air suspension system is
disabled to assist with changing a spare tire. Press the box
next to your selection and a check-mark appears next to
4
UNDERSTANDING YOUR INSTRUMENT PANEL 389
Page 393 of 871
until a check-mark appears next to the setting, showing
that the setting has been selected. Refer to “Integrated
Trailer Brake Module” in “Starting And Operating.”
•Trailer Name
When this feature is selected, the Trailer name can be
selected from 16 names. To make your selection, scroll up
or down until the preferred setting is highlighted, then
press and release the SELECT button until a check-mark
appears next to the setting, showing that the setting has
been selected.
Audio
After pressing the “Audio” button on the touchscreen the
following settings will be available:
•Balance/Fade
This feature allows you to adjust the Balance and Fade
settings. Press and drag the speaker icon or use the
arrows to adjust, tap the “C” icon to readjust to the center.
Press the back arrow button on the touchscreen to return
to the previous menu.
•Equalizer
When in this display you may adjust the Bass, Mid and
Treble settings. Adjust the settings with the “+” and “–”
buttons on the touchscreen or by selecting any point on
the scale between the “+” and “–” buttons on the
touchscreen. Press the back arrow button on the touch-
screen to return to the previous menu.
•Speed Adjusted Volume
This feature increases or decreases volume relative to
vehicle speed. To change the Speed Adjusted Volume
press the “Speed Adjusted Volume” button on the touch-
screen and select from “Off,” “1,” “2” or “3” buttons on
the touchscreen. Press the back arrow button on the
touchscreen to return to the previous menu.
4
UNDERSTANDING YOUR INSTRUMENT PANEL 391
Page 395 of 871
SiriusXM Setup — If Equipped
After pressing the “SiriusXM Setup” button on the touch-
screen, the following settings will be available:
•Channel Skip
SiriusXM can be programmed to designate a group of
channels that are the most desirable to listen to or to
exclude undesirable channels while scanning. To make
your selection, press the “Channel Skip” button on the
touchscreen, select the channels you would like to skip
followed by pressing the back arrow button on the
touchscreen.
•Subscription Information
New vehicle purchasers or lessees will receive a free
limited time subscription to SiriusXM Satellite Radio
with your radio. Following the expiration of the free
services, it will be necessary to access the information on
the Subscription Information screen to re-subscribe.
Press the “Subscription Info” button on the touchscreen
to access the Subscription Information screen.
Write down the SIRIUS ID numbers for your receiver. To
reactivate your service, either call the number listed on
the screen or visit the provider online.
NOTE:SiriusXM Travel Link is a separate subscription
and is available for U.S. residents only.
Restore Settings
After pressing the “Restore Settings” button on the
touchscreen the following settings will be available:
•Restore Settings
When this feature is selected it will reset the Display,
Clock, Audio, and Radio Settings to their default settings.
To restore the settings to their default setting, press the
“Restore Settings” button on the touchscreen and pop-up
will appear asking#Are you sure you want to reset your
4
UNDERSTANDING YOUR INSTRUMENT PANEL 393
Page 396 of 871

settings to default?” select “OK” to restore, or “Cancel” to
exit. Once the settings are restored, a pop-up appears
stating#settings reset to default.#
Clear Personal Data
After pressing the “Clear Personal Data Settings” button
on the touchscreen the following settings will be avail-
able:
•Clear Personal Data
When this feature is selected it will remove personal data
including Bluetooth® devices and presets. To remove
personal information, press the “Clear Personal Data”
button and a pop-up will appear asking#Are you sure
you want to clear all personal data?” select “OK” to
Clear, or “Cancel” to exit. Once the data has been cleared,
a pop up appears stating#Personal data cleared.”
System Information
After pressing the “System Information” button on the
touchscreen the following settings will be available:
•System Information
When System Information is selected, a System Informa-
tion screen will appear displaying the system software
version.
Uconnect® RADIOS — IF EQUIPPED
For detailed information about your Uconnect® radio,
refer to your Uconnect® Supplement Manual.
394 UNDERSTANDING YOUR INSTRUMENT PANEL
Page 420 of 871

NOTE:In cold weather, use of Recirculation mode may
lead to excessive window fogging. The recirculation
feature may be unavailable (button on the touchscreen
greyed out) if conditions exist that could create fogging
on the inside of the windshield. On systems with Manual
Climate Controls, the recirculation mode is not allowed
in Defrost mode to improve window clearing operation.
Recirculation will be disabled automatically if this mode
is selected. Attempting to use Recirculation while in this
mode will cause the LED in the control button on the
faceplate to blink and then turn off.
Automatic Temperature Control (ATC)
Automatic Operation
1. Push the AUTO button on the faceplate or press the
“AUTO” button on the touchscreen.
2. Next, adjust the temperature you would like the
system to maintain by adjusting the driver and pas-
senger temperature buttons on the faceplate or but-
tons on the touchscreen. Once the desired temperature
is displayed, the system will achieve and automati-
cally maintain that comfort level.
3. When the system is set up for your comfort level, it is
not necessary to change the temperature. You will
experience the greatest efficiency by simply allowing
the system to function automatically.
NOTE:
•It is not necessary to move the temperature settings. The
system automatically adjusts the temperature, mode, and
blower speed to provide comfort as quickly as possible.
•The temperature can be displayed in U.S. or Metric
units by selecting the Uconnect® customer-
programmable feature. Refer to the “Uconnect® Sys-
tem Settings” in this section of the manual.
418 UNDERSTANDING YOUR INSTRUMENT PANEL
Page 424 of 871
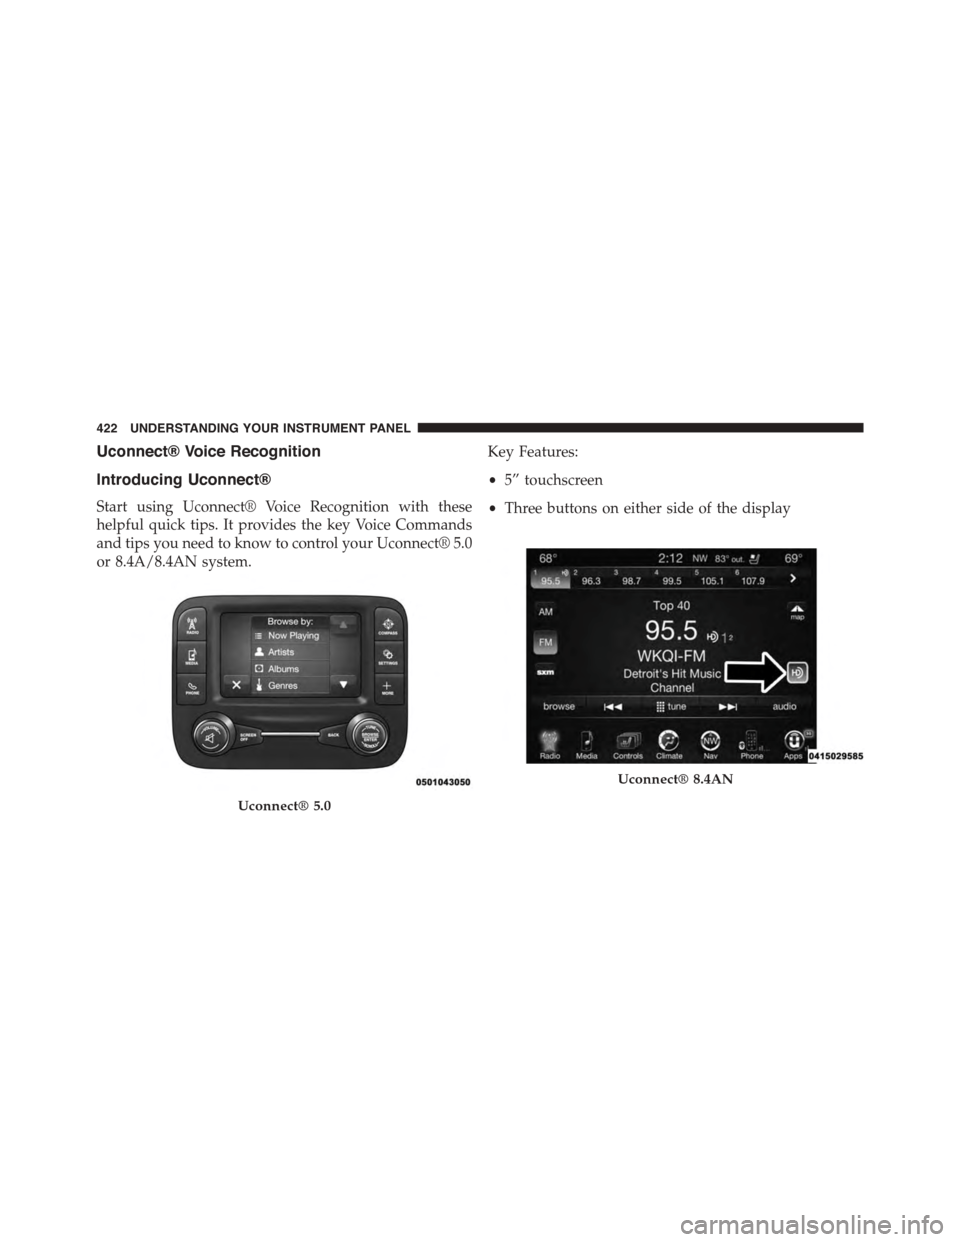
Uconnect® Voice Recognition
Introducing Uconnect®
Start using Uconnect® Voice Recognition with these
helpful quick tips. It provides the key Voice Commands
and tips you need to know to control your Uconnect® 5.0
or 8.4A/8.4AN system.
Key Features:
•5” touchscreen
•Three buttons on either side of the display
Uconnect® 5.0
Uconnect® 8.4AN
422 UNDERSTANDING YOUR INSTRUMENT PANEL
Page 430 of 871
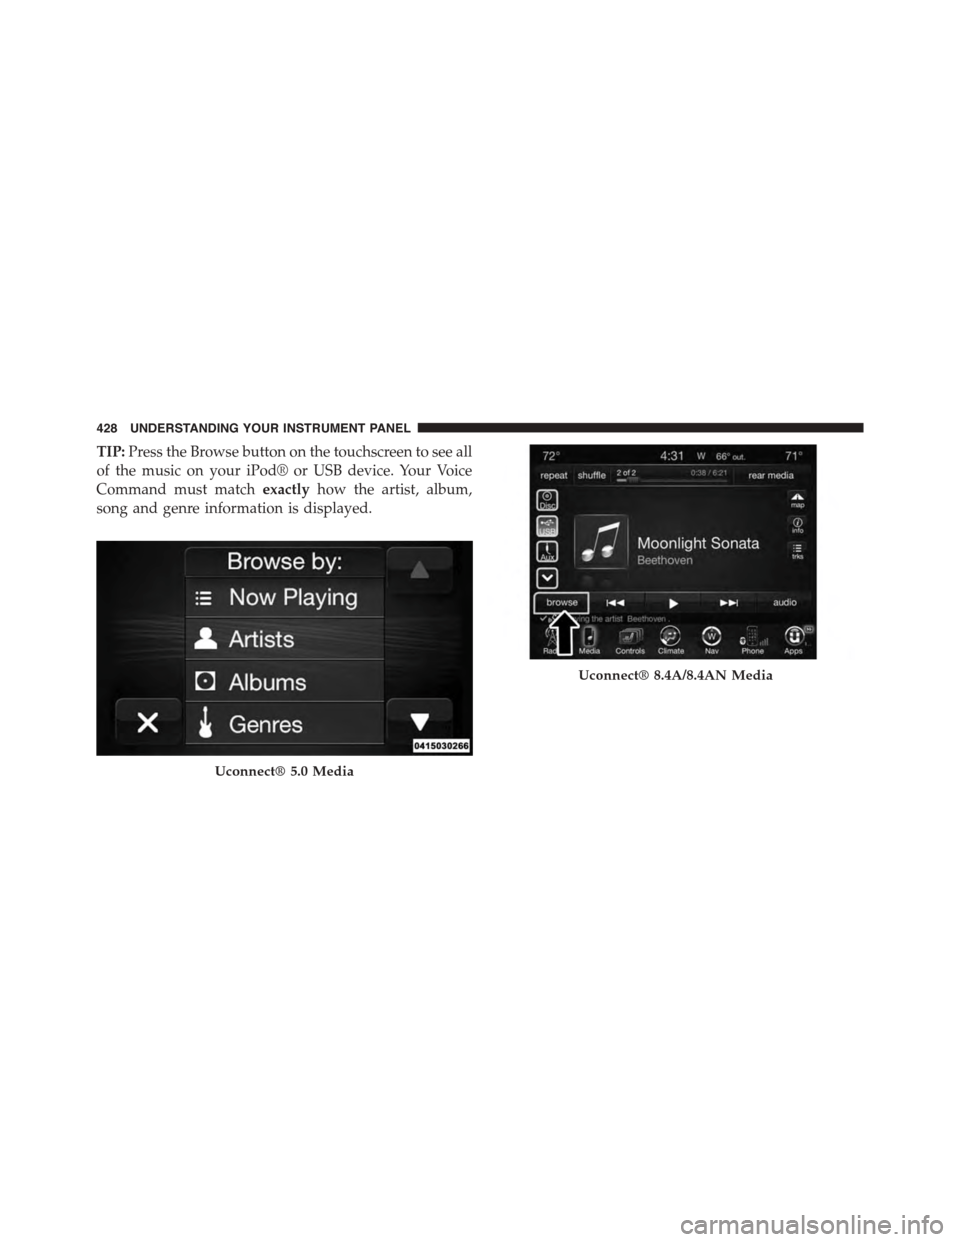
TIP:Press the Browse button on the touchscreen to see all
of the music on your iPod® or USB device. Your Voice
Command must matchexactlyhow the artist, album,
song and genre information is displayed.
Uconnect® 5.0 Media
Uconnect® 8.4A/8.4AN Media
428 UNDERSTANDING YOUR INSTRUMENT PANEL
Page 439 of 871

4. Once the YELP® home screen appears on the touch-
screen, push the VR button, then say:“YELP
search.”
5. Listen to the system prompts and after the beep, tell
Uconnect® the place or business that you’d like
Uconnect® to find.
TIP:Once you perform a search, you can reorganize the
results by selecting either the Best Match, Rating or
Distance tab on the top of the touchscreen display.
Yelp®
4
UNDERSTANDING YOUR INSTRUMENT PANEL 437
Page 444 of 871
▫Brake/Transmission Shift Interlock System . . .461
▫Eight-Speed Automatic Transmission —
If Equipped.........................461
▫Six-Speed Automatic Transmission —
1500 Models Only (If Equipped)...........470
▫Six-Speed Automatic Transmission —
2500/3500 Models Only................483
!FOUR-WHEEL DRIVE OPERATION —
IF EQUIPPED.........................494
▫Manually Shifted Transfer Case —
If Equipped..........................494
▫Electronically Shifted Transfer Case (Four-Position
Switch) — If Equipped.................498
▫Electronically Shifted Transfer Case (Five-Position
Switch) — If Equipped.................504
▫Electronically Shifted Transfer Case (Five-Position
Switch) — If Equipped.................509
!AIR SUSPENSION SYSTEM (1500 MODELS) —
IF EQUIPPED.........................516
▫Description..........................516
▫Air Suspension Modes..................520
▫Electronic Vehicle Information Center
(EVIC)/Driver Information Display (DID)
Display Messages.....................522
▫Operation...........................522
!AIR SUSPENSION SYSTEM (2500/3500 MODELS) —
IF EQUIPPED..........................524
▫Description..........................524
▫Air Suspension Modes..................526
442 STARTING AND OPERATING