warning RENAULT KANGOO 2017 X61 / 2.G Repair Manual
[x] Cancel search | Manufacturer: RENAULT, Model Year: 2017, Model line: KANGOO, Model: RENAULT KANGOO 2017 X61 / 2.GPages: 260, PDF Size: 5.68 MB
Page 178 of 260
4.4
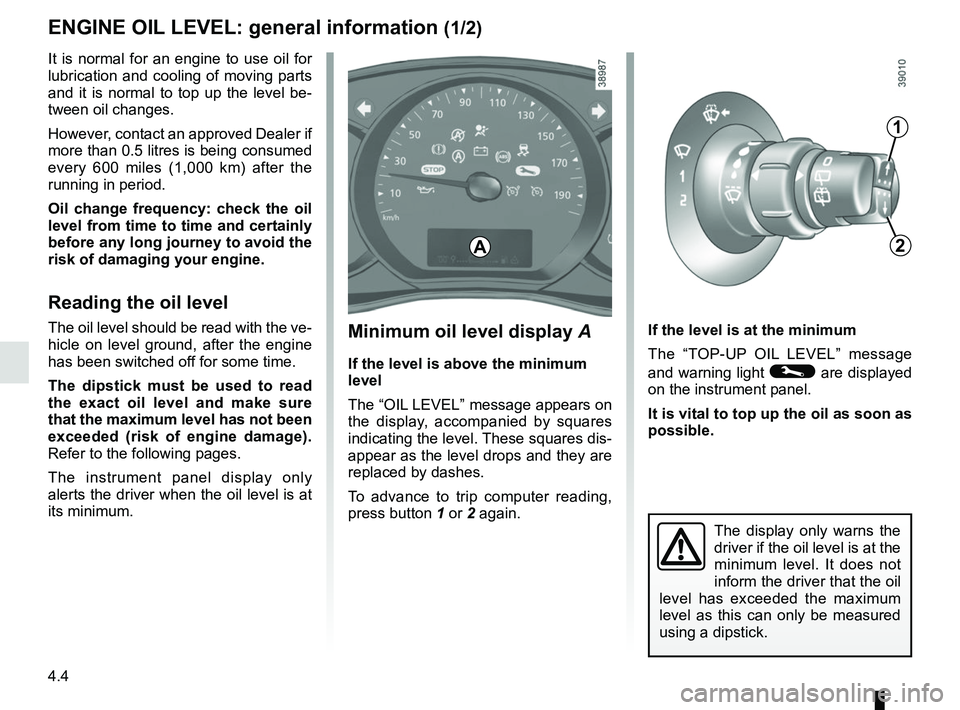
Minimum oil level display A
If the level is above the minimum
level
The “OIL LEVEL” message appears on
the display, accompanied by squares
indicating the level. These squares dis-
appear as the level drops and they are
replaced by dashes.
To advance to trip computer reading,
press button 1 or 2 again. If the level is at the minimum
The “TOP-UP OIL LEVEL” message
and warning light © are displayed
on the instrument panel.
It is vital to top up the oil as soon as
possible.
The display only warns the
driver if the oil level is at the
minimum level. It does not
inform the driver that the oil
level has exceeded the maximum
level as this can only be measured
using a dipstick.
It is normal for an engine to use oil for
lubrication and cooling of moving parts
and it is normal to top up the level be-
tween oil changes.
However, contact an approved Dealer if
more than 0.5 litres is being consumed
every 600 miles (1,000 km) after the
running in period.
Oil change frequency: check the oil
level from time to time and certainly
before any long journey to avoid the
risk of damaging your engine.
Reading the oil level
The oil level should be read with the ve-
hicle on level ground, after the engine
has been switched off for some time.
The dipstick must be used to read
the exact oil level and make sure
that the maximum level has not been
exceeded (risk of engine damage).
Refer to the following pages.
The instrument panel display only
alerts the driver when the oil level is at
its minimum.
1
2A
ENGINE OIL LEVEL: general information (1/2)
Page 187 of 260
4.13
TYRE PRESSURE WHEN cold (1/2)
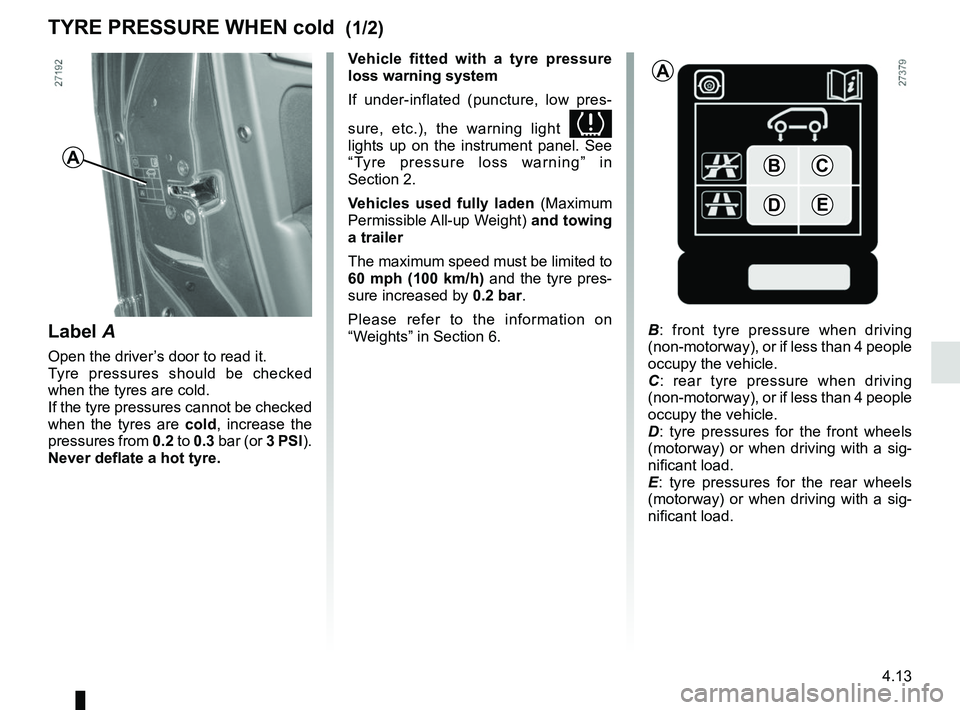
B: front tyre pressure when driving
(non-motorway), or if less than 4 people
occupy the vehicle.
C : rear tyre pressure when driving
(non-motorway), or if less than 4 people
occupy the vehicle.
D : tyre pressures for the front wheels
(motorway) or when driving with a sig-
nificant load.
E : tyre pressures for the rear wheels
(motorway) or when driving with a sig-
nificant load.
C
DE
BA
A
Label A
Open the driver’s door to read it.
Tyre pressures should be checked
when the tyres are cold.
If the tyre pressures cannot be checked
when the tyres are cold, increase the
pressures from 0.2 to 0.3 bar (or 3 PSI).
Never deflate a hot tyre. Vehicle fitted with a tyre pressure
loss warning system
If under-inflated (puncture, low pres-
sure, etc.), the warning light
lights up on the instrument panel. See
“Tyre pressure loss warning” in
Section 2.
Vehicles used fully laden (Maximum
Permissible All-up Weight) and towing
a trailer
The maximum speed must be limited to
60 mph (100 km/h) and the tyre pres-
sure increased by 0.2 bar.
Please refer to the information on
“Weights” in Section 6.
Page 194 of 260
5.2
PUNCTURE, EMERGENCY SPARE WHEEL (1/2)
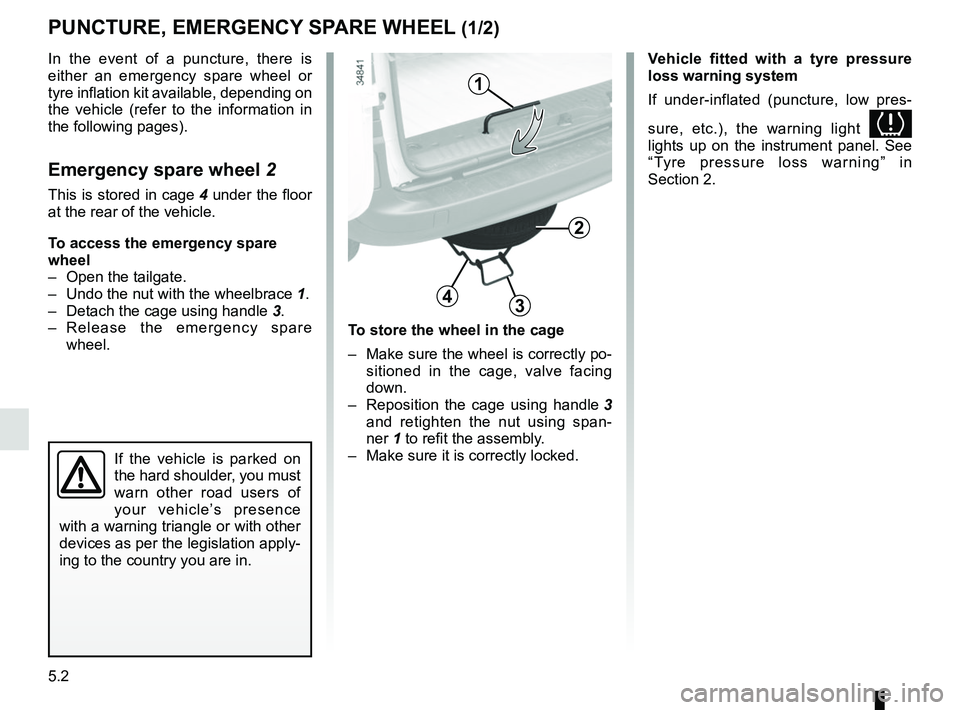
To store the wheel in the cage
– Make sure the wheel is correctly po-sitioned in the cage, valve facing
down.
– Reposition the cage using handle 3
and retighten the nut using span-
ner 1 to refit the assembly.
– Make sure it is correctly locked.
2
3
1
4
In the event of a puncture, there is
either an emergency spare wheel or
tyre inflation kit available, depending on
the vehicle (refer to the information in
the following pages).
Emergency spare wheel 2
This is stored in cage 4 under the floor
at the rear of the vehicle.
To access the emergency spare
wheel
– Open the tailgate.
– Undo the nut with the wheelbrace 1.
– Detach the cage using handle 3.
– Release the emergency spare wheel.
Vehicle fitted with a tyre pressure
loss warning system
If under-inflated (puncture, low pres-
sure, etc.), the warning light
lights up on the instrument panel. See
“Tyre pressure loss warning” in
Section 2.
If the vehicle is parked on
the hard shoulder, you must
warn other road users of
your vehicle’s presence
with a warning triangle or with other
devices as per the legislation apply-
ing to the country you are in.
Page 195 of 260
5.3
PUNCTURE, EMERGENCY SPARE WHEEL (2/2)
If the emergency spare wheel has been stored for several years, have it \
checked by your Dealer to ensure that it is
safe to use.
Vehicle fitted with an emergency spare wheel that differs from the other \
wheels:
– Never fit more than one emergency spare wheel to the same vehicle.
– As the punctured wheel is wider than the emergency spare wheel, the vehi\
cle’s ground clearance is reduced.
– Replace the emergency spare wheel as soon as possible with a wheel ident\
ical to the original one.
– If wheel bolts are supplied with the emergency spare wheel, it is impera\
tive that they are used and that they are used for th e
emergency spare wheel only: refer to the label affixed to the emergency spare wheel.
– When this is fitted to the vehicle, which must only be a temporary measu\
re, the driving speed must not exceed the speed indicated on the label on the wheel.
– Fitting an emergency spare wheel may alter the way the vehicle usually r\
uns. Avoid sudden acceleration or deceleration and reduce your speed when cornering.
– If you need to use snow chains, fit the emergency spare wheel to the rea\
r axle and check the tyre pressure.
– The warning light
on the instrument panel flashes for several seconds, then stays on.
Page 197 of 260
5.5
TYRE INFLATION KIT (2/4)
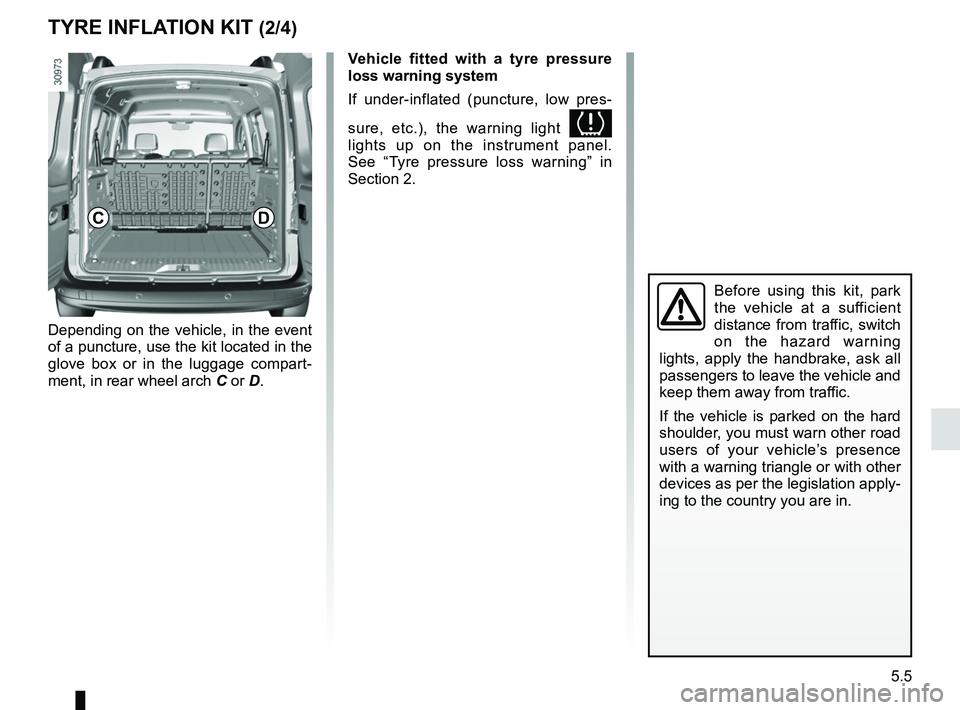
Depending on the vehicle, in the event
of a puncture, use the kit located in the
glove box or in the luggage compart-
ment, in rear wheel arch C or D.
Before using this kit, park
the vehicle at a sufficient
distance from traffic, switch
on the hazard warning
lights, apply the handbrake, ask all
passengers to leave the vehicle and
keep them away from traffic.
If the vehicle is parked on the hard
shoulder, you must warn other road
users of your vehicle’s presence
with a warning triangle or with other
devices as per the legislation apply-
ing to the country you are in.
C
Vehicle fitted with a tyre pressure
loss warning system
If under-inflated (puncture, low pres-
sure, etc.), the warning light
lights up on the instrument panel.
See “Tyre pressure loss warning” in
Section 2.
D
Page 203 of 260
5.11
2
3
1
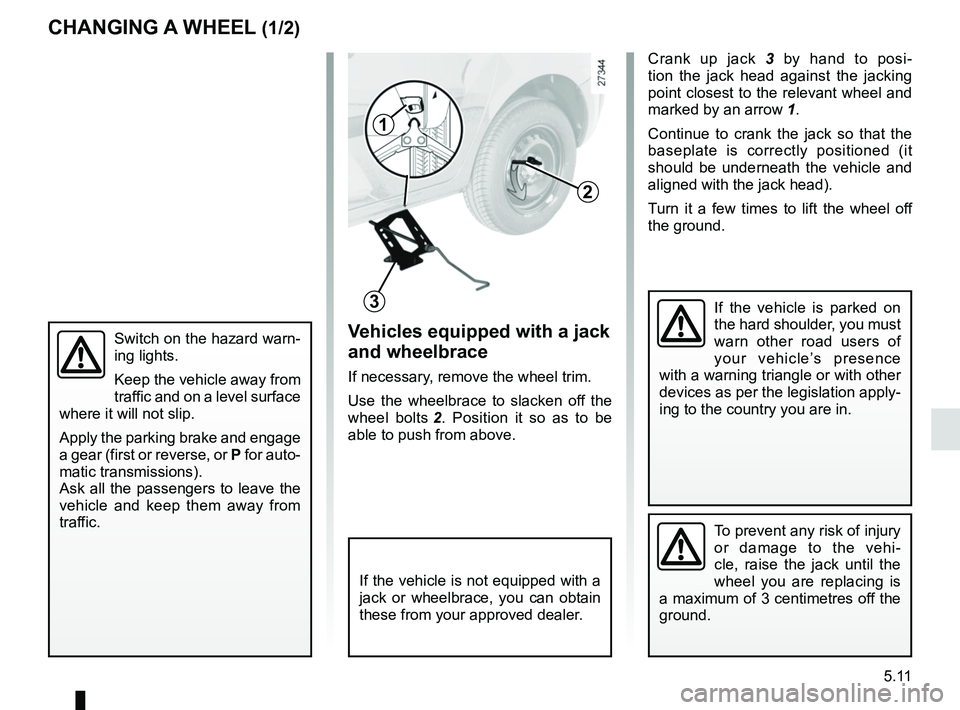
Vehicles equipped with a jack
and wheelbrace
If necessary, remove the wheel trim.
Use the wheelbrace to slacken off the
wheel bolts 2. Position it so as to be
able to push from above.
Switch on the hazard warn-
ing lights.
Keep the vehicle away from
traffic and on a level surface
where it will not slip.
Apply the parking brake and engage
a gear (first or reverse, or P for auto-
matic transmissions).
Ask all the passengers to leave the
vehicle and keep them away from
traffic.
CHANGING A WHEEL (1/2)
Crank up jack 3 by hand to posi-
tion the jack head against the jacking
point closest to the relevant wheel and
marked by an arrow 1.
Continue to crank the jack so that the
baseplate is correctly positioned (it
should be underneath the vehicle and
aligned with the jack head).
Turn it a few times to lift the wheel off
the ground.
To prevent any risk of injury
or damage to the vehi-
cle, raise the jack until the
wheel you are replacing is
a maximum of 3 centimetres off the
ground.
If the vehicle is parked on
the hard shoulder, you must
warn other road users of
your vehicle’s presence
with a warning triangle or with other
devices as per the legislation apply-
ing to the country you are in.
If the vehicle is not equipped with a
jack or wheelbrace, you can obtain
these from your approved dealer.
Page 204 of 260
5.12
Undo the bolts and take off the wheel.
For vehicles fitted with alloy wheels,
use the guide bolt located in the tool kit
to finish loosening and start tightening
the bolts.
Fit the emergency spare wheel on
the central hub and turn it to align the
mounting holes in the wheel and the
hub.
Tighten the bolts, checking that the
wheel is correctly positioned on its hub.
Lower the jack.
If bolts are supplied with the emergency
spare wheel, only use these bolts for
the emergency spare wheel.
With the wheel on the ground, tighten
the bolts fully and have the tightness of
the bolts checked and the emergency
spare wheel pressure checked as soon
as possible.
CHANGING A WHEEL (2/2)
Anti-theft bolts
If you use anti-theft bolts, fit these
nearest the valve (wheel trim may
not be able to fit).
If you have a puncture, re-
place the wheel as soon as
possible.
A tyre which has been punc-
tured should always be inspected
(and repaired, where possible) by a
specialist.
Vehicle fitted with a tyre pressure
loss warning system
If under-inflated (puncture, low pres-
sure, etc.), the warning light
lights up on the instrument panel. See
“Tyre pressure loss warning” in
Section 2.
Page 205 of 260
5.13
TYRES (1/3)Maintaining the tyres
The tyres must be in good condition
and the tread form must have sufficient
depth; tyres approved by our Technical
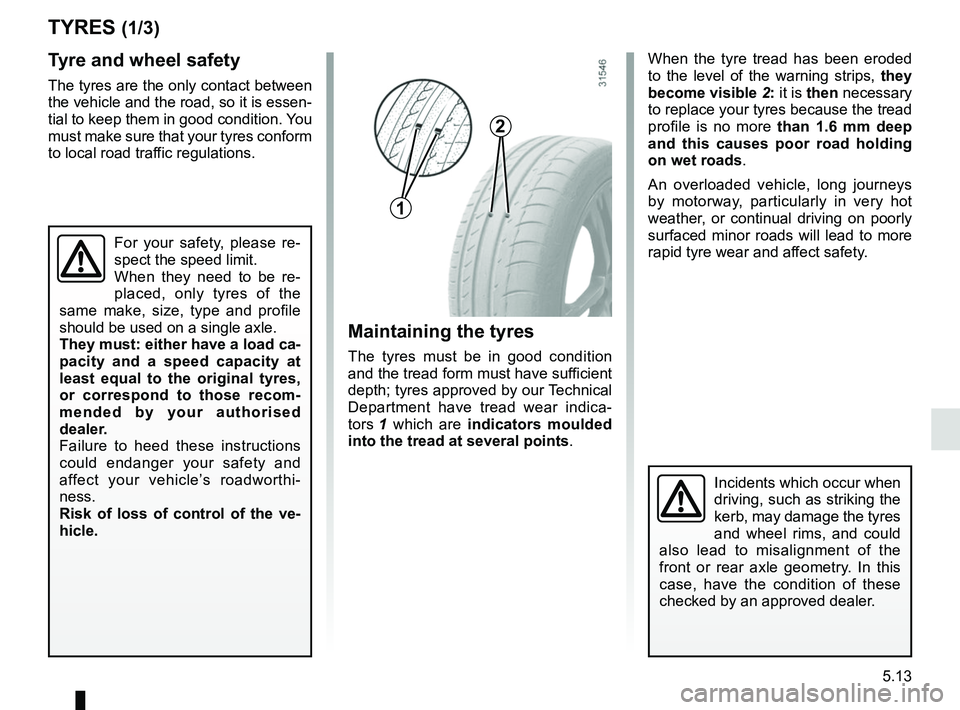
Department have tread wear indica-
tors 1 which are indicators moulded
into the tread at several points .
Tyre and wheel safety
The tyres are the only contact between
the vehicle and the road, so it is essen-
tial to keep them in good condition. You
must make sure that your tyres conform
to local road traffic regulations. When the tyre tread has been eroded
to the level of the warning strips, they
become visible 2: it is then necessary
to replace your tyres because the tread
profile is no more than 1.6
mm deep
and this causes poor road holding
on wet roads.
An overloaded vehicle, long journeys
by motorway, particularly in very hot
weather, or continual driving on poorly
surfaced minor roads will lead to more
rapid tyre wear and affect safety.
Incidents which occur when
driving, such as striking the
kerb, may damage the tyres
and wheel rims, and could
also lead to misalignment of the
front or rear axle geometry. In this
case, have the condition of these
checked by an approved dealer.
1
2
For your safety, please re-
spect the speed limit.
When they need to be re-
placed, only tyres of the
same make, size, type and profile
should be used on a single axle.
They must: either have a load ca-
pacity and a speed capacity at
least equal to the original tyres,
or correspond to those recom-
mended by your authorised
dealer.
Failure to heed these instructions
could endanger your safety and
affect your vehicle’s roadworthi-
ness.
Risk of loss of control of the ve-
hicle.
Page 206 of 260
5.14
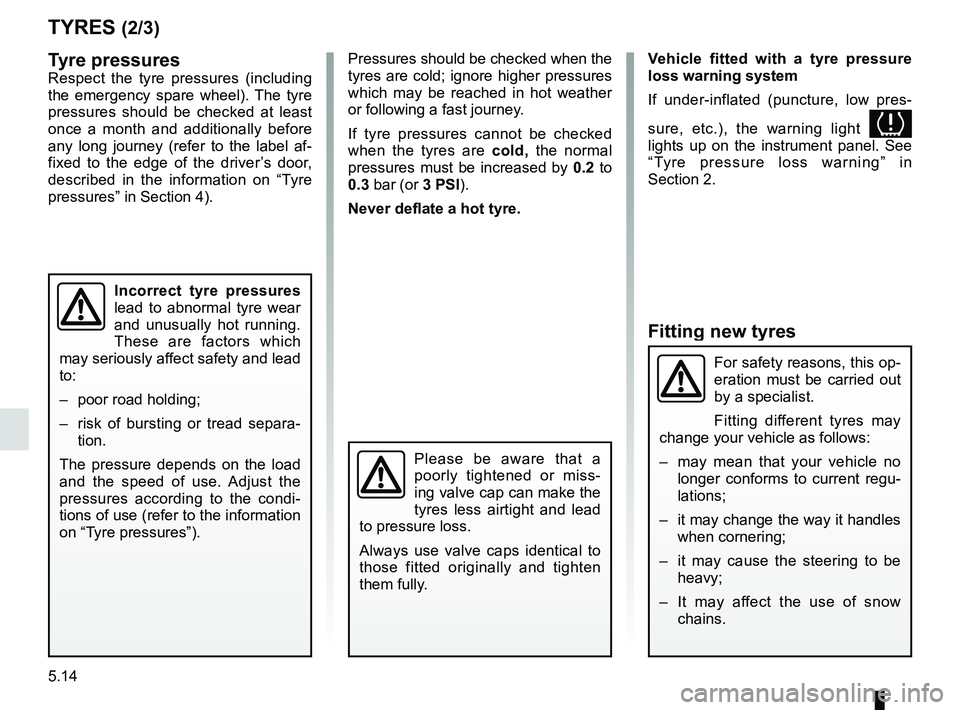
Fitting new tyres
TYRES (2/3)
Pressures should be checked when the
tyres are cold; ignore higher pressures
which may be reached in hot weather
or following a fast journey.
If tyre pressures cannot be checked
when the tyres are cold, the normal
pressures must be increased by 0.2 to
0.3 bar (or 3 PSI).
Never deflate a hot tyre.Tyre pressuresRespect the tyre pressures (including
the emergency spare wheel). The tyre
pressures should be checked at least
once a month and additionally before
any long journey (refer to the label af-
fixed to the edge of the driver’s door,
described in the information on “Tyre
pressures” in Section 4).
Incorrect tyre pressures
lead to abnormal tyre wear
and unusually hot running.
These are factors which
may seriously affect safety and lead
to:
– poor road holding;
– risk of bursting or tread separa- tion.
The pressure depends on the load
and the speed of use. Adjust the
pressures according to the condi-
tions of use (refer to the information
on “Tyre pressures”).
Please be aware that a
poorly tightened or miss-
ing valve cap can make the
tyres less airtight and lead
to pressure loss.
Always use valve caps identical to
those fitted originally and tighten
them fully.
For safety reasons, this op-
eration must be carried out
by a specialist.
Fitting different tyres may
change your vehicle as follows:
– may mean that your vehicle no longer conforms to current regu-
lations;
– it may change the way it handles when cornering;
– it may cause the steering to be heavy;
– It may affect the use of snow chains.
Vehicle fitted with a tyre pressure
loss warning system
If under-inflated (puncture, low pres-
sure, etc.), the warning light
lights up on the instrument panel. See
“Tyre pressure loss warning” in
Section 2.
Page 220 of 260
5.28
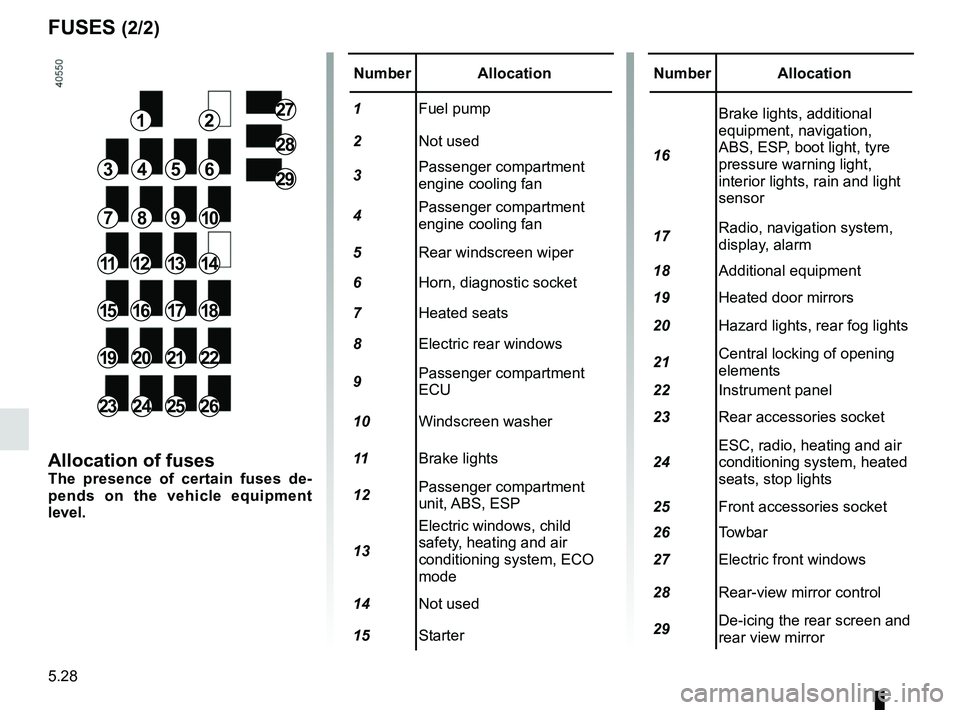
FUSES (2/2)
Number Allocation
1 Fuel pump
2 Not used
3 Passenger compartment
engine cooling fan
4 Passenger compartment
engine cooling fan
5 Rear windscreen wiper
6 Horn, diagnostic socket
7 Heated seats
8 Electric rear windows
9 Passenger compartment
ECU
10 Windscreen washer
11 Brake lights
12 Passenger compartment
unit, ABS, ESP
13 Electric windows, child
safety, heating and air
conditioning system, ECO
mode
14 Not used
15 StarterNumber Allocation
16 Brake lights, additional
equipment, navigation,
ABS, ESP, boot light, tyre
pressure warning light,
interior lights, rain and light
sensor
17 Radio, navigation system,
display, alarm
18 Additional equipment
19 Heated door mirrors
20 Hazard lights, rear fog lights
21 Central locking of opening
elements
22 Instrument panel
23 Rear accessories socket
24 ESC, radio, heating and air
conditioning system, heated
seats, stop lights
25 Front accessories socket
26 Towbar
27 Electric front windows
28 Rear-view mirror control
29 De-icing the rear screen and
rear view mirror
12
3456
78910
11121314
15161718
19202122
23242526
27
28
29
Allocation of fusesThe presence of certain fuses de-
pends on the vehicle equipment
level.