SAAB 900 1986 User Guide
900 1986
SAAB
SAAB
https://www.carmanualsonline.info/img/65/57499/w960_57499-0.png
SAAB 900 1986 User Guide
Page 47 of 133
Downloaded from www.Manualslib.com manuals search engine Top assembty 812-23
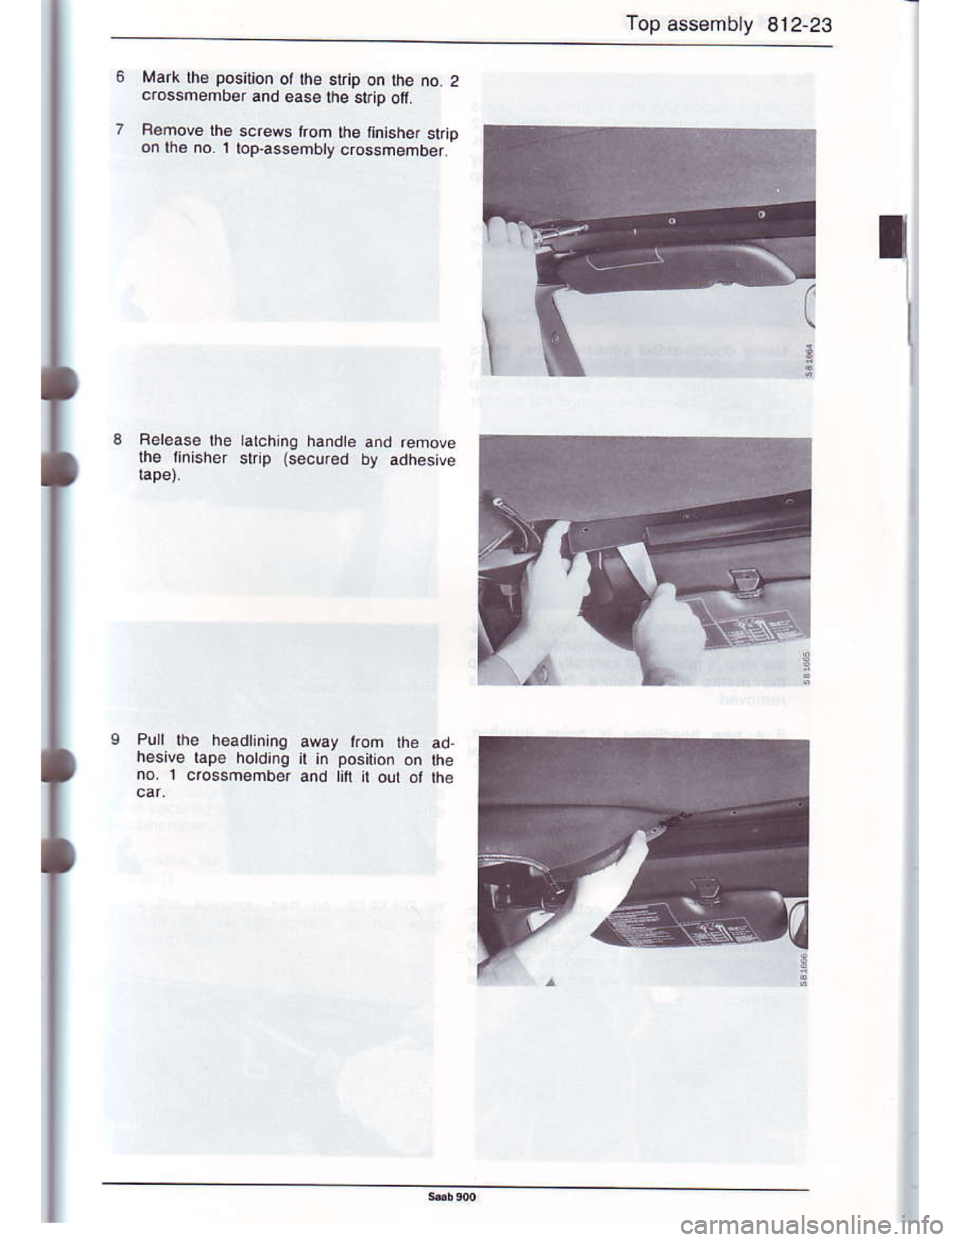
Mark $€ position ot the strip on lhe no. 2crossmefroer and 6ase ftre strip ofi.
Remove lh6 screws trom lhe tinishef $ipon fio no. 1 top.assembty cros.nenb€r.
Rel€ase the talching handte and refrove
h€enn6her st4 (securod by adhesive
Page 49 of 133
Downloaded from www.Manualslib.com manuals search engine Top assembly 8i2-25
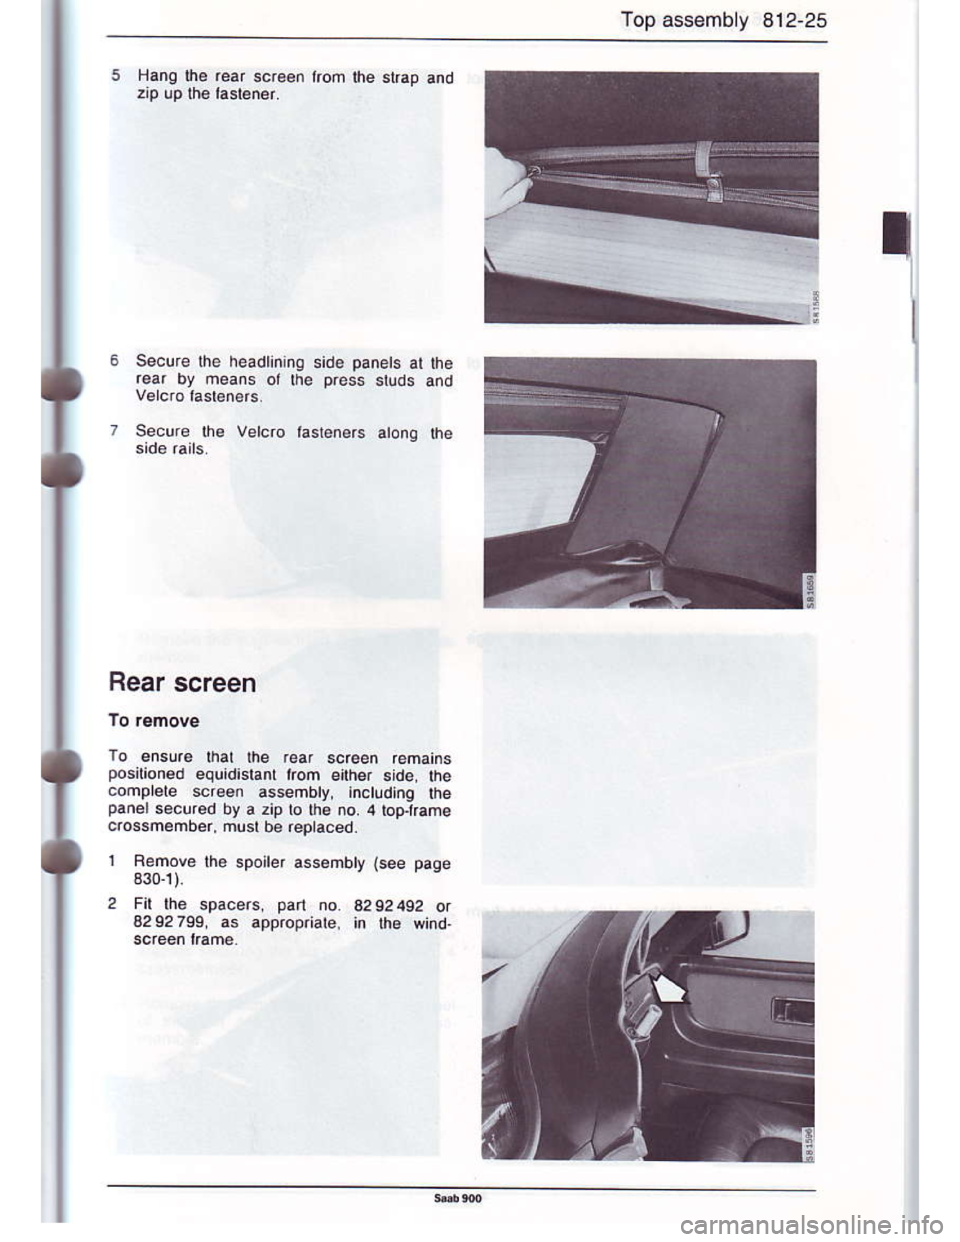
Hang the ,ear scr€€n lrom the st6p and
Secur€ lhe headlining side panels at the
r€ar by neans or lhe p.ess srlds and
Setu.e the Veldo lasleners atong lh€
I
r3
Rear screen
To ensure tral lhe ,ear 6creen remainsposrtioned equidislanl irom eith6r side, lhecomprere scr€6n assembty, inctlding thepaner s6cured by a zip lo tha no. 4 topjlam.qossmember, 6usl be reptaced.
I Bemove rh€ sporrer assembty {see pase
330.1)
2 Flt th6 spacers pan no. 82S2492 or
4292799, as appropriate. in th. wind
Page 51 of 133
Downloaded from www.Manualslib.com manuals search engine Top assembly 812-27
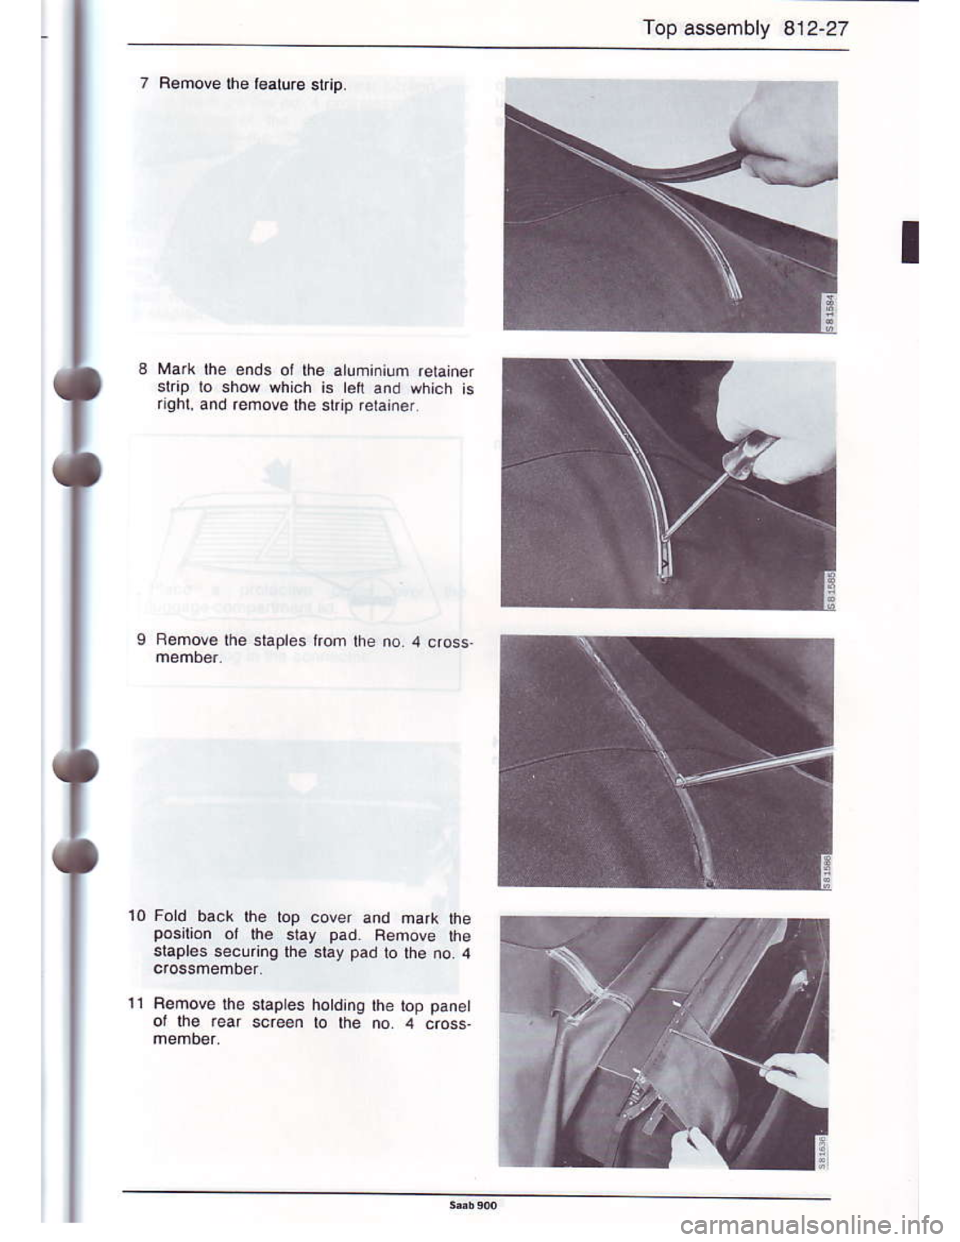
7 Bemove lhe l€.ture skrp.
T
Ma( the ends oi lhe atuminium retainer
skip to show which is lei and which is
riahl, and refrovothe slip relain€r.
Remove the staples lrom lhe no 4 c.oss
10Fotd back the lop cover and mark lheposilion ot the siay pad. Remove the$apr€s secuing lh€ siay pad to the no. 4
11 Remove lh. staples hotding the iop panel
or lh€ rear screen lo lhe no 4 cross-
Page 54 of 133
Downloaded from www.Manualslib.com manuals search engine 812-30 Top assembly
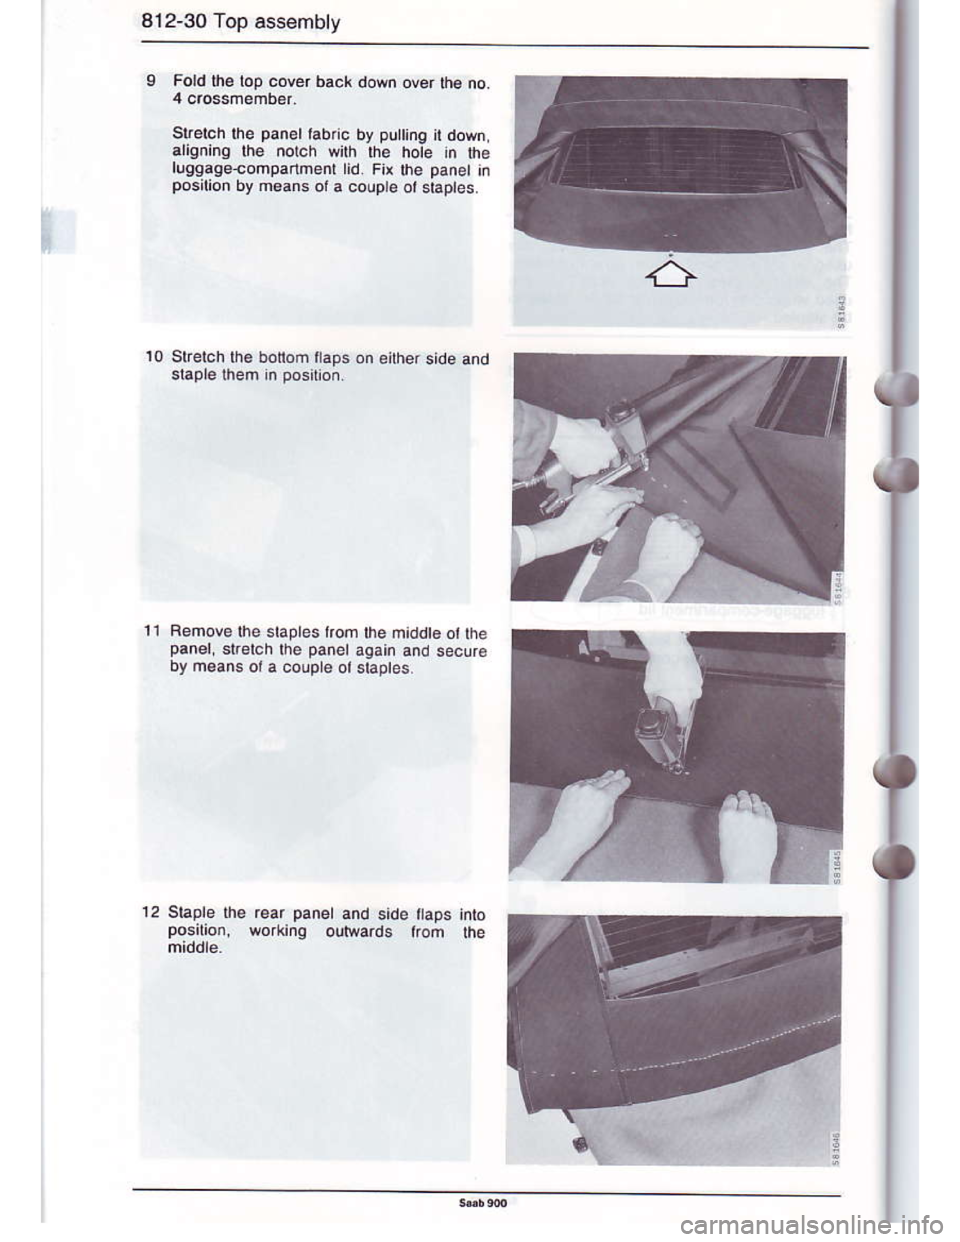
Fold th€ top cov6r back down ovor th€ no.
slretch rhe panel labnc by pu 'no it down,
arcnlnq lh€ norch wirh lhe hote ln trle
luggage€omparth.nl lid. Ftr th6 p.net inposalion by m.ans ol a couple ol staples.
Slretch lhe bonom flaps o.6ither stde and
Rehove the slaples lrom the middt€ ot lhepanel, str6Lh lhe panel again dnd secur€
by n€ans ora coupl€ ol staptes.
Staple be rear panet and side flaps inroposilion, wo*inq oltyeards trom the
't2
Page 56 of 133
Downloaded from www.Manualslib.com manuals search engine 812-32 Top assembty
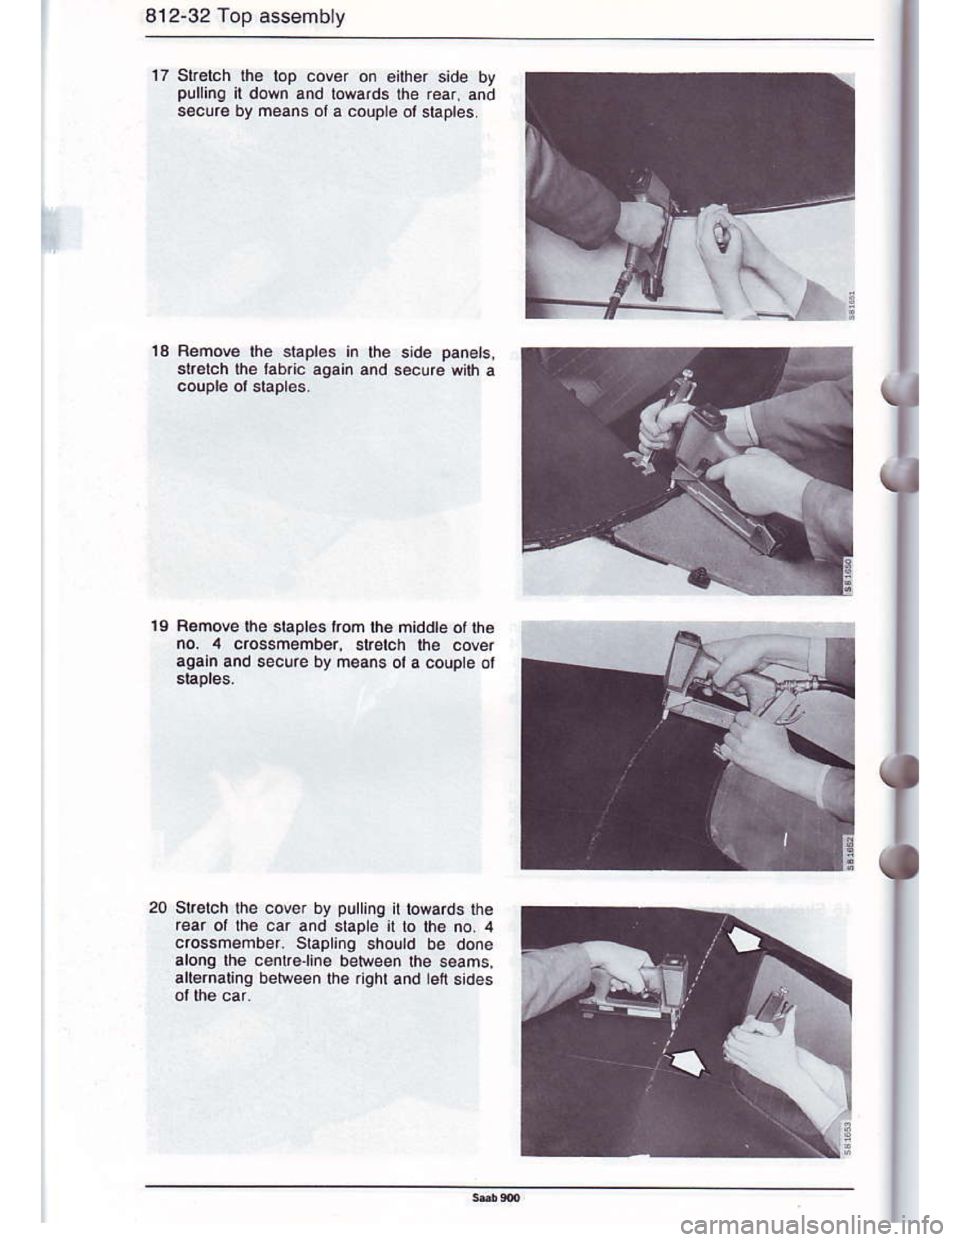
17 Sttelch the top cover on eiher side bvpullinq il down and lowards the rear, anA
s€cur€ by means ot a couple oi slapres.
13Femove lhe stapl€s in
19 R€move the stapt6s kon lhe middleotrhe
no. 4 crossmembe., slrotch he cover
.gain and secure by m.an6 ola couple ot
20 sLelch lhe cove. by pulling il lowards lhe
rea. ol lhe car and slaple il b lhe no. 4
crossmember srapling shourd be done
alonq lhe cenlre.line behdeen th€ s€ams,
6rlernaung between lh€ righl and len sides
Page 60 of 133
Downloaded from www.Manualslib.com manuals search engine 812-36 Top assembly
Panels ol lhe headlining
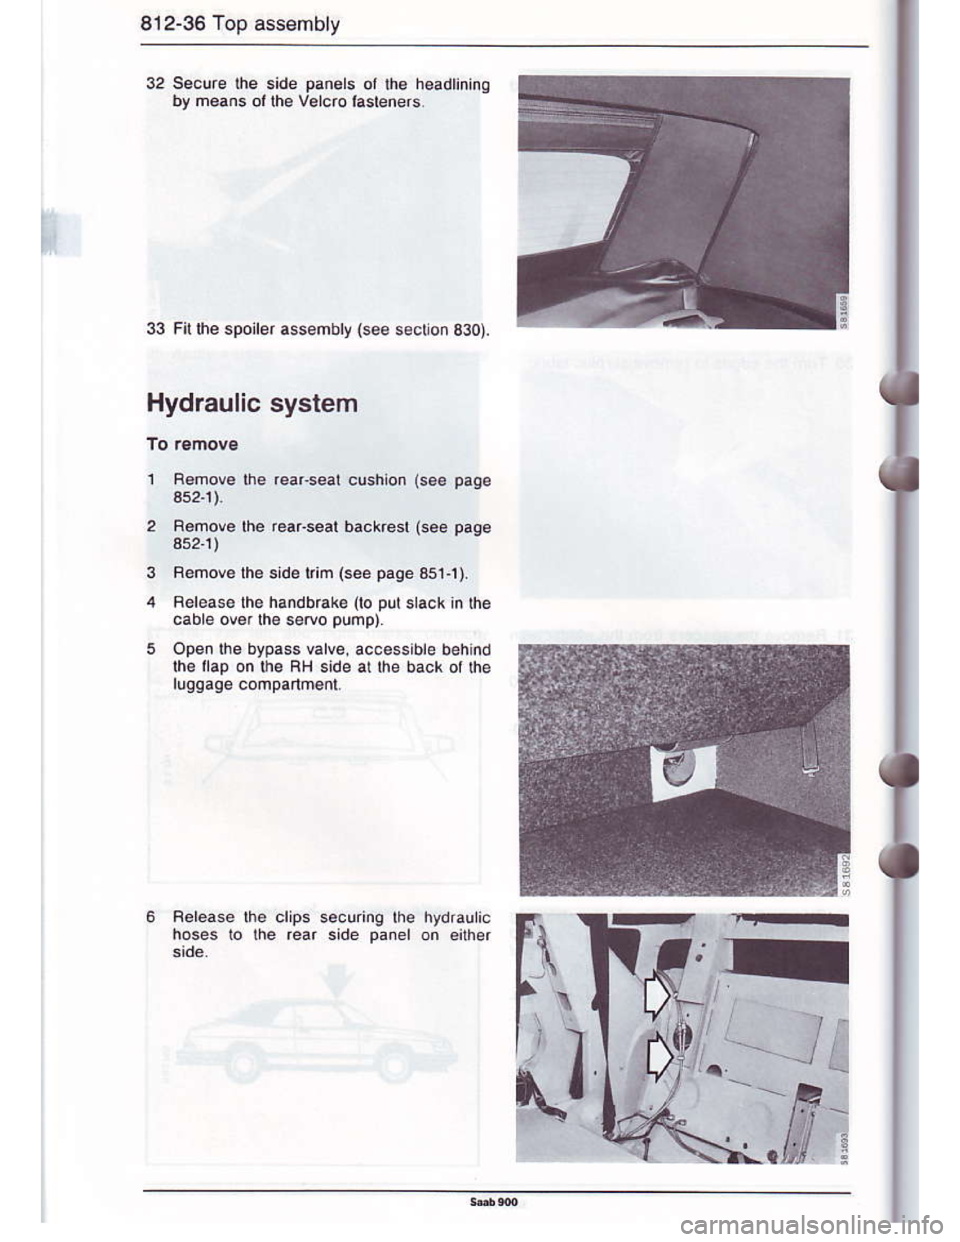
33 Fit the spoirer assehbry {see s€cio.330)
Hydraulic system
1 Remove the rear seal cushion (soe page
3s2-1)
2 Remove lhe rearseat backrest (see page
3s2r)
3 Femovelhe sde rim (see paqe 3s1.1)
4 Release lhe handbrak€ (lo put slack in the
cab e ov€r lhe sefro pump)
5 Open the bypass valve. accessibie behind
lhe llap on the FH sde at the back ot the
luggage comparlmenl
Belease lh6 clips securing lhe hydrauic
hoses lo the rear side panel on eilher
I
R
il
e
Page 65 of 133
Downloaded from www.Manualslib.com manuals search engine Top asssmbly 812-41
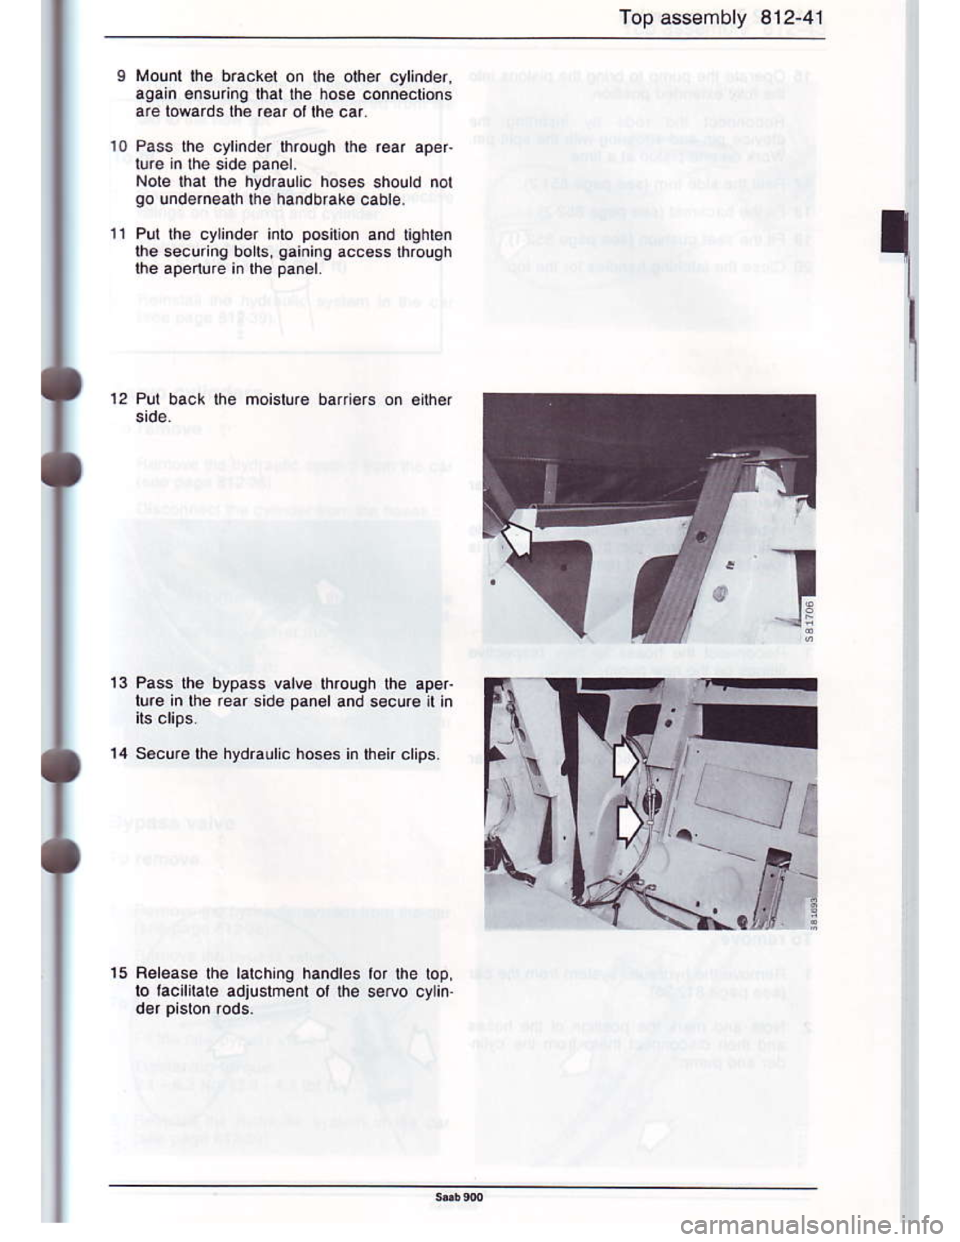
Mount lhe bracket on the oher cylinder,
agaln €nsuing lhat lhe hose oonnections
are towards the rea. ot lhe car
Pass the cylinde. lhrough lhe rear aper
Note lhat lhe hydraulc hos€s should nol
90 lndernealh lhe handbrake cable.
Put the cylinder inlo posilion and righbn
lhe secu nq bolls, gaininq access lhrolgh
$e apenure in the panel.
1o
12 Pul back fte moislure bariers on €ilhef
13Pass lhe bypass valve throuqh lhe ape.
lu.e in lhe rear sido panel and secure il in
Secure the hydraulc hoses in lheirclips.
15 Release lhe lalchng handles lor lhe lop,
lo tacililate adiushent ol lhe seruo cyin.
Page 66 of 133
Downloaded from www.Manualslib.com manuals search engine 812-42 Top assembly
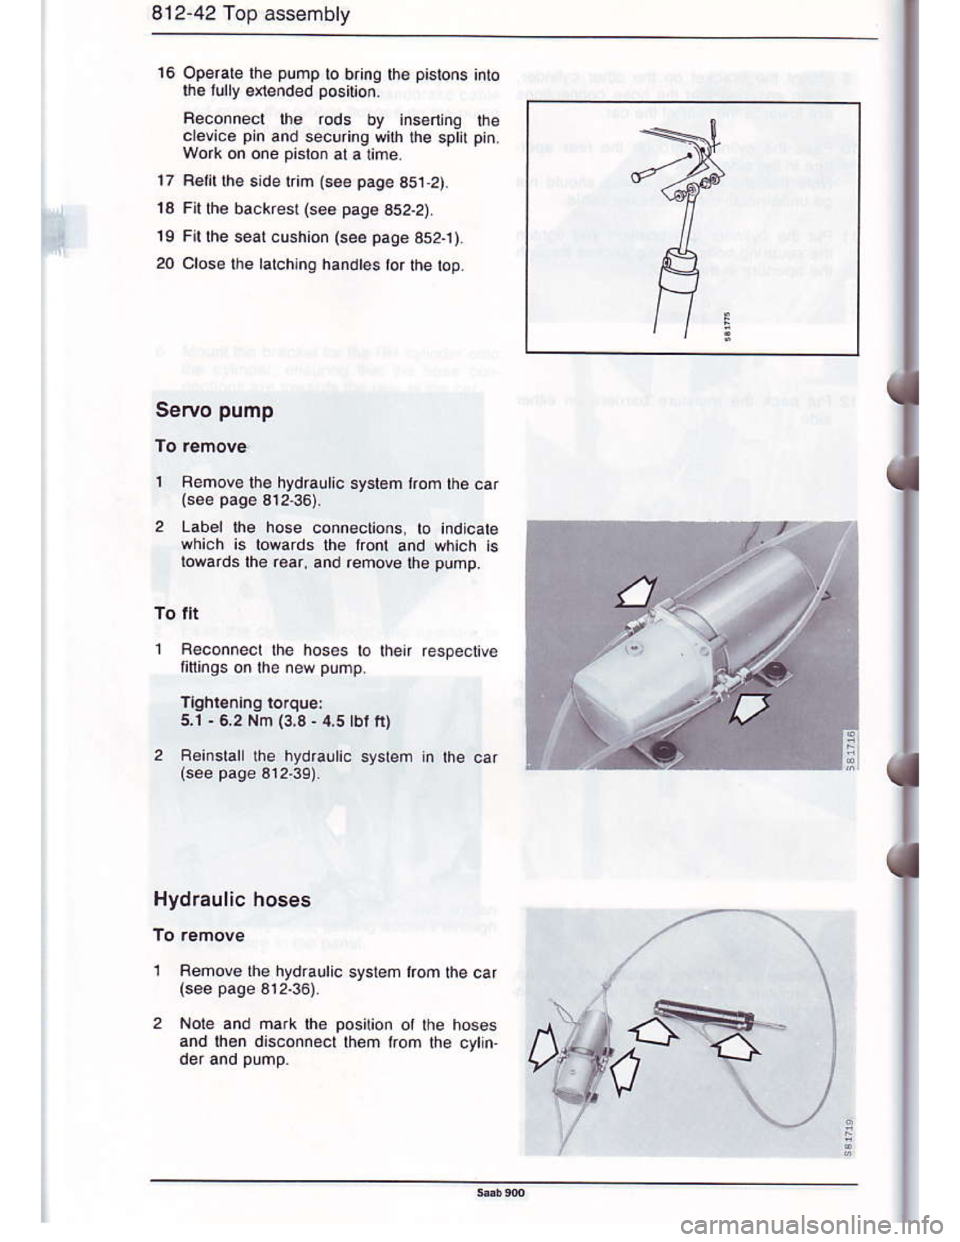
16 operale lhe pump lo bring lhe pistons into
$e lully e{ended position.
Aeconnect $6 rods by insarlng the
crev'ce pin and securinq wilh lhe spll prn
worh on one piston al a ime
17 Felil lhe side tim (s€6 page 351,2).
13 Fi he backest (soe page 3s2.2)
1S Fn lhe sear cushion (see page 3s2.1).
20 close lhe ratching handtes ror thebp
Servo pump
Rehovelhe hydraulic systBm kom lhe car
Labd ba hose conn€clions to indicab
which is towards th€ lront and which is
lowards lhe r€ar, and remove he pump.
To ilt
Reconnect the hoses lo ben respectve
litlings on the new pump
5.1 - 6.2 Nm (3,3- 4,5lbl fr)
F€inslall ihe hydraulic system in rhe car
Hydraulic hoses
1 Renove the hydraulic syslem lrom Ihe car
Nole and mark $e position ot the hoses
and lhen dlsconnecl lhem ifom the cytm
Page 74 of 133
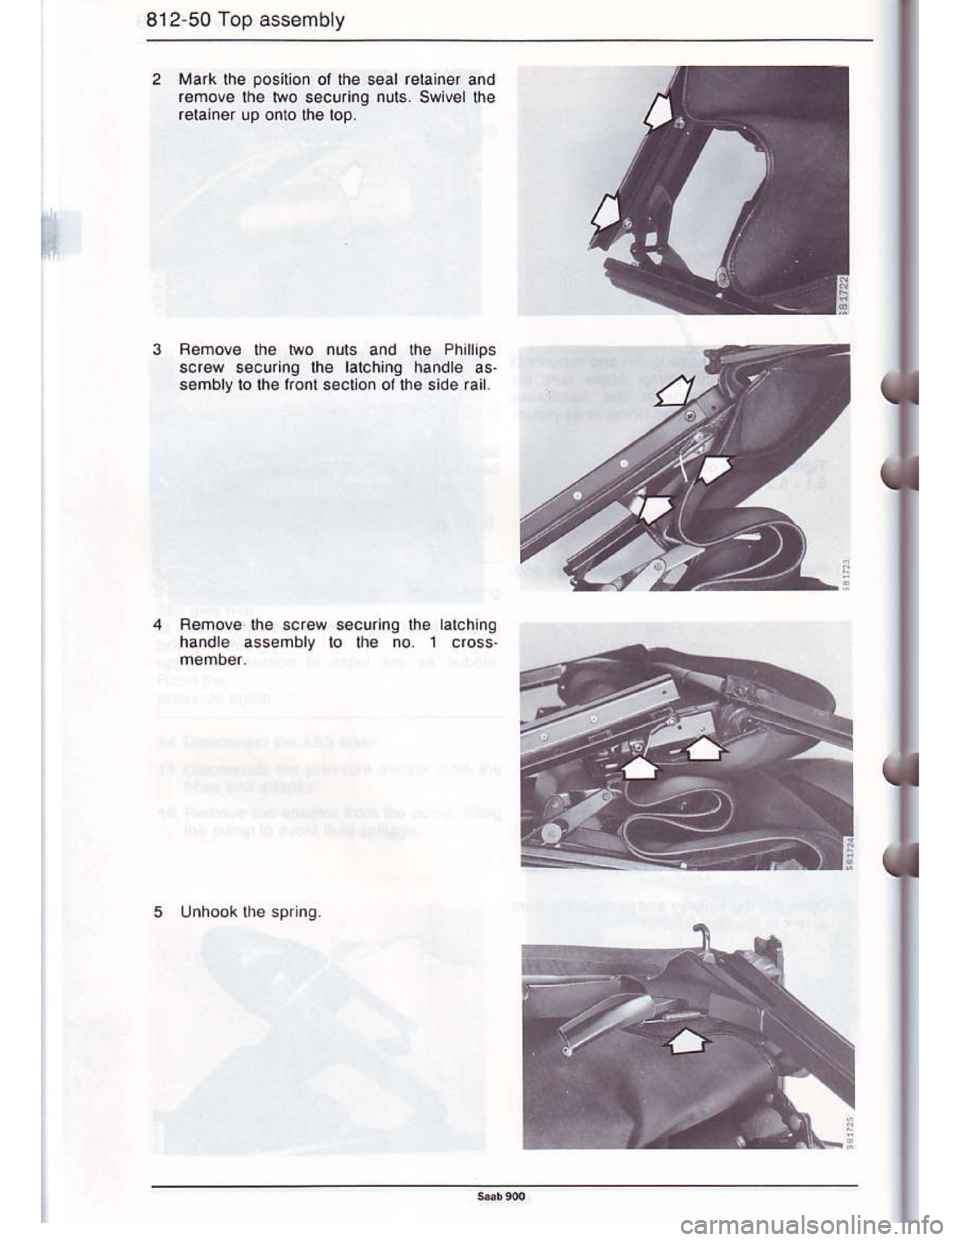
Downloaded from www.Manualslib.com manuals search engine 812-50 Top assembly
Ma.k the position ol ihe seal retainer and
r€move lhe lwo securing nuls. swivel Ihe
Remov€ lhe lwo nuls and lhe Phillips
screw securing lhe latching handle as'
sembly to lhe lronl seclon ol lhe side 6il.
Remove the screw securing lhe latching
handle assembly lo lhe no 1 cross
Page 75 of 133
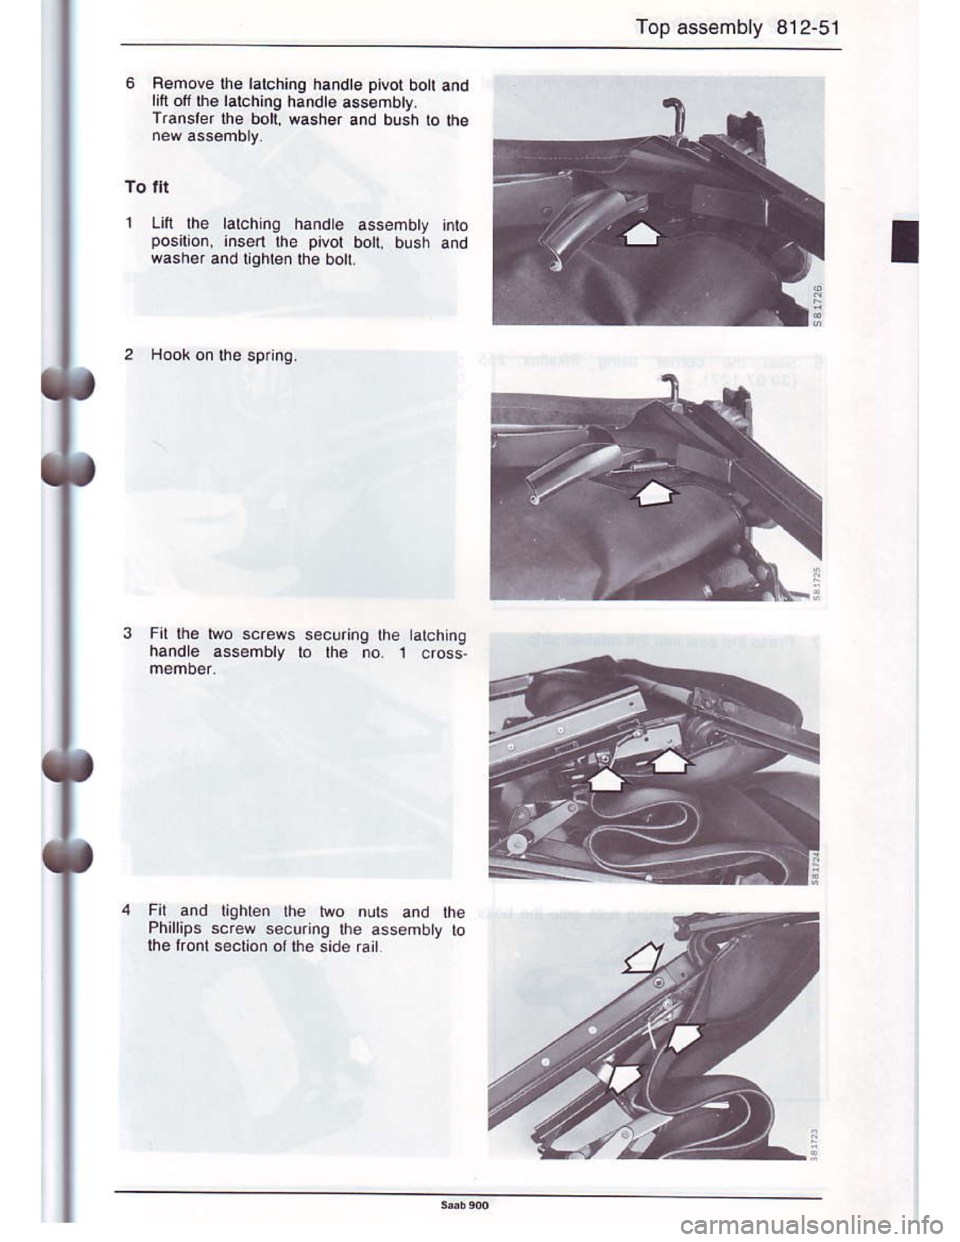
Downloaded from www.Manualslib.com manuals search engine Top assembly 812-51
Bemove lhe lalching handte pivot boll a.d
li{l oll lh€ l6!ching handt€ a6sembty.
Transler lhe bol( washer and bush lo the
10 fit
Lifi lhe latohing handle assembty tntoposjtion. insert the pivol bo[, bush and
wash4 and tlghten lh€ boll.
Fil lha t*o screws securing the tabhing
handle .ssembly to the no. 1 doss-
Fit and tghlen the tuo nuls and the
Phillips $'ew s€cunng the ass€mby ro
me ltonl seclion ollhe sida rail
