turn signal SATURN OUTLOOK 2010 Owners Manual
[x] Cancel search | Manufacturer: SATURN, Model Year: 2010, Model line: OUTLOOK, Model: SATURN OUTLOOK 2010Pages: 444, PDF Size: 4.43 MB
Page 9 of 444
In Brief 1-3
A.Air Vents on page 8‑12.
B. Turn and Lane-Change Signals
on page 6‑4.
C. Instrument Cluster
on
page 5‑12.
D. Driver Information Center (DIC) Buttons. See Driver Information
Center (DIC) (With DIC Buttons)
on page 5‑24or Driver
Information Center (DIC)
(Without DIC Buttons)
on
page 5‑30.
E. Instrument Panel Storage
on
page 4‑1.
F. AM-FM Radio
on page 7‑6.
Navigation/Radio System (If
Equipped). See Navigation
System manual.
G. Exterior Lamp Controls
on
page 6‑1.
H. Hood Release. See Hood
on
page 10‑5.
I. Instrument Panel Illumination
Control on page 6‑5.
J. Cruise Control on page 9‑30. K.
Steering Wheel Adjustment
on
page 5‑2.
L. Horn on page 5‑5.
M. Steering Wheel Controls
on
page 5‑3.
N. Hazard Warning Flashers
on
page 6‑4.
O. Center Console Shift Lever. See “Console Shift Lever” under
Shifting Into Park on page 9‑19.
P. Rear Window Wiper/Washer
on
page 5‑6.
Q. Power Outlets on page 5‑9.
R. Heated Front Seats
on
page 3‑8.
S. Climate Control Systems
on
page 8‑1or Dual Automatic
Climate Control Systemon
page 8‑4(If Equipped).
T. Passenger Airbag Status
Indicator on page 5‑16.
U. Glove Box on page 4‑1.
Initial Drive
Information
This section provides a brief
overview about some of the
important features that may or may
not be on your specific vehicle.
For more detailed information, refer
to each of the features which can be
found later in this owner manual.
ProCarManuals.com
Page 18 of 444

1-12 In Brief
6:Delays wiping cycle. Turn the
band up for more frequent wipes or
down for less frequent wipes.
1 : Slow wipes.
2 : Fast wipes.
Windshield Washer
J: Press the button at the end of
the turn signal/lane change lever to
spray washer fluid on the
windshield.
See Windshield Wiper/Washer
on
page 5‑5.
Climate Controls
A. Fan Control
B. Temperature Control
C. Air Delivery Mode Control
D. Air Conditioning E. REAR (Rear Climate Control)
F. Air Recirculation
G. Rear Window Defogger
ProCarManuals.com
Page 33 of 444
Keys, Doors and Windows 2-3
If there is a decrease in the RKE
operating range:
.Check the distance. The
transmitter may be too far from
the vehicle.
.Check the location. Other
vehicles or objects may be
blocking the signal.
.Check the transmitter's battery.
See“Battery Replacement” later
in this section.
.If the transmitter is still not
working correctly, see your
dealer/retailer or a qualified
technician for service.
Remote Keyless Entry
(RKE) System Operation
The Remote Keyless Entry (RKE)
transmitter functions work up to
60 m (195 feet) away from the
vehicle. There are other conditions which
can affect the performance of the
transmitter. See
Remote Keyless
Entry (RKE) System on page 2‑2.
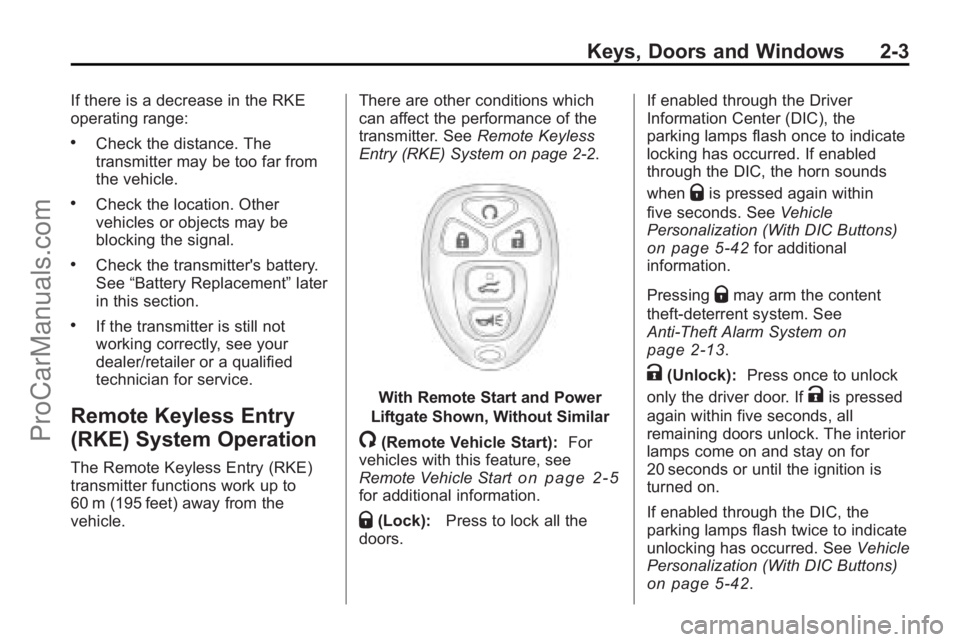
With Remote Start and Power
Liftgate Shown, Without Similar
/(Remote Vehicle Start): For
vehicles with this feature, see
Remote Vehicle Start
on page 2‑5for additional information.
Q(Lock): Press to lock all the
doors. If enabled through the Driver
Information Center (DIC), the
parking lamps flash once to indicate
locking has occurred. If enabled
through the DIC, the horn sounds
when
Qis pressed again within
five seconds. See Vehicle
Personalization (With DIC Buttons)
on page 5‑42for additional
information.
Pressing
Qmay arm the content
theft-deterrent system. See
Anti-Theft Alarm System
on
page 2‑13.
K(Unlock): Press once to unlock
only the driver door. If
Kis pressed
again within five seconds, all
remaining doors unlock. The interior
lamps come on and stay on for
20 seconds or until the ignition is
turned on.
If enabled through the DIC, the
parking lamps flash twice to indicate
unlocking has occurred. See Vehicle
Personalization (With DIC Buttons)
on page 5‑42.
ProCarManuals.com
Page 47 of 444
Keys, Doors and Windows 2-17
For vehicles with outside power
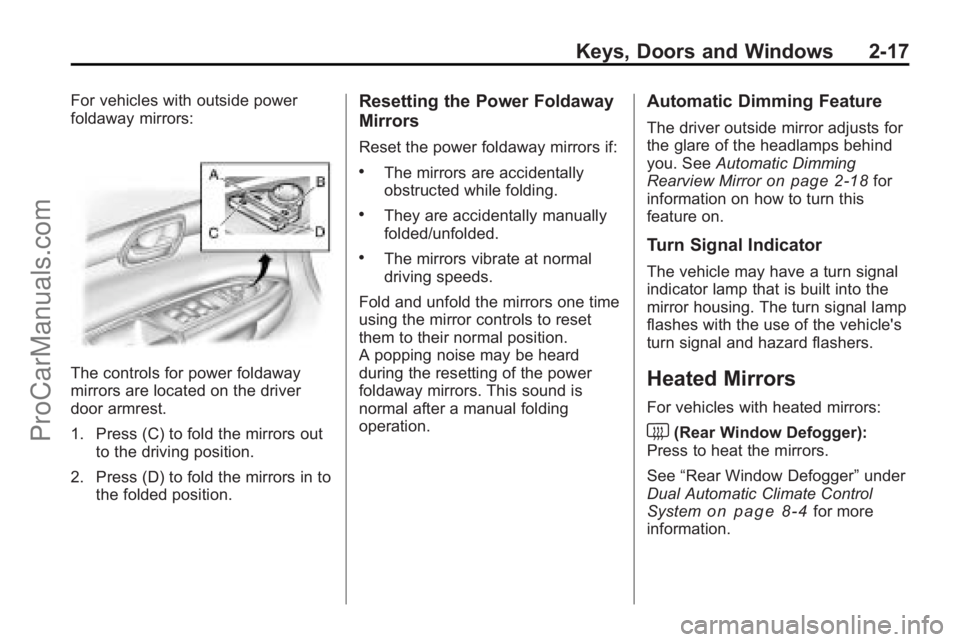
foldaway mirrors:
The controls for power foldaway
mirrors are located on the driver
door armrest.
1. Press (C) to fold the mirrors outto the driving position.
2. Press (D) to fold the mirrors in to the folded position.
Resetting the Power Foldaway
Mirrors
Reset the power foldaway mirrors if:
.The mirrors are accidentally
obstructed while folding.
.They are accidentally manually
folded/unfolded.
.The mirrors vibrate at normal
driving speeds.
Fold and unfold the mirrors one time
using the mirror controls to reset
them to their normal position.
A popping noise may be heard
during the resetting of the power
foldaway mirrors. This sound is
normal after a manual folding
operation.
Automatic Dimming Feature
The driver outside mirror adjusts for
the glare of the headlamps behind
you. See Automatic Dimming
Rearview Mirror
on page 2‑18for
information on how to turn this
feature on.
Turn Signal Indicator
The vehicle may have a turn signal
indicator lamp that is built into the
mirror housing. The turn signal lamp
flashes with the use of the vehicle's
turn signal and hazard flashers.
Heated Mirrors
For vehicles with heated mirrors:
<(Rear Window Defogger):
Press to heat the mirrors.
See “Rear Window Defogger” under
Dual Automatic Climate Control
System
on page 8‑4for more
information.
ProCarManuals.com
Page 127 of 444
Instruments and Controls 5-5
Press¨to select a track or a
folder when navigating folders on an
iPod or USB device.
For vehicles with a navigation
system:
1. Press and hold
¨until a beep
is heard, to place the radio into
SCAN mode, a station will play
for five seconds before moving
to the next station.
2. To stop the SCAN function, press
¨again.
3. In CD/DVD, iPod, or AUX USB, press and hold to quickly move
forward through the tracks.
Release to stop on the desired
track.
+
e−e(Volume): Press to
increase or to decrease the volume.
Horn
Press near or on the horn symbols
on the steering wheel pad to sound
the horn.
Windshield Wiper/Washer
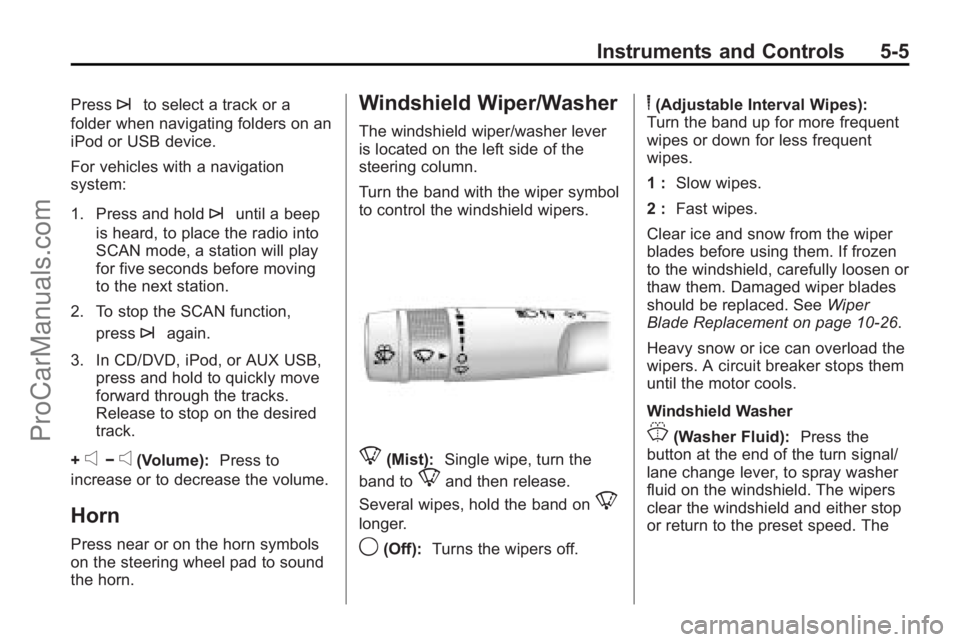
The windshield wiper/washer lever
is located on the left side of the
steering column.
Turn the band with the wiper symbol
to control the windshield wipers.
8(Mist): Single wipe, turn the
band to
8and then release.
Several wipes, hold the band on
8
longer.
9(Off): Turns the wipers off.
6(Adjustable Interval Wipes):
Turn the band up for more frequent
wipes or down for less frequent
wipes.
1 : Slow wipes.
2 : Fast wipes.
Clear ice and snow from the wiper
blades before using them. If frozen
to the windshield, carefully loosen or
thaw them. Damaged wiper blades
should be replaced. See Wiper
Blade Replacement on page 10‑26.
Heavy snow or ice can overload the
wipers. A circuit breaker stops them
until the motor cools.
Windshield Washer
J(Washer Fluid): Press the
button at the end of the turn signal/
lane change lever, to spray washer
fluid on the windshield. The wipers
clear the windshield and either stop
or return to the preset speed. The
ProCarManuals.com
Page 159 of 444
Instruments and Controls 5-37
TIGHTEN GAS CAP
This message may display along
with the check engine light on the
instrument panel cluster if the
vehicle's fuel cap is not tightened
properly. SeeMalfunction Indicator
Lamp
on page 5‑17. Reinstall the
fuel cap fully. See Filling the Tank
on page 9‑41. The diagnostic
system can determine if the fuel cap
has been left off or improperly
installed. A loose or missing fuel
cap allows fuel to evaporate into the
atmosphere. A few driving trips with
the cap properly installed should
turn this light and message off.
Key and Lock Messages
REMOTE KEY LEARNING
ACTIVE
This message displays while you
are matching a Remote Keyless
Entry (RKE) transmitter to your
vehicle. See “Matching
Transmitter(s) to Your Vehicle” under
Remote Keyless Entry (RKE)
System Operation
on page 2‑3and Driver Information Center (DIC)
(With DIC Buttons)on page 5‑24or
Driver Information Center (DIC)
(Without DIC Buttons)
on
page 5‑30for more information.
REPLACE BATTERY IN
REMOTE KEY
This message displays if a Remote
Keyless Entry (RKE) transmitter
battery is low. The battery needs to
be replaced in the transmitter. See
“Battery Replacement” under
Remote Keyless Entry (RKE)
System Operation on page 2‑3.
Lamp Messages
AUTOMATIC LIGHT
CONTROL OFF
This message displays when the
automatic headlamps are turned off.
This message clears itself after
10 seconds.
AUTOMATIC LIGHT
CONTROL ON
This message displays when the
automatic headlamps are turned on.
This message clears itself after
10 seconds.
TURN SIGNAL ON
This message displays and a chime
sounds if a turn signal is left on for
3/4 of a mile (1.2 km). Move the turn
signal/multifunction lever to the off
position.
Object Detection System
Messages
PARK ASSIST OFF
If your vehicle has the Ultrasonic
Rear Parking Assist (URPA) system,
after the vehicle has been started
and shifted out of P (Park), this
message displays to remind the
driver that the URPA system has
been turned off or to notify the driver
that the system has turned itself off.
ProCarManuals.com
Page 167 of 444

Instruments and Controls 5-45
LIGHTS ON (default):The exterior
lamps will flash when you press the
unlock button on the RKE
transmitter.
NO CHANGE: No change will be
made to this feature. The current
setting will remain.
To select a setting, press the set/
reset button while the desired
setting is displayed on the DIC.
DELAY DOOR LOCK
This feature allows you to select
whether or not the locking of the
vehicle's doors and liftgate will be
delayed. When locking the doors
and liftgate with the power door lock
switch and a door or the liftgate is
open, this feature will delay locking
the doors and liftgate until
five seconds after the last door is
closed. You will hear three chimes
to signal that the delayed locking
feature is in use. The key must be
out of the ignition for this feature to
work. You can temporarily override
delayed locking by pressing the
power door lock switch twice or the lock button on the RKE transmitter
twice. See
Delayed Lockingon
page 2‑7for more information.
Press the customization button until
DELAY DOOR LOCK appears on
the DIC display. Press the set/reset
button once to access the settings
for this feature. Then press the
customization button to scroll
through the following settings:
OFF: There will be no delayed
locking of the vehicle's doors.
ON (default): The doors will not
lock until five seconds after the last
door or the liftgate is closed.
NO CHANGE: No change will be
made to this feature. The current
setting will remain.
To select a setting, press the set/
reset button while the desired
setting is displayed on the DIC.
EXIT LIGHTING
This feature allows you to select the
amount of time you want the
exterior lamps to remain on when it is dark enough outside. This
happens after the key is turned from
ON/RUN to LOCK/OFF.
Press the customization button until
EXIT LIGHTING appears on the DIC
display. Press the set/reset button
once to access the settings for this
feature. Then press the
customization button to scroll
through the following settings:
OFF:
The exterior lamps will not
turn on.
30 SECONDS (default): The
exterior lamps will stay on for
30 seconds.
1 MINUTE: The exterior lamps will
stay on for one minute.
2 MINUTES: The exterior lamps will
stay on for two minutes.
NO CHANGE: No change will be
made to this feature. The current
setting will remain.
To select a setting, press the set/
reset button while the desired
setting is displayed on the DIC.
ProCarManuals.com
Page 173 of 444

Instruments and Controls 5-51
2. Hold the end of your hand-heldtransmitter about 3 to 8 cm (1 to
3 inches) away from the
Universal Home Remote buttons
while keeping the indicator light
in view. The hand-held
transmitter was supplied by the
manufacturer of your garage
door opener receiver (motor
head unit).
3. At the same time, press and hold both the Universal Home
Remote button to be used to
control the garage door and the
hand-held transmitter button. Do
not release the Universal Home
Remote button or the hand-held
transmitter button until Step 4
has been completed.
Some entry gates and garage
door openers may require
substitution of Step 3 with the
procedure noted in “Gate
Operator and Canadian
Programming” later in this
section. 4. The indicator light on the
Universal Home Remote will
flash slowly at first and then
rapidly after Universal Home
Remote successfully receives
the frequency signal from the
hand-held transmitter. Release
both buttons.
5. Press and hold the newly-trained Universal Home Remote button
and observe the indicator light.
.If the indicator light stays on
continuously, the
programming is complete
and the garage door should
move when the Universal
Home Remote button is
pressed and released.
There is no need to
continue programming
Steps 6 through 8.
.If the Universal Home
Remote indicator light
blinks rapidly for
two seconds and then turns to a constant light, continue
with the programming
Steps 6 through 8.
It may be helpful to have
another person assist with
the remaining steps.
6. After Steps 1 through 5 have
been completed, locate inside
the garage the garage door
opener receiver (motor-head
unit). Locate the “Learn”or
“Smart” button. The name and
color of the button may vary by
manufacturer.
ProCarManuals.com
Page 174 of 444
5-52 Instruments and Controls
7. Firmly press and release the“Learn” or“Smart” button. After
you press this button, you will
have 30 seconds to complete
Step 8.
8. Immediately return to the vehicle. Firmly press and hold
the Universal Home Remote
button, selected in Step 3 to
control the garage door, for
two seconds, and then release
it. If the garage door does not
move, press and hold the same
button a second time for
two seconds, and then release
it. Again, if the door does not
move, press and hold the same
button a third time for
two seconds, and then release.
The Universal Home Remote
should now activate the
garage door. To program the remaining two
Universal Home Remote buttons,
begin with Step 2 of
“Programming
the Universal Home Remote
System.” Do not repeat Step 1, as
this will erase all previous
programming from the Universal
Home Remote buttons.
Gate Operator and Canadian
Programming
If you have questions or need help
programming the Universal Home
Remote System, call
1-800-355-3515 or go to
www.homelink.com.
Canadian radio-frequency laws
require transmitter signals to time
out or quit after several seconds of
transmission. This may not be long
enough for Universal Home Remote
to pick up the signal during
programming. Similarly, some U.S.
gate operators are manufactured to
time out in the same manner. If you live in Canada, or you are
having difficulty programming a gate
operator or garage door opener by
using the
“Programming Universal
Home Remote” procedures,
regardless of where you live,
replace Step 3 under “Programming
Universal Home Remote” with the
following:
Continue to press and hold the
Universal Home Remote button
while you press and release every
two seconds (cycle) the hand-held
transmitter button until the
frequency signal has been
successfully accepted by the
Universal Home Remote. The
Universal Home Remote indicator
light will flash slowly at first and then
rapidly. Proceed with Step 4 under
“Programming Universal Home
Remote” to complete the training
procedure.
ProCarManuals.com
Page 177 of 444

Lighting 6-1
Lighting
Exterior Lighting
Exterior Lamp Controls . . . . . . . . 6-1
Headlamp High/Low-BeamChanger . . . . . . . . . . . . . . . . . . . . . 6-2
Flash-to-Pass . . . . . . . . . . . . . . . . . 6-3
Daytime Running Lamps (DRL)/Automatic Headlamp
System . . . . . . . . . . . . . . . . . . . . . . 6-3
Delayed Headlamps . . . . . . . . . . 6-3
Hazard Warning Flashers . . . . . 6-4
Turn and Lane-Change Signals . . . . . . . . . . . . . . . . . . . . . . 6-4
Fog Lamps . . . . . . . . . . . . . . . . . . . . 6-5
Interior Lighting
Instrument Panel Illumination Control . . . . . . . . . . . . . . . . . . . . . . 6-5
Courtesy Lamps . . . . . . . . . . . . . . 6-5
Dome Lamps . . . . . . . . . . . . . . . . . 6-5
Reading Lamps . . . . . . . . . . . . . . . 6-6
Lighting Features
Entry Lighting . . . . . . . . . . . . . . . . . 6-6
Delayed Entry Lighting . . . . . . . . 6-6
Delayed Exit Lighting . . . . . . . . . 6-7
Parade Dimming . . . . . . . . . . . . . . 6-7
Battery Load Management . . . . 6-7
Battery Power Protection . . . . . . 6-8
Exterior Lighting
Exterior Lamp Controls
The exterior lamps control is on the
instrument panel to the left of the
steering wheel.
ProCarManuals.com