change time Seat Altea Freetrack 2013 User Guide
[x] Cancel search | Manufacturer: SEAT, Model Year: 2013, Model line: Altea Freetrack, Model: Seat Altea Freetrack 2013Pages: 301, PDF Size: 4.45 MB
Page 181 of 301
179
Driving
Changing gear with the selector lever
– Put the lever in position D and press towards the right to enter
the tiptronic gate ⇒ Fig. 145.
– Press the gear lever forwards +
⇒ Fig. 145 to select a higher
gear.
– Press the gear lever back –
⇒ Fig. 145 to select a lower gear.
Changing gear with the steering wheel levers
– Press the right paddle lever +
(+OFF) towards the steering
wheel to change up ⇒ Fig. 146.
– Press the left paddle –
towards the steering wheel to change
down ⇒ Fig. 146.
Using the paddle levers on the steering wheel, you can access manual driv-
ing mode regardless of the pre-selected driving mode.
General information about driving in tiptronic mode
When accelerating, the automatic gearbox / DSG automatic gearbox goes
into a higher gear a little before the engine reaches its maximum permitted
revolutions.
If a lower gear is selected, the automatic gearbox / DSG automatic gearbox
will only change down when the engine cannot go over its maximum permit-
ted revolutions.
If tiptronic is selected whilst the vehicle is in motion and the automatic
gearbox / DSG automatic gearbox is in third gear and selector lever position
D, tiptronic mode will then also be in third gear.
Changing gears in the normal or sport programme using the steering wheel
paddle levers
If the paddle levers ⇒ Fig. 146 are used in the normal or sport programme,
the system switches temporarily to tiptronic mode. To exit tiptronic mode again, press the right paddle lever
+ OFF
towards the steering wheel for ap-
proximately one second. You will also leave tiptronic mode if the paddle lev-
ers are not moved for a certain time.
Note
● The gearbox controls on the steering wheel can operate with the selector
lever in any position and with the vehicle in motion.
Kick-down feature
This feature allows maximum acceleration. If you press the accelerator down thoroughly, the gearbox automatically
changes down, depending on speed and engine speed, into a lower gear to
take full advantage of give the vehicle maximum acceleration.
The gearbox does not change gear until the engine reaches the maximum
determined engine speed for the gear.
WARNING
You could lose control of the vehicle if you accelerate on slippery road
surfaces. Risk of serious injury.
● Be particularly careful when using the kick-down features on slippery
road surfaces. With a fast acceleration, the vehicle could lose traction
and skid.
● You should use the kick-down feature only when traffic and weather
conditions allow it to be used safely.
Safety FirstOperating InstructionsPractical TipsTechnical Specifications
Page 192 of 301
190Intelligent technology
Electronic Stability Control (ESC*)
The ESC reduces the risk of skidding by braking the wheels individually.
The system uses the steering wheel angle and road speed to calculate the
changes of direction desired by the driver, and constantly compares them
with the actual behaviour of the vehicle. When irregularities occur, for exam-
ple, if the vehicle begins to skid, the ESC brakes the appropriate wheel au-
tomatically.
The forces acting on the braked wheel bring the vehicle back to a stable
condition. If the vehicle tends to oversteer, the system will act on the front
wheel on the outside of the turn.
Steering manoeuvre recommendations
This is a complementary safety function included in the ESC. This function
aids the driver to better stabilize the vehicle in a critical situation. For exam-
ple, in case of sudden braking surface with varied adherence, the vehicle
will tend to destabilise its trajectory to the right or to the left. In this case,
the ESC recognises the situation and assists the driver with a counter steer-
ing manoeuvre from the power steering.
This function simply provides the driver with a recommended manoeuvre in
critical situations.
The vehicle does not steer itself with this function, the driver has full control
of the vehicle at all times.
WARNING
● Remember that not even the ESC can defy the laws of physics. This
should be kept in mind, particularly on slippery and wet roads and when
towing a trailer.
● Always adapt your driving style to suit the condition of the roads and
the traffic situation. The greater safety provided by the ESC should not
encourage you to run any risks.
CAUTION
● To ensure that the ESC works correctly, all four wheels must be fitted
with the same tyres. Any differences in the rolling radius of the tyres can
cause the system to reduce engine power when this is not desired.
● Any modifications made to the vehicle (for example, to the engine,
brake system, running gear or to the combination of wheels and tyres) may
affect the operation of the ABS, EDL, ESC and ASR.
Anti-lock brake system (ABS)
The anti-lock brake system prevents the wheels locking during braking
⇒ page 188.
Electronic differential lock (EDL)*
The electronic differential lock helps prevent the loss of trac-
tion caused if one of the driven wheels starts spinning.
EDL helps the vehicle to start moving, accelerate and climb a gradient in
slippery conditions where this may otherwise be difficult or even impossi-
ble.
The system will control the revolutions of the driven wheels using the ABS
sensors (in case of an EDL fault the warning lamp for ABS lights up)
⇒ page 82.
At speeds of up to approximately 80 km/h, it is able to balance out differen-
ces in the speed of the driven wheels of approximately 100 rpm caused by a
slippery road surface on one side of the vehicle. It does this by braking the
wheel which has lost traction and distributing more driving force to the oth-
er driven wheel via the differential.
Page 197 of 301
195
Driving and the environment
Driving and the environment
Running-in Running in a new engine
The engine needs to be run in over the first 1500 km
(1000 miles).
Up to 1000 kilometres (600 miles)
– Do not drive at speeds of more than 2/3 the maximum speed.
– Do not accelerate hard.
– Avoid high engine revolutions.
– Do not tow a trailer.
From 1000 to 1500 kilometres (600 to 900 miles)
– Speeds can be gradually increased to the maximum road speed
or maximum permissible engine speed (rpm).
During its first few hours of running, the internal friction in the engine is
greater than later on, when all the moving parts have bedded in.
For the sake of the environment
If the engine is run in gently, its life will be increased and its oil consump-
tion reduced. Braking capacity and braking distance
The braking capacity and braking distance are influenced by
driving situations and road conditions.
The efficiency of the brakes depends directly on the
brake pad wear. The
rate of wear of the brake pads depends to a great extent on the conditions
under which the vehicle is operated and the way the vehicle is driven. If you
often drive in town traffic, drive short distances or have a sporty driving
style, we recommend that you have the thickness of your brake pads
checked by a Technical Service more frequently than recommended in the
Service Plan.
If you drive with wet brakes, for example, after crossing areas of water, in
heavy rainfall or even after washing the vehicle, the effect of the brakes is
lessened as the brake discs are wet or even frozen (in winter). In this case
the brakes should be dried by pressing the brake pedal several times.
WARNING
Longer braking distances and faults in the brake system increase the risk
of accidents.
● New brake pads must be run in and do not have the correct friction
during the first 400 km (120 miles). However, the reduced braking ca-
pacity may be compensated by pressing on the brake pedal a little hard-
er. This also applies when the brake pads have to be changed further on.
● If brakes are wet or frozen, or if you are driving on roads which have
been salted, braking power may be lower than normal.
Safety FirstOperating InstructionsPractical TipsTechnical Specifications
Page 200 of 301

198Driving and the environment
let the vehicle roll with a gear engaged, for example, if you see a red light
ahead. The braking effect achieved in this way helps to reduce the wear of
brakes and tyres; emissions and fuel consumption are reduced to zero (dis-
connection due to inertia).
Change gear early to save energy
An effective way of saving fuel is to change up quickly through the gears.
Running the engine at high rpm in the lower gears uses an unnecessary
amount of fuel.
Manual gearbox: Change from first to second gear as quickly as possible.
We recommend that, whenever possible, you change to a higher gear upon
reaching 2000 rpm. Follow the “recommended gear” indication that ap-
pears on the instrument panel ⇒ page 61.
Avoid driving at high speed
We advise you not to drive at the top speed permitted by the vehicle. Fuel
consumption, exhaust emissions and noise levels all increase very rapidly
at higher speeds. Driving at moderate speeds will help to save fuel.
Avoid idling
It is worthwhile switching off the engine when waiting in a traffic jam, at lev-
el crossings or at traffic lights with a long red phase. The fuel saved after
only 30 - 40 seconds is greater than the amount of fuel needed to restart
the engine.
The engine takes a long time to warm up when it is idling. Mechanical wear
and pollutant emissions are also especially high during this initial warm-up
phase. It is therefore best to drive off immediately after starting the engine.
Avoid running the engine at high speed.
Periodic maintenance
Periodic maintenance work guarantees that, before beginning a journey,
you will not consume more than the required amount of fuel. A well-serviced
engine gives you the benefit of improved fuel efficiency as well as maxi-
mum reliability and an enhanced resale value.
A badly serviced engine can consume up to 10% more fuel than necessary. Avoid short journeys
To reduce the consumption and emission of polluting exhaust gases, the
engine and the exhaust gas filtration systems should reach the optimum
operating temperature.
With the engine cold, fuel consumption is proportionally higher. The engine
does not warm up and fuel consumption does not normalise until having
driven approximately
four kilometres (2.5 miles). This is why we recommend
avoiding short trips whenever possible.
Maintain the correct tyre pressures
Bear in mind that keeping the tyres at an adequate pressure saves fuel. If
the tyre pressure is just one bar too low, fuel consumption can increase by
as much as 5%. Due to the greater rolling resistance, under-inflation also
increases tyre wear and impairs handling.
The tyre pressures should always be checked when the tyres are cold.
Do not use winter tyres all year round as they increase fuel consumption by
up to 10%.
Avoid unnecessary weight
Given that every kilo of extra weight will increase the fuel consumption, it is
advisable to always check the luggage compartment to make sure that no
unnecessary loads are being transported.
A roof rack is often left in place for the sake of convenience, even when it is
no longer needed. At a speed of 100-120 km/h (60-75 mph) your vehicle
will use about 12% more fuel as a result of the extra wind resistance caused
by the roof rack even when it is not in use.
Save electricity
The engine activates the alternator, which produces electricity. With the
need for electricity, fuel consumption is also increased. Because of this, al-
ways turn off electrical components when you do not need them. Examples
of components that use a lot of electricity are: the fan at high speeds, the
rear window heating or the seat heaters*.
Page 227 of 301

225
Checking and refilling levels
WARNING
If the bonnet is not closed properly, it could open while you are driving
and completely obscure your view of the road. Risk of accident.
● After closing the bonnet, always check that it is properly secured. The
bonnet must be flush with the surrounding body panels.
● If you notice that the bonnet latch is not secured when the vehicle is
moving, stop the vehicle immediately and close the bonnet properly.
Risk of accident.
Engine oil General notes
The engine comes with a special, multi-grade oil that can be used all year
round.
Because the use of high-quality oil is essential for the correct operation of
the engine and its long useful life, when topping up or changing oil, use on-
ly those oils that comply with VW standards.
The specifications (VW standards) set out in the following page should ap-
pear on the container of the service oil; when the container displays the
specific standards for petrol and diesel engines together, it means that the
oil can be used for both types of engines.
We recommend that the oil change, indicated in the Maintenance Pro-
gramme, be performed by a Technical Service or a specialised workshop.
The correct oil specifications for your engine are listed in the ⇒ page 226,
Oil properties. Service intervals
Service intervals can be flexible (LongLife service) or fixed (dependent on
time/distance travelled).
If the PR code that appears on the back of the “Maintenance Programme”
booklet is PR QI6, this means that your vehicle has the LongLife service pro-
grammed. If it lists the codes QI1, QI2, QI3, QI4 or QI7, the interval service
is dependent on time/distance travelled.
Flexible service intervals (LongLife service intervals*)
Special oils and processes have been developed which, depending on the
characteristics and individual driving profiles, enable the extension of the
oil change service (LongLife service intervals).
Because this oil is essential for extending the service intervals, it
must only
be used observing the following indications:
● Avoid mixing it with oil for fixed service intervals.
● Only in exceptional circumstances, if the engine oil level is too low
⇒ page 226 and LongLife oil is not available, it is permitted to top up
(once) with oil for fixed service intervals ⇒ page 226 (up to a maximum of
0.5 litres).
Fixed service intervals*
If your vehicle does not have the “LongLife service interval” or it has been
disabled (by request), you may use oils for fixed service intervals, which al-
so appear in ⇒ page 226, Oil properties. In this case, your vehicle must be
serviced after a fixed interval of 1 year/15 000 km (10 000 miles)(whatever
comes first) ⇒ Booklet Maintenance Programme.
● In exceptional circumstances, if the engine oil level is too low
⇒ page 226 and you cannot obtain the oil specified for your vehicle, you
can put in a small quantity of oil conforming to the specification ACEA A2 or
ACEA A3 (petrol engines) or ACEA B3 or ACEA B4 (diesel engines) (up to 0.5
l).
Safety FirstOperating InstructionsPractical TipsTechnical Specifications
Page 236 of 301
234Checking and refilling levels
WARNING
Do not drive unless you have good visibility through all windows!
● Clean the windscreen wiper blades and all windows regularly.
● The wiper blades should be changed once or twice a year.
CAUTION
● A damaged or dirty window wiper could scratch the rear window.
● Never use fuel, nail varnish remover, paint thinner or similar products to
clean the window.
● Never move the windscreen wiper by hand. This could cause damage. Brake fluid
Checking the brake fluid level
The brake fluid is checked at the intervals given in the serv-
ice schedule.
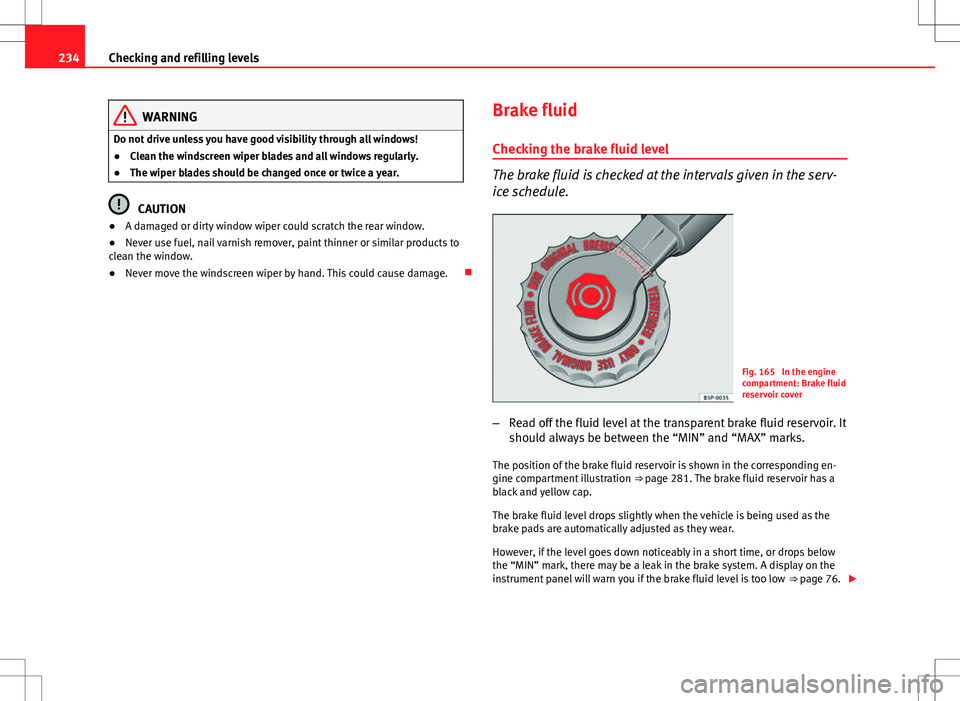
Fig. 165 In the engine
compartment: Brake fluid
reservoir cover
– Read off the fluid level at the transparent brake fluid reservoir. It
should always be between the “MIN” and “MAX” marks.
The position of the brake fluid reservoir is shown in the corresponding en-
gine compartment illustration ⇒ page 281. The brake fluid reservoir has a
black and yellow cap.
The brake fluid level drops slightly when the vehicle is being used as the
brake pads are automatically adjusted as they wear.
However, if the level goes down noticeably in a short time, or drops below
the “MIN” mark, there may be a leak in the brake system. A display on the
instrument panel will warn you if the brake fluid level is too low ⇒ page 76.
Page 237 of 301

235
Checking and refilling levels
WARNING
Before opening the bonnet to check the brake fluid level, read and ob-
serve the warnings ⇒ page 222.
Changing the brake fluid
The Maintenance Programme indicates the brake fluid
change intervals. We recommend that you have the brake fluid changed by a Technical Serv-
ice.
Before opening the bonnet, please read and follow the warnings ⇒
in
Safety instructions on working in the engine compartment on page 222 in
section “Safety notes for working in the engine compartment”.
Brake fluid absorbs moisture. In the course of time, it will absorb water from
the ambient air. If the water content in the brake fluid is too high, the brake
system could corrode. This also considerably reduces the boiling point of
the brake fluid. Heavy use of the brakes may then cause a vapour lock
which could impair the braking effect.
Be sure to always use the correct brake fluid. Only use brake fluid that ex-
pressly meets VW 501 14 standards.
You can buy VW 501 14 standard brake fluid in a SEAT dealership or SEAT
Official Service. If none is available, use only high quality brake fluid that
meets DIN ISO 4925 CLASS 4 standards, or USA Standards FMVSS 116 DOT
4.
Using any other kind of brake fluid or one that is not of a high quality may
affect operation of the brake system and reduce its effectiveness. Never use
a brake fluid if the container does not state that it complies with VW 501 14,
DIN ISO 4925 CLASS 4 standards, or USA standards FMVSS 116 DOT 4.
WARNING
Brake fluid is poisonous. Old brake fluid impairs the braking effect.
● Before opening the bonnet to check the brake fluid level, read and ob-
serve the warnings ⇒ page 222.
● Brake fluid should be stored in the closed original container in a safe
place out of reach of children. There is a toxic risk.
● Complete the brake fluid change according to the Maintenance Pro-
gramme. Heavy use of the brakes may cause a vapour lock if the brake
fluid is left in the brake system for too long. This would seriously affect
the effectiveness of the brakes and the safety of the vehicle. This may
cause an accident.
CAUTION
Brake fluid damages the vehicle paintwork. Wipe off any brake fluid from
the paintwork immediately.
For the sake of the environment
The brake pads and brake fluid must be collected and disposed of accord-
ing the applicable regulations. The SEAT Technical Service network has the
necessary equipment and qualified personnel for collecting and disposing
of this waste material.
Safety FirstOperating InstructionsPractical TipsTechnical Specifications
Page 239 of 301

237
Checking and refilling levels
CAUTION
● Never disconnect the battery if the ignition is switched on or if the en-
gine is running. This could damage the electrical system or electronic com-
ponents.
● Do not expose the battery to direct sunlight over a long period of time,
as the intense ultraviolet radiation can damage the battery housing.
● If the vehicle is left standing in cold conditions for a long period, protect
the battery from freezing. If it freezes it will be damaged.
Checking the electrolyte level
The electrolyte level should be checked regularly in high-
mileage vehicles, in hot countries and in older batteries. – Open the engine bonnet and the battery cover ⇒
in Safety in-
structions on working in the engine compartment on page 222
⇒
in Warnings on handling the battery on page 236.
– Check the colour display in the "magic eye" on the top of the
battery.
– If there are air bubbles in the window, tap the window gently
until they disperse.
The position of the battery is shown in the corresponding engine compart-
ment diagram ⇒ page 281.
The “magic eye” indicator, located on the top of the battery changes colour,
depending on the charge state and electrolyte level of the battery.
There are two different colours: ●
Black: correct charge status.
● Transparent/clear yellow: the battery must be replaced. Contact a speci-
alised workshop.
Charging and changing the vehicle battery
The battery is maintenance-free and is checked during the
inspection service. All work on the vehicle battery requires
specialist knowledge.
If you often drive short distances or if the vehicle is not driven for long peri-
ods, the battery should be checked by a specialised workshop between the
scheduled services.
If the battery has discharged and you have problems starting the vehicle,
the battery might be damaged. If this happens, we recommend you have
the vehicle battery checked by a Technical Service where it will be re-charg-
ed or replaced.
Charging the battery
The vehicle battery should be charged by a specialised workshop only, as
batteries using special technology have been installed and they must be
charged in a controlled environment.
Replacing a vehicle battery
The battery has been developed to suit the conditions of its location and
has special safety features.
Genuine SEAT batteries fulfil the maintenance, performance and safety
specifications of your vehicle.
Safety FirstOperating InstructionsPractical TipsTechnical Specifications
Page 244 of 301
242Wheels and tyres
Wear indicators
The original tyres on your vehicle have 1.6 mm high “tread wear indicators”
⇒ Fig. 166, running across the tread. Depending on the make, there will be
6 to 8 of them evenly spaced around the tyre. Markings on the tyre sidewall
(for instance the letters “TWI” or other symbols) indicate the positions of
the tread wear indicators. The minimum tread depth required by law is
1.6 mm (measured in the tread grooves next to the tread wear indicators).
Worn tyres must be replaced. Different figures may apply in export countries
⇒
.
Tyre pressure
Incorrect tyre pressure causes premature wear and could cause tyre blow-
out. For this reason, the tyre pressure should be checked at least once per
month ⇒ page 239.
Driving style
Fast cornering, heavy acceleration and hard braking all increase tyre wear.
Changing wheels around
If the front tyres are worn considerably more than the rear ones it is advisa-
ble to change them around as shown ⇒ Fig. 167. The useful life of all the
tyres will then be about the same time.
Wheel balance
The wheels on new vehicles are balanced. However, various factors encoun-
tered in normal driving can cause them to become unbalanced, which re-
sults in steering vibration.
Unbalanced wheels should be rebalanced, as they otherwise cause exces-
sive wear on steering, suspension and tyres. A wheel must also be reba-
lanced when a new tyre is fitted. Incorrect wheel alignment
Incorrect wheel alignment causes excessive tyre wear, impairing the safety
of the vehicle. If tyres show excessive wear, you should have the wheel
alignment checked by a Technical Service.
WARNING
There is a serious danger of accidents if a tyre bursts during driving!
● The tyres must be replaced at the latest when the tread wear indica-
tors are worn ⇒ page 242. Failure to do so could result in an accident.
Worn tyres do not grip well at high speeds on wet roads. There is also a
greater risk of aquaplaning.
● At continuously high speeds, a tyre with insufficient pressure flexes
more. This causes it to overheat. This can cause tread separation and tyre
blow-out. Risk of accident. Always observe the recommended tyre pres-
sures.
● If tyres show excessive wear, you should have the running gear
checked by a Technical Service.
● Keep chemicals such as oil, fuel and brake fluid away from tyres.
● Damaged wheels and tyres must be replaced immediately!
For the sake of the environment
Under-inflated tyres will increase fuel consumption.
Page 247 of 301

245
Wheels and tyres
WARNING
● We recommend that you use only wheels and tyres which have been
approved by SEAT for your model. Failure to do so could impair vehicle
handling. Risk of accident.
● Avoid running the vehicle on tyres that are more than 6 years old. If
you have no alternative, you should drive slowly and with extra care at all
times.
● Never use old tyres or those with an unknown history of use.
● If wheel trims are retrofitted, you must ensure that the flow of air to
the brakes is not restricted. This could cause the brake system to over-
heat.
● All four wheels must be fitted with radial tyres of the same type, size
(rolling circumference) and the same tread pattern.
For the sake of the environment
Old tyres must be disposed of according to the laws in the country con-
cerned.
Note
● For technical reasons, it is not generally possible to use the wheels from
other vehicles. This can also apply to wheels of the same model. The use of
wheels or tyres which have not been approved by SEAT for use with your
model may invalidate the vehicle's type approval for use on public roads.
● If the spare tyre is not the same as the tyres that are mounted on the
vehicle (e.g. winter tyres) you should only use the spare tyre for a short peri-
od of time and drive with extra care. Refit the normal road wheel as soon as
possible. Wheel bolts
Wheel bolts must be tightened to the correct torque.
The design of wheel bolts is matched to the rims. If different wheel rims are
fitted, the correct wheel bolts with the right length and correctly shaped
bolt heads must be used. This ensures that wheels are fitted securely and
that the brake system functions correctly.
In certain circumstances, you should not use wheel bolts from a different
vehicle, even if it is the same model ⇒ page 217.
After the wheels have been changed, the tightening torque of the wheel
bolts should be checked as soon as possible with a torque wrench ⇒
.
The tightening torque for steel and alloy wheels is 120 Nm.
WARNING
If the wheel bolts are not tightened correctly, the wheel could become
loose while driving. Risk of accident.
● The wheel bolts must be clean and turn easily. Never apply grease or
oil to them.
● Use only wheel bolts which belong to the wheel.
● If the tightening torque of the wheel bolts is too low, they could loos-
en whilst the vehicle is in motion. Risk of accident! If the tightening tor-
que is too high, the wheel bolts and threads can be damaged.
CAUTION
The prescribed tightening torque for wheel bolts for steel and alloy wheels
is 120 Nm.
Safety FirstOperating InstructionsPractical TipsTechnical Specifications