cooling Seat Cordoba 2007 Owner's Manual
[x] Cancel search | Manufacturer: SEAT, Model Year: 2007, Model line: Cordoba, Model: Seat Cordoba 2007Pages: 256, PDF Size: 7.75 MB
Page 54 of 256
Cockpit
52
WARNING
When working in the engine compartment, always bear in mind the safety
warnings. ⇒page 172
Caution
Accessories in front of the air inlet reduce the cooling effect of the coolant. At
high outside temperatures and high engine loads, there is a risk of the
engine overheating.Fuel gauge
and reserve indicator
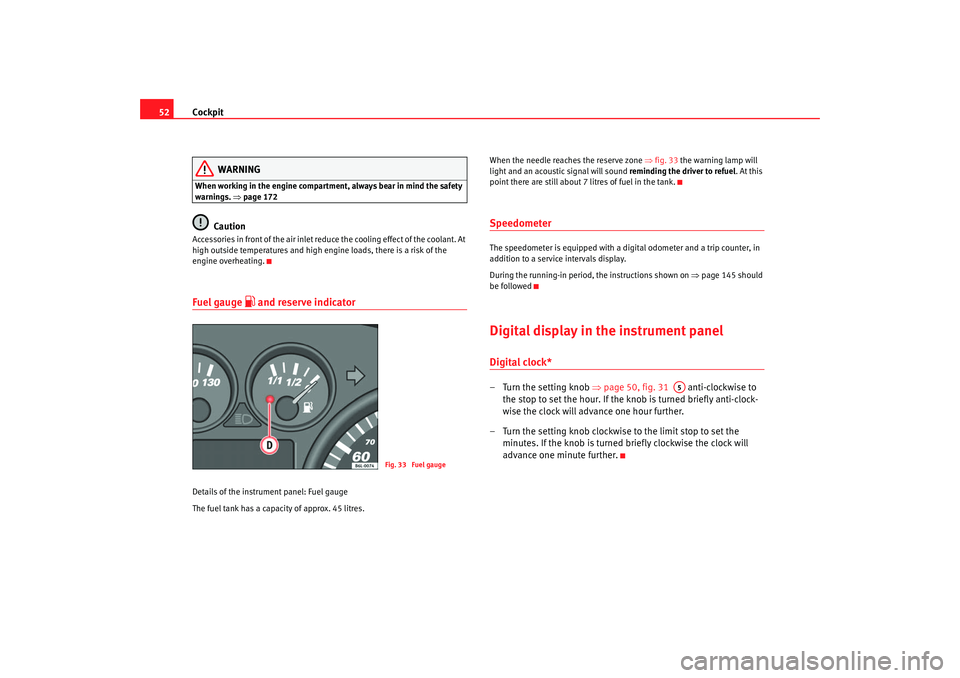
Details of the instrument panel: Fuel gauge
The fuel tank has a capacity of approx. 45 litres. When the needle reaches the reserve zone
⇒fig. 33 the warning lamp will
light and an acoustic signal will sound reminding the driver to refuel. At this
point there are still about 7 litres of fuel in the tank.
SpeedometerThe speedometer is equipped with a digital odometer and a trip counter, in
addition to a service intervals display.
During the running-in period, the instructions shown on ⇒page 145 should
be followedDigital display in the instrument panelDigital clock* – Turn the setting knob ⇒page 50, fig. 31 anti-clockwise to
the stop to set the hour. If the kn ob is turned briefly anti-clock-
wise the clock will advance one hour further.
– Turn the setting knob clockwise to the limit stop to set the minutes. If the knob is turned briefly clockwise the clock will
advance one minute further.
Fig. 33 Fuel gauge
A5
cordoba_ingles_0706 Seite 52 Montag, 28. August 2006 1:18 13
Page 120 of 256
Heating, Ventilation and Air conditioning
118
– Turn the fan control to one of the two levels depending on the
speed required.
– Rotate the temperature control to the desired level.
– Close outlets .
– O pen
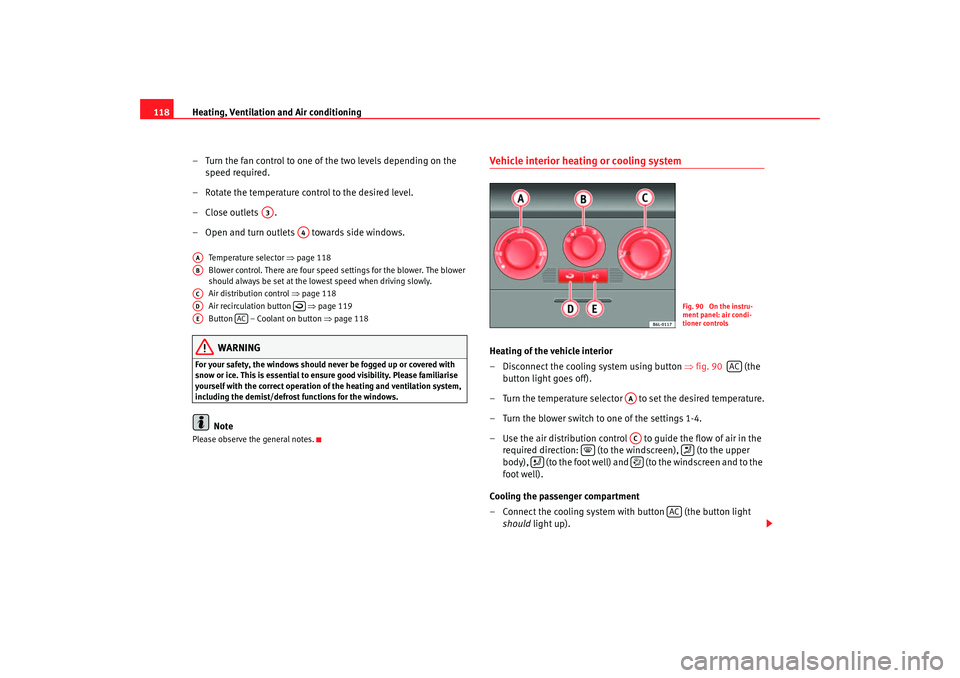
and turn outlets towards side windows.Temperature selector ⇒page 118
Blower control. There are four speed settings for the blower. The blower
should always be set at the lowest speed when driving slowly.
Air distribution control ⇒page 118
Air recirculation button ⇒page 119
Button – Coolant on button ⇒page 118WARNING
For your safety, the windows should never be fogged up or covered with
snow or ice. This is essential to ensure good visibility. Please familiarise
yourself with the correct operation of the heating and ventilation system,
including the demist/defrost functions for the windows.
Note
Please observe the general notes.
Vehicle interior heating or cooling system Heating of the vehicle interior
– Disconnect the cooling system using button ⇒fig. 90 (the
button light goes off).
– Turn the temperature selector to set the desired temperature.
– Turn the blower switch to one of the settings 1-4.
– Use the air distribution control to guide the flow of air in the required direction: (to the windscreen), (to the upper
body), (to the foot well) and (to the windscreen and to the
foot well).
Cooling the passenger compartment
– Connect the cooling system with button (the button light
should light up).
A3
A4
AAABACAD
AE
AC
Fig. 90 On the instru-
ment panel: air condi-
tioner controls
AC
AAAC
AC
cordoba_ingles_0706 Seite 118 Montag, 28. August 2006 1:18 13
Page 121 of 256
Heating, Ventilation and Air conditioning 119
Safety First
Operating instructions
Tips and Maintenance
Te c h n i c a l D a t a
– Turn the temperature control switch until the desired interior
temperature is obtained.
– Turn the blower switch to one of the settings 1-4.
– Use the air distribution control to guide the flow of air in the required direction: (to the windscreen), (to the upper
body), (to the foot well) and (to the windscreen and to the
foot well).Heating system
Maximum heat output, which is needed to defrost the windows quickly, is
only available when the engine has reached its operating temperature.
Cooling system
When the cooling system is switched on , not only the temperature, but also
the air humidity in the vehicle interior is reduced. This improves comfort for
the vehicle occupants and prevents misting of the windows when the outside
air humidity is high.
If the cooling system cannot be switched on this may be due to the following
reasons:•
the engine is not running.
•
The blower is switched off.
•
The outside temperature is lower than +5°C.
•
the cooling system compressor has been temporarily switched off
because the engine coolant temperature is too high.
•
The air conditioner fuse is faulty.
•
Another fault in the vehicle. Have th e air conditioner checked by a quali-
fied workshop.
Air recirculation
Air recirculation mode prevents fumes or unpleasant smells
from entering the vehicle.When air recirculation mode is switched on (button ⇒page 118, fig. 90
with warning lamp) strong odours in th e outside air do not enter the vehicle
interior, for example when passing th rough a tunnel or in queuing traffic.
When the outside temperature is low, using air recirculation mode provides
more effective heating by heating air from the vehicle interior instead of cold
air from outside.
When the outside temperature is high, using air recirculation mode provides
more effective cooling by cooling air from the vehicle interior instead of warm
air from outside.
For safety reasons, air recirculation is not possible when the control for air
distribution is set to the windscreen setting
.
WARNING
In air recirculation mode, no ambient air enters the vehicle interior. If the
air conditioning system is switched off, the windows can quickly mist over.
Therefore, you should never leave the air recirculation mode switched on
for longer periods, as this increases the risk of an accident.
Note
•
When reverse gear is engaged the air recirculation connects automatically
to prevent the entrance of exhaust fumes in the vehicle on travelling back-
wards. The control light on the button does not light up.
•
If the temperature control is turned to the coldest setting (blue point) and
the switch is activated, the “Air recirculation” function is automatically
activated in order to cool the passenger compartment rapidly using a
minimum of energy and the fu nction indicator will light.
AC
cordoba_ingles_0706 Seite 119 Montag, 28. August 2006 1:18 13
Page 124 of 256
Heating, Ventilation and Air conditioning
122Climatronic automatically maintains a constant temperature. The tempera-
ture of the air supplied to the interior, the blower speed and the air distribu-
tion are regulated automatically. The sy stem also allows for the effect of
strong sunlight, so there is no need for manual adjustment. Therefore, auto-
matic mode provides the best comfort for the vehicle occupants in virtually all
conditions throughout the year.
Automatic mode is switched off whenever an adjustment is made using the
buttons for the air distribution, blower or . The temperature continues
to be regulated.Manual mode
In manual mode you can adjust the air temperature, flow, and
distribution yourself.Switching on manual mode
– Press one of the buttons ⇒page 120, fig. 91 to , or turn
the blower control . The display is switched off .Temperature
It is possible to select interior te mperatures from +18°C (64°F) to +29°C
(86°F). These are approximate temperat ures and the actual temperature may
be slightly higher or lower depen ding on the outside conditions.
If a temperature below 18°C (64°F) is selected, the display switches to LO. In
this setting the system runs at maximum cooling output and the temperature
is not regulated.
If a temperature above 29°C (86°F) is selected the display indicates HI . In this
setting the system runs at maximum heating output and the temperature is
not controlled. Blower
The blower can be infinitely adjusted
with the blower control . Always have
the blower running at a low setting to ensure a constant flow of fresh air into
the vehicle. If the blower is switched off (no level displayed ) and the
control is turned further to the left, th e Climatronic is switched off. Then OFF
is displayed on the screen.
Air distribution
The air distribution is adjusted using the buttons , and . It is also
possible to open and close some of the air outlets separately.
Switching the air conditioning system on and off
Pressing the button switches off the air cooling system to save fuel.
The temperature continues to be regulated. The set temperature can then
only be reached if it is higher than the outside temperature.
Air recirculation mode
Air recirculation mode prevents fumes or unpleasant smells
from entering the vehicle.– Press the button to switch air recirculation mode on or off. This is ON if the symbol
⇒ page 120, fig. 91 is displayed
on the screen.
Air recirculation mode pr events strong odours in the ambient air from
entering the vehicle interior, for example when passing through a tunnel or in
queuing traffic.
When the outside temperature is low, us ing air recirculation mode provides
more effective heating by heating air from the vehicle interior instead of cold
air from outside.
ECON
A13
A15
A1
A7
A1A2
ECON
A5
cordoba_ingles_0706 Seite 122 Montag, 28. August 2006 1:18 13
Page 125 of 256
Heating, Ventilation and Air conditioning 123
Safety First
Operating instructions
Tips and Maintenance
Te c h n i c a l D a t a
When the outside temperature is high, using air recirculation mode provides
more effective cooling by cooling air fr
om the vehicle interior instead of warm
air from outside.
For safety reasons, air recirculation is not possible when the control for air
distribution is set to the windscreen setting
.
WARNING
In air recirculation mode, no ambient air enters the vehicle interior. If the
air conditioning system is switched of f, the windows can quickly mist over.
Therefore, you should never leave the air recirculation mode switched on
for longer periods, as this increases the risk of an accident.
Note
When reverse gear is engaged the air recirculation connects automatically to
prevent the entrance of exhaust fumes in the vehicle on travelling backwards.
In this case the symbol for air recirculation is not displayed.General notesThe pollen filter
The pollution filter (a combined pa rticulate filter and activated carbon filter)
serves as a barrier against impurities in the outside air, including dust and
pollen.
For the air conditioning system to work with maximum efficiency, the pollen
filter must be replaced at the intervals specified in the Inspections and Main-
tenance Schedule.
If the filter loses efficiency prematurely due to use in areas with very high
levels of air pollution, the pollen filter must be changed more frequently than
stated in the Service Schedule.
Caution
•
If you suspect that the air conditioner is damaged, switch off the air condi-
tioner with button to prevent further damage and have it checked by a
qualified workshop.
•
Repairs to the air conditioning system require specialist knowledge and
special tools. Therefore, we recommend that you take the vehicle to a quali-
fied workshop should problems occur.Note
•
If the humidity and temperature outside the vehicle are high, condensa-
tion can drip off the evaporator in the cooling system and form a pool under-
neath the vehicle, this is completely normal and there is no need to suspect
a leak.
•
Keep the air intake slots in front of the windscreen free of snow, ice and
leaves to ensure heating and cooling is not impaired, and to prevent the
windows misting over.
•
The air from the vents flows through the passenger compartment and is
extracted by slots designed for this purpose. Do not cover these slots with
articles of clothing or other objects.
•
The air conditioning system operates most effectively with the windows
and the sliding/tilting roof* closed. However, if the sun has heated up the
vehicle, the air inside can be cooled more quickly by opening the windows for
a short period.
•
Do not smoke while air recirculation mode is on, as smoke drawn into the
air conditioning system leaves a residue on the evaporator, producing a
permanent unpleasant odour.
•
At low outside temperatures the comp ressor switches off automatically.
The button cannot be switched on either.
•
The air conditioning should be turned on at least once a month, to lubri-
cate the system gaskets and prevent leaks. If a decrease in the cooling
capacity is detected, an Authorised Service Centre should be consulted to
check the system.
ECON
AUTO
cordoba_ingles_0706 Seite 123 Montag, 28. August 2006 1:18 13
Page 170 of 256
Accessories, parts replacement and modifications
168If a towing bracket is to be fitted after the vehicle is purchased, this must be
completed according to the instructions of the towing bracket manufacturer.
The attachment points for the towing bracket are underneath the vehicle.
The distance between the centre of the ball coupling and the ground should
never be lower than the measurement indicated when the vehicle is fully
loaded including the maximum resting weight.
Measurement for securing the towing bracket:
72 mm (minimum)
from 350 mm to 420 mm (fully laden vehicle)
958 mm
413 mm
166 mm
Fitting a towing bracket•
Driving with a trailer implies additional work for the vehicle. Therefore,
before fitting a towing bracket, please contact an Authorised Service Centre
to check whether your cooling system needs modification.
•
Observe the legal requirements in your country (e.g. the fitting of a sepa-
rate warning lamp).
•
Certain vehicle components, e.g. the rear bumper must be removed and
reinstalled. The towing bracket securin g bolts must be tightened using a
torque wrench, and an electrical sock et must be used to connect to the
vehicle’s electrical system. This requ ires specialist knowledge and tools.
•
The figures in the illustration show the dimensions and attachment points
that must be observed if you are retrofitting a towing bracket.
WARNING
Towing brackets should be fitted by specialists.•
If the towing bracket is incorrectly installed, there is serious danger of
an accident.
•
For your own safety, please observe the instructions provided by the
manufacturer of the towing bracket.Caution
•
If the electrical socket is incorrectly installed, this could cause damage to
the vehicle’s electrical system.
AA
ABACADAEAF
WARNING (continued)
cordoba_ingles_0706 Seite 168 Montag, 28. August 2006 1:18 13
Page 175 of 256
Checking and refilling levels173
Safety First
Operating instructions
Tips and Maintenance
Te c h n i c a l D a t a
•
Avoid causing short-circuits in the electrical system, particularly at the
points where the jump leads are attached ⇒page 219. The battery could
explode.
•
Never touch the radiator fan. It is temperature controlled and could
start automatically, even when the engine has been switched off and the
key removed from the ignition!
•
Do not unscrew the cap on the expansion tank when the engine is hot.
If the coolant is hot, the cooling system will be pressurised!
•
Protect face, hands and arms by covering the cap with a large, thick
cloth to protect against escaping coolant and steam.
•
Always make sure you have not left any objects, such as cleaning cloths
and tools, in the engine compartment.
•
If you have to work underneath the vehicle, you must use suitable
stands additionally to support the vehicle, there is a risk of accident!. A
hydraulic jack is insufficient for securing the vehicle and there is a risk of
injury.
•
If any work has to be performed when the engine is started or with the
engine running, there is an additional, pote ntially fatal, safety risk from the
rotating parts, such as the drive belts, alternator, radiator fan, etc., and
from the high-voltage ignition syst em. You should also observe the
following points:
−Never touch the electrical wiring of the ignition system.
− Ensure that jewellery, loose clothing and long hair do not get
trapped in rotating engine parts. Danger of death. Before starting any
work remove jewellery, tie back and cover hair, and wear tight-fitting
clothes.
− Always think carefully about pressing the accelerator if a gear is
engaged in either an automatic or manual gearbox. The vehicle could
move, even if the handbrake is applied. Danger of death.
•
If work has to be carried out on the fuel system or on electrical compo-
nents, you must observe the following sa fety notes in addition to the above
warnings:
−Always disconnect the battery. The vehicle must be unlocked when
this is done, otherwise the alarm will be triggered.
− Do not smoke.
− Never work near naked flames.
− Always have a fire extinguisher on hand.Caution
When changing or topping up service fluids, make absolutely certain that you
fill the fluids into the correct reservoirs. Failure to observe this point will result
in serious malfunctions and engine damage!
For the sake of the environment
Service fluids leaks are harmful to the environment. For this reason you
should make regular checks on the ground underneath your vehicle. If you
find spots of oil or other fluids, have your vehicle inspected in a qualified
workshop.
WARNING (continued)
WARNING (continued)
cordoba_ingles_0706 Seite 173 Montag, 28. August 2006 1:18 13
Page 181 of 256
Checking and refilling levels179
Safety First
Operating instructions
Tips and Maintenance
Te c h n i c a l D a t a
For the sake of the environment
•
Because of the disposal problems, the necessa ry special tools and
specialist knowledge required, we reco mmend that you have the engine oil
and filter changed by an Authorised Service Centre.
•
Never pour oil down drains or into the ground.
•
Use a suitable container when draining the used oil. It has to be large
enough to hold all the engine oil
CoolantCoolant specifications
Coolant is a mixture of water and at least 40% coolant addi-
tive.The cooling system must be filled with a mixture of water and at least 40 % of
our coolant additive G 12+ or an additive with the specification TT-VW 774 F
(it is dyed purple). This mixture gives the necessary frost protection down to
-25
° C and protects the alloy parts of the cooling system against corrosion. It
also prevents scaling and raises the boiling point of the coolant.
The concentration of coolant must always be at least 40% - even if frost
protection is not required.
If greater frost protection is required in very cold climates, the proportion of
the antifreeze additive G 12+ can be increased. However, the percentage of
coolant additives should not exceed 60%, as this would reduce the frost
protection. It would also reduce the cooling effect. A mixture with 60%
coolant additive will give frost protection to approx. -40
° C.
WARNING
•
The coolant additive is toxic. There is a toxic risk. Always keep the
coolant additive in the original container which should be stored out of the
reach of children. The same applies to coolant that you have drained off.
•
The coolant additive G 12+ must be added in sufficient quantities to
provide anti-freeze protection at the coldest ambient temperatures that
can be expected. At extremely cold ambient temperatures, the coolant
could freeze, causing the vehicle to breakdown. As the heater would also
not work in this situat ion, there is a risk of suffering exposure!Caution
•
Other additives may give considerably inferior corrosion protection. The
resulting corrosion in the cooling system can lead to a loss of coolant,
causing serious damage to the engine.
•
The coolant additive G 12+ (purple) can be mixed with the additive G 12
(red) or G 11. Never mix G12 (red colour) with G 11.
cordoba_ingles_0706 Seite 179 Montag, 28. August 2006 1:18 13
Page 182 of 256
Checking and refilling levels
180Checking the coolant level and topping up
The correct coolant level is important for fault-free func-
tioning of the engine cooling system.Before opening the bonnet, read and observe the warnings ⇒ in
“Safety instructions on working in the engine compartment” on
page 172.
Opening the coolant expansion tank
– Switch off the engine and allow it to cool.
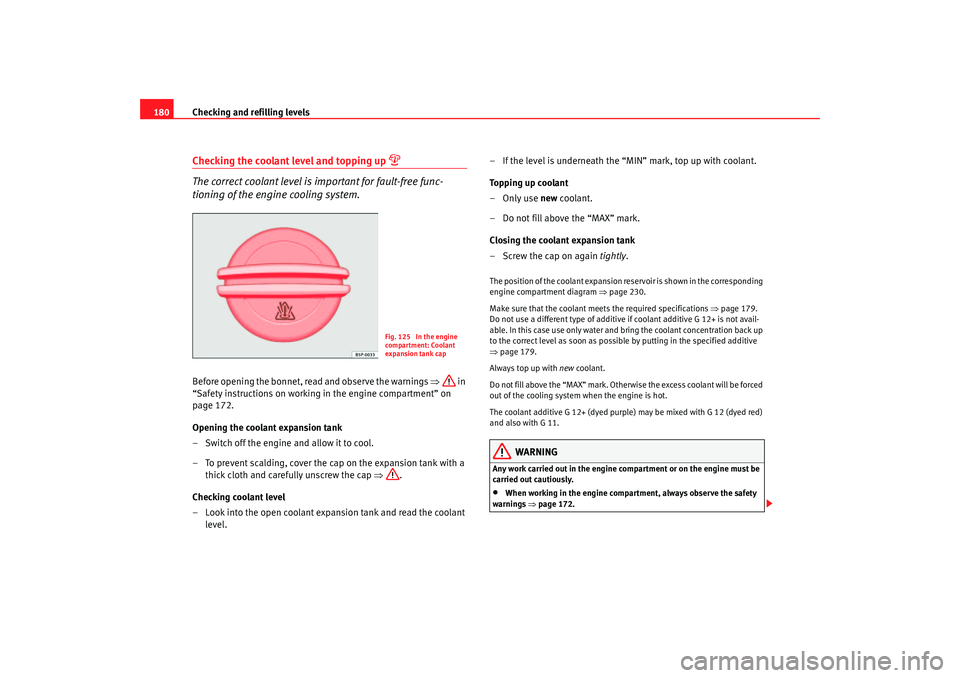
– To prevent scalding, cover the cap on the expansion tank with a thick cloth and carefully unscrew the cap ⇒.
Checking coolant level
– Look into the open coolant expansion tank and read the coolant level. – If the level is underneath the “MIN” mark, top up with coolant.
Topping up coolant
–Only use
new coolant.
– Do not fill above the “MAX” mark.
Closing the coolant expansion tank
– Screw the cap on again tightly.
The position of the coolant expansion re servoir is shown in the corresponding
engine compartment diagram ⇒page 230.
Make sure that the coolant meets the required specifications ⇒page 179.
Do not use a different type of additive if coolant additive G 12+ is not avail-
able. In this case use only water and bring the coolant concentration back up
to the correct level as soon as possible by putting in the specified additive
⇒ page 179.
Always top up with new coolant.
Do not fill above the “MAX” mark. Otherwise the excess coolant will be forced
out of the cooling system when the engine is hot.
The coolant additive G 12+ (dyed purple ) may be mixed with G 12 (dyed red)
and also with G 11.
WARNING
Any work carried out in the engine compartment or on the engine must be
carried out cautiously.•
When working in the engine compartment, always observe the safety
warnings ⇒page 172.
Fig. 125 In the engine
compartment: Coolant
expansion tank cap
cordoba_ingles_0706 Seite 180 Montag, 28. August 2006 1:18 13
Page 183 of 256
Checking and refilling levels181
Safety First
Operating instructions
Tips and Maintenance
Te c h n i c a l D a t a
•
When the engine is warm or hot, the cooling system is pressurised! Do
not unscrew the cap on the expansion t ank when the engine is hot. This is
a burn injury risk.Caution
•
When mixed with other additives the colour of G 12 will change to brown.
If this occurs you should have the coolant changed immediately. Failure to do
so will result in engine damage!
•
If a lot of coolant has been lost, wait for the engine to cool down before
putting in cold coolant. This avoids damaging the engine. Large coolant
losses are an indication of leaks in the cooling system. See a specialised
workshop immediately and have the c ooling system checked. Otherwise,
there is a risk of engine damage.
Washer fluid and windscreen wiper bladesTopping up washer fluid
The water for cleaning the windscreen should always be
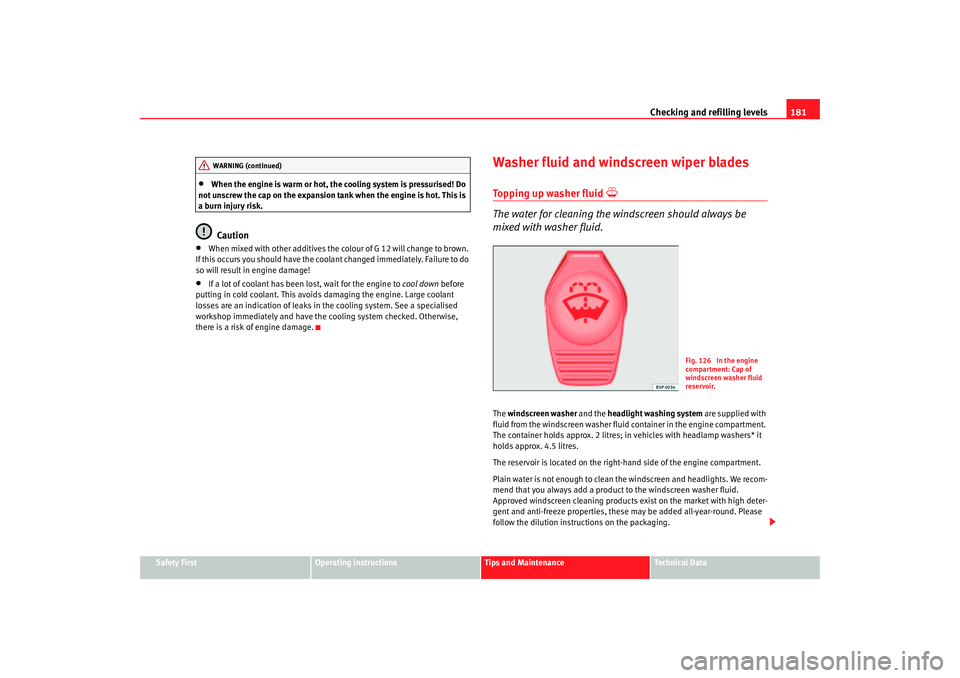
mixed with washer fluid.The windscreen washer and the headlight washing system are supplied with
fluid from the windscreen washer fluid container in the engine compartment.
The container holds approx. 2 litres; in vehicles with headlamp washers* it
holds approx. 4.5 litres.
The reservoir is located on the right-hand side of the engine compartment.
Plain water is not enough to clean th e windscreen and headlights. We recom-
mend that you always add a product to the windscreen washer fluid.
Approved windscreen cleaning products exist on the market with high deter-
gent and anti-freeze properties, these may be added all-year-round. Please
follow the dilution instructions on the packaging.
WARNING (continued)
Fig. 126 In the engine
compartment: Cap of
windscreen washer fluid
reservoir.
cordoba_ingles_0706 Seite 181 Montag, 28. August 2006 1:18 13