headlights Seat Exeo 2011 User Guide
[x] Cancel search | Manufacturer: SEAT, Model Year: 2011, Model line: Exeo, Model: Seat Exeo 2011Pages: 313, PDF Size: 5.02 MB
Page 122 of 313
120Lights and visibility
All seats occupied, luggage compartment loaded
Driver only, luggage compartment loaded
CAUTION
Always adjust the headlights to avoid dazzling oncoming traffic. Make sure
you lower the headlights when the vehicle is more heavily laden.
Dynamic headlight range control
On vehicles with xenon lamps, the headlights automatically adapt to suit
the load being carried when the ignition is switched on and when the vehi-
cle is moving, depending on the load of the vehicle and the type of driving
(e.g. when accelerating and braking).
2
3Daytime running lights*
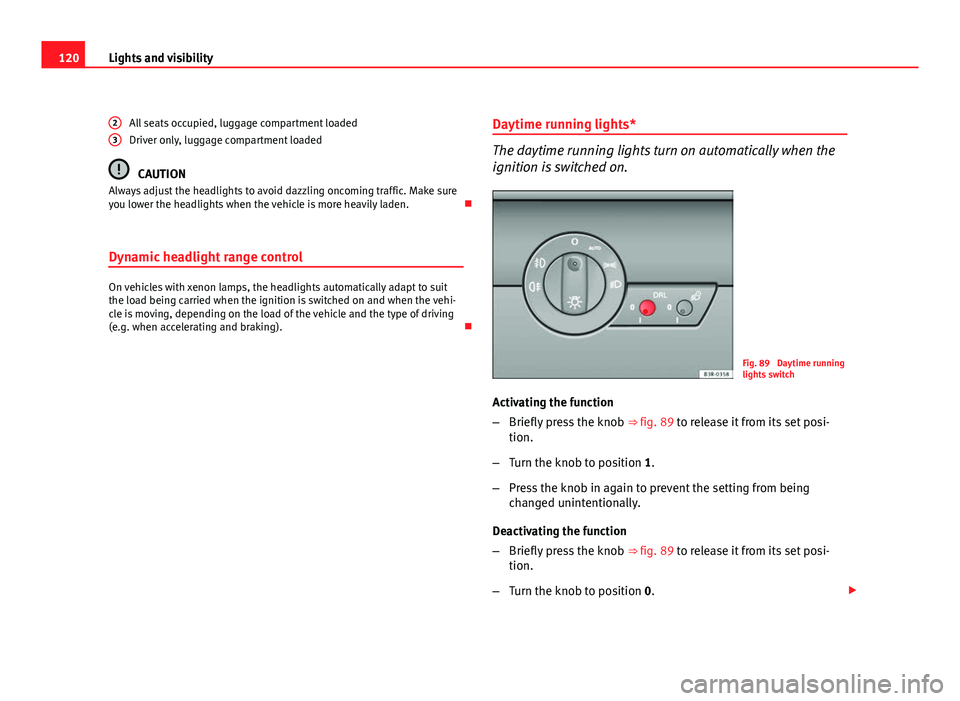
The daytime running lights turn on automatically when the
ignition is switched on.
Fig. 89 Daytime running
lights switch
Activating the function
– Briefly press the knob ⇒ fig. 89 to release it from its set posi-
tion.
– Turn the knob to position 1.
– Press the knob in again to prevent the setting from being
changed unintentionally.
Deactivating the function
– Briefly press the knob ⇒ fig. 89 to release it from its set posi-
tion.
– Turn the knob to position 0.
Page 123 of 313
121
Lights and visibility
– Press the knob in again to prevent the setting from being
changed unintentionally.
This button activates or deactivates the daytime running lights function.
With the function activated, when the ignition is switched on the daytime
running lights are turned on automatically.
Note
Please observe any relevant legal requirements which may apply in your
country.
Adaptive headlights* (for driving around bends)
When driving around bends, the headlights will light the
most important areas of the road.
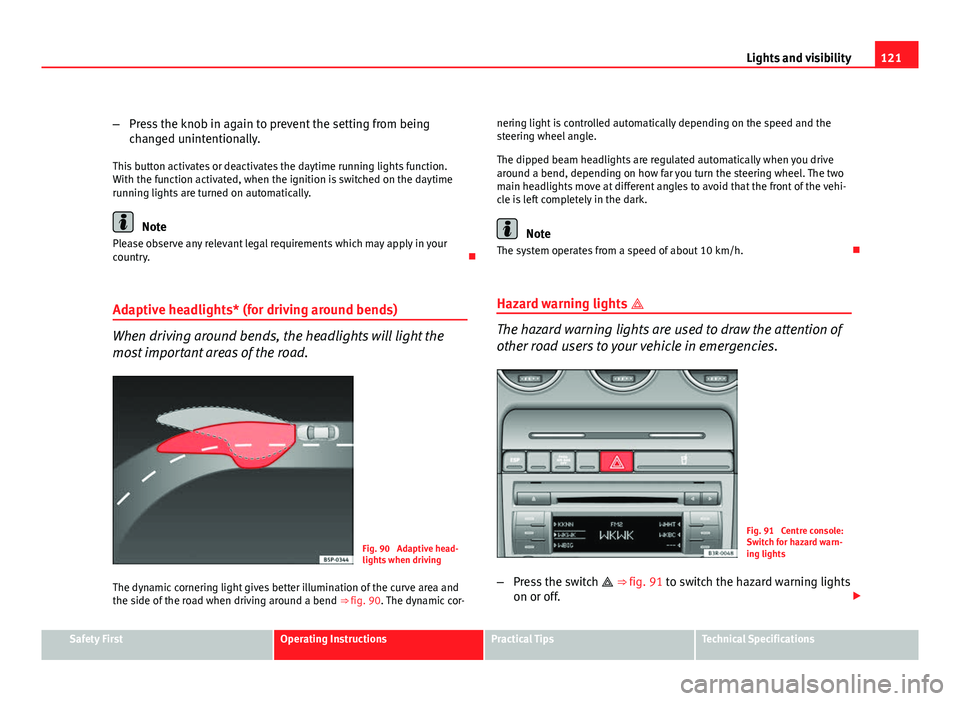
Fig. 90 Adaptive head-
lights when driving
The dynamic cornering light gives better illumination of the curve area and
the side of the road when driving around a bend ⇒ fig. 90. The dynamic cor-nering light is controlled automatically depending on the speed and the
steering wheel angle.
The dipped beam headlights are regulated automatically when you drive
around a bend, depending on how far you turn the steering wheel. The two
main headlights move at different angles to avoid that the front of the vehi-
cle is left completely in the dark.
Note
The system operates from a speed of about 10 km/h.
Hazard warning lights
The hazard warning lights are used to draw the attention of
other road users to your vehicle in emergencies.
Fig. 91 Centre console:
Switch for hazard warn-
ing lights
– Press the switch
⇒ fig. 91 to switch the hazard warning lights
on or off.
Safety FirstOperating InstructionsPractical TipsTechnical Specifications
Page 125 of 313

123
Lights and visibility
Main beam headlights
– Press the lever forward to switch on the main beams.
– Pull the lever back towards you to switch the main beam head-
lights off again.
Headlight flasher
– Pull the lever towards the steering wheel to operate the flasher.
Parking light
– Switch the ignition off.
– Move the lever up or down to turn on the right or left-hand park-
ing lights respectively.
Notes on these functions
● The turn signals only work when the ignition is switched on. The turn
signal lamp or flashes in the instrument panel when the turns signals
⇒ page 65 are working.
● The turn signals are cancelled automatically when the steering wheel is
returned to the straight-ahead position.
● The main beam headlights can only be switched on if the dipped beam
headlights are already on. The main beam headlight indicator lamp then
comes on in the instrument panel.
● The headlight flasher comes on for as long as you pull the lever, even if
no other lights are switched on. The main beam headlight indicator lamp
then comes on in the instrument panel.
● When the parking lights are switched on, the headlight and the tail light
on one side of the vehicle light up with reduced intensity. The parking lights
will only work with the ignition off.
CAUTION
Never use the main beam headlights or the headlight flasher if this would
dazzle oncoming traffic.
Interior lights
Front interior lights and glove compartment light
The front interior light also incorporates the reading lights
for the driver and passenger.
Fig. 93 Detail of headlin-
er: front interior lights
The rocker switch A
⇒ fig. 93 for the front interior light has the fol-
lowing functions:
Door light position
– Move switch A
to the centre position.
Safety FirstOperating InstructionsPractical TipsTechnical Specifications
Page 126 of 313
124Lights and visibility
Interior light switched on
–Move switch A
to position I.
Interior light switched off
– Move switch A
to position O.
Front reading lights
– Press one of the switches B
to turn the left and right reading
lights on and off.
Glove compartment light
– Open the glove compartment on the front passenger side. The
glove compartment light will come on automatically if the side
lights or headlights are switched on, and will go out again
when the glove compartment is closed.
Footwell* and door lighting
– This is switched on when the doors are opened and off when
they are closed.
If the switch is in the courtesy light position, the interior light comes on au-
tomatically when the vehicle is unlocked or the doors are opened. The light
also comes on when the key is pulled out of the ignition. The light turns off
about 30 seconds after closing the doors. The interior light is switched off
immediately when the vehicle is locked or when the ignition is switched on.
If a door is left open, the light is switched off after about 10 minutes to pre-
vent the battery from running flat.
The brightness of the lights is automatically adjusted by a dimmer when
they are switched on. Ambient lighting*
The ambient lighting illuminates a number of important
controls.
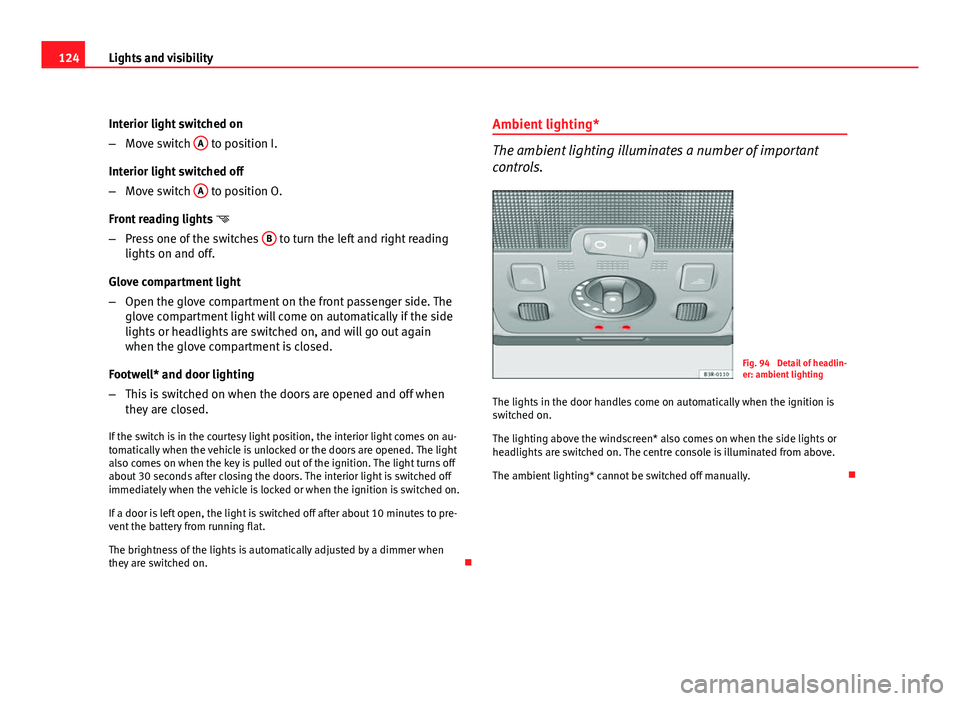
Fig. 94 Detail of headlin-
er: ambient lighting
The lights in the door handles come on automatically when the ignition is
switched on.
The lighting above the windscreen* also comes on when the side lights or
headlights are switched on. The centre console is illuminated from above.
The ambient lighting* cannot be switched off manually.
Page 133 of 313

131
Lights and visibility
Switching off the anti-dazzle function
– Press button A
⇒ fig. 103. Indicator lamp B goes off.
Switching on the anti-dazzle function
– Press button A
⇒ fig. 103. Indicator lamp B turns on.
Anti-dazzle function
The anti-dazzle function is activated every time the ignition is switched on.
The green indicator lamp lights up in the mirror housing.
When the anti-dazzle function is enabled, the interior mirror will darken au-
tomatically according to the amount of light it receives. The anti-dazzle
function is disabled if:
● the interior lighting is switched on
● reverse gear is engaged
Sensors for automatic headlights*
When the light switch is set to the AUTO position, the dipped beam head-
lights are switched on and off automatically according to the ambient light
level with the aid of the sensors located in the interior mirror ⇒ page 116.
WARNING
Electrolyte fluid can leak from a broken mirror. This fluid can cause irrita-
tion to the skin, eyes and respiratory organs. Wash thoroughly with clean
water should you come into contact with this fluid. Seek medical assis-
tance if needed!
CAUTION
Electrolyte fluid leaking from a broken mirror can cause damage to plastic
surfaces. Use a sponge or similar to remove the fluid as soon as possible.
Note
● The interior mirror automatic anti-dazzle function* will only work proper-
ly if the sun blind* for the rear window is retracted and if there are no other
objects preventing light from reaching the mirror.
● If you have to stick any type of sticker on the windscreen, do not do so in
front of the sensors. Doing so could prevent the automatic headlight or anti-
dazzle function from working correctly or even from working at all.
Exterior mirrors
The exterior mirrors are adjusted electrically.
Fig. 104 Detailed view of
the armrest: Adjuster
knob
Adjusting the exterior mirrors
– Turn the adjuster knob to position ⇒ fig. 104 L
(left exterior
mirror) or position R (right exterior mirror).
– Move the knob as required to adjust the exterior mirror for a
good view behind you.
Safety FirstOperating InstructionsPractical TipsTechnical Specifications
Page 154 of 313
152Seats and storage compartments
Compartments
Overview
There are several storage compartments at various points in
the vehicle.
Your vehicle has the following storage compartments:
First-aid kit* Emergency triangle* Glove compartment⇒ page 152Storage compartment in the centre console On-board documentation compartment* Compartments in the door trims⇒ page 153Coat hooks⇒ page 153Rear shelf⇒ page 143Side storage compartment in luggage com-
partment
Some of the compartments listed are only provided in certain models or are
optional extras. Glove compartment
The lockable glove compartment is equipped with a light.
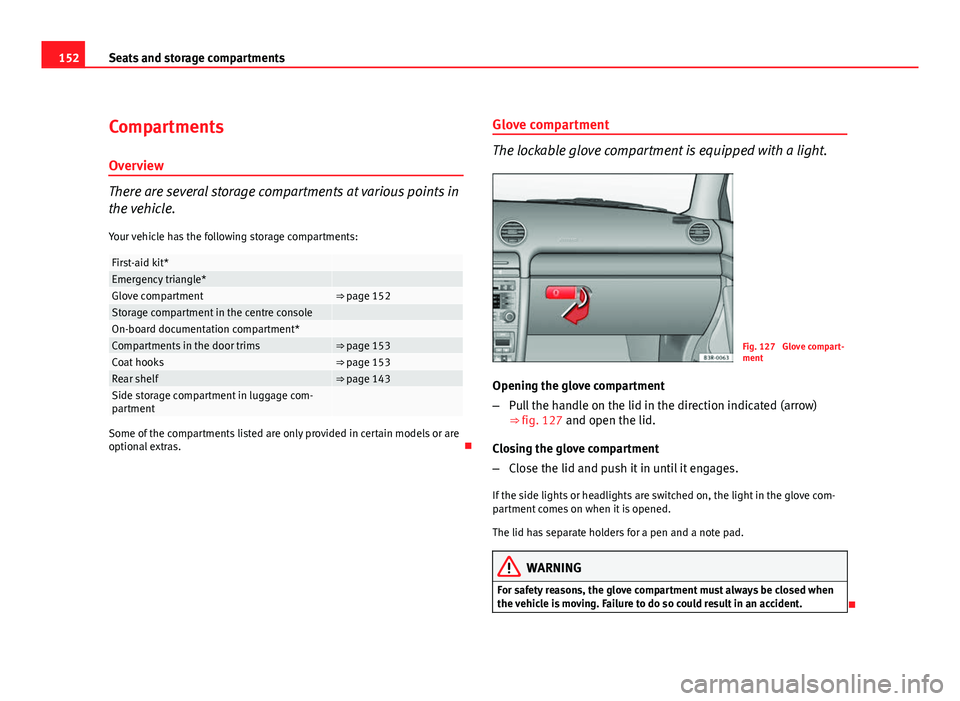
Fig. 127 Glove compart-
ment
Opening the glove compartment
– Pull the handle on the lid in the direction indicated (arrow)
⇒ fig. 127 and open the lid.
Closing the glove compartment
– Close the lid and push it in until it engages.
If the side lights or headlights are switched on, the light in the glove com-
partment comes on when it is opened.
The lid has separate holders for a pen and a note pad.
WARNING
For safety reasons, the glove compartment must always be closed when
the vehicle is moving. Failure to do so could result in an accident.
Page 197 of 313

195
Driving and the environment
Environmental friendliness
Environmental protection is a top priority in the design, choice of materials
and production of your new Seat.
Design measures for economical recycling
● Joints and connections designed for easy dismantling
● Modular construction to facilitate dismantling
● Increased use of single-grade materials
● Plastic parts and elastomers are marked in accordance with ISO 1043,
ISO 11469 and ISO 1629
Choice of materials
● Nearly all materials used can be recycled
● Similar types of plastics grouped together for easy recycling
● Recycled materials used in manufacture
● Reduction of volatile compounds in plastics
● CFC-free refrigerant in air conditioner
Compliance with prohibited materials regulation : cadmium, lead, mercury,
chrome VI.
Manufacturing methods
● Use of recycled material for manufacturing plastic parts
● Solvent-free cavity sealing
● Solvent-free wax for protecting the vehicles in transit
● Solvent-free adhesives
● No CFCs used in production
● Surplus materials used extensively for energy conversion and building
materials
● Overall water consumption reduced
● Heat recovery systems
● The use of water-soluble paints Driving abroad
Observations
To drive abroad, the following must be taken into consideration:
● For vehicles fitted with a catalytic converter ensure that unleaded petrol
is available for the journey. See the chapter “Refuelling”. Automobile organ-
isations will have information about service station networks selling unlea-
ded fuel.
● In some countries, it is possible that your vehicle model is not sold, and
therefore spare parts are not available or the Authorised Services can only
carry out limited repairs.
SEAT importers and distributors will gladly provide information about the
technical preparations that you vehicle requires and also about necessary
maintenance and repair possibilities.
Adhesive strips for headlights
If you have to drive a right-hand drive vehicle in a left-hand drive country, or
vice versa, the asymmetric dipped beam headlights will dazzle oncoming
traffic.
To prevent dazzling, you must apply stickers to certain parts of the head-
light lenses. Further information is available at your Authorised Service Cen-
tre.
In vehicles with adaptive headlights, the rotation system must previously be
disconnected. To do this, please go to a specialised workshop.
Safety FirstOperating InstructionsPractical TipsTechnical Specifications
Page 199 of 313
197
Trailer towing
Where possible, operate the trailer with the maximum permitted drawbar
load on the ball joint of the towing bracket, but do not exceed the specified
limit.
Tyre pressure
Check the tyre pressures on your vehicle, and adjust for “full load” condi-
tions (refer to the sticker listing the tyre pressures on the door pillar). It may
also be necessary to adjust the tyre pressures on the trailer according to the
recommendations of the trailer manufacturer.
Exterior mirrors
Check whether you can see enough of the road behind the trailer with the
standard mirrors. If this is not the case you should have additional mirrors
fitted. The two exterior mirrors should be fitted on folding arms. Adjust the
mirrors to give sufficient rear vision.
Headlights
Before starting a journey, check the headlight beam settings with the trailer
hitched up. If necessary, alter the height of the headlight beams by means
of the headlight range control. See ⇒ page 119.
Power supply
When you remove the ignition key, the power supply to the trailer is inter-
rupted.
Removable ball joint coupling
Vehicles with a factory-fitted towing bracket are equipped with a removable
ball joint coupling. This is stored in the spare wheel well in the luggage
compartment together with the necessary fitting instructions.
Note
If you frequently tow, we recommend you also have the vehicle serviced be-
tween services. Notes on towing
Towing a trailer involves additional attention by the driver.
Weight distribution
The weight distribution of a loaded trailer with an unladen vehicle is very
unfavourable. However, if this cannot be avoided, drive extra slow to allow
for the unbalanced weight distribution.
Speed
The stability of the vehicle and trailer is reduced with increasing speed.
Therefore, it is advisable not to drive at the maximum permissible speed in
unfavourable road, weather or wind conditions. This especially applies
when driving downhill.
You should always reduce speed immediately if the trailer shows the slight-
est sign of swaying. Never try to stabilise the trailer by accelerating.
Anticipate hazards and brake in good time. If towing a trailer with an inertia
brake, first brake gently and then harder. This will prevent brake tapping by
the trailer wheels when they lock. Select a low gear in due course before go-
ing down a steep downhill. This enables you to use the engine braking to
slow down the vehicle.
Swaying and pitching can be reduced by stabiliser aids. We recommend
having stabiliser aids installed when towing trailers with a high trailer
weight. They can be purchased and installed at a Technical Service.
Reheating
When climbing long hills in hot weather with the engine running fast in low
gear, you should keep an eye on the coolant temperature gauge ⇒ page 60.
Reduce speed immediately if the needle moves to the right end of the scale.
If the temperature warning lamp in the instrument panel should start
flashing, stop the vehicle and let the engine cool down by running it at
idling speed for a few minutes.
Safety FirstOperating InstructionsPractical TipsTechnical Specifications
Page 259 of 313
257
If and when
Fuse assignment
This list shows the fuses which can be replaced relatively
easily by the owner.
No.ConsumerAmps1Air conditioner102Footwell lamps53Heated washer jets54Radiator fan55Parking aid, automatic gearbox106Air conditioner (air purity sensor), pressure sensor5
7Electronic Stability Programme (ESP), brake light
switch, clutch pedal switch, steering angle sensor10
8Telephone59Vacant 10Adaptive headlights right5
11Airbag and disconnection of the front passenger air-
bag5
12Diagnostic socket1013Steering column unit1014Brake lights1015Instrument panel1016Vacant 17Tyre pressure control, rain/light sensor1018Adaptive headlights left519Vacant 20Vacant 21Vacant 22Driver door / front passenger door1523Rear doors15
No.ConsumerAmps24Central electrics unit for convenience equipment2025Heater blower3026Rear window heater3027Power socket for trailer (control unit)3028Fuel pump, auxiliary pump for diesel2029Vacant 30Sliding/tilting sunroof20
31Diagnosis connection, automatic anti-dazzle interior
mirror, reverse light, automatic gearbox15
32Towing socket1533Lighter2034Lambda probe heater1035Luggage compartment power socket*2036Wiper system30
37Pump for windscreen washer and headlight washer
system30
38Luggage compartment illumination, alarm1539Radio, Amplifier2040Horn2541230 volt socket3042Electronic Stability Programme (ESP)2543Engine management1544Seat heating35
Some of the electrical items listed in the table are only fitted on certain
models or are optional extras.
The electric windows and electric seat adjusters are protected by circuit
breakers. These reset automatically after a few seconds when the overload
(caused for example by frozen windows) has been corrected.
Safety FirstOperating InstructionsPractical TipsTechnical Specifications
Page 260 of 313

258If and when
Note
Please note that the above list contains all data at the time of going to
press, so it is subject to modifications. If discrepancies should occur,
please refer to the sticker on the inside of the fuse cover for the correct in-
formation for your model.
Bulbs
General information
You can change the following bulbs for exterior lights yourself:
● Main headlights: all bulbs (except xenon headlights)
● Tail lights: all bulbs
● Side turn signal bulb
The following bulbs can only be changed by a qualified workshop:
● Main headlights: Xenon* bulb ⇒ page 265
● Front fog lights: Bulb
As a rule, you require a certain degree of practical skill to change defective
bulbs. This applies in particular to those bulbs which are only accessible
from the engine compartment.
If in doubt, we recommend that you have defective bulbs changed by a
qualified workshop or qualified mechanic.
If you do decide to change bulbs in the engine compartment yourself, be
aware of the safety risks involved ⇒ page 221 ⇒
in Types of bulbs on
page 259. The name of many of the lamps fitted by SEAT ends in "LL". This means Long
Life. These lamps are used for functions with a long service time (dipped
beam, side lights, daylight driving, etc.). This does not apply to lamps with
a shorter service time (turn signals, etc.). A lamp with the same name ex-
cept for the last two letters, "LL“ or “SLL”, is compatible, but will have a
service life of approximately half of the LongLife lamps.
When replacing lamp bulbs, the same type of bulb as originally fitted
should always be used where possible.