ignition Seat Ibiza 2017 Edition 11.17 Owners Manual
[x] Cancel search | Manufacturer: SEAT, Model Year: 2017, Model line: Ibiza, Model: Seat Ibiza 2017Pages: 312, PDF Size: 6.51 MB
Page 252 of 312
Advice
freezing. Apply silicone spray to the rubber
se al
s.
Af
ter washing the vehicle
– After washing, avoid sudden and sharp
brakin
g. “Dry” the brakes by braking sever-
al times. WARNING
● Wa sh
your vehicle with the ignition switch-
ed off.
● Protect your hands and arms from cuts on
sharp meta
l edges when cleaning the under-
body, the inside of the wheel housings etc.
Risk of injury.
● Water, ice and salt on the brake system can
reduce br
aking effectiveness. Risk of acci-
dent. CAUTION
● Never r emo
ve dirt, mud or dust if the vehi-
cle surface is dry. Never use a dry cloth or
sponge for cleaning purposes. This could
scratch the paintwork or glass on your vehi-
cle.
● Washing the vehicle in low temperatures:
when washin
g the vehicle with a hose, do not
direct water into the lock cylinders or the
gaps around the doors, rear lid, or sunroof.
Risk of freezing. For the sake of the environment
To protect the environment, the vehicle
shoul d be w
ashed only in specially provided
wash bays, to prevent toxic, oil-laden waste
water from entering the sewer system. In
some places, washing vehicles outside wash
bays is prohibited. Note
Do not wash the vehicle in direct sunlight. Washing the vehicle with a high pres-
s
ur
e c
leaner Be particularly careful when using a high
pr
e
s
sure cleaner!
– Always observe the instructions for the
high-pres
sure cleaner, particularly those
concerning the pressure and the spraying
distance.
– Increase the spraying distance for soft ma-
terial
s and painted bumpers.
– Do not use a high pressure cleaner to re-
move ic
e or snow from windows
››› page 251.
– Never use concentrated jet nozzles (“rotat-
ing jets”) ›
›› .–
Af t
er w
ashing, avoid sudden and sharp
braking. “Dry” the brakes by braking sever-
al times ››› page 181. WARNING
● Never w a
sh tyres with a concentrated jet
(“rotating nozzle”). Even at large spraying
distances and short cleaning times, damage
can occur to the tyres. This may cause an ac-
cident.
● Water, ice and salt on the brake system can
reduce br
aking effectiveness. Risk of acci-
dent. CAUTION
● Do not u se w
ater hotter than +60°C
(+140°F). This could damage the vehicle.
● To avoid damage to the vehicle, keep a suf-
ficient di
stance from sensitive materials such
as flexible hoses, plastic, soundproofing ma-
terial, etc. This also applies to bumpers pain-
ted in the colour of the bodywork. The closer
the nozzle is to the surface, the greater the
wear on the material. Factory-fitted adhesive sheets
The following indications should be taken in-
t
o ac
c
ount to avoid damaging adhesive
sheets:
● Do not use high pressure cleaners.
250
Page 256 of 312
Advice
have the engine cleaned. On commissioning
thi s
w
ork, ensure that all surfaces, seams,
joints and components in the engine com-
partment are given anti-corrosion treatment. WARNING
● When work in
g in the engine compartment,
always observe the safety warnings
››› page 263.
● Before opening the bonnet, switch the en-
gine off, app
ly the handbrake firmly and al-
ways remove the key from the ignition.
● Allow the engine to cool before you clean
the engine comp
artment.
● Do not clean, for example, the vehicle un-
derbody, wheel ar
ches or wheel trims without
protecting your hands and arms. You may cut
yourself on sharp-edged metal parts. Failure
to comply could result in injury.
● Moisture, ice and salt on the brake system
may
affect braking effectiveness. Risk of acci-
dent. Directly after washing, avoid sudden
and sharp braking.
● Never touch the radiator fan. It is tempera-
ture-c
ontrolled and could start automatically,
even when the key is removed from the igni-
tion! For the sake of the environment
Fuel, grease and oil deposits can be removed
when the engine i s
washed. The polluted wa-
ter must be cleaned in an oil separator. For
this reason, engine washing should be car- ried out only by a specialised workshop or a
petro
l
station. Caring for the vehicle interior
Scr een f
or the radio/Easy Connect*
and control panel* The display can be cleaned with a soft cloth
and a prof
e
ssionally available “LCD cleaner”.
Moisten the cloth with a small amount of the
cleaning fluid.
The Easy Connect control panel* should first
be cleaned with a brush so that no dirt goes
into the device or between the keys and
housing. Next, we recommend cleaning the
Easy Connect control panel* using a cloth
dampened with water and washing-up liquid. CAUTION
● To av oid s
cratching the screen, do not wipe
the display with a dry cloth.
● To avoid damage, ensure that no liquid
goes
into the Easy Connect control panel*. Cleaning plastic parts and the dash
p
anel –
Use a clean, damp cloth to clean plastic
par ts
and the dash panel. –
If this
does not provide satisfactory results,
use a special solvent-free plastic cleaning
product. WARNING
Never clean the dash panel and the airbag
modul e s
urface with cleaners containing sol-
vents. Solvents cause the surface to become
porous. If the airbag triggered, plastic parts
could become detached and cause injuries. CAUTION
Cleaning products which contain solvents will
dam ag
e the material. Cleaning wooden trim*
–
Clean the wooden trim with a water-mois-
tened c
l
ean cloth.
– If this does not provide satisfactory results,
use a gen
tle soap solution. CAUTION
Cleaning products which contain solvents will
dam ag
e the material. Cleaning textile covers and trim parts
Textile covers and trim parts (e.g. seats, door
trim) shou
l
d be c
leaned regularly with a
254
Page 259 of 312
Checking and refilling levels
Checking and refilling levels
R ef
uel
ling
Refuelling Read the additional information carefully
›› ›
page 57
If the automatic filler nozzle is operated cor-
rectly, it will switch itself off as soon as the
tank is “full”. Never attempt to fill beyond
this point, as this will fill the expansion
chamber. Fuel may leak out if ambient condi-
tions are warm.
The correct fuel grade for your vehicle is giv-
en on a sticker on the inside of the fuel tank
flap.
Vehicles with natural gas engines and hy-
brids
Every 6 months it is necessary to run on pet-
rol until the control lamp switches off and
then the tank must be refilled. This is neces-
sary to ensure that the system works proper-
ly, as well as the fuel quality required for driv-
ing with petrol. WARNING
● Fuel i
s highly flammable and can cause se-
rious burns and other injuries. –
Never smok e or c
ome into contact with
sparks when filling the fuel tank of the
vehicle or a spare fuel canister with fuel.
This is an explosion hazard.
– Follow legal requirements for the use of
spare fuel canisters.
– For safety reasons we do not recommend
carrying a spare fuel canister in the vehi-
cle. The canister could be damaged in an
accident and leak.
● If, in exceptional circumstances, you have
to carr
y a spare fuel canister, please observe
the following:
–Never fill the spare fuel canister inside
the vehicle or on it. An electrostatic
charge could build up during filling, caus-
ing the fuel fumes to ignite. This could
cause an explosion. Always place the
canister on the ground to fill it.
– Insert the fuel nozzle into the mouth of
the canister as far as possible.
– If the spare fuel canister is made of met-
al, the filling nozzle must be in contact
with the canister during filling. This
helps prevent an electrostatic charge
building up.
– Never spill fuel in the vehicle or in the
luggage compartment. Fuel vapours are
explosive. Danger of death. CAUTION
● Fuel s
pills should be removed from the
paintwork immediately. ●
Never ru n the t
ank completely dry. Irregular
fuel supply can cause misfiring. As a result,
unburnt fuel could enter the catalytic convert-
er and cause damage.
● When filling the fuel tank after having run it
compl
etely dry on a vehicle with a diesel en-
gine the ignition must be switched on for at
least 30 seconds before starting the engine.
Subsequently, when you start the engine it
may take longer than normal to start firing
(up to one minute). This is due to the fact that
the fuel system has to purge itself of air be-
fore starting. For the sake of the environment
Do not try to put in more fuel after the auto-
matic fi
ller nozzle has switched off, this may
cause the fuel to overflow if it becomes warm. Note
There is no emergency mechanism for the
manua l
release of the fuel tank flap. If neces-
sary, request assistance from specialised per-
sonnel. 257
Technical data
Advice
Operation
Emergencies
Safety
Page 262 of 312
Advice
Diesel fuel Please note the information on the inside of
the fuel
t
ank flap.
We recommend the use of diesel fuel which
complies to European standard EN 590. If
diesel fuel which meets European standard
EN 590 is not available, the Cetane number
(CZ) must, at minimum, be 51. If the engine
is equipped with a particulate filter, the sul-
phur content of the fuel must be below 50
parts per million.
Winter-grade diesel
Summer fuel becomes thicker in winter and it
is more difficult to start the engine. For this
reason, petrol stations in some countries al-
so offer winter diesel with improved fluidity
when cold (winter-grade diesel). CAUTION
● The v ehic
le is not designed for the use of
FAME fuel (biodiesel). The fuel system would
be damaged if you used biodiesel.
● Do not mix fuel additives, the so-called
“thinners”, petro
l or similar additives with
diesel fuel.
● If poor-quality diesel fuel is used, it may be
neces
sary to drain the fuel filter more fre-
quently than is specified in the Maintenance
Programme. We recommend having this done
by a specialised workshop. If water is allowed to collect in the filter, this can cause engine
perf
orm
ance problems. Natural gas
Natural gas can be compressed or in liquid
form, a
d
dition to others.
Liquefied natural gas (LNG) is the result of
heavy cooling of natural gas. Therefore its
volume is considerably reduced compared
with compressed natural gas (CNG). In vehi-
cles with a natural gas engine, liquefied nat-
ural gas cannot be directly refilled, as the gas
would expand excessively in the vehicle gas
tank.
Therefore, vehicles with a natural gas engine
must only be refuelled using compressed
natural gas ››› .
Nat ur
a
l gas quality and consumption
Natural gas is divided into the groups H and
L depending on its quality.
Gas type H has a superior heating power and
inferior nitrogen and carbon dioxide content
than type L. The higher the heating power of
the natural gas, the lower the consumption
will be.
However, the heating power and the propor-
tion of nitrogen and carbon dioxide can fluc-
tuate within the quality groups. Therefore, ve- hicle consumption can also vary when using
a singl
e type of gas only.
The engine management automatically
adapts to the natural gas used according to
its quality. Therefore, different quality gases
can be mixed in the tank, without the need
for comprehensive draining before applying a
different quality gas.
Updated information relating to natural gas
quality is displayed on the instrument panel
››› page 37.
Natural gas and safety
If you can smell gas or suspect that there is a
leak ››› :
● Stop the vehicle immediately.
● Switch the ignition off.
● Open the doors to appropriately ventilate
the v
ehic
le.
● Extinguish cigarettes immediately.
● Move away from the vehicle or switch off
obj
ects that may cause sparks or a fire.
● If you continue to smell gas, do not contin-
ue driving!
● Seek
specialist assistance. Have the fault
repair
ed.
Regular checks of the natural gas system
The natural gas tanks may be damaged or
corroded by external factors. The walls of the
260
Page 264 of 312
Advice
Refilling AdBlue ®Fig. 228
AdBlue tank cap. Operations prior to refilling
P
ark
the
vehicle on a flat surface. If the vehi-
cle is not parked on a flat surface, but, for ex-
ample, on a slope or on the side of a curb,
the level indicator may not detect the load
properly.
If a warning message about AdBlue ®
levels
appears on the dash panel display, fill at
least the minimum amount required (approx.
5 litres). Only after adding this amount will
the system detect that AdBlue ®
has been
added and you will be able to start the en-
gine again. The maximum amount that can
be refilled is 11 litres.
Switch the ignition off. If the ignition is not
switched off during refilling, the warning to
refill may continue to appear on the instru-
ment panel display. Fill with a refill bottle
Only u
se AdBlue ®
that complies with ISO
22241-1. Only use original containers.
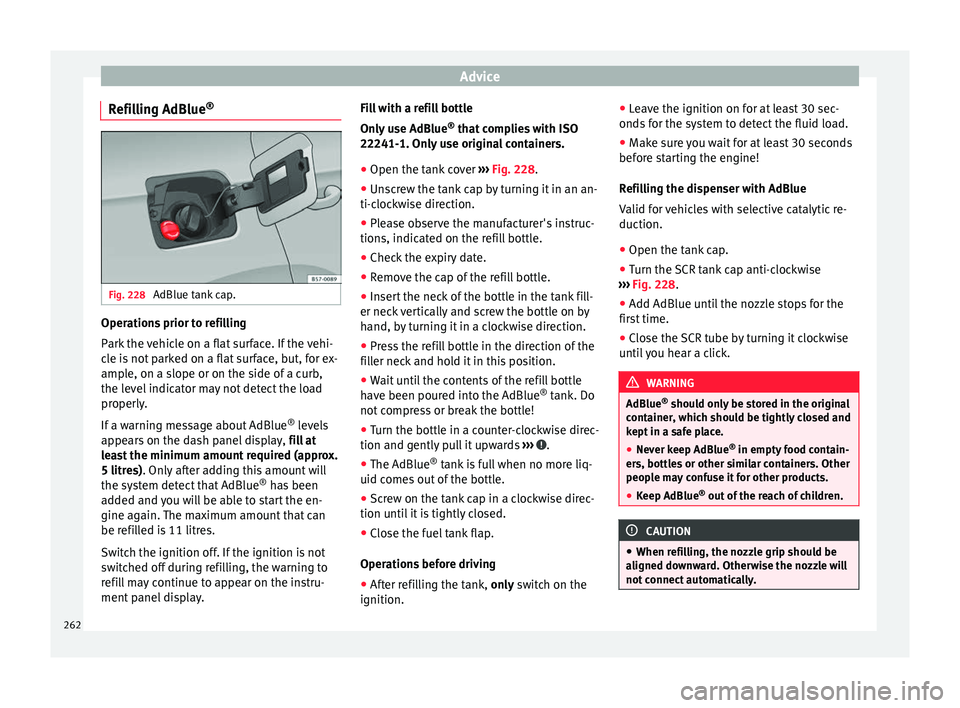
● Open the tank cover ›››
Fig. 228.
● Unscrew the tank cap by turning it in an an-
ti-clock
wise direction.
● Please observe the manufacturer's instruc-
tions, indicat
ed on the refill bottle.
● Check the expiry date.
● Remove the cap of the refill bottle.
● Insert the neck of the bottle in the tank fill-
er neck
vertically and screw the bottle on by
hand, by turning it in a clockwise direction.
● Press the refill bottle in the direction of the
fill
er neck and hold it in this position.
● Wait until the contents of the refill bottle
have been pour
ed into the AdBlue ®
tank. Do
not compress or break the bottle!
● Turn the bottle in a counter-clockwise direc-
tion and gently p
ull it upwards ››› .
● The AdBlue ®
tank
i
s full when no more liq-
uid comes out of the bottle.
● Screw on the tank cap in a clockwise direc-
tion until
it is tightly closed.
● Close the fuel tank flap.
Operations
before driving
● After refilling the tank, only sw
itch on the
ignition. ●
Leav
e the ignition on for at least 30 sec-
onds for the system to detect the fluid load.
● Make sure you wait for at least 30 seconds
before s
tarting the engine!
Refilling the dispenser with AdBlue
Valid for vehicles with selective catalytic re-
duction.
● Open the tank cap.
● Turn the SCR tank cap anti-clockwise
›››
Fig. 228.
● Add AdBlue until the nozzle stops for the
first
time.
● Close the SCR tube by turning it clockwise
until
you hear a click. WARNING
AdBlue ®
shoul d on
ly be stored in the original
container, which should be tightly closed and
kept in a safe place.
● Never keep AdBlue ®
in empty food c
ontain-
ers, bottles or other similar containers. Other
people may confuse it for other products.
● Keep AdBlue ®
out of the r
each of children. CAUTION
● When refi l
ling, the nozzle grip should be
aligned downward. Otherwise the nozzle will
not connect automatically. 262
Page 265 of 312
Checking and refilling levels
●
Do not tr y
to add any more additive after
the nozzle has stopped for the first time. The
AdBlue tank could overflow and AdBlue could
spill out.
● Only use AdBlue ®
that c
omplies with ISO
22241-1. Only use original containers.
● Never mix AdBlue ®
with wat
er, fuel or addi-
tives. Any type of damage caused by such a
mixture will not be covered by the warranty.
● Never pour AdBlue ®
into the fuel
tank. This
could result in engine damage.
● Do not carry the refill bottle inside the vehi-
cle. If
there is a leak (due to temperature
changes or damage to the bottle), the
AdBlue ®
may damage the vehicle. For the sake of the environment
Dispose of the refill bottle in an environment-
friendly m anner
.Note
You can buy refill bottles that are adequate
for AdBlue ®
u se at
SEAT dealerships. Working in the engine compart-
ment
Saf ety
not
es for work in the engine
compartment Read the additional information carefully
›› ›
page 17
Before starting any work on the engine or in
the engine compartment:
1. Switch off the engine and remove the key from the ignition.
2. Ap
ply the handbrake.
3. Move the gear lever to neutral or the selec- tor lev
er to position P.
4. Wait for the engine to cool down.
5. Keep children away from the vehicle.
6. Raise the bonnet ›››
page 264.
You should not do any work in the engine
compartment unless you know exactly how to
carry out the jobs and have the correct tools!
Have the work carried out by a specialised
workshop if you are uncertain.
All service fluids and consumables, e.g. cool-
ant, engine oil, spark plugs and batteries,
are under constant development. SEAT pro-
vides a constant flow of information to Tech-
nical Services concerning modifications. For
this reason, we recommend you have service fluids and consumables replaced by a Techni-
cal
Service. Please observe the relevant in-
structions ››› page 247. The engine compart-
ment of the vehicle is a hazardous area ››› .
WARNING
All work on the engine or in the engine com-
par tment, e.
g. checking and refilling fluids,
involves the danger of injury and burns, acci-
dents and even fire.
● Never open the bonnet if you see steam,
smoke or coo
lant escaping from the engine
compartment. Otherwise, there is a risk of
sustaining burns. Wait until no more steam or
coolant is emitted, then allow the engine to
cool before carefully opening the bonnet.
● Switch off the engine and remove the key
from the ignition.
● App
ly the handbrake and move the gear
lever t
o neutral or selector lever to position P.
● Keep children away from the vehicle.
● Never touch hot engine parts. There is a
risk of
burns.
● Never spill liquids on a hot engine or on a
hot exh
aust gas system. This is a fire hazard.
● Avoid causing short-circuits in the electri-
cal
system, particularly at the points where
the jump leads are attached ›››
page 72.
The battery could explode.
● Never touch the radiator fan. It is tempera-
ture c
ontrolled and could start automatically,
even when the engine has been switched off
and the key removed from the ignition! » 263
Technical data
Advice
Operation
Emergencies
Safety
Page 266 of 312
Advice
●
Never c o
ver the engine with additional in-
sulating materials such as a blanket. Risk of
fire!
● Do not unscrew the cap on the coolant ex-
pans
ion tank when the engine is hot. If the
coolant is hot, the cooling system will be
pressurised!
● Protect face, hands and arms by covering
the cap with a l
arge, thick cloth to protect
against escaping coolant and steam.
● Always make sure you have not left any ob-
jects, s
uch as cleaning cloths or tools, in the
engine compartment.
● If you have to work underneath the vehicle,
you mus
t use suitable stands additionally to
support the vehicle, there is a risk of acci-
dent!. A hydraulic jack is insufficient for se-
curing the vehicle and there is a risk of injury.
● If any work has to be performed when the
engine is
started or with the engine running,
there is an additional, potentially fatal, safety
risk from the rotating parts, such as the drive
belts, alternator, radiator fan, etc., and from
the high-voltage ignition system. You should
also observe the following:
– Never touch the electrical wiring of the
ignition system.
– Ensure that jewellery, loose clothing and
long hair do not get trapped in rotating
engine parts. Danger of death. Before
starting any work remove jewellery, tie
back and cover hair, and wear tight-fit-
ting clothes. –
Never ac c
elerate with a gear engaged
without taking the necessary precau-
tions. The vehicle could move, even if the
handbrake is applied. Danger of death.
● If work has to be carried out on the fuel
syst
em or on electrical components, you
must observe the following safety notes in
addition to the above warnings:
– Always disconnect the battery from the
on-board network. The vehicle must be
unlocked when this is done, otherwise
the alarm will be triggered.
– Do not smoke.
– Never work near naked flames.
– Always have a fire extinguisher on hand. WARNING
If the bonnet is not correctly closed, it could
sud den
ly open while driving leaving the driv-
er without visibility. This could result in a se-
rious accident.
● After closing the bonnet, always check that
it is
properly secured by the locking mecha-
nism in the lock carrier piece. The bonnet
must be flush with the surrounding body pan-
els.
● While driving, if you notice that the bonnet
is not
correctly closed then stop immediately
and close it correctly.
● Only open and close the bonnet when there
is no
body within its range. CAUTION
When topping up service fluids, make sure
not t o mi
stake them. Using the wrong fluids
could cause serious malfunctions and engine
damage! For the sake of the environment
Service fluids leaks are harmful to the envi-
ronment . F
or this reason you should make
regular checks on the ground underneath
your vehicle. If you find spots of oil or other
fluids, have your vehicle inspected in a speci-
alised workshop. Opening the bonnet
Read the additional information carefully
› ›
›
page 17
The bonnet is released from inside the vehi-
cle.
Before opening the bonnet ensure that the
windscreen wipers are in rest position. WARNING
Hot coolant can scald!
● Never open the bonnet if you see steam,
smoke or c oo
lant escaping from the engine
compartment. 264
Page 272 of 312
Advice
●
Never open the bonnet if
you can see or
hear steam or coolant escaping from the en-
gine compartment. Risk of scalding. Wait un-
til you can no longer see or hear escaping
steam or coolant.
● The engine compartment is a dangerous
area. B
efore carrying out any work in the en-
gine compartment, switch off the engine and
allow it to cool down. Always note the corre-
sponding warnings ››› page 263. Topping up coolant
Read the additional information carefully
› ›
›
page 59
Top up coolant when the level is below the
MIN (minimum) mark.
Checking coolant level – Park the vehicle in a horizontal position.
– Switch the ignition off.
– Read off the coolant level on coolant ex-
pans
ion tank. When the engine is cold, the
coolant level should be between the marks.
When the engine is hot, it may be slightly
above the upper mark.
Topping up coolant – Wait for the engine to cool down. –
Cov
er the coolant expansion tank cap with
a cloth and carefully unscrew it to the left
››› .
– Top up the coolant only if there is still cool-
ant in the e
xp
ansion tank, otherwise you
could damage the engine. If there is no
coolant in the expansion tank, do not con-
tinue driving. You should obtain professio- nal assistance ››› .
– If there is still some coolant in the expan-
sion t
ank, t
op up to the upper mark.
– Top up with coolant until the level becomes
stab
le.
– Screw the cap back on correctly.
Any lo
ss of coolant fluid normally indicates a
leak in the cooling system. Take the vehicle
straight to a specialised workshop to have
the cooling system examined. If there are no
leaks in the engine cooling system, a loss of
coolant can only occur if the coolant boils
and is forced out of the system as a result of
overheating. WARNING
● The coo lin
g system is under pressure. Do
not unscrew the cap on the coolant expan-
sion tank when the engine is hot: risk of
burns!
● The antifreeze and coolant fluid can be a
health h
azard. Therefore, the antifreeze
should be stored in the original container in a safe place out of reach of children. Failure to
comp
ly
could result in poisoning.
● If working inside the engine compartment,
remember that, ev
en when the ignition is
switched off, the radiator fan may start up au-
tomatically, and therefore there is a risk of in-
jury. WARNING
If there is not enough anti-freeze in the cool-
ant sys
tem, the engine may fail leading to se-
rious damage.
● Please make sure that the percentage of
additiv
e is correct with respect to the lowest
expected ambient temperature in the zone in
which the vehicle is to be used.
● When the outside temperature is very low,
the cool
ant could freeze and the vehicle
would be immobilised. In this case, the heat-
ing would not work either and inadequately
dressed passengers could die of cold. CAUTION
Do not top up the expansion tank with cool-
ant fluid if it
is empty! Air could enter the
cooling system. In this case, stop driving.
Seek specialist assistance. Otherwise, there
is a risk of engine damage. 270
Page 275 of 312
Checking and refilling levels
seek medical care immediately. Neutralise
any
ac
id splashes on the skin or clothing
with a soapy solution, and rinse off with plen-
ty of water. If acid is swallowed by mistake,
consult a doctor immediately.
● Fires, sparks, open flames and smoking are
prohibit
ed. When handling cables and electri-
cal equipment, avoid causing sparks and
electrostatic charge. Never short the battery
terminals. High-energy sparks can cause in-
jury.
● A highly explosive mixture of gases is re-
lea
sed when the battery is under charge. The
batteries should be charged in a well-ventila-
ted room only.
● Keep children away from acid and batteries.
● Before working on the electrical system,
you mus
t switch off the engine, the ignition
and all electrical devices. The negative cable
on the battery must be disconnected. When a
light bulb is changed, you need only switch
off the light.
● Deactivate the anti-theft alarm by unlock-
ing the v
ehicle before you disconnect the bat-
tery! The alarm will otherwise be triggered.
● When disconnecting the battery from the
vehicl
e on-board network, disconnect first
the negative cable and then the positive ca-
ble.
● Switch off all electrical devices before re-
connecting the b
attery. Reconnect first the
positive cable and then the negative cable.
Never reverse the polarity of the connections.
This could cause an electrical fire. ●
Never c h
arge a frozen battery, or one which
has thawed. This could result in explosions
and chemical burns. Always replace a battery
which has frozen. A flat battery can also
freeze at temperatures close to 0°C (+32°F).
● Ensure that the vent hose is always connec-
ted to the b
attery.
● Never use a defective battery. This could
cause an e
xplosion. Replace a damaged bat-
tery immediately. CAUTION
● Nev er di s
connect the battery if the ignition
is switched on or if the engine is running.
This could damage the electrical system or
electronic components.
● Do not expose the battery to direct sunlight
over a lon
g period of time, as the intense ul-
traviolet radiation can damage the battery
housing.
● If the vehicle is left standing in cold condi-
tions f
or a long period, protect the battery
from “freezing”. If it freezes it will be dam-
aged. Warning lamp
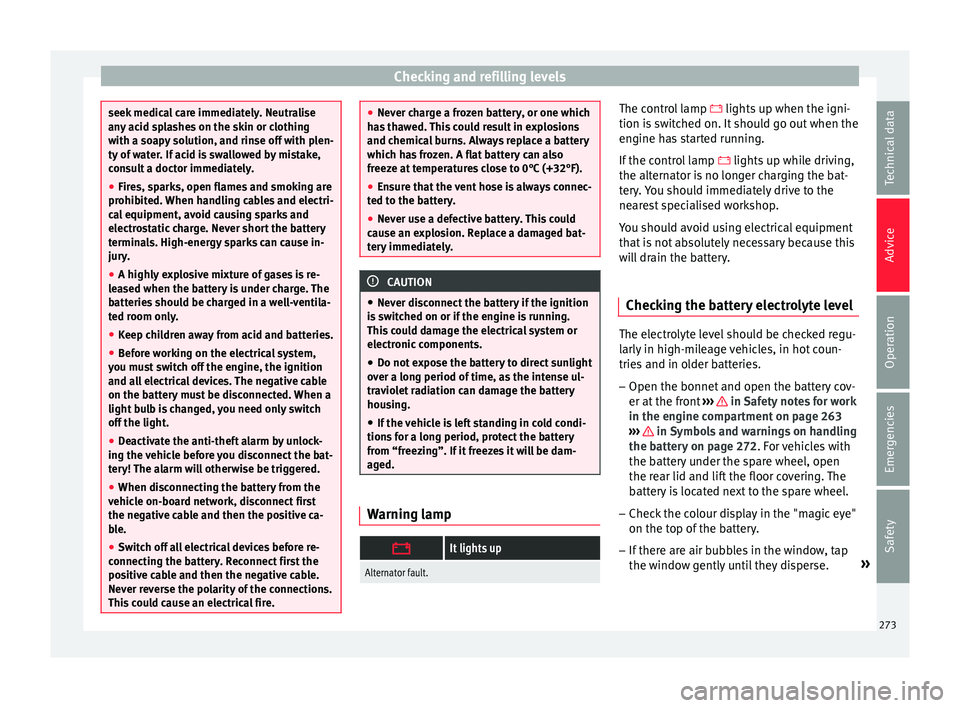
It lights up
Alternator fault. The control lamp
lights up when the igni-
tion i s
switched on. It should go out when the
engine has started running.
If the control lamp lights up while driving,
the alternator is no longer charging the bat-
tery. You should immediately drive to the
nearest specialised workshop.
You should avoid using electrical equipment
that is not absolutely necessary because this
will drain the battery.
Checking the battery electrolyte level The electrolyte level should be checked regu-
l
arly
in high-mi
leage vehicles, in hot coun-
tries and in older batteries.
– Open the bonnet and open the battery cov-
er at the front
››› in Safety notes for work
in the en gine c
omp
artment on page 263
››› in Symbols and warnings on handling
the b att
er
y on page 272. For vehicles with
the battery under the spare wheel, open
the rear lid and lift the floor covering. The
battery is located next to the spare wheel.
– Check the colour display in the "magic eye"
on the top of the b
attery.
– If there are air bubbles in the window, tap
the window g
ently until they disperse. »
273
Technical data
Advice
Operation
Emergencies
Safety
Page 280 of 312
Advice
Wheel bolts The design of wheel bolts is matched to the
rims. If diff
er
ent wheel rims are fitted, the
correct wheel bolts with the right length and
correctly shaped bolt heads must be used.
This ensures that wheels are fitted securely
and that the brake system functions correctly.
In certain circumstances, you should not use
wheel bolts from a different vehicle, even if it
is the same model ››› page 247. WARNING
If the wheel bolts are not tightened correctly,
the wheel c ou
ld become loose while driving.
Risk of accident.
● The wheel bolts must be clean and turn
eas
ily. Never apply grease or oil to them.
● Use only wheel bolts which belong to the
wheel.
● If the pr
escribed torque of the wheel bolts
is t
oo low, they could loosen whilst the vehi-
cle is in motion. Risk of accident! If the tight-
ening torque is too high, the wheel bolts and
threads can be damaged. CAUTION
The prescribed tightening torque for wheel
bolt s
for steel and alloy wheels is 120 Nm. Tyre monitoring indicator*
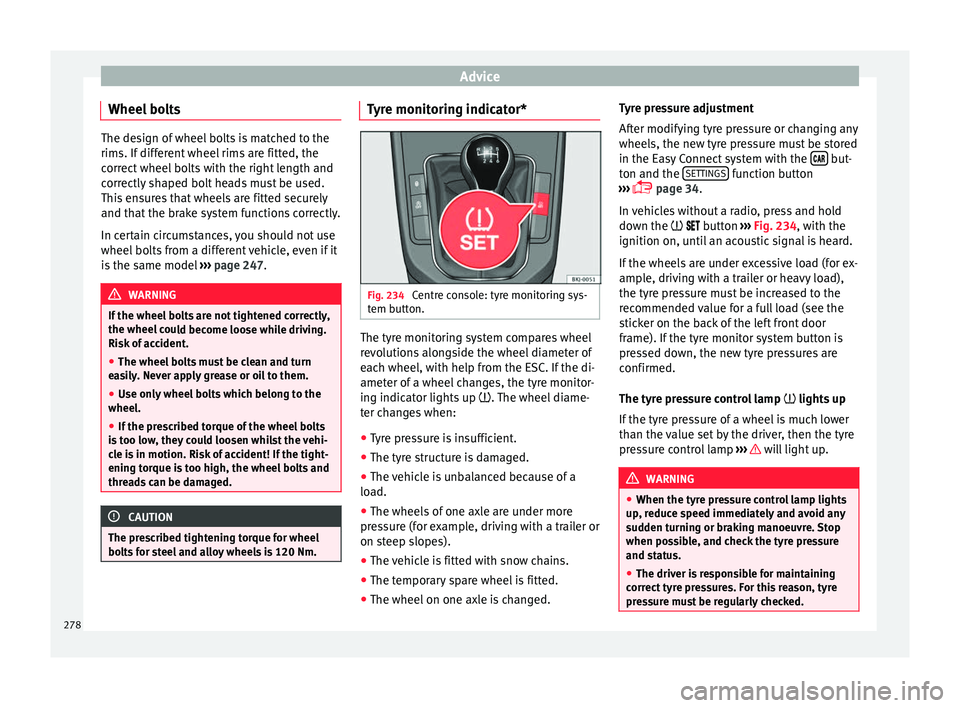
Fig. 234
Centre console: tyre monitoring sys-
t em b
utt
on. The tyre monitoring system compares wheel
r
ev
o
lutions alongside the wheel diameter of
each wheel, with help from the ESC. If the di-
ameter of a wheel changes, the tyre monitor-
ing indicator lights up . The wheel diame-
ter changes when:
● Tyre pressure is insufficient.
● The tyre structure is damaged.
● The vehicle is unbalanced because of a
load.
● The wheel
s of one axle are under more
pres
sure (for example, driving with a trailer or
on steep slopes).
● The vehicle is fitted with snow chains.
● The temporary spare wheel is fitted.
● The wheel on one axle is changed. Tyre pressure adjustment
After modif
ying tyre pressure or changing any
wheels, the new tyre pressure must be stored
in the Easy Connect system with the but-
t on and the S
ET
TINGS function button
› ›
›
page 34.
In vehicles without a radio, press and hold
down the button ››› Fig. 234, with the
ignition on, until an acoustic signal is heard.
If the wheels are under excessive load (for ex-
ample, driving with a trailer or heavy load),
the tyre pressure must be increased to the
recommended value for a full load (see the
sticker on the back of the left front door
frame). If the tyre monitor system button is
pressed down, the new tyre pressures are
confirmed.
The tyre pressure control lamp lights up
If the tyre pressure of a wheel is much lower
than the value set by the driver, then the tyre
pressure control lamp ››› will light up.
WARNING
● When the tyr e pr
essure control lamp lights
up, reduce speed immediately and avoid any
sudden turning or braking manoeuvre. Stop
when possible, and check the tyre pressure
and status.
● The driver is responsible for maintaining
correct
tyre pressures. For this reason, tyre
pressure must be regularly checked. 278