tow Seat Leon 5D 2015 User Guide
[x] Cancel search | Manufacturer: SEAT, Model Year: 2015, Model line: Leon 5D, Model: Seat Leon 5D 2015Pages: 308, PDF Size: 5.93 MB
Page 63 of 308
The essentials
● Ret
urn al
l tools to their proper storing loca-
tion.
● If the replaced wheel does not fit in the
spar
e wheel housing, store it safely in the
luggage compartment ›››
page 148.
● Check the tyre pressure of the newly moun-
ted tyr
e as soon as possible.
● In vehicles fitted with a tyre pressure indi-
cator
, adjust the pressure and store the read-
ing in the radio/Easy Connect system*
››› page 259.
● Have the tightening torque of the wheel
bolts c
hecked as soon as possible with a tor-
que wrench (it should be 120 Nm). Mean-
while, drive carefully.
● Have the flat tyre replaced as quickly as
poss
ible.
Snow chains Use Snow chains should only be used on the
fr
on
t
wheels.
Check that they are correctly seated after
driving for a few yards; correct the position if
necessary, in accordance with the manufac-
turer's fitting instructions. Keep your speed
below 50 km/h. If there is a danger of being trapped despite
havin
g mounted the chains, it is best to disa-
ble the driving wheels (ASR) in the ESC
››› page 180, Switching on/off the ESC
and ASR.
Snow chains will improve braking ability as
well as traction in winter conditions.
For technical reasons snow chains may only
be used with the following wheel rim/tyre
combination.
195/65 R15Chains with links of maximum 15 mm
205/55 R16Chains with links of maximum 15 mm
225/45 R17Chains with links of maximum 9 mm
225/40 R18Chains with links of maximum 9 mm Remove wheel covers and any integral trim
rin
g bef
or
e fitting snow chains.
Remove the chains when roads are free of
snow. Driving characteristics worsen, and the
wheels become damaged quickly and may
even be rendered unusable. Emergency towing of the vehi-
cle
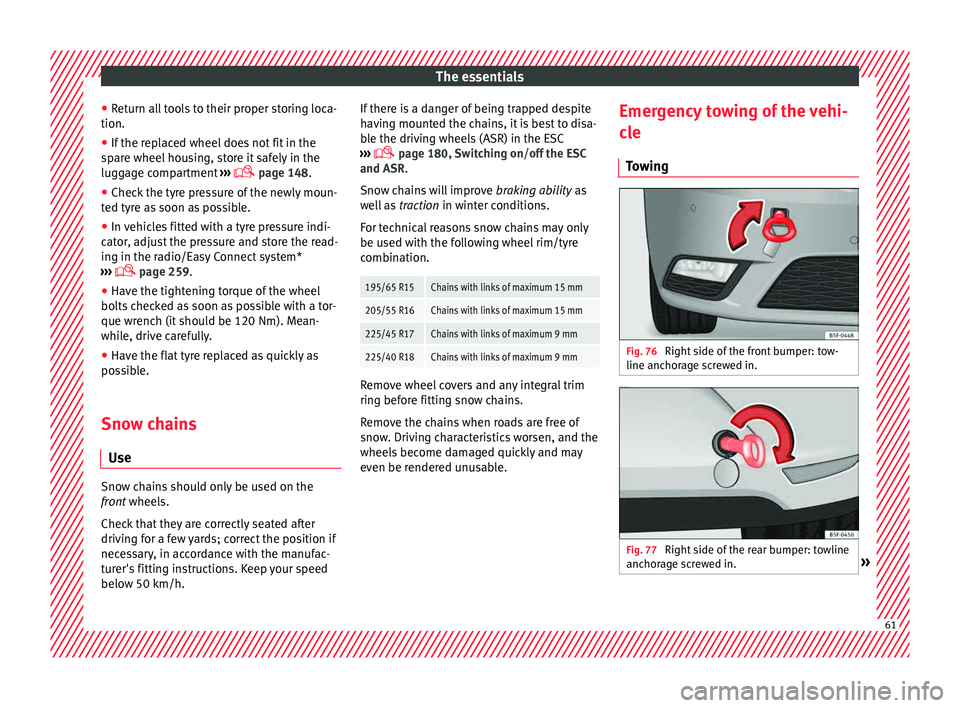
T
owing Fig. 76
Right side of the front bumper: tow-
line anc hor
ag
e screwed in. Fig. 77
Right side of the rear bumper: towline
anc hor
ag
e screwed in. » 61
Page 64 of 308
The essentials
Towline anchorages
Att ac
h the b
ar or rope to the towline ancho-
rages.
The towline anchorages are located under
the floor panel in the luggage compartment,
next to the vehicle tools ›››
page 86.
Screw the towline anchorage into the screw
connection ››› Fig. 76 o ››› Fig. 77 and tighten
it with the wheel brace.
Tow rope or tow bar
The tow bar offers increased safety and a
lower risk of damage.
The tow rope is recommended when there is
no tow bar. It must be elastic so that it does
not damage the vehicle.
Notes for the driver of the towing vehicle
● The tow rope must be taut before you drive
off.
● Rel
ease the clutch very carefully when start-
ing the v
ehicle (manual gearbox), or acceler-
ate gently (automatic gearbox).
Driving style
Towing requires some experience, especially
when using a tow rope. Both drivers should
realise how difficult it is to tow a vehicle. In-
experienced drivers should not attempt to
tow. Do not pull too hard with the towing vehicle
and take c
are to avoid jerking the tow rope.
When towing on an unpaved road, there is al-
ways a risk of overloading and damaging the
anchorage points.
Switch on the ignition so that the turn sig-
nals, windscreen wipers and windscreen
washer can work. Ensure that the steering
wheel is unlocked and moves freely.
Place the gear lever in neutral on vehicles
with a manual gearbox. With an automatic
gearbox, place the lever in N.
To brake, press the brake pedal firmly. The
brake servo does not work when the engine
is switched off.
The power steering only works when the igni-
tion is switched on and the vehicle is moving,
provided that the battery is sufficiently charg-
ed. Otherwise, it will need more force.
Ensure that the tow rope remains taut at all
times.
››› in General information on page 89
››› page 89 Tow-starting
If the engine will not start, first try starting it
us
in
g the battery of another vehicle
››› page 62. You should only attempt to tow-
start a vehicle if charging the battery does
not work. This is done by leveraging wheel
movement.
When tow-starting a vehicle with a petrol en-
gine, do not tow it more than a short dis-
tance, otherwise unburned fuel can enter the
catalytic converter.
● Engage 2nd or 3rd gear before moving off.
● Press the clutch and hold the pedal down.
● Switch the ignition on.
● Once both vehicles are moving, release the
clut c
h.
● As soon as the engine has started, press
the clutc
h and move the gear lever to neutral.
How to jump start Jump lea
ds The jump lead must have a sufficient wire
c
r
o
ss section.
If the engine fails to start because of a dis-
charged battery, the battery can be connec-
ted to the battery of another vehicle to start
the engine. 62
Page 70 of 308
Safety
the chest and the centre of the steering
wheel
››
› Fig. 83. If you are sitting closer than
25 cm, the airbag system cannot protect you
properly.
● If your physical constitution prevents you
from maint
aining the minimum distance of 25
cm, contact a specialised workshop. The
workshop will help you decide if special spe-
cific modifications are necessary.
● When driving, always hold the steering
wheel with both h
ands on the outside of the
ring at the 9 o'clock and 3 o'clock positions.
This reduces the risk of injury when the driver
airbag is triggered.
● Never hold the steering wheel at the 12
o'clock
position, or in any other manner (e.g.
in the centre of the steering wheel). In such
cases, if the airbag is triggered, you may sus-
tain injuries to the arms, hands and head.
● To reduce the risk of injury to the driver
during sud
den braking manoeuvres or an ac-
cident, never drive with the backrest tilted far
back! The airbag system and seat belts can
only provide optimal protection when the
backrest is in an upright position and the
driver is wearing his or her seat belt correct-
ly.
● Adjust the head restraint properly to ach-
ieve optima
l protection. Adjusting the steering wheel position
Read the additional information carefully
›› ›
page 17. WARNING
● Never a dju
st the position of the steering
wheel when the vehicle is moving, as this
could cause an accident.
● Move the lever up firmly so the steering
wheel pos
ition does not accidentally change
during driving. risk of accident!
● Make sure you are capable of reaching and
firmly ho
lding the upper part of the steering
wheel: risk of accident!
● If you adjust the steering wheel so that it
points t
owards your face, the driver airbag
will not protect you properly in the event of
an accident. Make sure that the steering
wheel points towards your chest. Correct sitting position for front pas-
sen
g
er For your own safety and to reduce the risk of
injur
y
in the ev
ent of an accident, we recom-
mend the following adjustments for the front
passenger:
– Move the front passenger seat back as far
as po
ssible ››› .–
Mo v
e the se
at backrest to an upright posi-
tion so that your back rests completely
against it.
– Adjust the head restraint so that its upper
edge is
at the same level as the top of your
head, or as close as possible to the same
level as the top of your head ››› page 70.
– Always keep both feet in the footwell in
front of
the front passenger seat.
– Fasten your seat belt securely ›››
page 72.
It is possible to deactivate the front passen-
ger airbag in exceptional circumstances
››› page 81.
Adjusting the front passenger seat
››› page 140. WARNING
● An incorr ect
sitting position of the front
passenger can lead to severe injuries.
● Adjust the front passenger seat so that
there is
at least 25 cm between your chest
and the dash panel. If you are sitting closer
than 25 cm, the airbag system cannot protect
you properly.
● If your physical constitution prevents you
from maint
aining the minimum distance of 25
cm, contact a specialised workshop. The
workshop will help you decide if special spe-
cific modifications are necessary.
● Always keep your feet in the footwell when
the vehic
le is moving; never rest them on the68
Page 75 of 308
Seat belts
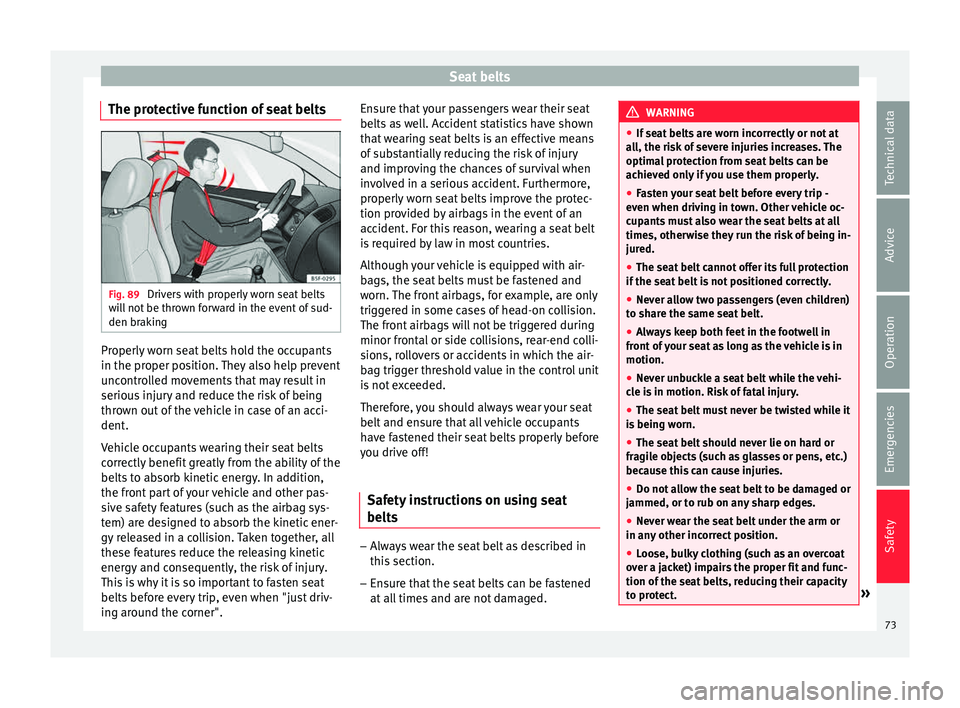
The protective function of seat belts Fig. 89
Drivers with properly worn seat belts
w i
l
l not be thrown forward in the event of sud-
den braking Properly worn seat belts hold the occupants
in the pr
oper po
s
ition. They also help prevent
uncontrolled movements that may result in
serious injury and reduce the risk of being
thrown out of the vehicle in case of an acci-
dent.
Vehicle occupants wearing their seat belts
correctly benefit greatly from the ability of the
belts to absorb kinetic energy. In addition,
the front part of your vehicle and other pas-
sive safety features (such as the airbag sys-
tem) are designed to absorb the kinetic ener-
gy released in a collision. Taken together, all
these features reduce the releasing kinetic
energy and consequently, the risk of injury.
This is why it is so important to fasten seat
belts before every trip, even when "just driv-
ing around the corner". Ensure that your passengers wear their seat
belts as
well. Accident statistics have shown
that wearing seat belts is an effective means
of substantially reducing the risk of injury
and improving the chances of survival when
involved in a serious accident. Furthermore,
properly worn seat belts improve the protec-
tion provided by airbags in the event of an
accident. For this reason, wearing a seat belt
is required by law in most countries.
Although your vehicle is equipped with air-
bags, the seat belts must be fastened and
worn. The front airbags, for example, are only
triggered in some cases of head-on collision.
The front airbags will not be triggered during
minor frontal or side collisions, rear-end colli-
sions, rollovers or accidents in which the air-
bag trigger threshold value in the control unit
is not exceeded.
Therefore, you should always wear your seat
belt and ensure that all vehicle occupants
have fastened their seat belts properly before
you drive off!
Safety instructions on using seat
belts –
Always wear the seat belt as described in
thi s
section.
– En
sure that the seat belts can be fastened
at all
times and are not damaged. WARNING
● If se at
belts are worn incorrectly or not at
all, the risk of severe injuries increases. The
optimal protection from seat belts can be
achieved only if you use them properly.
● Fasten your seat belt before every trip -
even when drivin
g in town. Other vehicle oc-
cupants must also wear the seat belts at all
times, otherwise they run the risk of being in-
jured.
● The seat belt cannot offer its full protection
if the seat
belt is not positioned correctly.
● Never allow two passengers (even children)
to shar
e the same seat belt.
● Always keep both feet in the footwell in
front of
your seat as long as the vehicle is in
motion.
● Never unbuckle a seat belt while the vehi-
cle i
s in motion. Risk of fatal injury.
● The seat belt must never be twisted while it
is bein
g worn.
● The seat belt should never lie on hard or
fragil
e objects (such as glasses or pens, etc.)
because this can cause injuries.
● Do not allow the seat belt to be damaged or
jammed, or to rub on an
y sharp edges.
● Never wear the seat belt under the arm or
in any other inc
orrect position.
● Loose, bulky clothing (such as an overcoat
over a j
acket) impairs the proper fit and func-
tion of the seat belts, reducing their capacity
to protect. » 73
Technical data
Advice
Operation
Emergencies
Safety
Page 88 of 308
Emergencies
Emergencies
Self -help
V ehic
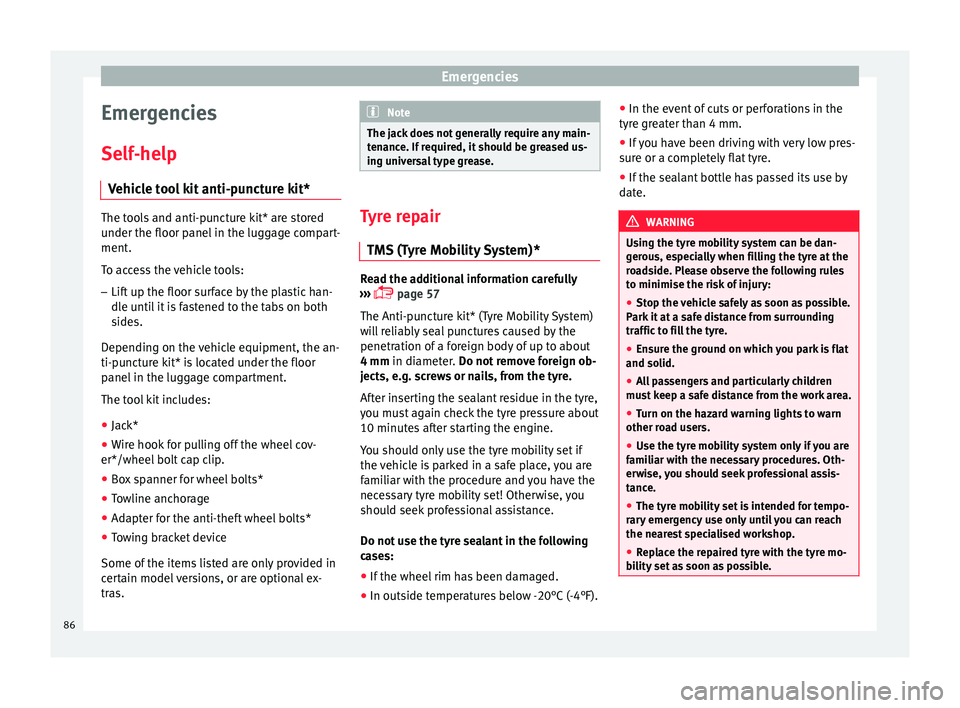
le tool kit anti-puncture kit* The tools and anti-puncture kit* are stored
under the floor p
anel
in the luggage compart-
ment.
To access the vehicle tools:
– Lift up the floor surface by the plastic han-
dle u nti
l it is fastened to the tabs on both
sides.
Depending on the vehicle equipment, the an-
ti-puncture kit* is located under the floor
panel in the luggage compartment.
The tool kit includes:
● Jack*
● Wire hook for pulling off the wheel cov-
er*/wheel bolt
cap clip.
● Box spanner for wheel bolts*
● Towline anchorage
● Adapter for the anti-theft wheel bolts*
● Towing bracket device
Some of the items
listed are only provided in
certain model versions, or are optional ex-
tras. Note
The jack does not generally require any main-
ten anc
e. If required, it should be greased us-
ing universal type grease. Tyre repair
TMS (T
yre Mobility System)* Read the additional information carefully
›› ›
page 57
The Anti-puncture kit* (Tyre Mobility System)
will reliably seal punctures caused by the
penetration of a foreign body of up to about
4 mm in diameter. Do not remove foreign ob-
jects, e.g. screws or nails, from the tyre.
After inserting the sealant residue in the tyre,
you must again check the tyre pressure about
10 minutes after starting the engine.
You should only use the tyre mobility set if
the vehicle is parked in a safe place, you are
familiar with the procedure and you have the
necessary tyre mobility set! Otherwise, you
should seek professional assistance.
Do not use the tyre sealant in the following
cases:
● If the wheel rim has been damaged.
● In outside temperatures below -20°C (-4°F). ●
In the ev ent
of
cuts or perforations in the
tyre greater than 4 mm.
● If you have been driving with very low pres-
sure or a c
ompletely flat tyre.
● If the sealant bottle has passed its use by
date. WARNING
Using the tyre mobility system can be dan-
ger ou
s, especially when filling the tyre at the
roadside. Please observe the following rules
to minimise the risk of injury:
● Stop the vehicle safely as soon as possible.
Park it
at a safe distance from surrounding
traffic to fill the tyre.
● Ensure the ground on which you park is flat
and solid.
● Al
l passengers and particularly children
must
keep a safe distance from the work area.
● Turn on the hazard warning lights to warn
other roa
d users.
● Use the tyre mobility system only if you are
famili
ar with the necessary procedures. Oth-
erwise, you should seek professional assis-
tance.
● The tyre mobility set is intended for tempo-
rary
emergency use only until you can reach
the nearest specialised workshop.
● Replace the repaired tyre with the tyre mo-
bility
set as soon as possible.86
Page 91 of 308
Self-help
they should be changed if they are damaged,
or c l
e
aned if they are dirty ››› .
Dam ag
ed w
iper blades should be replaced
immediately. These are available from quali-
fied workshops. WARNING
Worn or dirty wiper blades reduce visibility
and incr e
ase the risk of accident and serious
injury.
● Always replace damaged or worn blades or
bla
des which do not clean the windscreen
correctly. CAUTION
● Damag ed or dir
ty windscreen wipers could
scratch the glass.
● If products containing solvents, rough
spong
es or sharp objects are used to clean
the blades, the graphite layer will be dam-
aged.
● Never use fuel, nail varnish remover, paint
thinner or simil
ar products to clean the win-
dows.
● In icy conditions, always check that the
wiper bl
ades are not frozen to the glass be-
fore using the wipers. In cold weather, it may
help to leave the vehicle parked with the wip-
ers in service position ›››
page 64. CAUTION
● To pr ev
ent damage to the bonnet and the
wiper arms, only leave them in the service
position.
● Before driving, always lower the wiper
arms. Towing and tow-starting the ve-
hicl
e
Gener
al information Read the additional information carefully
› ›
›
page 61. WARNING
If the vehicle has no electrical power, the
brak e light
s, turn signals and all other lights
will no longer function. Do not have the vehi-
cle towed away. Failure to follow this instruc-
tion could result in an accident. WARNING
The risk of accidents is high when tow-start-
ing, f or e
xample, the towed vehicle can easily
be driven into the towing vehicle. CAUTION
If there is no oil in the gearbox or no lubricant
in the autom atic
transmission the car may only be towed with the driven wheels lifted
cl
e
ar of the road, or transported on a special
car transporter or trailer. CAUTION
Do not tow a vehicle for more than 50 m in at-
t empt t
o start it. There is risk of damage to
the catalytic converter. Note
● Ple a
se observe related legal requirements.
● Switch on the hazard warning lights of both
vehicl
es. However, observe any regulations
to the contrary.
● The tow rope must not be twisted. Other-
wise the fr
ont tow line anchorage could be
pulled off the vehicle. 89
Technical data
Advice
Operation
Emergencies
Safety
Page 92 of 308
Emergencies
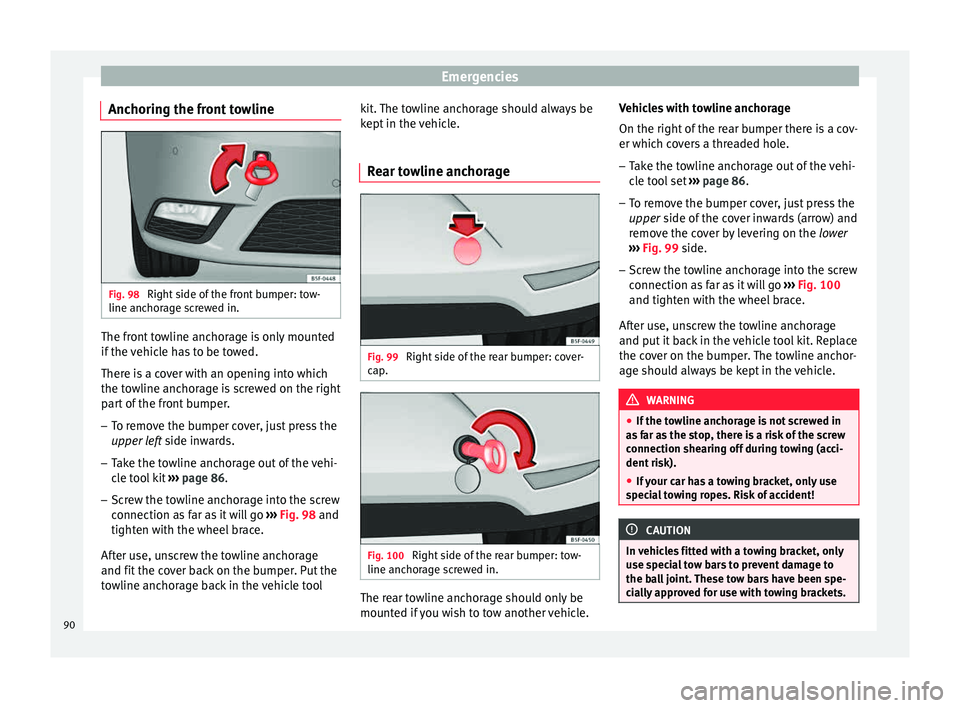
Anchoring the front towline Fig. 98
Right side of the front bumper: tow-
line anc hor
ag
e screwed in. The front towline anchorage is only mounted
if
the
v
ehicle has to be towed.
There is a cover with an opening into which
the towline anchorage is screwed on the right part of the front bumper.
– To remove the bumper cover, just press the
upper left s
ide inwards.
– Take the towline anchorage out of the vehi-
cle t
ool kit ››› page 86.
– Screw the towline anchorage into the screw
connection as
far as it will go ››› Fig. 98 and
tighten with the wheel brace.
After use, unscrew the towline anchorage
and fit the cover back on the bumper. Put the
towline anchorage back in the vehicle tool kit. The towline anchorage should always be
kept in the
vehicle.
Rear towline anchorage Fig. 99
Right side of the rear bumper: cover-
c ap
. Fig. 100
Right side of the rear bumper: tow-
line anc hor
ag
e screwed in. The rear towline anchorage should only be
mou
nt
ed if
you wish to tow another vehicle. Vehicles with towline anchorage
On the right of the r
ear bumper there is a cov-
er which covers a threaded hole.
– Take the towline anchorage out of the vehi-
cle t
ool set ››› page 86.
– To remove the bumper cover, just press the
upper side of the c
over inwards (arrow) and
remove the cover by levering on the lower
››› Fig. 99 side.
– Screw the towline anchorage into the screw
connection as
far as it will go ››› Fig. 100
and tighten with the wheel brace.
After use, unscrew the towline anchorage
and put it back in the vehicle tool kit. Replace
the cover on the bumper. The towline anchor-
age should always be kept in the vehicle. WARNING
● If the t o
wline anchorage is not screwed in
as far as the stop, there is a risk of the screw
connection shearing off during towing (acci-
dent risk).
● If your car has a towing bracket, only use
speci
al towing ropes. Risk of accident! CAUTION
In vehicles fitted with a towing bracket, only
use s pec
ial tow bars to prevent damage to
the ball joint. These tow bars have been spe-
cially approved for use with towing brackets. 90
Page 93 of 308
Fuses and bulbs
Towing vehicles with a manual gear-
bo x Towing is relatively straightforward.
Ple
a
se observe the relevant instructions
››› page 89.
The vehicle can be towed using a tow bar or
tow rope in the normal way, with all four
wheels on the road; it can also be towed with
either the front or rear wheels lifted off the
road. The maximum towing speed is 50 km/h
(30 mph).
Towing a vehicle equipped with auto-
matic g
earbox Certain restrictions must be observed when
t
o
w
ing your vehicle.
Please observe the relevant instructions
››› page 89.
The vehicle can be towed with a tow bar or
tow rope in the normal way, with all four
wheels on the ground. When doing so,
please note the following points:
● Make sure the selector l
ever is in the N po-
sition.
● The vehicle must not be towed faster than
50 km/h (30 mph).
● The vehicle must not be towed further than
50 km (30 mile
s). Reason: when the engine is not running, the gearbox oil pump does
not work
and the gearbox is not adequately
lubricated for higher speeds or longer distan-
ces.
If the vehicle has to be towed with a break-
down truck, it must only be suspended at the
front wheels. Reason: the drive shafts are lo-
cated on the front wheels. If the car is towed
with the rear wheels lifted off the road (I.e.
travelling backwards), the drive shafts also
turn backwards. The planetary gears in the
automatic gearbox then turn at such high
speeds that the gearbox will be severely
damaged in a short time. Note
● If it i
s not possible to tow the vehicle in the
normal way, or if it has to be towed further
than 50 km (30 miles), it must be transported
on a special car transporter or trailer.
● Should the power supply to the selector
lever be int
errupted in position P, the selector
lever will be locked. Before the vehicle can be
recovered/manoeuvred you must manually
release the selector lever ›››
page 44. Fuses and bulbs
F u
se
s
Introduction In general, a fuse can be assigned to various
electric
al
components. Likewise, an electrical
component can be protected by several
fuses.
Only replace fuses when the cause of the
problem has been solved. If a newly inserted
fuse blows after a short time, you must have
the electrical system checked by a special-
ised workshop as soon as possible. WARNING
The high voltages in the electrical system can
give seriou s
electrical shocks, causing burns
and even death!
● Never touch the electrical wiring of the igni-
tion syst
em.
● Take care not to cause short circuits in the
electrica
l system. WARNING
Using unsuitable fuses, repairing fuses or
bridging a c urr
ent circuit without fuses can
cause a fire and serious injury. » 91
Technical data
Advice
Operation
Emergencies
Safety
Page 96 of 308
Emergencies
Note
● In the v ehic
le, there are more fuses than
those indicated in this chapter. These should
only be changed by a specialised workshop.
● Positions not containing a fuse do not ap-
pear in the fo
llowing tables.
● Some of the equipment listed in the tables
below pert
ain only to certain versions of the
model or are optional extras.
● Please note that the above lists, while cor-
rect at
the time of printing, are subject to
change. Bulbs
Ch an
gin
g a bulbRead the additional information carefully
› ›
›
page 56.
Changing bulbs requires a certain degree of
practical skill.
If you choose to change the engine compart-
ment lamps yourself, remember that it is a
dangerous area ››› in Work in the engine
c omp
ar
tment on page 246.
Always use identical bulbs with the same
designation. The name can be found on the
base of the bulb holder. Depending on how equipped the vehicle is,
there are diff
erent sets of headlights and tail
lights:
● Halogen headlights
● Full-LED main headlights*
● Rear bulb light
● LED rear light*
Ful
l-LED headlight system*
Full-LED headlights handle all light functions
(daylight, side light, turn signal, dipped
beam and route light) with light emitting di-
odes (LEDs) as a light source.
Full-LED headlights are designed to last the
lifetime of the car and light bulbs cannot be
replaced. In case of headlight failure, go to
an authorised workshop to have it replaced. WARNING
● Tak e p
articular care when working on com-
ponents in the engine compartment if the en-
gine is warm. Risk of burns.
● Bulbs are highly sensitive to pressure. The
glas
s can break when you touch the bulb,
causing injury.
● When changing bulbs, please take care not
to injure
yourself on sharp edges, in particu-
lar on the headlight housing. CAUTION
● Remo v
e the ignition key before working on
the electric system. Otherwise, a short circuit
could occur.
● Switch off the lights and the parking light
before c
hanging a bulb.
● Take good care to avoid damaging any com-
ponents. For the sake of the environment
Please ask your specialist retailer how to dis-
pose of u
sed bulbs in the proper manner. Note
● Ple a
se check at regular intervals that all
lighting (especially the exterior lighting) on
your vehicle is functioning properly. This is
not only in the interest of your own safety,
but also that of all other road users.
● Before changing a bulb, make sure you
have the c
orrect new bulb.
● Do not touch the glass part of the bulb with
your bar
e hands, use a cloth or paper towel
instead, since the fingerprints left on the
glass will vaporise as a result of the heat gen-
erated by the bulb, they will be deposited on
the reflector and will impair its surface. 94
Page 118 of 308
Operation
Opening and closing C entr
a
l locking system
Description Read the additional information carefully
›› ›
page 11
The vehicle can be locked and unlocked via
the central locking system. There are several
methods, depending on the vehicle equip-
ment:
● key with remote control ››
›
page 118 ,
● lock on driver door (emergency opening
›››
page 11) or
● interior central locking switch ›››
page 119.
Unlocking one side of the vehicle only
When you lock the vehicle with the key, the
doors and the rear lid are locked. When you
open the door, you can either unlock only the
driver door, or all the vehicle doors. To select
the required option, use Easy Connect*
››› page 119.
Automatic locking (Auto Lock)*
The Auto Lock function locks the doors and
the rear lid when the vehicle exceeds a speed
of about 15 km/h (10 mph). The vehicle is unlocked again when the igni-
tion key i
s removed. Alternatively, the vehicle
can also be unlocked via the central locking
switch or by pulling one of the inside door
handles. The Auto Lock function can be
switched on and off on the sound system or
on the Easy Connect* system ››› page 119.
In the event of an accident in which the air-
bags inflate, the doors will be automatically
unlocked to facilitate access and assistance.
Anti-theft alarm system*
If the anti-theft alarm system senses interfer-
ence with the vehicle it triggers an audible
and visible alarm.
The anti-theft alarm system is automatically
switched on when locking the vehicle. It
switches off when the vehicle is unlocked
from a distance.
When the driver door is unlocked with the
key, you should switch on the ignition within
15 seconds. Otherwise the alarm will be trig-
gered. On some export versions, the alarm is
triggered immediately when you open a door.
To deactivate the alarm, press the button on the remote control key, or switch on the
ignition. Af
t
er a c
ertain time, the alarm will
automatically switch off.
Switch off the vehicle interior monitoring and
tow-away protection if you wish to prevent the alarm from being triggered accidentally
›››
page 123.
Turn signals
The turn signals will flash twice when the ve-
hicle is unlocked and once when the vehicle
is locked.
If it does not flash, this indicates that one of
the doors, the rear lid or the bonnet is not
closed correctly.
Accidental lock-out
The central locking system prevents you from
being locked out of the vehicle in the follow-
ing situations: ● If the driver door is open, the vehicle can-
not be lock
ed with the central locking switch
››› page 119.
Lock the vehicle with the remote control key,
when all the doors and the rear lid have been
closed. This prevents the accidental locking
of the vehicle. WARNING
Do not leave anyone (especially children) in
the v ehic
le if it is locked from the outside and
the anti-theft security system* is enabled, as
the doors and windows cannot then be
opened from the inside. Locked doors could
delay assistance in an emergency, potentially
putting lives at risk. 116