maintenance Seat Toledo 2017 Owner's manual
[x] Cancel search | Manufacturer: SEAT, Model Year: 2017, Model line: Toledo, Model: Seat Toledo 2017Pages: 248, PDF Size: 5.86 MB
Page 3 of 248
Foreword
Thi s
In
struction Manual and its correspond-
ing supplements should be read carefully to
familiarise yourself with your vehicle.
Besides the regular care and maintenance of
the vehicle, its correct handling will help pre-
serve its value.
For safety reasons, always note the informa-
tion concerning accessories, modifications
and part replacements.
If selling the vehicle, give all of the on-board
documentation to the new owner, as it
should be kept with the vehicle.
You can access the information in this man-
ual using:
● Thematic table of contents that follows the
manual’s g
eneral chapter structure.
● Visual table of contents that uses graphics
to indicat
e the pages containing “essential”
information, which is detailed in the corre-
sponding chapters.
● Alphabetical index with many terms and
synonyms
to help you find information. WARNING
Read and always observe safety informa-
tion conc ernin
g the passenger's front air-
bag ››› page 74, Important information
regarding the front passenger's airbag .
Thank you for trusting in us.
We wish you safe and enjoya-
ble motoring.
SEAT, S.A.
Page 6 of 248
Table of Contents
Engine management and emission control sys-
t em
. . . . . . . . . . . . . . . . . . . . . . . . . . . . . . . . . . . 167
Driv
ing tips . . . . . . . . . . . . . . . . . . . . . . . . . . . . . 169
Driver assistance systems . . . . . . . . . . . . . . . . . 170
Parking aid . . . . . . . . . . . . . . . . . . . . . . . . . . . . . 170
Rear Assist “Rear View Camera”* . . . . . . . . . . . 175
Cruise speed (Cruise Control)* . . . . . . . . . . . . . 178
Emergency brake assist system (Front As-
sis
t)* . . . . . . . . . . . . . . . . . . . . . . . . . . . . . . . . . . 179
Start-Stop System* . . . . . . . . . . . . . . . . . . . . . . . 183
Fatigue detection (break recommendation)* . . 185
Towing bracket device . . . . . . . . . . . . . . . . . . . . 186
Driving with a trailer . . . . . . . . . . . . . . . . . . . . . . 186
Towing bracket device . . . . . . . . . . . . . . . . . . . . 188
Advice . . . . . . . . . . . . . . . . . . . . . . . . . . . . . . . . 194
Care and maintenance . . . . . . . . . . . . . . . . . . . . 194
Accessories and modifications to the vehi-
cle
. . . . . . . . . . . . . . . . . . . . . . . . . . . . . . . . . . . . 194
Care and cleaning . . . . . . . . . . . . . . . . . . . . . . . 195
Checking and refilling levels . . . . . . . . . . . . . . . 201
Fuel . . . . . . . . . . . . . . . . . . . . . . . . . . . . . . . . . . . 201
Engine compartment . . . . . . . . . . . . . . . . . . . . . 204
Engine oil . . . . . . . . . . . . . . . . . . . . . . . . . . . . . . 207
Coolant . . . . . . . . . . . . . . . . . . . . . . . . . . . . . . . . 210
Brake fluid . . . . . . . . . . . . . . . . . . . . . . . . . . . . . 211
Window washer system . . . . . . . . . . . . . . . . . . . 212
Battery . . . . . . . . . . . . . . . . . . . . . . . . . . . . . . . . . 213
Wheels and tyres . . . . . . . . . . . . . . . . . . . . . . . . 217
Tyres . . . . . . . . . . . . . . . . . . . . . . . . . . . . . . . . . . 217
Spare wheel . . . . . . . . . . . . . . . . . . . . . . . . . . . . 220
Tyre monitoring systems . . . . . . . . . . . . . . . . . . 221
Winter service . . . . . . . . . . . . . . . . . . . . . . . . . . . 222
Technical data . . . . . . . . . . . . . . . . . . . . . . . . 223
Technical specifications . . . . . . . . . . . . . . . . . . 223
Important information . . . . . . . . . . . . . . . . . . . . 223
Information on fuel consumption . . . . . . . . . . . 224 Driving with a trailer . . . . . . . . . . . . . . . . . . . . . . 225
Wheels . . . . . . . . . . . . . . . . . . . . . . . . . . . . . . . . 226
Engine data . . . . . . . . . . . . . . . . . . . . . . . . . . . . . 227
Dimensions . . . . . . . . . . . . . . . . . . . . . . . . . . . . . 233
Index . . . . . . . . . . . . . . . . . . . . . . . . . . . . . . . . . 235
4
Page 15 of 248
The essentials
Seat belt tensioners During a collision, the seat belts on the front
seats
ar
e retracted automatically.
The tensioner can be triggered only once.
››› in Maintenance and disposal of belt
tensioners on page 67
››› page 66 Adjusting the exterior mirrors
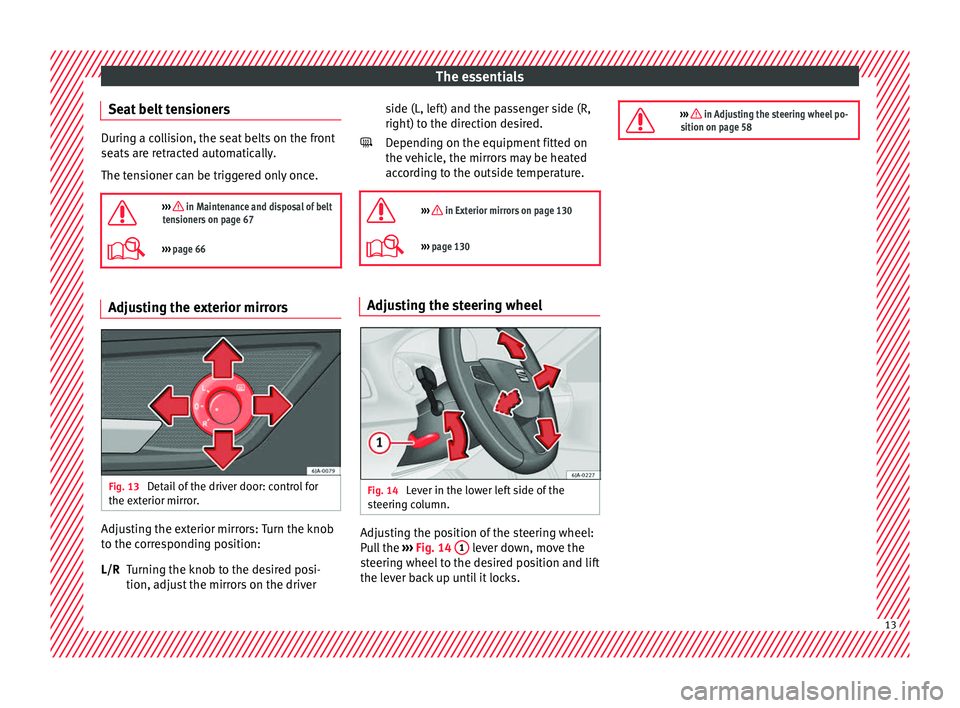
Fig. 13
Detail of the driver door: control for
the e xt
erior mirr
or. Adjusting the exterior mirrors: Turn the knob
t
o the c
orr
esponding position:
Turning the knob to the desired posi-
tion, adjust the mirrors on the driver
L/R side (L, left) and the passenger side (R,
right) to the direction de
sired.
Depending on the equipment fitted on
the vehicle, the mirrors may be heated
according to the outside temperature.
››› in Exterior mirrors on page 130
››› page 130 Adjusting the steering wheel
Fig. 14
Lever in the lower left side of the
s t
eerin
g column. Adjusting the position of the steering wheel:
P
u
l
l the ››› Fig. 14 1 lever down, move the
s t
eerin
g wheel to the desired position and lift
the lever back up until it locks.
››› in Adjusting the steering wheel po-
sition on page 58 13
Page 33 of 248
The essentials
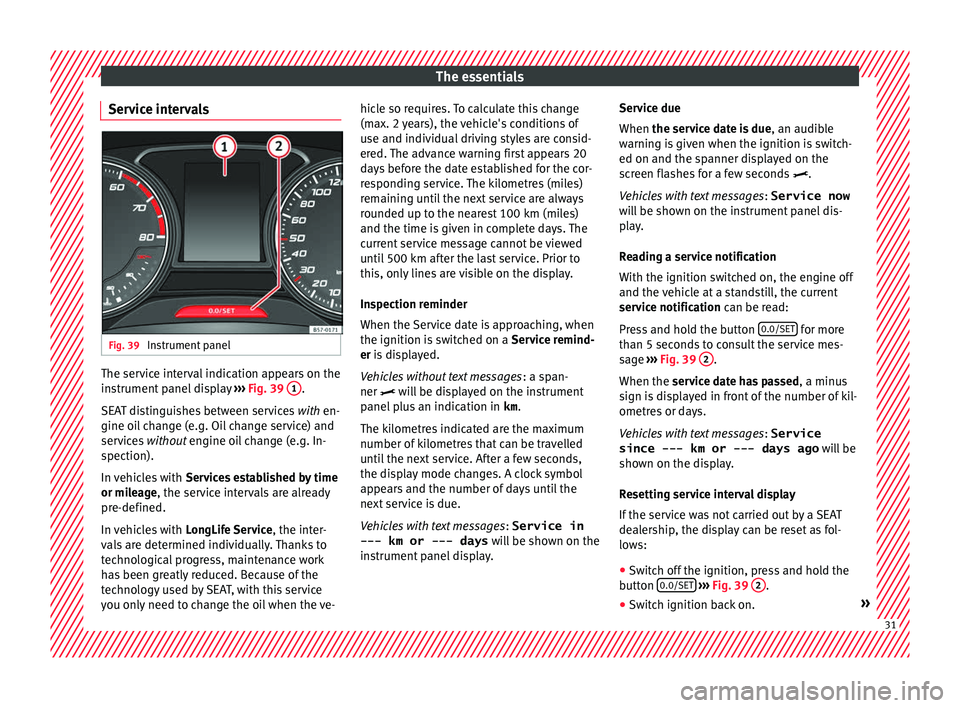
Service intervals Fig. 39
Instrument panel The service interval indication appears on the
in
s
trument
panel display ››› Fig. 39 1 .
S EA
T di
stinguishes between services with en-
gine oil change (e.g. Oil change service) and
services without engine oil change (e.g. In-
spection).
In vehicles with Services established by time
or mileage, the service intervals are already
pre-defined.
In vehicles with LongLife Service , the inter-
vals are determined individually. Thanks to
technological progress, maintenance work
has been greatly reduced. Because of the
technology used by SEAT, with this service
you only need to change the oil when the ve- hicle so requires. To calculate this change
(max. 2 y
ears), the vehicle's conditions of
use and individual driving styles are consid-
ered. The advance warning first appears 20
days before the date established for the cor-
responding service. The kilometres (miles)
remaining until the next service are always
rounded up to the nearest 100 km (miles)
and the time is given in complete days. The
current service message cannot be viewed
until 500 km after the last service. Prior to
this, only lines are visible on the display.
Inspection reminder
When the Service date is approaching, when
the ignition is switched on a Service remind-
er is displayed.
Vehicles without text messages : a span-
ner will be displayed on the instrument
panel plus an indication in km.
The kilometres indicated are the maximum
number of kilometres that can be travelled
until the next service. After a few seconds,
the display mode changes. A clock symbol
appears and the number of days until the
next service is due.
Vehicles with text messages : Service in
--- km or --- days will be shown on the
instrument panel display. Service due
When the servic
e date is due, an audible
warning is given when the ignition is switch-
ed on and the spanner displayed on the
screen flashes for a few seconds .
Vehicles with text messages : Service now
will be shown on the instrument panel dis-
play.
Reading a service notification
With the ignition switched on, the engine off
and the vehicle at a standstill, the current
service notification can be read:
Press and hold the button 0.0/SET for more
th an 5 sec
ond
s to consult the service mes-
sage ››› Fig. 39 2 .
When the ser v
ic
e date has passed , a minus
sign is displayed in front of the number of kil-
ometres or days.
Vehicles with text messages : Service
since --- km or --- days ago will be
shown on the display.
Resetting service interval display
If the service was not carried out by a SEAT
dealership, the display can be reset as fol-
lows:
● Switch off the ignition, press and hold the
button 0.0/S
ET
› ›
› Fig. 39 2 .
● Switch ignition back on. » 31
Page 34 of 248
The essentials
● Rel
e
ase the button 0.0/SET and press it
ag ain f
or the ne
xt 20 seconds. Note
● The serv ic
e message disappears after a few
seconds, when the engine is started or when OK/RESET is pressed on the windscreen wiper
lev er
, or OK on the multifunction steering
wheel.
● In v
ehicles with the LongLife system in
which the batt
ery has been disconnected for
a long period of time, it is not possible to cal-
culate the date of the next service. Therefore
the service interval display may not be cor- rect. In this case, bear in mind the maximum
service intervals permitted in the ››› Booklet
Maintenance Programme. Cruise control
Oper atin
g the c
ruise control system
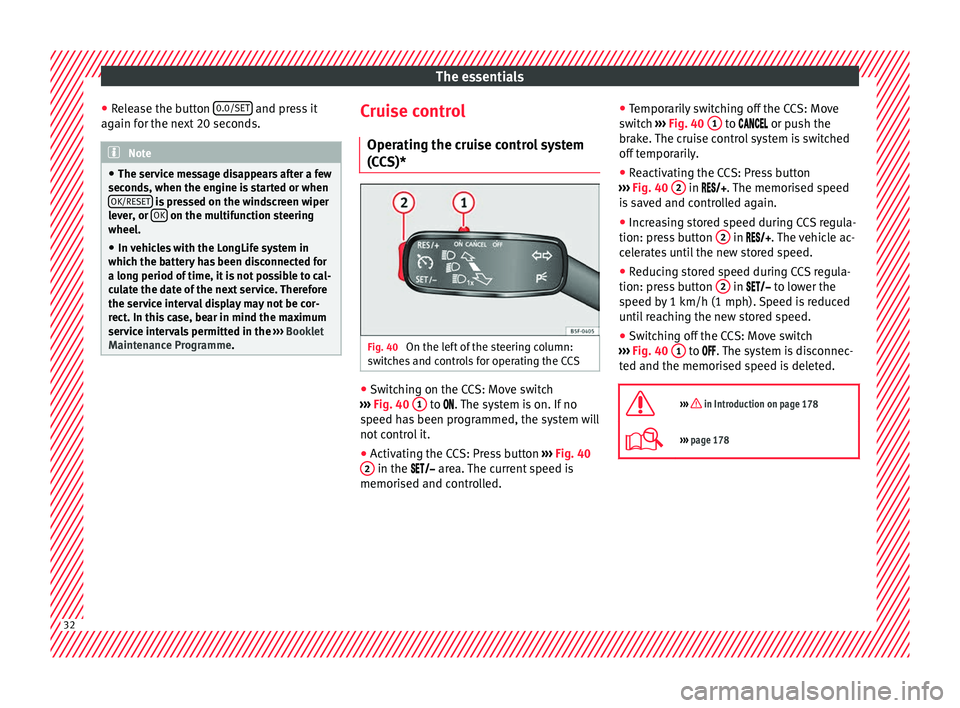
(CCS)* Fig. 40
On the left of the steering column:
sw it
c
hes and controls for operating the CCS ●
Switching on the CCS: Move switch
› ›
›
Fig. 40 1 to .
The system is on. If no
s peed h
as been programmed, the system will
not control it.
● Activating the CCS: Press button ›››
Fig. 40
2 in the ar
e
a. The current speed is
memorised and controlled. ●
Temporari
ly switching off the CCS: Move
switch ››› Fig. 40 1 to
or push the
br ak
e. The cruise control system is switched
off temporarily.
● Reactivating the CCS: Press button
›››
Fig. 40 2 in
. The memorised speed
i s
saved and controlled again.
● Increasing stored speed during CCS regula-
tion: pres
s button 2 in
. The vehicle ac-
c el
erates until the new stored speed.
● Reducing stored speed during CCS regula-
tion: pres
s button 2 in t
o lower the
s peed b
y 1 km/h (1 mph). Speed is reduced
until reaching the new stored speed.
● Switching off the CCS: Move switch
›››
Fig. 40 1 to .
The system is disconnec-
t ed and the memori
sed speed is deleted.
››› in Introduction on page 178
››› page 178 32
Page 45 of 248
The essentials
››› in Topping up the coolant level on
page 211
››› page 210 Brake fluid
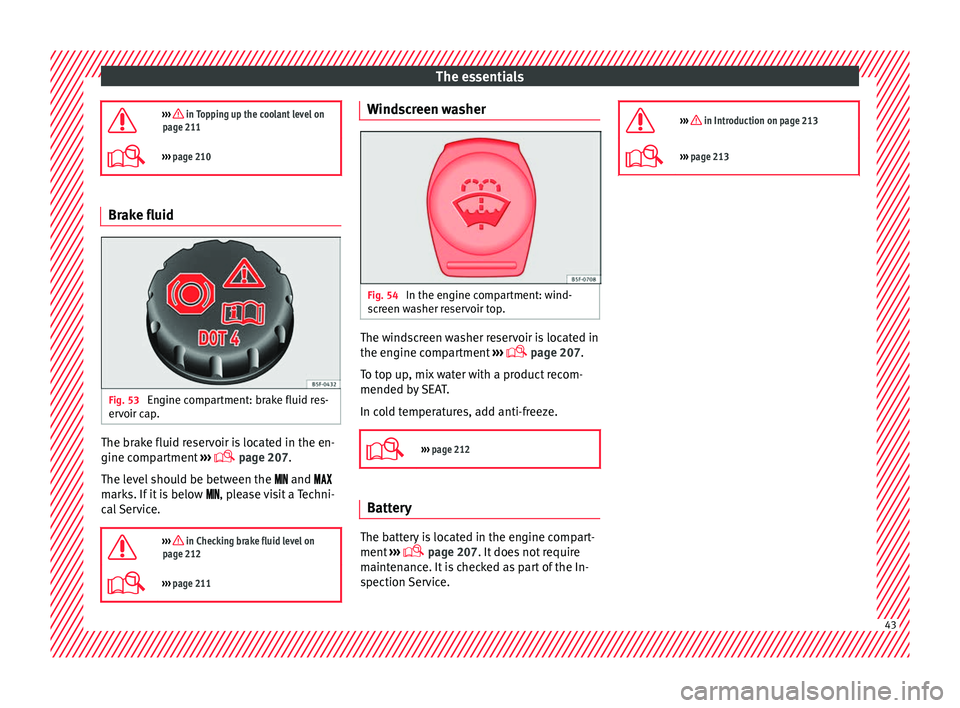
Fig. 53
Engine compartment: brake fluid res-
er v
oir c
ap. The brake fluid reservoir is located in the en-
gine c
omp
ar
tment ›››
page 207
.
The level should be between the and
marks. If it is below , please visit a Techni-
cal Service.
››› in Checking brake fluid level on
page 212
››› page 211 Windscreen washer
Fig. 54
In the engine compartment: wind-
s c
r
een washer reservoir top. The windscreen washer reservoir is located in
the en
gine c
omp
artment ›››
page 207.
To top up, mix water with a product recom-
mended by SEAT.
In cold temperatures, add anti-freeze.
››› page 212 Battery
The battery is located in the engine compart-
ment
›
›
› page 207. It does not require
maintenance. It is checked as part of the In-
spection Service.
››› in Introduction on page 213
›››
page 213 43
Page 69 of 248
Airbag system
Maintenance and disposal of belt ten-
s ioner
s The belt tensioners are components of the
seat
belts
that are installed in the seats of
your vehicle. If you work on the belt tension-
ers or remove and install parts of the system
when performing other repair work, the seat
belt may be damaged. The consequence may
be that, in the event of an accident, the belt
tensioners function incorrectly or may not
function at all.
So that the effectiveness of the seat belt ten-
sioner is not reduced and that removed parts
do not cause any injuries or environmental
pollution, regulations, which are known to
the specialised workshops, must be ob-
served. WARNING
● Improper u se or r
epairs not carried out by
qualified mechanics increase the risk of se-
vere or fatal injuries. The belt tensioners may
fail to trigger or may trigger in the wrong cir-
cumstances.
● Never attempt to repair, adjust, remove or
inst
all parts of the belt tensioners or seat
belts.
● The seat belt tensioner, seat belt and auto-
matic r
etractor cannot be repaired.
● Any work on the belt tensioners and seat
belts, includin
g the removal and refitting of
system parts in conjunction with other repair work, must be performed by a specialised
work
shop on
ly.
● The belt tensioners will only provide pro-
tection for one ac
cident and must be changed
if they have been activated. Airbag system
Brief intr
oduction
Wh
y is it so important to wear a seat
belt and to sit correctly? For the inflating airbags to achieve the best
prot
ection, the se
at belt must always be worn
properly and the correct sitting position must
be assumed.
The airbag system is not a substitute for seat
belts, but it is an integral part of the vehicle's
overall passive safety system. Please bear in
mind that the airbag system can only work ef-
fectively when the vehicle occupants are
wearing their seat belts correctly and have
adjusted the head restraints properly. There-
fore, it is most important to wear the seat
belts at all times, not only because this is re-
quired by law in most countries, but also for
your safety ›››
page 62, The whys and where-
fores of seat belts .
The airbag inflates in a matter of seconds, so
if you are not properly seated when the air-
bag is triggered, you may sustain fatal inju-
ries. Therefore, it is essential that all vehicle
occupants assume a correct sitting position
while travelling.
Sharp braking before an accident may cause
a passenger not wearing a seat belt to be
thrown forward into the area of the deploying »
67
Technical data
Advice
Operation
Emergencies
Safety
Page 169 of 248
Driving
Periodic maintenance
P eriodic
m
aintenance work guarantees that,
before beginning a journey, you will not con-
sume more than the required amount of fuel.
A well-serviced engine gives you the benefit
of improved fuel efficiency as well as maxi-
mum reliability and an enhanced resale val-
ue.
A badly serviced engine can consume up to
10% more fuel than necessary.
Avoid short journeys
To reduce the consumption and emission of
polluting exhaust gases, the engine and the
exhaust gas filtration systems should reach
the optimum operating temperature.
With the engine cold, fuel consumption is
proportionally higher. The engine does not
warm up and fuel consumption does not nor-
malise until having driven approximately four
kilometres (2.5 miles). This is why we recom-
mend avoiding short trips whenever possi-
ble.
Maintain the correct tyre pressures
Bear in mind that keeping the tyres at an ad-
equate pressure saves fuel. If the tyre pres-
sure is just one bar (14.5 psi/100 kPa) too
low, fuel consumption can increase by as
much as 5%. Due to the greater rolling resist-
ance, under-inflation also increases tyre wear
wear and impairs handling. The tyre pressures should always be checked
when the tyre
s are cold.
Do not use winter tyres all year round as they
increase fuel consumption by up to 10%.
Avoid unnecessary weight
Given that every kilo of extra weight will in-
crease the fuel consumption, it is advisable
to always check the luggage compartment to
make sure that no unnecessary loads are be-
ing transported.
A roof rack is often left in place for the sake
of convenience, even when it is no longer
needed. At a speed of 100 km/h (62 mph)
and 120 km/h (75 mph) your vehicle will use
about 12% more fuel as a result of the extra
wind resistance caused by the roof rack even
when it is not in use.
Save electricity
The engine activates the alternator, which
produces electricity. With the need for elec-
tricity, fuel consumption also increases. Be-
cause of this, always turn off electrical devi-
ces when you do not need them. Examples of
devices that use a lot of electricity are: the
fan at high speeds, the rear window heating
and the seat heaters*. Note
● If y
ou vehicle has Start-Stop, it is not rec-
ommended to switch this function off. ●
It i s
recommended that you close the win-
dows when driving at more than 60 km/h
(37 mph).
● Do not drive with your foot resting on the
clutc
h pedal,, as the pressure can make the
plate spin, more fuel will be used and it can
burn the clutch plate lining, causing a serious
fault.
● Do not hold the vehicle on a hill with the
clutc
h, use the foot brake or hand brake, us-
ing the latter to start. The fuel consumption
will be lower and you will prevent the clutch
plate from being damaged.
● On descents, use the engine brake, chang-
ing to the g
ear that is more suitable for the
slope. Fuel consumption will be “zero” and
the brakes will not suffer. Engine management and emis-
s
ion c
ontr
ol system
Introduction WARNING
● Bec au
se of the high temperatures which
can occur in the exhaust purification system
(catalytic converter or diesel particulate fil-
ter), do not park the vehicle where the ex-
haust can come into contact with flammable
materials under the car (e.g. on grass or at
the forest edge). Fire hazard! » 167
Technical data
Advice
Operation
Emergencies
Safety
Page 195 of 248
Towing bracket device
The ball-headed bar should be placed in the
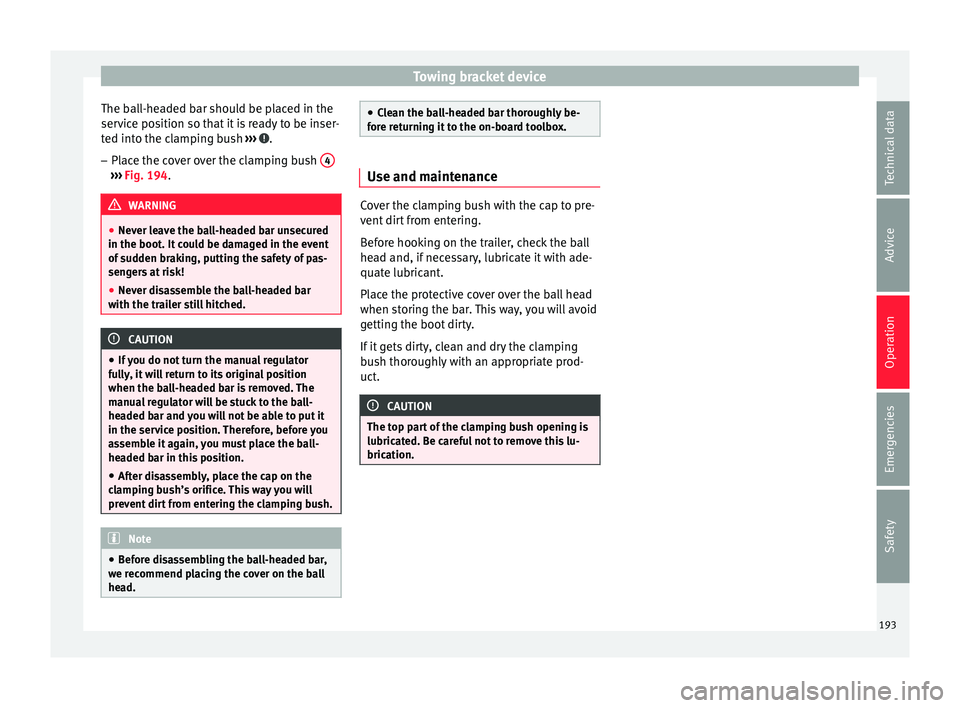
ser v
ic
e position so that it is ready to be inser-
ted into the clamping bush ››› .
– Place the cover over the clamping bush 4›››
Fig. 194. WARNING
● Never leave the ball-headed bar unsecured
in the boot. It c
ould be damaged in the event
of sudden braking, putting the safety of pas-
sengers at risk!
● Never disassemble the ball-headed bar
with the trai
ler still hitched. CAUTION
● If y
ou do not turn the manual regulator
fully, it will return to its original position
when the ball-headed bar is removed. The
manual regulator will be stuck to the ball-
headed bar and you will not be able to put it
in the service position. Therefore, before you
assemble it again, you must place the ball-
headed bar in this position.
● After disassembly, place the cap on the
clampin
g bush’s orifice. This way you will
prevent dirt from entering the clamping bush. Note
● Bef or
e disassembling the ball-headed bar,
we recommend placing the cover on the ball
head. ●
Cle
an the ball-headed bar thoroughly be-
fore returning it to the on-board toolbox. Use and maintenance
Cover the clamping bush with the cap to pre-
vent
dir
t from entering.
Before hooking on the trailer, check the ball
head and, if necessary, lubricate it with ade-
quate lubricant.
Place the protective cover over the ball head
when storing the bar. This way, you will avoid
getting the boot dirty.
If it gets dirty, clean and dry the clamping
bush thoroughly with an appropriate prod-
uct. CAUTION
The top part of the clamping bush opening is
lubricat ed. B
e careful not to remove this lu-
brication. 193
Technical data
Advice
Operation
Emergencies
Safety
Page 197 of 248
Care and maintenance
●
The modification of the s
uspension of the
vehicle wheels, including the use of non-per-
mitted combinations of tyres and rims can al-
ter the operation of the airbag system and in-
crease the risk of serious or fatal injuries in
an accident.
● During all jobs on the airbag system, in ad-
dition to the remo
val and fitting of parts of
the system in the course of other repair jobs,
parts of the airbag system can be damaged.
Therefore in the event of an accident, this
may cause the airbags to activate incorrectly
or not activate at all. Radio and aerial reception
In vehicles factory-fitted with an audio or
n
av
ig
ation system, the aerial may be instal-
led in different places:
● inside the rear window next to the heating
elements,
● on the roof
of the vehicle.
Care and cleaning Introduction Regular and suitable care helps to
m
aint ain
the u
seful life of your vehicle. This may also
be one of the requirements for upholding any warranty claims in the event of corrosion or
paint def
ects.
We recommend you use cleaning products
from the SEAT Original Accessories pro-
gramme available in SEAT dealers. Please fol-
low the instructions for use on the packag-
ing. WARNING
● Cle
aning products and other materials used
for car care can damage the health if mis-
used.
● Always keep car care materials in a safe
plac
e out of the reach of children. Risk of poi-
soning!
● When washing the car during the winter
season: Moi
sture and ice on the brakes may
affect braking efficiency. Risk of accident!
● The ignition must always be switched off
when the car is
washed. Risk of accident!
● Do not clean the underside of the car or in-
side the wheel ar
ches without protecting your
hands and arms. You may cut yourself on
sharp metal parts!
● Perfumes and air fresheners inside the ve-
hicle m
ay be harmful to health at high tem-
peratures in the interior. CAUTION
● Check the c
olour-fastness of your clothing
to avoid damaging or visibly staining the fab-
ric (leather), upholstery and fabric trim. ●
Cle
aning products containing solvents may
damage the material being cleaned.
● Do not wash the vehicle in direct sunlight.
Risk of
damage to paintwork.
● If washing the vehicle with a hose in win-
ter, do not
direct the jet of water directly at
the locks or at the door seals or bonnet. Risk
of freezing.
● Do not use sponges for removing insects or
abras
ive household sponges, etc. on painted
surfaces. Risk of damage to the painted sur-
face!
● Do not put stickers on the inner side of the
rear w
indow in areas where heating elements
or the aerial are located. This could cause
damage and, in the case of the aerial, radio
and navigation system reception faults.
● Do not clean the inside of the window with
sharp ob
jects or corrosive or acidic cleaning
products. Risk of damaging the heating ele-
ments or the aerial.
● Do not attach any fragrance or air freshener
to the da
sh panel. Risk of damage to the
dash panel!
● To avoid damaging the parking aid system
sensors, s
pray them only briefly at a mini-
mum distance of 10 cm when cleaning the ve-
hicle with a high-pressure or steam cleaner.
● Do not clean the roof panel with a brush.
Risk of
damage to the panel surface! » 195
Technical data
Advice
Operation
Emergencies
Safety