stop start SKODA CITIGO 2015 1.G User Guide
[x] Cancel search | Manufacturer: SKODA, Model Year: 2015, Model line: CITIGO, Model: SKODA CITIGO 2015 1.GPages: 160, PDF Size: 23.1 MB
Page 79 of 160
START-STOPsystem
Introduction
This chapter contains information on the following subjects:
Operation
77
Manually deactivating/activating the system
78
The START-STOPsystem (hereinafter referred to as: the system) reduces CO 2emissions and harmful emissions, and saves fuel.
If the system determine that the engine is not needed when the vehicle stops
(e.g. at the traffic lights), it turns off the engine and starts it again when mov-
ing off.
The system function depends on many factors. Some of them are down to the
driver, the others are systemic and can neither be influenced nor identified.
Therefore the system may react differently in situations which seem identi-
cal from the driver's perspective.
The system is automatically activated every time the ignition is switched on
(even where this has previously been manually deactivated with the button
).
Note
If the engine has stopped due to the system, the ignition remains on.
Operation
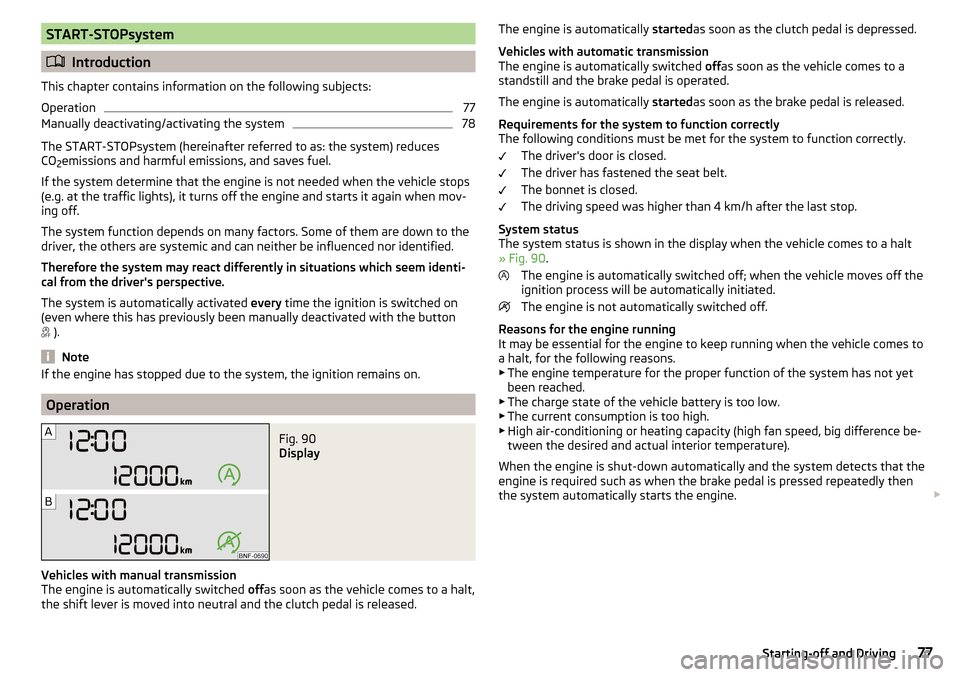
Fig. 90
Display
Vehicles with manual transmission
The engine is automatically switched offas soon as the vehicle comes to a halt,
the shift lever is moved into neutral and the clutch pedal is released.
The engine is automatically startedas soon as the clutch pedal is depressed.
Vehicles with automatic transmission
The engine is automatically switched offas soon as the vehicle comes to a
standstill and the brake pedal is operated.
The engine is automatically startedas soon as the brake pedal is released.
Requirements for the system to function correctly
The following conditions must be met for the system to function correctly.
The driver's door is closed.
The driver has fastened the seat belt.
The bonnet is closed.
The driving speed was higher than 4 km/h after the last stop.
System status
The system status is shown in the display when the vehicle comes to a halt
» Fig. 90 .
The engine is automatically switched off; when the vehicle moves off the
ignition process will be automatically initiated.
The engine is not automatically switched off.
Reasons for the engine running
It may be essential for the engine to keep running when the vehicle comes to
a halt, for the following reasons. ▶ The engine temperature for the proper function of the system has not yet
been reached.
▶ The charge state of the vehicle battery is too low.
▶ The current consumption is too high.
▶ High air-conditioning or heating capacity (high fan speed, big difference be-
tween the desired and actual interior temperature).
When the engine is shut-down automatically and the system detects that the
engine is required such as when the brake pedal is pressed repeatedly then
the system automatically starts the engine. 77Starting-off and Driving
Page 80 of 160
Note■If the vehicle remains outdoors for a long time in minus temperatures or in
direct sunlight, it can take several hours until the internal temperature of the
vehicle battery reaches a suitable temperature for proper operation of the
START STOP system.■
If the driver's seat belt is removed for more than approx. 30 seconds or the
driver's door is opened during stop mode, the engine will have to be started
manually.
■
No automatic engine shut-down takes place when a vehicle with automatic
transmission is moving at low speed (e.g. during a traffic jam) and remains sta-
tionary after pressing the brake pedal lightly. Automatic engine shutdown
takes place if you press the brake pedal down with more force.
■
For vehicles with automatic transmission there is no automatic engine shut-
down when the system detects a manoeuvring action due to a large steering
angle.
Manually deactivating/activating the system
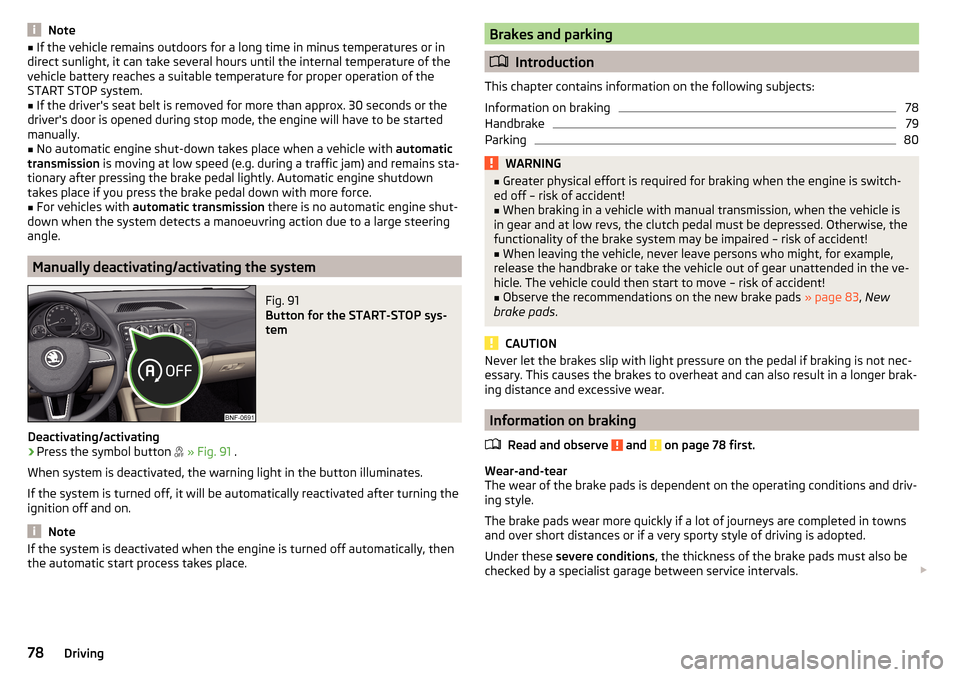
Fig. 91
Button for the START-STOP sys-
tem
Deactivating/activating
›
Press the symbol button
» Fig. 91 .
When system is deactivated, the warning light in the button illuminates.
If the system is turned off, it will be automatically reactivated after turning the
ignition off and on.
Note
If the system is deactivated when the engine is turned off automatically, then
the automatic start process takes place.Brakes and parking
Introduction
This chapter contains information on the following subjects:
Information on braking
78
Handbrake
79
Parking
80WARNING■ Greater physical effort is required for braking when the engine is switch-
ed off – risk of accident!■
When braking in a vehicle with manual transmission, when the vehicle is
in gear and at low revs, the clutch pedal must be depressed. Otherwise, the
functionality of the brake system may be impaired – risk of accident!
■
When leaving the vehicle, never leave persons who might, for example,
release the handbrake or take the vehicle out of gear unattended in the ve-
hicle. The vehicle could then start to move – risk of accident!
■
Observe the recommendations on the new brake pads » page 83, New
brake pads .
CAUTION
Never let the brakes slip with light pressure on the pedal if braking is not nec-
essary. This causes the brakes to overheat and can also result in a longer brak-
ing distance and excessive wear.
Information on braking
Read and observe
and on page 78 first.
Wear-and-tear
The wear of the brake pads is dependent on the operating conditions and driv-
ing style.
The brake pads wear more quickly if a lot of journeys are completed in towns
and over short distances or if a very sporty style of driving is adopted.
Under these severe conditions , the thickness of the brake pads must also be
checked by a specialist garage between service intervals.
78Driving
Page 81 of 160
Wet roads or road salt
The performance of the brakes can be delayed as the brake discs and brake
pads may be moist or have a coating of ice or layer of salt on them in winter.
The brakes are cleaned and dried by applying the brakes several times »
.
Corrosion
Corrosion on the brake discs and dirt on the brake pads occur if the vehicle has
been parked for a long period and if you do not make much use of the braking
system. The brakes are cleaned by applying the brakes several times »
.
Long or steep slopes
Before travelling a long distance with a steep gradient, reduce speed and shift
into the next lowest gear. As a result, the braking effect of the engine will be
used, reducing the load on the brakes. Any additional braking should be com-
pleted intermittently, not continuously.
Emergency brake display
If the brakes are applied in full and the vehicle systems evaluate the situation
as dangerous for the traffic following behind, the brake light flashes automati-
cally.
After the speed was reduced below around 10 km/h or the vehicle was stop-
ped, the brake light stops flashing and the hazard warning light system
switches on. The hazard warning light system is switched off automatically af-
ter accelerating or driving off again.
Faults in the brake surface
If it is found that the braking distance has suddenly become longer and that
the brake pedal can be depressed further, the brake system may be faulty.
Visit a specialist garage immediately and adjust your style of driving appropri-
ately as you will not know the exact extent of the damage.
Low brake fluid level
An insufficient level of brake fluid may result in problems in the brake system.
The level of the brake fluid is monitored electronically » page 34,
Braking
system .
Brake booster
The brake booster increases the pressure generated with the brake pedal. The
brake booster only operates when the engine is running.
WARNINGOnly apply the brakes for the purpose of drying and cleaning the brake
discs if the traffic conditions permit this. Do not place any other road users
in jeopardy.
Handbrake
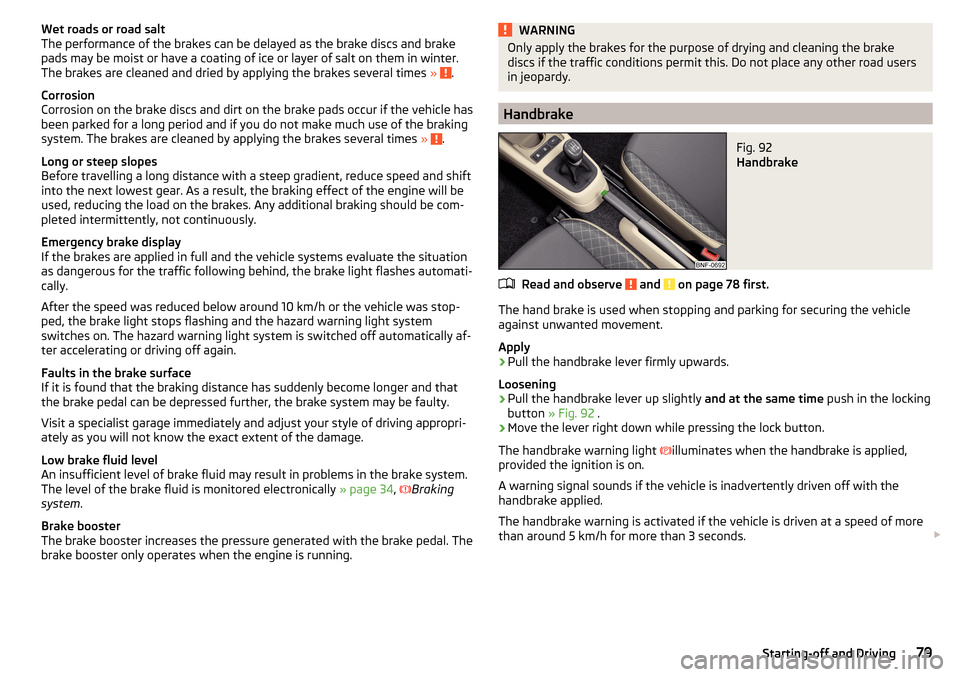
Fig. 92
Handbrake
Read and observe and on page 78 first.
The hand brake is used when stopping and parking for securing the vehicle
against unwanted movement.
Apply
›
Pull the handbrake lever firmly upwards.
Loosening
›
Pull the handbrake lever up slightly and at the same time push in the locking
button » Fig. 92 .
›
Move the lever right down while pressing the lock button.
The handbrake warning light
illuminates when the handbrake is applied,
provided the ignition is on.
A warning signal sounds if the vehicle is inadvertently driven off with the
handbrake applied.
The handbrake warning is activated if the vehicle is driven at a speed of more
than around 5 km/h for more than 3 seconds.
79Starting-off and Driving
Page 83 of 160
In the driver's footwell, only a footmat, which is attached to the two corre-
sponding attachment points may be used.
Only use factory-supplied footmats or footmats from the range of ŠKODAOrigi-
nal Accessories, which are fitted to two attachment points.WARNINGNo objects are allowed in the driver's footwell – risk of obstruction or limi-
tation in operating the pedals!
Automated transmission
Introduction
This chapter contains information on the following subjects:
Modes and lever control
81
Manual gearshift (Tiptronic)
82
Starting-off and driving
82
The automatic transmission performs automatic gear changes.
The modes of the automatic transmission are adjusted by the driver by means
of the selector lever.
WARNING■ No throttle when it is set before starting the mode for moving forward
with the selector lever - there is a risk of accident!■
Never move the selector lever to mode R when driving – risk of accident!
■
Always firmly apply the handbrake before leaving the vehicle! Otherwise,
the vehicle could be automatically set in motion - there is a risk of acci-
dents!
CAUTION
When stopping on a slope, never try to hold the vehicle using the accelerator
pedal – this may lead to gear damage.Note■ The engine can only be left on in position N, when the brake pedal is de-
pressed .■
If the selector lever position N is accidentally selected while driving, it is first
necessary to release pressure on the accelerator pedal and wait for the idling
speed of the engine to be reached before the selector lever can be engaged in
the drive position.
■
If the N symbol flashes next to the selector lever, engage the selector lever
position N.
Modes and lever control
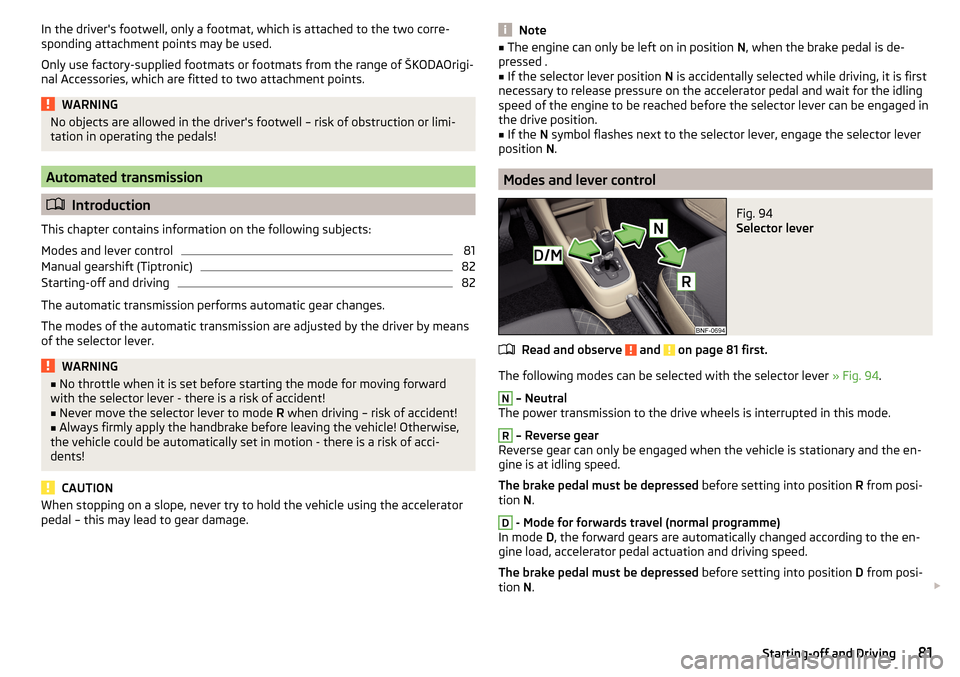
Fig. 94
Selector lever
Read and observe and on page 81 first.
The following modes can be selected with the selector lever » Fig. 94.
N
– Neutral
The power transmission to the drive wheels is interrupted in this mode.
R
– Reverse gear
Reverse gear can only be engaged when the vehicle is stationary and the en-
gine is at idling speed.
The brake pedal must be depressed before setting into position R from posi-
tion N.
D
- Mode for forwards travel (normal programme)
In mode D, the forward gears are automatically changed according to the en-
gine load, accelerator pedal actuation and driving speed.
The brake pedal must be depressed before setting into position D from posi-
tion N.
81Starting-off and Driving
Page 84 of 160
M - Manual gearshift (Tiptronic)
Further information » page 82.
With driving mode set, the vehicle will not start up
If the vehicle does not start off, the problem may be that the selector lever is not completely in the selected position. In such an instance, press the brake
pedal and put the selector lever into the required position.
Faults in the automatic gearbox
In the event of a fault in the automatic gearbox, warning lights may light up in
the instrument panel » page 35,
Automated transmission .
An error on the automated manual transmission can become noticed, for ex- ample, by the following.
▶ Only certain gears are selected.
▶ The reverse gear R cannot be used.
Manual gearshift (Tiptronic)
Fig. 95
Selector lever: manual shifting/information display
Read and observe
and on page 81 first.
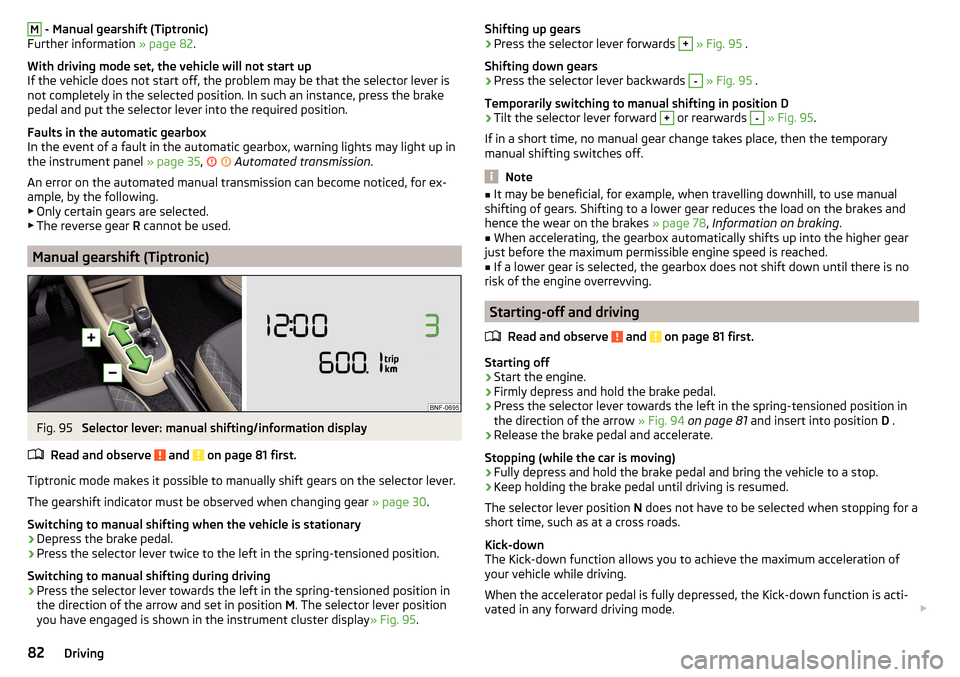
Tiptronic mode makes it possible to manually shift gears on the selector lever. The gearshift indicator must be observed when changing gear » page 30.
Switching to manual shifting when the vehicle is stationary
›
Depress the brake pedal.
›
Press the selector lever twice to the left in the spring-tensioned position.
Switching to manual shifting during driving
›
Press the selector lever towards the left in the spring-tensioned position in
the direction of the arrow and set in position M. The selector lever position
you have engaged is shown in the instrument cluster display » Fig. 95.
Shifting up gears›Press the selector lever forwards + » Fig. 95 .
Shifting down gears›
Press the selector lever backwards
-
» Fig. 95 .
Temporarily switching to manual shifting in position D
›
Tilt the selector lever forward
+
or rearwards
-
» Fig. 95 .
If in a short time, no manual gear change takes place, then the temporary
manual shifting switches off.
Note
■ It may be beneficial, for example, when travelling downhill, to use manual
shifting of gears. Shifting to a lower gear reduces the load on the brakes and
hence the wear on the brakes » page 78, Information on braking .■
When accelerating, the gearbox automatically shifts up into the higher gear
just before the maximum permissible engine speed is reached.
■
If a lower gear is selected, the gearbox does not shift down until there is no
risk of the engine overrevving.
Starting-off and driving
Read and observe
and on page 81 first.
Starting off
›
Start the engine.
›
Firmly depress and hold the brake pedal.
›
Press the selector lever towards the left in the spring-tensioned position in
the direction of the arrow » Fig. 94 on page 81 and insert into position D .
›
Release the brake pedal and accelerate.
Stopping (while the car is moving)
›
Fully depress and hold the brake pedal and bring the vehicle to a stop.
›
Keep holding the brake pedal until driving is resumed.
The selector lever position N does not have to be selected when stopping for a
short time, such as at a cross roads.
Kick-down
The Kick-down function allows you to achieve the maximum acceleration of
your vehicle while driving.
When the accelerator pedal is fully depressed, the Kick-down function is acti-
vated in any forward driving mode.
82Driving
Page 85 of 160
The gearbox shifts down one or more gears depending on the vehicle speed
and engine speed, and the vehicle accelerates.
The gearbox does not shift up into the highest gear until the engine has
reached its maximum revolutions for this gear range.WARNINGRapid acceleration, particularly on slippery roads, can lead to loss of vehicle
control – risk of accident!
Running-in and economical driving
Introduction
This chapter contains information on the following subjects:
Running-in
83
Tips for economical driving
83
The fuel consumption, degree of pollution and vehicle wear depend on driving
style, road condition, weather conditions and the like.
Running-in
Driving in the engine
The engine has to be run in during the first 1 500 kilometres. During this peri-
od, the driving style decides on the quality of the driving-in process.
During the first 1 000 km we recommend not driving faster than 3/4 of the
maximum permissible engine speed, not to drive at full throttle and to dis-
pense with the trailer.
In the area of 1,000 to 1,500 kilometres the engine load can be increased up
to the maximum permitted engine speed.
New tyres
New tyres must firstly be “run in” since they do not offer optimal grip at first.
Therefore, drive especially carefully for the first 500 km or so.
New brake pads
New brake pads have to first “grind in” because these do not initially have the
best possible braking effect.
Therefore, drive especially carefully for the first 200 km or so.
Tips for economical driving
To achieve the lowest possible fuel consumption, the following instructions
must be observed.
Looking ahead when driving
Avoid unnecessary acceleration and braking.
Switch in an energy saving and timely manner Observe the recommended gear » page 30.
Avoid full throttle and high speeds
Fuel consumption can be reduced by half if only three-quarters of the possible
top speed of your vehicle is used.
Reducing idling
If the vehicle is fitted with the START - STOP system there is an automatic re-
duction of the idling. If the engine is stopped on vehicles without START-STOP
system, such as when waiting in a traffic jam, the fuel economy is already
greater after 30 - 40 s than the fuel quantity which is required for engine re-
start.
Avoid short distances
When driving a short distance of less than about 4 km, the engine cannot
reach its operating temperature. As long as the engine has not reached oper-
ating temperature, the fuel consumption is significantly higher than with the
engine hot.
Pay attention to the correct tyre inflation pressure being maintained
Further information » page 117.
Avoid unnecessary ballast
Per 100 kg of weight, consumption increases by about 0.3 l/100 km. At a speed
of 100 - 120 km/h, a vehicle fitted with a roof rack cross member without a load
will use about 10 % more fuel than normal due to the increased aerodynamic
drag.
Saving electricity
Only turn on electrical consumers (e.g. seat, window and mirror heating and
similar) for as long as necessary.
Use the cooling system economically
The air conditioning system compressor uses power from the engine when in
cooling mode, which will affect the fuel consumption. 83Starting-off and Driving
Page 106 of 160
Fuel additives
Unleaded petrol in accordance with the EN 228 standard 1)
meets all the condi-
tions for a smooth-running engine. We therefore recommend that no fuel ad-
ditives are used. This can result in considerable damage to parts of the engine
or the exhaust system.
CAUTION
■ Even one filling of the tank with petrol that does not meet the standards can
lead to serious damage to parts of the exhaust system!■
If a fuel other than unleaded fuel which complies to the above mentioned
standards (e.g. leaded petrol) is put in the tank by mistake, do not start the en-
gine or switch on the ignition. Extensive damage to engine parts can occur.
CAUTION
■ If petrol with a lower octane number than the one prescribed is used do not
drive with a high engine speed. A high engine load can severely damage en-
gine components.■
Even in the event of an emergency, petrol of a lower octane number than 91
RON must not be used, otherwise the engine can be severely damaged.
CAUTION
In no case may fuel additives with metal components be used, especially not
with manganese or iron content. There is a risk of causing severe damage to
parts of the engine or exhaust system.
CAUTION
Fuels with metal components, such as LRP (lead replacement petrol) must
not be used. There is a risk of causing severe damage to parts of the engine
or exhaust system.
Note
■ Unleaded petrol that has a higher octane number than that required by the
engine can be used without limitations.■
On vehicles using prescribed unleaded petrol of min. 95 RON, the use of pet-
rol with a higher octane number than 95 RON can increase the power and re-
duce fuel consumption.
Refuelling CNG (compressed natural gas)Fig. 104
Natural gas filler tubes
Read and observe
and on page 102 first.
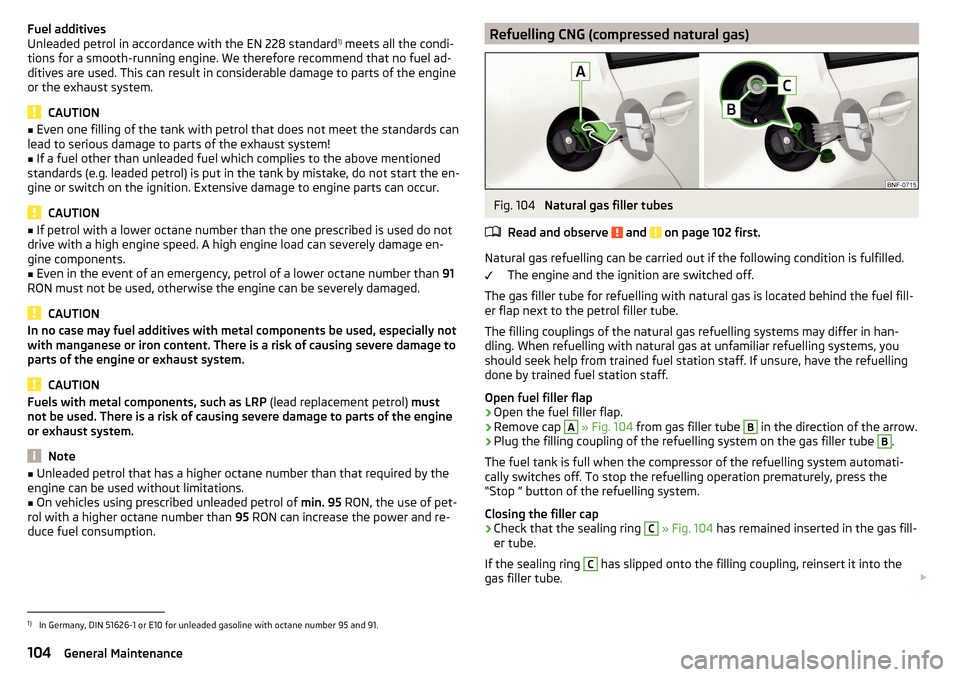
Natural gas refuelling can be carried out if the following condition is fulfilled. The engine and the ignition are switched off.
The gas filler tube for refuelling with natural gas is located behind the fuel fill-
er flap next to the petrol filler tube.
The filling couplings of the natural gas refuelling systems may differ in han-
dling. When refuelling with natural gas at unfamiliar refuelling systems, you
should seek help from trained fuel station staff. If unsure, have the refuelling
done by trained fuel station staff.
Open fuel filler flap
›
Open the fuel filler flap.
›
Remove cap
A
» Fig. 104 from gas filler tube
B
in the direction of the arrow.
›
Plug the filling coupling of the refuelling system on the gas filler tube
B
.
The fuel tank is full when the compressor of the refuelling system automati-
cally switches off. To stop the refuelling operation prematurely, press the
“Stop ” button of the refuelling system.
Closing the filler cap
›
Check that the sealing ring
C
» Fig. 104 has remained inserted in the gas fill-
er tube.
If the sealing ring
C
has slipped onto the filling coupling, reinsert it into the
gas filler tube.
1)
In Germany, DIN 51626-1 or E10 for unleaded gasoline with octane number 95 and 91.
104General Maintenance
Page 107 of 160
›Plug the cap A onto the gas filler tube.›Close the bonnet.
The natural gas refuelling systems have an overfill protection relating to the
outdoor temperature. At very high outside temperatures, it may happen that
the gas tank may not be fully refuelled.
The natural gas system of your vehicle is suitable both for “slow fuelling” (fuel-
ling from small compressors) and for “quick fuelling” (fuelling from natural gas
stations with large compressors).
If the vehicle is parked for a longer period of time immediately after refuelling,
the situation may arise in which the pointer of the fuel tank gauge does not
indicate exactly the same level as was the case immediately after refuelling
when the engine is restarted. This is not due to any system leakages but a
drop in pressure in the natural gas fuel tank due to technical reasons after a
cooling phase directly after refuelling.
The maximum lifetime of the gas tank is 20 years.
The capacity of the natural gas fuel tank is about 11 litres, of which about 1.5
litres are in reserve.
The capacity of the gasoline fuel tank is about 10 litres, of which about 5 litres
are in reserve.WARNING■ When refuelling, never get into the vehicle. If you have to get into your
vehicle in exceptional cases, touch a metal surface before you touch the
filling coupling again. This will avoid electrostatic discharges, which may
generate sparks. Sparks can cause a fire during refuelling.■
Natural gas is highly explosive and highly flammable.
Note
During the filling process sounds are heard which are harmless. If you are un-
sure which service station staff to use, ask the petrol station staff.CNGFig. 105
Position of the CNG label(s).
Read and observe
and on page 102 first.
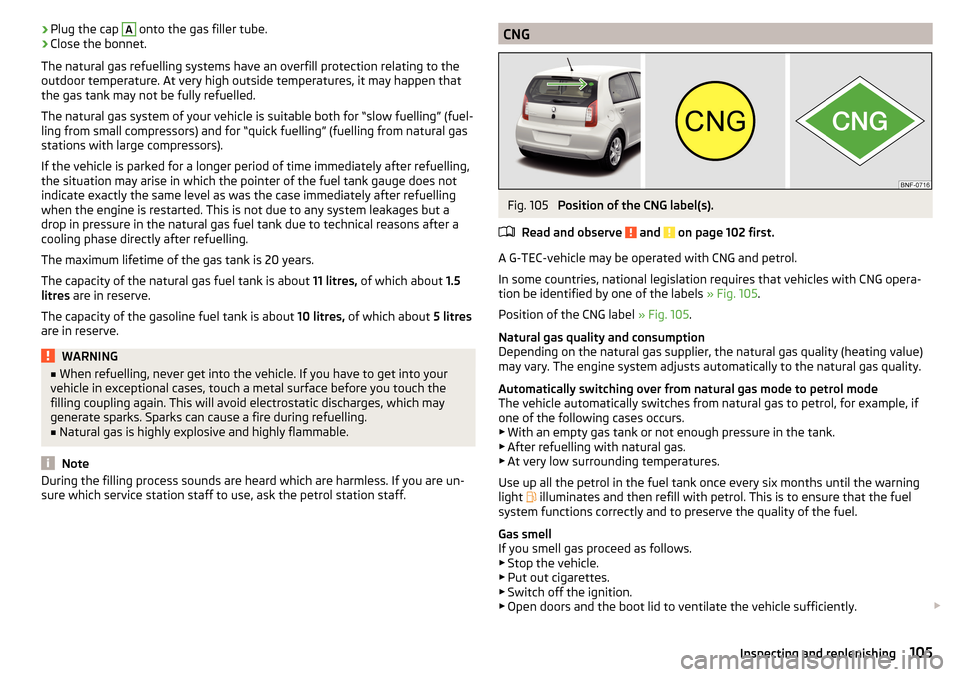
A G-TEC-vehicle may be operated with CNG and petrol.
In some countries, national legislation requires that vehicles with CNG opera- tion be identified by one of the labels » Fig. 105.
Position of the CNG label » Fig. 105.
Natural gas quality and consumption
Depending on the natural gas supplier, the natural gas quality (heating value) may vary. The engine system adjusts automatically to the natural gas quality.
Automatically switching over from natural gas mode to petrol mode
The vehicle automatically switches from natural gas to petrol, for example, if one of the following cases occurs.
▶ With an empty gas tank or not enough pressure in the tank.
▶ After refuelling with natural gas.
▶ At very low surrounding temperatures.
Use up all the petrol in the fuel tank once every six months until the warning
light illuminates and then refill with petrol. This is to ensure that the fuel
system functions correctly and to preserve the quality of the fuel.
Gas smell
If you smell gas proceed as follows. ▶ Stop the vehicle.
▶ Put out cigarettes.
▶ Switch off the ignition.
▶ Open doors and the boot lid to ventilate the vehicle sufficiently.
105Inspecting and replenishing
Page 116 of 160
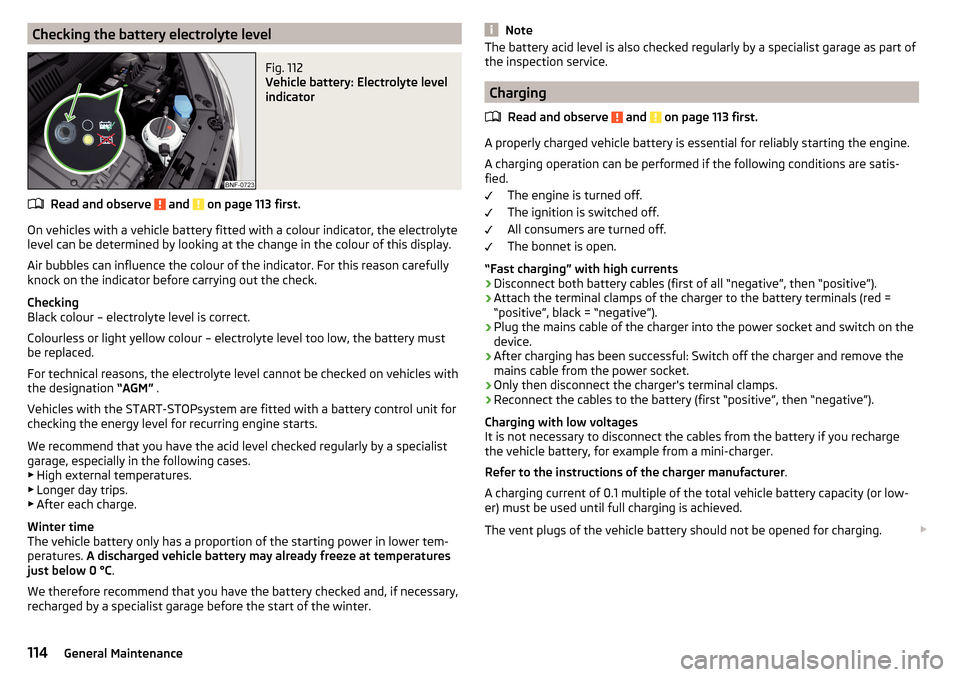
Checking the battery electrolyte levelFig. 112
Vehicle battery: Electrolyte level
indicator
Read and observe and on page 113 first.
On vehicles with a vehicle battery fitted with a colour indicator, the electrolyte
level can be determined by looking at the change in the colour of this display.
Air bubbles can influence the colour of the indicator. For this reason carefully
knock on the indicator before carrying out the check.
Checking
Black colour – electrolyte level is correct.
Colourless or light yellow colour – electrolyte level too low, the battery must
be replaced.
For technical reasons, the electrolyte level cannot be checked on vehicles with
the designation “AGM” .
Vehicles with the START-STOPsystem are fitted with a battery control unit for
checking the energy level for recurring engine starts.
We recommend that you have the acid level checked regularly by a specialist
garage, especially in the following cases. ▶ High external temperatures.
▶ Longer day trips.
▶ After each charge.
Winter time
The vehicle battery only has a proportion of the starting power in lower tem- peratures. A discharged vehicle battery may already freeze at temperatures
just below 0 °C .
We therefore recommend that you have the battery checked and, if necessary,
recharged by a specialist garage before the start of the winter.
NoteThe battery acid level is also checked regularly by a specialist garage as part of
the inspection service.
Charging
Read and observe
and on page 113 first.
A properly charged vehicle battery is essential for reliably starting the engine.
A charging operation can be performed if the following conditions are satis-
fied.
The engine is turned off.
The ignition is switched off.
All consumers are turned off.
The bonnet is open.
“Fast charging” with high currents
›
Disconnect both battery cables (first of all “negative”, then “positive”).
›
Attach the terminal clamps of the charger to the battery terminals (red =
“positive”, black = “negative”).
›
Plug the mains cable of the charger into the power socket and switch on the
device.
›
After charging has been successful: Switch off the charger and remove the
mains cable from the power socket.
›
Only then disconnect the charger's terminal clamps.
›
Reconnect the cables to the battery (first “positive”, then “negative”).
Charging with low voltages
It is not necessary to disconnect the cables from the battery if you recharge
the vehicle battery, for example from a mini-charger.
Refer to the instructions of the charger manufacturer .
A charging current of 0.1 multiple of the total vehicle battery capacity (or low-
er) must be used until full charging is achieved.
The vent plugs of the vehicle battery should not be opened for charging.
114General Maintenance
Page 117 of 160
WARNING■When you charge a battery, hydrogen is released, and a highly explosive
gas mixture is also produced. An explosion can be caused through sparkling
over during unclamping or loosening of the cable plug while the ignition is
on.■
Creating a bridge between the poles on the battery (e.g. with metal ob-
jects - cables) creates a short circuit - risk of damage to the battery, explo-
sion and burning of the battery, jets of acid spurting out.
■
Avoid creating sparks when working with cables and electrical devices.
Strong sparking represents a risk of injury.
■
Before carrying out any work on the electrical system, switch off the en-
gine, the ignition and all electrical consumers and disconnect the negative
terminal
.
■
“Quick-charging” the vehicle battery is dangerous and requires a special
charger and specialist knowledge.
■
We therefore recommend that vehicle batteries be “rapidly charged” by a
specialist garage.
CAUTION
On vehicles with the START-STOP system, the pole terminal of the charger
must not be connected directly to the negative terminal of the vehicle battery,
but only to the engine earth » page 129.
Replace
Read and observe
and on page 113 first.
The new vehicle battery must have the same capacity, voltage, current and
size as the original battery. Suitable vehicle battery types can be purchased
from a specialist garage.
We recommend you have the battery replaced by a specialist garage.
Disconnecting and reconnecting
Read and observe
and on page 113 first.
Disconnecting
›
Switch off the ignition.
›
Disconnect the negative terminal
first and then the positive
terminal of
the battery.
Connecting›Connect the positive terminal first, then the negative battery terminal.
After disconnecting and re-connecting the vehicle battery, the following func-
tions or devices are partially or completely inoperative.Function / deviceOperating measureRadioEnter code » Owner´s Manual
RadioTime settings» page 33
CAUTION
■ Disconnect the vehicle battery only with the ignition turned off - there is a
risk of damaging the electrical system of the vehicle.■
Under no circumstances must the battery cables be connected incorrectly –
risk of a cable fire.
Note
■ After disconnecting and re-connecting the vehicle battery, we recommend
having the vehicle checked by a specialist to ensure that the full functionality
of all electrical systems is guaranteed.■
The data of the multi-function display will be reset.
Automatic load deactivation
Read and observe
and on page 113 first.
The vehicle's electrical system automatically prevents the battery from dis-
charging when the battery is being heavily used. This manifests itself by the
following. ▶ The idling speed is raised to allow the generator to deliver more electricity to
the electrical system.
▶ Where necessary, large convenience consumers such as seat heaters and
rear window heaters have their power limited or are shut off completely in
the event of an emergency.
115Inspecting and replenishing