warning SKODA OCTAVIA 2008 2.G / (1Z) Owner's Manual
[x] Cancel search | Manufacturer: SKODA, Model Year: 2008, Model line: OCTAVIA, Model: SKODA OCTAVIA 2008 2.G / (1Z)Pages: 304, PDF Size: 17.69 MB
Page 133 of 304
Starting-off and Driving
132
– After the desired speed has been reached, press the rocker button into the SET position.
After you have released the rocker button out of the position SET, the speed you
have just stored is maintained at a cons tant speed without having to depress the
accelerator.
You can increase the speed by depressing the a ccelerator. Releasing the acceler-
ator will cause the speed to drop again to the set speed.
This does not apply, however, if you drive at a speed which is more than 10 km/h
higher than the set speed for a period of longer than 5 minutes. The stored speed
will be cancelled in the memory. You then have to re-store the desired speed.
One can reduce the speed in the usual manner. The system is switched off tempo-
rarily by actuating the brake or clutch pedal ⇒page 132.
WARNING
First ensure that it is not too high for the traffic conditions which exist at that
moment before resuming the stored speed.
Changing a stored speed
You can also change the speed of the vehicle without depressing the
accelerator.
Fa s t er
– You can increase the stored speed without depressing the acceler-
ator, by pressing the rocker button ⇒page 131, fig. 152 in the RES
position.
– The speed of the car will increase co ntinuously if you hold the rocker
button pressed in the RES position. Once the car has reached the
desired speed, release the rocker button. The set speed is then stored
in the memory. Slower
– You can
decrease the stored speed by pressing the rocker button
in the SET position.
– Holding down the rocker button pressed in the SET position will cause
the speed of the vehicle to reduce continuously. Once the car has
reached the desired speed, release the rocker button. The set speed is
then stored in the memory.
– If you release the rocker button when the car is travelling at a speed of less than 30 km/h, the speed is not stored, the memory is erased. It is
then necessary to again store the speed with the rocker button in
the position SET after an increase in speed of the vehicle to more than
30 km/hour.
Switching off the cruise control system temporarily
– You can switch off the cruise control system temporarily by
depressing the brake pedal or clutch pedal, on models with auto-
matic gearbox and only with brake pedal.
– You can switch off temporarily the cruise control system, if you press the switch in the middle position.
The set speed remains stored in the memory.
The Resumption of the stored speed is achieved by releasing the brake or clutch
pedal, on vehicles fitted with automatic ge arbox only after releasing the brake pedal
and after shortly pressing the rocker button ⇒page 131, fig. 152 into the posi-
tion RES.
WARNING
First ensure that it is not too high for the traffic conditions which exist at that
moment before resuming the stored speed.
AB
AB
AB
AB
AB
AA
AB
20A5Facelift.book Page 132 Saturday, September 6, 2008 2:13 PM
Page 135 of 304
Automatic gearbox
134
Automatic gearbox
Automatic gearbox*
Information for driving with the 6-speed automatic gearbox*
Your car is equipped with a conventional 6-speed automatic
gearbox.
The maximum speed is reached in the 5th gear. The 6th gear serves as an
economic driving programme, which is intended to reduce the fuel
consumption. Shifting up and down through the gears is performed auto-
matically. You can also, however, switch the gearbox over into the
Tiptronic mode . This mode makes it possible for you to also shift gears
manually ⇒page 138.
Starting-off and Driving
– Depress the brake pedal fully and keep it depressed.
– Press the Shiftlock button (button in handle of the selector lever),
move the selector lever into the desired position, e.g. D ⇒ page 136,
and then release the Shiftlock button.
– Wait a moment until the gearbox has shifted (a slight engagement nudge can be felt).
– Release the brake pedal and depress the accelerator ⇒.
Stopping for a short time
– The selector lever position N does not have to be selected when stop-
ping just for a short time, such as at a cross roads. It is absolutely suffi-
cient to hold the stopped vehicle st ationary by depressing the foot
brake. The engine can, however, be allowed just to idle. Parking
– Depress the brake pedal and hold it depressed.
– Apply the handbrake firmly.
– Press and Shiftlock button in the
selector lever, move the selector
lever to P and then release the Shiftlock button.The engine can only be started when the selector lever is in position P or N
⇒ page 126.
It is sufficient to engage selector lever position P when parking on a flat surface.
When parking on a slope you should first apply the handbrake firmly and then
move the selector lever into position P. This is to ensure that there is no excessive
pressure acting on the lock mechanism and that it is easier to subsequently move
the selector lever out of position P.
If the selector lever position N is selected by accident wh ile driving it is first neces-
sary to release pressure on the accelerato r pedal and wait for idling speed of the
engine to be reached before engaging a drive position in the selector lever.
WARNING
•Do not depress the accelerator when changing the position of the
selector lever if the car is stationary and the engine is running - risk of acci-
dent!
•Never move the selector lever into position R or P when driving - risk of
an accident!
•When the engine is running and the vehicle is stationary, it is necessary
to hold the car with the brake pedal in all the positions of the selector lever
(except P and N) since the power transmission is never completely inter-
rupted, also not when the engine is idling - the vehicle "creeps".
20A5Facelift.book Page 134 Saturday, September 6, 2008 2:13 PM
Page 136 of 304
Automatic gearbox135
Using the systemSafetyDriving TipsGeneral MaintenanceBreakdown assistanceTechnical Data
Information for driving with the automatic gearbox DSG*
The abbreviation DSG means Direct shift gearbox (Direct shift
gearbox).
Two independent clutches are needed for the power transmission
between the engine and the gearbox. These replace the torque converter
of the conventional automatic gearbox. Their shifting is matched in such
a way that there are no jerks when shifting the gear and the power trans-
mission of the engine to the front wheels is not interrupted. Shifting up
and down through the gears is perf ormed automatically. You can also,
however, switch the gearbox over into the Tiptronic mode. This mode
makes it possible for you to also shift gears manually ⇒page 138.
Starting-off and Driving
– Depress the brake pedal fully and keep it depressed.
– Press the Shiftlock button (button in handle of the selector lever),
move the selector lever into the desired position, e.g. in D, and then
release the Shiftlock button.
– Release the brake pedal and depress the accelerator ⇒.
Stopping for a short time
– The selector lever position N does not have to be selected when stop-
ping just for a short time, such as at a cross roads. It is absolutely suffi-
cient to hold the stopped vehicle stationary by depressing the foot
brake. The engine can, however, be allowed just to idle.
Parking
– Depress the brake pedal and hold it depressed.
– Apply the handbrake firmly.
– Press and Shiftlock button in the selector lever, move the selector lever to P and then release the Shiftlock button.
The engine can only be started when the selector lever is in position P or N
⇒ page 126. At temperatures below -10 °C the engine can only be started in the
selector lever position P.
It is sufficient to engage selector lever position P when parking on a flat surface.
When parking on a slope you should first apply the handbrake firmly and then
move the selector lever into position P. This is to ensure that there is no excessive
pressure acting on the lock mechanism and that it is easier to subsequently move
the selector lever out of position P.
If the selector lever position N is selected by accident while driving it is first neces-
sary to release pressure on the accelerato r pedal and wait for idling speed of the
engine to be reached before engaging a drive position in the selector lever.
WARNING
•Do not depress the accelerator when changing the position of the
selector lever if the car is stationary an d the engine is running - risk of acci-
dent!
•Never move the selector lever into position R or P when driving - risk of
an accident!
•If you are stopping at a hill (downhill section), never try to hold the car
stationary with the gear engaged by me ans of the “accelerator”, this means
by letting the clutch slip. This can lead to overheating of the clutch. If there is
a risk of overheating of the clutch due to overload, the clutch is opened auto-
matically and the vehicle rolls backward - risk of accident!
•If you must stop at a slope, depress and hold the brake pedal, so that you
can prevent the vehicle from rolling back.
Caution
•The double clutch on the automatic gear box DSG is equipped with an overload
protection. If you make use of the uphill function on a vehicle which is stationary or
driving slowly uphill, it will result in an increase of thermal stress of the clutches.
•An overheating of the clutches can be detected by the flashing of the selector
level indicator and the “jerk” of the clut ches, finally the clutches are opened. The
power transmission from the engine to the front wheels is interrupted and as a
20A5Facelift.book Page 135 Saturday, September 6, 2008 2:13 PM
Page 138 of 304
Automatic gearbox137
Using the systemSafetyDriving TipsGeneral MaintenanceBreakdown assistanceTechnical Data
The gearbox does not shift into the 6th gear in the position
S, because the
maximum speed is reached with the 5th gear
12).
The Shiftlock on the selector lever grip must be pressed when moving the selector
lever out of the position D into the position S.
WARNING
•Never move the selector lever into position R or P when driving - risk of
an accident!
•When the engine is running and the vehicle is stationary, it is necessary
to hold the car with the brake pedal in all the positions of the selector lever
(except P and N) since the power transmission is never completely inter-
rupted, also not when the engine is idling - the vehicle "creeps".
•You must on no account unintentionally operate the throttle (e.g. by
hand from the engine compartment) if a drive position is engaged when the
car is stationary. The vehicle would ot herwise immediately start off - also
when the handbrake is firmly applied - risk of an accident!
•You must move the selector lever into position P and firmly apply the
handbrake first before you or any other person opens the bonnet and starts
working on the engine when it is running - risk of accident! It is also essential
to observe all warnings ⇒page 225, “Working in the engine
compartment”.
Selector lever lock
Automatic selector lever lock
With the ignition on, the selector lever is locked when it is in the positions P and N.
You must first of all depress the brake peda l in order to move the selector lever out
of this position. The warning light
⇒ page 38 lights up in the instrument cluster
as a reminder for the driver when the selector lever is in position P and N:
A time delay element ensures that the selector lever is not blocked when rapidly
switching over the position N (e.g. from R to D). This does, for example, allow one to seesaw out a stuck vehicle. The selector
lever lock will click into place if the lever
is in the N position for more than 2 seconds without the brake pedal being pressed.
The selector lever lock is only active if th e vehicle is stationary or moving at speed
of less than 5 km/hour. The lock is switched off automatically into position N when
the car is travelling at a higher speed.
Shiftlock button
The Shiftlock button in the handle of selector lever prevents certain selector lever
positions being engaged inadvertently. The selector lever lock is cancelled when
you press the Shiftlock button.
Keylock - Ignition key withdrawal lock
You can only withdraw the ignition key after switching off the ignition if the selector
lever is in position P. If the ignition key is withdrawn, the selector lever is blocked in
position P.
Kickdown function
The kickdown function provides you with maximum acceleration
power.
Depressing the accelerator pedal allows the kickdown function to be activated in
the desired driving program. This function has precedence over the driving
programme and serves for maximum accelera tion of the vehicle when exploiting
the maximum power potential of the engine without taking into account the
current selector lever position ( D, S or Tiptronic ). The gearbox shifts down to one
or several gears in line with the driving state and the vehicle accelerates. The
gearbox does not shift up into the highes t gear until the engine has reached its
maximum revolutions for this gear range.
WARNING
Please note that using the kickdown f unction can result in the driven wheels
spinning on a smooth or slippery road surface - risk of skidding!
12)Not valid for vehicles with automatic gearbox DSG.
20A5Facelift.book Page 137 Saturday, September 6, 2008 2:13 PM
Page 144 of 304
Communication143
Using the systemSafetyDriving TipsGeneral MaintenanceBreakdown assistanceTechnical Data
Universal telephone preinstallation GSM II*
Introduction
This enables you to make full use of the advantages of a normal carphone (“hands-
free system - Hands Free” using a micropho ne integrated in the vehicle, optimal
transmission of signals using an external aerial
15) etc.). The equipment includes
also the voice control. The telephone is connected by means of the Bluetooth®
technology ⇒page 144, “Bluetooth®”. On vehicles fitted with a telephone
mount*, it is also possible to establish the connection via the interface of the
adapter
16) ⇒ page 145, “Operating telephone calls with the aid of the adapter*.”.
A phone phonebook is part of the mobile ph one preinstallation with voice control.
In the phone phonebook there are 1500 free memory locations available. This
phone phonebook is independent of the appliance used for the mobile phone.
Furthermore the volume can be changed individually during the call at any time
with the button for setting the radio* or on vehicles fitted with multifunction
steering wheel* with function buttons on the steering wheel.
If the system answers with the voice response “ Telephone is not ready”, please
check the operating state of the telephone as follows:
•Is the telephone switched on?
•Is the PIN code entered?
Dialogue
The period, in which the telephone system is ready to receive voice commands and
carry out the voice commands, is called DIALOGUE. The system gives audible feed-
back and guides you if necessary through the relevant functions. You can start or
end the dialogue at any time by pres sing the PTT button on the adapter*
⇒ page 145 or on the multifunction steering wheel* ⇒page 146.
The dialogue is always automatically ended after carrying out an operation, e.g.
after erasing the name from the phonebook. When receiving an incoming call, the dialogue is immediately interrupted and you
can accept the call by pressing the button
on the multifunction steering wheel*
⇒ page 146 or by pressing the button for receiving a call directly on your tele-
phone.
If a voice command is not detected, the system answers with “ Sorry?” and a new
entry can be performed. After the 2nd error the system repeats the aid. After the 3rd
error the answer “ Cancel” is given and the dialogue is ended.
Optimum understanding of the voice commands depends on the following
factors:
•Speak with a normal tone of voice without intonation and excessive voice
pauses.
•Avoid insufficient articulation.
•Close the doors, windows and sliding roof, in order to reduce or stop disturbing
exterior noise.
•It is recommended to speak louder at higher speeds, so that the tone of your
voice is louder than the increased surrounding noise.
•During the dialogue avoid additional noise in the vehicle, e.g. simultaneously
talking occupants.
•Do not speak, if the system makes an announcement.
•The microphone for voice control is direct ed to the driver and front passenger.
Therefore the driver and the front passenger can operate the equipment.
WARNING
Pay attention primarily to the traffic situation! As the driver you are fully
responsible for road safety. Use the tele phone system only to such an extent,
so that you are in full contro l of your vehicle at any time.
Caution
Taking the mobile phone out of the adapter during the call can lead to interruption
of the connection. When taking out the mobile phone, the connection to the
factory-fitted antenna is interrupted, this reduces the quality of the transmitting
and receiving signal. This might result a dditionally in harmful radiation from the
15)Valid for telephone used with adapter* in the telephone mount.16)Not valid for adapter “Bluetooth only” ⇒page 146.
20A5Facelift.book Page 143 Saturday, September 6, 2008 2:13 PM
Page 145 of 304
Communication
144
mobile phone in the interior of the ve hicle and the charging of the telephone
battery is interrupted.
Note
•Please also refer to the additional instructions ⇒page 160, “Mobile phones
and two-way radio systems”.
•Please contact your Škoda Service Partner if there are any points which are not
clear.
Bluetooth®
The Bluetooth® technology serves as ca bleless connection of a
mobile phone to a hands-free system of your vehicle.
In order to connect a mobile phone with Bluetooth® to the hands-free
system, it is necessary to adapt th e phone and the hands-free system to
each other. Detailed information on this is provided in the operating
instructions of your mobile phone. The following steps must be carried
out for the connection:
– Switch on the ignition.
– Select Bluetooth
® on the mobile phone and select the menu with
which the mobile phone searches for suitable Bluetooth® devices.
– If the hands-free system on the display of the mobile phone announces Skoda UHV , enter the PIN° 1234 within 30 seconds and
wait, until the connection is established.
17)
While connecting the mobile phone with the hands-free system by means of Blue-
tooth®, no other phone can be connected wi th the hands-free system via Blue-
tooth®. Up to three mobile phones can be connected to the hands-free system by means
of Bluetooth
®, whereby only one mobile phone can communicate via Bluetooth®
with the hands-free system. If a fourth mobile phone is connected to the hands-
free-system, then the telephone, which has not been used together with the hands-
free-system for the longest period, is disconnected by means of Bluetooth
®.
Establish Bluetooth
® connection
After switching on the ignition, the Blue tooth connection is automatically estab-
lished for the already adapted mobile phone
17). Check on the mobile unit if the
automatic connection was established.
Disconnect Bluetooth
® connection
After withdrawing the ignition key, the Bluetooth® connection is disconnected.
WARNING
•Pay attention primarily to the traffic situation! As the driver you are fully
responsible for road safety. Use the telephone system only to such an extent,
so that you are in full control of your vehicle at any time - risk of accident!
•In the event of air transport, the Bluetooth® function of the handsfree-
system must be switched off by a specialist garage!
Caution
Taking the mobile phone out of the adapter during the call can lead to interruption
of the connection. When taking out th e mobile phone, the connection to the
factory-fitted antenna is interrupted, this reduces the quality of the transmitting
and receiving signal. This might result additionally in harmful radiation from the
mobile phone in the interior of the ve hicle and the charging of the telephone
battery is interrupted.
Note
•Not valid for all mobile phones which enable a communication via Bluetooth®.
You can ask at a Škoda Service Partner if your telephone is compatible with the
universal telephone preinstallation GSM II.
17)Some mobile phones have a menu, in which the authorization for establishing a Bluetooth®
connection is performed via the input of a code. If the input for the authorization is neces-
sary, it must always be performed when re-establishing the Bluetooth connection.
20A5Facelift.book Page 144 Saturday, September 6, 2008 2:13 PM
Page 154 of 304
Communication153
Using the systemSafetyDriving TipsGeneral MaintenanceBreakdown assistanceTechnical Data
The dialogue is always automatically ended after carrying out an operation, e.g.
after erasing the name from the phonebook.
The dialogue of the incoming call is i
mmediately interrupted and you can accept
the call by pressing the button
.
If a voice command is not detected, the system answers with “ Sorry?” and a new
entry can be performed. After the 2nd error the system repeats the aid. After the 3rd
error the answer “ Cancel” is given and the dialogue is ended.
Optimum understanding of the voice commands depends on the following
factors:
•Speak with a normal tone of voice wi thout intonation and excessive voice
pauses.
•Avoid insufficient articulation.
•Close the doors, windows and sliding roof, in order to reduce or stop disturbing
exterior noise.
•It is recommended to speak louder at hi gher speeds, so that the tone of your
voice is louder than the increased surrounding noise.
•During the dialogue avoid additional nois e in the vehicle, e.g. simultaneously
talking occupants.
•Do not speak, if the system makes an announcement.
•The microphone for voice control is in serted in the moulded headliner and
directed to the driver and front passenger. Therefore the driver and the front
passenger can operate the equipment.
WARNING
Pay attention primarily to the traffic situation! As the driver you are fully
responsible for road safety. Use the telephone system only to such an extent,
so that you are in full control of your vehicle at any time.
Note
•Please contact your Škoda Service Partner if there are any points which are not
clear.
•Please also refer to the additional instructions ⇒page 160.
Bluetooth®
The equipment enables the wireless connection to the control unit of a
telephone with Bluetooth® function which supports the rSAP profile.
Process of connection
– Switch on the ignition.
– If you have not switched on Bluetooth
® on your telephone, switch it
on.
– For certain mobile phones it is necessary to switch on first the rSAP
function.
–Press the button
on the multifunction st eering wheel and select
device search . The system searches mobile devices and shows these
in the information display*.
– Select your telephone in the information display by turning the hand- wheel and select it by pressing the handwheel.
– Within 30 seconds enter in your telephone the 16 digit PIN of your
control unit, which is indicated in your information display* and
confirm it according to the instructions on the display of your tele-
phone.
– If your SIM card is blocked by a PIN code, enter the PIN of the SIM card of your telephone. The telephone connects to the control unit (during
the first connection you can only se lect in the information display*
and when the vehicle is stationary, if the PIN should be stored).
– For the first storage of a new user follow the instructions in the infor- mation display.
– To download the telephone book and the indentification data of the SIM card into the new control unit, confirm again the command rSAP
in your mobile phone. The sy stem reads the telephone book.
20A5Facelift.book Page 153 Saturday, September 6, 2008 2:13 PM
Page 155 of 304
Communication
154
If you do not want to confirm the command rSAP during each connection of the
telephone to the control unit, then you mu st carry out in the menu of the mobile
phone an authorization using the control unit.
The telephone deregisters from the GSM network and only the control unit ensures
the communication with the network. In the telephone only the interface for Blue-
tooth
® remains active. In this case, you can only select to separate from the device,
switch off the Bluetooth® connection or the number of the emergency call 112.
If the PIN was stored, an automatic selection and connection of the telephone take
place the next time the ignition is swit ched. Check on your mobile phone if the
automatic connection was established.
Connection terminated
The connection of the handsfree-system is terminated by means of Bluetooth
®:
•When removing the key from the ignition lock (during a telephone call, the
connection is disconnected).
•By switching off the Bluetooth® in the mobile phone.
•By selecting “separate telephone” in the menu of the mobile phone.
On vehicles which are fitted out with radio or navigation at the factory, it is possible
to terminate the telephone call after remo ving the key from the ignition lock by
pressing the icon on the touch-screen of the radio
18) or the navigation, see oper-
ating instructions for radio or for navigation.
WARNING
•Pay attention primarily to the traffic situation! As the driver you are fully
responsible for road safety. Use the tele phone system only to such an extent,
so that you are in full control of your vehicle at any time - risk of accident!
•In the event of air transport, the Bluetooth® function of the handsfree-
system must be switched off by a specialist garage!
Note
•In the memory of the control unit, up to three users can be stored, whereby the
handsfree-system can only communicate actively with one user. In the case of
mutual connection with a fourth mobile phone, you must erase one user.
•Not valid for all mobile phones which enable a communication via Bluetooth®.
You can ask at a Škoda Service Partner if your telephone is compatible with the
universal telephone preinstallation GSM II.
•If the telephone book of the mobile ph one contains more than 1 000 entries,
the system announces a failure while loading the telephone book .
•When connecting to the control unit, follow the instructions on your mobile
phone.
•Note that the range of the Bluetooth® connection to the handsfree-system is
optimized in the vehicle interior. The rang e is dependent on local factors, e.g.
obstacles between the devices and interferences with other devices.
18)Does not apply for Radio Swing.
20A5Facelift.book Page 154 Saturday, September 6, 2008 2:13 PM
Page 162 of 304
Communication161
Using the systemSafetyDriving TipsGeneral MaintenanceBreakdown assistanceTechnical Data
Operation of mobile phones or two-way radio systems may interfere with func-
tioning of the electronic systems of your
vehicle. The reasons for this may be:
•no external aerial
•external aerial incorrectly installed
•transmission power greater than 10 watts.
You should also be aware of the fact that only an external aerial makes it possible
to achieve the optimal range of such equipment.
WARNING
•If a mobile phone or two-way radio sy stem is operated inside the vehicle
without using an external aerial, or wi th an external aerial which has been
incorrectly installed, the result can be excessive electromagnetic fields
which may cause harm to your health.
•Please concentrate fully at all times on your driving!
•You must not install two-way radio systems, mobile phones or mounts
on the covers of the airbags or within the immediate deployment range of
airbags. This might result in injuries to the occupants in the event of an acci-
dent.
Note
Please also refer to the operating instru ctions of the mobile phones and two-way
radio systems.
Input AUX-IN*
The input AUX-IN is located below the armrest* of the front seats and is marked
with . The equipment AUX-IN can only be us ed in combination with a radio or
navigation system installed in the factory.
The input AUX-IN connects the external audio sources (e. g. iPod or mp3 player)
and records music from these devices via your radio* or your navigation*. The description of the operation can be
found in the relevant Owner's Manual of
your radio* or your navigation*.
Note
•If an external audio source is conne cted via AUX-IN, which has a separate
power supply, this can lead to an interfer ence of the audio signals. It depends on
the properties of the adapter.
•The loudspeakers in the vehicle are matched to a power output of 30 W.
MDI input*
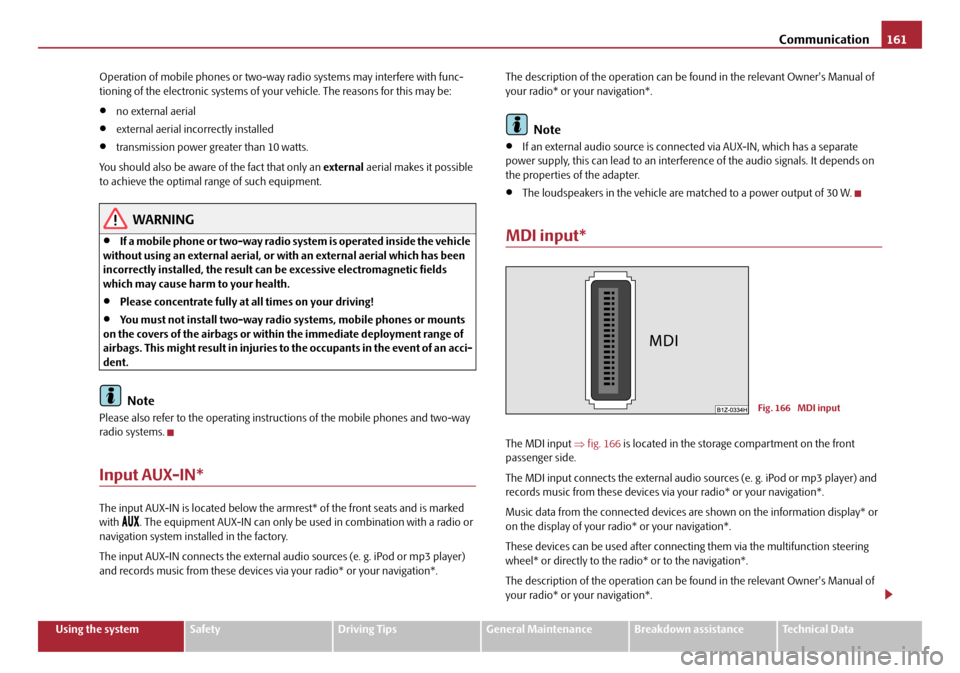
The MDI input ⇒fig. 166 is located in the storage compartment on the front
passenger side.
The MDI input connects the external audio sources (e. g. iPod or mp3 player) and
records music from these devices via your radio* or your navigation*.
Music data from the connected devices ar e shown on the information display* or
on the display of your radio* or your navigation*.
These devices can be used after connectin g them via the multifunction steering
wheel* or directly to the ra dio* or to the navigation*.
The description of the operation can be found in the relevant Owner's Manual of
your radio* or your navigation*.
Fig. 166 MDI input
20A5Facelift.book Page 161 Saturday, September 6, 2008 2:13 PM
Page 164 of 304
Passive Safety163
Using the systemSafetyDriving TipsGeneral MaintenanceBreakdown assistanceTechnical Data
Safety
Passive Safety
Basic information
Driving the safe way
Passive safety measures reduce the risk of injury in accident situa-
tions.
In this section you will find important inform ation, tips and notes on the subject of
passive safety in your vehicle. We ha ve combined everything here which you
should be familiar with, for example, regarding seat belts, airbags, child seats and
safety of children. It is therefore importan t, in particular, to comply with the notes
and warnings in this section for your own interest and in the interest of those trav-
elling with you.
WARNING
•This chapter contains important information on how to use the vehicle
for the driver and his occupants. You will find further information on safety,
which concerns you and those travelling with you, in the following chapters
of this Owner's Manual.
•The complete on-board literature should always be in the vehicle. This
applies in particular, if you rent out or sell the vehicle.
Safety equipment
The safety equipment is part of the occupant protection and it can
reduce the risk of injuries in accident situations.
“Do not put at risk” your safety and the safety of those travelling with you . In the
event of an accident, the safety equipmen t can reduce the risk of injuries. The
following list contains part of th e safety equipment in your vehicle:
•Three-point seat belts for all the seats,
•belt force limiter for front and outer rear seats*,
•belt tensioner for front seats,
•seat belt height adjuster for front seats,
•front airbag for the driver and the front seat passenger*,
•Side airbags*,
•head airbags*,
•anchoring points for child seat using the “ISOFIX” system,
•anchoring points for child seat using the “Top Tether” system,
•head restraint adjustable for height,
•adjustable steering column.
The specified safety equipment works toge ther, in order to optimally protect you
and those travelling with you in accident situations. The safety equipment does not
protect you or the people travelling with you, if you or your occupants adopt an
incorrect seated position or the equipmen t is not correctly adjusted or used.
Fo r t h i s re a s o n y o u w i l l b e p ro v i d e d w i th i n fo rm a ti o n o n w hy t h i s e q u i p m e nt i s v e r y
important, how it protects you and the o ccupants, what should be observed when
using the equipment and how you and the pe ople travelling with you can make full
use of the existing safety equipment. This Owner's Manual contains important
warning notes, which you and those travelli ng with you should pay attention to in
order to reduce a risk of injury.
Safety concerns everybody!
20A5Facelift.book Page 163 Saturday, September 6, 2008 2:13 PM