warning lights SKODA OCTAVIA 2010 2.G / (1Z) Repair Manual
[x] Cancel search | Manufacturer: SKODA, Model Year: 2010, Model line: OCTAVIA, Model: SKODA OCTAVIA 2010 2.G / (1Z)Pages: 275, PDF Size: 16.43 MB
Page 174 of 275
Intelligent Technology173
Using the system
Safety
Driving Tips
General Maintenance
Breakdown assistance
Technical Data
one wheel per axle was changed.
Basic setting of the system
After changing the tyre inflation pressures, after changing one or several wheels, the
position of a wheel on the vehicle (e.g. exch anging the wheels between the axles) or
when the warning light lights up while drivin g, a basic setting of the system must be
carried out as follows.
Inflate all tyres to the specified inflation pressure page 208.
Switch on the ignition.
Press button page 172, fig. 151 for more than 2 seconds. While pressing
the button, the warning light
lights up. At the same time the memory of the system
is erased and the new calibration is started, which is confirmed with an audible signal
and then the warning light
goes out.
If the warning light
does not go out after the basic setting, there is a fault in the
system. Have the vehicle inspected by your nearest specialist garage.
Warning light
lights up
If the tyre inflation pressure of at least one wheel is insufficiently inflated in comparison
to the stored basic value, the warning light
lights up.
Warning light
flashes
If the warning light flashes, there is a system fault. Have the vehicle inspected by your
nearest specialist garage.
WARNING
When the warning light
lights up, immediately reduce the speed and
avoid sudden steering and brake manoeuvr es. Please stop the vehicle without
delay at the nearest possible stop and in spect the tyres and their inflation pres-
sures.
The driver is responsible for the correct tyre inflation pressures. For this
reason, the tyre inflation pressu res must be checked regularly.
Under certain circumstances (e.g. sporty style of driving, wintry or unpaved
roads) the warning light
can be delayed or does not light up at all.
The tyre pressure monitoring system does not take away the responsibility
from the driver for the correct tyre inflation pressure.
Note
The tyre pressure monitoring system:
does not replace the regular tyre inflatio n pressure control, because the system
cannot detect an even pressure loss,
cannot warn in case of very rapid tyre inflation pressure loss, e.g. in case of sudden
tyre damage. In this case ca refully bring the vehicle to a standstill without sudden
steering movements and without sharp braking.
In order to ensure a proper functioning of the tyre inflation pressure-control
system, it is necessary to carry out the ba sic setting again every 10 000 km or 1x a
year.
Diesel particle filter* (diesel engine)In the diesel particle filter the resu lting soot particles are collected and
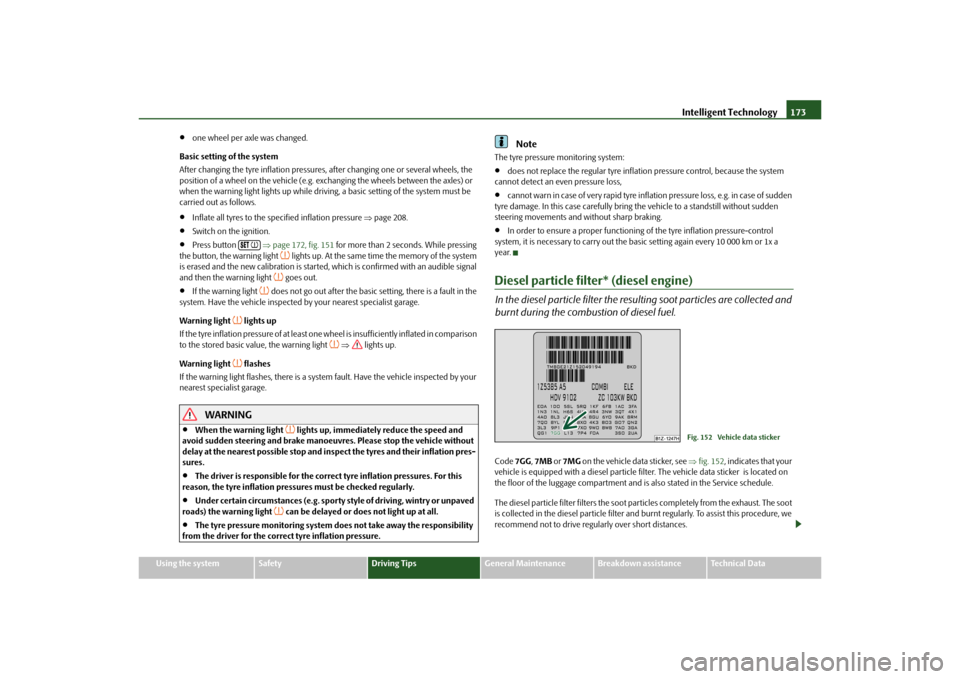
burnt during the combustion of diesel fuel.Code 7GG, 7MB or 7MG on the vehicle data sticker, see fig. 152 , indicates that your
vehicle is equipped with a diesel particle fi lter. The vehicle data sticker is located on
the floor of the luggage compartment and is also stated in the Service schedule.
The diesel particle filter filters the soot particles completely from the exhaust. The soot
is collected in the diesel particle filter and burnt regularly. To assist this procedure, we
recommend not to drive regu larly over short distances.
Fig. 152 Vehicle data sticker
s43s.1.book Page 173 Thursday, May 13, 2010 1:21 PM
Page 184 of 275
Towing a trailer183
Using the system
Safety
Driving Tips
General Maintenance
Breakdown assistance
Technical Data
Headlights
Before starting off with a hitched trailer, also check the setting of the headlights. Alter
the setting as necessary with the ai
d of the headlight beam adjuster page 56.
Detachable ball head
The ball rod is detachable on vehicles which feature a factory-fitted towing device. It is
stowed together with separate fitting instru ctions in the spare wheel well in the luggage
compartment of the vehicle.
Further information on the towing device page 184.
Note
We recommend that you also have your vehicle inspected between service inter-
vals if you tow a trailer frequently.
The handbrake on the towing vehicle must be put on when coupling and decou-
pling the trailer.
Driving Tips
Particular caution is required when towing a trailer.– Do not, as far as possible, drive with your vehicle unladen and the trailer laden.
– Do not make full use of the legal maximum speeds. This applies in particular to downhill sections.
– Apply the brakes in good time.
– Keep a check on the coolant temperature gauge if the outside temperature is high.
Distribution of weight
The distribution of the weight is very poor if your vehicle is unladen and the trailer is
laden. Maintain a particularly low speed if you cannot avoid driving with this combina-
tion.
Driving speed
Do not drive faster than 80 km/hour for safety reasons. This also applies for countries
in which higher speeds are allowed. The fact that the driving stability of the vehicle + trailer combination reduces with
increasing speed means that the legally allowed speed should not be used when there
are unfavourable road, weather or wind cond
itions, particularly near accident black
spots.
You must always reduce your speed immediat ely as soon as you detect even just the
slightest swaying of the trailer. On no account attempt to stop the trailer from
“swaying” by accelerating.
Apply the brakes in good time! If the trailer is fitted with a trailer brake, apply the
brakes gently at first and then brake firmly. This will avoid brake jolts resulting from the
trailer wheels locking. Shift down gears in good time before negotiating a downhill
section to allow the engine to also act as a brake.
Engine overheating
Please keep a check on the coolant temperature gauge if you have to negotiate a
lengthy slope in a low gear at a high engi ne speed when the outside temperature is
very high page 16, “Coolant temperature gauge”.
If the needle of the coolant temperature gauge moves into the right-hand area or even
the red area of the scale, reduce your speed immediately. Stop and switch off the
engine if the warning light
in the instrument cluster begins flashing. Wait a few
minutes and check the level of coolant in the coolant expansion bottle page 201,
“Inspecting the coolant level”.
Please refer to the following guidelines page 31, “Coolant temperature/coolant
level ”.
The coolant temperature can be reduced by switching on the heating.
Any increase in the cooling effect of the coolant fan through shifting down a gear and
increasing the engine speed is not possible since the fan speed is independent of the
engine speed. One should also not drop a gear for this reason when towing a trailer as
long as the engine can manage th e slope without any drop in speed.
s43s.1.book Page 183 Thursday, May 13, 2010 1:21 PM
Page 189 of 275
Taking care of your vehicle and cleaning the vehicle
188
Do not use window leathers which you have us ed to polish the vehicle body to dry off
the windows. Residues of preservatives in the window leather can dirty the window
and reduce visibility.
Do not affix any stickers over the inside of the rear window to avoid damage to the
heating elements of the rear window heater .
We recommend using a preserva tive from Škoda genuine accessories offered by your
Škoda dealer.
Caution
Never remove snow or ice from the glass parts with warm or hot water - risk of forma-
tion of cracks in the glass!The headlight lensesPlease do not use any aggressi ve cleaning or chemical solvent products for cleaning
the front headlights - risk of damage to the plastic lenses. Please use soap and clean
warm water.
Caution
Never wipe the headlights dry and do not use any sharp objects for cleaning the plastic
lenses, this may result in damage to the protective paintwork and consequently in
formation of cracks on the headlight lenses, e.g through effect of chemical products.Door and window sealsThe rubber seals on the doors, boot lid, bonnet and windows remain supple and last
longer if you treat them from time to time with a rubber care product (e.g. with a spray
with silicone-free oil). You also avoid premature wear of the seals and prevent leakages
in this way. It is also easier to open the doors. Rubber seals which are well cared for also
do not stick together in cold winter weather.Locking cylinderWe recommend that you use the spray from Škoda original accessories with regreasing
and anticorrosive effect for de-icing locking cylinders.
Note
When washing your vehicle, ensure that as little water as possible gets into the locking
cylinders.WheelsSteel wheels
You should also thoroughly wash the wheels and wheel trims when giving your vehicle
its regular wash. This prevents any brake dust, dirt and road salt from sticking to the
wheel hubs. You can remove stubborn brake abrasion adhering to the wheels with an
industrial cleaner. Touch up any damage to the paintwork on the wheels before rust is
able to form.
Light alloy wheels
Regular care of light alloy wh eels is necessary in order to retain their decorative
appearance over long periods. It is particul arly important to remove regularly any road
salt and brake abrasion from light alloy wheels, otherwise the light metal will suffer.
Wash thoroughly and then treat the wheels with a protective product for light alloy
wheels which does not cont ain any acidic components. We recommend to apply a
hard wax layer onto the wheel hubs every three months. You must not use any prod-
ucts which cause abrasion when treating the wheel hubs. Any damage to the paint
layer on the wheel hubs must be touched up immediately.
We recommend using a preservative from Šk oda genuine accessories offered by your
Škoda dealer.
WARNING
One should remember when cleaning th e wheels that moisture, ice and road
salt may adversely affect braking ef ficiency - risk of an accident!
Note
Severe layers of dirt on the wheels can also result in wheel imbalance. This may show
itself in the form of a wheel vibration which is transmitted to the steering wheel which,
in certain circumstances, can cause premature wear of the steering. This means it is
necessary to remove the dirt.
s43s.1.book Page 188 Thursday, May 13, 2010 1:21 PM
Page 208 of 275
Inspecting and replenishing207
Using the system
Safety
Driving Tips
General Maintenance
Breakdown assistance
Technical Data
We recommend having the vehicle checked by a Škoda Service Partner to ensure full
functionality of all electrical systems.
Replacing the batteryYou should only replace a battery with a ne
w battery of the same capacity, voltage (12
V), amperage and of the same size. Škoda Service Partners have a range of suitable
batteries available.
We recommend that you only have an old ba ttery disposed of by your Škoda Service
Partner since it does require special disposal.
For the sake of the environment
Batteries contain poisonous substances such as sulphuric acid and lead. They must be
disposed of in accordance with local environmental protection regulations and on no
account as domestic waste.
In view of the problems involved with it s proper disposal, we recommend having
the battery replaced by a specialist garage.
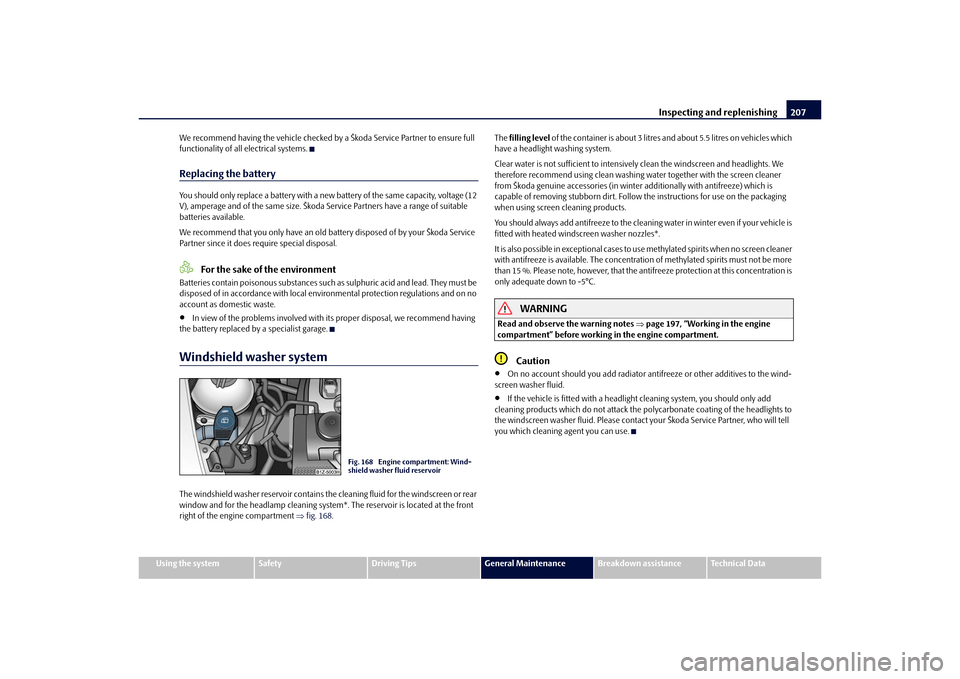
Windshield washer systemThe windshield washer reservoir contains the cleaning fluid for the windscreen or rear
window and for the headlamp cleaning system*. The reservoir is located at the front
right of the engine compartment fig. 168 . The
filling level of the container is about 3 litres and about 5.5 litres on vehicles which
have a headlight washing system.
Clear water is not sufficient to intensively clean the windscreen and headlights. We
therefore recommend using clean washing water together with the screen cleaner
from Škoda genuine accessories (in winter additionally with antifreeze) which is
capable of removing stubborn dirt. Follow the instructions for use on the packaging
when using screen cleaning products.
You should always add antifreeze to the cleaning water in winter even if your vehicle is
fitted with heated wind screen washer nozzles*.
It is also possible in exceptional cases to use methylated spirits when no screen cleaner
with antifreeze is available. The concentration of methylated spirits must not be more
than 15 %. Please note, however, that the anti freeze protection at this concentration is
only adequate down to -5°C.
WARNING
Read and observe the warning notes page 197, “Working in the engine
compartment” before working in the engine compartment.
Caution
On no account should you add radiator an tifreeze or other additives to the wind-
screen washer fluid.
If the vehicle is fitted with a headlight cleaning system, you should only add
cleaning products which do not attack the polycarbonate coating of the headlights to
the windscreen washer fluid. Please contac t your Škoda Service Partner, who will tell
you which cleaning agent you can use.
Fig. 168 Engine compartment: Wind-
shield washer fluid reservoir
s43s.1.book Page 207 Thursday, May 13, 2010 1:21 PM
Page 217 of 275
Breakdown assistance
216WARNING
If the fire extinguisher is not correctl y attached, in case of sudden manoeuvres
or an accident it can be “thrown” through the interior compartment and cause
injuries.
Note
The fire extinguisher must comply with the relevant and valid legal requirements.
Pay attention to the expiration date of the fire extinguisher. If the fire extinguisher
is used after the expiration date, its proper function is no longer assured.
The fire extinguisher is only supplied in certain countries within the scope of
delivery.
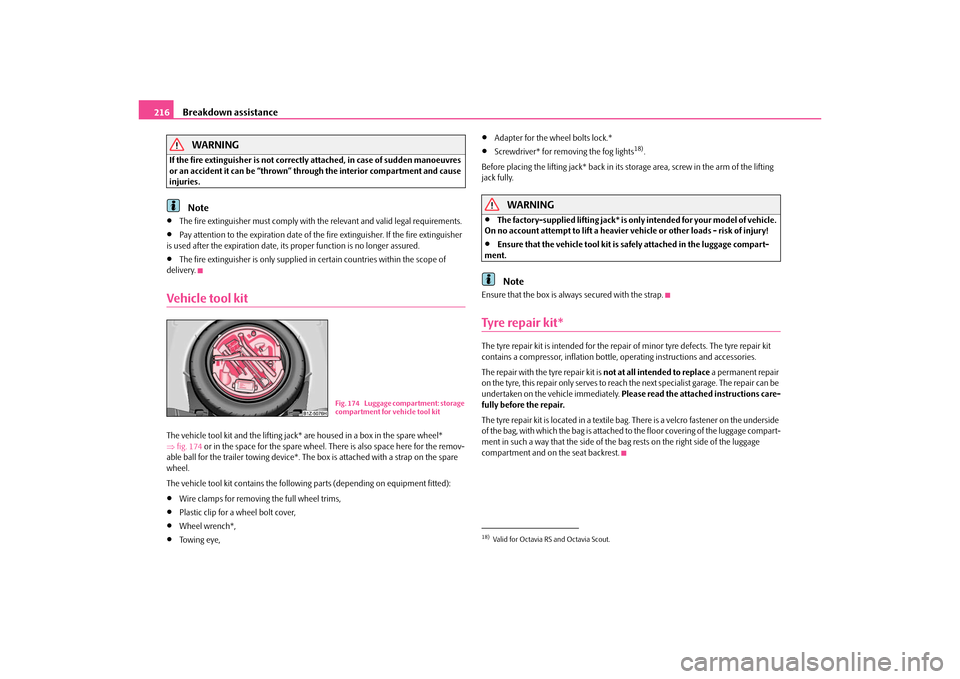
Vehicle tool kitThe vehicle tool kit and the lifting jack* are housed in a box in the spare wheel*
fig. 174 or in the space for the spare wheel. There is also space here for the remov-
able ball for the trailer towing device*. Th e box is attached with a strap on the spare
wheel.
The vehicle tool kit contains the following parts (depending on equipment fitted):
Wire clamps for removing the full wheel trims,
Plastic clip for a wheel bolt cover,
Wheel wrench*,
To w i n g e y e ,
Adapter for the wheel bolts lock.*
Screwdriver* for removing the fog lights
18).
Before placing the lifting jack* back in its storage area, screw in the arm of the lifting
jack fully.
WARNING
The factory-supplied lifting jack* is only intended for your model of vehicle.
On no account attempt to lift a heavier vehicle or other loads - risk of injury!
Ensure that the vehicle tool kit is sa fely attached in the luggage compart-
ment.Note
Ensure that the box is always secured with the strap.Tyre repair kit*The tyre repair kit is intended for the repair of minor tyre defects. The tyre repair kit
contains a compressor, inflation bottle, operating instructions and accessories.
The repair with the tyre repair kit is not at all intended to replace a permanent repair
on the tyre, this repair only serves to reach the next specialist garage. The repair can be
undertaken on the vehicle immediately. Please read the attached instructions care-
fully before the repair.
The tyre repair kit is located in a textile bag. There is a velcro fastener on the underside
of the bag, with which the bag is attached to the floor covering of the luggage compart-
ment in such a way that the side of the bag rests on the right side of the luggage
compartment and on the seat backrest.
Fig. 174 Luggage compartment: storage
compartment for vehicle tool kit
18)Valid for Octavia RS and Octavia Scout.
s43s.1.book Page 216 Thursday, May 13, 2010 1:21 PM
Page 218 of 275
Breakdown assistance217
Using the system
Safety
Driving Tips
General Maintenance
Breakdown assistance
Technical Data
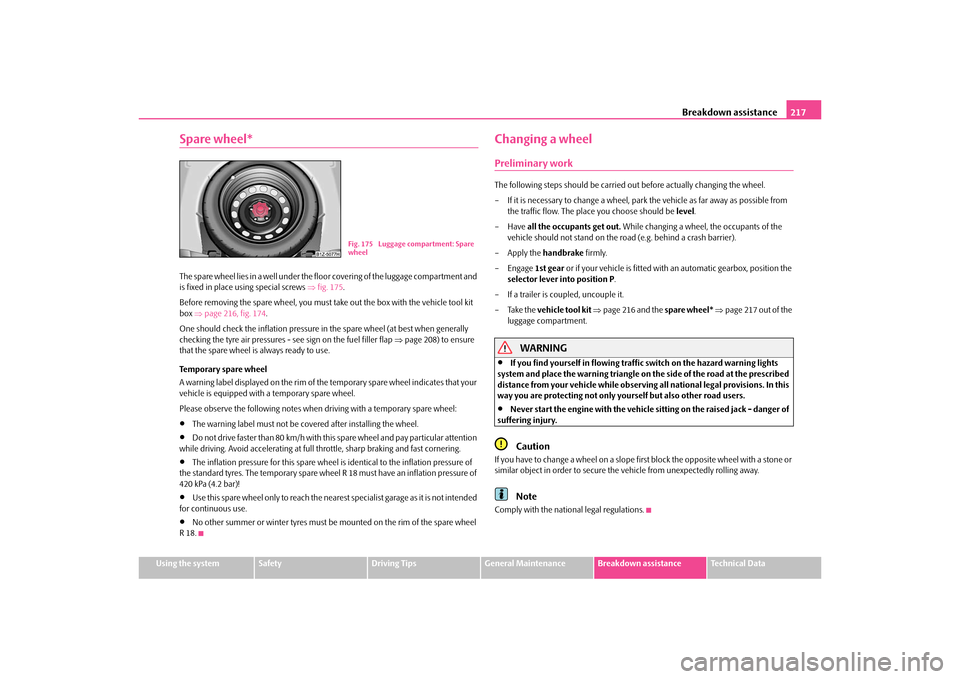
Spare wheel*The spare wheel lies in a well under the floor covering of the luggage compartment and
is fixed in place using special screws fig. 175 .
Before removing the spare wheel, you must take out the box with the vehicle tool kit
box page 216, fig. 174.
One should check the inflation pressure in the spare wheel (at best when generally
checking the tyre air pressures - see sign on the fuel filler flap page 208) to ensure
that the spare wheel is always ready to use.
Temporary spare wheel
A warning label displayed on the rim of the temporary spare wheel indicates that your
vehicle is equippe d with a temporary spare wheel.
Please observe the following notes when driving with a temporary spare wheel:
The warning label must not be covered after installing the wheel.
Do not drive faster than 80 km/h with this spare wheel and pay particular attention
while driving. Avoid accelerating at full throttle, sharp braking and fast cornering.
The inflation pressure for this spare wheel is identical to the inflation pressure of
the standard tyres. The temporary spare wheel R 18 must have an inflation pressure of
420 kPa (4.2 bar)!
Use this spare wheel only to reach the nearest specialist garage as it is not intended
for continuous use.
No other summer or winter tyres must be mounted on the rim of the spare wheel
R 18.
Changing a wheelPreliminary workThe following steps should be carried ou t before actually changing the wheel.
– If it is necessary to change a wheel, park the vehicle as far away as possible from
the traffic flow. The place you choose should be level.
–Have all the occupants get out. While changing a wheel, the occupants of the
vehicle should not stand on the ro ad (e.g. behind a crash barrier).
– Apply the handbrake firmly.
–Engage 1st gear or if your vehicle is fitted with an automatic gearbox, position the
selector lever into position P .
– If a trailer is coupled, uncouple it.
–Take the vehicle tool kit page 216 and the spare wheel* page 217 out of the
luggage compartment.
WARNING
If you find yourself in flowing traffic switch on the hazard warning lights
system and place the warning triangle on the side of the road at the prescribed
distance from your vehicle while observin g all national legal provisions. In this
way you are protecting not only yourself but also other road users.
Never start the engine with the vehicle si tting on the raised jack - danger of
suffering injury.Caution
If you have to change a wheel on a slope fi rst block the opposite wheel with a stone or
similar object in order to secure the vehicle from unexpectedly rolling away.
Note
Comply with the national legal regulations.
Fig. 175 Luggage compartment: Spare
wheel
s43s.1.book Page 217 Thursday, May 13, 2010 1:21 PM
Page 223 of 275
Breakdown assistance
222
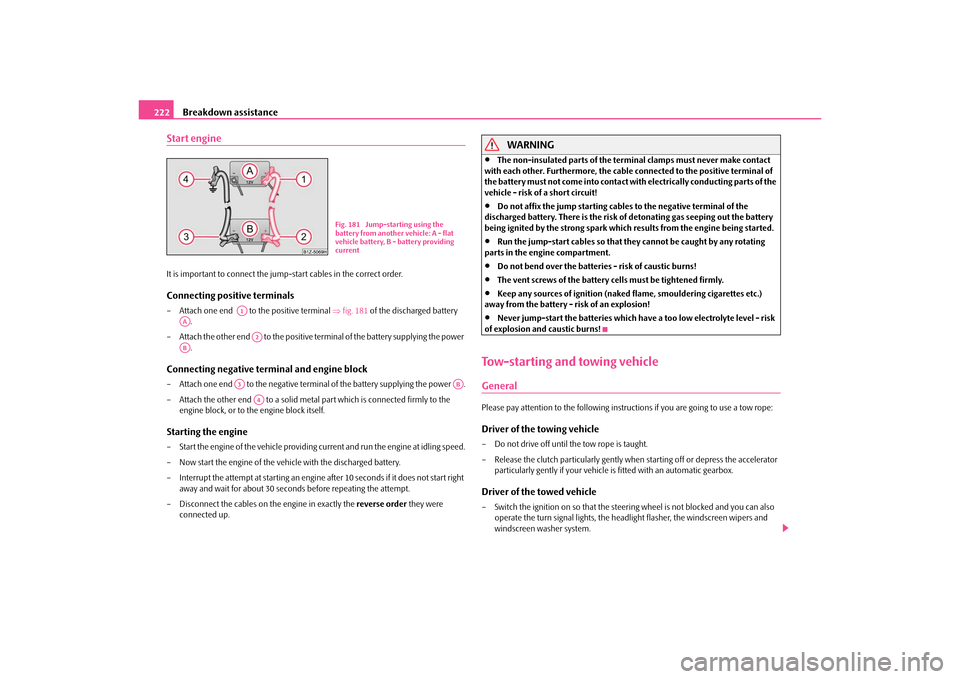
Start engineIt is important to connect the jump -start cables in the correct order.Connecting positive terminals– Attach one end to the positive terminal fig. 181 of the discharged battery
.
– Attach the other end to the positive term inal of the battery supplying the power
.Connecting negative terminal and engine block– Attach one end to the negative termin al of the battery supplying the power .
– Attach the other end to a solid metal part which is connected firmly to the
engine block, or to the engine block itself.Starting the engine– Start the engine of the vehicle providing current and run the engine at idling speed.
– Now start the engine of the vehicle with the discharged battery.
– Interrupt the attempt at starting an engine after 10 seconds if it does not start right
away and wait for about 30 seconds before repeating the attempt.
– Disconnect the cables on the engine in exactly the reverse order they were
connected up.
WARNING
The non-insulated parts of the terminal clamps must never make contact
with each other. Furthermore, the cable connected to the positive terminal of
the battery must not come into contact with electrically conducting parts of the
vehicle - risk of a short circuit!
Do not affix the jump starting cables to the negative terminal of the
discharged battery. There is the risk of detonating gas seeping out the battery
being ignited by the strong spark which results from the engine being started.
Run the jump-start cables so that they cannot be caught by any rotating
parts in the engine compartment.
Do not bend over the batteries - risk of caustic burns!
The vent screws of the battery cells must be tightened firmly.
Keep any sources of ignition (naked flame, smouldering cigarettes etc.)
away from the battery - risk of an explosion!
Never jump-start the batteries which ha ve a too low electrolyte level - risk
of explosion and caustic burns!
Tow-starting and towing vehicleGeneralPlease pay attention to the following instru ctions if you are going to use a tow rope:Driver of the towing vehicle– Do not drive off until the tow rope is taught.
– Release the clutch particularly gently wh en starting off or depress the accelerator
particularly gently if yo ur vehicle is fitted with an automatic gearbox.Driver of the towed vehicle– Switch the ignition on so that the steeri ng wheel is not blocked and you can also
operate the turn signal lights, the headlight flasher, the windscreen wipers and
windscreen washer system.
Fig. 181 Jump-starting using the
battery from another vehicle: A - flat
vehicle battery, B - battery providing
current
A1
AA
A2
AB
A3
AB
A4
s43s.1.book Page 222 Thursday, May 13, 2010 1:21 PM
Page 231 of 275
Fuses and light bulbs
230
We therefore recommend that you have an y bulbs changed by an authorised Škoda
Service Partner or, in exceptional cases, by calling on other professional assistance.
Please note that the engine compartment is a hazardous area page 197, “Working
in the engine compartment”.
We recommend that you always have a small box of replacement bulbs in your vehicle.
You can obtain replacement bulbs from Škoda original accessories or from a specialist
garage
21).
A stowage place for the bulbs is located in the box in the spare wheel.
Fitted with a xenon headlight
Change of bulbs on vehicles with Xenon lights (low beam lights, parking lights and
main beam lights) should be und ertaken by a specialist garage.
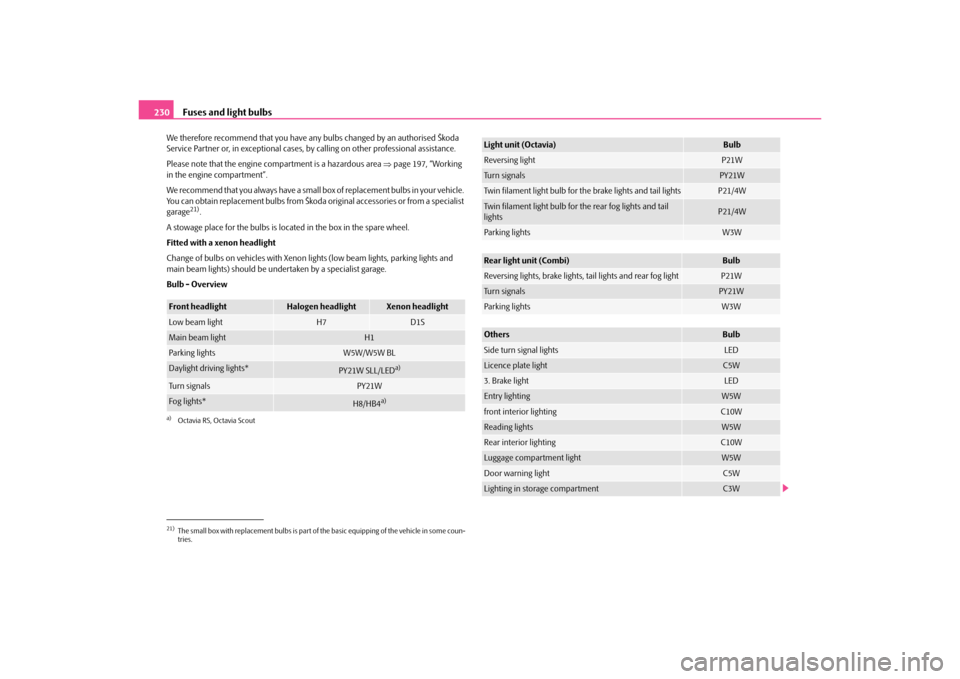
Bulb - Overview
21)The small box with replacement bulbs is part of the basic equipping of the vehicle in some coun-
tries.Front headlight
Halogen headlight
Xenon headlight
Low beam light
H7
D1S
Main beam light
H1
Parking lights
W5W/W5W BL
Daylight driving lights*
PY21W SLL/LED
a)
a)Octavia RS, Octavia ScoutTu r n s i g n a l s
PY21W
Fog lights*
H8/HB4
a)
Light unit (Octavia)
Bulb
Reversing light
P21W
Turn signals
PY21W
Twin filament light bulb for th e brake lights and tail lights
P21/4W
Twin filament light bulb for the rear fog lights and tail
lights
P21/4W
Parking lights
W3W
Rear light unit (Combi)
Bulb
Reversing lights, brake lights, tail lights and rear fog light
P21W
Turn signals
PY21W
Parking lights
W3W
Others
Bulb
Side turn signal lights
LED
Licence plate light
C5W
3. Brake light
LED
Entry lighting
W5W
front interior lighting
C10W
Reading lights
W5W
Rear interior lighting
C10W
Luggage compartment light
W5W
Door warning light
C5W
Lighting in storage compartment
C3W
s43s.1.book Page 230 Thursday, May 13, 2010 1:21 PM
Page 232 of 275
Fuses and light bulbs231
Using the system
Safety
Driving Tips
General Maintenance
Breakdown assistance
Technical Data
WARNING
Bulbs H7 and H1 are pressurised and may burst when changing the bulb -
risk of injury!
It is recommended to wear gloves and safety glasses when changing a bulb.
Gas discharge bulbs* (xenon bulbs) operate with a high voltage, profes-
sional knowledge is required - danger to life!Caution
Do not take hold of the glass bulb with naked fingers (even the smallest amount of dirt
reduces the working life of the light bulb). Use a clean cloth, serviette or something
similar.
Note
This Owner's Manual only describes the replacement of bulbs where it is assumed that
no major complications will arise. Other light bulbs should be replaced by your
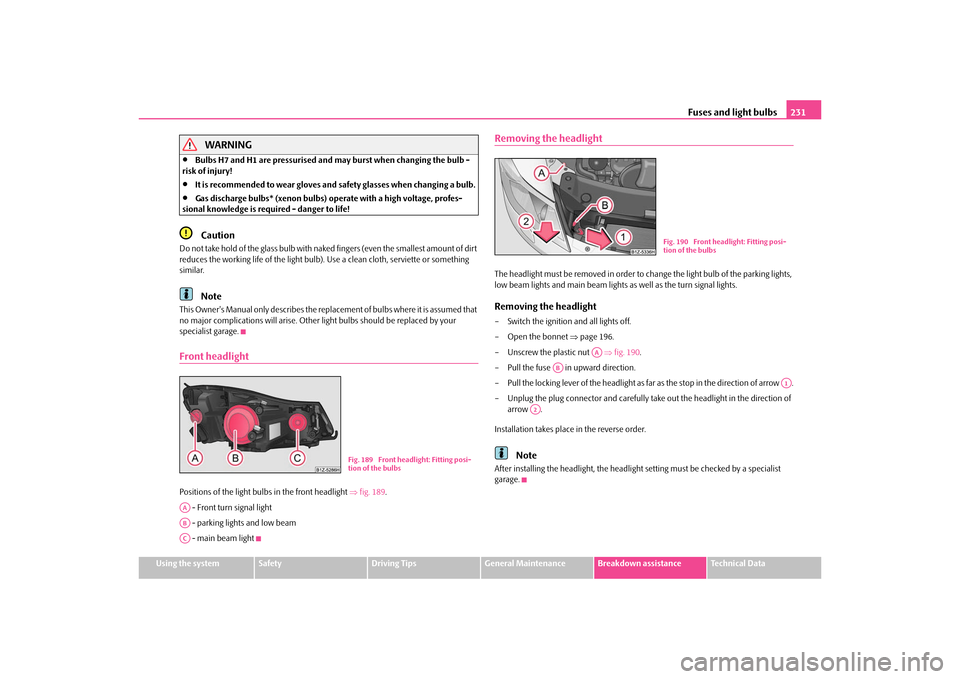
specialist garage.Front headlightPositions of the light bulbs in the front headlight fig. 189 .
- Front turn signal light
- parking lights and low beam
- main beam light
Removing the headlightThe headlight must be removed in order to ch ange the light bulb of the parking lights,
low beam lights and main beam lights as well as the turn signal lights.Removing the headlight– Switch the ignition and all lights off.
– Open the bonnet page 196.
– Unscrew the plastic nut fig. 190 .
– Pull the fuse in upward direction.
– Pull the locking lever of the headlight as far as the stop in the direction of arrow .
– Unplug the plug connector and carefully ta ke out the headlight in the direction of
arrow .
Installation takes place in the reverse order.
Note
After installing the headlight, the headligh t setting must be checked by a specialist
garage.
Fig. 189 Front headlight: Fitting posi-
tion of the bulbs
AAABAC
Fig. 190 Front headlight: Fitting posi-
tion of the bulbs
AA
AB
A1
A2
s43s.1.book Page 231 Thursday, May 13, 2010 1:21 PM
Page 265 of 275
Index
264
Child safety seat
on the front passenger seat . . . . . . . . . . . . . . . 160
Safety information . . . . . . . . . . . . . . . . . . . . . . . 159
Child seat . . . . . . . . . . . . . . . . . . . . . . . . . . . . . . . . . . . 161 Classification into groups . . . . . . . . . . . . . . . . . 161
ISOFIX system . . . . . . . . . . . . . . . . . . . . . . . . . . . 164
Use of child safety seats . . . . . . . . . . . . . . . . . . 162
Children and safety . . . . . . . . . . . . . . . . . . . . . . . . . . 159
Chrome parts . . . . . . . . . . . . . . . . . . . . . . . . . . . . . . . 187
Cigarette lighter . . . . . . . . . . . . . . . . . . . . . . . . . . . . . . . 85
Cleaning . . . . . . . . . . . . . . . . . . . . . . . . . . . . . . . . . . . . 185
Climatronic Defrosting windows . . . . . . . . . . . . . . . . . . . . . . 104
Recirculated air mode . . . . . . . . . . . . . . . . . . . . 103
Climatronic (automat ic air conditioning) . . . . . . 100
Clock . . . . . . . . . . . . . . . . . . . . . . . . . . . . . . . . . . . . . . . . . 18
Clothes hooks . . . . . . . . . . . . . . . . . . . . . . . . . . . . . . . . . 93
Cockpit General view . . . . . . . . . . . . . . . . . . . . . . . . . . . . . . . 9
Compartments . . . . . . . . . . . . . . . . . . . . . . . . . . . . . . . . 86
Computer . . . . . . . . . . . . . . . . . . . . . . . . . . . . . . . . . . . . 19
Connection to the internet . . . . . . . . . . . . . . . . . . . 138
Convenience operation . . . . . . . . . . . . . . . . . . . . . . . . 48
Converting/masking over headlights . . . . . . . . . . 180
Coolant . . . . . . . . . . . . . . . . . . . . . . . . . . . . . . . . . . . . . 200 replenishing . . . . . . . . . . . . . . . . . . . . . . . . . . . . . 201
Warning light . . . . . . . . . . . . . . . . . . . . . . . . . . . . . . 31
Coolant level Warning light . . . . . . . . . . . . . . . . . . . . . . . . . . . . . . 31
Coolant quantity Warning light . . . . . . . . . . . . . . . . . . . . . . . . . . . . . . 31
Coolant temperature gauge . . . . . . . . . . . . . . . . . . . . 16 Coolant temperature/coolant level
Warning light . . . . . . . . . . . . . . . . . . . . . . . . . . . . . 31
Cornering lights . . . . . . . . . . . . . . . . . . . . . . . . . . . . . . 53
Correct seated position . . . . . . . . . . . . . . . . . . . . . . 142
Counter for distance driven . . . . . . . . . . . . . . . . . . . 17
Cruise control system . . . . . . . . . . . . . . . . . . . . . . . . 113 Warning light . . . . . . . . . . . . . . . . . . . . . . . . . . . . . 29
Cup holder front . . . . . . . . . . . . . . . . . . . . . . . . . . . . . . . . . . . . . 82
rear . . . . . . . . . . . . . . . . . . . . . . . . . . . . . . . . . . . . . . 83
DDaylight driving lights . . . . . . . . . . . . . . . . . . . . . . . . . 52
Deactivatingan airbag . . . . . . . . . . . . . . . . . . . . . . . . . . . . . . . . 157
Deactivating an airbag . . . . . . . . . . . . . . . . . . . . . . . 157
Defrosting rear window . . . . . . . . . . . . . . . . . . . . . . . 59
De-icing the windows . . . . . . . . . . . . . . . . . . . . . . . . 187
Detachable towing device . . . . . . . . . . . . . . . . . . . . 184
Diesel . . . . . . . . . . . . . . . . . . . . . . . . . . . . . . . . . . . . . . 194
Diesel engines Starting the engine . . . . . . . . . . . . . . . . . . . . . . . 109
Diesel particle filter . . . . . . . . . . . . . . . . . . . . . . . . . . 173 Warning light . . . . . . . . . . . . . . . . . . . . . . . . . . . . . 29
Digital clock . . . . . . . . . . . . . . . . . . . . . . . . . . . . . . . . . . 18
Direction indicators . . . . . . . . . . . . . . . . . . . . . . . . . . . 57 Warning light . . . . . . . . . . . . . . . . . . . . . . . . . . . . . 28
Display . . . . . . . . . . . . . . . . . . . . . . . . . . . . . . . . . . . . . . 22
Displays . . . . . . . . . . . . . . . . . . . . . . . . . . . . . . . . . . . . . 15
Distance driven . . . . . . . . . . . . . . . . . . . . . . . . . . . . . . 17
Door Child safety lock . . . . . . . . . . . . . . . . . . . . . . . . . . 38 Driving economically . . . . . . . . . . . . . . . . . . . . . . . . 176
EEDL . . . . . . . . . . . . . . . . . . . . . . . . . . . . . . . . . . . . . . . . . 168
Electric power-operated window
Operational faults . . . . . . . . . . . . . . . . . . . . . . . . . 48
Electric sliding/tilting roof . . . . . . . . . . . . . . . . . . . . . 48
Electrically adjustable exterior mirror . . . . . . . . . . . 65
Electronic Differential Lock . . . . . . . . . . . . . . . . . . . 168
Electronic immobiliser . . . . . . . . . . . . . . . . . . . . . . . . 38
Electronic stability programme . . . . . . . . . . . . . . . 167
Electronic stability programme (ESP) Warning light . . . . . . . . . . . . . . . . . . . . . . . . . . . . . 32
Engine starting . . . . . . . . . . . . . . . . . . . . . . . . . . . . . . . . . . 108
switching off . . . . . . . . . . . . . . . . . . . . . . . . . . . . . 109
Engine compartment Safety information . . . . . . . . . . . . . . . . . . . . . . . . 197
Engine electronics Warning light . . . . . . . . . . . . . . . . . . . . . . . . . . . . . 31
Engine oil . . . . . . . . . . . . . . . . . . . . . . . . . . . . . . . . . . . 198 Changing . . . . . . . . . . . . . . . . . . . . . . . . . . . . . . . . 199
changing . . . . . . . . . . . . . . . . . . . . . . . . . . . . . . . . 199
check . . . . . . . . . . . . . . . . . . . . . . . . . . . . . . . . . . . 198
replenishing . . . . . . . . . . . . . . . . . . . . . . . . . . . . . 199
Warning light . . . . . . . . . . . . . . . . . . . . . . . . . . . . . 30
Engine oil level Warning light . . . . . . . . . . . . . . . . . . . . . . . . . . . . . 35
Engine revolutions counter . . . . . . . . . . . . . . . . . . . . 15
Environment . . . . . . . . . . . . . . . . . . . . . . . . . . . . . . . . 176
Environmental compatibility . . . . . . . . . . . . . 176, 179
s43s.1.book Page 264 Thursday, May 13, 2010 1:21 PM