lock SKODA OCTAVIA 2012 2.G / (1Z) Owner's Guide
[x] Cancel search | Manufacturer: SKODA, Model Year: 2012, Model line: OCTAVIA, Model: SKODA OCTAVIA 2012 2.G / (1Z)Pages: 222, PDF Size: 13.52 MB
Page 42 of 222
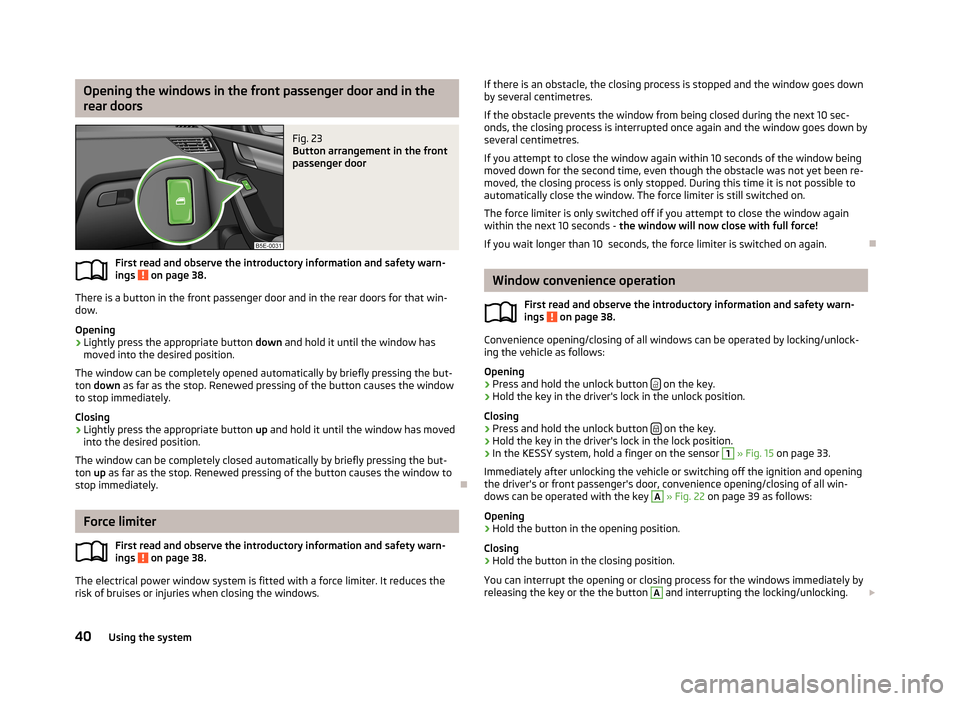
Opening the windows in the front passenger door and in the
rear doorsFig. 23
Button arrangement in the front
passenger door
First read and observe the introductory information and safety warn-
ings on page 38.
There is a button in the front passenger door and in the rear doors for that win- dow.
Opening
›
Lightly press the appropriate button down and hold it until the window has
moved into the desired position.
The window can be completely opened automatically by briefly pressing the but- ton down as far as the stop. Renewed pressing of the button causes the window
to stop immediately.
Closing
›
Lightly press the appropriate button up and hold it until the window has moved
into the desired position.
The window can be completely closed automatically by briefly pressing the but-
ton up as far as the stop. Renewed pressing of the button causes the window to
stop immediately.
Force limiter
First read and observe the introductory information and safety warn-ings
on page 38.
The electrical power window system is fitted with a force limiter. It reduces therisk of bruises or injuries when closing the windows.
If there is an obstacle, the closing process is stopped and the window goes down
by several centimetres.
If the obstacle prevents the window from being closed during the next 10 sec- onds, the closing process is interrupted once again and the window goes down by several centimetres.
If you attempt to close the window again within 10 seconds of the window being
moved down for the second time, even though the obstacle was not yet been re-
moved, the closing process is only stopped. During this time it is not possible to automatically close the window. The force limiter is still switched on.
The force limiter is only switched off if you attempt to close the window againwithin the next 10 seconds - the window will now close with full force!
If you wait longer than 10 seconds, the force limiter is switched on again.
Window convenience operation
First read and observe the introductory information and safety warn-ings
on page 38.
Convenience opening/closing of all windows can be operated by locking/unlock-ing the vehicle as follows:
Opening
›
Press and hold the unlock button on the key.
›
Hold the key in the driver's lock in the unlock position.
Closing
›
Press and hold the unlock button on the key.
›
Hold the key in the driver's lock in the lock position.
›
In the KESSY system, hold a finger on the sensor
1
» Fig. 15 on page 33.
Immediately after unlocking the vehicle or switching off the ignition and opening
the driver's or front passenger's door, convenience opening/closing of all win-
dows can be operated with the key
A
» Fig. 22 on page 39 as follows:
Opening
›
Hold the button in the opening position.
Closing
›
Hold the button in the closing position.
You can interrupt the opening or closing process for the windows immediately by
releasing the key or the the button
A
and interrupting the locking/unlocking.
40Using the system
Page 43 of 222
The convenience opening of the windows by means of the key in the driver's/
front passenger's lock is only possible within 45 seconds of deactivating or acti-
vating the alarm system.
Setting options
Information on the setting » operating instructions for Infotainment , chapter Set-
ting vehicle systems (CAR button) .
Operational faults in the automatic power windows
First read and observe the introductory information and safety warn-
ings
on page 38.
The automatic power windows do not work if the vehicle battery was disconnec-
ted and connected while a window is open. The system must be activated.
Proceed as follows in order to re-establish the function:
›
Switch on the ignition.
›
Pull the top edge of the button and close the window.
›
Release the button.
›
Pull the relevant button upwards again for approx. 3 seconds, and keep it press-ed down.
In the winter, ice accumulating on the surface of the window may cause there to be more resistance when closing the window. The window will stop and move
back several centimetres.
It is necessary to deactivate the force limiter to close the window » page 40.
Power panoramic sliding/sliding tilting roof
Introductory information
The power panoramic sliding/tilting roof (abbreviated in the following as 'sliding/
tilting roof'), can only be when the ignition is turned on and when the outdoor temperature is higher than -20 °C.
The sliding/tilting roof can still be operated for approx. 10 minutes after switching the ignition off. However, as soon as the driver or front passenger's door is
opened it is no longer possible to operate the sliding/tilting roof.
CAUTION■ Always close the sliding/tilting roof before disconnecting the battery.■If the battery has been disconnected and reconnected, it is possible that the
sliding/tilting roof does not operate correctly. Next, move the rotary switch into
position A
» Fig. 24 on page 41, pull it, and hold onto the recess downwards
and forwards tightly. The sliding/tilting roof opens and closes again after around 10 seconds. Do not release the control dial until it has done so.
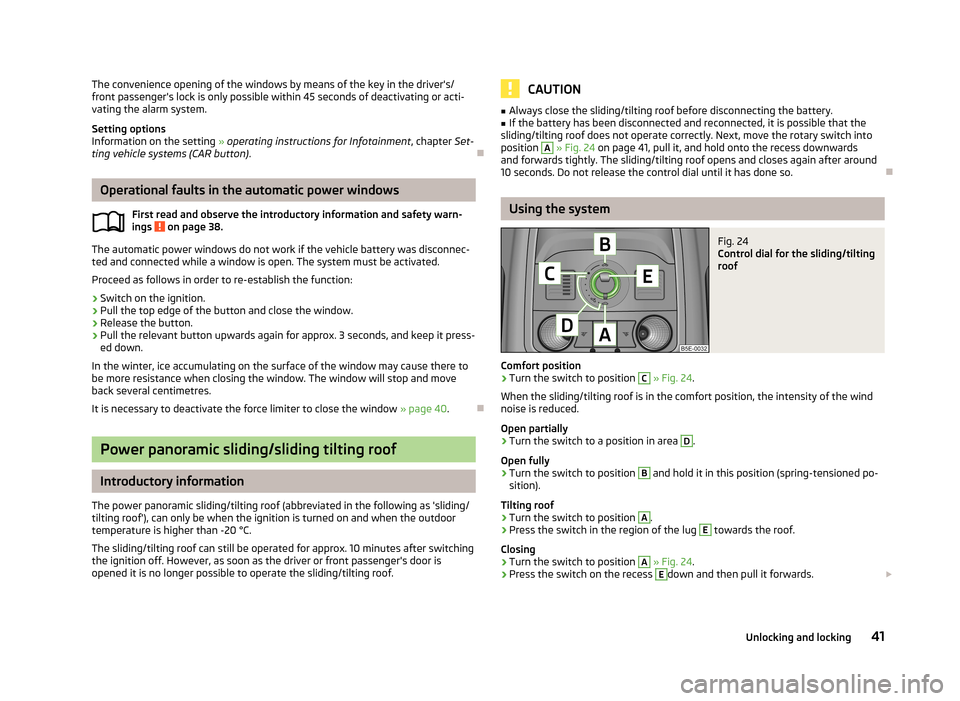
Using the system
Fig. 24
Control dial for the sliding/tilting
roof
Comfort position
›
Turn the switch to position
C
» Fig. 24 .
When the sliding/tilting roof is in the comfort position, the intensity of the wind noise is reduced.
Open partially
›
Turn the switch to a position in area
D
.
Open fully
›
Turn the switch to position
B
and hold it in this position (spring-tensioned po-
sition).
Tilting roof
›
Turn the switch to position
A
.
›
Press the switch in the region of the lug
E
towards the roof.
Closing
›
Turn the switch to position
A
» Fig. 24 .
›
Press the switch on the recess
E
down and then pull it forwards.
41Unlocking and locking
Page 44 of 222
Force limiter
The sliding/tilting roof is fitted with a force limiter. The sliding/tilting roof stops and moves back several centimetres when it cannot be closed because there is
something in the way (e.g. ice). The sliding/tilting roof can be fully closed without
a force limiter by pressing the switch on the recess down and then pushing it for- ward until the sliding/tilting roof is fully closed »
.
WARNINGWhen closing the sliding/tilting roof proceed with caution to avoid causing
crushing injuries - risk of injury!
CAUTION
During the winter it may be necessary to remove any ice and snow in the vicinity
of the sliding/tilting roof before opening it to prevent any damage to the opening
mechanism.
Convenience operating feature of the sliding/tilting roof
The sliding/tilting roof can be operated by locking/unlocking using the key or us-
ing the KESSY system with the aid of the sensor
1
» Fig. 15 on page 33.
Closing
›
Press and hold the button on the key or hold the key in the locking cylinder
of the driver's door in the lock position, or with the KESSY system, keep your
finger on the sensor
1
» Fig. 15 on page 33 » .
By releasing the lock or lifting your finger off the sensor
1
when using the KESSY
system, the closing process is immediately interrupted.
Tilting roof
›
Press and hold the unlock button on the key.
WARNINGClose the sliding/tilting roof carefully - risk of injury! The force limiter does not
operate with the convenience closing.
Note
The sliding/tilting roof cannot be opened using the convenience operating fea-
ture.
42Using the system
Page 46 of 222
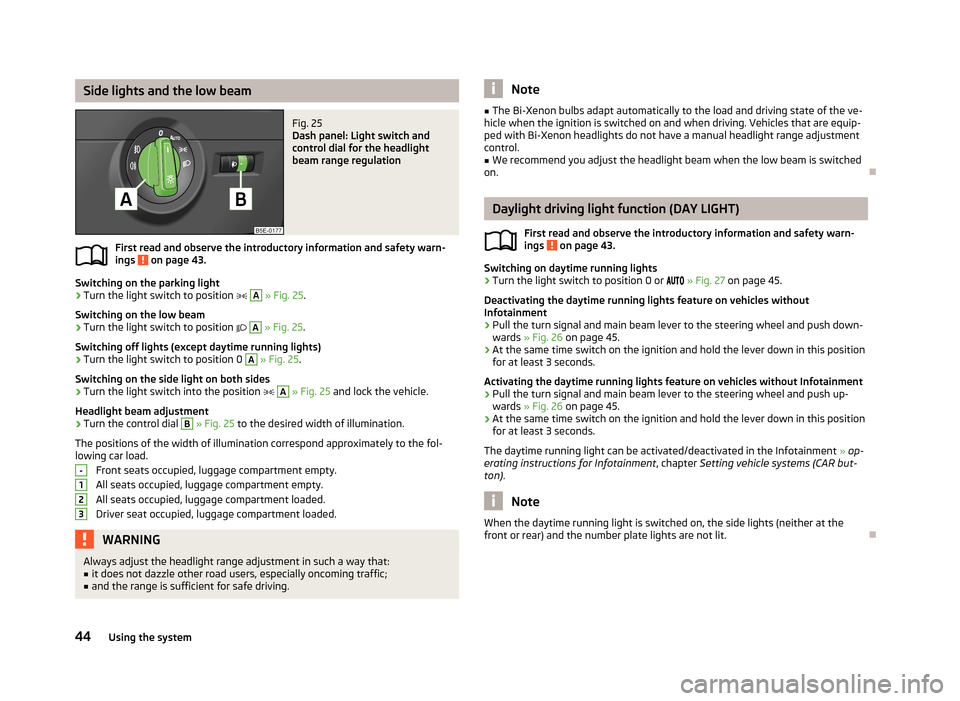
Side lights and the low beamFig. 25
Dash panel: Light switch and
control dial for the headlight
beam range regulation
First read and observe the introductory information and safety warn- ings on page 43.
Switching on the parking light
›
Turn the light switch to position
A
» Fig. 25 .
Switching on the low beam
›
Turn the light switch to position
A
» Fig. 25 .
Switching off lights (except daytime running lights)
›
Turn the light switch to position 0
A
» Fig. 25 .
Switching on the side light on both sides
›
Turn the light switch into the position
A
» Fig. 25 and lock the vehicle.
Headlight beam adjustment
›
Turn the control dial
B
» Fig. 25 to the desired width of illumination.
The positions of the width of illumination correspond approximately to the fol-
lowing car load.
Front seats occupied, luggage compartment empty.All seats occupied, luggage compartment empty.All seats occupied, luggage compartment loaded.
Driver seat occupied, luggage compartment loaded.
WARNINGAlways adjust the headlight range adjustment in such a way that:■it does not dazzle other road users, especially oncoming traffic;■
and the range is sufficient for safe driving.-123Note■ The Bi-Xenon bulbs adapt automatically to the load and driving state of the ve-
hicle when the ignition is switched on and when driving. Vehicles that are equip- ped with Bi-Xenon headlights do not have a manual headlight range adjustment
control.■
We recommend you adjust the headlight beam when the low beam is switched
on.
Daylight driving light function (DAY LIGHT)
First read and observe the introductory information and safety warn-ings
on page 43.
Switching on daytime running lights
›
Turn the light switch to position 0 or
» Fig. 27 on page 45.
Deactivating the daytime running lights feature on vehicles without
Infotainment
›
Pull the turn signal and main beam lever to the steering wheel and push down-
wards » Fig. 26 on page 45.
›
At the same time switch on the ignition and hold the lever down in this position
for at least 3 seconds.
Activating the daytime running lights feature on vehicles without Infotainment
›
Pull the turn signal and main beam lever to the steering wheel and push up- wards » Fig. 26 on page 45.
›
At the same time switch on the ignition and hold the lever down in this position
for at least 3 seconds.
The daytime running light can be activated/deactivated in the Infotainment » op-
erating instructions for Infotainment , chapter Setting vehicle systems (CAR but-
ton) .
Note
When the daytime running light is switched on, the side lights (neither at the
front or rear) and the number plate lights are not lit.
44Using the system
Page 51 of 222
If the vehicle is not fitted with fog lights, the rear fog light is switched on by pull-
ing out the light switch directly to the position 2. This switch only has one posi-
tion.
The warning light lights up in the instrument cluster when the rear fog light is
switched on » page 12.
When the rear fig light is switched on in towing mode, only the rear fog light of the trailer will light up. This is only the case when the trailer is coupled to a facto-
ry-fitted towing device/a towing device from ŠKODA Original accessories.
COMING HOME/LEAVING HOME function
First read and observe the introductory information and safety warn-ings
on page 43.
In poor visibility conditions, this function makes it possible to automatically
switch on the lights for a short time after leaving the vehicle or when approach-
ing the vehicle.
The intensity of the surrounding light for switching on the lights is controlled
with the light sensor in the interior mirror holder.
Switching on the COMING HOME function
›
Turn the light switch into position
» Fig. 27 on page 45.
›
Switch off the ignition.
The light switches on after opening the driver's door.
Switching off the COMING HOME function
›
Close all doors and the luggage compartment lid.
The light switches off after the pre-set time has passed.
If a door or the boot lid remains open, the light goes out after 60 seconds.
Switching on the LEAVING HOME function
›
Before leaving the vehicle, turn the light switch into position
» Fig. 27 on
page 45.
The light switches on after unlocking the vehicle with the remote control.
Switching off the LEAVING HOME function
The light switches off after the pre-set time has passed or before the pre-set
time has lapsed after the ignition is switched on or the vehicle is locked.
The COMING HOME/LEAVING HOME function can be configured in the Infotain-
ment » operating instructions for Infotainment , chapter Setting vehicle systems
(CAR button) .
Depending on the equipment fitted the COMING HOME/LEAVING HOME function switches on the following lights:
› Parking lights;
› Low beam;
› Entry lighting in the exterior mirrors;
› Licence plate light.
CAUTION
Do not affix any stickers or similar objects in front of the light sensor on the wind-
screen, so as not to impair or disable the COMING HOME/LEAVING HOME function.
Note
If the COMING HOME/LEAVING HOME function is switched on continuously, the
battery will be heavily discharged particularly over short distances.
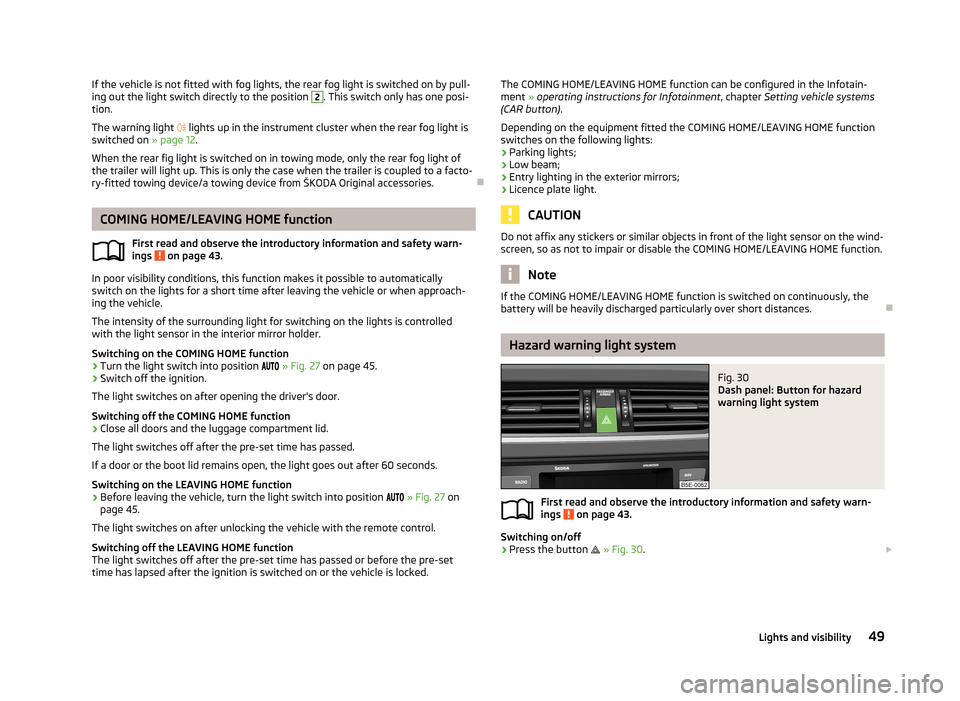
Hazard warning light system
Fig. 30
Dash panel: Button for hazard
warning light system
First read and observe the introductory information and safety warn-
ings on page 43.
Switching on/off
›
Press the button
» Fig. 30 .
49Lights and visibility
Page 53 of 222
Interior light
Interior lights at the front
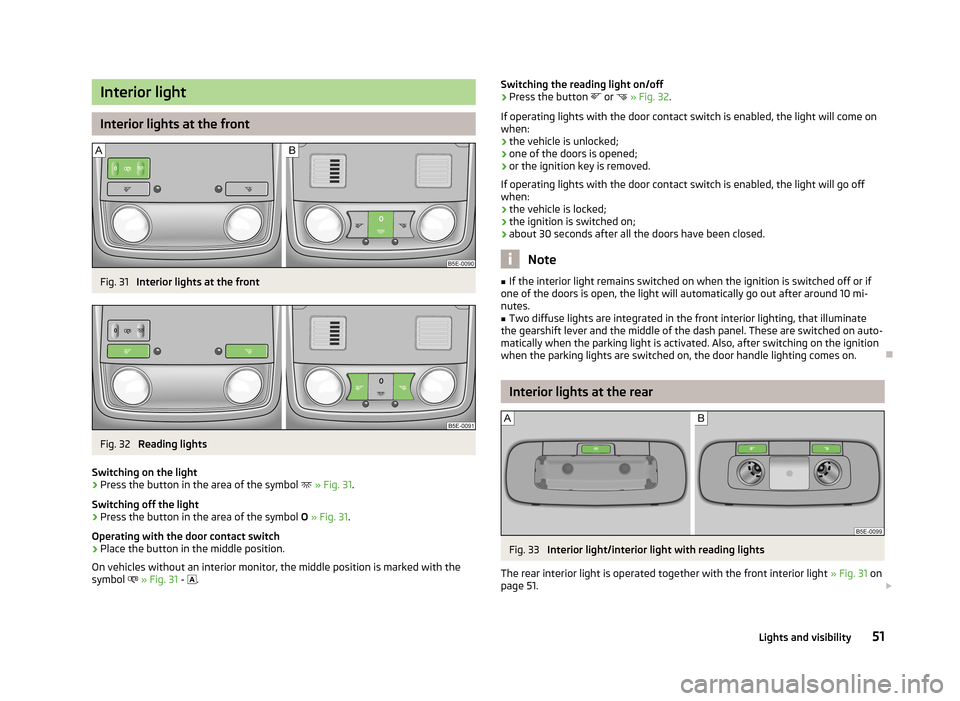
Fig. 31
Interior lights at the front
Fig. 32
Reading lights
Switching on the light
›
Press the button in the area of the symbol
» Fig. 31 .
Switching off the light
›
Press the button in the area of the symbol O » Fig. 31 .
Operating with the door contact switch
›
Place the button in the middle position.
On vehicles without an interior monitor, the middle position is marked with the symbol
» Fig. 31 -
.
Switching the reading light on/off›Press the button
or » Fig. 32 .
If operating lights with the door contact switch is enabled, the light will come on
when:
› the vehicle is unlocked;
› one of the doors is opened;
› or the ignition key is removed.
If operating lights with the door contact switch is enabled, the light will go off
when:
› the vehicle is locked;
› the ignition is switched on;
› about 30 seconds after all the doors have been closed.
Note
■
If the interior light remains switched on when the ignition is switched off or if
one of the doors is open, the light will automatically go out after around 10 mi- nutes.■
Two diffuse lights are integrated in the front interior lighting, that illuminate
the gearshift lever and the middle of the dash panel. These are switched on auto-
matically when the parking light is activated. Also, after switching on the ignition when the parking lights are switched on, the door handle lighting comes on.
Interior lights at the rear
Fig. 33
Interior light/interior light with reading lights
The rear interior light is operated together with the front interior light » Fig. 31 on
page 51.
51Lights and visibility
Page 54 of 222

Switching the light on/off›Press the button » Fig. 33 - .
Switching the reading light on/off›
Press the button or
» Fig. 33 - .
Front door warning light
Fig. 34
Front door: Warning light
The warning light is located in the lower door trim panel » Fig. 34.
The light switches on/off when the front door is opened or closed.
Note
If the door is open and the ignition switched off, the light will extinguish auto-
matically after around 10 minutes.
Entry lighting
The lighting is positioned on the bottom edge of the exterior mirror and illumi- nates the entry area of the front door.
The light comes on after the vehicle has been unlocked or on opening the front
door. The lighting goes out within around 30 seconds after the front door is
closed or the ignition is switched on.
WARNINGIf the entry light is on, do not touch its cover - risk of burns!NoteIf the door is open and the ignition switched off, the light will extinguish auto-
matically after around 10 minutes.
Visibility
Windscreen and rear window heater
Fig. 35
Buttons for the front and rear window heater/manual air-condition-
ing system, heating
Switching the windscreen heater on/off
›
Press the button
» Fig. 35 .
The indicator light in or underneath the button lights up/goes out.
Switching the rear window heater on/off
›
Press the button
» Fig. 35 .
The indicator light in or underneath the button lights up/goes out.
The windscreen and rear window heater only operates when the engine is run- ning.
The windscreen and rear window heater automatically switches off after approxi-
mately 10 minutes.
52Using the system
Page 58 of 222
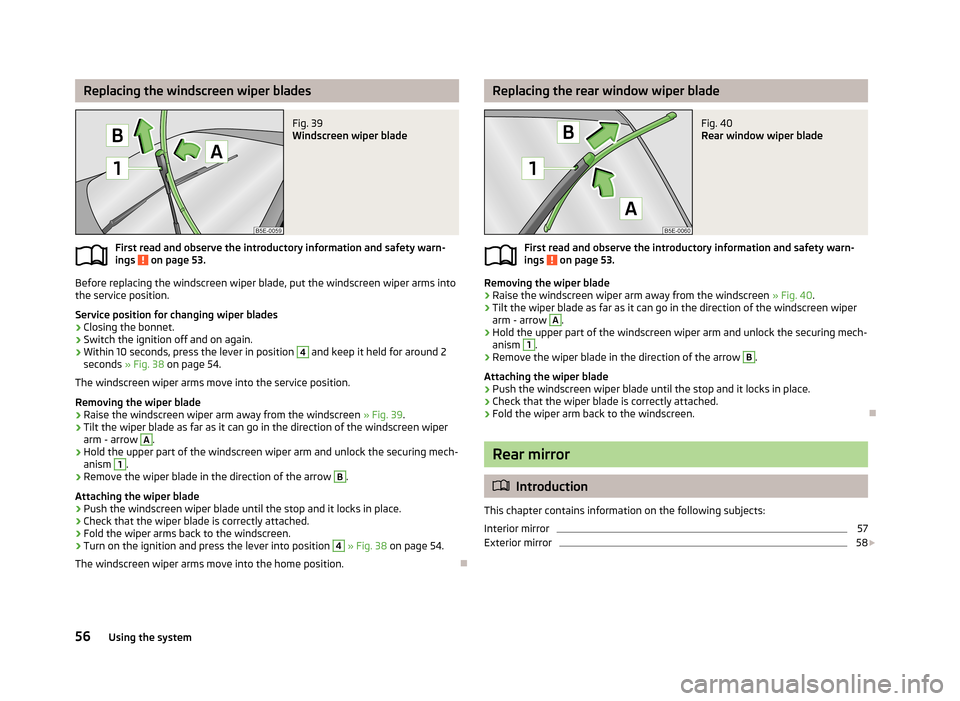
Replacing the windscreen wiper bladesFig. 39
Windscreen wiper blade
First read and observe the introductory information and safety warn-ings on page 53.
Before replacing the windscreen wiper blade, put the windscreen wiper arms into
the service position.
Service position for changing wiper blades
›
Closing the bonnet.
›
Switch the ignition off and on again.
›
Within 10 seconds, press the lever in position
4
and keep it held for around 2
seconds » Fig. 38 on page 54.
The windscreen wiper arms move into the service position.
Removing the wiper blade
›
Raise the windscreen wiper arm away from the windscreen » Fig. 39.
›
Tilt the wiper blade as far as it can go in the direction of the windscreen wiper
arm - arrow
A
.
›
Hold the upper part of the windscreen wiper arm and unlock the securing mech-
anism
1
.
›
Remove the wiper blade in the direction of the arrow
B
.
Attaching the wiper blade
›
Push the windscreen wiper blade until the stop and it locks in place.
›
Check that the wiper blade is correctly attached.
›
Fold the wiper arms back to the windscreen.
›
Turn on the ignition and press the lever into position
4
» Fig. 38 on page 54.
The windscreen wiper arms move into the home position.
Replacing the rear window wiper bladeFig. 40
Rear window wiper blade
First read and observe the introductory information and safety warn- ings on page 53.
Removing the wiper blade
›
Raise the windscreen wiper arm away from the windscreen » Fig. 40.
›
Tilt the wiper blade as far as it can go in the direction of the windscreen wiper
arm - arrow
A
.
›
Hold the upper part of the windscreen wiper arm and unlock the securing mech-
anism
1
.
›
Remove the wiper blade in the direction of the arrow
B
.
Attaching the wiper blade
›
Push the windscreen wiper blade until the stop and it locks in place.
›
Check that the wiper blade is correctly attached.
›
Fold the wiper arm back to the windscreen.
Rear mirror
Introduction
This chapter contains information on the following subjects:
Interior mirror
57
Exterior mirror
58
56Using the system
Page 60 of 222

When the interior lights are switched on or the reverse gear is engaged, the mir-
ror always moves back into the basic position (not dimmed).
Do not attach external navigation devices on to the windscreen or in the vicinity
of the automatic dimming interior mirror » page 57,
in section Introduction .
Exterior mirror
Fig. 43
Inner part of door: Rotary knob
First read and observe the introductory information and safety warn-
ings on page 56.
Mirror heater
›
Set the rotary knob into the position
» Fig. 43 .
The mirror heater only operates when the engine is running and up to an outside temperature of +35 ℃.
Adjusting both mirrors in sync
›
Set the rotary dial into position
or, on right-hand drive vehicles, into position
» Fig. 43 . The movement of the mirror surface is identical to the movement of
the rotary knob.
The synchronous setting of both mirrors can be activated/deactivated in the Info-
tainment » operating instructions for Infotainment , chapter Setting vehicle sys-
tems (CAR button) .
Adjusting the front passenger's mirror
›
Set the rotary dial into position
or, on right-hand drive vehicles, into position
» Fig. 43 . The movement of the mirror surface is identical to the movement of
the rotary knob.
Switching off operating control
›
Set the rotary knob into the position
» Fig. 43 .
Folding-in both of the exterior mirrors with the rotary knob›Set the rotary knob into the position » Fig. 43 .
It is only possible to fold in both exterior mirrors when the ignition is switched on and at a speed of up to 50 km/h.
The mirrors are folded back into the driving position after the rotary knob is
turned from the position to a different one.
Folding-in both of the exterior mirrors using the remote control key›
Hold down the lock button on the remote control key, or when using the
KESSY system, keep your finger on the sensor
1
» Fig. 15 on page 33.
Folding in requires that all electrical power windows are working » page 41, Op-
erational faults in the automatic power windows .
The exterior mirror is folded back into the driving position when the ignition is
switched on.
Folding in of both mirrors can be activated/deactivated in the Infotainment » op-
erating instructions for Infotainment , chapter Setting vehicle systems (CAR but-
ton) .
Automatic dimming mirror
The exterior mirrors are dimmed together with the automatic dimming interior
mirror » page 57 .
Tilting surface of front passenger mirror
On vehicles fitted with the memory function for the driver seat » page 61, the
surface of the mirror tilts down slightly when the reverse gear is engaged and the rotary knob is in the position
or in position
on vehicles with right-hand
drive » Fig. 43 . This provides an aid in seeing the kerb of the pavement when
parking the car.
The mirror returns into its initial position, after the rotary knob is moved out of
the position
or position
on vehicles with right-hand drive, and put into another
position or if the speed is more than 15 km/h.
Tilting the surface of the front passenger mirror can be activated/deactivated in the Infotainment » operating instructions for Infotainment , chapter Setting vehi-
cle systems (CAR button) .
Memory function for mirrors
On vehicles fitted with the memory function for the driver seat » page 61 or the
memory function for the remote control key » page 61 it is possible to save the
position of the exterior mirror when saving the driver seat position.
58Using the system
Page 62 of 222
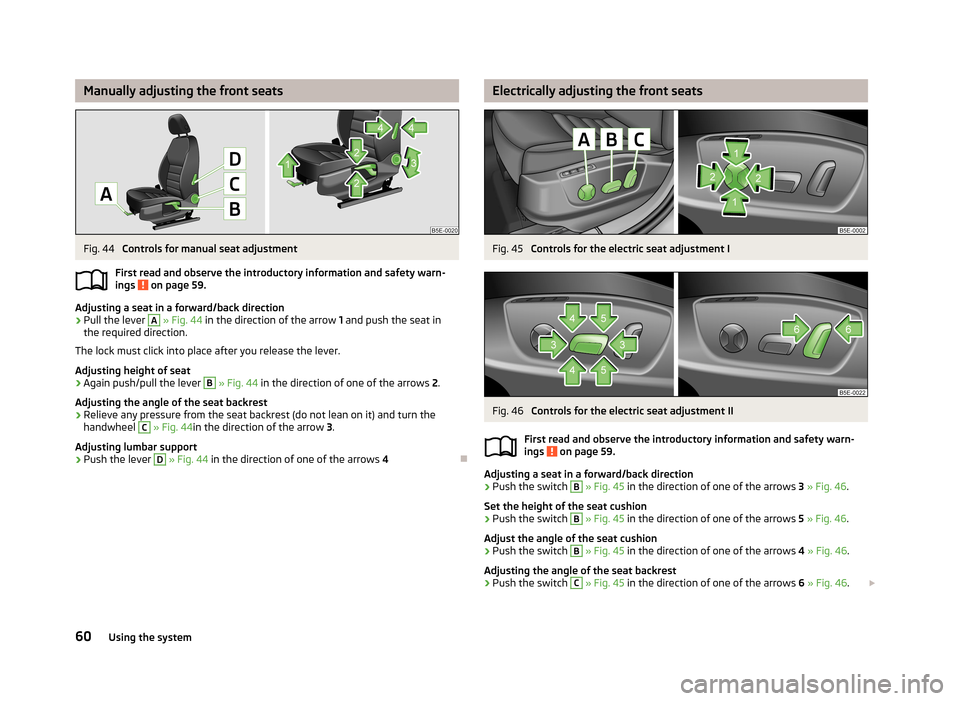
Manually adjusting the front seatsFig. 44
Controls for manual seat adjustment
First read and observe the introductory information and safety warn- ings
on page 59.
Adjusting a seat in a forward/back direction
›
Pull the lever
A
» Fig. 44 in the direction of the arrow 1 and push the seat in
the required direction.
The lock must click into place after you release the lever.
Adjusting height of seat
›
Again push/pull the lever
B
» Fig. 44 in the direction of one of the arrows 2.
Adjusting the angle of the seat backrest
›
Relieve any pressure from the seat backrest (do not lean on it) and turn the handwheel
C
» Fig. 44 in the direction of the arrow 3.
Adjusting lumbar support
›
Push the lever
D
» Fig. 44 in the direction of one of the arrows 4
Electrically adjusting the front seatsFig. 45
Controls for the electric seat adjustment I
Fig. 46
Controls for the electric seat adjustment II
First read and observe the introductory information and safety warn-
ings
on page 59.
Adjusting a seat in a forward/back direction
›
Push the switch
B
» Fig. 45 in the direction of one of the arrows 3 » Fig. 46 .
Set the height of the seat cushion
›
Push the switch
B
» Fig. 45 in the direction of one of the arrows 5 » Fig. 46 .
Adjust the angle of the seat cushion
›
Push the switch
B
» Fig. 45 in the direction of one of the arrows 4 » Fig. 46 .
Adjusting the angle of the seat backrest
›
Push the switch
C
» Fig. 45 in the direction of one of the arrows 6 » Fig. 46 .
60Using the system