audio SKODA RAPID SPACEBACK 2015 1.G Amundsen Bolero Infotainment System Manual
[x] Cancel search | Manufacturer: SKODA, Model Year: 2015, Model line: RAPID SPACEBACK, Model: SKODA RAPID SPACEBACK 2015 1.GPages: 84, PDF Size: 8.21 MB
Page 35 of 84
The ignition is switched on.
The Bluetooth ®
function of the device » page 16 and the telephone is
switched on.
The visibility of the device » page 16 and the telephone is switched on.
The telephone is within range of the Bluetooth ®
signal of the device.
The telephone is compatible with the device.
There is no device connected to the device using Apple CarPlay.
The pairing can be initiated from the device or from the telephone.
During the coupling and connecting process the device can demand the confir-
mation by the Bluetooth ®
profile (e.g., enable contact import, enable the test
messaging or the connection of an audio player or similar). The telephone dis-
play should be monitored to acknowledge any possible request.
Please refer to the compatibility of telephones as well as updates which are available for the Bluetooth ®
device, and are available on the ŠKODA Internet
pages.
http://infotainment.skoda-auto.com
Telephone Search
The telephone is not in the list of paired devices
The telephone can be searched for in one of the following ways.
›
If there is no connected telephone to the device, then press the button →
Find telephone .
›
If there is no telephone connected to the device, then press the button →
→ Find telephone .
A search for available devices starts. After about 30 seconds a list of found de-
vices appears, which is updated up to 1 minute after the start of the search ap-
pears.
›
If you do not want to wait for the display of the list press the function key
Results .
›
Select the desired telephone.
The telephone is in the list of coupled devices
If a telephone is connected with the device then proceed in one of the follow- ing ways.
›
Press the key
→
and select the desired phone.
or
›
Press the key
→ Select telephone and select the desired telephone.
or›
Press the key
→
→ Bluetooth → Paired devices and select the tele-
phone and a Bluetooth ®
connection profile » page 33.
Coupling - no telephone connected
›
Press the key
→ Find telephone .
A search for available Bluetooth ®
devices takes place.
›
Select the desired telephone.
›
Confirm the coupling.
After pairing confirmation the telephone is connected to the device as the
main telephone.
Coupling - connected telephone
›
Press the key
→
→ Find telephone .
A search for available Bluetooth ®
devices takes place.
›
Select the desired telephone.
The following menu appears in the screen.
■ Cancel - Cancel the coupling
■ Replace - Coupling and replacement of the main telephone
■ Add - Coupling as an additional telephone
› Select the desired connection type.
› Confirm the coupling.
After pairing confirmation the telephone connects to the device.
Coupling - two telephones connected
›
Press the key
→
→ Find telephone .
A search for available Bluetooth ®
devices takes place.
›
Select the desired telephone.
The following menu appears in the screen.
32Telephone
Page 36 of 84
■Cancel - Cancel the coupling
■ Main tel. - Changing the main telephone
■ Addition. tel. - Changing the auxiliary telephone
› Select the desired connection type.
› Confirm the coupling.
After pairing confirmation the telephone connects to the device.
Coupling from the telephone
When coupling from the telephone, follow the instructions in the telephone
owner's manual.
›
Search available Bluetooth ®
devices in your telephone.
›
Select the Bluetooth ®
device unit.
The device is displayed in the telephone to be connected to as SKODA BT .....
... is replaced with the last four symbols of the vehicle identification number
(VIN) of your vehicle.
›
Confirm the pairing request.
›
Confirm the pairing » page 33, Pairing confirmation .
After coupling confirmation the telephone is connected to the device as fol-
lows.
No telephone connected - The telephone connects as main telephone .
Telephone connected - The telephone connects as an auxiliary telephone.
Two connected phones - The phone is paired and connected only as an audio
player (with free audio profile).
Note
You can change the name of the Bluetooth ®
device » page 16 .
Pairing confirmation
Depending on the type of telephone, the coupling confirmation takes place in
one of the following ways.
Confirmation with the pairing from the device
Version 1
› Confirm the 6-digit PIN code displayed on the device screen and the tele-
phone display within 30 seconds on both the device and the telephone.
Version 2
› Confirm the coupling request in the telephone.
› Enter the 4 digit PIN code shown on the unit display into the telephone with-
in 30 seconds 1)
.
Confirmation with the pairing from the telephone
Version 1
› Confirm the coupling request on the device.
› Confirm the 6-digit PIN code displayed on the device screen and the tele-
phone display within 30 seconds on both the device and the telephone.
Version 2 › Enter the 4 - 16 digit PIN code into the telephone.
› Confirm the coupling request on the device.
› Enter the same PIN code into the device that is in the telephone and con-
firm 1)
.
Version 3
› Confirm the coupling request on the device.
› The device generates a 4-digit PIN code.
› Enter into the telephone the PIN generated by the device and confirm 1)
.
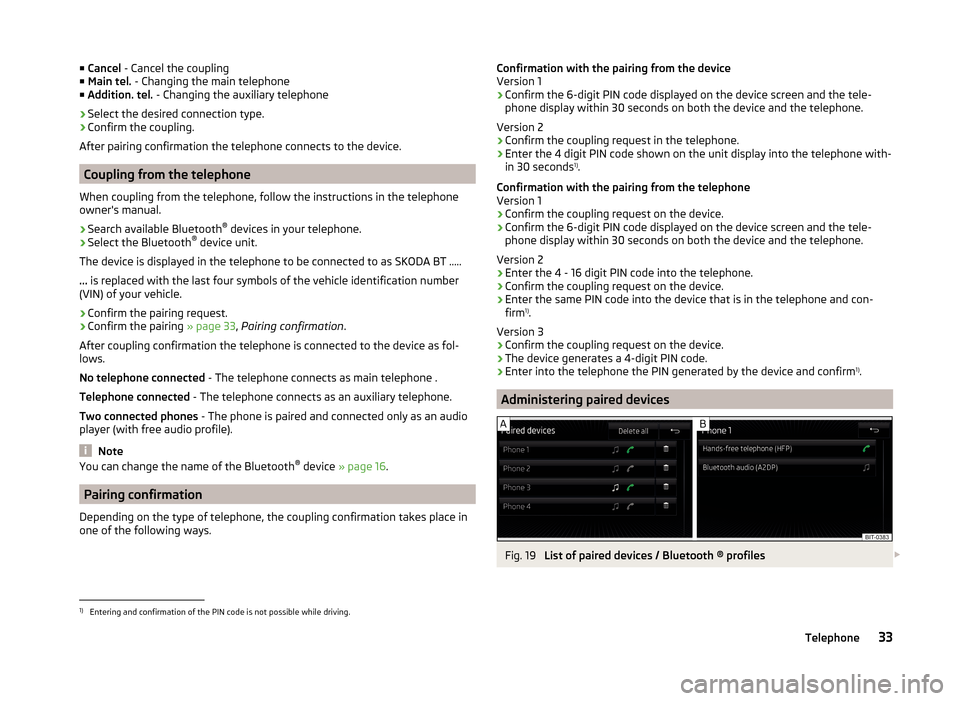
Administering paired devices
Fig. 19
List of paired devices / Bluetooth ® profiles
1)
Entering and confirmation of the PIN code is not possible while driving.
33Telephone
Page 37 of 84
Display list of blocked coupled devices›Press in the menu Telephone the function key → Bluetooth → Paired de-
vices .
In the list displayed the following symbol of the Bluetooth ®
profile » Fig. 19 -
may appear with some devices.SymbolIcon col- ourOperation
greyA device that supports the connection via the hands-
free profile (HFP).greenA device that is connected via the handsfree profile
(HFP).
greyA device that supports the connection via the audio
profile.whiteA device that is connected via the audio profile.
Connection set-up
› Select the device you want from the list of paired devices.
› Select the desired profile from the list of available Bluetooth ®
profiles
» Fig. 19 -
.
The subsequent connection is affected by whether another device is connec- ted or not connected by means of the desired profile.
Disconnection
› Select the device you want from the list of paired devices.
› Select the desired profile from the list of available Bluetooth ®
profiles
» Fig. 19 -
.
› Press the function key
Disconnect .
Delete the coupled device
› Select the device you want from the list of paired devices.
- Delete all device
- Delete the desired device
› Confirm the deletion by pressing the function key
Delete.
Note
The audio Bluetooth ®
profile can be turned off/on by pressing the button →
→ Bluetooth → Bluetooth audio (A2DP/AVRCP) . Delete allTelephone functions
Introduction
This chapter contains information on the following subjects:
Enter a telephone number and dial
34
List of telephone contacts
35
Manage preferred contacts
36
Call list
36
Telephone conversation
37
Conference
37
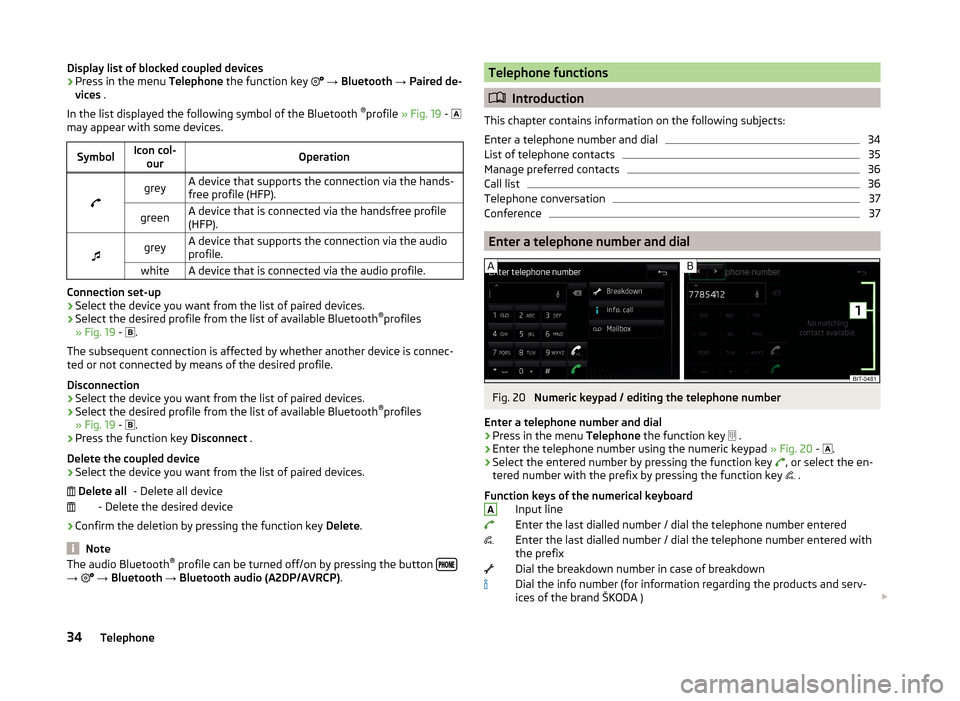
Enter a telephone number and dial
Fig. 20
Numeric keypad / editing the telephone number
Enter a telephone number and dial
›
Press in the menu Telephone the function key
.
›
Enter the telephone number using the numeric keypad
» Fig. 20 -
.
›
Select the entered number by pressing the function key
, or select the en-
tered number with the prefix by pressing the function key .
Function keys of the numerical keyboard Input line
Enter the last dialled number / dial the telephone number entered
Enter the last dialled number / dial the telephone number entered with
the prefix
Dial the breakdown number in case of breakdown
Dial the info number (for information regarding the products and serv-
ices of the brand ŠKODA )
A34Telephone
Page 44 of 84
The change of the preferred connection type takes affect only after reconnect-
ing the external device.
Disconnection
The following procedure for the disconnection does not apply for MirrorLink ™
.
› Press the function key in the main menu SmartLink
.
› In the list of connected devices press the function key
Disconnect.
Settings
Read and observe
on page 40 first.
›
Press the key
→
→
.
■ Select device - Display a list of connected devices
■ Pref. connection type: - Select the preferred connection type (if different
connection types are supported by the device)
■ Android Auto - Connection using the Android Auto ™
function
■ MirrorLink™ - Connection using the MirrorLink ™
function
■ Activate data transfer for ŠKODA apps - Activation / deactivation of the data
transfer for the connected device for ŠKODA applications
■ MirrorLink™ - Setting the display MirrorLink ™
- connection
■ Screen orientation: - Screen display
■ Landscape - Width display
■ Portrait - Height display
■ Rotated 180 degrees - Image reversed by 180°
■ Infotainment system keyboard prioritised - Turn on / off the device key-
board
Android Auto ™
Introduction
This chapter contains information on the following subjects:
Home Page
41
Function problems
42
The Android Auto ™
connection can be set up under the following conditions.
The ignition is switched on.
The unit is switched on.
The device to be connected is switched on.
Some applications require that the data connection in the connected device is
turned on.
By establishing the Android Auto ™
connection all existing Bluetooth ®
connec-
tions are terminated to the device and a Bluetooth ®
connection using the
Android Auto ™
is established to the device.
A device connected using Android Auto ™
cannot be used as an audio source in
the menu Media.
If route guidance is active at this moment in the device, then this is terminated
by starting the route guidance in the Android Auto ™
application. This is also
true reciprocally.
A list of devices and applications that the Android Aut ™
connection supports
can be found on the Google website.
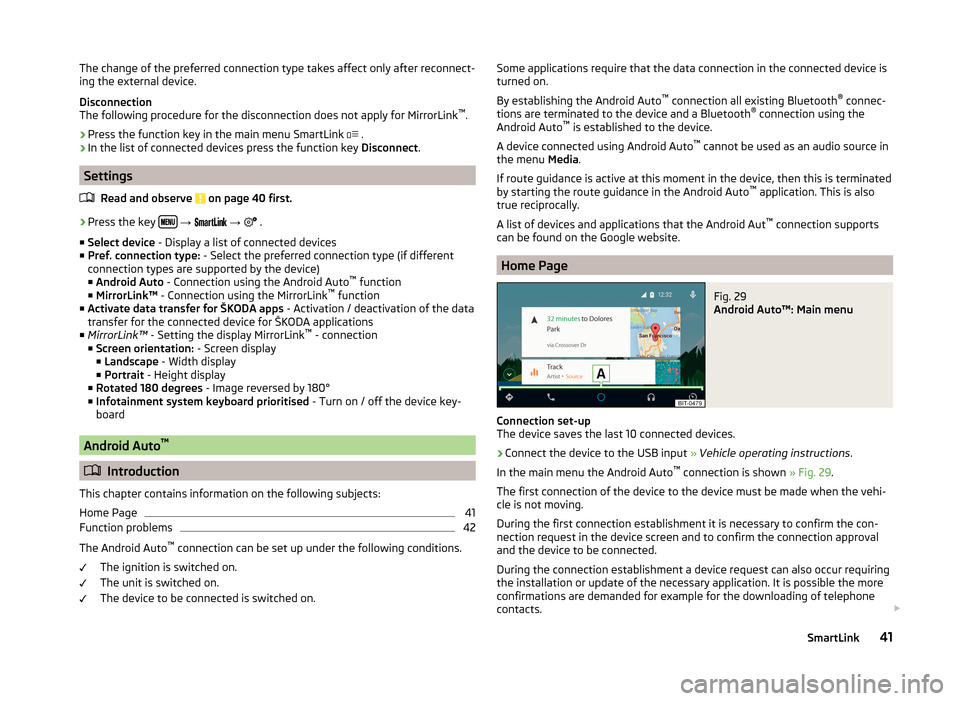
Home Page
Fig. 29
Android Auto™: Main menu
Connection set-up
The device saves the last 10 connected devices.
›
Connect the device to the USB input » Vehicle operating instructions .
In the main menu the Android Auto ™
connection is shown » Fig. 29.
The first connection of the device to the device must be made when the vehi- cle is not moving.
During the first connection establishment it is necessary to confirm the con-
nection request in the device screen and to confirm the connection approval
and the device to be connected.
During the connection establishment a device request can also occur requiring
the installation or update of the necessary application. It is possible the more
confirmations are demanded for example for the downloading of telephone
contacts.
41SmartLink
Page 45 of 84
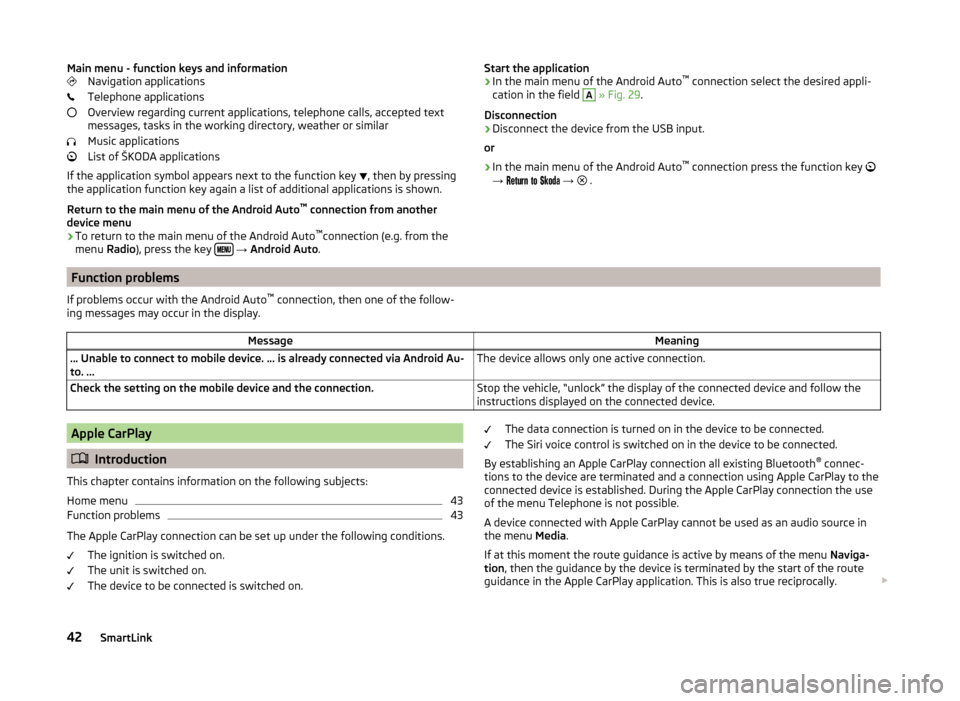
Main menu - function keys and informationNavigation applications
Telephone applications
Overview regarding current applications, telephone calls, accepted text
messages, tasks in the working directory, weather or similar
Music applications
List of ŠKODA applications
If the application symbol appears next to the function key
, then by pressing
the application function key again a list of additional applications is shown.
Return to the main menu of the Android Auto ™
connection from another
device menu
› To return to the main menu of the Android Auto ™
connection (e.g. from the
menu Radio), press the key
→ Android Auto .
Start the application
› In the main menu of the Android Auto ™
connection select the desired appli-
cation in the field A
» Fig. 29 .
Disconnection
› Disconnect the device from the USB input.
or
› In the main menu of the Android Auto ™
connection press the function key
→
→
.Function problems
If problems occur with the Android Auto ™
connection, then one of the follow-
ing messages may occur in the display.MessageMeaning… Unable to connect to mobile device. … is already connected via Android Au-
to. ...The device allows only one active connection.Check the setting on the mobile device and the connection.Stop the vehicle, “unlock” the display of the connected device and follow the
instructions displayed on the connected device.Apple CarPlay
Introduction
This chapter contains information on the following subjects:
Home menu
43
Function problems
43
The Apple CarPlay connection can be set up under the following conditions. The ignition is switched on.
The unit is switched on.
The device to be connected is switched on.
The data connection is turned on in the device to be connected.
The Siri voice control is switched on in the device to be connected.
By establishing an Apple CarPlay connection all existing Bluetooth ®
connec-
tions to the device are terminated and a connection using Apple CarPlay to the
connected device is established. During the Apple CarPlay connection the use
of the menu Telephone is not possible.
A device connected with Apple CarPlay cannot be used as an audio source in
the menu Media.
If at this moment the route guidance is active by means of the menu Naviga-
tion , then the guidance by the device is terminated by the start of the route
guidance in the Apple CarPlay application. This is also true reciprocally.
42SmartLink
Page 47 of 84
MirrorLink
Introduction
This chapter contains information on the following subjects:
Home menu
44
Operation
45
Function problems
45
The MirrorLink ™
connection can be set up under the following conditions.
The ignition is switched on.
The unit is switched on.
The device to be connected is switched on.
Some applications require that the data connection in the connected device is turned on.
If you want to use the device menu Telephone, then before establishing the
MirrorLink ™
connection with the device then connect the device first via Blue-
tooth ®
.
A device connected using MirrorLink ™
cannot be used as an audio source in the
menu Media.
If route guidance is active at this moment in the device, then this is not termi-
nated by starting the route guidance in the MirrorLink ™
application.
The list of available applications and devices, which support the MirrorLink ™
function, can be seed in the ŠKODA Internet pages www.infotainment.skoda-
auto.com.
Home menu
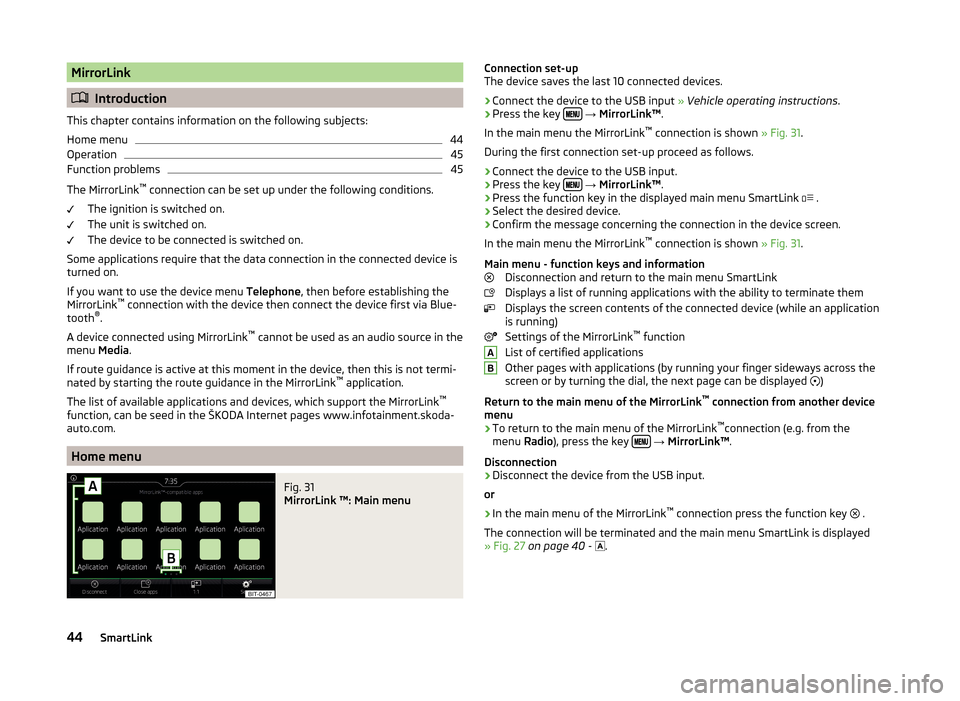
Fig. 31
MirrorLink ™: Main menu
Connection set-up
The device saves the last 10 connected devices.›
Connect the device to the USB input » Vehicle operating instructions .
›
Press the key
→ MirrorLink™ .
In the main menu the MirrorLink ™
connection is shown » Fig. 31.
During the first connection set-up proceed as follows.
›
Connect the device to the USB input.
›
Press the key
→ MirrorLink™ .
›
Press the function key in the displayed main menu SmartLink
.
›
Select the desired device.
›
Confirm the message concerning the connection in the device screen.
In the main menu the MirrorLink ™
connection is shown » Fig. 31.
Main menu - function keys and information Disconnection and return to the main menu SmartLink
Displays a list of running applications with the ability to terminate them
Displays the screen contents of the connected device (while an application
is running)
Settings of the MirrorLink ™
function
List of certified applications
Other pages with applications (by running your finger sideways across the
screen or by turning the dial, the next page can be displayed )
Return to the main menu of the MirrorLink ™
connection from another device
menu
› To return to the main menu of the MirrorLink ™
connection (e.g. from the
menu Radio), press the key
→ MirrorLink™ .
Disconnection
› Disconnect the device from the USB input.
or
› In the main menu of the MirrorLink ™
connection press the function key .
The connection will be terminated and the main menu SmartLink is displayed
» Fig. 27 on page 40 -
.
AB44SmartLink
Page 48 of 84
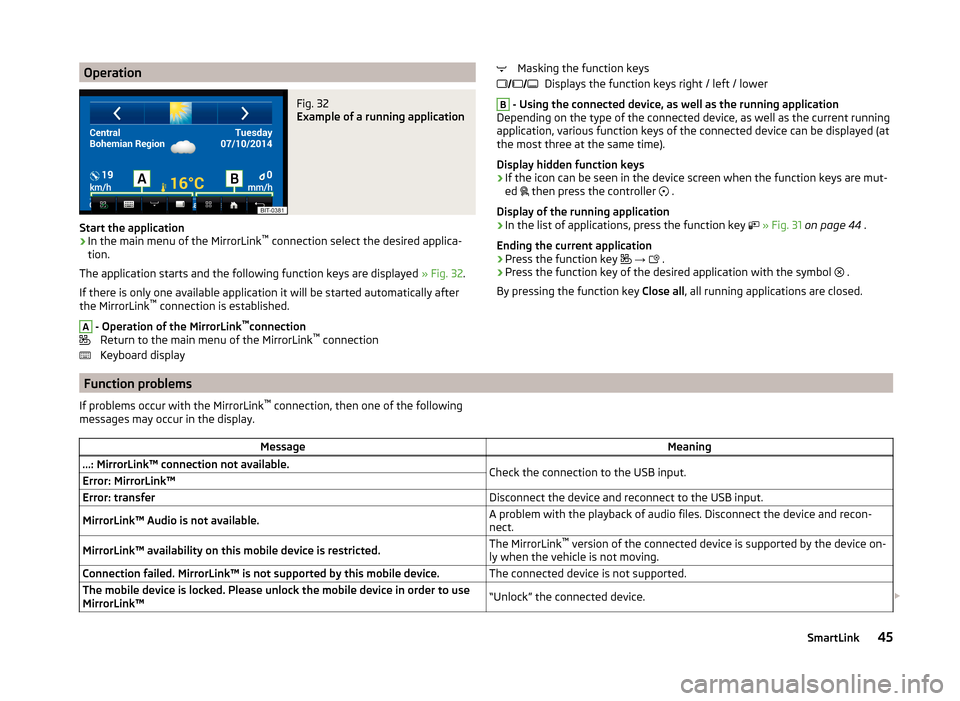
OperationFig. 32
Example of a running application
Start the application
›
In the main menu of the MirrorLink™
connection select the desired applica-
tion.
The application starts and the following function keys are displayed » Fig. 32.
If there is only one available application it will be started automatically after
the MirrorLink ™
connection is established.
A
- Operation of the MirrorLink ™
connection
Return to the main menu of the MirrorLink ™
connection
Keyboard display
Masking the function keys Displays the function keys right / left / lowerB
- Using the connected device, as well as the running application
Depending on the type of the connected device, as well as the current running
application, various function keys of the connected device can be displayed (at
the most three at the same time).
Display hidden function keys › If the icon can be seen in the device screen when the function keys are mut-
ed
then press the controller
.
Display of the running application
› In the list of applications, press the function key
» Fig. 31 on page 44 .
Ending the current application
› Press the function key
→
.
› Press the function key of the desired application with the symbol
.
By pressing the function key Close all, all running applications are closed.
Function problems
If problems occur with the MirrorLink ™
connection, then one of the following
messages may occur in the display.MessageMeaning…: MirrorLink™ connection not available.Check the connection to the USB input.Error: MirrorLink™Error: transferDisconnect the device and reconnect to the USB input.MirrorLink™ Audio is not available.A problem with the playback of audio files. Disconnect the device and recon-
nect.MirrorLink™ availability on this mobile device is restricted.The MirrorLink ™
version of the connected device is supported by the device on-
ly when the vehicle is not moving.Connection failed. MirrorLink™ is not supported by this mobile device.The connected device is not supported.The mobile device is locked. Please unlock the mobile device in order to use
MirrorLink™“Unlock” the connected device. 45SmartLink
Page 51 of 84

Pop-up windowsFig. 34
Extra window
Switch display on/off
›
Press in the Navigation menu the function key
→ Split screen .
The split screen can also be switched off by operating the function key.
Select extra window content
The display of some additional information is possible in the split screen
A
» Fig. 34 .
› Press the function key
.
› Select one of the following split screen menus.
■ Audio - Operation of the radio / media playback
■ Compass - Displays the current vehicle location in relation to the compass di-
rections
■ Häuf. Routes - Display of three most commonly travelled routes for the cur-
rent time and geographical position
■ Manoeuvre - Graphic display of driving recommendations (there is a route
guidance)
■ Position - Displays the geographical coordinates of the current vehicle loca-
tion
New destination
Introduction
This chapter contains information on the following subjects:
Enter destination
48
Enter POI
49
Enter destination on the map
49Enter destination on GPS coordinates49Enter destination in route50
This chapter covers the input options for a new destination target.
Enter destination
Fig. 35
Select a location
›
If no guidance takes place, then in the menu Navigation, press the function
key .
›
If
guidance takes place, then in the menu Navigation, press the function key
→ New dest./stopover .
›
Enter the address and confirm (when entering, the address can be checked in
the map by pressing the function key Map).
›
Press the function key Start.
If the menu for setting the alternative routes is turned on, the guidance for
this route type (most economic/fastest/shortest) must be selected before
starting.
If the destination entry occurs during route guidance, the destination change
must be confirmed by pressing the function key Start in addition to confirming
in the following menu that appears.
While entering the address, the device provides priority to towns which have
been previously entered. The list of these towns can be deleted as follows.
› Press in the
Navigation menu the function key
→ Manage memory → De-
lete user data → Entered cities .
Select a location
If in the country you entered there are several places with the same name,
then when you type, depending on the number of places found, a map will be
displayed with a list of the places » Fig. 35. This map can also be shown by
pressing the function key .
48Navigation (Amundsen)
Page 66 of 84
■ Avoid routes requiring toll stickers - Switch use of routes requiring toll
stickers on/off for route calculation
■ Available toll stickers - Selection of countries for which a valid toll sticker is
required (routes requiring toll stickers are used for route calculation)
Map
›
Press in the Navigation menu the function key
→ Map .
■ Lane guidance - Display of lane guidance on/off
■ Show favourites - Switch on/off the display of favourites
■ Show road signs - Switch on/off the display of traffic signs
■ Show POIs - Switch on/off the display of POIs
■ Select categories for POIs - Selection of displayed POIs (max 10 categories)
■ Show brands for POIs - Switch on/off the display company logos at the POIs
Fuel options
›
Press in the Navigation menu the function key
→ Fuel options .
■ Select preferred fuel station - Select your preferred fuel station brand (the
selected station brand will be displayed in the first three positions of the list)
■ Fuel warning - Switch on / off the display of the following warning (when the
fuel gauge reaches the reserve area)
Warning: fuel tank almost empty. Would you like to find a fuel station near-
by? with the following menu items.
› Cancel
- Close the window with the warning
› Find
- Find the nearest petrol station; by selecting the petrol station the
route guidance is started
Navigation announcements
›
Press in the Navigation menu the function key
→ Navigation announce-
ments .
■ Volume - Volume control of the navigation announcements
■ Entertainment fading (nav. announce.) - Setting the fading of the audio vol-
ume (e.g. radio volume.) with navigation announcements
■ No navigation sound during call - Enable / disable the playback of navigation
prompts during a telephone conversation
Advanced settings›
Press in the Navigation menu the function key
→ Advanced settings .
■ Time display: - Select the time display in the status line
■ Time of arrival - Estimated time of arrival at the destination
■ Travelling time - Estimated travelling time to the destination
■ Status line: - Selection of the target type for which the status line the route
and travel time are displayed according to the setting Time display: (the se-
lection also affects the target type displayed in the map » page 54)
■ Destination - Final destination
■ Next stopover - Next stopover
■ Note: national border crossed - Switching on/off the display for information
on national speed limits when crossing the national border
■ Demo mode - Switch on/off guidance in demo mode
■ Define demo mode starting point - Enter the start point of the route guid-
ance in the demo mode
■ Cancel - Cancel the entry
■ Position - Enter the current vehicle position as the starting point
■ Address - Enter an address as the starting point
Manage memory
›
Press in the Navigation menu the function key
→ Manage memory .
■ Sort by: - Setting the configuration of the phone book
■ Surname - Sort by contact name
■ Forename - Sort by contact's first name
■ Define home address - Enter the home address
■ Delete my POIs - Delete the custom POIs
■ Update my POIs - Update the custom POIs
■ Delete user data - Delete user data (by pressing the function key Delete and
confirming the deletion, the selected menu item is deleted) ■ Last destinations - Delete the last destinations
■ Dest. memory - Delete the stored destinations
■ Tour memory - Deletes the stored tours
■ My points of interest (Personal POI) - Delete the custom POIs
■ Entered cities - Delete the history of places already entered via the address
■ Home address - Delete the stored home address
■ Flagged destination - Delete the flagged destination
■ Most frequent routes - Deletion of the most travelled routes
63Navigation (Amundsen)
Page 69 of 84
■Tyre Pressure Loss Indicator - Tyre pressure monitoring function
■ SET - Storing the tyre pressure values
■ Winter tyres - Setting an alarm on reaching the speed limit for winter tyres
■ Speed warning - Switching the function Winter tyres on and off
■ Warning at - Setting the speed for the warning
Assistance systems
›
Press the key
→
→ Driver assistance .
■ ACC (adaptive cruise control) - Setting for the adaptive cruise control
■ Driving programme: - Set the vehicle acceleration when adaptive cruise
control is activated 1)
■ Normal - Normal
■ Sport - Sports
■ Eco - Economical
■ Last distance selected - Last selected distance on/off
■ Distance: - Set the distance monitoring to the vehicles ahead
■ Very close - Very small distance
■ Close - Small distance
■ Medium - Medium distance
■ Far - Large distance
■ Very far - Very large distance
■ Front Assist (ambient traffic monitor. sys.) - Set the assistant for distance
monitoring to the vehicles ahead
■ Active - Activate/deactivate the assistant
■ Advance warning (Version 1) - Activate/deactivate warning
■ Advance warning (Version 2) - Activating/deactivating and setting the dis-
tance level at which a warning occurs
■ Early - Longer distance
■ Medium - Medium distance
■ Late - Short distance
■ Off - Deactivation of the warning
■ Display distance warning - Activate/deactivate distance warnings
■ Lane Assist - Settings for Lane Assist
■ Active - Activate/deactivate the assistant
■ Adaptive lane guidance - Activate/deactivate adaptive lane guidance
■
Blind Spot Monitor - Activation / deactivation of the assistant “Blind Spot
Monitor”
■ Dynamic Road Sign Display - Settings for the Dynamic Road Sign Display
■ Show in instrument cluster - Activation/deactivation of the additional traf-
fic signs in the display of the instrument cluster
■ Trailer recognition (show road signs) - Activate/deactivate the Dynamic
Road Sign Display relevant for trailer operation
■ Top speed 2)
- Set the top speed for towing a trailer
■ Warning 2)
- Activation / deactivation and setting for the excessive speed
warning ■ Off - The warning is deactivated
■ At + 0 km/h - Warning when reaching the speed limit
■ At + 5 km/h - Warning when exceeding the speed limit by 5 km/h
■ At + 10 km/h - Warning when exceeding the speed limit by 10 km/h
■ At + 15 km/h - Warning when exceeding the speed limit by 15 km/h
■ Driver Alert System - Activate/deactivate the driver alert system
■ Proactive passenger protection - Activate/deactivate proactive passenger
protection
Parking and manoeuvring
›
Press the key
→
→ Parking and manoeuvring .
■ ParkPilot - Settings for the parking aid
■ Activate automatically - Activate/deactivate the compact parking aid dis-
play (when driving forward)
■ Front volume - Adjust the volume of the beeps for obstacle detection in
front
■ Front tone setting - Setting the pitch of the beeps for obstacle detection in
front
■ Rear volume - Set the volume level of the beeps for the rear obstacle de-
tection
■ Rear tone setting - Setting the pitch of the beeps for the rear obstacle de-
tection
■ Entertainment fading (parking) - Lowers the audio volume (e.g. radio vol-
ume) with activated parking aid
■ Rear Traffic Alert - Activate/deactivate the Rear Traffic Alert
1)
On vehicles with the choice of travel mode, this setting is done » Vehicle Owner's Manual , chapter Selec-
tion of travel mode (MODE button) .
2)
Applies for the Superb.
66Vehicle systems