change wheel SKODA SUPERB 2009 2.G / (B6/3T) User Guide
[x] Cancel search | Manufacturer: SKODA, Model Year: 2009, Model line: SUPERB, Model: SKODA SUPERB 2009 2.G / (B6/3T)Pages: 294, PDF Size: 21.33 MB
Page 196 of 294
Intelligent Technology
195
Using the system
Safety
Driving Tips
General Maintenance
Breakdown assistance
Technical Data
Traction control system (TCS) The traction control system prevents
the driven wheels from spinning
when accelerating.General The TCS makes it much easier, and sometimes at all possible, to start off, accelerate and climb a steep hill when the conditio
ns of the road surface are unfavourable.
Operating principle The TCS switches on automatically when th
e engine is started and then conducts a
self-test. The system monitors the speeds of the driven wheels with the aid of the ABS sensors. If the wheels are spinning, the force transmitted to the road surface is automatically adapted by redu
cing the engine speed. Th
is occurs at all speeds.
The TCS operates in combination with the ABS
⇒page 197. The TCS will not func-
tion if a fault exists in the ABS system. The TCS warning light lights up in the instrument cluster when there is a fault on the TCS
⇒page 38.
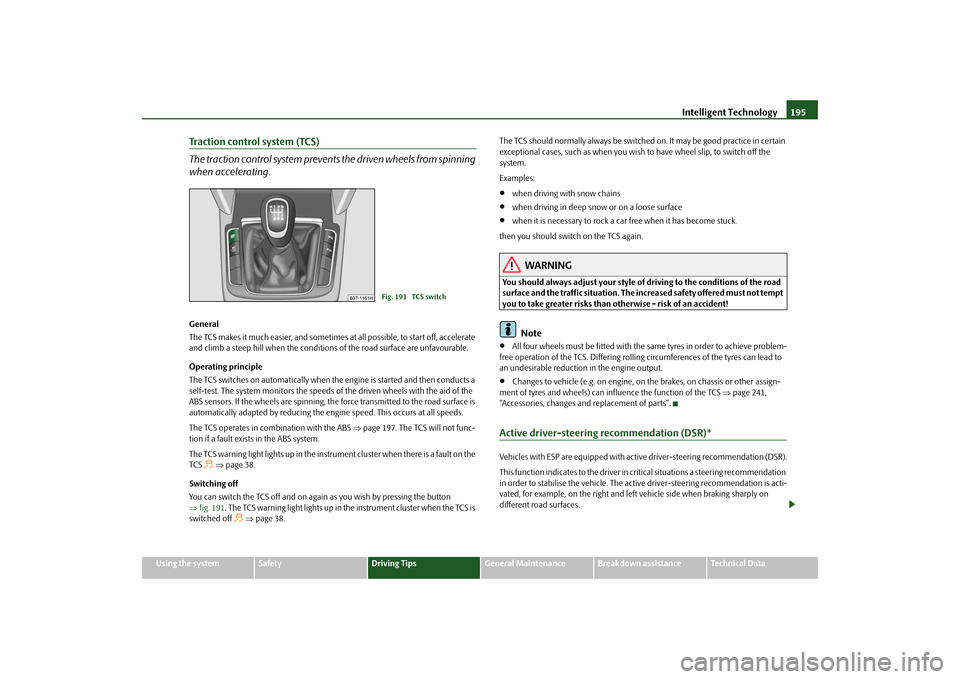
Switching off You can switch the TCS off and on again
as you wish by pressing the button
⇒ fig. 191
. The TCS warning light lights up in the instrument cluster when the TCS is
switched off
⇒page 38.
The TCS should normally always be switched on. It may be good practice in certain exceptional cases, such as when you wish
to have wheel slip, to switch off the
system. Examples:•
when driving with snow chains
•
when driving in deep snow or on a loose surface
•
when it is necessary to rock a car free when it has become stuck.
then you should switch on the TCS again.
WARNING
You should always adjust your style of driving to the conditions of the road surface and the traffic situation. The increased safety offered must not tempt you to take greater risks than otherwise - risk of an accident!
Note
•
All four wheels must be fitted with the same tyres in order to achieve problem-
free operation of the TCS. Differing rolling circumferences of the tyres can lead to an undesirable reduction in the engine output.•
Changes to vehicle (e.g. on engine, on the brakes, on chassis or other assign-
ment of tyres and wheels) can in
fluence the function of the TCS
⇒page 241,
“Accessories, changes and replacement of parts”.Active driver-steering recommendation (DSR)*Vehicles with ESP are equi
pped with active driver-steering recommendation (DSR).
This function indicates to the driver in critical situations a steering recommendation in order to stabilise the vehicle. The active driver-steering recommendation is acti- vated, for example, on the right and left
vehicle side when
braking sharply on
different road surfaces.
Fig. 191 TCS switch
s2dk.1.book Page 195 Wednesday, April 8, 2009 12:23 PM
Page 198 of 294

Intelligent Technology
197
Using the system
Safety
Driving Tips
General Maintenance
Breakdown assistance
Technical Data
vehicle and reduces the strain on the brakes
. Any additional braking should be done
intermittently, no
t continuously.
Note
The brake light flashes automa
tically in case of an em
ergency braking at speeds
g re a t e r t h a n 6 0 k m /h o r w i t h t he i n t e r v e n t i o n o f th e A BS , w h i ch l a s t s l o n g e r th a n 1 .5 seconds. After the speed was reduced belo
w 10 km/h or the vehicle was stopped,
the brake light stops flashing and the hazard warning light system switches on. The hazard warning light system is switched
off automatically after accelerating or
driving off again.Brake boosterThe brake booster boosts the pressure which you generate with the brake pedal. The necessary pressure is only gene
rated when the engine is running.
WARNING
•
Never switch off the engine before the vehicle is stationary.
•
The brake booster only operates when the engine is running. Greater
physical effort for braking is required
when engine is switched off. Because
if you do not stop as normal, this can cause an accident and severe injuries.Antilock brake system (ABS)ABS prevents the wheels locking when braking.General The ABS contributes significan
tly to enhancing the active
safety of your vehicle.
Compared to a car not fitted with the ABS brake system, you are able to retain optimal steering ability even during a fu
ll brake application on a slippery road
surface because the wheels do not lock up. You must not expect, however, that the br
aking distance will be shorter under all
circumstances as a result of the ABS. Th
e braking distance for example on gravel
and fresh snow, when you should anyway be driving slowly and cautiously, will be longer. Operating principle The brake pressure will be reduced on a wheel which is rotating at a speed which is too low for the speed of the vehicle and tend
ing to lock. This control cycle is notice-
able from a
pulsating movement of the brake pedal
which is accompanied by
noises. This is consciously intended to provide the driver with the information that the wheels are tending to lock (ABS control range). You must always keep the brake pedal depressed to enable the ABS to optima
lly control the brake application in this
braking range. Never interrupt the application of the brakes!
WARNING
•
The ABS can also not overcome the physic
al limits of your vehicle. Please
do not forget this, particularly when driv
ing on icy or wet road surfaces. If the
ABS is operating within the control ra
nge, adapt your speed immediately to
the conditions of the road surface and the traffic situation. The increased safety offered by the ABS must not tempt you to take greater risks than otherwise - risk of an accident!•
The normal braking system is still fully
functional if there is an ABS fault.
Visit a specialist garage as quickly as po
ssible and adjust yo
ur style of driving
to take account of the ABS fault in the meantime since you will not know how great the damage is.
Note
•
A warning light comes on if a fault occurs in the ABS system
⇒page 39.
•
Changes to vehicle (e.g. on engine, on the brakes, on chassis or other assign-
ment of tyres and wheels) can in
fluence the function of the ABS
⇒page 241,
“Accessories, changes and replacement of parts”.
s2dk.1.book Page 197 Wednesday, April 8, 2009 12:23 PM
Page 200 of 294
Intelligent Technology
199
Using the system
Safety
Driving Tips
General Maintenance
Breakdown assistance
Technical Data
Tyre inflation pressu
re-control system*
The tyre inflation pressure-control system compares with the aid of the ABS sensors the speed and also the rolling circumference
of the individual wheels. If the rolling
circumference of a wheel is changed, the warning light°
lights up in the instru-
ment cluster
⇒page 39. The rolling circumference of the tyre can change if:
•
the tyre inflation pressure is too low,
•
the structure of the tyre is damaged,
•
the vehicle is loaded on one side,
•
the wheels of an axle are loaded heavily (e.g. when towing a trailer or when
driving uphill or downhill),•
snow chains are mounted,
•
the temporary spare wheel is mounted,
•
one wheel per axle was changed.
Basic setting of tyre inflation pressure-control system After changing the tyre inflation pressures or after changing one or several wheels, a basic setting of the system must be carried out as follows.•
Inflate all tyres to the specified inflation pressure
⇒page 235.
•
Switch on the ignition.
•
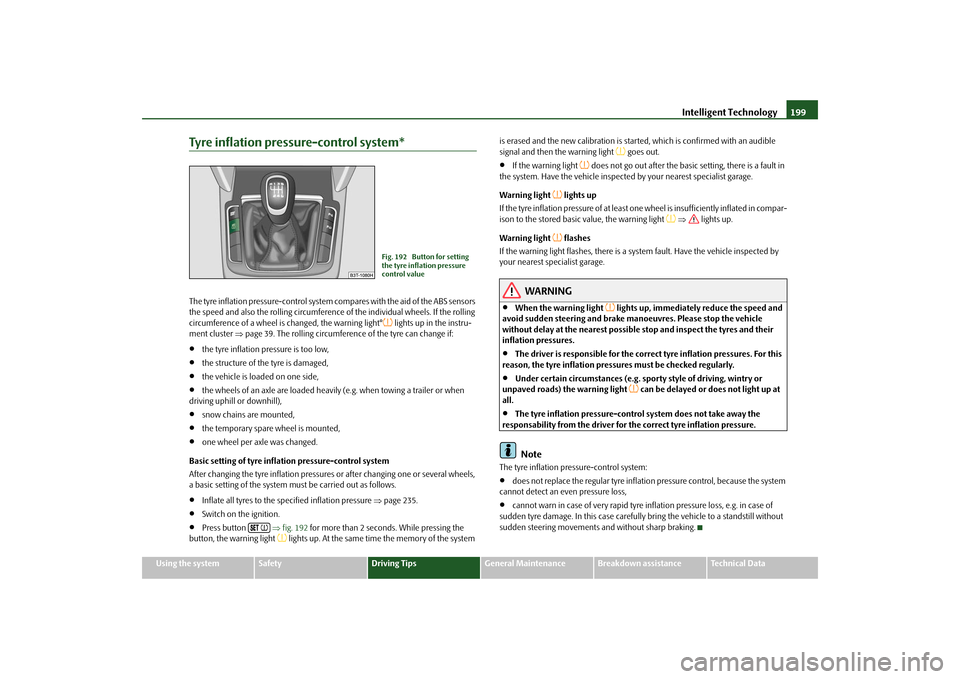
Press button
⇒fig. 192
for more than 2 seconds. While pressing the
button, the warning light
lights up. At the same time the memory of the system
is erased and the new calibration is star
ted, which is confirmed with an audible
signal and then the warning light
goes out.
•
If the warning light
does not go out after the basic setting, there is a fault in
the system. Have the vehicle inspected by your nearest specialist garage. Warning light
lights up
If the tyre inflation pressure of at least on
e wheel is insufficiently inflated in compar-
ison to the stored basic value, the warning light
⇒
lights up.
Warning light
flashes
If the warning light flashes, there is a system fault. Have the vehicle inspected by your nearest specialist garage.
WARNING
•
When the warning light
lights up, immediately reduce the speed and
avoid sudden steering and brake mano
euvres. Please stop the vehicle
without delay at the nearest possible stop and inspect the tyres and their inflation pressures.•
The driver is responsible for the correc
t tyre inflation pressures. For this
reason, the tyre inflation pressures must be checked regularly.•
Under certain circumstances (e.g. sporty style of driving, wintry or
unpaved roads) the warning light
can be delayed or does not light up at
all.•
The tyre inflation pressure-control system does not take away the
responsability from the driver for the correct tyre inflation pressure.
Note
The tyre inflation pressure-control system:•
does not replace the regular tyre inflatio
n pressure control, because the system
cannot detect an even pressure loss,•
cannot warn in case of very rapid tyre inflation pressure loss, e.g. in case of
sudden tyre damage. In this
case carefully bring the vehi
cle to a standstill without
sudden steering movements and without sharp braking.
Fig. 192 Button for setting the tyre inflation pressure control value
s2dk.1.book Page 199 Wednesday, April 8, 2009 12:23 PM
Page 238 of 294

Wheels and Tyres
237
Using the system
Safety
Driving Tips
General Maintenance
Breakdown assistance
Technical Data
Changing wheels aroundIf significantly greater wear is present on the front tyres, we recommend changing the front wheels around with the rear wheels as shown in the diagram
⇒fig. 212
.
You will then obtain approximately the same life for all the tyres. It may be advantageous to swap the tyre
s over “crosswise” when certain types of
wear characteristic arise on
the running surface of the tyres (but not in the case of
unidirectional tyres). The co-workers of the authorised Škoda Service Partners are extensively familiar with the combination possibilites. We recommend that you change the wheels around every 10 000 km in order to achieve even wear on all wheels and to obtain optimal tyre life.New tyres and wheelsTyres and wheel rims are important design
elements. One should therefore use the
tyres and wheel rims which have been released for use by Škoda Auto. They are exactly matched to the vehicle type and th
erefore contribute significantly to good
road holding and safe driving characteristics
⇒
.
Only fit radial tyres of the same type on
all 4 wheels, size (rolling circumference)
and, if possible, the same tread pattern on one axle. The authorised Škoda Service Partners have access to the most current information about which tyres we have rele
ased for use on your vehicle.
We recommend that you have any work rela
ting to tyres or wheels carried out by
an authorised Škoda Service Partner
. The authorised Škoda Service Partners
have all of the necessary special tools
and replacement parts available plus the
required specialist knowledge and are also in a position to properly dispose of the old tyres. A large number of authorised Škod
a Service Partners also have an attrac-
tive range of tyres and wheels available. The tyre/wheel combinations which are appr
oved for your vehicle are indicated in
your vehicle documents. Approval and lice
nsing may differ according to the legis-
lation prevailing in individual countries. Proper knowledge of the tyre data makes it easier for you to select the correct type of tyre. Tyres do, for example, have the following
inscription
on their walls:
205 / 55 R 16 94 V
What this means is: The following
speed restrictions
apply to tyres.
Fig. 212 Changing wheels around
205
Tyre wid th i n m m
55
Height/width ratio in %
R
Code letter for the type of tyre -
R adial
16
Diameter of wheel in inches
94
Load index
V
Speed symbol
Speed symbol
Permissible maximum speed
S
180 km/h
T
190 km/h
H
210 km/h
V
240 km/h
W
270 km/h
Y
300 km/h
s2dk.1.book Page 237 Wednesday, April 8, 2009 12:23 PM
Page 246 of 294
Breakdown assistance
245
Using the system
Safety
Driving Tips
General Maintenance
Breakdown assistance
Technical Data
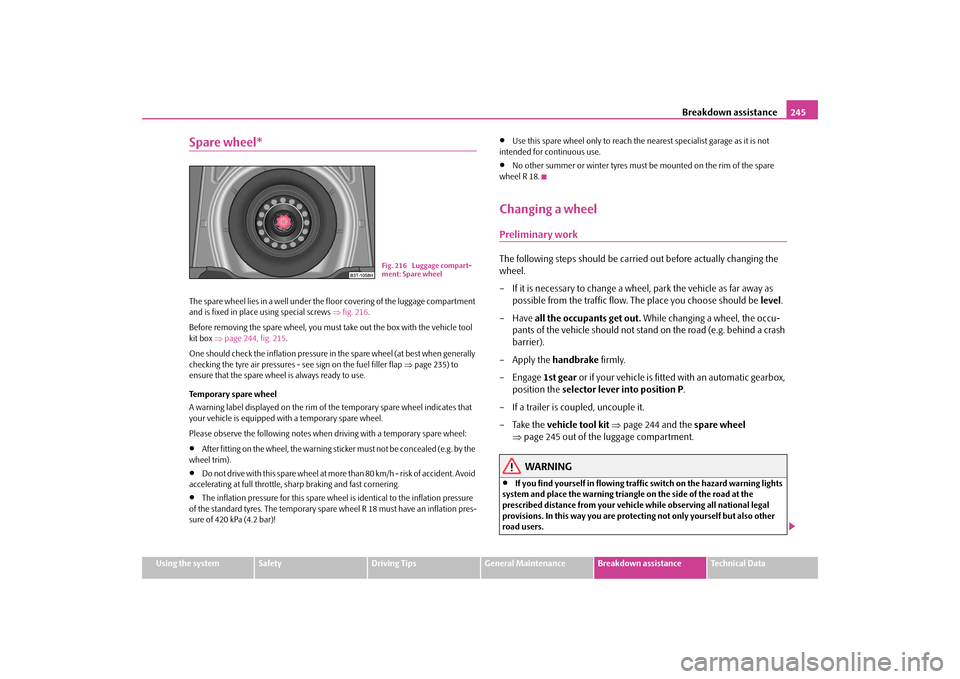
Spare wheel*The spare wheel lies in a well under the floor covering of the luggage compartment and is fixed in place using special screws
⇒fig. 216
.
Before removing the spare wheel, you must take out the box with the vehicle tool kit box
⇒page 244, fig. 215
.
One should check the inflation pressure in the spare wheel (at best when generally checking the tyre air pressures - see sign on the fuel filler flap
⇒page 235) to
ensure that the spare wheel is always ready to use. Temporary spare wheel A warning label displayed on the rim of the temporary spare wheel indicates that your vehicle is equipped with a temporary spare wheel. Please observe the following notes when driving with a temporary spare wheel:•
After fitting on the wheel, the warning stic
ker must not be concealed (e.g. by the
wheel trim).•
Do not drive with this spare wheel at more than 80 km/h - risk of accident. Avoid
accelerating at full throttle, sharp braking and fast cornering.•
The inflation pressure for this spare wheel is identical to the inflation pressure
of the standard tyres. The temporary spare wheel R 18 must have an inflation pres-sure of 420 kPa (4.2 bar)!
•
Use this spare wheel only to reach the nearest specialist garage as it is not
intended for continuous use.•
No other summer or winter tyres must
be mounted on the rim of the spare
wheel R 18.Changing a wheelPreliminary workThe following steps should be carried out before actually changing the wheel. – If it is necessary to change a wheel, park the vehicle as far away as
possible from the traffic flow. The place you choose should be
level
.
–Have
all the occupants get out.
While changing a wheel, the occu-
pants of the vehicle should not stan
d on the road (e.g. behind a crash
barrier).
– Apply the
handbrake
firmly.
–Engage
1st gear
or if your vehicle is fitted with an automatic gearbox,
position the
selector lever into position P
.
– If a trailer is coupled, uncouple it. – Take the
vehicle tool kit
⇒
page 244 and the
spare wheel
⇒
page 245 out of the luggage compartment.WARNING
•
If you find yourself in flowing traffic switch on the hazard warning lights
system and place the warning triangle
on the side of the road at the
prescribed distance from
your vehicle while obse
rving all national legal
provisions. In this way you are protecting not only yourself but also other road users.
Fig. 216 Luggage compart- ment: Spare wheel
s2dk.1.book Page 245 Wednesday, April 8, 2009 12:23 PM
Page 247 of 294
Breakdown assistance
246
•
Never start the engine with the vehicle
sitting on the raised jack - danger
of suffering injury!
Caution
If you have to change a wheel on a slope
first block the opposite wheel with a stone
or similar object in order to secure th
e vehicle from unexpectedly rolling away.
Note
Comply with the national legal regulations.Changing a wheelAlways change a wheel on a level surface as far as possible. – Take off the full wheel trim*
⇒
page 247 or the caps
⇒
page 247.
– In the case of light alloy wheels remove the wheel trim cap
⇒
page 248.
– First of all slacken the safety wh
eel bolt * and afterwards the other
wheel bolts
⇒
page 248.
– Jack up the vehicle until the wheel to
be changed is clear of the ground
⇒
page 249.
– Unscrew the wheel bolts and place them on a clean surface (cloth,
paper etc.).
– Take off the wheel. – Fit on the spare wheel and tighten the wheel bolts slightly. –Lower the car.
– Tighten the wheel bolts firmly, al
ternately and diagonally using the
wheel wrench (crosswise) and last the safety wheel bolt*
⇒
page 248.
– Mount the full wheel trim/w
heel trim cap or the caps.
Note
•
All bolts must be clean
and must turn easily.
•
You must never grease or oil the wheel bolts!
•
When fitting on unidirectional tyres, ensure that the tyres rotate in the correct
direction
⇒page 235.
Subsequent stepsAfter changing the wheel, you must perform the following steps. – Stow and attach the replaced wheel in the spare wheel well using a
special screw
⇒
page 245, fig. 216
.
– Stow the vehicle tool kit in the space provided.–
Check
the
tyre pressure
on the spare wheel just mounted as soon as
possible.
– Have the
tightening torque
of the wheel bolts
checked
with a torque
wrench as soon as possible. Steel and light alloy wheels must be tight-ened to a tightening torque of
120 Nm
.
– Have the defective tyre repaired as soon as possible.
WARNING
It is necessary to observe the guidelines given on
⇒page 237 if the vehicle is
subsequently fitted with tyres which are
different to those it was fitted with
at the works.
WARNING (continued)
s2dk.1.book Page 246 Wednesday, April 8, 2009 12:23 PM
Page 262 of 294
Fuses and light bulbs
261
Using the system
Safety
Driving Tips
General Maintenance
Breakdown assistance
Technical Data
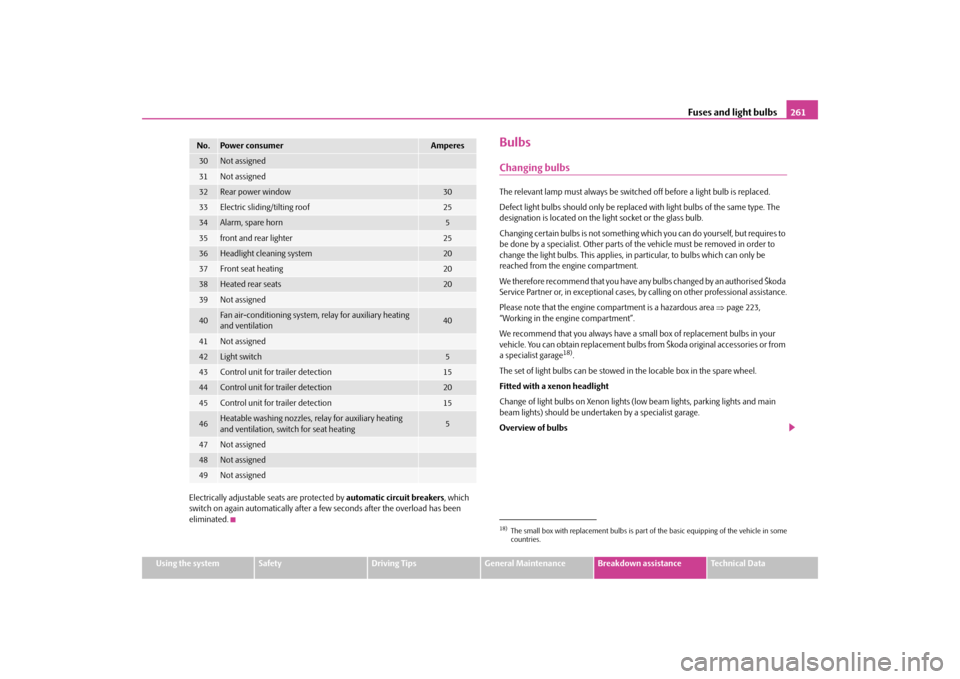
Electrically adjustable seats are protected by
automatic circuit breakers
, which
switch on again automatically after a few seconds after the overload has been eliminated.
BulbsChanging bulbsThe relevant lamp must always be switch
ed off before a light bulb is replaced.
Defect light bulbs should only be replaced
with light bulbs of the same type. The
designation is located on the light socket or the glass bulb. Changing certain bulbs is not something wh
ich you can do yourself, but requires to
be done by a specialist. Other parts of the vehicle must be removed in order to change the light bulbs. This applies, in
particular, to bulbs which can only be
reached from the engine compartment. We therefore recommend that you have an
y bulbs changed by an authorised Škoda
Service Partner or, in exceptional cases, by
calling on other professional assistance.
Please note that the engine co
mpartment is a hazardous area
⇒page 223,
“Working in the engine compartment”. We recommend that you always have a sm
all box of replacement bulbs in your
vehicle. You can obtain replacement bulbs from Škoda original accessories or from a specialist garage
18).
The set of light bulbs can be stowed in the locable box in the spare wheel.Fitted with a xenon headlightChange of light bulbs on Xenon lights (low beam lights, parking lights and main beam lights) should be undertaken by a specialist garage. Overview of bulbs
30
Not assigned
31
Not assigned
32
Rear power window
30
33
Electric sliding/tilting roof
25
34
Alarm, spare horn
5
35
front and rear lighter
25
36
Headlight cleaning system
20
37
Front seat heating
20
38
Heated rear seats
20
39
Not assigned
40
Fan air-conditioning system,
relay for auxiliary heating
and ventilation
40
41
Not assigned
42
Light switch
5
43
Control unit for trailer detection
15
44
Control unit for trailer detection
20
45
Control unit for trailer detection
15
46
Heatable washing nozzles, relay for auxiliary heating and ventilation, switch for seat heating
5
47
Not assigned
48
Not assigned
49
Not assigned
No.
Power consumer
Amperes
18)The small box with replacement bulbs is part of the basic equipping of the vehicle in some countries.
s2dk.1.book Page 261 Wednesday, April 8, 2009 12:23 PM
Page 286 of 294
Index285
Using the system
Safety
Driving Tips
General Maintenance
Breakdown assistance
Technical Data
Index
AAbroad . . . . . . . . . . . . . . . . . . . . . . . . . . . . . . . . . . . . . 206
ABS . . . . . . . . . . . . . . . . . . . . . . . . . . . . . . . . . . . . . . . . . 197
Warning light . . . . . . . . . . . . . . . . . . . . . . . . . . . . . 39
Accessories . . . . . . . . . . . . . . . . . . . . . . . . . . . . . . . . . 241
Active driver-steering recommendation . . . . . . . 195
Adaptive headlights . . . . . . . . . . . . . . . . . . . . . . . . . . . 63
Warning light . . . . . . . . . . . . . . . . . . . . . . . . . . . . . 35
Adjusting seats . . . . . . . . . . . . . . . . . . . . . . . . . . . 78, 164
electrically . . . . . . . . . . . . . . . . . . . . . . . . . . . . . . . . 79
Adjusting the steering wheel . . . . . . . . . . . . . . . . . . 117
AHL . . . . . . . . . . . . . . . . . . . . . . . . . . . . . . . . . . . . . . . . . 63
Air conditioning system . . . . . . . . . . . . . . . . . . . . . . 106
Recirculated air mode . . . . . . . . . . . . . . . . . . . . 108
Airbag . . . . . . . . . . . . . . . . . . . . . . . . . . . . . . . . . . . . . . 174
Deployment . . . . . . . . . . . . . . . . . . . . . . . . . . . . . 175
Front airbag . . . . . . . . . . . . . . . . . . . . . . . . . . . . . 176
Head airbag . . . . . . . . . . . . . . . . . . . . . . . . . . . . . 181
Knee airbag . . . . . . . . . . . . . . . . . . . . . . . . . . . . . . 178
Side airbag . . . . . . . . . . . . . . . . . . . . . . . . . . . . . . 179
Warning light . . . . . . . . . . . . . . . . . . . . . . . . . . . . . 36
Airbag system . . . . . . . . . . . . . . . . . . . . . . . . . . . . . . . 174
Warning light . . . . . . . . . . . . . . . . . . . . . . . . . . . . . 36
Airbags . . . . . . . . . . . . . . . . . . . . . . . . . . . . . . . . . . . . . 174
Alarm . . . . . . . . . . . . . . . . . . . . . . . . . . . . . . . . . . . . . . . . 52
Alternator
Warning light . . . . . . . . . . . . . . . . . . . . . . . . . . . . . 42Antilock brake system . . . . . . . . . . . . . . . . . . . . . . . . 197
Antilock brake system (ABS)
Warning light . . . . . . . . . . . . . . . . . . . . . . . . . . . . . 39
Anti-theft alarm system . . . . . . . . . . . . . . . . . . . . . . . 52
Ashtray . . . . . . . . . . . . . . . . . . . . . . . . . . . . . . . . . . . . . . 93
Auto Check Control . . . . . . . . . . . . . . . . . . . . . . . . . . . 29
Auto Computer . . . . . . . . . . . . . . . . . . . . . . . . . . . . . . 21
Automatic gearbox
Emergency programme . . . . . . . . . . . . . . . . . . 136
Automatic gearbox DSG . . . . . . . . . . . . . . . . . . . . . . 131
Kickdown . . . . . . . . . . . . . . . . . . . . . . . . . . . . . . . 134
Selector lever-emergency unlocking . . . . . . . 136
Tiptronic . . . . . . . . . . . . . . . . . . . . . . . . . . . . . . . . 134
Automatic light control . . . . . . . . . . . . . . . . . . . . . . . . 61
Automatic seat adjustment . . . . . . . . . . . . . . . . . . . . 80
Automatic vehicle wash systems . . . . . . . . . . . . . . 212
Automatic wiper/washer system . . . . . . . . . . . . . . . 73
AUX-IN . . . . . . . . . . . . . . . . . . . . . . . . . . . . . . . . . . . . . 160
Avoiding damage to your vehicle . . . . . . . . . . . . . 207
BBattery . . . . . . . . . . . . . . . . . . . . . . . . . . . . . . . . . . 42, 229
change . . . . . . . . . . . . . . . . . . . . . . . . . . . . . . . . . . 233
Charge . . . . . . . . . . . . . . . . . . . . . . . . . . . . . . . . . . 233
Inspecting the electrolyte level . . . . . . . . . . . . 232
Operation in winter . . . . . . . . . . . . . . . . . . . . . . 232
Before setting off . . . . . . . . . . . . . . . . . . . . . . . . . . . . 164Belt
Warning light . . . . . . . . . . . . . . . . . . . . . . . . . . . . . 40
Belt tensioners . . . . . . . . . . . . . . . . . . . . . . . . . . . . . . 172
Belts . . . . . . . . . . . . . . . . . . . . . . . . . . . . . . . . . . . . . . . . 168
Bluetooth . . . . . . . . . . . . . . . . . . . . . . . . . . . . . . . 142, 152
Bonnet . . . . . . . . . . . . . . . . . . . . . . . . . . . . . . . . . . 15, 222
Warning light . . . . . . . . . . . . . . . . . . . . . . . . . . . . . 40
Boot lid . . . . . . . . . . . . . . . . . . . . . . . . . . . . . . . . . . . 48, 49
Warning light . . . . . . . . . . . . . . . . . . . . . . . . . . . . . 41
Brake
Handbrake . . . . . . . . . . . . . . . . . . . . . . . . . . . . . . 121
Warning light . . . . . . . . . . . . . . . . . . . . . . . . . . . . . 41
Brake Assist . . . . . . . . . . . . . . . . . . . . . . . . . . . . . . . . . 198
Brake booster . . . . . . . . . . . . . . . . . . . . . . . . . . . . . . . 197
Brake fluid . . . . . . . . . . . . . . . . . . . . . . . . . . . . . . . . . . 228
Brake pads
Warning light . . . . . . . . . . . . . . . . . . . . . . . . . . . . . 40
Brakes . . . . . . . . . . . . . . . . . . . . . . . . . . . . . . . . . . . . . . 196
Button for the central locking system . . . . . . . . . . . 46
Button in the driver's door
Power windows . . . . . . . . . . . . . . . . . . . . . . . . . . . 54
CCar jack . . . . . . . . . . . . . . . . . . . . . . . . . . . . . . . . . 244, 249
Car state . . . . . . . . . . . . . . . . . . . . . . . . . . . . . . . . . . . . . 29
Catalytic converter . . . . . . . . . . . . . . . . . . . . . . . . . . 202
CD changer . . . . . . . . . . . . . . . . . . . . . . . . . . . . . . . . . 160
s2dk.1.book Page 285 Wednesday, April 8, 2009 12:23 PM