washer SKODA SUPERB 2016 3.G / (B8/3V) Owner's Manual
[x] Cancel search | Manufacturer: SKODA, Model Year: 2016, Model line: SUPERB, Model: SKODA SUPERB 2016 3.G / (B8/3V)Pages: 336, PDF Size: 53.89 MB
Page 4 of 336
Table of Contents
Liability for defects and ŠKODA Warranty for
new cars5
Printed Owner's Manual
7
Online Owner's Manual
8
Notes
9
Structure of the Owner´s Manual and further
information
10
Abbreviations
Safety
Passive Safety
12
General information
12
Correct and safe seated position
12
Seat belts
15
Using seat belts
15
Belt retractors and belt tensioners, reversible
seat belts
17
Airbag system
18
Description of the airbag system
18
Airbag deactivation
21
Transporting children safely
22
Child seat
22
Fastening systems
26
Using the system
Cockpit
31
Overview
30
Instruments and warning lights
32
Instrument cluster
32
Warning lights
33Information system43Driver information system43
Operation of the information system
45
Driving data (Multifunction display)
46
MAXI DOT display
48
Service interval display
49
Personalisation
49
SmartGate
51
Unlocking and opening
53
Unlocking and locking
53
Anti-theft alarm system
58
Manually operated tailgate
59
Electric boot lid
59
Window operation
62
Panoramic tilting / sliding sunroof
64
Lights and visibility
66
Light
66
Headlight Assist (Light Assist / Dynamic Light
Assist)
71
Interior lighting
72
Visibility
74
Windscreen wipers and washers
76
Rear view mirror
77
Seats and head restraints
80
Front seats
80
Rear seats
83
Headrests
84
Seat heating and ventilation
85
Heated steering wheel
86
Practical features
87
Interior equipment
87
Electrical sockets
96
Ashtray and cigarette lighter
98
Tablet holder
99Transport of cargo101Luggage compartment101
Variable loading floor in the luggage
compartment (Estate)
109
Net partition
111
Transportation on the roof rack
112
Heating and ventilation
113
Heating, manual air conditioning system,
Climatronic
113
Auxiliary heating (auxiliary heating and
ventilation)
118
Infotainment
Introductory information
121
Important information
121
Infotainment overview
122
Infotainment operation
125
Infotainment operation
125
Voice control
128
Software Infotainment update
131
Infotainment settings - Columbus, Amundsen,
Bolero
131
Infotainment system settings
131
Menu Settings Radio
134
Media menu settings
135
Image menu settings
135
Video DVD menu settings
135
TV tuner menu settings
135
Telephone menu settings
136
SmartLink menu settings
137
Navigation menu settings
137
Infotainment settings - Swing
139
Infotainment system settings
139
Radio menu settings
140
Media menu settings
141
Telephone menu settings
1412Table of Contents
Page 14 of 336
Safety
Passive Safety
General information
Introduction
This chapter contains information on the following subjects:
Before setting off
12
Driving safety
12
This section of the manual includes important information on the subject of
passive safety. We have combined everything here which you should be famili-
ar with, for example, regarding seat belts, airbags, safety of children and any-
thing similar.
Other important safety information can also be found in the following chapters
of this Owner´s Manual. The Owner´s Manual should therefore always be in
the vehicle.
Before setting off
For your own safety and the safety of the people travelling with you, please
pay attention to the following points before setting off.
▶ Check the function of the lighting and turn signal systems.
▶ Check the function of the wipers and check the wiper blades for wear. Check
the windscreen washer fluid level.
▶ Ensure that all of the windows offer good visibility to the outside.
▶ Adjust the rear-view mirror so that vision to the rear is guaranteed. Ensure
that the mirrors are not covered.
▶ Check the tyre inflation pressure.
▶ Check the engine oil, brake fluid and coolant level.
▶ Secure all items of luggage.
▶ Do not exceed the permissible axle loads and permissible gross weight of the
vehicle.
▶ Close all doors as well as the bonnet and boot lid.
▶ Ensure that no objects can obstruct the pedals.
▶
Protect children by using a suitable child seat » page 22, Transporting chil-
dren safely .
▶ Adopt the correct seated position. Instruct your passengers to assume the
correct seated position » page 12, Correct and safe seated position .
Driving safety
In the interests of traffic safety, the following information must be observed. ▶ Do not become distracted from concentrating on the traffic situation, (e.g. by
your passengers or mobile telephone calls).
▶ Never drive when your driving ability is impaired, (e.g. due to medication, al-
cohol or drugs).
▶ Keep to the traffic regulations and the permissible speed limit.
▶ Always adjust the driving speed to the road, traffic and weather conditions.
▶ Take regular breaks on long journeys (at least every two hours).
Correct and safe seated position
Introduction
This chapter contains information on the following subjects:
Driver’s correct seating position
13
Adjusting the steering wheel position
13
Correct seating position of the passenger
14
Correct seating position for the passengers in the rear seats
14
Always assume the correct seated position before setting off and do not
change this position while driving. Also advise your passengers to adopt the
correct seated position and not to change this position while the car is moving.
The following list contains instructions for the Passenger which, if not ob-
served, may cause serious injuries or death. ▶ Do not lean against the dash panel.
▶ Do not put your feet on the dash panel.
The following list contains instructions for all Passengers which, if not ob-
served, may cause serious injuries or death.
▶ Do not sit only on the front part of the seat.
▶ Do not sit facing to the side.
▶ Do not lean out of the window.
▶ Do not put your limbs out of the window.
▶ Do not put your feet on the seat cushion.
12Safety
Page 33 of 336
Using the system
Cockpit
OverviewElectrical power windows
62
Electric exterior mirror adjustment
78
Door opening lever
57
Air outlet vents
117
Ticket holder
88
Operating lever (depending on equipment):
▶ Direction and high beam
68
▶Speed regulating system
229
▶Speed limiter
231
▶Headlamp assistant
71
Steering wheel with horn / with driver's front airbag
18
Buttons for operating the information system
43
Instrument cluster
32
Operating lever:
▶ Windscreen wipers and washers
76
▶Information system
43
Infotainment
122
Button for hazard warning light system
70
Warning light for the front passenger airbag
21
Interior rear-view mirror
78
Storage compartment on the front passenger side
92
Front passenger airbag
18
External Infotainment module (in the front passenger storage
compartment)
124
Key switch for switching off the front passenger airbag (in front
passenger storage compartment)
21
Electric window in the front passenger door
62
Storage compartment
88
Light switch
67
Bonnet release lever
269
Storage compartment
881234567891011121314151617181920212223Operating lever for adaptive cruise control235
Steering wheel locking lever
13
Depending on equipment fitted:
▶ Ignition lock
200
▶Starter button
200
Depending on equipment fitted:
▶ Gearshift lever (manual gearbox)
206
▶Selector lever (automatic gearbox)
207
Auto-hold button
204
Button for the electric parking brake
203
Central locking system
55
Bars with buttons (depending on the equipment fitted):
▶ START-STOP
201
▶
Stabilisation control ESC / Traction control TCS
213, 214
▶
Selection of travel mode
240
▶
Park Assist
225
▶
Parking aid
215
Storage compartment
89
Depending on equipment fitted:
▶ Phonebox
89
▶12-volt power outlet
96
▶Cigarette lighter
99
▶Ashtrays
98
▶USB and AUX input
90
Controls for heating / air conditioning
114
Note
The layout of the controls on right-hand drive vehicles differs partially from
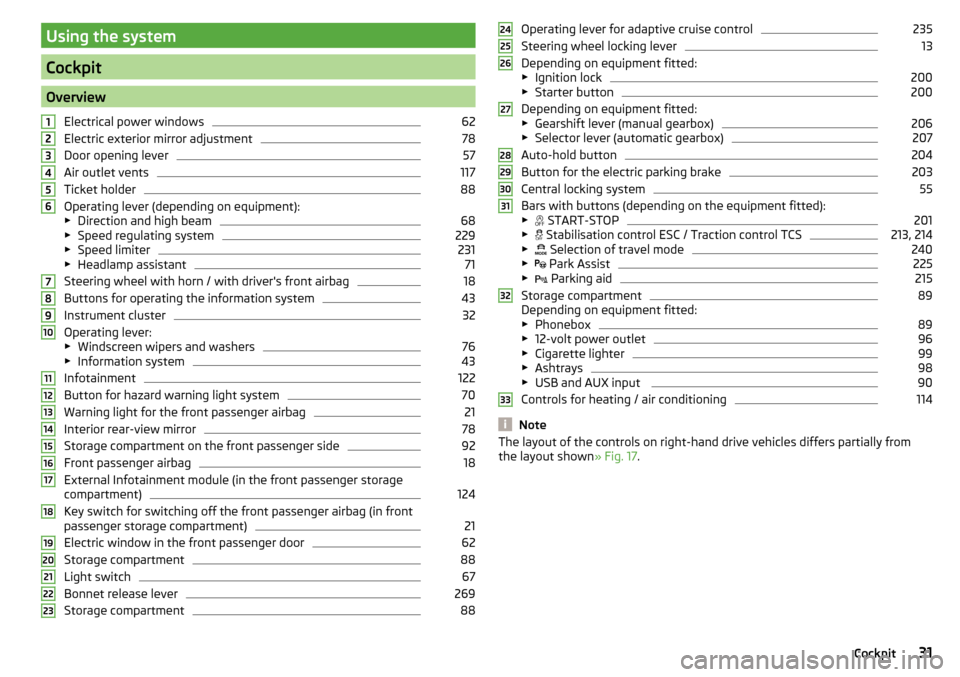
the layout shown » Fig. 17.2425262728293031323331Cockpit
Page 36 of 336
Brake linings38 Fuel reserve38
Lane Departure Warning (Lane Assist)
38
Turn signal system
38
Trailer turn signal lights
38
Fog lights
38
Speed regulating system / speed limiter
38
Brake pedal (automatic gearbox)
38
Auto Hold function
39
Main beam
39
Automatic gearbox
39
Rear seat belt warning light
39
Generator
39
Coolant
39
Engine oil pressure
40
Engine oil level
40
AdBlue ®
40
Lamp failure
41
Diesel particle filter (diesel)
41
Windscreen washer fluid level
41
Headlight assistant
41
START-STOPsystem
41
Display - a low temperature
42
Water in the fuel filter (diesel)
42
Adaptive cruise control (ACC)
42
Distance warning (Front Assist)
42
front Assist
42
Economy mode
42
Adaptive Chassis Control (DCC)
42
Service
42
The warning lights in the instrument cluster indicate certain functions or
faults.
Some warning lights can be accompanied by acoustic signals and messages in
the display of the instrument cluster.
After switching on the ignition, some warning lights light up briefly as a func-
tion test. If the tested systems are OK, the corresponding warning lights go
out a few seconds after switching on the ignition or after starting the engine.
The warning lights are located at the following positions in the instrument
cluster » Fig. 18 on page 32 .
▶ Engine revolutions counter 1
▶Display
2
▶Speedometer
3
▶Bar with warning lights
5
Warning lights in the display
Depending on the importance the warning light
(danger) or
(warning) illu-
minate along with some of the warning lights in the list with the warning
lights.
Depending on vehicle equipment, some warning lights can be displayed in col-
our on the display. For example. the coolant warning lamp may be represented
as follows.
▶ - Segment display / monochromatic (“black and white”) MAXI DOT display
▶ - Coloured MAXI DOT display
WARNING■
Ignoring illuminated warning lights and related messages or instructions
in the display of the instrument cluster may lead to serious personal injury
or damage to the vehicle.■
If you have to stop for technical reasons, then park the vehicle at a safe
distance from the traffic, switch off the engine and switch on the hazard
warning lights » page 70. Place the warning triangle at the prescribed dis-
tance.
■
The engine compartment of your car is a hazardous area. While working in
the engine compartment, be sure to observe the following warnings
» page 268 .
Parking brake
Read and observe
on page 34 first.
illuminates - the parking brake is switched on.
Parking brake error
Illumi-
nates
Error: electronic parking brakePARKING BRAKE FAILURE
▶ Seek help from a specialist garage.
34Using the system
Page 43 of 336
There is a fault in the AdBlue®
system.
The value in the display indicates the distance to travel, after which no engine
restart is possible.
▶ Seek help from a specialist garage. Illumi-
nates
Error: AdBlue (DEF). No engine start possible.ADBLUE (DEF) ERROR RESTART DISABLED
There is an error in the AdBlue ®
system, engine start is not possible.
▶ Seek help from a specialist garage.
Lamp failure
Read and observe
on page 34 first.
illuminates – one of the lamps is faulty.
A message will appear in the display about the affected lamp.
Diesel particle filter (diesel)
Read and observe
on page 34 first.
The diesel particulate filter separates the soot particles from the exhaust. The
soot particles collect in the diesel particulate filter where they are burnt on a
regular basis.
illuminates – the filter is clogged with soot.
To clean the filter, and where traffic conditions permit »
, drive as follows for
at least 15 minutes or until the indicator light goes out.
4. or 5. gear engaged (automatic gearbox: position D / S).
Vehicle speed at least 70 km/h.
Engine speed between 1800 - 2500 rpm.
If the filter is properly cleaned, the warning light extinguishes.
If the filter is not properly cleaned, the warning light does not go out and
the warning light begins to flash.
▶ You can drive on, exercising appropriate caution. Seek assistance from a spe-
cialist garage immediately.
WARNING■ Always adjust the speed and driving style to the actual weather, road, ter-
rain and traffic conditions.■
The diesel particulate filter reaches very high temperatures - there is a
fire hazard and serious injury could be caused. Therefore, never stop the
vehicle at places where the underside of your vehicle can come into contact
with flammable materials, such as dry grass, undergrowth, leaves, spilled
fuel or the like.
CAUTION
■ As long as the warning light illuminates, one must take into account an
increased fuel consumption and a power reduction of the engine.■
Using diesel fuel with increased sulphur content can significantly reduce the
service life of the diesel particle filter. A ŠKODA partner will be able to tell you
which countries use diesel fuel with a high sulphur content.
Note
We encourage you to avoid constant short journeys. This will improve the com-
bustion process of the soot particles in the diesel particulate filter.
Windscreen washer fluid level
Read and observe
on page 34 first.
illuminates – the windscreen washer fluid level is too low.
▶ Top up the windscreen washer fluid » page 270.
Headlight assistant
Read and observe
on page 34 first.
illuminates – the headlight assistant is activated
» page 71, Headlight As-
sist (Light Assist / Dynamic Light Assist) .
START-STOPsystem
Read and observe
on page 34 first.
The warning lights
indicates the state of the START STOP system
» page 201 .
41Instruments and warning lights
Page 78 of 336
Windscreen wipers and washers
Introduction
This chapter contains information on the following subjects:
Front wipers and washers
76
Rear window wipers and washers / reversing camera cleaning system
77
Headlight cleaning system
77
The windscreen wipers and the wash system only operate if the ignition is
switched on and the bonnet and boot are closed.
WARNINGDo not use the windscreen washer system at low temperatures, without
heating the windscreen beforehand. The window washer fluid could other-
wise freeze on the windscreen and restrict the view to the front.
CAUTION
■ If the windscreen wipers are in rest position, they cannot be folded out from
the windscreen. The wipers must be set to the service position to raise them
off the windscreen » page 294.■
In cold temperatures and during the winter, check before switching on the
ignition that the wiper blades are not frozen to the windscreen. If the wind-
screen wipers are switched on when the blades are frozen to the windscreen,
this may damage both the blades and windscreen wiper motor.
■
Carefully release the frozen-on windscreen wiper blades from the wind-
screen and remove snow and ice.
■
Handle the windscreen wipers with care - there is the risk of damaging the
windscreen with the windscreen wiper arms.
■
Do not switch on the ignition when the front windscreen wiper arms are fol-
ded down - there is the danger of damaging the bonnet by the windscreen
wiper arms.
■
If there is an obstacle on the windscreen, the wipers will try to push away
the obstacle five times. Thereafter, the wipers will stop to prevent them be-
coming damaged. Turn on the wipers again only after the obstacle has been
removed.
Note■ Each time the ignition switches off for the third time, the position of the
windscreen wipers changes. This counteracts an early fatigue of the wiper
blades.■
The windscreen washer nozzles for the windscreen are heated when the en-
gine is running and the outside temperature is less than +10 °C.
Front wipers and washers
Fig. 63
Operating the windscreen wipers
and washing system at the front
Read and observe and on page 76 first.
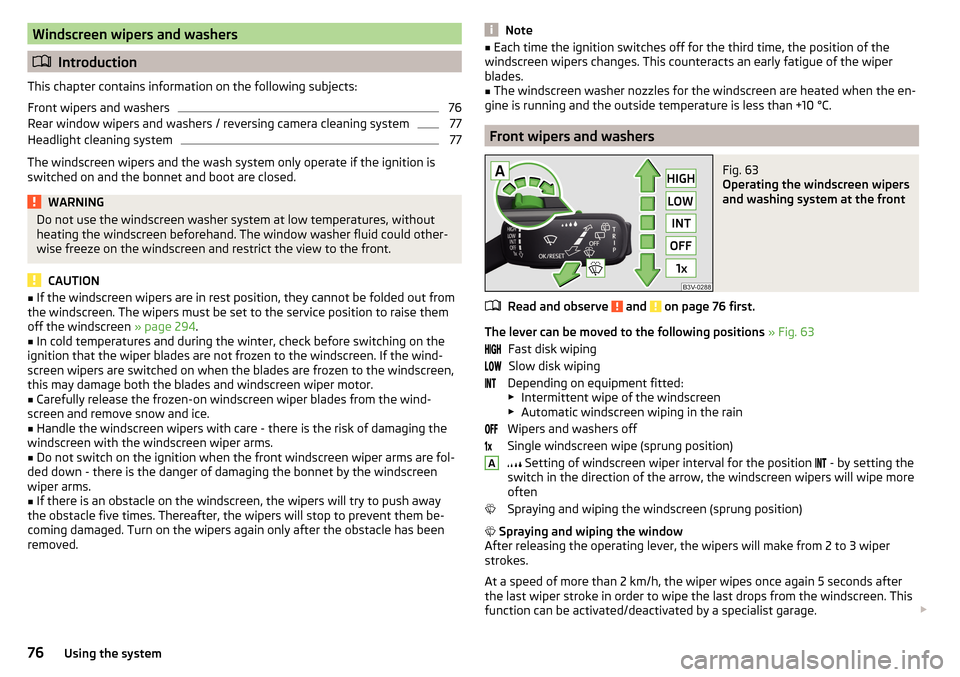
The lever can be moved to the following positions » Fig. 63
Fast disk wiping Slow disk wiping
Depending on equipment fitted:
▶ Intermittent wipe of the windscreen
▶ Automatic windscreen wiping in the rain
Wipers and washers off
Single windscreen wipe (sprung position)
Setting of windscreen wiper interval for the position
- by setting the
switch in the direction of the arrow, the windscreen wipers will wipe more
often
Spraying and wiping the windscreen (sprung position)
Spraying and wiping the window
After releasing the operating lever, the wipers will make from 2 to 3 wiper
strokes.
At a speed of more than 2 km/h, the wiper wipes once again 5 seconds after
the last wiper stroke in order to wipe the last drops from the windscreen. This
function can be activated/deactivated by a specialist garage.
A76Using the system
Page 79 of 336

Automatic windscreen wiping during rain can be in the Infotainment menu
→ →
Mirrors and wipers
enabled / disabled .WARNINGAutomatic wiping during rain is only a support. The driver is not released
from the responsibility to set the function of the windscreen wipers man-
ually depending on the visibility conditions.
Note
■ If the wiping is carried out without interruption, the wiping speed varies de-
pending on the vehicle speed.■
The setting (activation/deactivation) of the automatic windscreen wiping in
the rain is stored (depending on the Infotainment type) in the active user ac-
count personalisation » page 49.
Rear window wipers and washers / reversing camera cleaning
system
Fig. 64
Operating the windscreen wipers
and washing system
Read and observe and on page 76 first.
The lever can be moved to the following positions » Fig. 64
Spraying and wiping the windscreen (sprung position) - after releasing the
control stalk, the wipers perform another 2 to 3 wiper strokes
Spraying the rear view camera (sprung position)
Windscreen wiping
Wipers and washers off
Automatic rear wiper
If the windscreen wiping is performed without interruption, then the automat-
ic regular intermittent wiping of the rear window takes place.
This function can be activated / deactivated in the Infotainment menu
→
→ Mirrors and wipers
.
Note
■
The rear window is wiped automatically if the windscreen wipers are on
when reverse gear is selected.■
The setting (activation/deactivation) of the automatic rear window wiping in
the rain is stored (depending on the Infotainment type) in the active user ac-
count personalisation » page 49.
Headlight cleaning system
Read and observe
and on page 76 first.
The headlights are cleaned with every first and after every tenth spraying of
the windscreen under the following conditions.
The ignition is switched on.
The low beam is switched on.
The outside temperature is about -12° C to +39° C.
To ensure the correct functioning of the system, even in winter, this needs to
be regularly cleared of snow and ice (e.g. using the de-icing spray).
Rear view mirror
Introduction
This chapter contains information on the following subjects:
Interior mirror dimming
78
Exterior mirrors
78WARNINGExterior mirrors increase the field of view, however, make objects appear
smaller and further away. Therefore, use the rear-view mirror to determine
the distances to the following vehicles. 77Lights and visibility
Page 263 of 336

The longer insect residues, bird droppings, road salt and other aggressive de-
posits remain on the paintwork of your vehicle, the more detrimental their de-
structive effect can be. High temperatures, such as those caused by intensive
sun's rays, accentuate this caustic effect.
It is essential to also thoroughly clean the underside of the vehicle at the end
of the winter.
Washing by hand
Wash the vehicle from top to bottom, if necessary, wash using a soft sponge or
washing mitt and plenty of water with appropriate detergents. Wash out the
sponge or washing glove thoroughly at short intervals.
Use a different sponge for the wheels, door sills and lower vehicle areas.
Give the vehicle a good rinse after washing it and dry it off using a chamois
leather.
Automatic car washes
The usual precautionary measures must be taken before washing the vehicle
in an automatic car wash system (e.g. closing the windows and the sliding/tilt-
ing roof etc.).
If your vehicle is fitted with any particular attached parts, such as a spoiler,
roof rack system, two-way radio aerial etc., it is best to consult the operator of
the car wash system beforehand.
After an automatic wash with wax treatment, the blades of the wipers should
be cleaned with cleaning agents specially designed for the purpose, and then
degreased.
Pressure washer
When washing the vehicle with a high-pressure cleaner, the instructions for
use of the equipment must be observed. This particularly applies to informa-
tion with respect to the pressure and spray distance from the vehicle surface.WARNING■
When washing your vehicle in the winter: Water and ice in the braking
system can affect the braking efficiency – risk of accident!■
Take care when cleaning the underbody or the inside of the wheel wells -
there is a risk of injury on sharp metal parts!
CAUTION■ Do not wash the vehicle in direct sunlight, do not exert pressure on the body
while washing. The temperature of the washing water should be max. 60 ° C -
otherwise there is a risk of damaging the vehicle paint.■
Before driving through a car wash, fold in the exterior mirrors - there is a risk
of damage.
CAUTION
Washing the vehicle using pressure washers■The foils should not be washed using pressure washers - there is a risk of
damage .■
Do not aim the water jet directly at the lock cylinders or the door or opening
joints when washing the vehicle in the winter – there is a risk of freezing.
■
During cleaning always keep a sufficiently large spraying distance to the
parking sensors, the rear camera lens, to external decorative and protective
plastic parts (e.g. Roof racks, spoilers, protective strips) and other vehicle parts
made of non-metallic materials such as rubber hoses or insulation materials.
■
The sensors of the parking aid can be sprayed only for a short time and there
must be a minimum distance of 10 cm - there is a risk of damage.
■
When washing the vehicle, do not point the water jet directly at the tow bar
or the trailer socket - there is a risk of seal damage or washing out the grease.
Caring for the outside of the vehicle
Read and observe
and on page 260 first.
Vehicle compo- nentFacts of thematterRemedy
Paint
Spilled fuelClear water, cloth, (clean as soon as
possible)No water drop-
lets form on the
paintUse hard wax (min. twice a year), apply
wax to clean and dry bodyMatt paintUse polish, then preserve (if the polish
does not contain any preservative in-
gredients)Chromed
and anodised
partsSoilingClear water, cloth or cleaning agent
provided for this purpose, then polish
with a soft dry clothFoilsSoilingSoft sponge and mild soap solution a)
261Care and maintenance
Page 264 of 336

Vehicle compo-nentFacts of thematterRemedyWindows
and door mirrorsSoilingWash with clean water and dry using
the intended clothHeadlights/lightsSoilingSoft sponge and mild soap solution a)
Reversing cameraSoilingWash with clean water and dry with a
soft clothSnow / iceHand brush / de-icerDoor lock cylinderSnow / iceDe-icerWiper / wiper
bladesSoilingGlass cleaner, sponge or clothWheelsSoilingClear water, then coat with appropriate
conservation solutiona)
Mild soap solution = 2 tablespoons of natural soap to 1 litre of lukewarm water.
The jack is maintenance-free. If necessary, the moving parts of the jack should
be lubricated with a suitable lubricant.
The towing device is maintenance-free. Coat the ball head of the towing de-
vice with a suitable grease whenever necessary.
Protection of hollow spaces
All the hollow spaces on your vehicle which are at risk from corrosion are pro-
tected for life by a layer of protective wax applied in the factory.
If any small amount of wax flow out of the cavities at high temperatures, these
must be removed with a plastic scraper and the stains cleaned using a petrole-
um cleaner.
Underbody protection
The underside of your vehicle is already permanently protected by the factory
against chemical and mechanical influences.
We recommend having the protective coating underneath the vehicle and the
chassis checked — preferably before the beginning of winter and at the end of winter.
Product life of the films
Environmental influences (e.g. sunlight, humidity, air pollution, rockfall) affect
the life of the films. Films will age and become brittle – this is entirely normal:
this is not a fault.
Sunlight may also affect the strength of the film colour.
When transporting a load on the roof rack (e.g. roof box or similar), there is an
increased risk of film damage (e.g. of chipping from the secured load).
CAUTION
■ Vehicle paint
■ Damaged areas should be repaired as soon as possible.
■ Do not treat painted parts with or hard waxes.
■ Do not polish the paintwork in a dusty environment - risk of paint scratch-
es. ■ Do not apply any paint care products to door seals or window guides.■
Plastic parts
■ Do not use paint care products.
■
Chromed and anodised parts
■ Do not polish the chrome parts in a dusty environment - risk of surface
scratches.
■
Foils
The following instructions must be observed, otherwise there is a risk of foil
damage.
■ Do not clean with dirty cloths or sponges.
■ To remove ice and snow, do not use a scraper or other means.
■ Do not polish the foils
■ Do not use a pressure washer to clean the foils
■
Rubber seals
■ Do not treat the door seals and window guides with any products - the pro-
tective lacquer layer could be affected.
■
Windows and external mirror glass
■ Do not clean the inside of the windows with sharp objects - there is a risk
of damage to the filaments or glass antenna. ■ Do not use a cloth, which was used to polish the body - this could soil the
window and reduce visibility.
■
Headlights/lights ■ Do not dry off the headlights/lights, do not use sharp objects - there is a
risk of damage to the protective coating and subsequent cracking of the
headlight glass.
■
Reversing camera
The following instructions must be observed, otherwise there is a risk of
camera damage.
■ Do not remove snow / ice with warm / hot water.
■ To wash, never use a pressure washer or steam jet.
■ For cleaning, do not use abrasive cleaners.
262General Maintenance
Page 270 of 336
We recommend when refilling using refill bottles that you use refill bottles
from ŠKODA Original Accessories.
When adding AdBlue ®
take note of the minimum and maximum AdBlue ®
tank
capacity shown in the display of the instrument cluster » page 40.
Refill AdBlue ®
under the following conditions.
The vehicle is on a horizontal surface.
The ignition is switched off.
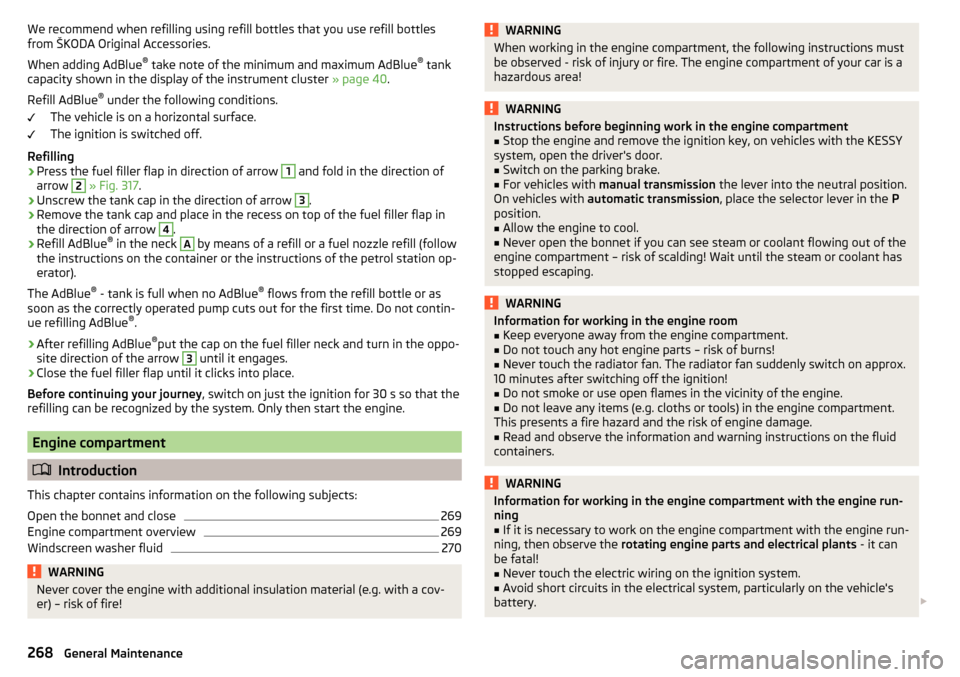
Refilling›
Press the fuel filler flap in direction of arrow
1
and fold in the direction of
arrow
2
» Fig. 317 .
›
Unscrew the tank cap in the direction of arrow
3
.
›
Remove the tank cap and place in the recess on top of the fuel filler flap in
the direction of arrow
4
.
›
Refill AdBlue ®
in the neck
A
by means of a refill or a fuel nozzle refill (follow
the instructions on the container or the instructions of the petrol station op-
erator).
The AdBlue ®
- tank is full when no AdBlue ®
flows from the refill bottle or as
soon as the correctly operated pump cuts out for the first time. Do not contin-
ue refilling AdBlue ®
.
›
After refilling AdBlue ®
put the cap on the fuel filler neck and turn in the oppo-
site direction of the arrow
3
until it engages.
›
Close the fuel filler flap until it clicks into place.
Before continuing your journey , switch on just the ignition for 30 s so that the
refilling can be recognized by the system. Only then start the engine.
Engine compartment
Introduction
This chapter contains information on the following subjects:
Open the bonnet and close
269
Engine compartment overview
269
Windscreen washer fluid
270WARNINGNever cover the engine with additional insulation material (e.g. with a cov-
er) – risk of fire!WARNINGWhen working in the engine compartment, the following instructions must
be observed - risk of injury or fire. The engine compartment of your car is a
hazardous area!WARNINGInstructions before beginning work in the engine compartment■Stop the engine and remove the ignition key, on vehicles with the KESSY
system, open the driver's door.■
Switch on the parking brake.
■
For vehicles with manual transmission the lever into the neutral position.
On vehicles with automatic transmission , place the selector lever in the P
position.
■
Allow the engine to cool.
■
Never open the bonnet if you can see steam or coolant flowing out of the
engine compartment – risk of scalding! Wait until the steam or coolant has
stopped escaping.
WARNINGInformation for working in the engine room■Keep everyone away from the engine compartment.■
Do not touch any hot engine parts – risk of burns!
■
Never touch the radiator fan. The radiator fan suddenly switch on approx.
10 minutes after switching off the ignition!
■
Do not smoke or use open flames in the vicinity of the engine.
■
Do not leave any items (e.g. cloths or tools) in the engine compartment.
This presents a fire hazard and the risk of engine damage.
■
Read and observe the information and warning instructions on the fluid
containers.
WARNINGInformation for working in the engine compartment with the engine run-
ning■
If it is necessary to work on the engine compartment with the engine run-
ning, then observe the rotating engine parts and electrical plants - it can
be fatal!
■
Never touch the electric wiring on the ignition system.
■
Avoid short circuits in the electrical system, particularly on the vehicle's
battery.
268General Maintenance