instrument cluster SKODA YETI 2010 1.G / 5L User Guide
[x] Cancel search | Manufacturer: SKODA, Model Year: 2010, Model line: YETI, Model: SKODA YETI 2010 1.G / 5LPages: 271, PDF Size: 14.71 MB
Page 35 of 271
Instruments and warning lights
34
Electronic stability programme (ESP)*
The warning light
comes on for a few seconds when the ignition is switched on.
When the ESP helps to stabilise the vehicle (for example when applying and releasing
a braking force to an individual wheel), then the warning light
flashes in the infor-
mation display.
The ESP system cannot be switched off, only the TCS system can be switched off by
pressing the button page 163, fig. 146 , the warning light
lights up.
The warning light lights up permanently if there is a fault in the ESP system.
The fact that the ESP system operates together with the ABS means that the ESP
warning light will also come on if the ABS system is not operating properly.
If the warning light
comes on immediately after starting the engine, the ESP system
can be switched off for technical reasons. In this case, the ESP system can be switched
on again by switching the ignition on and off. If the warning light goes out, the ESP
system is fully functional again.
Further information on the ESP page 163, “Electronic stability programme (ESP)*”.
Electronic Differential Lock (EDL)*
The EDL is a part of the ESP. A fault in the EDL is indicated by the lighting up of the ESP
warning light in the instrument cluster. Have the vehicle inspected immediately by
your specialist garage. Further information on the EDL page 164, “Electronic Differ-
ential Lock (EDL)*”.
Note
If the battery has been disconnected and reconnected, the warning light
comes on
after switching on the ignition. The warning light must go out after driving a short
distance.
Selector lever lock*
If the green warning light
lights up, operate the brake pedal. This is necessary, in
order to be able to move the selector lever out of the position P or N.
Further information about the selector lever lock page 122.
Tyre inflation pressure*
The warning light
lights up, if there is a substantial drop in inflation pressure in one
of the tyres. Reduce the speed and check or correct as soon as possible the inflation
pressure in the tyres page 216.
An audible signal sounds as an additional warning signal.
If the warning light flashes, there is a system fault. Visit the nearest specialist garage and
have the fault rectified.
Further information about the tyre pressure monitoring system page 169.
WARNING
When the warning light
lights up, immediately reduce the speed and
avoid sudden steering and brake manoeuvr es. Please stop the vehicle without
delay at the nearest possible stop and in spect the tyres and their inflation pres-
sures.
Under certain circumstances (e.g. sporty style of driving, wintry or unpaved
roads) the warning light
can be delayed or does not light up at all.
Note
If the battery has been disconnected, the warning light
comes on after switching on
the ignition. The warning light must go out after driving a short distance.
Antilock brake system (ABS)
The warning light
shows the functionality of the ABS.
The warning light comes on for a few seconds after the ignition has been switched on
or when starting the engine. The warning light goes out after an automatic check
sequence has been completed.
A fault in the ABS
The system is not functioning properly if the ABS warning light
does not go out
within a few seconds after switching on the igni tion, does not light up at all or lights up
while driving. The vehicle will only be br aked by the normal brake system. Visit a
s2ug.6.book Page 34 Friday, April 9, 2010 2:24 PM
Page 55 of 271
Lights and Visibility
54
Deactivating the function daylight driving lights
– Pull the turn signal light lever towards the steering wheel up to 3 seconds after switching on the ignition and at the same time, slide it to the bottom and hold it in
this position for at least 3 seconds.Activating the function daylight driving lights– Pull the turn signal light lever towards the steering wheel up to 3 seconds after switching on the ignition and at the same time, slide it to the top and hold it in this
position for at least 3 seconds.
In some countries, the national legal provisions require that the rear parking lights
come on together with the bulbs for daylight driving lights when activating the function
daylight driving lights.
On vehicles which are fitted with bulbs for daylight driving lights in the fog lights, the
parking lights do not come on when activa ting the function daylight driving lights.
When the daylight driving lights are switched on, the lighting of the instrument cluster
is switched on as well.
On vehicles fitted with an information displa y*, you can also activate or deactivate in
the menu the function da ylight driving lights:
Setup
Lights & Vision (Lights & Vision)
Automatic driving lamp control*
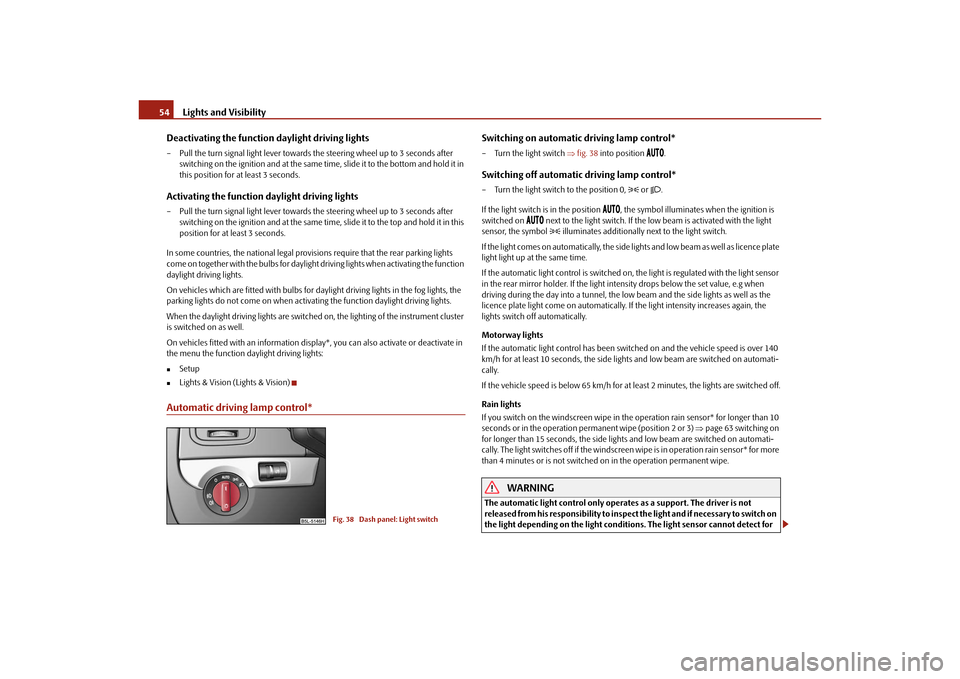
Switching on automatic driving lamp control*– Turn the light switch fig. 38 into position
.
Switching off automatic driving lamp control*– Turn the light switch to the position 0,
or .
If the light switch is in the position
, the symbol illuminates when the ignition is
switched on
next to the light switch. If the low beam is activated with the light
sensor, the symbol illuminates additionally next to the light switch.
If the light comes on automatically, the side lights and low beam as well as licence plate
light light up at the same time.
If the automatic light control is switched on, the light is regulated with the light sensor
in the rear mirror holder. If the light intensity drops below the set value, e.g when
driving during the day into a tunnel, the lo w beam and the side lights as well as the
licence plate light come on automatically. If the light intensity increases again, the
lights switch off automatically.
Motorway lights
If the automatic light control has been swit ched on and the vehicle speed is over 140
km/h for at least 10 seconds, the side ligh ts and low beam are switched on automati-
cally.
If the vehicle speed is below 65 km/h for at least 2 minutes, the lights are switched off.
Rain lights
If you switch on the windscreen wipe in th e operation rain sensor* for longer than 10
seconds or in the operation perm anent wipe (position 2 or 3) page 63 switching on
for longer than 15 seconds, the side ligh ts and low beam are switched on automati-
cally. The light switches off if the windscreen wipe is in operation rain sensor* for more
than 4 minutes or is not switched on in the operation permanent wipe.
WARNING
The automatic light control only operat es as a support. The driver is not
released from his responsibility to inspect the light and if necessary to switch on
the light depending on the light conditions. The light sensor cannot detect for
Fig. 38 Dash panel: Light switch
s2ug.6.book Page 54 Friday, April 9, 2010 2:24 PM
Page 58 of 271
Lights and Visibility57
Using the system
Safety
Driving Tips
General Maintenance
Breakdown assistance
Technical Data
The warning light
lights up in the instrument cluste
r when the fog lights are switched
on page 28.
Fog lights with turning light “CORNER”* function
The fog lights with the function “COR NER” are designed for a better illu-
mination of the surrounding area near the vehicle when corning,
parking etc.The fog lights with the function “CORNER” ar e adjusted according to the steering angle
or after switching on the turn signal light
8) in the following circumstances:
the vehicle is stationary and the engine is running or it moves with a speed of
maximum 40 km/h;
the daylight driving lights are not switched on;
the low beam is switched on or th e light switch is in the position
and the
intensity of the ambient light causes the low beam to be switched on;
the fog lights are not switched on;
no reverse gear is engaged.Note
If you engage the reverse gear during the active function “CORNER”, both fog lights
illuminate.Rear fog light
Switching on the rear fog light– First of all turn the light switch into position
or page 56, fig. 39 .
– Pull the switch into position .
The warning light
lights up in the instrument cluster when the rear fog light is
switched on page 28. Only the rear fog light of the trailer lights
up automatically when you are towing a trailer
using a factory-fitted towing device from Škoda original accessories which is
fitted with the rear fog light.
The rear fog light is located in the rear light array on the driver's side.
Caution
The rear fog light should only be switched on if visibility is particularly poor (conform
with any varying legal provisions) to avoi d dazzling vehicles behind your vehicle.Instrument lighting*
You can adjust the brightness of the instrument lighting.Instrument lighting– Switch on the light.
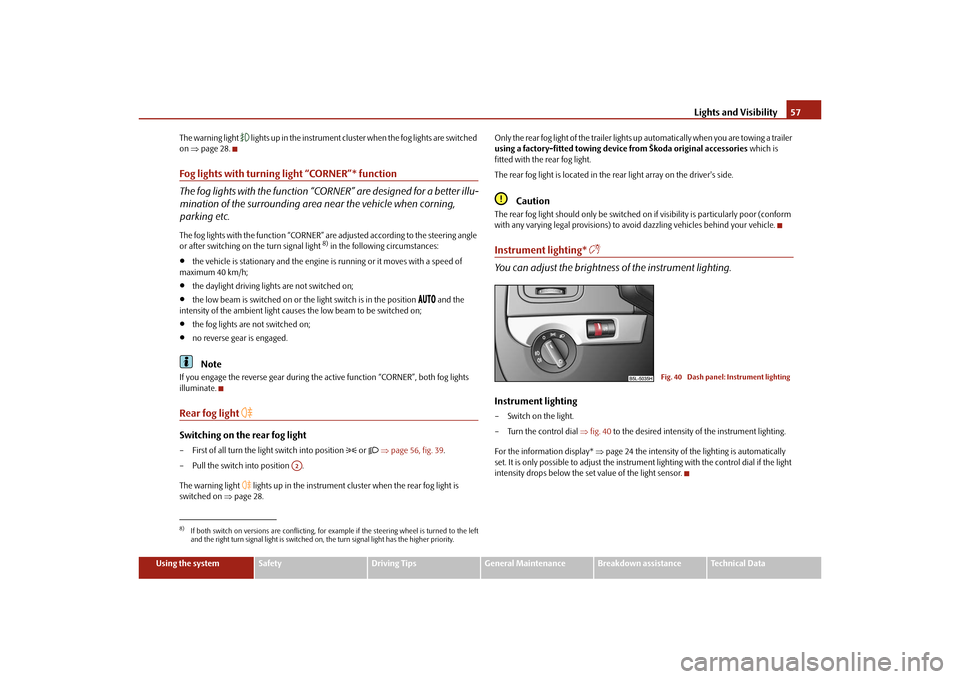
– Turn the control dial fig. 40 to the desired intensity of the instrument lighting.
For the information display* page 24 the intensity of the lighting is automatically
set. It is only possible to adjust the instrume nt lighting with the control dial if the light
intensity drops below the set value of the light sensor.
8)If both switch on versions are conflicting, for ex ample if the steering wheel is turned to the left
and the right turn signal light is switched on, the turn signal light has the higher priority.
A2
Fig. 40 Dash panel: Instrument lighting
s2ug.6.book Page 57 Friday, April 9, 2010 2:24 PM
Page 60 of 271
Lights and Visibility59
Using the system
Safety
Driving Tips
General Maintenance
Breakdown assistance
Technical Data
The turn signal
and main beam lever
The parking lights and headlight flas her are also switched on and off
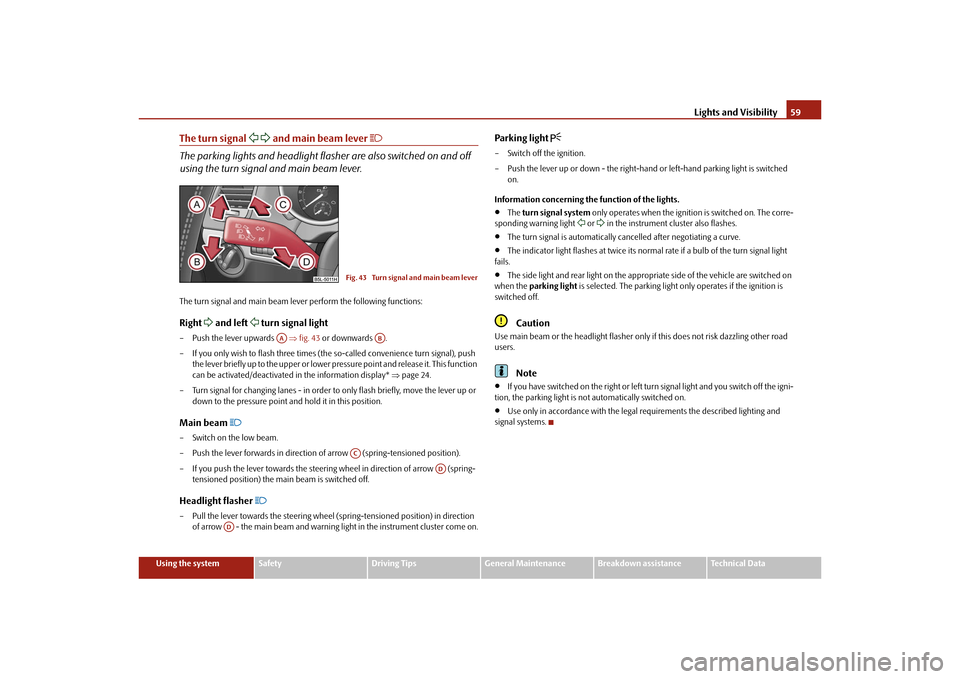
using the turn signal and main beam lever.The turn signal and main beam le ver perform the following functions:Right
and left
turn signal light
– Push the lever upwards fig. 43 or downwards .
– If you only wish to flash three times (the so-called convenience turn signal), push
the lever briefly up to the upper or lower pr essure point and release it. This function
can be activated/deactivated in the information display* page 24.
– Turn signal for changing lanes - in order to only flash briefly, move the lever up or
down to the pressure point and hold it in this position.Main beam
– Switch on the low beam.
– Push the lever forwards in direction of arrow (spring-tensioned position).
– If you push the lever towards the steering wheel in direction of arrow (spring-
tensioned position) the main beam is switched off.Headlight flasher
– Pull the lever towards the steering wheel (spring-tensioned position) in direction
of arrow - the main beam and warning light in the instrument cluster come on.
Parking light
– Switch off the ignition.
– Push the lever up or down - the right-hand or left-hand parking light is switched
on.
Information concerning the function of the lights.
The turn signal system only operates when the ignition is switched on. The corre-
sponding warning light
or in the instrument cluster also flashes.
The turn signal is automatically cancelled after negotiating a curve.
The indicator light flashes at twice its normal rate if a bulb of the turn signal light
fails.
The side light and rear light on the appropriate side of the vehicle are switched on
when the parking light is selected. The parking light only operates if the ignition is
switched off.Caution
Use main beam or the headlight flasher only if this does not risk dazzling other road
users.
Note
If you have switched on the right or left turn signal light and you switch off the igni-
tion, the parking light is not automatically switched on.
Use only in accordance with the legal requirements the described lighting and
signal systems.
Fig. 43 Turn signal and main beam lever
AA
AB
AC
AD
AD
s2ug.6.book Page 59 Friday, April 9, 2010 2:24 PM
Page 110 of 271
Starting-off and Driving109
Using the system
Safety
Driving Tips
General Maintenance
Breakdown assistance
Technical Data
You should not switch on any major elec trical components during the heating
period otherwise the vehicle battery will be drained unnecessarily.
- start engine
Applies to all models:
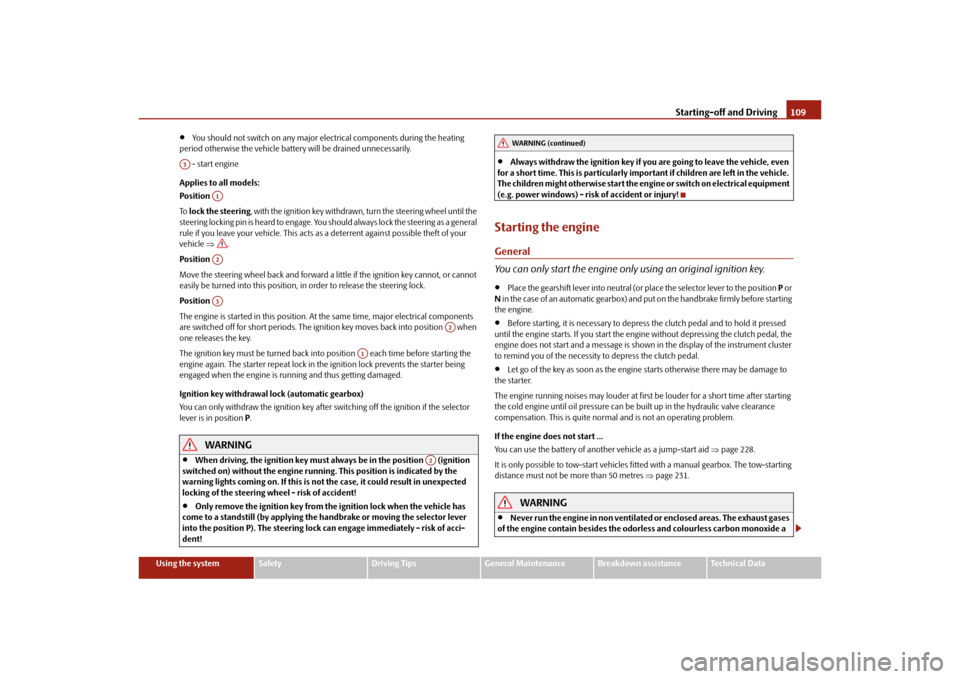
Position
To lock the steering , with the ignition key withdrawn, turn the steering wheel until the
steering locking pin is heard to engage. You should always lock the steering as a general
rule if you leave your vehicle. This acts as a deterrent against possible theft of your
vehicle .
Position
Move the steering wheel back and forward a little if the ignition key cannot, or cannot
easily be turned into this position, in order to release the steering lock.
Position
The engine is started in this position. At the same time, major electrical components
are switched off for short periods. The ignition key moves back into position when
one releases the key.
The ignition key must be turned back into position each time before starting the
engine again. The starter repeat lock in th e ignition lock prevents the starter being
engaged when the engine is r unning and thus getting damaged.
Ignition key withdrawal lock (automatic gearbox)
You can only withdraw the ignition key after switching off the ignition if the selector
lever is in position P.
WARNING
When driving, the ignition key must always be in the position (ignition
switched on) without the engine running. This position is indicated by the
warning lights coming on. If this is not the case, it could result in unexpected
locking of the steering wh eel - risk of accident!
Only remove the ignition key from the ignition lock when the vehicle has
come to a standstill (by applying the handbrake or moving the selector lever
into the position P). The steering lock can engage imme diately - risk of acci-
dent!
Always withdraw the ignition key if you are going to leave the vehicle, even
for a short time. This is particularly important if children are left in the vehicle.
The children might otherwise start the engi ne or switch on electrical equipment
(e.g. power windows) - risk of accident or injury!
Starting the engineGeneral
You can only start the engine only using an original ignition key.
Place the gearshift lever into neutral (or place the selector lever to the position P or
N in the case of an automatic gearbox) and put on the handbrake firmly before starting
the engine.
Before starting, it is necessary to depres s the clutch pedal and to hold it pressed
until the engine starts. If you start the engi ne without depressing the clutch pedal, the
engine does not start and a message is show n in the display of the instrument cluster
to remind you of th e necessity to depress the clutch pedal.
Let go of the key as soon as the engine starts otherwise there may be damage to
the starter.
The engine running noises may louder at first be louder for a short time after starting
the cold engine until oil pressure can be built up in the hydraulic valve clearance
compensation. This is quite normal and is not an operating problem.
If the engine does not start ...
You can use the battery of anothe r vehicle as a jump-start aid page 228.
It is only possible to tow-start vehicles fitt ed with a manual gearbox. The tow-starting
distance must not be more than 50 metres page 231.
WARNING
Never run the engine in non ventilated or enclosed areas. The exhaust gases
of the engine contain besides the odorless and colourless carbon monoxide a
A3
A1A2A3
A2
A1
A2
WARNING (continued)
s2ug.6.book Page 109 Friday, April 9, 2010 2:24 PM
Page 116 of 271
Starting-off and Driving115
Using the system
Safety
Driving Tips
General Maintenance
Breakdown assistance
Technical Data
The external sound source of the park assist and the parking aid can be
disruptively influenced and under unfavourable conditions, objects or people
cannot be recognised by the sensors of the parking aid.Caution
If other vehicles are parked behind or on the kurb, the park assist guides your
ve hicle be yond the kurb or onto it. Make s ure that the whee ls or the whe el rims of yo ur
vehicle are not damaged and if necessary intervene in time.
You should satisfy yourself before parking that there is no small obstacle, such as a
rock, thin post, trailer drawbar etc., in front or behind your vehicle. Such an obstacle
might not be within the range detected by the sensors.
Under certain circumstances, surfaces or st ructures of certain objects such as wire
mesh fences, powder snow etc..., ca nnot be recognised by the system.
The evaluation of the parking space and the parking procedure depends on the
circumference of the wheels. The system does not function correctly if your vehicle is
mounted with wheels of non-permissible size, snow chains or a temporary spare
wheel (in order to reach the nearest workshop). If the tyres other than those excepted
by the manufacturer are mounted, the resulting position of the vehicle in the parking
space can differ slightly. The parking assistant system automatically performs the
correction of the wheel circumference when driving.
The accuracy of the evaluation for the parking space can be influenced by the
incorrectly determined outside temperature if the later is influenced by the thermal
radiation of the engine i.e for stop and go in a traffic jam.
In order to avoid damaging th e sensors while cleaning with high-pressure cleaners
or steam jets, the sensors must only be directly sprayed for short periods while a
minimum distance of 10 cm must be observed.Note
A component of the park assist is the front and rear parking aid*.
The electronic stability programme (ESP*) must always be switched on for the
parking procedure.
Only the front parking aid operates if you are towing a trailer (applies only to
models which feature a factory-fitted towing device*). This is why it is not possible to
park backwards with the help of the park assist when towing a trailer.
The sensors must be kept clean and free of ice to enable the parking aid to operate
properly.
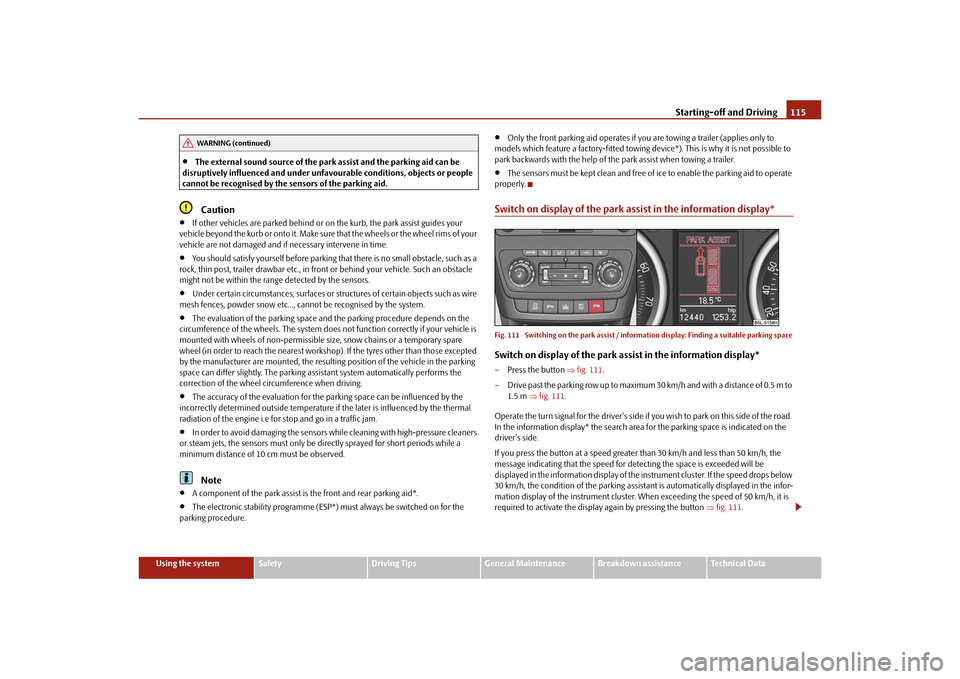
Switch on display of the park a ssist in the information display*Fig. 111 Switching on the park assist / inform ation display: Finding a suitable parking spaceSwitch on display of the park assist in the information display*– Press the button fig. 111 .
– Drive past the parking row up to maximum 30 km/h and with a distance of 0.5 m to 1.5 m fig. 111 .
Operate the turn signal for the driver's side if you wish to park on this side of the road.
In the information display* the search area for the parking space is indicated on the
driver's side.
If you press the button at a speed greate r than 30 km/h and less than 50 km/h, the
message indicating that the speed for detecting the space is exceeded will be
displayed in the information display of the in strument cluster. If the speed drops below
30 km/h, the condition of the parking assistant is automatically displayed in the infor-
mation display of the instrument cluster. When exceeding the speed of 50 km/h, it is
required to activate the displa y again by pressing the button fig. 111 .
WARNING (continued)
s2ug.6.book Page 115 Friday, April 9, 2010 2:24 PM
Page 123 of 271
Automatic gearbox DSG*
122WARNING
Never move the selector lever into position R or P when driving - risk of an
accident!
When the engine is running and the vehicle is stationary, it is necessary to
hold the car with the brake pedal in all the positions of the selector lever (except
P and N) since the power transmission is never completely interrupted, also not
when the engine is idling - the vehicle creeps.
You must on no account unintentionally operate the throttle (e.g. by hand
from the engine compartment) if a driv e position is engaged when the car is
stationary. The vehicle would otherwise immediately start off - also when the
handbrake is firmly applied - risk of an accident!
You must move the selector lever into position P and firmly apply the hand-
brake first before you or any other person opens the bonnet and starts working
on the engine when it is running - risk of accident! It is also essential to observe
all warnings page 204, “Working in the engine compartment”.
Selector lever lockAutomatic selector lever lock
With the ignition on, the selector lever is locked when it is in the positions P and N . You
must first of all depress the brake pedal in or der to move the selector lever out of this
position. The warning light
page 34 lights up in the instrument cluster as a
reminder for the driver when the selector lever is in the positions P and N.
A time delay element ensures that the selector lever is not blocked when rapidly
switching over the position N (e.g. from R to D). This does, for example, allow one to
seesaw out a stuck vehicle. The selector lever lo ck will click into place if the lever is in
the N position for more than 2 seconds without the brake pedal being pressed.
The selector lever lock is only active if the vehicle is stationary or moving at speed of
less than 5 km/hour. The lock is swit ched off automatically into position N when the
car is travelling at a higher speed.
Shiftlock button
The Shiftlock button in the hand le of selector lever prevents certain selector lever posi-
tions being engaged inadvertently. The select or lever lock is cancelled when you press
the Shiftlock button. Keylock - Ignition key withdrawal lock
You can only withdraw the ignition key after
switching off the ignition if the selector
lever is in position P. If the ignition key is withdrawn, the selector lever is blocked in
position P.
Kickdown function
The kickdown function provides you with maximum acceleration
power.Fully depressing the accelerato r pedal allows the kickdown function to be activated in
the desired driving program. This function has precedence over the driving
programme and serves for maximum accelerati on of the vehicle when exploiting the
maximum power potential of the engine wi thout taking into account the current
selector lever position ( D, S or Tiptronic). The gearbox shifts down to one or several
gears in line with the driving state and the vehicle accelerates. The gearbox does not
shift up into the highest gear until the en gine has reached its maximum revolutions for
this gear range.
WARNING
Please note that using the kickdown function can result in the driven wheels
spinning on a smooth or slippery road surface - risk of skidding!Dynamic shift programmeThe automatic gearbox of your vehicle is controlled electronically. Shifting up and
down through the gears is performed automati cally on the basis of pre-defined driving
programmes.
Adopting a moderate style of driving will cause the gearbox to select the most
economical driving programme. Shifting up into a higher gear as soon as possible and
shifting down as late as po ssible will have a favourable effect on your fuel consump-
tion.
Adopting a sporty style of driving with rapid movements of the accelerator pedal
combined with sharp acceleration and frequent changes in speed, exploiting the top
speed of the car or depressing the accelerator pedal (kickdown function), will cause
s2ug.6.book Page 122 Friday, April 9, 2010 2:24 PM
Page 124 of 271
Automatic gearbox DSG*123
Using the system
Safety
Driving Tips
General Maintenance
Breakdown assistance
Technical Data
the gearbox to switch over to this style of driving and shift down earlier with frequent
changes in gears in comparison to the moderate style of driving.
Selecting the most appropriate driving programme for the particular style of driving is
a continuous process. Irrespective of this it is, however, possible to switch or shift down
into a dynamic shift programme by depressi
ng the accelerator rapidly. The gearbox
shifts down into a lower gear matching th e speed of the car and this allows you to
accelerate rapidly (e.g. when overtaking) without having to depress the accelerator
pedal fully into the kickdown range. The original programme will be reactivated to
match your particular styl e of driving once the gearbox has shifted up again.
When driving in hilly regions, the gears are selected to match uphill and downhill
sections. This avoids the gearbox frequently shifting up an d down when negotiating an
uphill stretch. When driving downhill, it is possible to shift down into the Tiptronic
position, in order to exploit the engine brake torque.
Tiptronic
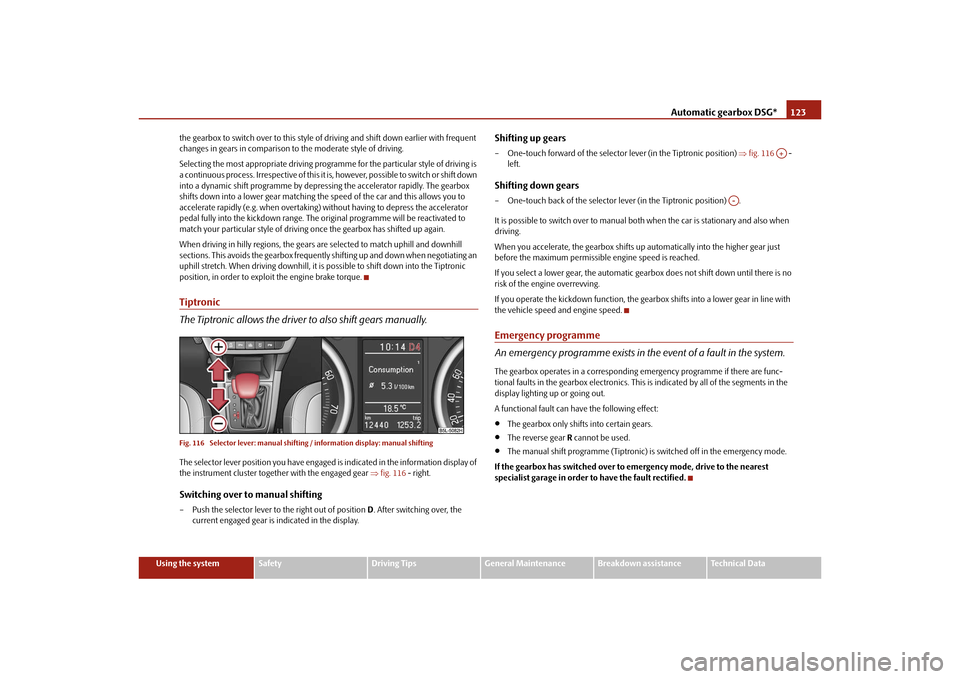
The Tiptronic allows the driver to also shift gears manually.Fig. 116 Selector lever: manual shifting / information display: manual shiftingThe selector lever position you have engaged is indicated in the information display of
the instrument cluster together with the engaged gear fig. 116 - right.Switching over to manual shifting– Push the selector lever to the right out of position D. After switching over, the
current engaged gear is indicated in the display.
Shifting up gears– One-touch forward of the selector lever (in the Tiptronic position) fig. 116 -
left.Shifting down gears– One-touch back of the selector lever (in the Tiptronic position) .
It is possible to switch over to manual bo th when the car is stationary and also when
driving.
When you accelerate, the gearbox shifts up automatically into the higher gear just
before the maximum permissible engine speed is reached.
If you select a lower gear, the automatic gear box does not shift down until there is no
risk of the engine overrevving.
If you operate the kickdown function, the gear box shifts into a lower gear in line with
the vehicle speed and engine speed.Emergency programme
An emergency programme exists in the event of a fault in the system.The gearbox operates in a corresponding emergency programme if there are func-
tional faults in the gearbox electronics. This is indicated by all of the segments in the
display lighting up or going out.
A functional fault can ha ve the following effect:
The gearbox only shifts into certain gears.
The reverse gear R cannot be used.
The manual shift programme (Tiptronic) is switched off in the emergency mode.
If the gearbox has switched over to emergency mode, drive to the nearest
specialist garage in order to have the fault rectified.
A+
A-
s2ug.6.book Page 123 Friday, April 9, 2010 2:24 PM
Page 147 of 271
Airbag system
146
Airbag systemDescription of the airbag systemGeneral information on the airbag systemThe front airbag system is complementary to the three-point seat belts and offers addi-
tional protection for the head and chest area of the driver and passenger in the event
of a frontal collision.
In the case of a violent side cr ash, the side* and head airbags* reduce the risk of inju-
ries to the occupants on the side of the collision .
The airbag system is only functional af ter the ignition has been switched on.
The operational readiness of the airbag syst em is monitored electronically. The airbag
indicator light comes on for a few seconds each time the ignition is switched on.
The airbag system (according to vehicle equipment) consists of:
an electronic control unit,
the front airbags for the driver and front passenger,
driver's knee airbag*,
front side airbags*,
Rear side airbags*,
head airbags*,
an airbag indicator light in the instrument cluster,
a front passenger airbag switch page 154,
an indicator light for a switched off front seat passenger airbag in the middle of the
dash panel page 154.
A fault in the airbag system exists if:
the airbag indicator light does not light up when the ignition is switched on,
the warning light does not go out after about 4 seconds after the ignition is
switched on,
the airbag indicator light goes out and come s on again after the ignition is switched
on,
the airbag indicator light comes on or flickers when driving,
the airbag indicator light showing a swit ched-off front passenger airbag in the
middle of the dash panel flashes.
WARNING
To enable the occupants of a vehicle to be protected with the greatest
possible effect when the airbag is deployed, the front seats must be
page 138, “Correct seated position” co rrectly adjusted to match the body
size of the occupant.
If you do not fasten the seat belts when driving, lean too far forward or
adopt an incorrect seated position, you are exposing yourself to increased risk
of injury in the event of an accident.
Have the airbag system checked immediat ely by a specialist garage if a fault
exists. Otherwise, there is a risk of the airbag not being activated in the event of
an accident.
No modifications of any kind may be made to parts of the airbag system.
It is prohibited to manipulate individual parts of the airbag system as this
might result in the airbag being deployed.
The protective function of the airbag system is sufficient for only one acci-
dent. The airbag system must then be re placed if the airbag has been deployed.
The airbag system needs no maintenance during its working life.
If you sell your car, please hand over the complete vehicle documentation to
the new owener. Please note that the documents relating to the possibility of
deactivating the front passenger airbag are also part of the vehicle documents!
If the vehicle or individual parts of the airbag system are scrapped, it is
essential to observe the relevant safety precautions. Specialist garages are
familiar with these regulations.
When disposing of vehicle or parts of the airbag system, it is important to
comply with the national legal requirements.
s2ug.6.book Page 146 Friday, April 9, 2010 2:24 PM
Page 164 of 271
Intelligent Technology163
Using the system
Safety
Driving Tips
General Maintenance
Breakdown assistance
Technical Data
Driving TipsIntelligent TechnologyElectronic stability programme (ESP)*GeneralGeneral
The ESP aids you in maintaining control of your vehicle in situations in which the
vehicle is driving at its dynamic limits, such as entering a curve fast. The risk of skidding
is reduced and your vehicle thus offers greater driving stability depending on the
conditions of the road surface. The system operates at all speeds.
The following systems are integrated into the electronic stability programme:
Electronic Differential Lock (EDL),
Traction control system (TCS),
active driver-steering recommendation (DSR),
Antilock brake system (ABS),
Brake Assist,
Uphill Start Assist
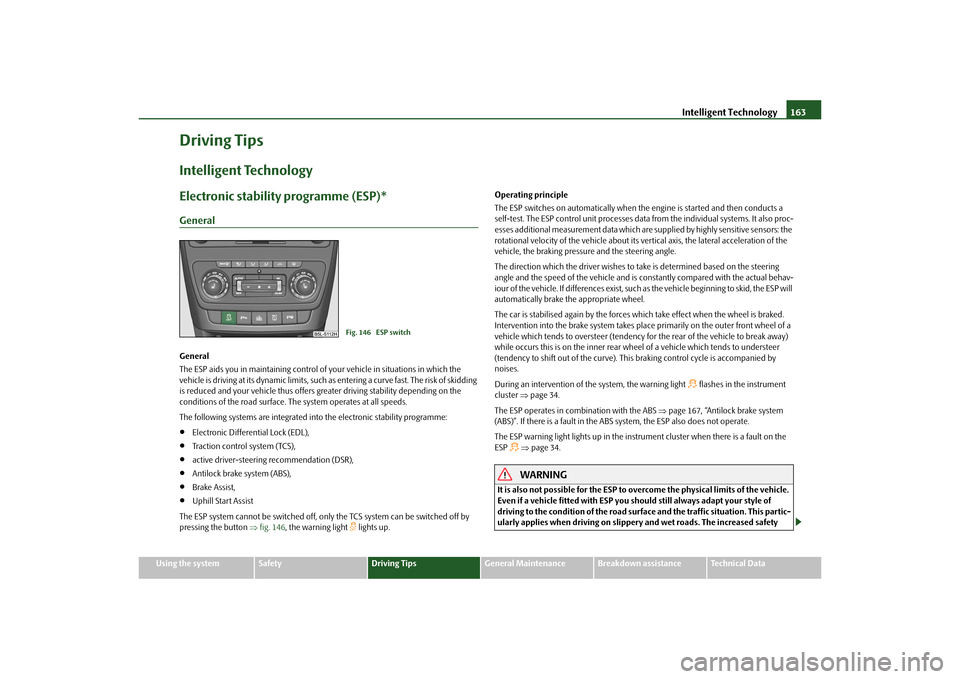
The ESP system cannot be switched off, only the TCS system can be switched off by
pressing the button fig. 146 , the warning light
lights up. Operating principle
The ESP switches on automatically when the engine is started and then conducts a
self-test. The ESP control unit processes data from the individual systems. It also proc-
esses additional measurement data which are supplied by highly sensitive sensors: the
rotational velocity of the vehicle about its ve
rtical axis, the lateral acceleration of the
vehicle, the braking pressure and the steering angle.
The direction which the driver wishes to take is determined based on the steering
angle and the speed of the vehicle and is co nstantly compared with the actual behav-
iour of the vehicle. If differences exist, such as the vehi cle beginning to skid, the ESP will
automatically brake the appropriate wheel.
The car is stabilised again by the forces wh ich take effect when the wheel is braked.
Intervention into the brake system takes place primarily on the outer front wheel of a
vehicle which tends to oversteer (tendency for the rear of the vehicle to break away)
while occurs this is on the inner rear wh eel of a vehicle which tends to understeer
(tendency to shift out of the curve). This braking control cycle is accompanied by
noises.
During an intervention of the system, the warning light
flashes in the instrument
cluster page 34.
The ESP operates in combination with the ABS page 167, “Antilock brake system
(ABS)”. If there is a fault in the ABS system, the ESP also does not operate.
The ESP warning light lights up in the instrument cluster when there is a fault on the
ESP
page 34.WARNING
It is also not possible for the ESP to overcome the physical limits of the vehicle.
Even if a vehicle fitted with ESP you should still always adapt your style of
driving to the condition of the road surfac e and the traffic situation. This partic-
ularly applies when driving on slippery and wet roads. The increased safety
Fig. 146 ESP switch
s2ug.6.book Page 163 Friday, April 9, 2010 2:24 PM