engine SKODA YETI 2011 1.G / 5L Manual Online
[x] Cancel search | Manufacturer: SKODA, Model Year: 2011, Model line: YETI, Model: SKODA YETI 2011 1.G / 5LPages: 252, PDF Size: 3.61 MB
Page 199 of 252
●
Do not place the battery in direct daylight in order to protect the battery hous-
ing from the effects of ultra-violet light.
● If the vehicle has not been driven for more than 3 to 4 weeks, the battery will
discharge This is because certain electrical components consume electricity (e. g.
control units) also in idle state. You can prevent the discharging of the battery by
disconnecting the negative terminal or charging the battery constantly with a very
low charging current. For the sake of the environment
A removed battery is a special type of waste which is harmful to the environment
- contact your specialist garage regarding disposing of the battery. Note
● Please also refer to the guidelines ⇒ page 198
, also after connecting the bat-
tery.
● You should replace batteries older than 5 years.
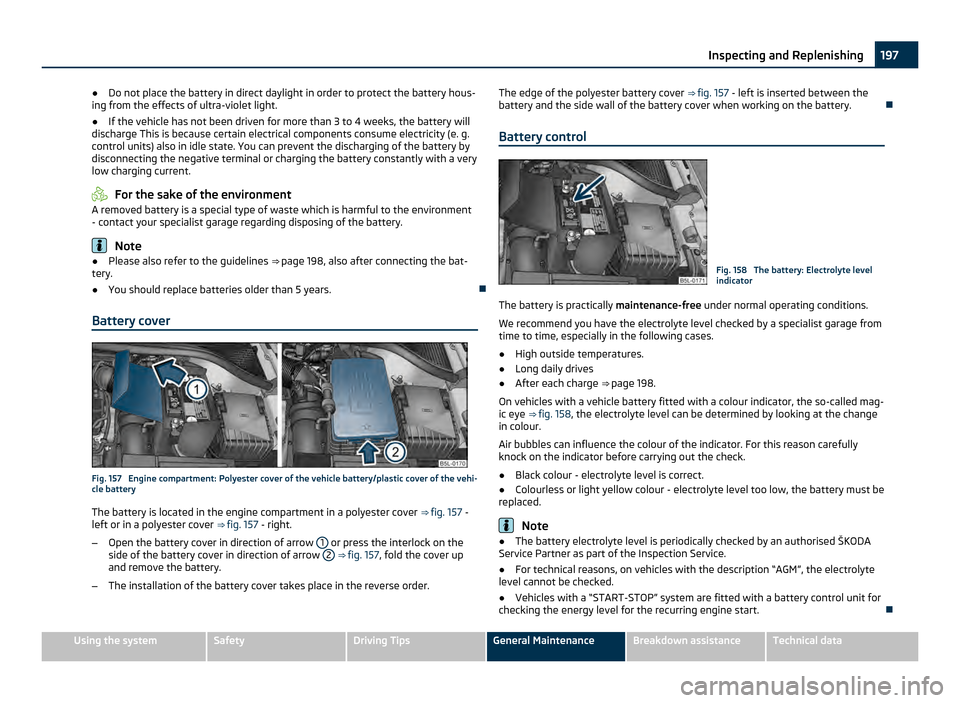
Battery cover Fig. 157 Engine compartment: Polyester cover of the vehicle battery/plastic cover of the vehi-
cle battery
The battery is located in the engine compartment in a polyester cover ⇒ fig. 157 -
left or in a polyester cover ⇒ fig. 157 - right.
– Open the battery cover in direction of arrow 1 or press the interlock on the
side of the battery cover in direction of arrow 2
⇒
fig. 157, fold the cover up
and remove the battery.
– The installation of the battery cover takes place in the reverse order. The edge of the polyester battery cover
⇒
fig. 157 - left is inserted between the
battery and the side wall of the battery cover when working on the battery.
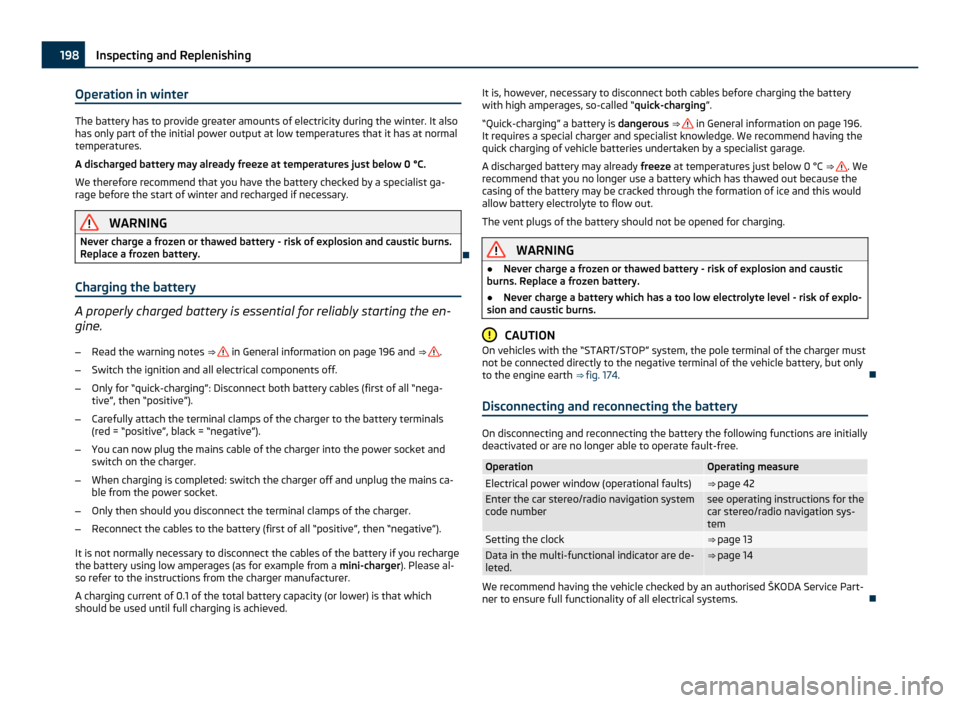
Battery control Fig. 158 The battery: Electrolyte level
indicator
The battery is practically maintenance-free under normal operating conditions.
We recommend you have the electrolyte level checked by a specialist garage from
time to time, especially in the following cases.
● High outside temperatures.
● Long daily drives
● After each charge ⇒
page 198.
On vehicles with a vehicle battery fitted with a colour indicator, the so-called mag-
ic eye ⇒ fig. 158 , the electrolyte level can be determined by looking at the change
in colour.
Air bubbles can influence the colour of the indicator. For this reason carefully
knock on the indicator before carrying out the check.
● Black colour - electrolyte level is correct.
● Colourless or light yellow colour - electrolyte level too low, the battery must be
replaced. Note
● The battery electrolyte level is periodically checked by an authorised
ŠKODA
Service Partner as part of the Inspection Service.
● For technical reasons, on vehicles with the description “AGM”, the electrolyte
level cannot be checked.
● Vehicles with a “START-STOP” system are fitted with a battery control unit for
checking the energy level for the recurring engine start. 197
Inspecting and Replenishing Using the system Safety Driving Tips General Maintenance Breakdown assistance Technical data
Page 200 of 252
Operation in winter
The battery has to provide greater amounts of electricity during the winter. It also
has only part of the initial power output at low temperatures that it has at normal
temperatures.
A discharged battery may already freeze at temperatures just below 0 °C.
We therefore recommend that you have the battery checked by a specialist ga-
rage before the start of winter and recharged if necessary. WARNING
Never charge a frozen or thawed battery - risk of explosion and caustic burns.
Replace a frozen battery.
Charging the battery A properly charged battery is essential for reliably starting the en-
gine.
– Read the warning notes ⇒ in General information on page 196 and
⇒ .
– Switch the ignition and all electrical components off.
– Only for “quick-charging”: Disconnect both battery cables (first of all “nega-
tive
”, then “positive”).
– Carefully attach the terminal clamps of the charger to the battery terminals
(red = “positive
”, black = “negative”).
– You can now plug the mains cable of the charger into the power socket and
switch on the charger.
– When charging is completed: switch the charger off and unplug the mains ca-
ble from the power socket.
– Only then should you disconnect the terminal clamps of the charger.
– Reconnect the cables to the battery (first of all “positive”, then “negative”).
It is not normally necessary to disconnect the cables of the battery if you recharge
the battery using low amperages (as for example from a mini-charger). Please al-
so refer to the instructions from the charger manufacturer.
A charging current of 0.1 of the total battery capacity (or lower) is that which
should be used until full charging is achieved. It is, however, necessary to disconnect both cables before charging the battery
with high amperages, so-called
“quick-charging ”.
“Quick-charging” a battery is dangerous ⇒ in General information on page 196.
It requires a special charger and specialist knowledge. We recommend having the
quick charging of vehicle batteries undertaken by a specialist garage.
A discharged battery may already freeze at temperatures just below 0
°C ⇒ . We
recommend that you no longer use a battery which has thawed out because the
casing of the battery may be cracked through the formation of ice and this would
allow battery electrolyte to flow out.
The vent plugs of the battery should not be opened for charging. WARNING
● Never charge a frozen or thawed battery - risk of explosion and caustic
burns. Replace a frozen battery.
● Never charge a battery which has a too low electrolyte level - risk of explo-
sion and caustic burns. CAUTION
On vehicles with the “START/STOP” system, the pole terminal of the charger must
not be connected directly to the negative terminal of the vehicle battery, but only
to the engine earth ⇒ fig. 174.
Disconnecting and reconnecting the battery On disconnecting and reconnecting the battery the following functions are initially
deactivated or are no longer able to operate fault-free.
Operation Operating measure
Electrical power window (operational faults) ⇒ page 42
Enter the car stereo/radio navigation system
code number see operating instructions for the
car stereo/radio navigation sys-
tem
Setting the clock ⇒ page 13
Data in the multi-functional indicator are de-
leted. ⇒ page 14
We recommend having the vehicle checked by an authorised ŠKODA Service Part-
ner to ensure full functionality of all electrical systems.
198
Inspecting and Replenishing
Page 201 of 252
Replacing the battery
When replacing a battery, the new new battery must have the same capacity,
voltage (12
V), amperage and be the same size. Suitable types of vehicle battery
are available from an authorised ŠKODA Service Partner.
We recommend you have a battery change carried out by an authorised ŠKODA
Service Partner, who will properly install the new battery and dispose of the origi-
nal one. CAUTION
Vehicles with a “START-STOP” system are fitted with a special battery type which
allows the battery control unit to check the energy level for recurring engine start.
This battery must only be replaced by a battery of the same type. For the sake of the environment
Batteries contain poisonous substances such as sulphuric acid and lead. For this
reason, it must be disposed of properly. Under no circumstances must it be dis-
posed of in the communal rubbish.
Automatic consumer shut-off Under heavy load on the vehicle battery, the vehicle electrical system manage-
ment automatically takes various measures to avoid draining the vehicle battery.
●
The idling speed is raised to allow the generator to deliver more electricity to
the electrical system.
● If necessary, some electrical consumers are limited in their performance or are
temporarily switched off completely. Note
Despite such intervention by the vehicle electric system management, the vehicle
battery may be drained. For example, when the ignition is switched on a long time
with the engine turned off or the side or parking lights are turned on during lon-
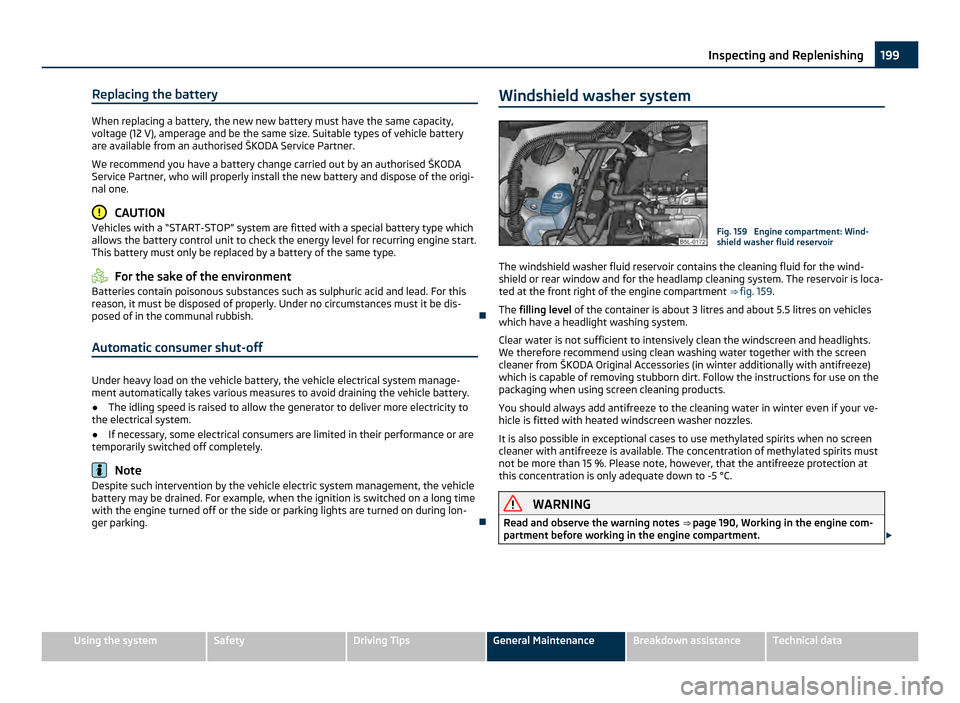
ger parking. Windshield washer system Fig. 159 Engine compartment: Wind-
shield washer fluid reservoir
The windshield washer fluid reservoir contains the cleaning fluid for the wind-
shield or rear window and for the headlamp cleaning system. The reservoir is loca-
ted at the front right of the engine compartment ⇒ fig. 159 .
The filling level of the container is about 3 litres and about 5.5 litres on vehicles
which have a headlight washing system.
Clear water is not sufficient to intensively clean the windscreen and headlights.
We therefore recommend using clean washing water together with the screen
cleaner from
ŠKODA Original Accessories (in winter additionally with antifreeze)
which is capable of removing stubborn dirt. Follow the instructions for use on the
packaging when using screen cleaning products.
You should always add antifreeze to the cleaning water in winter even if your ve-
hicle is fitted with heated windscreen washer nozzles.
It is also possible in exceptional cases to use methylated spirits when no screen
cleaner with antifreeze is available. The concentration of methylated spirits must
not be more than 15 %. Please note, however, that the antifreeze protection at
this concentration is only adequate down to -5 °C. WARNING
Read and observe the warning notes ⇒ page 190
, Working in the engine com-
partment before working in the engine compartment. £ 199
Inspecting and Replenishing Using the system Safety Driving Tips General Maintenance Breakdown assistance Technical data
Page 212 of 252
WARNING
● If you find yourself in flowing traffic switch on the hazard warning lights
system and place the warning triangle on the side of the road at the prescri-
bed distance from your vehicle. Comply with the national legal regulations. In
this way you are protecting not only yourself but also other road users.
● Never start the engine with the vehicle sitting on the raised jack - danger
of suffering injury. CAUTION
If you have to change a wheel on a slope first block the opposite wheel with a
stone or similar object in order to secure the vehicle from unexpectedly rolling
away. Note
Comply with the national legal regulations.
Changing a wheel Always change a wheel on a level surface as far as possible.
–
Take off the full wheel trim ⇒ page 210 or the wheel trim cap ⇒ page 211 or
the caps ⇒ page 211.
– In the case of light alloy wheels remove the wheel trim cap ⇒
page 211.
– First of all slacken the safety wheel bolt and afterwards the other wheel bolts
⇒ page 211.
– Jack up the vehicle until the wheel to be changed is clear of the ground
⇒ page 212.
– Unscrew the wheel bolts and place them on a clean surface (cloth, paper etc.).
– Take off the wheel.
– Fit on the spare wheel and tighten the wheel bolts slightly.
– Lower the car.
– Tighten the wheel bolts firmly, alternately and diagonally using the wheel
wrench (crosswise) and lastly the wheel safety bolt ⇒
page 211.
– Mount the full wheel trim/wheel trim cap or the caps. Note
● All bolts must be clean and must turn easily.
● You must never grease or oil the wheel bolts!
● When fitting on unidirectional tyres, ensure that the tyres rotate in the correct
direction ⇒ page 201
.
Subsequent steps After changing the wheel, you must perform the following steps.
–
Stow and attach the replaced wheel in the spare wheel well using a special
screw ⇒ fig. 165 .
– Stow the vehicle tool kit in the space provided.
– Check the tyre pressure on the spare wheel just mounted as soon as possible.
– Have the tightening torque of the wheel bolts checked with a torque wrench
as soon as possible. Steel and light alloy wheels must be tightened to a tight-
ening torque of 120
Nm.
– Change the damaged wheel or consult a specialist garage about possibilities
for getting repairs done. WARNING
It is necessary to observe the guidelines given on ⇒
page 203 if the vehicle is
subsequently fitted with tyres which are different to those it was fitted with
at the works. Note
● If you find, when changing the wheel, that the wheel bolts are corroded and
difficult to turn, the bolts must be replaced before checking the tightening torque.
● Drive cautiously and only at a moderate speed to a workshop where the tight-
ening torque can be checked.
Full wheel trim Pulling off
–
Hook the clamp found in the vehicle tool kit into the reinforced edge of the full
wheel trim. £210
Breakdown assistance
Page 217 of 252
–
Have all the occupants get out. While changing a tyre, the occupants of the
vehicle should not stand on the road (instead they should remain behind a
crash barrier, for example).
– Switch off the engine and engage 1st gear or if your vehicle is fitted with an
automatic gearbox, position the selector lever into position P .
– Apply the handbrake firmly.
– Check whether you can carry out the repairs with the tyre repair kit
⇒ page 213, General information.
– If a trailer is coupled, uncouple it.
– Remove the tyre repair kit from the luggage compartment.
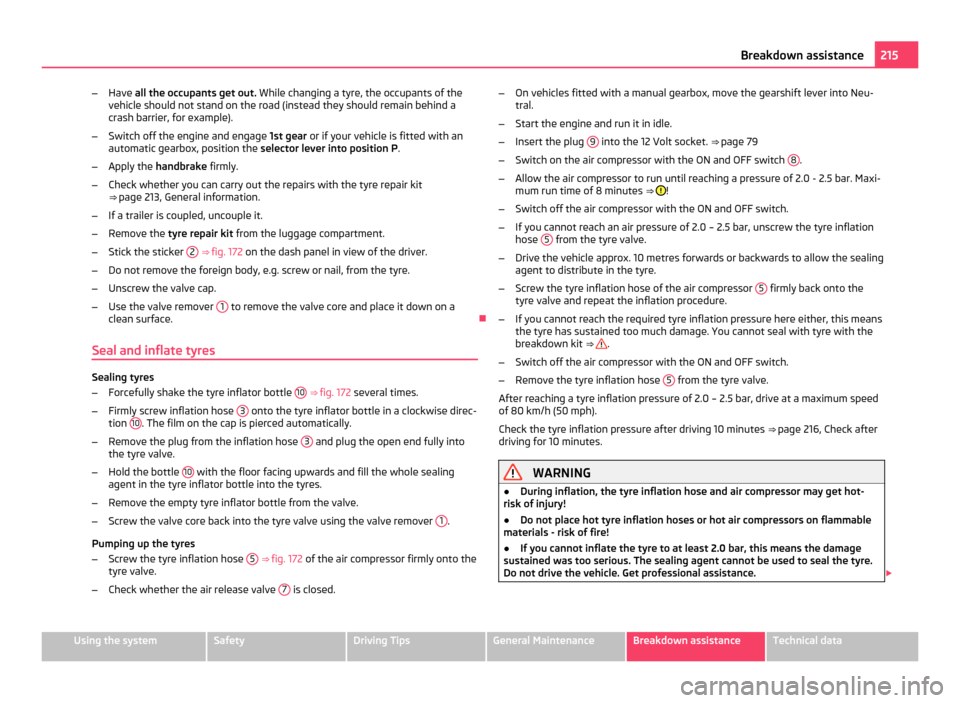
– Stick the sticker 2
⇒
fig. 172 on the dash panel in view of the driver.
– Do not remove the foreign body, e.g. screw or nail, from the tyre.
– Unscrew the valve cap.
– Use the valve remover 1 to remove the valve core and place it down on a
clean surface.
Seal and inflate tyres Sealing tyres
–
Forcefully shake the tyre inflator bottle 10
⇒ fig. 172 several times.
– Firmly screw inflation hose 3 onto the tyre inflator bottle in a clockwise direc-
tion 10 . The film on the cap is pierced automatically.
– Remove the plug from the inflation hose 3 and plug the open end fully into
the tyre valve.
– Hold the bottle 10 with the floor facing upwards and fill the whole sealing
agent in the tyre inflator bottle into the tyres.
– Remove the empty tyre inflator bottle from the valve.
– Screw the valve core back into the tyre valve using the valve remover 1 .
Pumping up the tyres
– Screw the tyre inflation hose 5
⇒
fig. 172 of the air compressor firmly onto the
tyre valve.
– Check whether the air release valve 7 is closed.–
On vehicles fitted with a manual gearbox, move the gearshift lever into Neu-
tral.
– Start the engine and run it in idle.
– Insert the plug 9 into the 12 Volt socket. ⇒
page 79
– Switch on the air compressor with the ON and OFF switch 8 .
– Allow the air compressor to run until reaching a pressure of 2.0 - 2.5 bar. Maxi-
mum run time of 8 minutes ⇒ !
– Switch off the air compressor with the ON and OFF switch.
– If you cannot reach an air pressure of 2.0 – 2.5 bar, unscrew the tyre inflation
hose 5 from the tyre valve.
– Drive the vehicle approx. 10 metres forwards or backwards to allow the sealing
agent to distribute in the tyre.
– Screw the tyre inflation hose of the air compressor 5 firmly back onto the
tyre valve and repeat the inflation procedure.
– If you cannot reach the required tyre inflation pressure here either, this means
the tyre has sustained too much damage. You cannot seal with tyre with the
breakdown kit ⇒ .
– Switch off the air compressor with the ON and OFF switch.
– Remove the tyre inflation hose 5 from the tyre valve.
After reaching a tyre inflation pressure of 2.0 – 2.5 bar, drive at a maximum speed
of 80 km/h (50
mph).
Check the tyre inflation pressure after driving 10 minutes ⇒ page 216, Check after
driving for 10 minutes. WARNING
● During inflation, the tyre inflation hose and air compressor may get hot-
risk of injury!
● Do not place hot tyre inflation hoses or hot air compressors on flammable
materials - risk of fire!
● If you cannot inflate the tyre to at least 2.0 bar, this means the damage
sustained was too serious. The sealing agent cannot be used to seal the tyre.
Do not drive the vehicle. Get professional assistance. £ 215
Breakdown assistance Using the system Safety Driving Tips General Maintenance Breakdown assistance Technical data
Page 218 of 252
CAUTION
Switch off the air compressor after running 8 minutes at the latest - danger of
overheating! Allow the air compressor to cool a few moments before switching it
on again.
Check after driving for 10 minutes Check the tyre inflation pressure after driving 10 minutes.
If the tyre inflation pressure is 1.3 bar or less:
–
Do not drive the vehicle! You cannot properly seal with tyre with the break-
down kit.
– Contact a Škoda dealer to obtain professional assistance.
If the tyre inflation pressure is 1.3 bar or more:
– Adjust the tyre inflation pressure to the correct value (see inside of fuel filler
cap).
– Continue driving carefully to the nearest specialist garage at a maximum
speed of 80 km/h (50 mph).
Jump-starting Initial steps You can use the battery of another vehicle for jump-starting yours if the engine
does not start because the battery on your vehicle is flat. You will require jump-
start cables for this purpose.
Both batteries must have a rated voltage of 12 V. The capacity
(Ah) of the battery
supplying the power must not be significantly less than the capacity of the dis-
charged battery in your vehicle.
Jump-start cables
Only use jump-start cables which have an adequately large cross-section and in-
sulated terminal clamps. Please pay attention to the manufacturer's instructions.
Positive cable - colour coding in the majority of cases red.
Negative cable -
colour coding in the majority of cases black. WARNING
● A discharged battery may already freeze at temperatures just below 0 °C.
In case of frozen battery carry out no jump-starting - risk of explosion!
● Please pay attention to the warning instructions relating to working in the
engine compartment ⇒ page 190
, Working in the engine compartment. Note
● There must not be any contact between the two vehicles otherwise current
may flow as soon as the negative terminals are connected.
● The discharged battery must be properly connected to the system of the vehi-
cle.
● Switch off any mobile phone, pay attention to the instructions for use of the
mobile phone in such a situation.
● We recommend you buy jump-start cables from a car battery specialist.
Start engine Fig. 173 Jump-starting using the battery
from another vehicle: A - flat vehicle bat-
tery, B - battery providing current
It is important to connect the jump-start cables in the correct order.
Connecting positive terminals
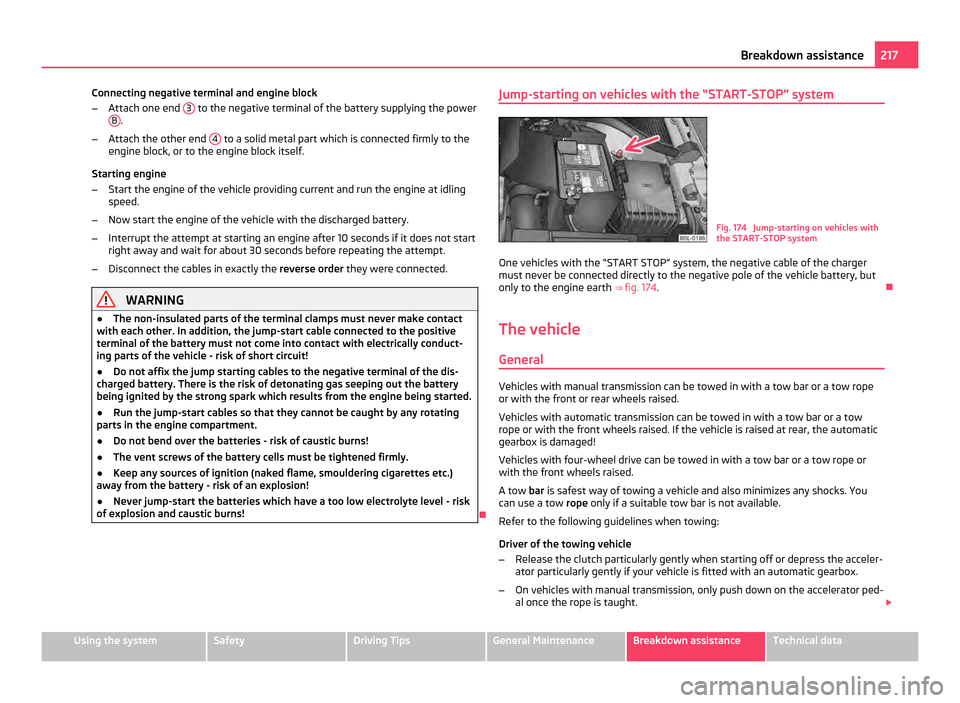
– Attach one end 1 to the positive terminal
⇒ fig. 173 of the discharged battery
A .
– Attach the other end 2 to the positive terminal of the battery supplying the
power B .
£216
Breakdown assistance
Page 219 of 252
Connecting negative terminal and engine block
– Attach one end 3 to the negative terminal of the battery supplying the power
B .
– Attach the other end 4 to a solid metal part which is connected firmly to the
engine block, or to the engine block itself.
Starting engine
– Start the engine of the vehicle providing current and run the engine at idling
speed.
– Now start the engine of the vehicle with the discharged battery.
– Interrupt the attempt at starting an engine after 10 seconds if it does not start
right away and wait for about 30 seconds before repeating the attempt.
– Disconnect the cables in exactly the reverse order they were connected.WARNING
● The non-insulated parts of the terminal clamps must never make contact
with each other. In addition, the jump-start cable connected to the positive
terminal of the battery must not come into contact with electrically conduct-
ing parts of the vehicle - risk of short circuit!
● Do not affix the jump starting cables to the negative terminal of the dis-
charged battery. There is the risk of detonating gas seeping out the battery
being ignited by the strong spark which results from the engine being started.
● Run the jump-start cables so that they cannot be caught by any rotating
parts in the engine compartment.
● Do not bend over the batteries - risk of caustic burns!
● The vent screws of the battery cells must be tightened firmly.
● Keep any sources of ignition (naked flame, smouldering cigarettes etc.)
away from the battery - risk of an explosion!
● Never jump-start the batteries which have a too low electrolyte level - risk
of explosion and caustic burns! Jump-starting on vehicles with the “START-STOP” system Fig. 174 Jump-starting on vehicles with
the START-STOP system
One vehicles with the “START STOP” system, the negative cable of the charger
must never be connected directly to the negative pole of the vehicle battery, but
only to the engine earth ⇒ fig. 174.
The vehicle General Vehicles with manual transmission can be towed in with a tow bar or a tow rope
or with the front or rear wheels raised.
Vehicles with automatic transmission can be towed in with a tow bar or a tow
rope or with the front wheels raised. If the vehicle is raised at rear, the automatic gearbox is damaged!
Vehicles with four-wheel drive can be towed in with a tow bar or a tow rope or
with the front wheels raised.
A tow bar is safest way of towing a vehicle and also minimizes any shocks. You
can use a tow rope only if a suitable tow bar is not available.
Refer to the following guidelines when towing:
Driver of the towing vehicle
– Release the clutch particularly gently when starting off or depress the acceler-
ator particularly gently if your vehicle is fitted with an automatic gearbox.
– On vehicles with manual transmission, only push down on the accelerator ped-
al once the rope is taught. £ 217
Breakdown assistance Using the system Safety Driving Tips General Maintenance Breakdown assistance Technical data
Page 220 of 252
The maximum towing speed is
50 km/h.
Driver of the towed vehicle
– Switch the ignition on so that the steering wheel is not blocked and you can
also operate the turn signal lights, the headlight flasher, the windscreen wip-
ers and windscreen washer system.
– Take the vehicle out of gear or move the selector lever into position N if your
vehicle is fitted with an automatic gearbox.
Note that the brake servo unit and power steering only operate if the engine is
running. You will require significantly greater physical force to depress the brake
pedal and to steer the vehicle if the engine is not running.
When using a tow rope, always ensure that the tow rope is always kept taught. CAUTION
● Do not tow start the engine - danger of damaging the engine. On vehicles with
a catalytic converter, unburnt fuel may get into the catalytic converter where it
may ignite. This in turn may damage or destroy the catalytic converter. You can
use the battery of another vehicle as a jump-start aid ⇒ page 216, Jump-starting
.
● If the gearbox of your vehicle no longer contains any oil because of a defect,
your vehicle must only be towed in with the driven wheels raised clear of the
ground, or on a special vehicle transporter or trailer.
● The vehicle must be transported on a special vehicle or trailer if it is not possi-
ble to tow in the vehicle in the way described or if the towing distance is greater
than 50
km.
● To protect both vehicles when tow-starting or towing, the tow rope should be
elastic. Thus one should only use plastic fibre rope or a rope made out of a similar-
ly elastic material.
● One should be constantly vigilant not to allow impermissibly high towing
forces or jerky loadings. There is always a risk of excessive stresses and damage
resulting at the points to which you attach the tow rope or tow bar when you at-
tempt to tow a vehicle which is not standing on a paved road.
● Attach the tow rope or the tow bar only to the towing eyes provided for this
purpose ⇒ page 218
, Front towing eye and ⇒ page 219, Rear towing eye Note
● We recommend a tow rope from the range of
ŠKODA Original Accessories that
you can purchase from an authorised ŠKODA Service Partner.
● Towing another vehicle requires a certain amount of practice. Both drivers
should be familiar with the particular points about towing a vehicle. Unskilled driv-
ers should not attempt to tow in another vehicle or to be towed in.
● When towing, respect the national legal provisions, especially those which re-
late to the identification of the towing vehicle and the vehicle being towed.
● The tow rope must not be twisted as it may in certain circumstances result in
the front towing eye being unscrewed out of your vehicle.
Front towing eye The towing eye is stored in the box of the vehicle tool kit.
Fig. 175 Front bumper: Removing the cover/installing the towing eye
–
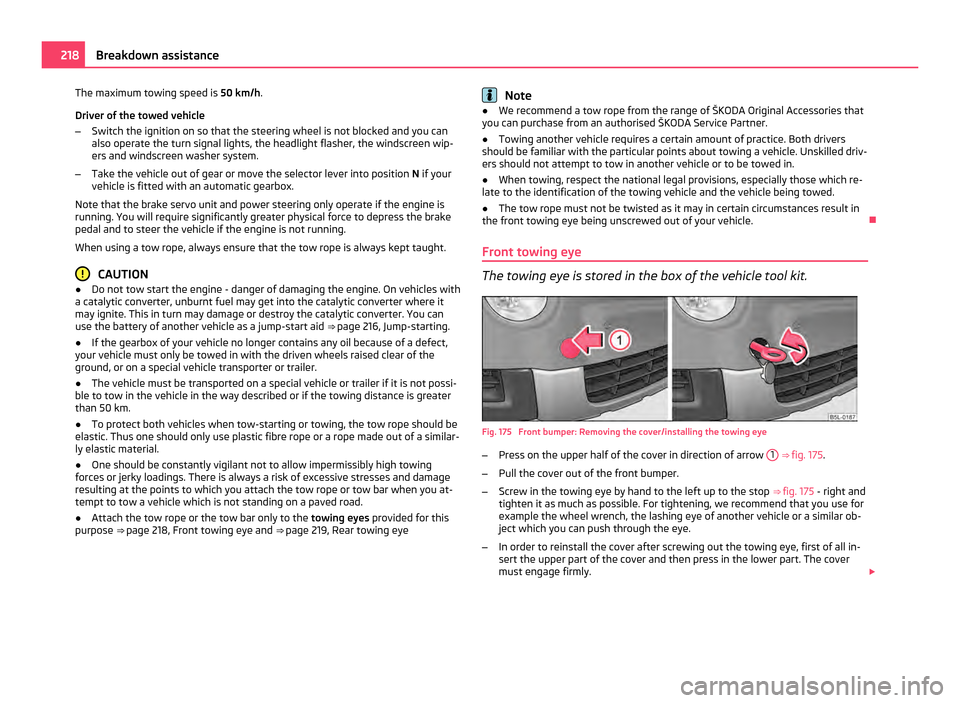
Press on the upper half of the cover in direction of arrow 1
⇒ fig. 175 .
– Pull the cover out of the front bumper.
– Screw in the towing eye by hand to the left up to the stop ⇒ fig. 175 - right and
tighten it as much as possible. For tightening, we recommend that you use for
example the wheel wrench, the lashing eye of another vehicle or a similar ob-
ject which you can push through the eye.
– In order to reinstall the cover after screwing out the towing eye, first of all in-
sert the upper part of the cover and then press in the lower part. The cover
must engage firmly. £218
Breakdown assistance
Page 222 of 252
Fuses and light bulbs
Electric fuses Replacing fuses Defect fuses must be replaced.
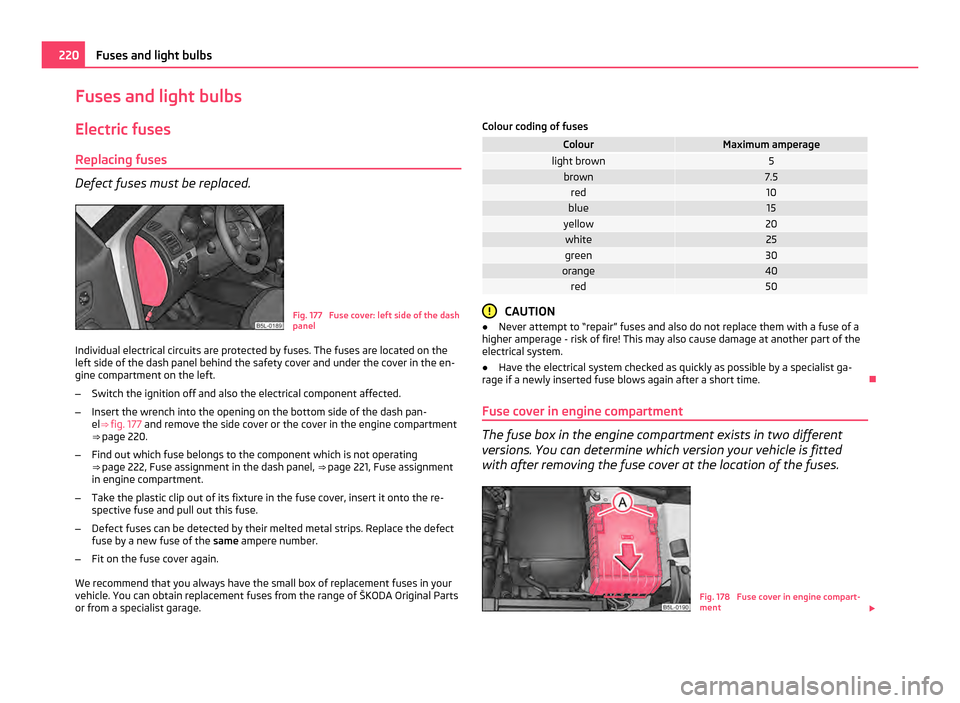
Fig. 177 Fuse cover: left side of the dash
panel
Individual electrical circuits are protected by fuses. The fuses are located on the
left side of the dash panel behind the safety cover and under the cover in the en-
gine compartment on the left.
– Switch the ignition off and also the electrical component affected.
– Insert the wrench into the opening on the bottom side of the dash pan-
el⇒
fig. 177 and remove the side cover or the cover in the engine compartment
⇒ page 220.
– Find out which fuse belongs to the component which is not operating
⇒ page 222, Fuse assignment in the dash panel
, ⇒ page 221, Fuse assignment
in engine compartment.
– Take the plastic clip out of its fixture in the fuse cover, insert it onto the re-
spective fuse and pull out this fuse.
– Defect fuses can be detected by their melted metal strips. Replace the defect
fuse by a new fuse of the same ampere number.
– Fit on the fuse cover again.
We recommend that you always have the small box of replacement fuses in your
vehicle. You can obtain replacement fuses from the range of
ŠKODA Original Parts
or from a specialist garage. Colour coding of fuses Colour Maximum amperage
light brown 5
brown 7.5
red 10
blue 15
yellow 20
white 25
green 30
orange 40
red 50
CAUTION
● Never attempt to
“repair” fuses and also do not replace them with a fuse of a
higher amperage - risk of fire! This may also cause damage at another part of the
electrical system.
● Have the electrical system checked as quickly as possible by a specialist ga-
rage if a newly inserted fuse blows again after a short time.
Fuse cover in engine compartment The fuse box in the engine compartment exists in two different
versions. You can determine which version your vehicle is fitted
with after removing the fuse cover at the location of the fuses. Fig. 178 Fuse cover in engine compart-
ment
£220
Fuses and light bulbs
Page 223 of 252
On some vehicles, the battery cover must be removed before removing the fuse
cover ⇒ page 197.
Removing fuse cover
–
Move the circlips A ⇒
fig. 178 as far as the stop, the symbol appears behind
the circlip and remove the cover.
Installing fuse cover
– Position the fuse cover on the fuse box and push the circlips A as far as the
stop - the symbol is visible behind the circlip.CAUTION
● When unlocking and locking the fuse cover, it must be pressed on the sides to
the box, otherwise damage can occur to the locking mechanism.
● Carefully position the fuse cover in the engine compartment. If the cover was
not correctly positioned, water can get into the fuses and this results in a damage
to the vehicle!
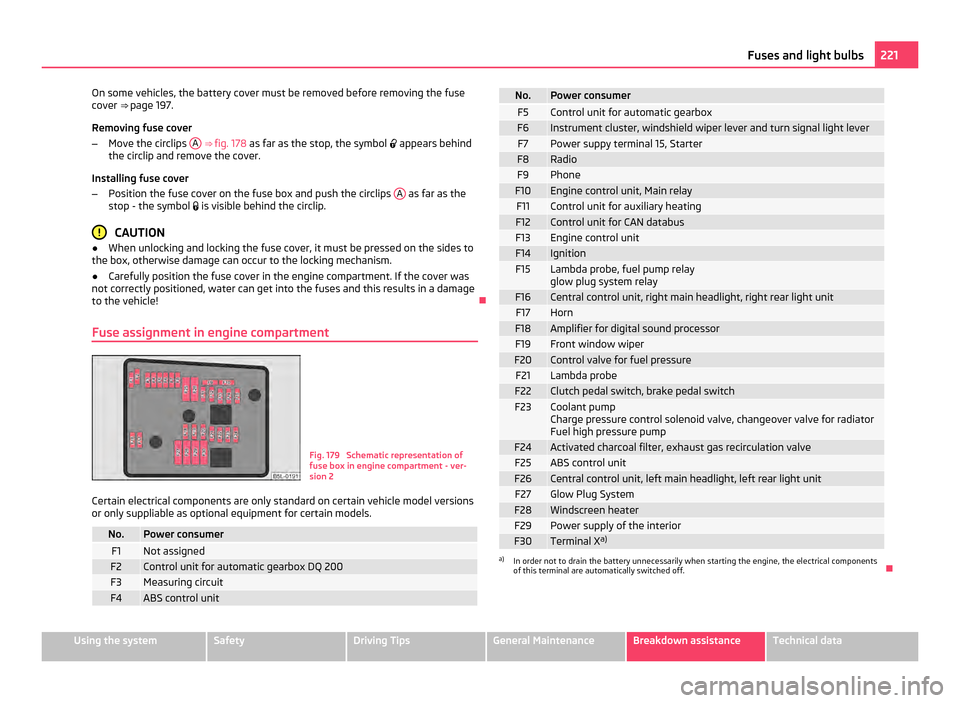
Fuse assignment in engine compartment Fig. 179 Schematic representation of
fuse box in engine compartment - ver-
sion 2
Certain electrical components are only standard on certain vehicle model versions
or only suppliable as optional equipment for certain models. No. Power consumer
F1 Not assigned
F2 Control unit for automatic gearbox DQ 200
F3 Measuring circuit
F4 ABS control unit No. Power consumer
F5 Control unit for automatic gearbox
F6 Instrument cluster, windshield wiper lever and turn signal light lever
F7 Power suppy terminal 15, Starter
F8 Radio
F9 Phone
F10 Engine control unit, Main relay
F11 Control unit for auxiliary heating
F12 Control unit for CAN databus
F13 Engine control unit
F14 Ignition
F15 Lambda probe, fuel pump relay
glow plug system relay
F16 Central control unit, right main headlight, right rear light unit
F17 Horn
F18 Amplifier for digital sound processor
F19 Front window wiper
F20 Control valve for fuel pressure
F21 Lambda probe
F22 Clutch pedal switch, brake pedal switch
F23 Coolant pump
Charge pressure control solenoid valve, changeover valve for radiator
Fuel high pressure pump
F24 Activated charcoal filter, exhaust gas recirculation valve
F25 ABS control unit
F26 Central control unit, left main headlight, left rear light unit
F27 Glow Plug System
F28 Windscreen heater
F29 Power supply of the interior
F30 Terminal X
a) a)
In order not to drain the battery unnecessarily when starting the engine, the electrical components
of this terminal are automatically switched off. 221
Fuses and light bulbs Using the system Safety Driving Tips General Maintenance Breakdown assistance Technical data