SUBARU WRX 2018 Owner's Guide
Manufacturer: SUBARU, Model Year: 2018, Model line: WRX, Model: SUBARU WRX 2018Pages: 578, PDF Size: 33.21 MB
Page 31 of 578

(30,1)
北米Model "A1700BE-B" EDITED: 2017/ 10/ 11
Item Function Possible settings Default setting Page
Dome light Operation of dome light/map light OFF delay timer OFF/10 seconds/20 sec-
onds/30 seconds30 seconds 6-3
Map light (models with moonroof)
Battery drainage prevention function Battery drainage prevention function Operation/Non-operation Operation 2-6
Seatbelt warning Sounds a chime while driving Operation/Non-operation Operation 3-14
Auto on/off headlights (if equipped) Sensitivity of the operation of the auto on/off
headlightsLow/Normal/High/Very
highNormal 3-64
Windshield wiper Auto-on/off wiper linked headlights Operation/Non-operation Operation 3-64
Auto dimmer cancel Sensitivity of the operation of the auto dimmer
cancelOFF/Min/Low/Mid/Hi/Max Mid 3-71
Welcome lighting Approaching (operation of timer) OFF/30 seconds/60 sec-
onds/90 seconds30 seconds 3-64
Exiting (operation of timer)
High beam assist function (models
with the EyeSight system)High beam assist function Operation/Non-operation Operation 3-65
One-touch lane changer Operation of the one-touch lane changer Operation/Non-operation Operation 3-7028
Page 32 of 578
(33,1)
北米Model "A1700BE-B" EDITED: 2017/ 10/ 11
Front seats..............................................................1-2
Manual seat........................................................... 1-4
Power seat (driver’s seat–if equipped) .................. 1-5
Head restraint adjustment...................................... 1-5
Seat heater (ifequipped)........................................1-7
Rear seats................................................................1-8
Head restraint adjustment...................................... 1-8
Folding down the rear seatback............................1-10
Armrest (except TYPE RA)....................................1-12
Seatbelts................................................................1-12
Seatbelt safety tips...............................................1-12
Emergency Locking Retractor (ELR)......................1-13
Automatic Locking Retractor/Emergency Locking
Retractor (ALR/ELR)............................................1-13
Seatbelt warning light and chime..........................1-14
Fastening the seatbelt...........................................1-14
Seatbelt maintenance............................................1-17
Front seatbelt pretensioners................................1-17
Driver’s seatbelt....................................................1-18
Front passenger’s seatbelt....................................1-18
Components that will operate with the seatbelt
pretensioner(s) simultaneously...........................1-19
Safety tips............................................................1-20
System monitors...................................................1-20
System servicing..................................................1-20
Precautions against vehicle modification...............1-21
Child restraint systems........................................1-21
Safety tips for installing child restraint systems .... 1-22
Where to place a child restraint system................1-23
Choosing a child restraint system.........................1-25
Installing child restraint systems with ALR/ELR
seatbelt.............................................................1-25
Installing a booster seat.......................................1-29
Installation of child restraint systems by use of
lower and tether anchorages (LATCH)................1-30
Top tether anchorages..........................................1-32
*SRS airbag
(Supplemental Restraint Systemairbag).........1-33
General precautions regarding SRS airbag
system..............................................................1-34
General precautions regarding SRS airbag
system for accessories and any objects.............1-36
General precautions regarding SRS airbag
system for children............................................1-38
Components.........................................................1-41
SUBARU advanced frontal airbag system..............1-43
SRS side airbag and SRS curtain airbag...............1-53
SRS airbag system monitors.................................1-62
SRS airbag system servicing ................................1-63
Precautions against vehicle modification..............1-64
How to contact the vehicle manufacturer
concerning modifications for persons with
disabilities that may affect the advanced airbag
system..............................................................1-65Seat, seatbelt and SRS airbags
1
Page 33 of 578
(34,1)
北米Model "A1700BE-B" EDITED: 2017/ 10/ 11
Front seats
WARNING
.Never adjust the seat while driv-
ing to avoid loss of vehicle con-
trol and personal injury.
.Before adjusting the seat, make
sure the hands and feet of rear
seat passengers and cargo are
clear of the adjusting mechan-
ism.
.After adjusting the seat, push it
slightly to make sure it is se-
curely locked. If the seat is not
securely locked, it may move or
the seatbelt may not operate
properly.
.Do not put objects under the front
seats. They may interfere with
front seat locking and cause an
accident.
.Seatbelts provide maximum re-
straint when the occupant sits
well back and upright in the seat.
To reduce the risk of sliding
under the seatbelt in a collision,
the front seatbacks should be
always used in the upright posi-
tion while the vehicle is running.
If the front seatbacks are notused in the upright position in a
collision, the risk of sliding under
the lap belt and of the lap belt
sliding up over the abdomen will
increase, and both can result in
serious internal injury or death.
.The SRS airbags deploy with
considerable speed and force.
Occupants who are out of proper
position when the SRS airbag
deploys could suffer very serious
injuries. Because the SRS airbag
needs enough space for deploy-
ment, the driver should always sit
upright and well back in the seat
as far from the steering wheel as
practical while still maintaining
full vehicle control and the front
passenger should move the seat
as far back as possible and sit
upright and well back in the seat.
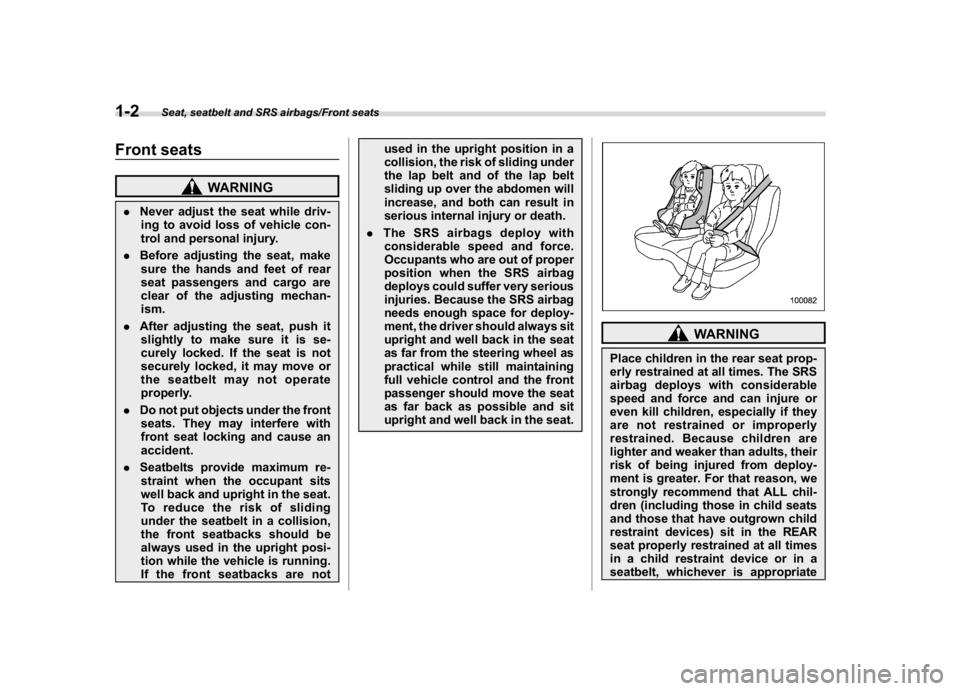
WARNING
Place children in the rear seat prop-
erly restrained at all times. The SRS
airbag deploys with considerable
speed and force and can injure or
even kill children, especially if they
are not restrained or improperly
restrained. Because children are
lighter and weaker than adults, their
risk of being injured from deploy-
ment is greater. For that reason, we
strongly recommend that ALL chil-
dren (including those in child seats
and those that have outgrown child
restraint devices) sit in the REAR
seat properly restrained at all times
in a child restraint device or in a
seatbelt, whichever is appropriate
Seat, seatbelt and SRS airbags/Front seats
1-2
Page 34 of 578
(35,1)
北米Model "A1700BE-B" EDITED: 2017/ 10/ 11
for the child’s age, height and
weight. Secure ALL types of child
restraint devices (including forward
facing child seat) in the REAR seats
at all times.
NEVER INSTALL A FORWARD OR
REARWARD FACING CHILD SEAT IN
THE FRONT SEAT. DOING SO RISKS
SERIOUS INJURY OR DEATH TO
THE CHILD BY PLACING THE
CHILD’S HEAD TOO CLOSE TO
THE SRS AIRBAG.
According to accident statistics,
children are safer when properly
restrained in the rear seating posi-
tions than in the front seating posi-
tions. For instructions and precau-
tions concerning child restraint sys-
tems, refer to“Child restraint sys-
tems”F1-21.
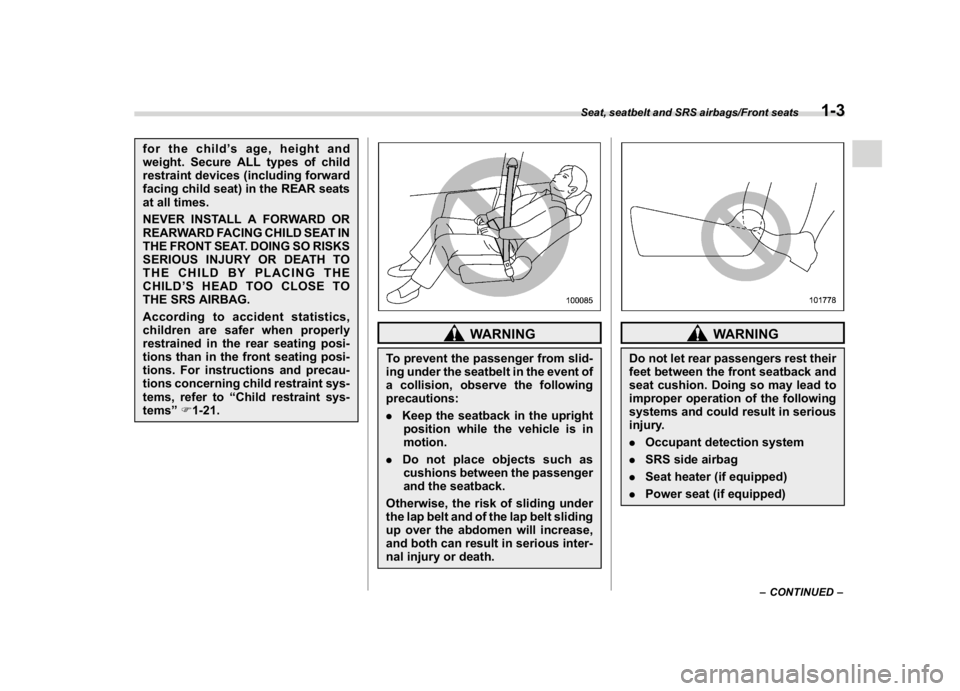
WARNING
To prevent the passenger from slid-
ing under the seatbelt in the event of
a collision, observe the following
precautions:
.Keep the seatback in the upright
position while the vehicle is in
motion.
.Do not place objects such as
cushions between the passenger
and the seatback.
Otherwise, the risk of sliding under
the lap belt and of the lap belt sliding
up over the abdomen will increase,
and both can result in serious inter-
nal injury or death.
WARNING
Do not let rear passengers rest their
feet between the front seatback and
seat cushion. Doing so may lead to
improper operation of the following
systems and could result in serious
injury.
.Occupant detection system
.SRS side airbag
.Seat heater (if equipped)
.Power seat (if equipped)
–CONTINUED–
Seat, seatbelt and SRS airbags/Front seats
1-3
1
Page 35 of 578
(36,1)
北米Model "A1700BE-B" EDITED: 2017/ 10/ 11
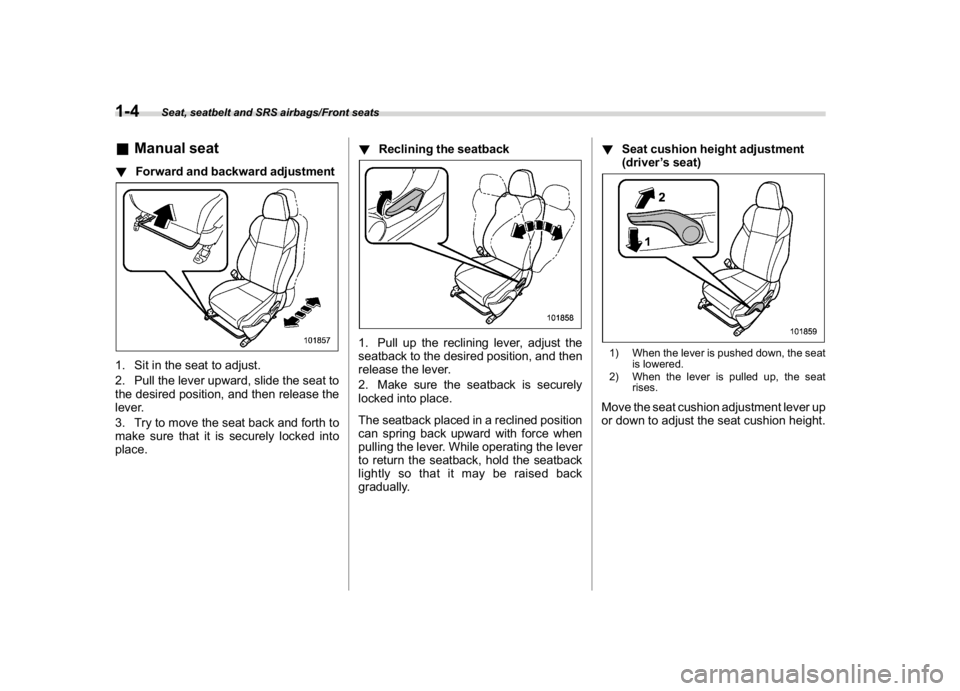
&Manual seat!Forward and backward adjustment1. Sit in the seat to adjust.
2. Pull the lever upward, slide the seat to
the desired position, and then release the
lever.
3. Try to move the seat back and forth to
make sure that it is securely locked into
place.!Reclining the seatback
1. Pull up the reclining lever, adjust the
seatback to the desired position, and then
release the lever.
2. Make sure the seatback is securely
locked into place.
The seatback placed in a reclined position
can spring back upward with force when
pulling the lever. While operating the lever
to return the seatback, hold the seatback
lightly so that it may be raised back
gradually.!Seat cushion height adjustment
(driver’s seat)
1) When the lever is pushed down, the seat
is lowered.
2) When the lever is pulled up, the seat
rises.Move the seat cushion adjustment lever up
or down to adjust the seat cushion height.
Seat, seatbelt and SRS airbags/Front seats
1-4
Page 36 of 578
(37,1)
北米Model "A1700BE-B" EDITED: 2017/ 10/ 11
&Power seat (driver’s seat–if
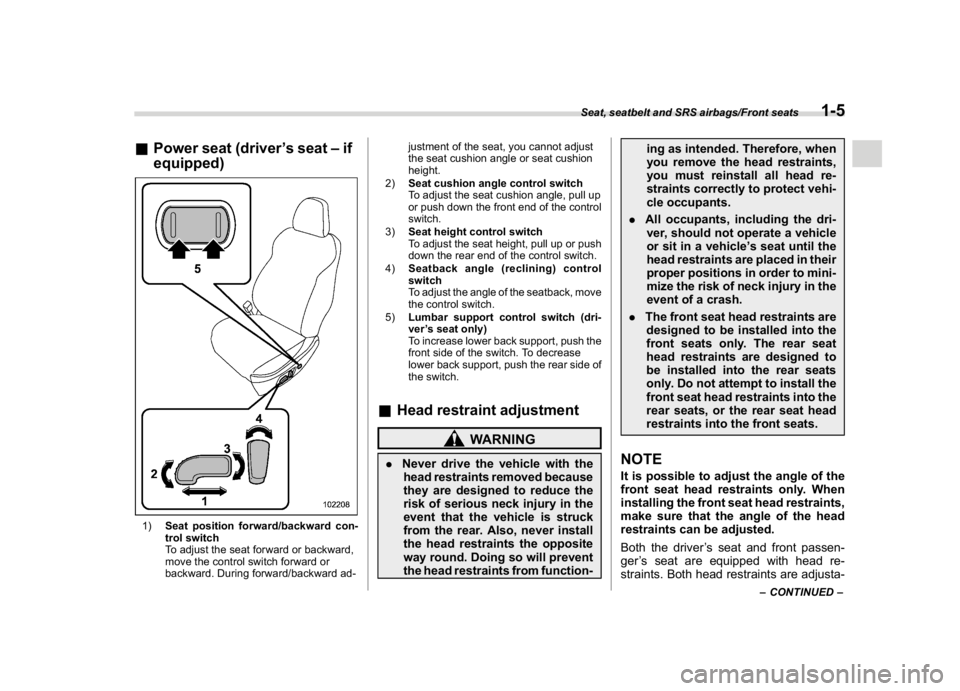
equipped)1)Seat position forward/backward con-
trol switch
To adjust the seat forward or backward,
move the control switch forward or
backward. During forward/backward ad-justment of the seat, you cannot adjust
the seat cushion angle or seat cushion
height.
2)Seat cushion angle control switch
To adjust the seat cushion angle, pull up
or push down the front end of the control
switch.
3)Seat height control switch
To adjust the seat height, pull up or push
down the rear end of the control switch.
4)Seatback angle (reclining) control
switch
To adjust the angle of the seatback, move
the control switch.
5)Lumbar support control switch (dri-
ver’s seat only)
To increase lower back support, push the
front side of the switch. To decrease
lower back support, push the rear side of
the switch.
&Head restraint adjustment
WARNING
.Never drive the vehicle with the
head restraints removed because
they are designed to reduce the
risk of serious neck injury in the
event that the vehicle is struck
from the rear. Also, never install
the head restraints the opposite
way round. Doing so will prevent
the head restraints from function-ing as intended. Therefore, when
you remove the head restraints,
you must reinstall all head re-
straints correctly to protect vehi-
cle occupants.
.All occupants, including the dri-
ver, should not operate a vehicle
or sit in a vehicle’s seat until the
head restraints are placed in their
proper positions in order to mini-
mize the risk of neck injury in the
event of a crash.
.The front seat head restraints are
designed to be installed into the
front seats only. The rear seat
head restraints are designed to
be installed into the rear seats
only. Do not attempt to install the
front seat head restraints into the
rear seats, or the rear seat head
restraints into the front seats.
NOTEIt is possible to adjust the angle of the
front seat head restraints only. When
installing the front seat head restraints,
make sure that the angle of the head
restraints can be adjusted.
Both the driver’s seat and front passen-
ger’s seat are equipped with head re-
straints. Both head restraints are adjusta-
–CONTINUED–
Seat, seatbelt and SRS airbags/Front seats
1-5
1
Page 37 of 578
(38,1)
北米Model "A1700BE-B" EDITED: 2017/ 10/ 11
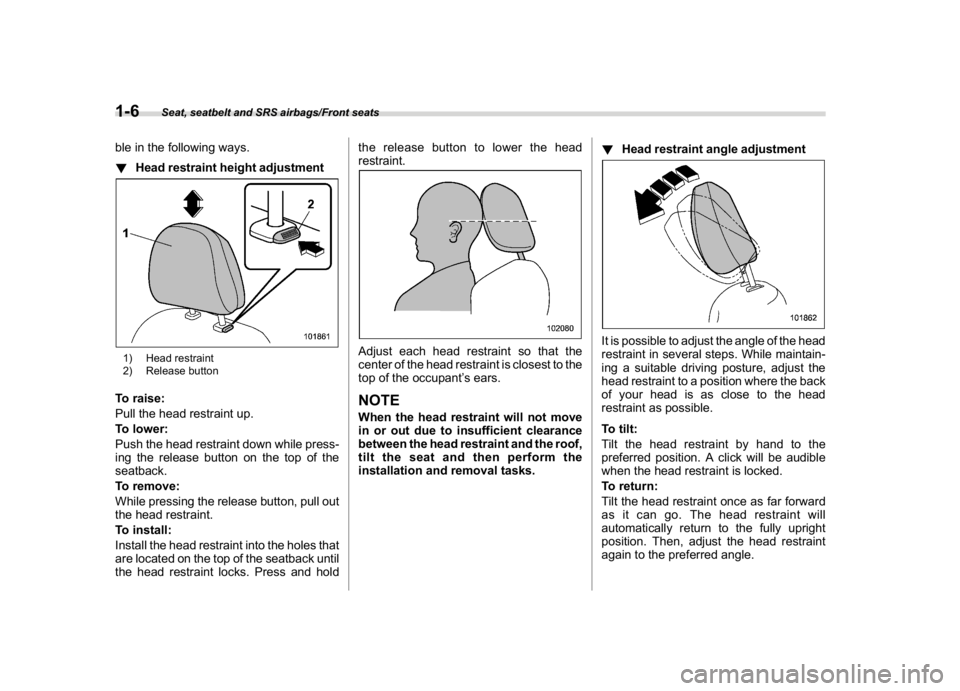
ble in the following ways.
!Head restraint height adjustment1) Head restraint
2) Release buttonTo raise:
Pull the head restraint up.
To lower:
Push the head restraint down while press-
ing the release button on the top of the
seatback.
To remove:
While pressing the release button, pull out
the head restraint.
To install:
Install the head restraint into the holes that
are located on the top of the seatback until
the head restraint locks. Press and holdthe release button to lower the head
restraint.
Adjust each head restraint so that the
center of the head restraint is closest to the
top of the occupant’s ears.NOTEWhen the head restraint will not move
in or out due to insufficient clearance
between the head restraint and the roof,
tilt the seat and then perform the
installation and removal tasks.!Head restraint angle adjustment
It is possible to adjust the angle of the head
restraint in several steps. While maintain-
ing a suitable driving posture, adjust the
head restraint to a position where the back
of your head is as close to the head
restraint as possible.
To tilt:
Tilt the head restraint by hand to the
preferred position. A click will be audible
when the head restraint is locked.
To return:
Tilt the head restraint once as far forward
as it can go. The head restraint will
automatically return to the fully upright
position. Then, adjust the head restraint
again to the preferred angle.
Seat, seatbelt and SRS airbags/Front seats
1-6
Page 38 of 578
(39,1)
北米Model "A1700BE-B" EDITED: 2017/ 10/ 11
Seat heater (if equipped)The front seats are equipped with a seat
heater.
The seat heater operates when the ignition
switch is either in the“ACC”or“ON”
position.
CAUTION
.People with delicate skin may
suffer slight burns even at low
temperatures if they use the seat
heater for a long period of time.
When using the heater, always be
sure to warn the persons con-
cerned.
.Do not put anything on the seat
which insulates against heat,
such as a blanket, cushion, or
similar items. This may cause the
seat heater to overheat.
.When the seat is warmed enough
or before you leave the vehicle,
be sure to turn off the seat heater.NOTEUse of the seat heater for a long period
of time while the engine is not running
can cause battery discharge.
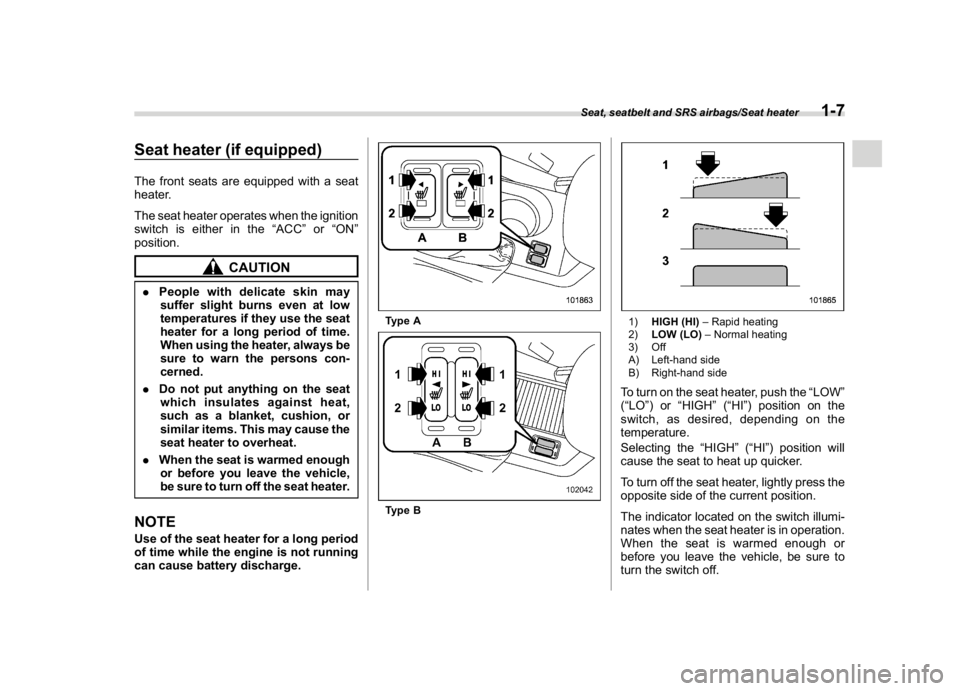
Type AType B
1)HIGH (HI)–Rapid heating
2)LOW (LO)–Normal heating
3) Off
A) Left-hand side
B) Right-hand sideTo turn on the seat heater, push the“LOW”
(“LO”)or“HIGH”(“HI”) position on the
switch, as desired, depending on the
temperature.
Selecting the“HIGH”(“HI”) position will
cause the seat to heat up quicker.
To turn off the seat heater, lightly press the
opposite side of the current position.
The indicator located on the switch illumi-
nates when the seat heater is in operation.
When the seat is warmed enough or
before you leave the vehicle, be sure to
turn the switch off.
Seat, seatbelt and SRS airbags/Seat heater
1-7
1
Page 39 of 578
(40,1)
北米Model "A1700BE-B" EDITED: 2017/ 10/ 11
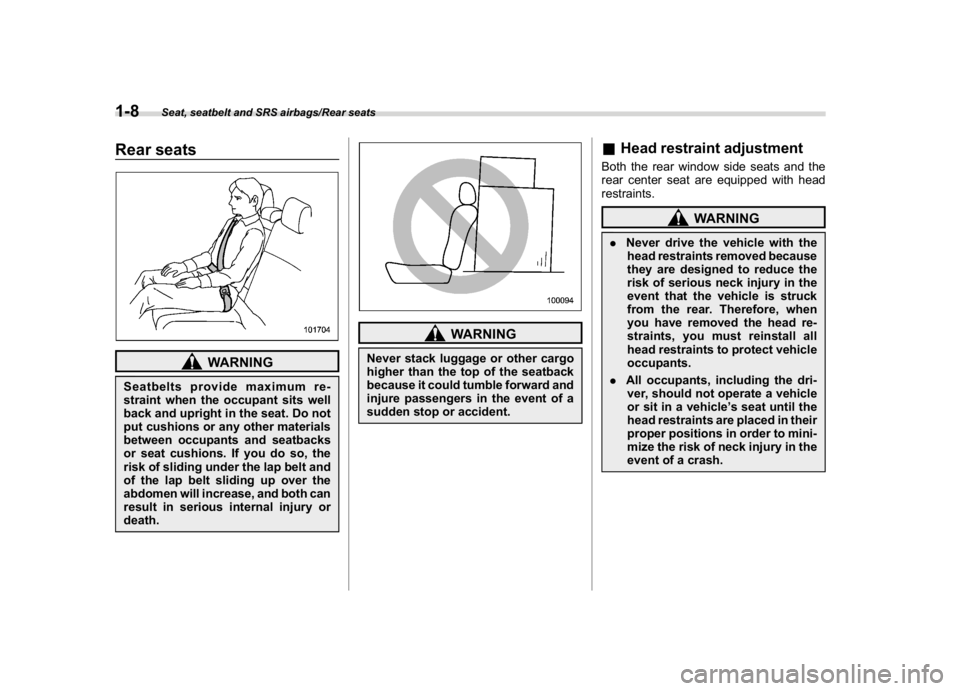
Rear seats
WARNING
Seatbelts provide maximum re-
straint when the occupant sits well
back and upright in the seat. Do not
put cushions or any other materials
between occupants and seatbacks
or seat cushions. If you do so, the
risk of sliding under the lap belt and
of the lap belt sliding up over the
abdomen will increase, and both can
result in serious internal injury or
death.
WARNING
Never stack luggage or other cargo
higher than the top of the seatback
because it could tumble forward and
injure passengers in the event of a
sudden stop or accident.
&Head restraint adjustmentBoth the rear window side seats and the
rear center seat are equipped with head
restraints.
WARNING
.Never drive the vehicle with the
head restraints removed because
they are designed to reduce the
risk of serious neck injury in the
event that the vehicle is struck
from the rear. Therefore, when
you have removed the head re-
straints, you must reinstall all
head restraints to protect vehicle
occupants.
.All occupants, including the dri-
ver, should not operate a vehicle
or sit in a vehicle’s seat until the
head restraints are placed in their
proper positions in order to mini-
mize the risk of neck injury in the
event of a crash.
Seat, seatbelt and SRS airbags/Rear seats
1-8
Page 40 of 578
(41,1)
北米Model "A1700BE-B" EDITED: 2017/ 10/ 11
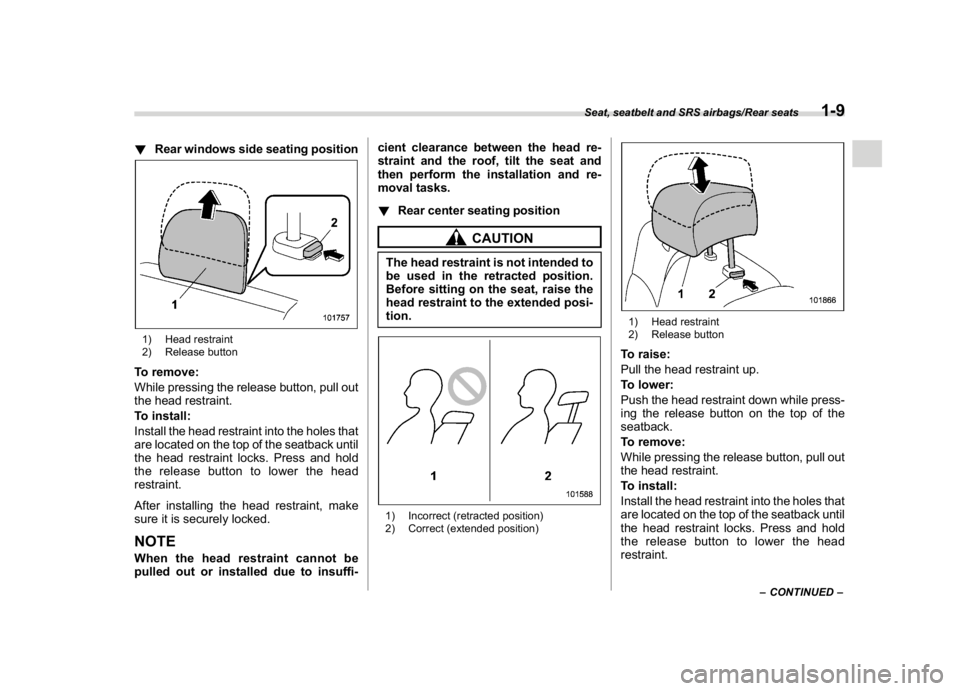
!Rear windows side seating position1) Head restraint
2) Release buttonTo remove:
While pressing the release button, pull out
the head restraint.
To install:
Install the head restraint into the holes that
are located on the top of the seatback until
the head restraint locks. Press and hold
the release button to lower the head
restraint.
After installing the head restraint, make
sure it is securely locked.NOTEWhen the head restraint cannot be
pulled out or installed due to insuffi-cient clearance between the head re-
straint and the roof, tilt the seat and
then perform the installation and re-
moval tasks.
!Rear center seating position
CAUTION
The head restraint is not intended to
be used in the retracted position.
Before sitting on the seat, raise the
head restraint to the extended posi-
tion.1) Incorrect (retracted position)
2) Correct (extended position)
1) Head restraint
2) Release buttonTo raise:
Pull the head restraint up.
To lower:
Push the head restraint down while press-
ing the release button on the top of the
seatback.
To remove:
While pressing the release button, pull out
the head restraint.
To install:
Install the head restraint into the holes that
are located on the top of the seatback until
the head restraint locks. Press and hold
the release button to lower the head
restraint.
–CONTINUED–
Seat, seatbelt and SRS airbags/Rear seats
1-9
1