change time SUZUKI IGNIS 2021 Owners Manual
[x] Cancel search | Manufacturer: SUZUKI, Model Year: 2021, Model line: IGNIS, Model: SUZUKI IGNIS 2021Pages: 505, PDF Size: 8.36 MB
Page 3 of 505
75RM4-01E
FOREWORDThis manual should be considered a per-
manent part of the vehicle and should
remain with the vehicle when resold or oth-
erwise transferred to a new owner or oper-
ator. Please read this manual carefully
before operating your new SUZUKI vehicle
and review the manual from time to time. It
contains important information on safety,
operation and maintenance.
All information in this manual is based
on the latest product information avail-
able at the time of publication. Due to
improvements or other changes, there
may be discrepancies between informa-
tion in this manual and your vehicle.
SUZUKI MOTOR CORPORATION
reserves the right to make production
changes at any time, without notice and
without incurring any obligation to
make the same or similar changes to
vehicles previously built or sold.
This vehicle may not comply with stan-
dards or regulations of other countries.
Before attempting to register this vehi-
cle in any other country, check all appli-
cable regulations and make anynecessary modifications. NOTE:
Please see the warning label named “Air
bag symbol meaning” in the “BEFORE
DRIVING” section for information on front
air bag protection.
NOTE:
(For Hong Kong models)
• “ENG A-STOP System” means Idling
Stop System.
• “SHVS (Smart Hybrid Vehicle by Suzuki)” means Mild Hybrid.
Page 40 of 505

2-17BEFORE DRIVING
75RM4-01E
How to arm the theft deterrent alarm
system (when enabled)
Lock all doors (including the tailgate) using
the keyless push start system remote con-
troller, the request switch or the keyless
entry system transmitter. The theft deter-
rent light (1) will start blinking, and the theft
deterrent alarm system will be armed in
about 20 seconds.
While the system is be ing armed, the indi-
cator continues to blink at intervals of
approximately 2 seconds.
75RM313
NOTE:
• To prevent the alarm from being acci- dentally triggered, avoid arming it while
anyone remains inside the vehicle. The
alarm will be triggered if any person
inside unlocks a door or engine hood (for
EU specification vehicle) by operating
the lock knob or power door locking
switch.
• The theft deterrent alarm system is not armed when all doors are locked using
the key from outside, or using the door
lock knobs or the power door locking
switch from inside.
• If any door is not operated within approx-
imately 30 seconds after the doors have
been unlocked using the keyless push
start system remote controller, the
request switch or the keyless entry sys-
tem transmitter, the doors are automati-
cally locked again. After the doors are
locked, the theft de terrent alarm system
will be armed in about 20 seconds if the
system is in the enabled state.
How to disarm the theft deterrent alarm
system
Simply unlock the doors using the keyless
push start system rem ote controller, the
request switch or the keyless entry system
transmitter. The theft deterrent light will go
out, indicating that t he theft deterrent alarm
system is disarmed. How to stop
the alarm
Should the alarm be triggered accidentally,
unlock the doors using the keyless push
start system remote c ontroller, the request
switch or the keyless entry system trans-
mitter, or press the engine switch to
change the ignition mode to ON or turn the
ignition switch to “ON” position. The alarm
will then stop.
NOTE:
• Even after the alarm has stopped, if you
lock the doors using the keyless push
start system remote controller, the
request switch or the keyless entry sys-
tem transmitter, the theft deterrent alarm
system will be rearmed with a delay of
about 20 seconds.
• If you disconnect the lead-acid battery while the theft deterrent alarm system is
in the armed condition or the alarm is
actually in operation, the alarm will be
triggered or re-triggered when the bat-
tery is then reconnected, although, in the
latter case, the alarm remains stopped
for the period between disconnection
and reconnection of the lead-acid bat-
tery.
• Even after the alarm has stopped at the
end of the predetermined operation time,
it will be triggered again if any door or
engine hood (for EU specification vehi-
cle) is opened without disarming the
theft deterrent alarm system.
(1)
EXAMPLE
Page 41 of 505
2-18
BEFORE DRIVING
75RM4-01E
Checking whether the alarm has been
triggered during parking
If the alarm was triggered due to an unau-
thorized entry into the vehicle and you then
press the engine switch to change the igni-
tion mode to ON or turn the ignition switch
to “ON” position, the theft deterrent light
will blink rapidly for about 8 seconds and a
buzzer will beep 4 times during this period.
If this happens, check whether your vehi-
cle has been broken into while you were
away from it.
Enabling and disabling the theft deter-
rent alarm system
The theft deterrent alarm system can be
either enabled or disabled.
When enabled (factory setting)
When the system is enabled, it causes the
hazard warning lights to flash for about 40
seconds if any of the alarm trigger condi-
tions is met. The system also causes the
interior buzzer to beep intermittently for
about 10 seconds, which is followed by
intermittent sounding of the horn for about
30 seconds.
The theft deterrent light continues to blink
during this time.
When disabled
When the system is disabled, it stays dis-
armed even if you perform any system
arming operation. How to switch the state of the theft
deterrent alarm system
(Except EU specification vehicle)
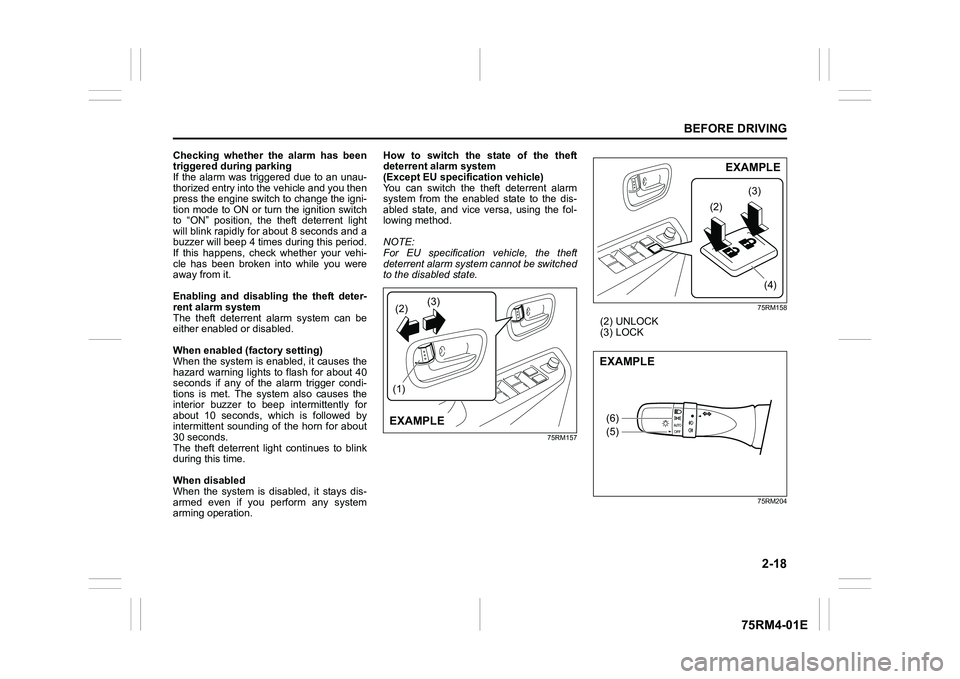
You can switch the theft deterrent alarm
system from the enabled
state to the dis-
abled state, and vice versa, using the fol-
lowing method.
NOTE:
For EU specification vehicle, the theft
deterrent alarm system cannot be switched
to the disabled state.
75RM157 75RM158
(2) UNLOCK
(3) LOCK
75RM204
(2)
(1) (3)EXAMPLE
(2)
(3)
(4)
EXAMPLE
(6)
(5)EXAMPLE
Page 42 of 505
2-19BEFORE DRIVING
75RM4-01E
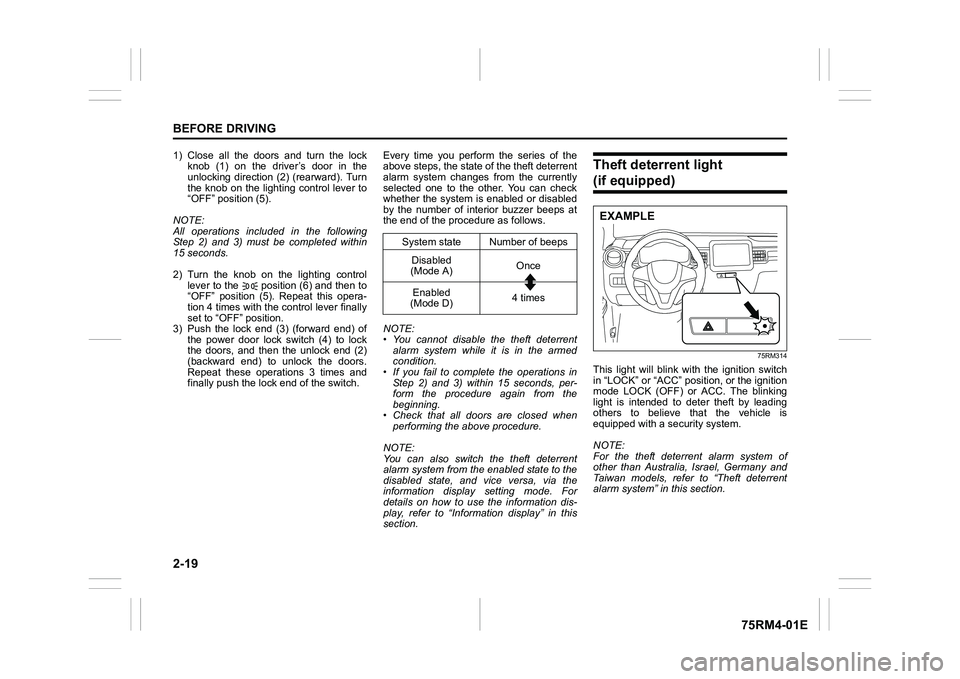
1) Close all the doors and turn the lockknob (1) on the driver’s door in the
unlocking direction (2) (rearward). Turn
the knob on the lighting control lever to
“OFF” position (5).
NOTE:
All operations included in the following
Step 2) and 3) must be completed within
15 seconds.
2) Turn the knob on the lighting control lever to the position (6) and then to
“OFF” position (5). Repeat this opera-
tion 4 times with the control lever finally
set to “OFF” position.
3) Push the lock end (3) (forward end) of
the power door lock switch (4) to lock
the doors, and then the unlock end (2)
(backward end) to unlock the doors.
Repeat these operations 3 times and
finally push the lock end of the switch. Every time you perform the series of the
above steps, the state of the theft deterrent
alarm system changes from the currently
selected one to the other. You can check
whether the system is
enabled or disabled
by the number of interior buzzer beeps at
the end of the procedure as follows.
NOTE:
• You cannot disable the theft deterrent
alarm system while it is in the armed
condition.
• If you fail to complete the operations in
Step 2) and 3) within 15 seconds, per-
form the procedure again from the
beginning.
• Check that all doors are closed when performing the above procedure.
NOTE:
You can also switch the theft deterrent
alarm system from the enabled state to the
disabled state, and vice versa, via the
information display setting mode. For
details on how to use the information dis-
play, refer to “Informa tion display” in this
section.
Theft deterrent light (if equipped)
75RM314
This light will blink with the ignition switch
in “LOCK” or “ACC” pos ition, or the ignition
mode LOCK (OFF) or ACC. The blinking
light is intended to deter theft by leading
others to believe that the vehicle is
equipped with a security system.
NOTE:
For the theft deterrent alarm system of
other than Australia, Israel, Germany and
Taiwan models, refer to “Theft deterrent
alarm system” in this section.
System state Number of beeps Disabled
(Mode A) Once
Enabled
(Mode D) 4 times
EXAMPLE
Page 49 of 505
2-26
BEFORE DRIVING
75RM4-01E
75RM264
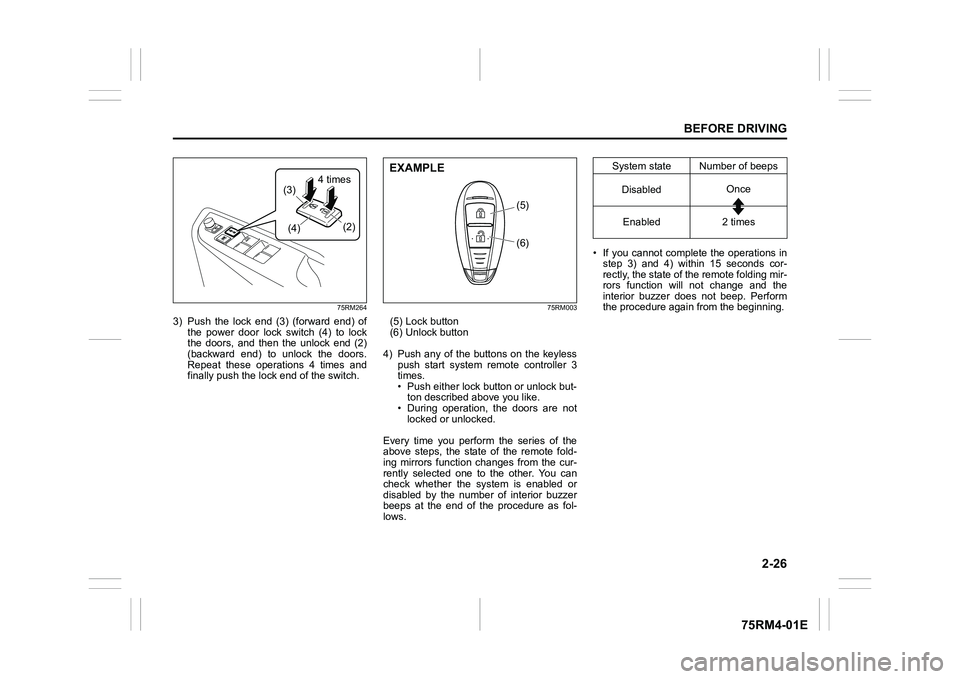
3) Push the lock end (3) (forward end) ofthe power door lock switch (4) to lock
the doors, and then the unlock end (2)
(backward end) to unlock the doors.
Repeat these operations 4 times and
finally push the lock end of the switch.
75RM003
(5) Lock button
(6) Unlock button
4) Push any of the buttons on the keyless push start system remote controller 3
times.
• Push either lock button or unlock but-ton described above you like.
• During operation, the doors are not locked or unlocked.
Every time you perform the series of the
above steps, the state of the remote fold-
ing mirrors function changes from the cur-
rently selected one to the other. You can
check whether the system is enabled or
disabled by the number of interior buzzer
beeps at the end of the procedure as fol-
lows. • If you cannot complete the operations in
step 3) and 4) within 15 seconds cor-
rectly, the state of the remote folding mir-
rors function will not change and the
interior buzzer does not beep. Perform
the procedure again from the beginning.
(4)
(3)
(2)
�м�а�W�L�P�H�Κ
(6)
(5)
EXAMPLE
System state Number of beeps
Disabled Once
Enabled 2 times
Page 61 of 505
2-38
BEFORE DRIVING
75RM4-01E
When the driver and/or passenger(s)
do(does) not buckle his or her seat belt,
the seat belt reminder light will come on or
blink and a buzzer will sound as a
reminder to the driver and/or passenger(s)
to buckle his or her seat belt. For more
details, refer to the explanation below.
NOTE:
The driver’s seat belt reminder light / front
passenger’s seat belt reminder light is for
both the driver and front passenger. Driver’s seat belt reminder
If the driver’s seat belt remains unbuckled
when the ignition switch is turned to “ON”
position or the engine switch is pressed to
change the ignition mode to ON, the
reminder works as follows:
1) The seat belt reminder light will come
on.
2) After the vehicle’s speed has reached
about 15 km/h, the seat belt reminder
light will blink and a buzzer will sound
for about 95 seconds.
3) The reminder light will remain on until the driver’s seat belt is buckled.
If the driver has buckled his or her seat belt
and later unbuckles the seat belt, the
reminder system will be activated from
Step 1) or 2) according to the vehicle’s
speed. When the vehicle’s speed is less
than 15 km/h, the reminder will start from
Step 1). When the vehicle’s speed is more
than 15 km/h, the reminder will start from
Step 2).
The reminder will be automatically can-
celed when the driver’s seat belt is buckled
or the ignition switch is turned off, or the
engine switch is pressed to change the
ignition mode to LOCK (OFF). Front passenger’s seat belt reminder
(if equipped)
The front passenger’s seat belt reminder
will activate only when there is a passen-
ger sitting in the front seat. In some situa-
tions, however, such as when you place
heavy objects in the front seat, the seat
belt reminder can be activated as if a pas-
senger was present. The front passenger’s
seat belt reminder wo
rks in the same man-
ner as the driver’s seat belt reminder.
Rear passenger’s seat belt reminder
(if equipped)
If a rear seat belt is not fastened when the
engine is started, all the rear passenger’s
seat belt reminder lights will come on for
about 35 seconds and then go out.
Within this 35 seconds;
• For the instrument c luster with tachome-
ter, the corresponding reminder is high-
lighted. The reminder fades when the
seat belt is fastened.
• For the instrum ent cluster without
tachometer, the corresponding reminder
comes on with the frame. The reminder
goes off with leaving the frame when the
seat belt is fastened.
The rear passenger’s seat belt reminder
lights will also come on for about 35 sec-
onds in the following conditions.
• If a seat belt is unfastened when the vehicle speed is less than 15 km/h, the
corresponding light will come on.
WA R N I N G
It is absolutely essential that the
driver and passengers fasten their
seat belts at all times. Persons who
are not fastening seat belts have a
much greater risk of injury if an acci-
dent occurs. Make a regular habit of
buckling your seat belt before putting
the key in the ignition or pressing the
engine switch.
Page 75 of 505
2-52
BEFORE DRIVING
75RM4-01E
Seat belt pretensioner system
63J269
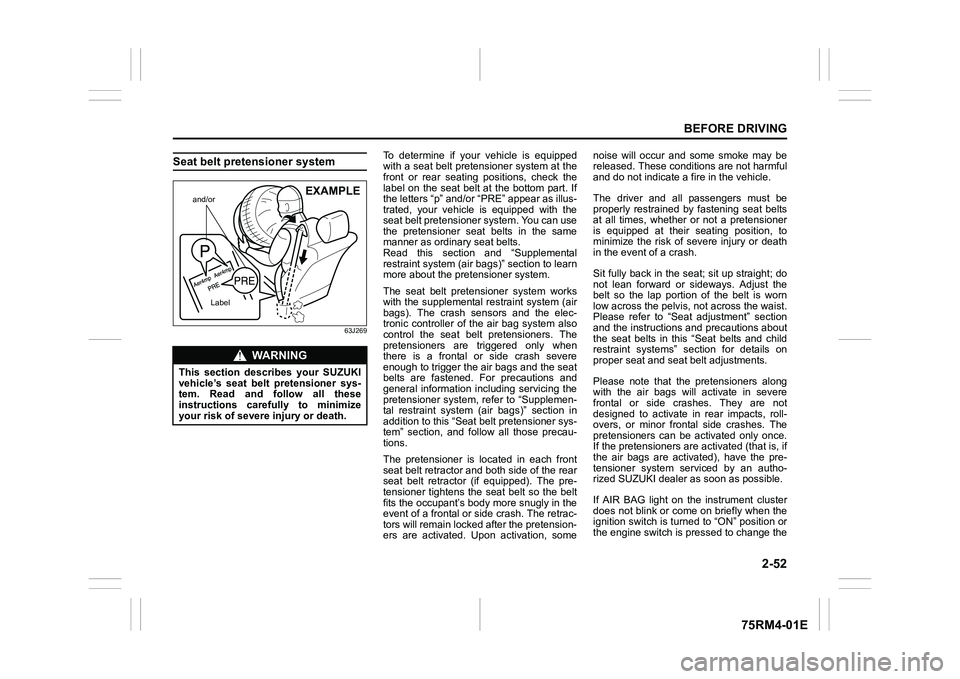
To determine if your vehicle is equipped
with a seat belt pretensioner system at the
front or rear seating positions, check the
label on the seat belt at the bottom part. If
the letters “p” and/or “PRE” appear as illus-
trated, your vehicle is equipped with the
seat belt pretensioner system. You can use
the pretensioner seat belts in the same
manner as ordinary seat belts.
Read this section and “Supplemental
restraint system (air bags)” section to learn
more about the pretensioner system.
The seat belt pretensioner system works
with the supplemental r estraint system (air
bags). The crash sensors and the elec-
tronic controller of t he air bag system also
control the seat belt pretensioners. The
pretensioners are triggered only when
there is a frontal or side crash severe
enough to trigger the air bags and the seat
belts are fastened. For precautions and
general information including servicing the
pretensioner system, refer to “Supplemen-
tal restraint system (air bags)” section in
addition to this “Seat belt pretensioner sys-
tem” section, and follow all those precau-
tions.
The pretensioner is located in each front
seat belt retractor and both side of the rear
seat belt retractor (if equipped). The pre-
tensioner tightens the seat belt so the belt
fits the occupant’s body more snugly in the
event of a frontal or side crash. The retrac-
tors will remain locked after the pretension-
ers are activated. Upon activation, some noise will occur and some smoke may be
released. These conditions are not harmful
and do not indicate a fire in the vehicle.
The driver and all passengers must be
properly restrained by fastening seat belts
at all times, whether or not a pretensioner
is equipped at their seating position, to
minimize the risk of severe injury or death
in the event o
f a crash.
Sit fully back in the seat; sit up straight; do
not lean forward or sideways. Adjust the
belt so the lap portion of the belt is worn
low across the pelvis , not across the waist.
Please refer to “Seat adjustment” section
and the instructions and precautions about
the seat belts in this “Seat belts and child
restraint systems” section for details on
proper seat and seat belt adjustments.
Please note that the pretensioners along
with the air bags will activate in severe
frontal or side crashes. They are not
designed to activate in rear impacts, roll-
overs, or minor frontal side crashes. The
pretensioners can be activated only once.
If the pretensioners are activated (that is, if
the air bags are activated), have the pre-
tensioner system serviced by an autho-
rized SUZUKI dealer as soon as possible.
If AIR BAG light on the instrument cluster
does not blink or come on briefly when the
ignition switch is turned to “ON” position or
the engine switch is pressed to change the
WA R N I N G
This section describes your SUZUKI
vehicle’s seat belt pretensioner sys-
tem. Read and follow all these
instructions carefully to minimize
your risk of severe injury or death.
and/or
Label
EXAMPLE
Page 78 of 505
2-55BEFORE DRIVING
75RM4-01E
AIR BAG light
63J030
If AIR BAG light on the instrument cluster
does not blink or come on when the igni-
tion switch is first turned to “ON” position,
or the ignition mode is first changed to ON,
or AIR BAG light stays on, or comes on
while driving, the air bag system (or the
seat belt pretensioner system) may not
work properly. Have the air bag system
inspected by an authorized SUZUKI dealer
as soon as possible. Air bag symbol meaning
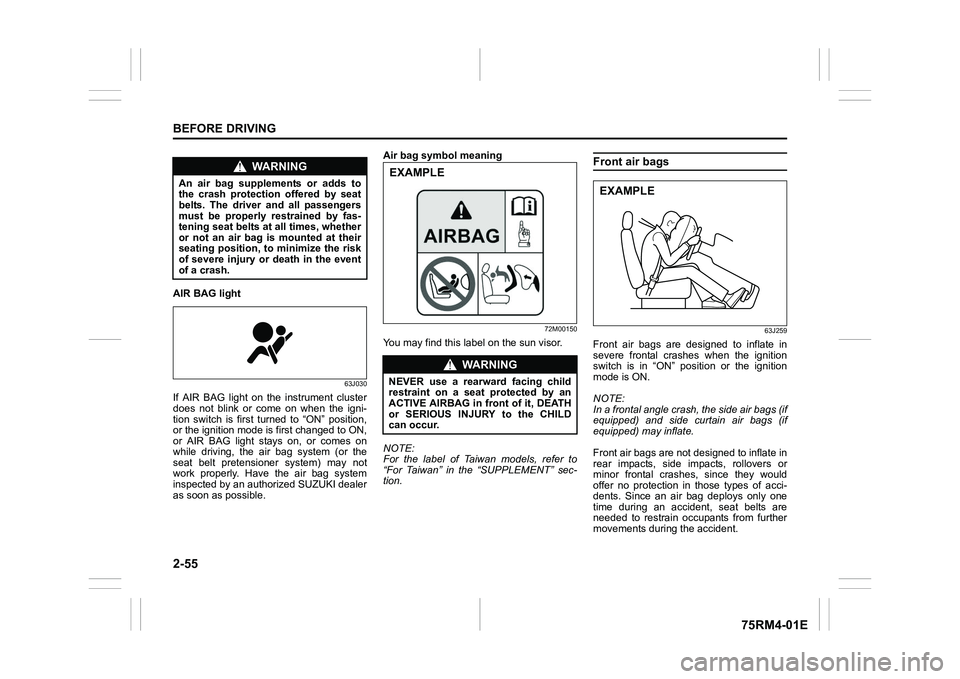
72M00150
You may find this label on the sun visor.
NOTE:
For the label of Taiwan models, refer to
“For Taiwan” in the “SUPPLEMENT” sec-
tion.
Front air bags
63J259
Front air bags are designed to inflate in
severe frontal crashes when the ignition
switch is in “ON” position or the ignition
mode is ON.
NOTE:
In a frontal angle crash, the side air bags (if
equipped) and side curtain air bags (if
equipped) may inflate.
Front air bags are not designed to inflate in
rear impacts, side impacts, rollovers or
minor frontal crashes, since they would
offer no protection in
those types of acci-
dents. Since an air bag deploys only one
time during an accident, seat belts are
needed to restrain occupants from further
movements during the accident.
WA R N I N G
An air bag supplements or adds to
the crash protectio n offered by seat
belts. The driver and all passengers
must be properly restrained by fas-
tening seat belts at all times, whether
or not an air bag is mounted at their
seating position, to minimize the risk
of severe injury or death in the event
of a crash.
WA R N I N G
NEVER use a rearward facing child
restraint on a seat protected by an
ACTIVE AIRBAG in front of it, DEATH
or SERIOUS INJURY to the CHILD
can occur.EXAMPLE
EXAMPLE
Page 96 of 505
2-73BEFORE DRIVING
75RM4-01E
75RM183
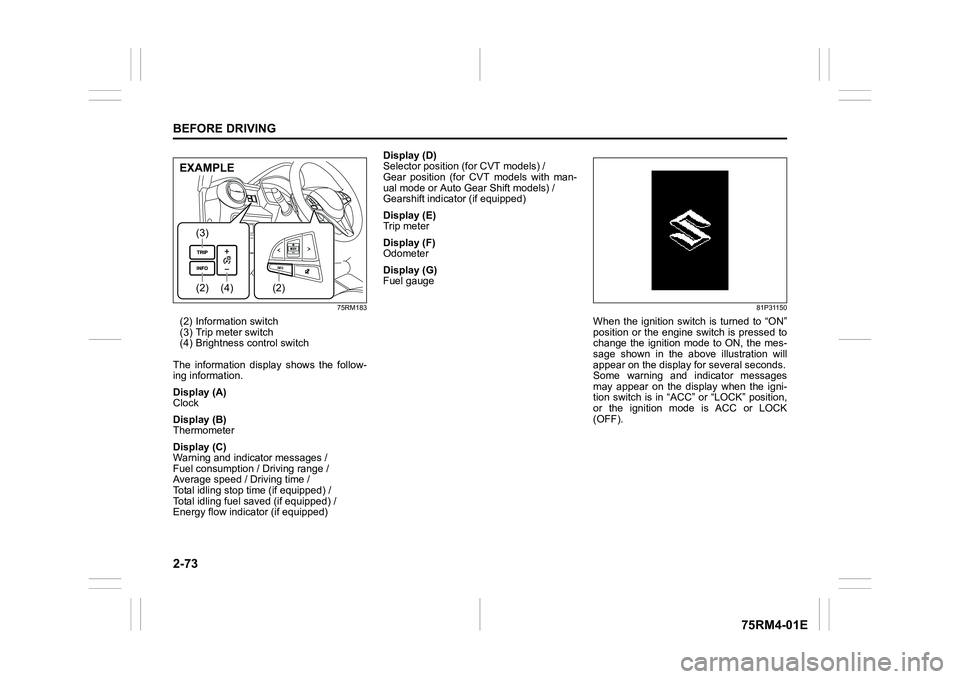
(2) Information switch
(3) Trip meter switch
(4) Brightness control switch
The information display shows the follow-
ing information.
Display (A)
Clock
Display (B)
Thermometer
Display (C)
Warning and indicator messages /
Fuel consumption / Driving range /
Average speed / Driving time /
Total idling stop time (if equipped) /
Total idling fuel saved (if equipped) /
Energy flow indicator (if equipped) Display (D)
Selector position (for CVT models) /
Gear position (for CVT models with man-
ual mode or Auto Gear Shift models) /
Gearshift indicator (if equipped)
Display (E)
Trip meter
Display (F)
Odometer
Display (G)
Fuel gauge
81P31150
When the ignition switch is turned to “ON”
position or the engine switch is pressed to
change the ignition mode to ON, the mes-
sage shown in the above illustration will
appear on the display
for several seconds.
Some warning and indicator messages
may appear on the display when the igni-
tion switch is in “ACC” or “LOCK” position,
or the ignition mode is ACC or LOCK
(OFF).
(4)
(2)(3)
(2)
EXAMPLE
Page 98 of 505
2-75BEFORE DRIVING
75RM4-01E
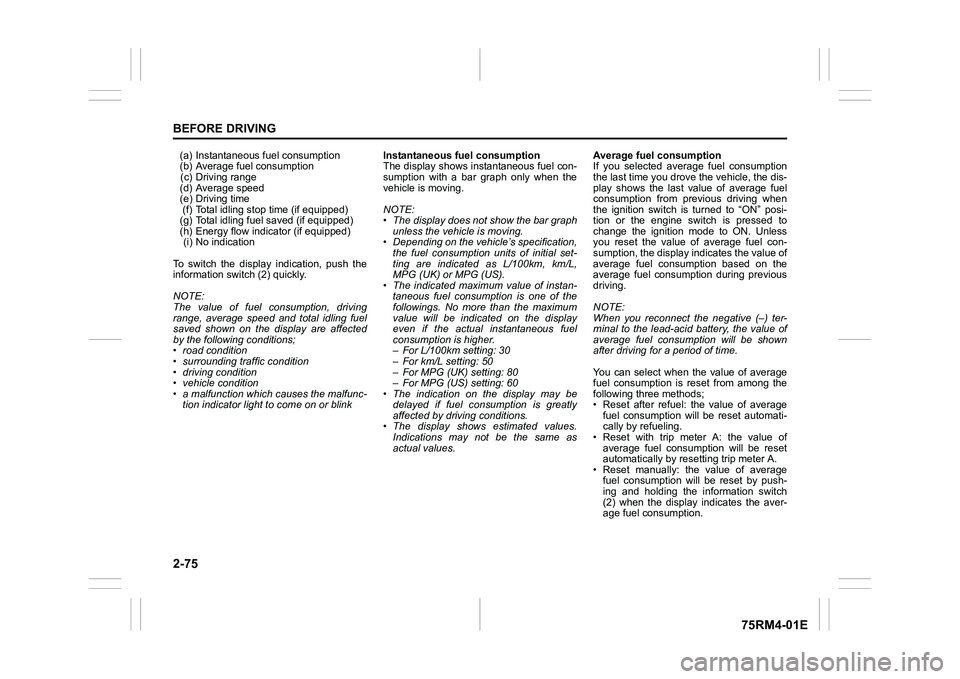
(a) Instantaneous fuel consumption
(b) Average fuel consumption(c) Driving range
(d) Average speed
(e) Driving time (f) Total idling stop time (if equipped)
(g) Total idling fuel saved (if equipped)
(h) Energy flow indicator (if equipped) (i) No indication
To switch the display indication, push the
information switch (2) quickly.
NOTE:
The value of fuel consumption, driving
range, average speed and total idling fuel
saved shown on the display are affected
by the following conditions;
• road condition
• surrounding traffic condition
• driving condition
• vehicle condition
• a malfunction which causes the malfunc- tion indicator light to come on or blink Instantaneous fuel consumption
The display shows instantaneous fuel con-
sumption with a bar graph only when the
vehicle is moving.
NOTE:
• The display does not show the bar graph
unless the vehicle is moving.
• Depending on the vehicle’s specification,
the fuel consumption units of initial set-
ting are indicated as L/100km, km/L,
MPG (UK) or MPG (US).
• The indicated maximum value of instan- taneous fuel consumption is one of the
followings. No more than the maximum
value will be indicated on the display
even if the actual instantaneous fuel
consumption is higher.
– For L/100km setting: 30
– For km/L setting: 50
– For MPG (UK) setting: 80
– For MPG (US) setting: 60
• The indication on the display may be
delayed if fuel consumption is greatly
affected by driving conditions.
• The display shows estimated values.
Indications may not be the same as
actual values. Average fuel consumption
If you selected average fuel consumption
the last time you drove
the vehicle, the dis-
play shows the last value of average fuel
consumption from previous driving when
the ignition switch is turned to “ON” posi-
tion or the engine switch is pressed to
change the ignition mode to ON. Unless
you reset the value of average fuel con-
sumption, the display indicates the value of
average fuel consumption based on the
average fuel consumption during previous
driving.
NOTE:
When you reconnect the negative (–) ter-
minal to the lead-acid battery, the value of
average fuel consumption will be shown
after driving for a period of time.
You can select when the value of average
fuel consumption is reset from among the
following three methods;
• Reset after refuel: the value of average fuel consumption will be reset automati-
cally by refueling.
• Reset with trip meter A: the value of average fuel consumption will be reset
automatically by resetting trip meter A.
• Reset manually: the value of average fuel consumption will be reset by push-
ing and holding the information switch
(2) when the display indicates the aver-
age fuel consumption.