battery SUZUKI JIMNY 2018 Owners Manual
[x] Cancel search | Manufacturer: SUZUKI, Model Year: 2018, Model line: JIMNY, Model: SUZUKI JIMNY 2018Pages: 421, PDF Size: 6.35 MB
Page 9 of 421
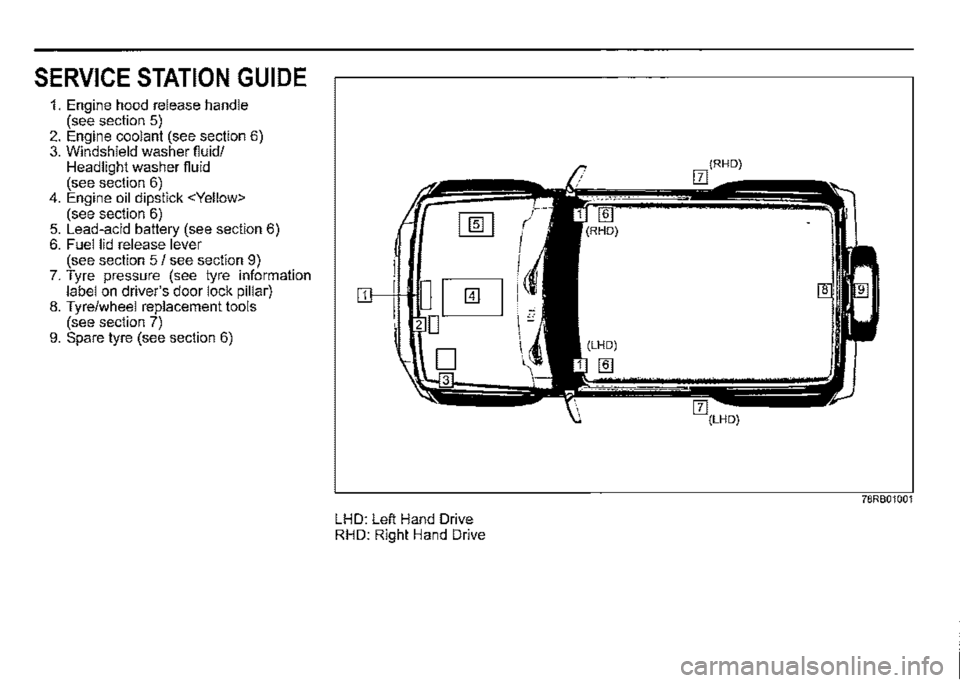
SERVICE STATION GUIDE
1. Engine hood release handle (see section 5) 2. Engine coolant (see section 6) 3. Windshield washer fiuid/ Headlight washer fiuid (see section 6) 4. Engine oil dipstick
(see section 6) 5. Lead-acid battery (see section 6) 6. Fuel lid release lever (see section 5 / see section 9) 7. Tyre pressure (see tyre information label on driver's door lock pillar) 8. Tyre/wheel replacement tools (see section 7) 9. Spare tyre (see section 6)
LHD: Left Hand Drive RHD: Right Hand Drive
78RB01001
Page 30 of 421
FOR SAFE DRIVING
A. WARNING
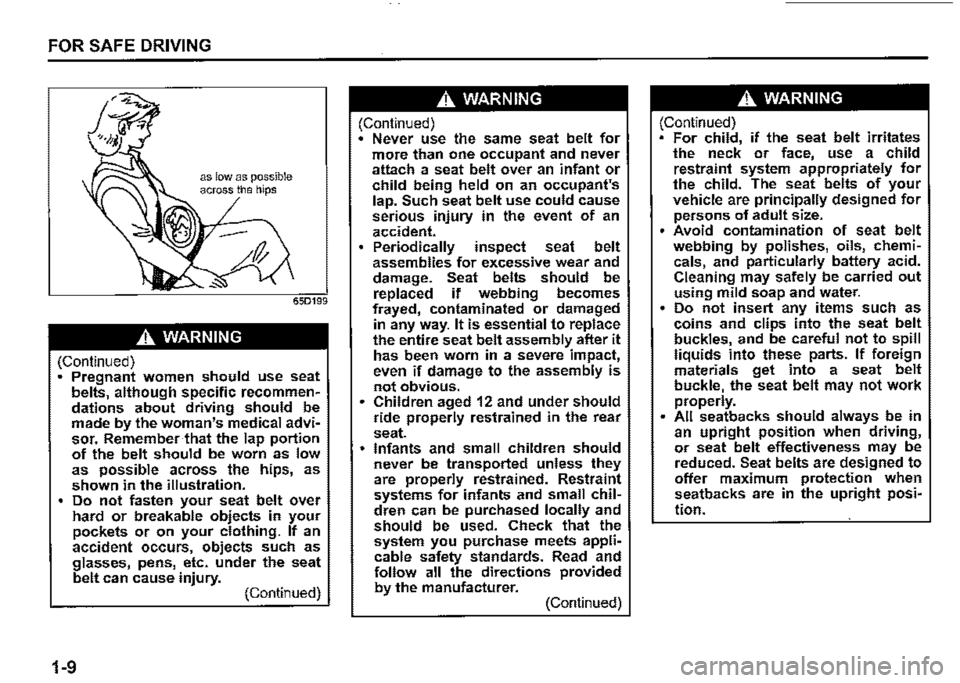
(Continued) Pregnant women should use seat belts, although specific recommendations about driving should be made by the woman's medical advi• sor. Remember that the lap portion of the belt should be worn as low as possible across the hips, as shown in the illustration. Do not fasten your seat belt over hard or breakable objects in your pockets or on your clothing. If an accident occurs, objects such as glasses, pens, etc. under the seat belt can cause injury. (Continued)
1-9
A. WARNING
(Continued) • Never use the same seat belt for more than one occupant and never attach a seat belt over an infant or child being held on an occupant's lap. Such seat belt use could cause serious injury in the event of an accident. Periodically inspect seat belt assemblies for excessive wear and damage. Seat belts should be replaced if webbing becomes frayed, contaminated or damaged in any way. It is essential to replace the entire seat belt assembly after it has been worn in a severe impact, even if damage to the assembly is not obvious. Children aged 12 and under should ride properly restrained in the rear seat. Infants and small children should never be transported unless they are properly restrained. Restraint systems for infants and small chil• dren can be purchased locally and should be used. Check that the system you purchase meets appli• cable safety standards. Read and follow all the directions provided by the manufacturer. (Continued)
A. WARNING
(Continued) For child, if the seat belt irritates the neck or face, use a child restraint system appropriately for the child. The seat belts of your vehicle are principally designed for persons of adult size. Avoid contamination of seat belt webbing by polishes, oils, chemi• cals, and particularly battery acid. Cleaning may safely be carried out using mild soap and water. • Do not insert any items such as coins and clips into the seat belt buckles, and be careful not to spill liquids into these parts. If foreign materials get into a seat belt buckle, the seat belt may not work properly. All seatbacks should always be in an upright position when driving, or seat belt effectiveness may be reduced. Seat belts are designed to offer maximum protection when seatbacks are in the upright posi•
tion.
Page 55 of 421
The pretensioner is located in each front seat belt retractor and each rear seat belt retractor in outboard seating position. The pretensioner tightens the seat belt so the belt fits the occupant's body more snugly in the event of a frontal or side collision. The retractors will remain locked after the pretensioners are activated. Upon activation, some noise will occur and some smoke may be released. These conditions are not harmful and do not indicate a fire in the vehicle.
The driver and all passengers must be properly restrained by fastening seat belts at all times, whether or not a pretensioner is equipped at their seating position, to minimize the risk of severe injury or death in the event of a collision.
Sit fully back in the seat; sit up straight; do not lean forward or sideways. Adjust the belt so the lap portion of the belt is worn low across the pelvis, not across the waist. Please refer to "Seat adjustment" section and the instructions and precautions about the seat belts in this "Seat belts and child restraint systems" section for details on proper seat and seat belt adjustments.
Please note that the pretensioners along with the airbags will activate in severe frontal or side collisions. They are not designed to activate in rear impacts, rollovers, or minor frontal side collisions. The pretensioners can be activated only once. If the pretensioners are activated (that is, if the airbags are activated), have the pretensioner system serviced by a SUZUKI dealer as soon as possible.
FOR SAFE DRIVING
If AIRBAG light on the instrument cluster does not blink or come on briefiy when the ignition switch is turned to "ON" position, stays on for more than 1 O seconds, or comes on while driving, the pretensioner system or the airbag system may not work properly. Have both systems inspected by a SUZUKI dealer as soon as possible.
Service on or around the pretensioner system components or wiring must be performed only by a SUZUKI dealer who is specially trained. Improper service could result in unintended activation of pretensioners or could render the pretensioner inoperative. Either of these two conditions may result in personal injury.
To prevent damage or unintended activation of the pretensioners, check that the lead-acid battery is disconnected and the ignition switch has been in "LOCK" position for at least 90 seconds before performing any electrical service work on your SUZUKI vehicle.
Do not touch pretensioner system components or wiring. The wires are wrapped with yellow tape or yellow tubing, and the couplers are yellow. When scrapping your SUZUKI vehicle, ask a SUZUKI dealer, body repair shop, or scrap yard for assistance.
1-34
Page 67 of 421
A WARNING
(Continued) For vehicles with side airbags, do not use non-genuine seat covers on the front seats, because nongenuine seat covers may obstruct the inflation of side airbags. Suzuki highly recommends Suzuki-genuine seat covers to be used when covering the front seats of such vehicles with side airbags. Also, near the door, do not place cup holders, hangers or any other objects and do not lean an umbrella, as these objects could be propelled by the airbag in the event of a collision. Either of these conditions may cause severe injury. Do not strike or apply significant levels of impact to the airbag component areas. It can cause the airbags to malfunction.
Even though your vehicle is moderately damaged by a collision, it may not be severe enough to trigger front, side or side curtain airbags to inflate. If your vehicle sustains any front-end or side damage, have the airbag system inspected by a SUZUKI dealer to ensure that ii works properly.
Your vehicle is equipped with a diagnostic module which records information about the airbag system if the airbags deploy in a collision. The module records information about overall system status, and which sensors activated the deployment, and for a certain vehicle only, whether the driver's seat belt was in use.
Servicing the airbag system If the airbags inflate, have the airbags and related components replaced by a SUZUKI dealer as soon as possible.
If your vehicle ever gets in deep water and the driver's floor is submerged, the airbag controller could be damaged. If this happens, ask a SUZUKI dealer to check the airbag system as soon as possible.
FOR SAFE DRIVING
Special procedures are required for servicing or replacing an airbag. For that reason, only a SUZUKI dealer should be allowed to service or replace your airbags. Remind anyone who services your SUZUKI vehicle that it has airbags.
Service on or around airbag components or wiring must be performed only by a SUZUKI dealer. Improper service could result in unintended airbag deployment or could render the airbag inoperative. Either of these two conditions may result in severe injury.
To prevent damage or unintended inflation of the airbag system, check that the leadacid battery is disconnected and the ignition switch has been in "LOCK" position for at least 90 seconds before performing any electrical service work on your SUZUKI vehicle. Do not touch airbag system components or wires. The wires are wrapped with yellow tape or yellow tubing, and the couplers are yellow for easy identification.
Scrapping a vehicle that has an uninflated airbag can be hazardous. Ask a SUZUKI dealer, body repair shop or scrap yard for help with disposal.
1-46
Page 75 of 421
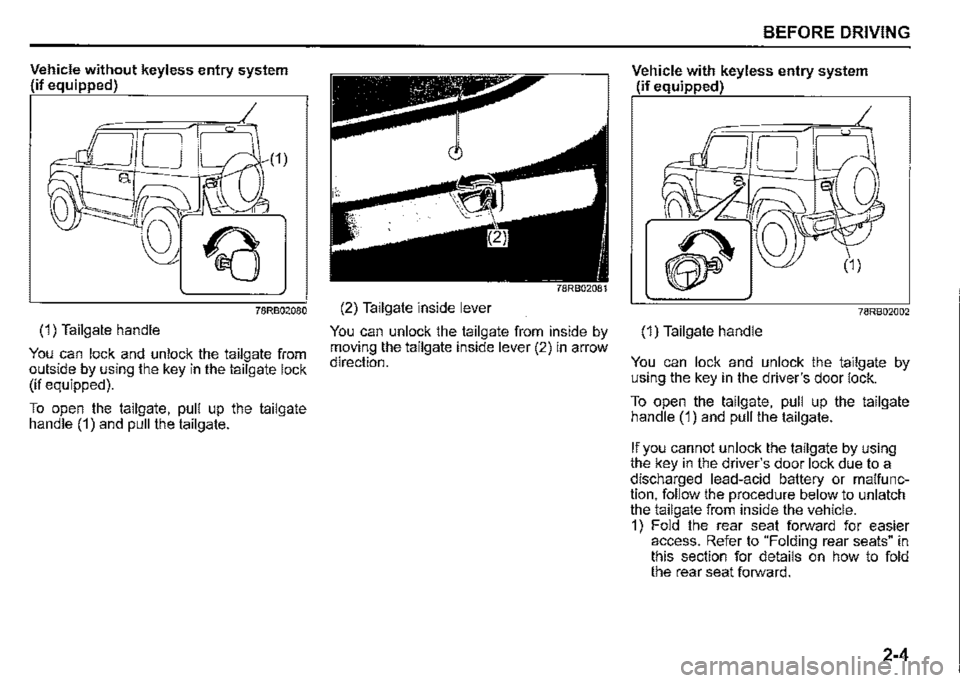
Vehicle without keyless entry system (if equipped)
78RB02080
(1) Tailgate handle
You can lock and unlock the tailgate from outside by using the key in the tailgate lock (if equipped).
To open the tailgate, pull up the tailgate handle (1) and pull the tailgate.
(2) Tailgate inside lever
You can unlock the tailgate from inside by moving the tailgate inside lever (2) in arrow direction.
BEFORE DRIVING
Vehicle with keyless entry system (if equipped)
(1)
78RB02002
(1) Tailgate handle
You can lock and unlock the tailgate by using the key in the driver's door lock.
To open the tailgate, pull up the tailgate handle (1) and pull the tailgate.
If you cannot unlock the tailgate by using the key in the driver's door lock due to a discharged lead-acid battery or malfunction, follow the procedure below to unlatch the tailgate from inside the vehicle. 1) Fold the rear seat forward for easier access. Refer to "Folding rear seats" in this section for details on how to fold the rear seat forward.
2-4
Page 78 of 421

BEFORE DRIVING
Battery replacement If the transmitter becomes unusable, replace the battery.
To replace the battery of the transmitter:
(2)
68LM248
1) Remove the screw (1), and open the transmitter cover. 2) Remove the transmitter (2).
2-7
68LM249
(3) Lithium disc type battery: CR1616 or equivalent
3) Put the edge of a flat-bladed screwdriver in the slot of the transmitter (2) and pry it open. 4) Replace the battery (3) so its+ terminal faces "+" mark of the transmitter. 5) Close the transmitter and install it into the transmitter holder. 6) Close the transmitter cover, install and tighten the screw (1 ). 7) Check that the door locks can be operated with the transmitter. 8) Dispose of the used battery properly according to applicable rules or regulations. Do not dispose of lithium batteries with ordinary household trash.
A WARNING
Swallowing a lithium battery may cause serious internal injury. Do not allow anyone to swallow a lithium battery. Keep lithium batteries away from children and pets. If swallowed, contact a physician immediately.
NOTICE
• The transmitter is a sensitive elec)ron!c instrument. To avoid damaging ,t, do not expose it to dust or moisture or tamper with internal parts. When replacing the battery by yourself, the transmitter controller could be damaged affected by static electricity. Discharge the static electricity built up in your body by touching metal before replacing the battery.
NOTE: Used batteries must be disposed of properly according to applicable rules or regulations and must not be disposed of with ordinary household trash.
Page 79 of 421
80JM133
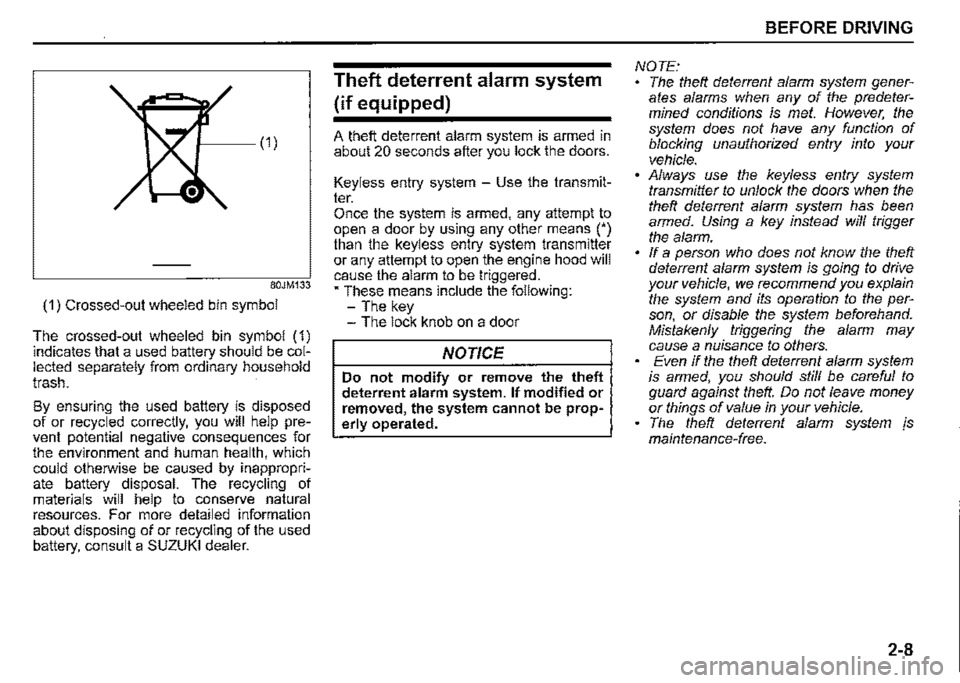
(1) Crossed-out wheeled bin symbol
The crossed-out wheeled bin symbol (1) indicates that a used battery should be collected separately from ordinary household trash.
By ensuring the used battery is disposed of or recycled correctly, you will help prevent potential negative consequences for the environment and human health, which could otherwise be caused by inappropriate battery disposal. The recycling of materials will help to conserve natural resources. For more detailed information about disposing of or recycling of the used battery, consult a SUZUKI dealer.
Theft deterrent alarm system
(if equipped)
A theft deterrent alarm system is armed in about 20 seconds after you lock the doors.
Keyless entry system -Use the transmitter. Once the system is armed, any attempt to open a door by using any other means (') than the keyless entry system transmitter or any attempt to open the engine hood will cause the alarm to be triggered. • These means include the following: -The key -The lock knob on a door
NOTICE
Do not modify or remove the theft deterrent alarm system. If modified or removed, the system cannot be properly operated.
BEFORE DRIVING
NOTE: The theft deterrent alarm system generates alarms when any of the predetermined conditions is met. However, the system does not have any function of blocking unauthorized entry into your vehicle. Always use the keyless entry system transmitter to unlock the doors when the theft deterrent alarm system has been armed. Using a key instead will trigger the alarm. If a person who does not know the theft deterrent alarm system is going to drive your vehicle, we recommend you explain the system and its operation to the person, or disable the system beforehand. Mistakenly triggering the alarm may cause a nuisance to others. Even if the theft deterrent alarm system is armed, you should still be careful to guard against theft. Do not leave money or things of value in your vehicle. The theft deterrent alarm system js maintenance-free.
2-8
Page 80 of 421
BEFORE DRIVING
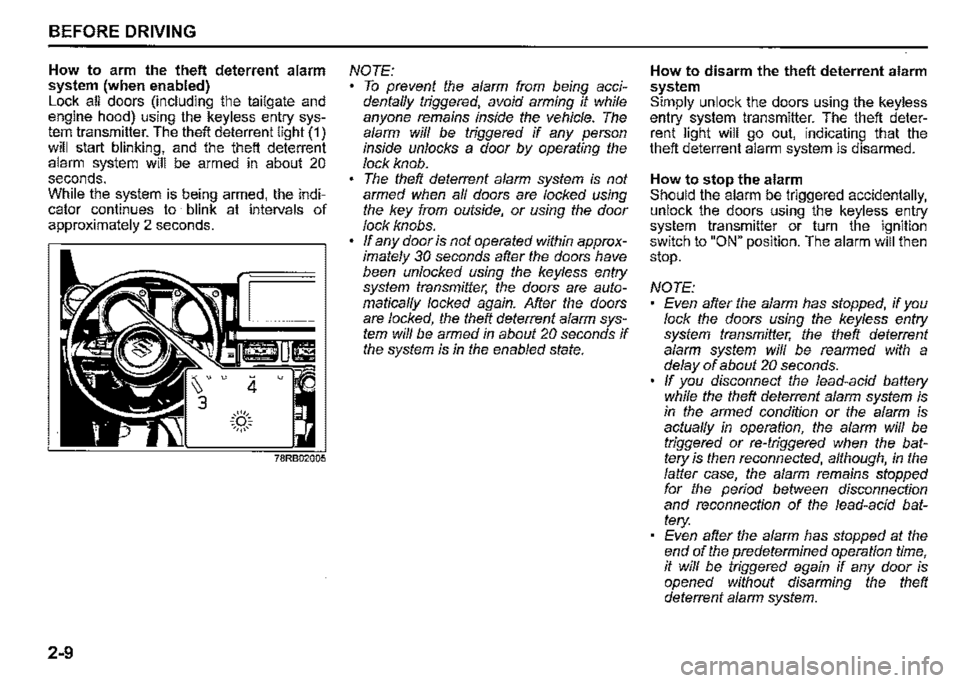
How to arm the theft deterrent alarm system (when enabled) Lock all doors (including the tailgate and engine hood) using the keyless entry system transmitter. The theft deterrent light (1) will start blinking, and the theft deterrent alarm system will be armed in about 20 seconds. While the system is being armed, the indicator continues to blink at intervals of approximately 2 seconds.
2-9
4 u
.::(')::. ~,,,,,~
NOTE: To prevent the alarm from being accidentaffy triggered, avoid arming it while anyone remains inside the vehicle. The alarm wiff be triggered if any person inside unlocks a door by operating the lock knob. The theft deterrent alarm system is not armed when af/ doors are locked using the key from outside, or using the door lock knobs. ff any door is not operated within approximately 30 seconds after the doors have been unlocked using the keyless entry system transmitter, the doors are automaticaf/y locked again. After the doors are locked, the theft deterrent alarm system wiff be armed in about 20 seconds if the system is in the enabled state.
How to disarm the theft deterrent alarm system Simply unlock the doors using the keyless entry system transmitter. The theft deterrent light will go out, indicating that the theft deterrent alarm system is disarmed.
How to stop the alarm Should the alarm be triggered accidentally, unlock the doors using the keyless entry system transmitter or turn the ignition switch to "ON" position. The alarm will then stop.
NOTE: Even after the alarm has stopped, if you lock the doors using the keyless entry system transmitter, the theft deterrent alarm system wiff be rearmed with a delay of about 20 seconds. ff you disconnect the lead-acid battery while the theft deterrent alarm system is in the armed condition or the alarm is actuaf/y in operation, the alarm will be triggered or re-triggered when the battery is then reconnected, although, in the falter case, the alarm remains stopped for the period between disconnection and reconnection of the lead-acid battery: Even after the alarm has stopped at the end of the predetermined operation time, it wiff be triggered again if any door is opened without disarming the theft deterrent alarm system.
Page 83 of 421
Pinching prevention function
(if equipped)
The driver's window is equipped with a pinching prevention function. This function detects a foreign object that is caught in the window as it is being closed by AUTOUP feature, which allows you to close the window without holding the window switch in UP position, and stops the window from closing to prevent damage.
A. WARNING
To avoid injuring an occupant by window entrapment, check that no part of the occupant's body such as hands or head is in the path of the electric window when closing it. This function may not detect an object due to the size, hardness, or position of the object being caught in the closing window.
A.CAUTION
The pinching prevention function does not operate while you are holding the window switch in UP position. The pinching prevention function may not detect an object caught in the window just before the window is fully closed.
NOTE: Even if you cannot close the window by the AUTO-UP feature because there may be something wrong with the pinching prevention function, you can close the window by holding the window switch in UP position. If you drive in extreme off-road condition, the pinching prevention function may operate accidentally because the window reacts to vehicle jolting.
Pinching prevention function initialization When you disconnect and reconnect the lead-acid battery or replace the fuse, the function will be deactivated. In this condition, the AUTO-DOWN feature will be deactivated, while the AUTO-UP feature may remain activated. The pinching prevention function needs to be initialized.
BEFORE DRIVING
To initialize the pinching prevention function, use the following procedure: 1) Turn the ignition switch to "ON" posi
tion. 2) Open the driver's window fully by holding the window switch in DOWN position. 3) Close the driver's window by holding the switch in UP position, and keep holding the switch for 2 seconds after the window is fully closed. 4) Check the driver's window to see if the AUTO-DOWN/UP feature works.
A. WARNING
Whenever you disconnect and reconnect the lead-acid battery or replace the fuse, the pinching prevention function needs to be initialized. The pinching prevention function will not be activated until the initialization is completed.
If the AUTO-DOWN/UP feature will not work after initialization, there might be something wrong with the pinching prevention function. Have your vehicle inspected by a SUZUKI dealer.
2-12
Page 92 of 421

BEFORE DRIVING
Trip meter The trip meter can be used to measure the distance traveled on short trips or between fuel stops. You can use the trip meter A or trip meter B independently.
To reset the trip meter, push and hold the trip meter selector knob (1) until the display shows a.a.
NOTE: The indicated maximum value of the trip meter is 9999.9. When you run past the maximum value, the indicated value will return to 0. 0. ·
Odometer The odometer records the total distance the vehicle has been driven.
NOTICE
Keep track of your odometer reading and check the maintenance schedule regularly for required services. Increased wear or damage to certain parts can result from failure to perform required services at the proper mileage intervals.
2-21
Instantaneous fuel consumption The display shows the value of instantaneous fuel consumption only when the vehicle is moving.
NOTE: The display does not show the value unless the vehicle is moving. Depending on the vehicle's specification, the fuel consumption units of initial setting are indicated as U100km or km/L. For "U100km" setting, the indicated maximum value of instantaneous fuel consumption is 30. No more than 30 will be indicated on the display even if the actual instantaneous fuel consumption is higher. For "km/L" setting, the indicated maximum value of instantaneous fuel consumption is 50. No more than 50 will be indicated on the display even if the actual instantaneous fuel consumption is higher. The indication on the display may be delayed if fuel consumption is greatly affected by driving conditions. The display shows estimated values. Indications may not be the same as actual values. For "U100km" or "km/L" setting, you can change the units that instantaneous fuel consumption is displayed in. Refer to ',<\verage fuel consumption" in this section.
Average fuel consumption If you previously selected average fuel consumption setting, the display shows average fuel consumption from the last reset to the present when the ignition switch is turned "ON".
To reset the average fuel consumption, push and hold the indicator selector knob (2) for a while when the display shows the average fuel consumption.
NOTE: When you reset the indication or reconnect the terminals to the lead-acid battery, the value of average fuel consumption will be shown after driving for a while.