check engine light SUZUKI RENO 2008 1.G User Guide
[x] Cancel search | Manufacturer: SUZUKI, Model Year: 2008, Model line: RENO, Model: SUZUKI RENO 2008 1.GPages: 226, PDF Size: 4.98 MB
Page 151 of 226
5-7SERVICE AND APPEARANCE CARE
85Z14-03E
Engine OilIf the oil pressure light appears on the
instrument cluster, it means you need to
check your engine oil level right away.
For more information, see “Oil Pressure
Light” in section 3.
You should check your engine oil level reg-
ularly; this is an added reminder.
Checking Engine Oil
It’s a good idea to check your engine oil
every time you get fuel. In order to get an
accurate reading, the oil must be warm
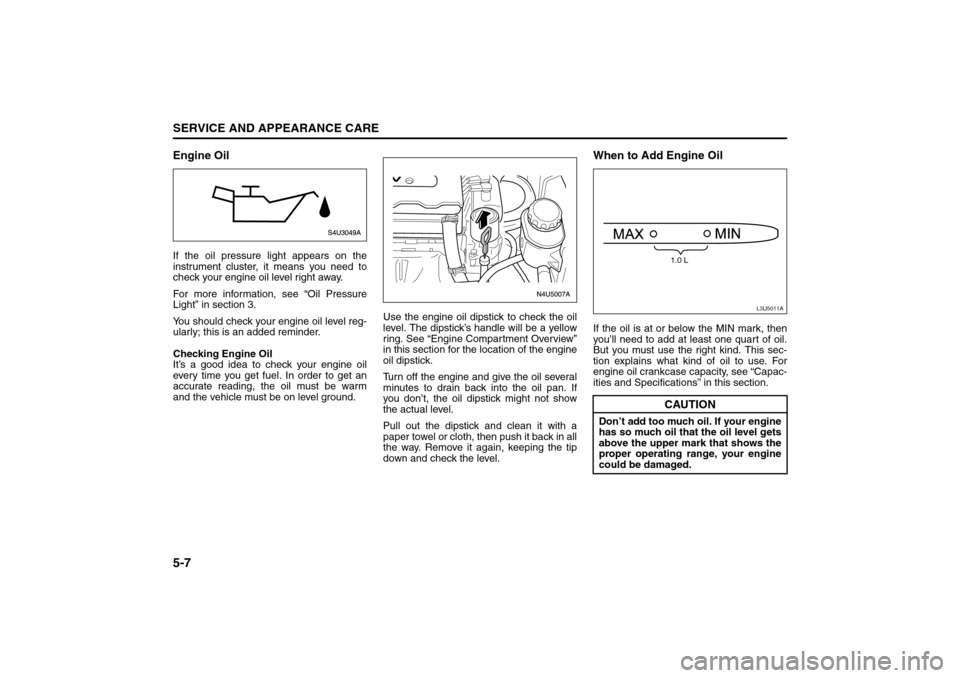
and the vehicle must be on level ground.Use the engine oil dipstick to check the oil
level. The dipstick’s handle will be a yellow
ring. See “Engine Compartment Overview”
in this section for the location of the engine
oil dipstick.
Turn off the engine and give the oil several
minutes to drain back into the oil pan. If
you don’t, the oil dipstick might not show
the actual level.
Pull out the dipstick and clean it with a
paper towel or cloth, then push it back in all
the way. Remove it again, keeping the tip
down and check the level.
When to Add Engine OilIf the oil is at or below the MIN mark, then
you’ll need to add at least one quart of oil.
But you must use the right kind. This sec-
tion explains what kind of oil to use. For
engine oil crankcase capacity, see “Capac-
ities and Specifications” in this section.
CAUTION
Don’t add too much oil. If your engine
has so much oil that the oil level gets
above the upper mark that shows the
proper operating range, your engine
could be damaged.
L3U5011A
1.0 L
Checking Things Under the Hood:
Page 154 of 226
5-10
SERVICE AND APPEARANCE CARE
85Z14-03E
km) or 3 months. If necessary, clean or
replace it.
How to Inspect the Engine Air Cleaner/
Filter
To inspect the air cleaner/filter, remove the
filter from the vehicle and lightly shake the
filter to release loose dust and dirt. If the fil-
ter remains “caked” with dirt, a new filter is
required.
To inspect or replace the filter, do the fol-
lowing:
1) Remove the four screws on the cover.
2) Lift off the cover.
3) Check or replace the engine air
cleaner/filter. See “Normal Mainte-
nance Replacement Parts” in this sec-
tion for replacement part numbers.
4) Reinstall the filter, put the cover back on
tightly, and tighten the screws.
Automatic Transmission FluidTo ensure proper functioning, efficiency,
and durability of the automatic transmis-
sion, be sure to keep the transmission fluid
at the proper level. Too much or too little
fluid can cause problems.
The fluid level must be checked with the
engine running and the selector lever in P
(Park). The vehicle must be up to normal
operating temperature and parked on level
ground.
The normal operating temperature for the
fluid will be reached after driving about 10
minutes.
Checking Automatic Transmission Fluid
Level
If the fluid is contaminated or discolored,
change the automatic transmission fluid.
A decrease in the fluid level indicates a
leak in the automatic transmission. If
noted, contact your SUZUKI dealer for
repair as soon as possible.1) Start the engine.
2) Warm up the engine until the tempera-
ture of the automatic transmission fluid
reaches approximately 40°C (104°F).
3) Move the selector lever from “P” to “1”
and return to “P”. Wait for a few sec-
onds at each select position until the
selected gears are fully engaged.
WARNING
Operating the engine with the air
cleaner/filter off can cause you or
others to be burned. The air cleaner
not only cleans the air, it helps to
stop flame if the engine backfires. If it
isn’t there and the engine backfires,
you could be burned. Don’t drive with
it off, and be careful working on the
engine with the air cleaner/filter off.
CAUTION
If the air cleaner/filter is off, a backfire
can cause a damaging engine fire.
And, dirt can easily get into your
engine, which will damage it. Always
have the air cleaner/filter in place
when you’re driving.
WARNING
This work requires special skill and
equipment. Before attempting to do
the work, be sure you are fully
acquainted with doing this job.
Have your SUZUKI dealer do this
work if you are not confident you can
complete the task safely.
Otherwise, you could be injured or
could damage the vehicle.
Checking Things Under the Hood:
Page 156 of 226
5-12
SERVICE AND APPEARANCE CARE
85Z14-03E
Hydraulic ClutchThere is one reservoir for both the brake
and the hydraulic clutch fluid. See “Brakes”
in this section for more information.
The hydraulic clutch linkage in your vehicle
is self-adjusting. The master cylinder res-
ervoir is filled with hydraulic fluid.
A fluid loss in this system could indicate a
problem. Have the system inspected and
repaired.
When to Check and What to Use
Refer to the Maintenance Schedule to
determine how often you should check the
fluid level and for the proper fluid. See sec-
tion 6.
How to Check and Add Fluid
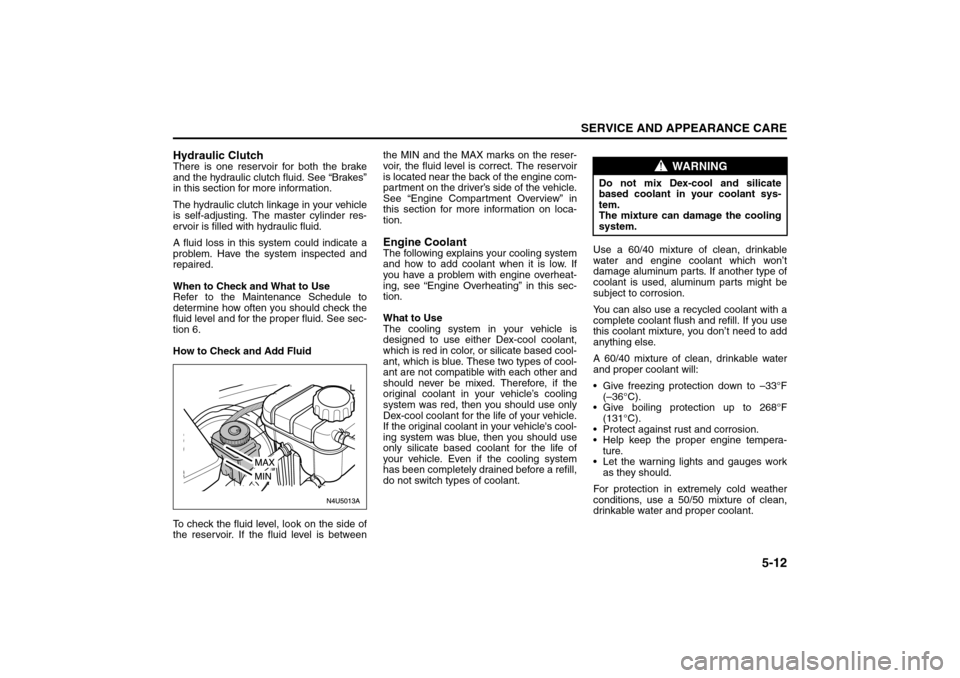
To check the fluid level, look on the side of
the reservoir. If the fluid level is betweenthe MIN and the MAX marks on the reser-
voir, the fluid level is correct. The reservoir
is located near the back of the engine com-
partment on the driver’s side of the vehicle.
See “Engine Compartment Overview” in
this section for more information on loca-
tion.
Engine CoolantThe following explains your cooling system
and how to add coolant when it is low. If
you have a problem with engine overheat-
ing, see “Engine Overheating” in this sec-
tion.
What to Use
The cooling system in your vehicle is
designed to use either Dex-cool coolant,
which is red in color, or silicate based cool-
ant, which is blue. These two types of cool-
ant are not compatible with each other and
should never be mixed. Therefore, if the
original coolant in your vehicle’s cooling
system was red, then you should use only
Dex-cool coolant for the life of your vehicle.
If the original coolant in your vehicle's cool-
ing system was blue, then you should use
only silicate based coolant for the life of
your vehicle. Even if the cooling system
has been completely drained before a refill,
do not switch types of coolant.Use a 60/40 mixture of clean, drinkable
water and engine coolant which won’t
damage aluminum parts. If another type of
coolant is used, aluminum parts might be
subject to corrosion.
You can also use a recycled coolant with a
complete coolant flush and refill. If you use
this coolant mixture, you don’t need to add
anything else.
A 60/40 mixture of clean, drinkable water
and proper coolant will:
Give freezing protection down to –33°F
(–36°C).
Give boiling protection up to 268°F
(131°C).
Protect against rust and corrosion.
Help keep the proper engine tempera-
ture.
Let the warning lights and gauges work
as they should.
For protection in extremely cold weather
conditions, use a 50/50 mixture of clean,
drinkable water and proper coolant.
WARNING
Do not mix Dex-cool and silicate
based coolant in your coolant sys-
tem.
The mixture can damage the cooling
system.
Checking Things Under the Hood:
Page 163 of 226
5-19SERVICE AND APPEARANCE CARE
85Z14-03E
When your brake fluid falls to a low level,
your brake warning light will come on. See
“Brake System Warning Light” in section 3.
What to Add
When you do need brake fluid, use only
DOT-3 brake fluid. Use new brake fluid
from a sealed container only. See “Recom-
mended Fluids and Lubricants” in section
6.
Always clean the brake fluid reservoir cap
and the area around the cap before remov-
ing it. This will help keep dirt from entering
the reservoir.Brake Wear
Your vehicle has front and rear disc brakes.
Disc brake pads have built-in wear indica-
tors that make a high-pitched warning
sound when the brake pads are worn and
new pads are needed. The sound may
come and go or be heard all the time your
vehicle is moving (except when you are
pushing on the brake pedal firmly).Some driving conditions or climates may
cause a brake squeal when the brakes are
first applied or lightly applied. This does
not mean something is wrong with your
brakes.
Properly torqued wheel nuts are necessary
to help prevent brake pulsation. When tires
are rotated, inspect brake pads for wear
and evenly tighten wheel nuts in the proper
sequence to SUZUKI torque specifica-
tions.
Brake linings should always be replaced as
complete axle sets.
See “Brake System Inspection” in section
6.
WARNING
If you have too much brake fluid, it
can spill on the engine. The fluid will
burn if the engine is hot enough. You
or others could be burned, and your
vehicle could be damaged.
WARNING
With the wrong kind of fluid in your
brake system, your brakes may not
work well, or they may not even work
at all. This could cause a crash.
Always use the proper brake fluid.
CAUTION
Using the wrong fluid can badly
damage brake system parts. For
example, just a few drops of min-
eral-based oil, such as engine oil,
in your brake system can damage
brake system parts so badly that
they’ll have to be replaced. Don’t let
someone put in the wrong kind of
fluid.
If you spill brake fluid on your vehi-
cle’s painted surfaces, the paint fin-
ish can be damaged. Be careful not
to spill brake fluid on your vehicle.
If you do, wash it off immediately.
See “Appearance Care” in the
Index.
WARNING
The brake wear warning sound
means that soon your brakes won’t
work well. That could lead to an acci-
dent. When you hear the brake wear
warning sound, have your vehicle
serviced.
CAUTION
Continuing to drive with worn-out
brake pads could result in costly
brake repair.
Checking Things Under the Hood:
Page 165 of 226
5-21SERVICE AND APPEARANCE CARE
85Z14-03E
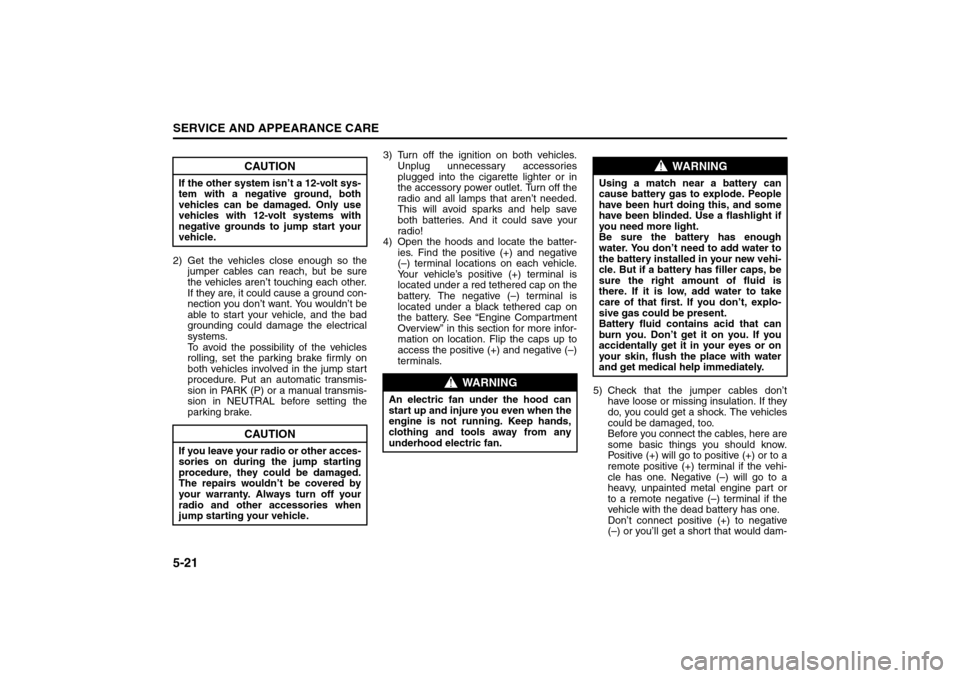
2) Get the vehicles close enough so the
jumper cables can reach, but be sure
the vehicles aren’t touching each other.
If they are, it could cause a ground con-
nection you don’t want. You wouldn’t be
able to start your vehicle, and the bad
grounding could damage the electrical
systems.
To avoid the possibility of the vehicles
rolling, set the parking brake firmly on
both vehicles involved in the jump start
procedure. Put an automatic transmis-
sion in PARK (P) or a manual transmis-
sion in NEUTRAL before setting the
parking brake.3) Turn off the ignition on both vehicles.
Unplug unnecessary accessories
plugged into the cigarette lighter or in
the accessory power outlet. Turn off the
radio and all lamps that aren’t needed.
This will avoid sparks and help save
both batteries. And it could save your
radio!
4) Open the hoods and locate the batter-
ies. Find the positive (+) and negative
(–) terminal locations on each vehicle.
Your vehicle’s positive (+) terminal is
located under a red tethered cap on the
battery. The negative (–) terminal is
located under a black tethered cap on
the battery. See “Engine Compartment
Overview” in this section for more infor-
mation on location. Flip the caps up to
access the positive (+) and negative (–)
terminals.
5) Check that the jumper cables don’t
have loose or missing insulation. If they
do, you could get a shock. The vehicles
could be damaged, too.
Before you connect the cables, here are
some basic things you should know.
Positive (+) will go to positive (+) or to a
remote positive (+) terminal if the vehi-
cle has one. Negative (–) will go to a
heavy, unpainted metal engine part or
to a remote negative (–) terminal if the
vehicle with the dead battery has one.
Don’t connect positive (+) to negative
(–) or you’ll get a short that would dam-
CAUTION
If the other system isn’t a 12-volt sys-
tem with a negative ground, both
vehicles can be damaged. Only use
vehicles with 12-volt systems with
negative grounds to jump start your
vehicle.
CAUTION
If you leave your radio or other acces-
sories on during the jump starting
procedure, they could be damaged.
The repairs wouldn’t be covered by
your warranty. Always turn off your
radio and other accessories when
jump starting your vehicle.
WARNING
An electric fan under the hood can
start up and injure you even when the
engine is not running. Keep hands,
clothing and tools away from any
underhood electric fan.
WARNING
Using a match near a battery can
cause battery gas to explode. People
have been hurt doing this, and some
have been blinded. Use a flashlight if
you need more light.
Be sure the battery has enough
water. You don’t need to add water to
the battery installed in your new vehi-
cle. But if a battery has filler caps, be
sure the right amount of fluid is
there. If it is low, add water to take
care of that first. If you don’t, explo-
sive gas could be present.
Battery fluid contains acid that can
burn you. Don’t get it on you. If you
accidentally get it in your eyes or on
your skin, flush the place with water
and get medical help immediately.
Checking Things Under the Hood:
Page 192 of 226
5-48
SERVICE AND APPEARANCE CARE
85Z14-03E
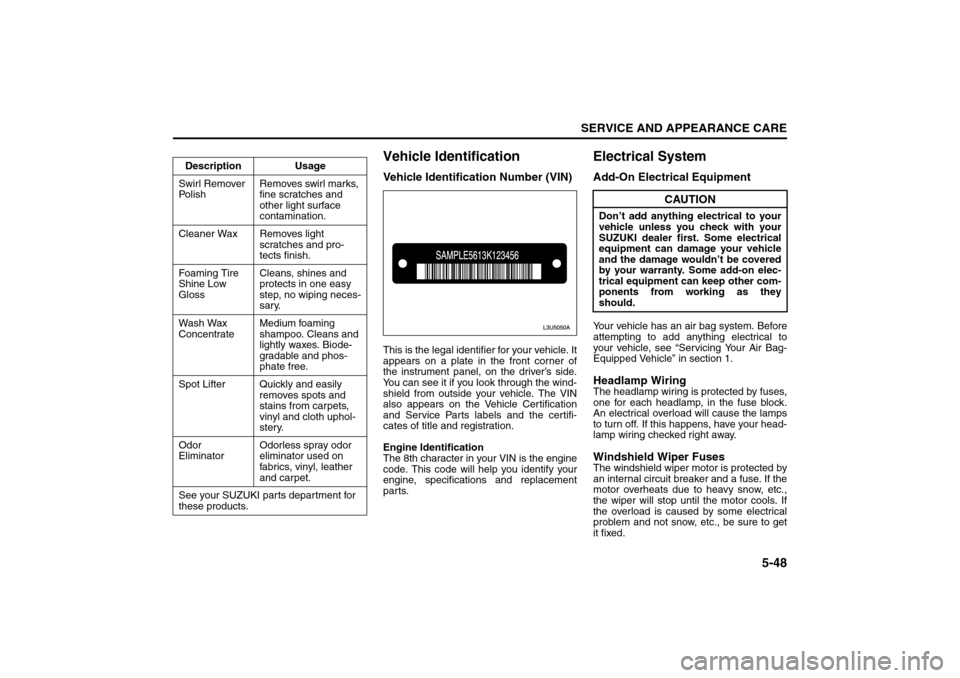
Vehicle IdentificationVehicle Identification Number (VIN)This is the legal identifier for your vehicle. It
appears on a plate in the front corner of
the instrument panel, on the driver’s side.
You can see it if you look through the wind-
shield from outside your vehicle. The VIN
also appears on the Vehicle Certification
and Service Parts labels and the certifi-
cates of title and registration.
Engine Identification
The 8th character in your VIN is the engine
code. This code will help you identify your
engine, specifications and replacement
parts.
Electrical SystemAdd-On Electrical EquipmentYour vehicle has an air bag system. Before
attempting to add anything electrical to
your vehicle, see “Servicing Your Air Bag-
Equipped Vehicle” in section 1.Headlamp WiringThe headlamp wiring is protected by fuses,
one for each headlamp, in the fuse block.
An electrical overload will cause the lamps
to turn off. If this happens, have your head-
lamp wiring checked right away.Windshield Wiper FusesThe windshield wiper motor is protected by
an internal circuit breaker and a fuse. If the
motor overheats due to heavy snow, etc.,
the wiper will stop until the motor cools. If
the overload is caused by some electrical
problem and not snow, etc., be sure to get
it fixed. Description Usage
Swirl Remover
Po l i s hRemoves swirl marks,
fine scratches and
other light surface
contamination.
Cleaner Wax Removes light
scratches and pro-
tects finish.
Foaming Tire
Shine Low
GlossCleans, shines and
protects in one easy
step, no wiping neces-
sary.
Wash Wax
ConcentrateMedium foaming
shampoo. Cleans and
lightly waxes. Biode-
gradable and phos-
phate free.
Spot Lifter Quickly and easily
removes spots and
stains from carpets,
vinyl and cloth uphol-
stery.
Odor
EliminatorOdorless spray odor
eliminator used on
fabrics, vinyl, leather
and carpet.
See your SUZUKI parts department for
these products.
CAUTION
Don’t add anything electrical to your
vehicle unless you check with your
SUZUKI dealer first. Some electrical
equipment can damage your vehicle
and the damage wouldn’t be covered
by your warranty. Some add-on elec-
trical equipment can keep other com-
ponents from working as they
should.
Electrical System:
Page 223 of 226
8-4INDEX
85Z14-03E
Power Windows and Other Power Options
.......................5-49
QQuestions and Answers About Safety Belts
.....................1-7
RRadio with Six-Disc CD (Double Display, MP3/WMA)
(AGH-5400)
...........................................................................3-38
Rear Door Security Locks
...................................................2-5
Rear Seat Armrest
...............................................................2-23
Rear Seat Passengers
.........................................................1-11
Rear Seats
............................................................................1-4
Rear Sidemarker Lamps
.....................................................5-27
Rear Window and Outside Rearview Mirror Defogger
.....3-16
Rear Window Washer/Wiper
...............................................3-6
Reclining Seatbacks
............................................................1-2
Recommended Fluids and Lubricants
..............................6-10
Recreational Vehicle Towing
..............................................4-16
Remote Keyless Entry System ...........................................2-1
Remote Keyless Entry System Operation
.........................2-2
Replacement Bulbs
.............................................................5-27
Replacing Restraint System Parts After a Crash
.............1-34
Reporting Safety Defects
....................................................7-4
Restraint System Check .....................................................1-33
Right Front Passenger Position
.........................................1-11
Running Your Engine While You Are Parked
...................2-19
SSafety Belt: They are for Everyone ....................................1-5
Safety Belt Extender
............................................................1-14
Safety Belt Pretensioner System
.......................................1-13
Safety Belt Reminder Light
.................................................3-19
Safety Belt Reminder Tone .................................................3-19
Safety Belt Use During Pregnancy
....................................1-10Safety Belts
......................................................................... 1-5
Safety Certification Label
................................................... 7-2
Scheduled Maintenance Services
..................................... 6-2
Securing a Child Restraint Designed for the LATCH
System
................................................................................. 1-23
Securing a Child Restraint in a Rear Seat Position
......... 1-24
Securing a Child Restraint in the Right Front Seat
Position
................................................................................ 1-25
Securing a Child Restraint with Top Strap
....................... 1-21
Selecting the Right Condition
............................................ 6-1
Service
................................................................................. 5-1
Servicing Your Air Bag-Equipped Vehicle
........................ 1-33
Sheet Metal Damage
........................................................... 5-47
Shifting Into Park (P) .......................................................... 2-17
Shifting Out of Park (P) ...................................................... 2-17
Spare Tire
............................................................................ 5-43
Specifications
...................................................................... 5-53
Speed Sensitive Power Steering (SSPS) Warning
Light
..................................................................................... 3-22
Speedometer and Odometer
.............................................. 3-18
Starting and Operating Your Vehicle
................................ 2-10
Starting Your Engine
.......................................................... 2-11
Steering
................................................................................ 4-5
STEERING WHEEL REMOTE OPERATION
..............3-37
, 3-44
Storage Areas
...................................................................... 2-21
Sun Visors
........................................................................... 2-8
Sunglasses Storage Compartment
................................... 2-22
Sunroof
................................................................................ 2-23
Supplemental Restraint System (air bags)
....................... 1-26
TTachometer
.......................................................................... 3-19