set clock TOYOTA AYGO X 2022 Owners Manual (in English)
[x] Cancel search | Manufacturer: TOYOTA, Model Year: 2022, Model line: AYGO X, Model: TOYOTA AYGO X 2022Pages: 494, PDF Size: 92.53 MB
Page 83 of 494
81
2
Owner's Manual_Europe_M99V08_en
2-1. Instrument cluster
Vehicle status information and indicators
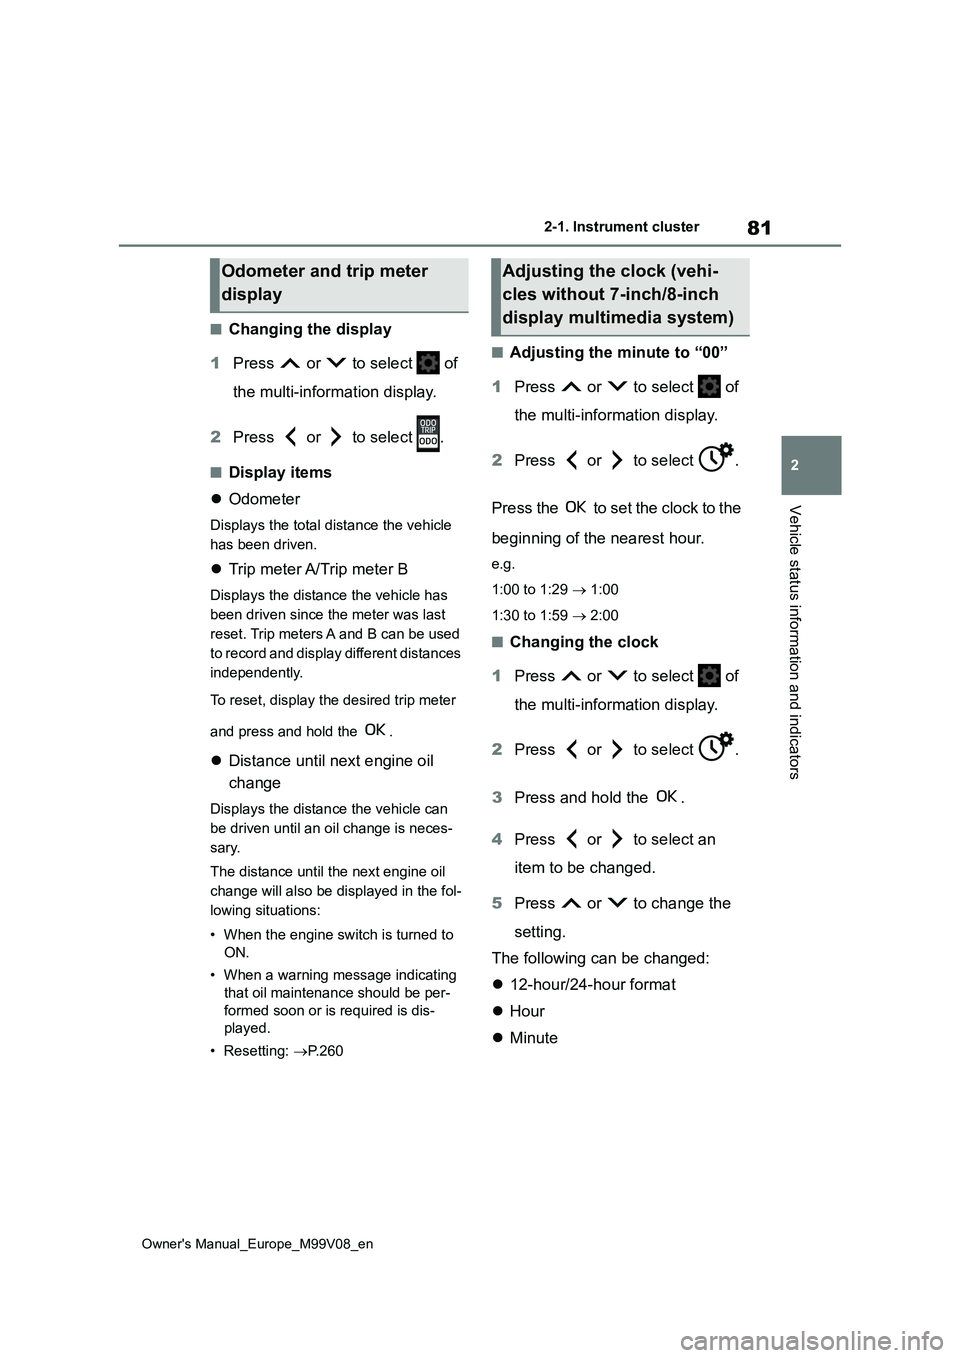
■Changing the display
1 Press or to select of
the multi-information display.
2 Press or to select .
■Display items
Odometer
Displays the total distance the vehicle
has been driven.
Trip meter A/Trip meter B
Displays the distance the vehicle has
been driven since the meter was last
reset. Trip meters A and B can be used
to record and display different distances
independently.
To reset, display the desired trip meter
and press and hold the .
Distance until next engine oil
change
Displays the distance the vehicle can
be driven until an oil change is neces-
sary.
The distance until the next engine oil
change will also be displayed in the fol-
lowing situations:
• When the engine switch is turned to
ON.
• When a warning message indicating
that oil maintenance should be per-
formed soon or is required is dis-
played.
• Resetting: P. 2 6 0
■Adjusting the minute to “00”
1 Press or to select of
the multi-information display.
2 Press or to select .
Press the to set the clock to the
beginning of the nearest hour.
e.g.
1:00 to 1:29 1:00
1:30 to 1:59 2:00
■Changing the clock
1 Press or to select of
the multi-information display.
2 Press or to select .
3 Press and hold the .
4 Press or to select an
item to be changed.
5 Press or to change the
setting.
The following can be changed:
12-hour/24-hour format
Hour
Minute
Odometer and trip meter
display
Adjusting the clock (vehi-
cles without 7-inch/8-inch
display multimedia system)
Page 84 of 494
82
Owner's Manual_Europe_M99V08_en
2-1. Instrument cluster
The clocks on the following can be
adjusted on the multimedia system
screen.
Multi-information display
Multimedia system screen
For details, refer to “Multimedia
system Owner’s manual”.
■Clock settings screen (vehicles with 7-inch/8-inch display multime-dia system)
If is displayed when is
selected on the multi-information dis-
play, the system may be malfunctioning.
Have the vehicle inspected by any
authorized Toyota retailer or Toyota
authorized repairer, or any reliable
repairer.
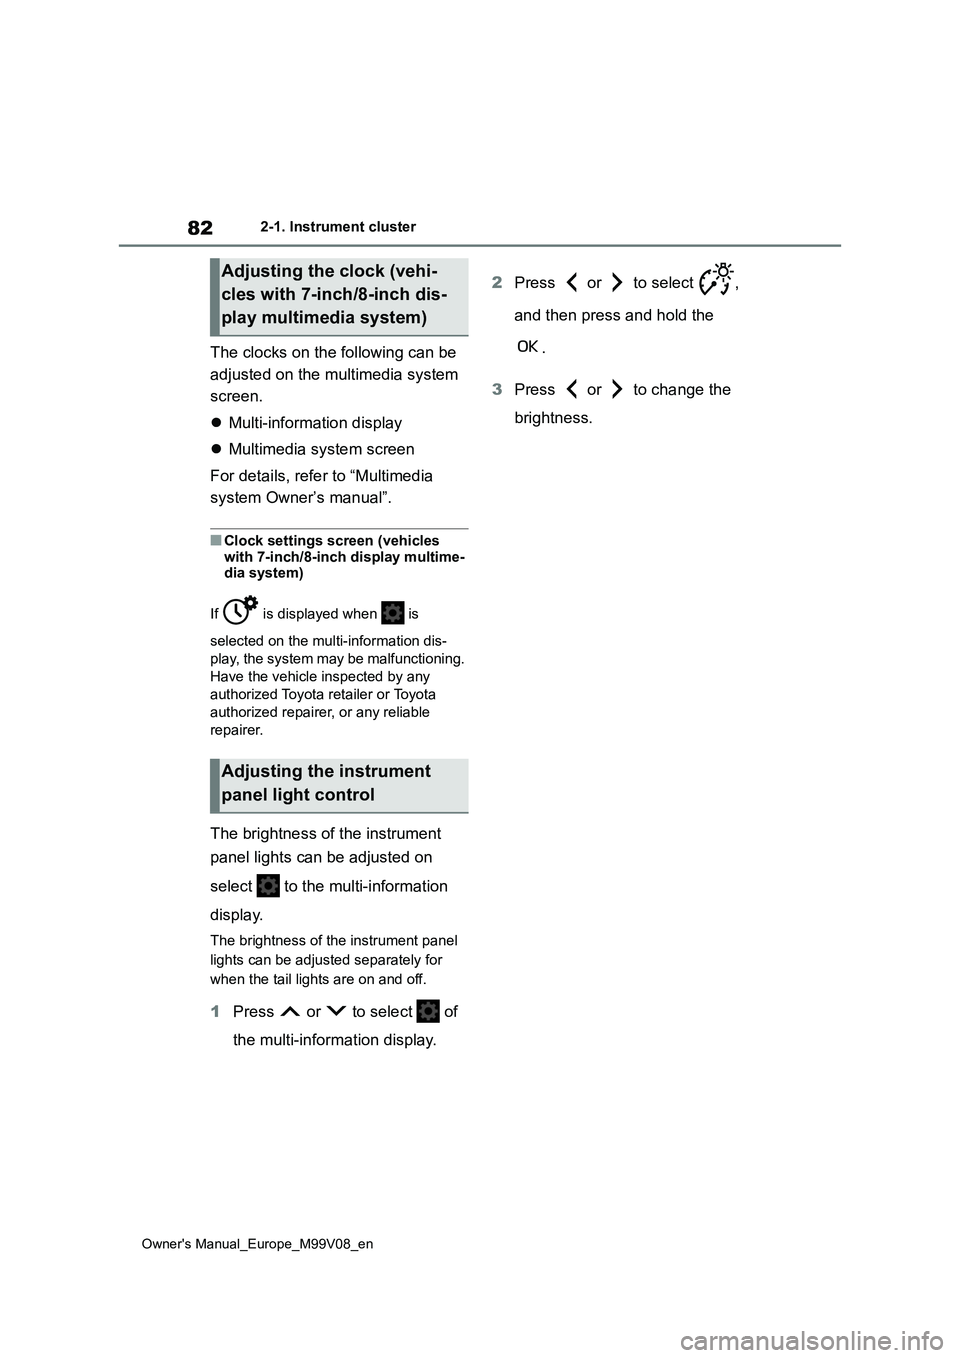
The brightness of the instrument
panel lights can be adjusted on
select to the multi-information
display.
The brightness of the instrument panel
lights can be adjusted separately for
when the tail lights are on and off.
1 Press or to select of
the multi-information display.
2 Press or to select ,
and then press and hold the
.
3 Press or to change the
brightness.
Adjusting the clock (vehi-
cles with 7-inch/8-inch dis-
play multimedia system)
Adjusting the instrument
panel light control
Page 222 of 494
220
Owner's Manual_Europe_M99V08_en
5-1. Using the air conditioning system and defogger
5-1.Using the a ir c onditioning sys te m and de fog ger
*: If equipped
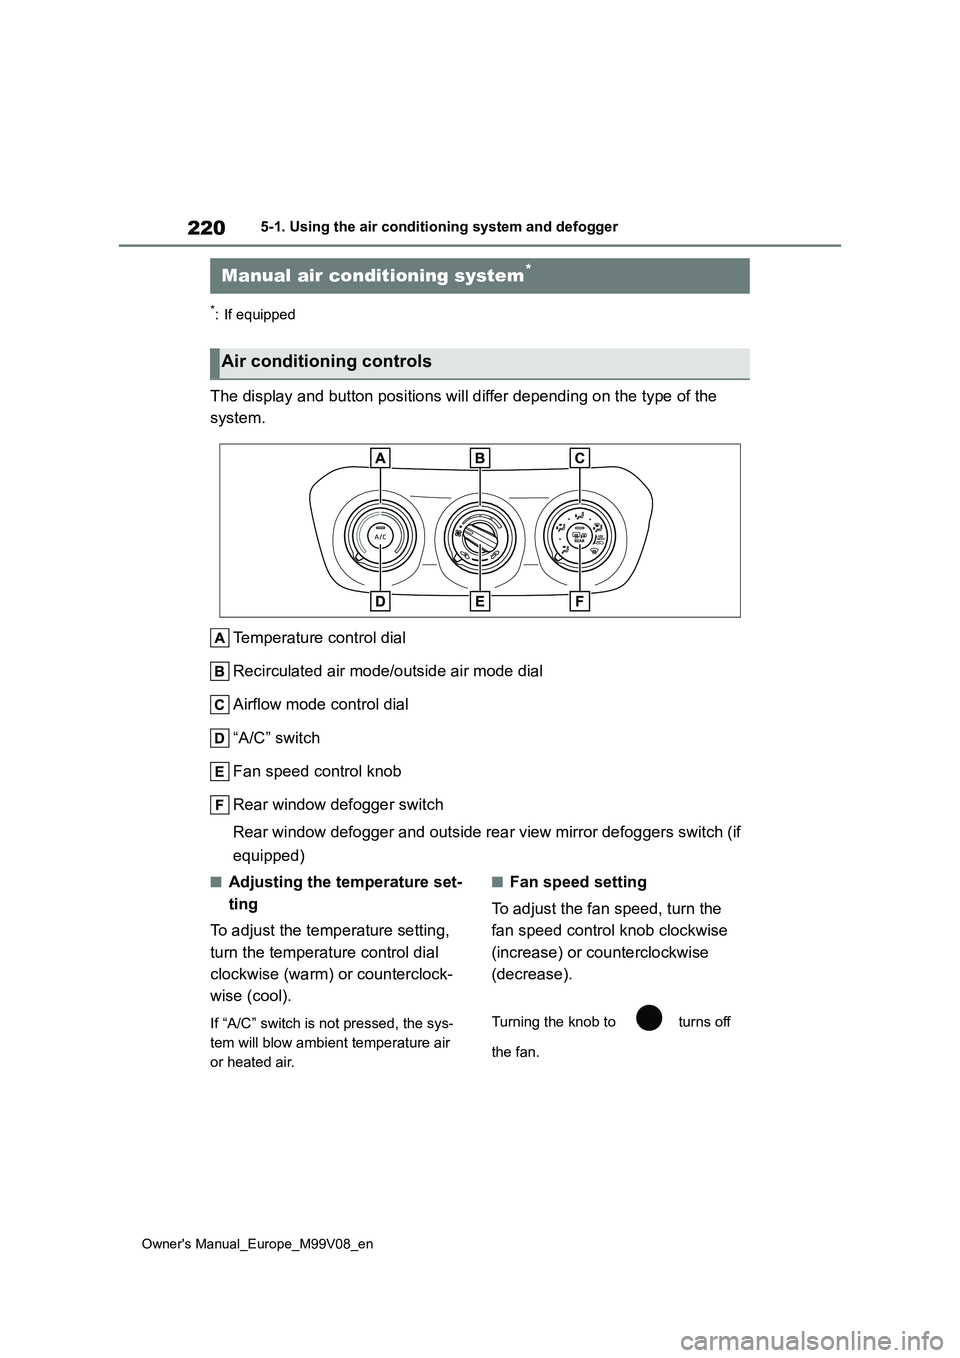
The display and button positions will differ depending on the type of the
system.
Temperature control dial
Recirculated air mode/outside air mode dial
Airflow mode control dial
“A/C” switch
Fan speed control knob
Rear window defogger switch
Rear window defogger and outside rear view mirror defoggers swi tch (if
equipped)
■Adjusting the temperature set-
ting
To adjust the temperature setting,
turn the temperature control dial
clockwise (warm) or counterclock-
wise (cool).
If “A/C” switch is not pressed, the sys-
tem will blow ambient temperature air
or heated air.
■Fan speed setting
To adjust the fan speed, turn the
fan speed control knob clockwise
(increase) or counterclockwise
(decrease).
Turning the knob to turns off
the fan.
Manual air conditioning system*
Air conditioning controls
Page 226 of 494
224
Owner's Manual_Europe_M99V08_en
5-1. Using the air conditioning system and defogger
*: If equipped
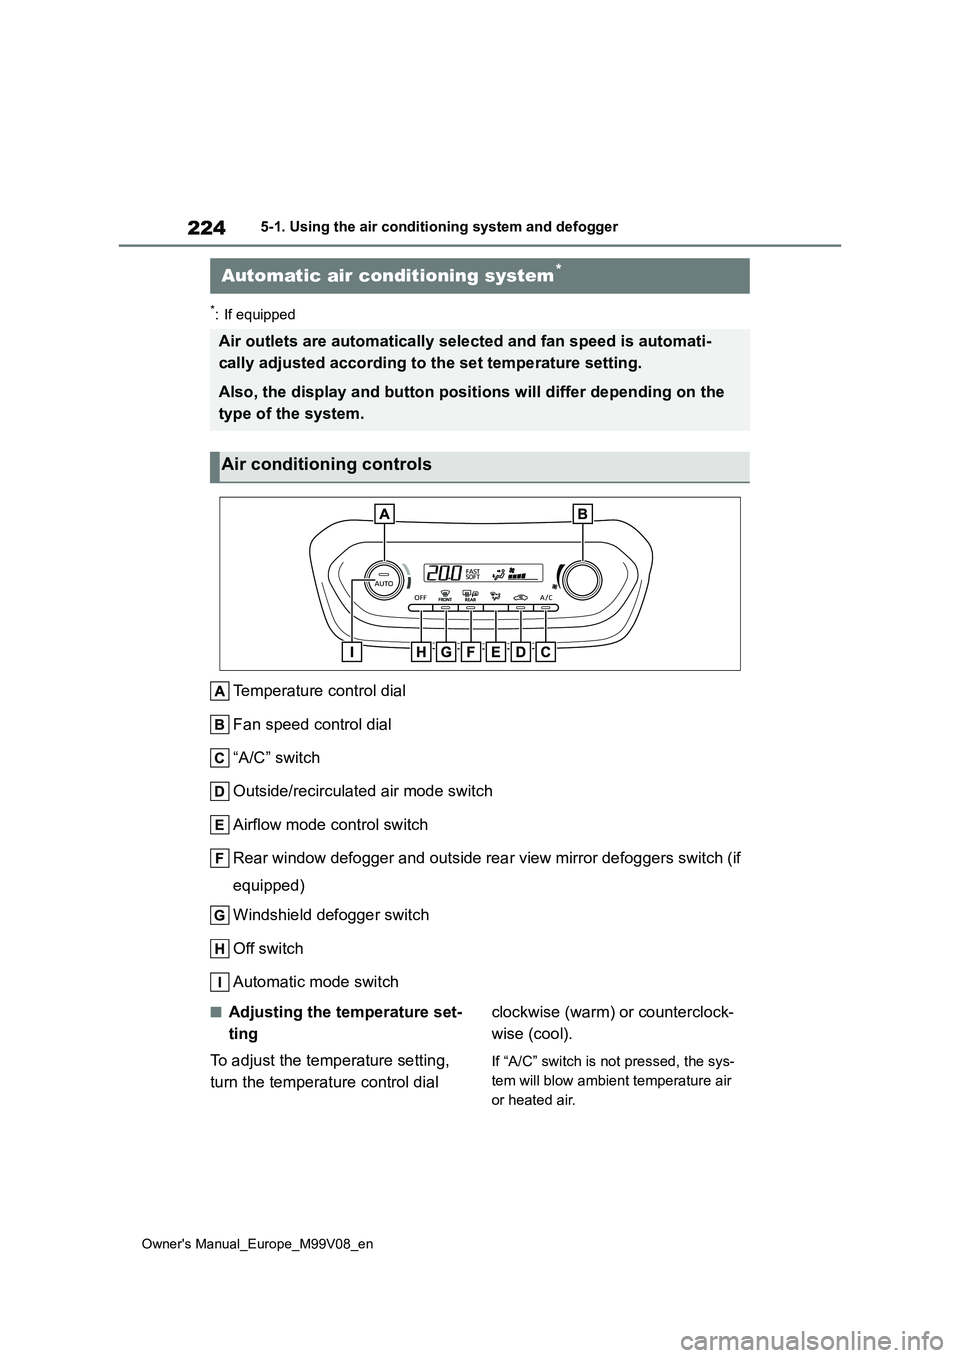
Temperature control dial
Fan speed control dial
“A/C” switch
Outside/recirculated air mode switch
Airflow mode control switch
Rear window defogger and outside rear view mirror defoggers swi tch (if
equipped)
Windshield defogger switch
Off switch
Automatic mode switch
■Adjusting the temperature set-
ting
To adjust the temperature setting,
turn the temperature control dial
clockwise (warm) or counterclock-
wise (cool).
If “A/C” switch is not pressed, the sys-
tem will blow ambient temperature air
or heated air.
Automatic air conditioning system*
Air outlets are automatically selected and fan speed is automat i-
cally adjusted according to the set temperature setting.
Also, the display and button positions will differ depending on the
type of the system.
Air conditioning controls
Page 227 of 494
225
5
Owner's Manual_Europe_M99V08_en
5-1. Using the air conditioning system and defogger
Interior features
■Setting the fan speed
To adjust the fan speed, turn the
fan speed control dial clockwise
(increase) or counterclockwise
(decrease).
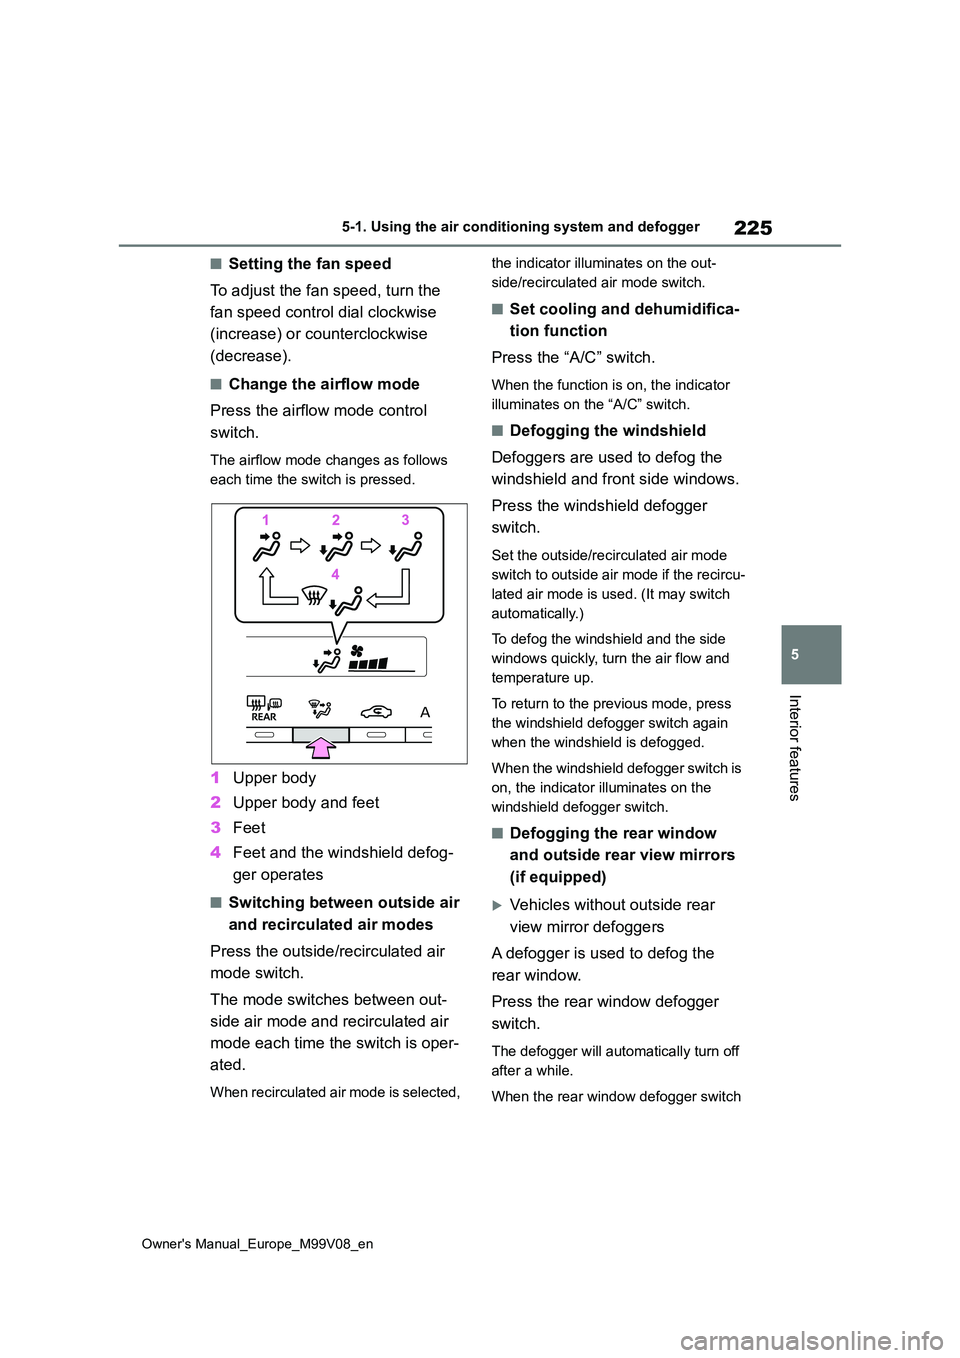
■Change the airflow mode
Press the airflow mode control
switch.
The airflow mode changes as follows
each time the switch is pressed.
1 Upper body
2 Upper body and feet
3 Feet
4 Feet and the windshield defog-
ger operates
■Switching between outside air
and recirculated air modes
Press the outside/recirculated air
mode switch.
The mode switches between out-
side air mode and recirculated air
mode each time the switch is oper-
ated.
When recirculated air mode is selected,
the indicator illuminates on the out-
side/recirculated air mode switch.
■Set cooling and dehumidifica-
tion function
Press the “A/C” switch.
When the function is on, the indicator
illuminates on the “A/C” switch.
■Defogging the windshield
Defoggers are used to defog the
windshield and front side windows.
Press the windshield defogger
switch.
Set the outside/recirculated air mode
switch to outside air mode if the recircu-
lated air mode is used. (It may switch
automatically.)
To defog the windshield and the side
windows quickly, turn the air flow and
temperature up.
To return to the previous mode, press
the windshield defogger switch again
when the windshield is defogged.
When the windshield defogger switch is
on, the indicator illuminates on the
windshield defogger switch.
■Defogging the rear window
and outside rear view mirrors
(if equipped)
Vehicles without outside rear
view mirror defoggers
A defogger is used to defog the
rear window.
Press the rear window defogger
switch.
The defogger will automatically turn off
after a while.
When the rear window defogger switch
Page 291 of 494
289
6
Owner's Manual_Europe_M99V08_en
6-3. Do-it-yourself maintenance
Maintenance and care
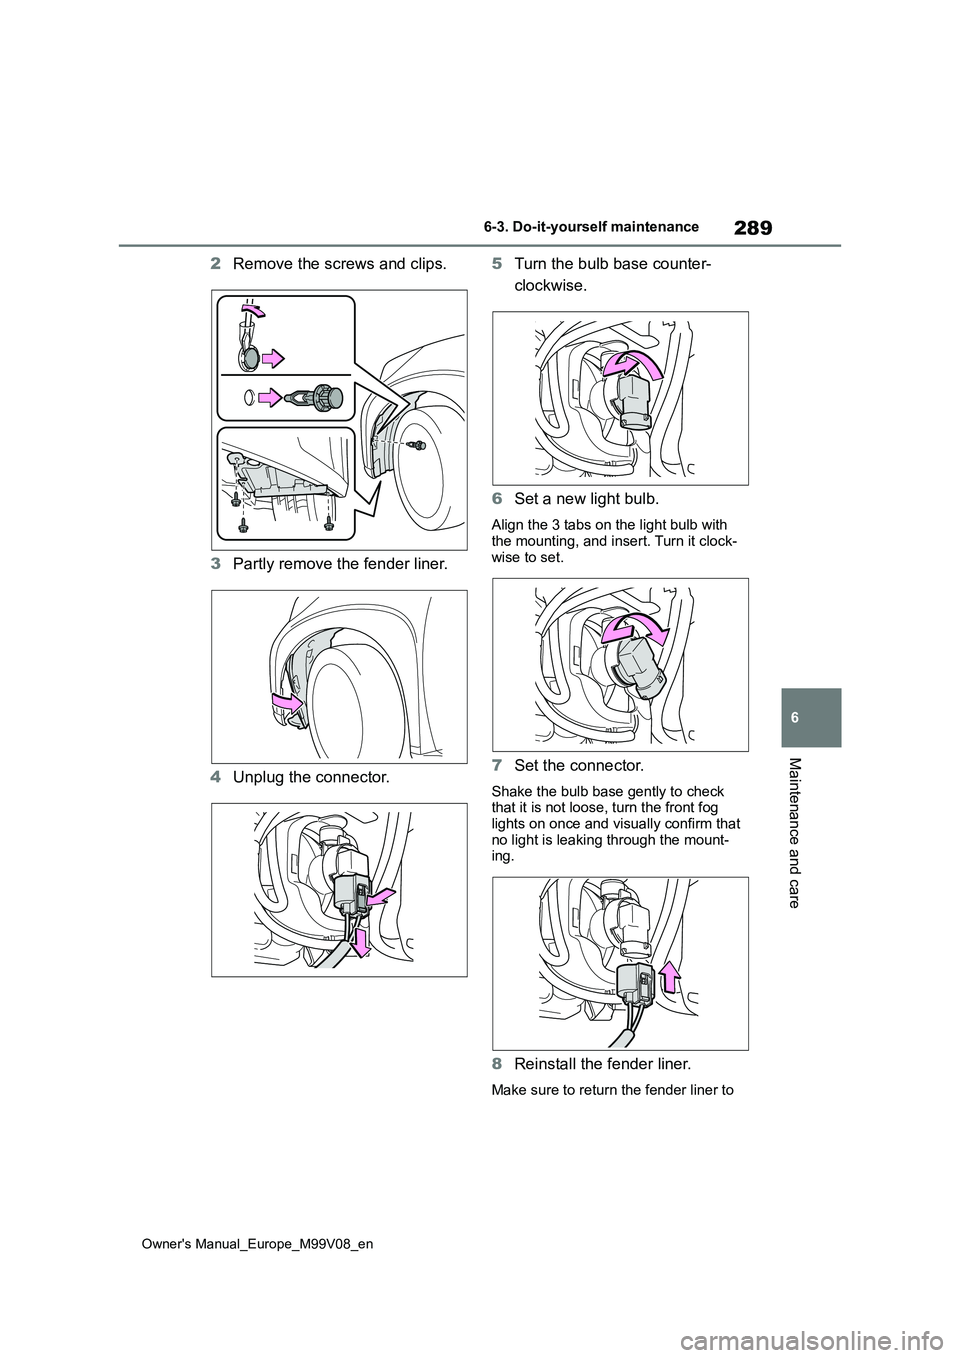
2Remove the screws and clips.
3 Partly remove the fender liner.
4 Unplug the connector.
5 Turn the bulb base counter-
clockwise.
6 Set a new light bulb.
Align the 3 tabs on the light bulb with the mounting, and insert. Turn it clock-
wise to set.
7 Set the connector.
Shake the bulb base gently to check that it is not loose, turn the front fog
lights on once and visually confirm that no light is leaking through the mount-ing.
8 Reinstall the fender liner.
Make sure to return the fender liner to
Page 374 of 494
372
Owner's Manual_Europe_M99V08_en
Alphabetical Index
Lights
Automatic High Beam system .... 145
Extended headlight lighting function
................................................. 143
Fog light switch .......................... 148
Headlight switch ......................... 142
Interior lights .............................. 230
Interior lights list ......................... 230
Luggage compartment light ....... 101
Replacing light bulbs .................. 286
Turn signal lever ........................ 140
Wattage ...................................... 351
Lock steering column .......... 129, 131
LTA (Lane Tracing Assist) ............ 172
Operation ................................... 172
Warning lights ............................ 307
Warning messages .................... 180
Luggage compartment features .. 233
Auxiliary box............................... 234
Deck board................................. 233
Luggage cover ........................... 234
Luggage compartment light
Wattage ...................................... 351
Luggage cover .............................. 234
M
Maintenance
Do-it-yourself maintenance ........ 253
Maintenance data ...................... 344
Maintenance requirements ........ 251
Malfunction indicator lamp .......... 305
Manual air conditioning system .. 220
Manual headlight leveling dial..... 144
Manual transmission ............ 139, 140
Menu icons ...................................... 83
Meter
Clock ............................................ 79
Indicators ..................................... 77
Instrument panel light control ....... 82
Meter control switches ................. 83
Meters .......................................... 79
Multi-information display ..............83
Settings ........................................ 86
Warning lights.......................76, 304
Warning message ...................... 311
Mirrors
Inside rear view mirror................ 111
Outside rear view mirror defoggers
......................................... 221, 225
Outside rear view mirrors ........... 112
Vanity mirrors .............................241
Multi-information display ............... 83
Audio system-linked display ......... 86
Clock ...................................... 81, 82
Cruise control .............................192
Driving information display ........... 84
Driving support system information
display ........................................ 86
Dynamic radar cruise control ..... 181
Eco Driving Indicator ....................85
Fuel economy...............................84
LTA (Lane Tracing Assist)........... 177
Menu icons ................................... 83
Meter control switches ................. 83
Settings ........................................ 86
Stop & Start system information...87
Tire pressure .............................. 267
Toyota parking assist-sensor...... 204
Vehicle information display........... 86
Warning message ...................... 311
Multidrive ....................................... 135
If the shift lever cannot be shifted
from P ...................................... 136
M mode ...................................... 138
Paddle shift switches..................137
O
Odometer......................................... 81
Odometer and trip meter display
Display change button.................. 81
Display items ................................ 81