display TOYOTA COROLLA 2016 11.G Navigation Manual
[x] Cancel search | Manufacturer: TOYOTA, Model Year: 2016, Model line: COROLLA, Model: TOYOTA COROLLA 2016 11.GPages: 294, PDF Size: 3.42 MB
Page 92 of 294
92
2. RADIO OPERATION
COROLLA_14CY_Navi_U
If “Ch 000” is selected using the “TUNE/
SCROLL” knob, the ID code, which is 8
alphanumeric characters, will be dis-
played. If another channel is selected, the
ID code will no longer be displayed. The
channel (000) alternates between display-
ing the radio ID and the specific radio
code.
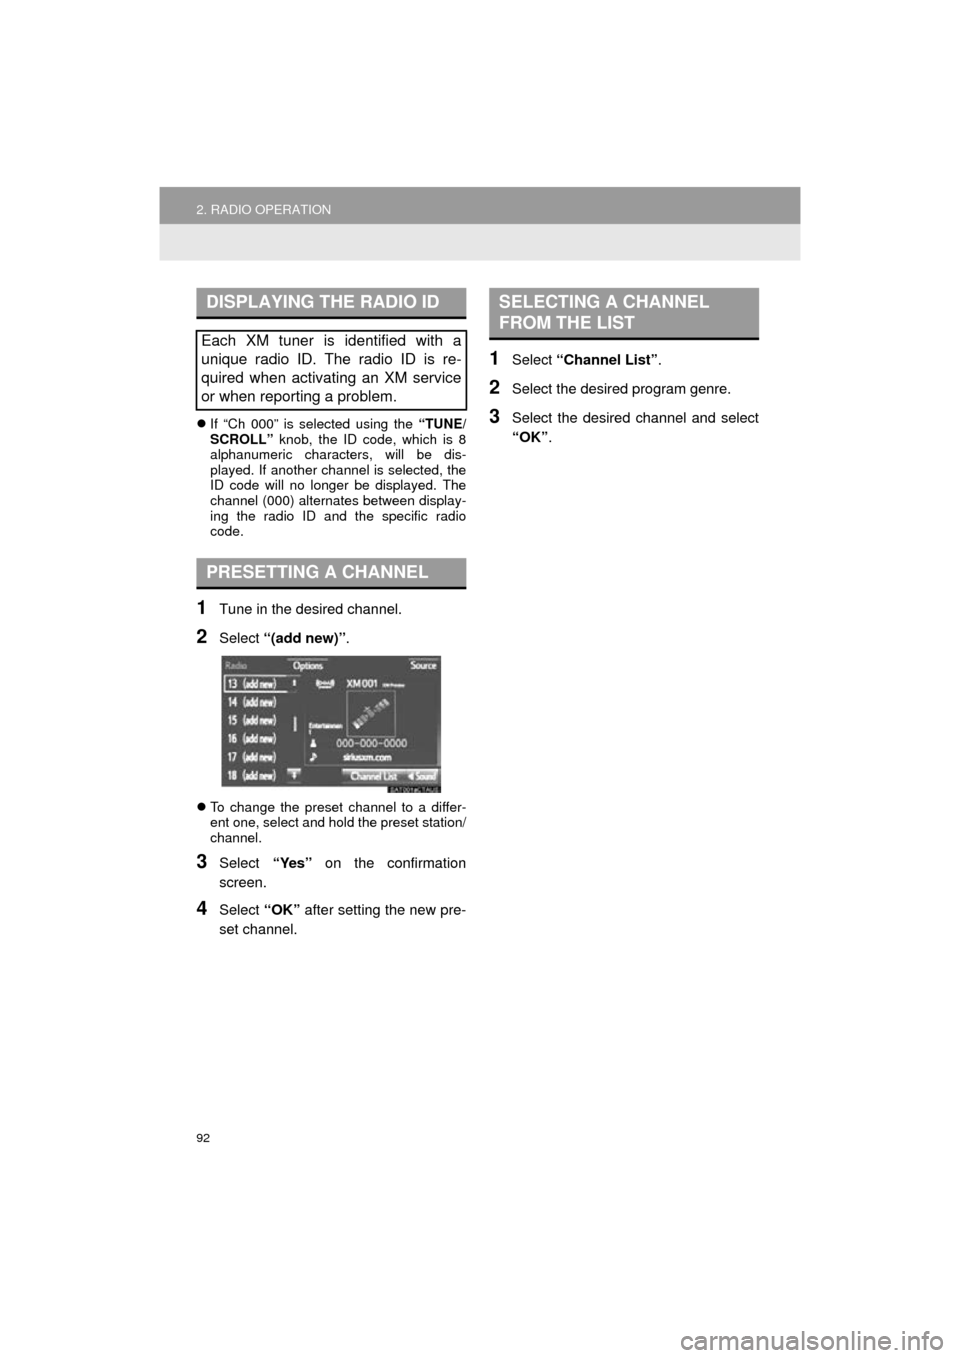
1Tune in the desired channel.
2Select “(add new)” .
To change the preset channel to a differ-
ent one, select and hold the preset station/
channel.
3Select “Yes” on the confirmation
screen.
4Select “OK” after setting the new pre-
set channel.
1Select “Channel List” .
2Select the desired program genre.
3Select the desired channel and select
“OK”.
DISPLAYING THE RADIO ID
Each XM tuner is identified with a
unique radio ID. The radio ID is re-
quired when activating an XM service
or when reporting a problem.
PRESETTING A CHANNEL
SELECTING A CHANNEL
FROM THE LIST
Page 94 of 294
94
2. RADIO OPERATION
COROLLA_14CY_Navi_U
3. INTERNET RADIO*
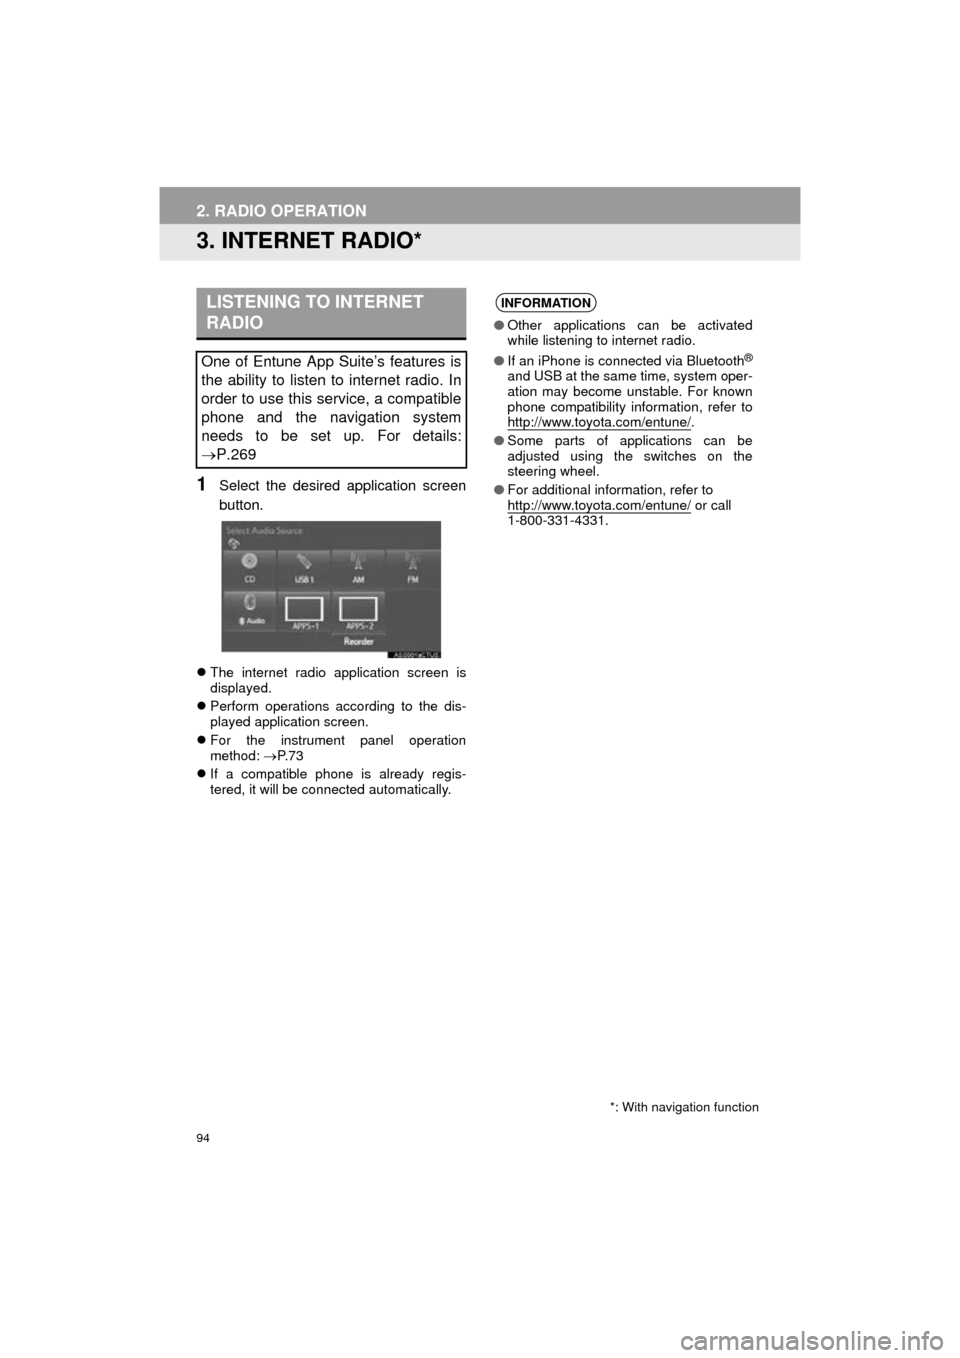
1Select the desired application screen
button.
The internet radio application screen is
displayed.
Perform operations according to the dis-
played application screen.
For the instrument panel operation
method: P. 7 3
If a compatible phone is already regis-
tered, it will be connected automatically.
LISTENING TO INTERNET
RADIO
One of Entune App Suite’s features is
the ability to listen to internet radio. In
order to use this service, a compatible
phone and the navigation system
needs to be set up. For details:
P.269
*: With navigation function
INFORMATION
●Other applications can be activated
while listening to internet radio.
● If an iPhone is connected via Bluetooth
®
and USB at the same time, system oper-
ation may become unstable. For known
phone compatibility information, refer to
http://www.toyota.com/entune/
.
● Some parts of applications can be
adjusted using the switches on the
steering wheel.
● For additional information, refer to
http://www.toyota.com/entune/
or call
1-800-331-4331.
Page 95 of 294
95
COROLLA_14CY_Navi_U
AUDIO SYSTEM
3
3. MEDIA OPERATION
1. CD
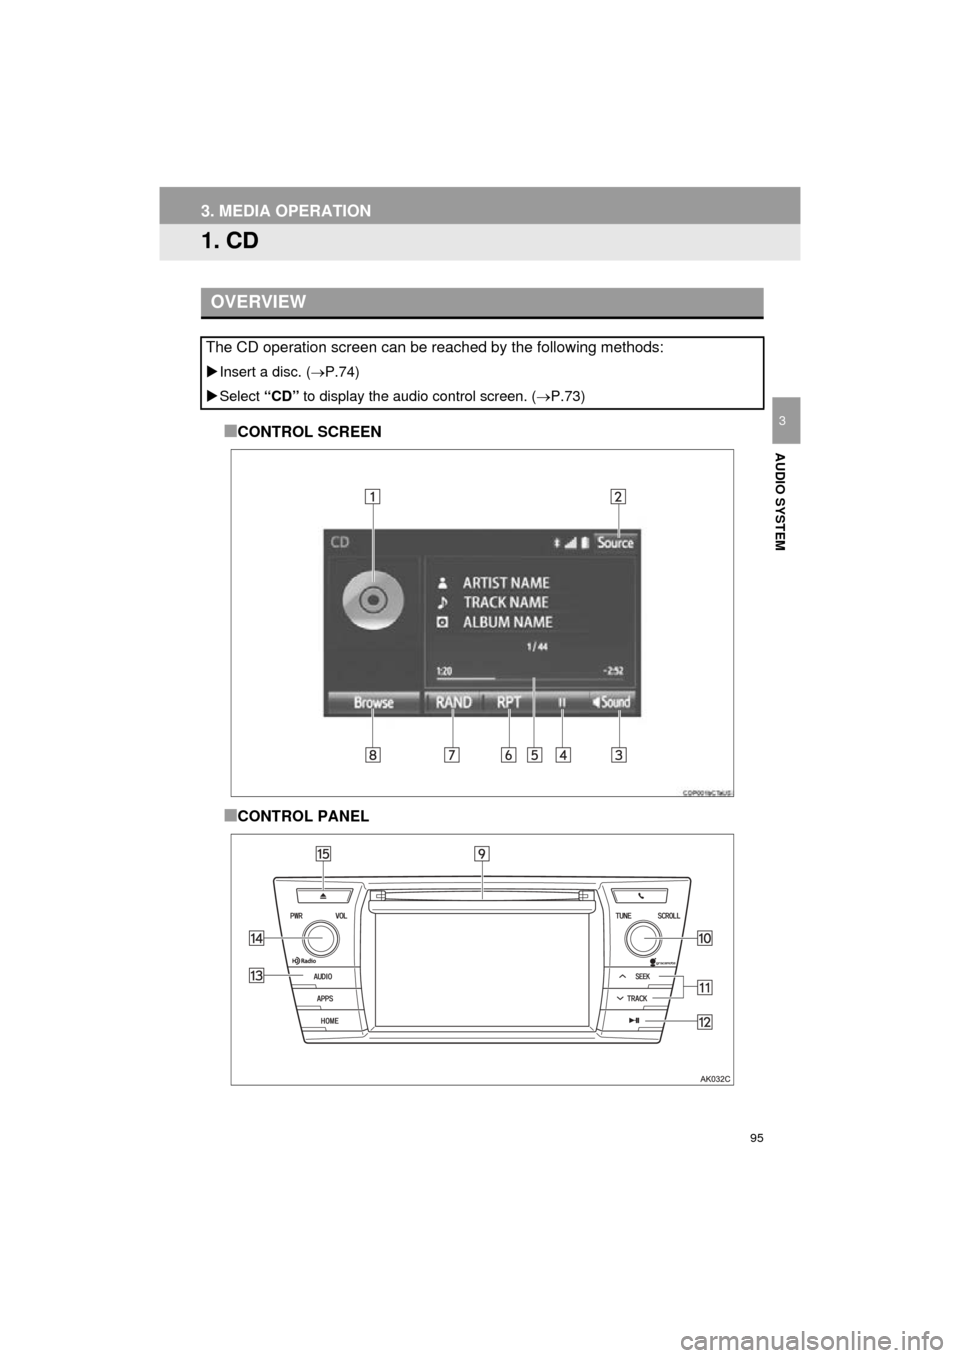
■CONTROL SCREEN
■CONTROL PANEL
OVERVIEW
The CD operation screen can be reached by the following methods:
Insert a disc. ( P.74)
Select “CD” to display the audio control screen. ( P.73)
Page 96 of 294
96
3. MEDIA OPERATION
COROLLA_14CY_Navi_U
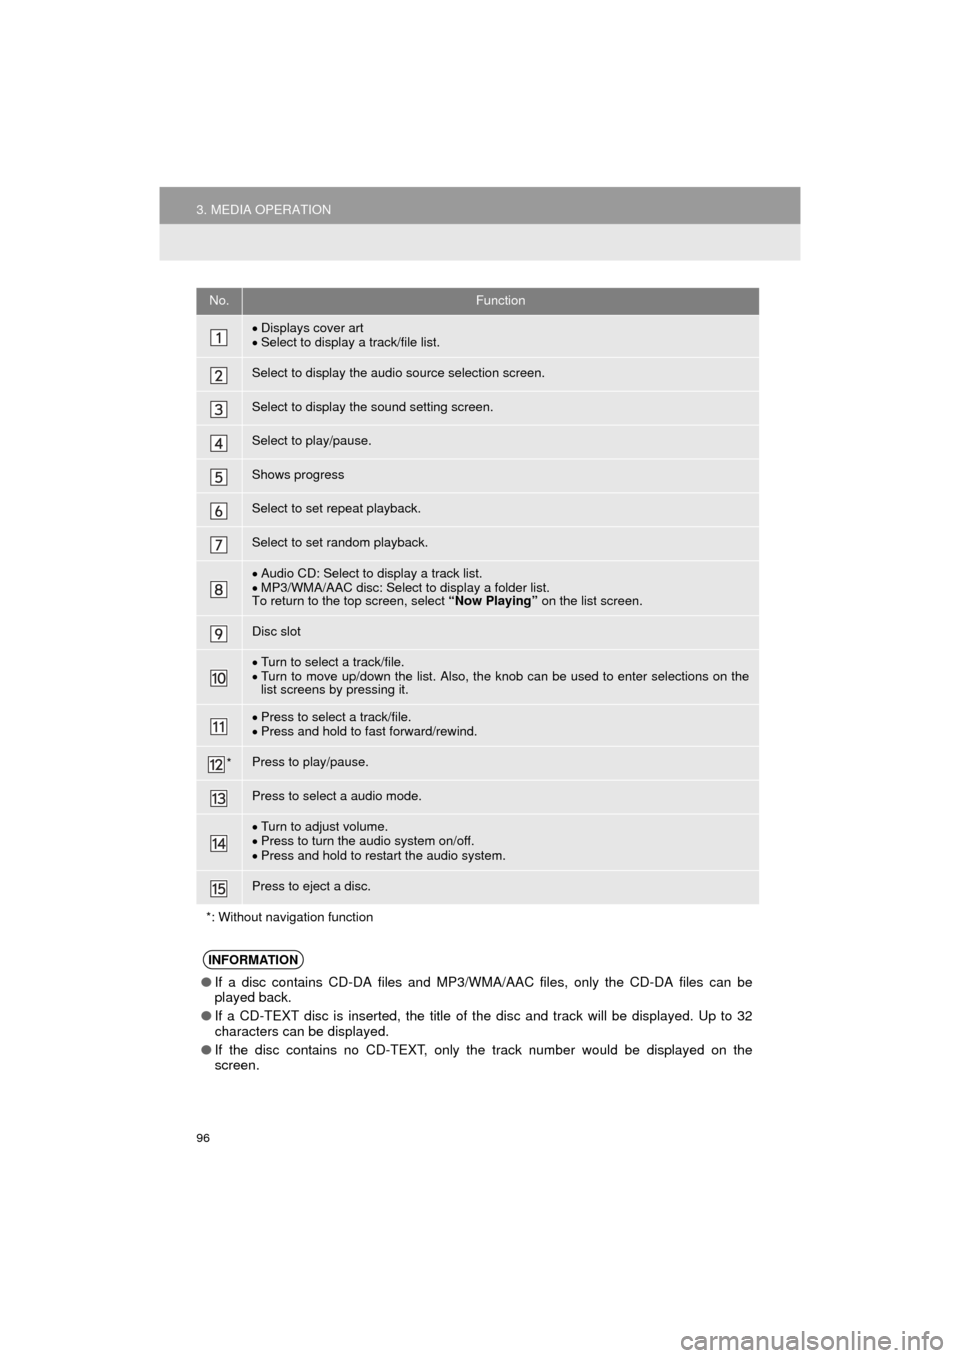
No.Function
Displays cover art
Select to display a track/file list.
Select to display the audio source selection screen.
Select to display the sound setting screen.
Select to play/pause.
Shows progress
Select to set repeat playback.
Select to set random playback.
Audio CD: Select to display a track list.
MP3/WMA/AAC disc: Select to display a folder list.
To return to the top screen, select “Now Playing” on the list screen.
Disc slot
Turn to select a track/file.
Turn to move up/down the list. Also, the knob can be used to enter selections on the
list screens by pressing it.
Press to select a track/file.
Press and hold to fast forward/rewind.
*Press to play/pause.
Press to select a audio mode.
Turn to adjust volume.
Press to turn the audio system on/off.
Press and hold to restart the audio system.
Press to eject a disc.
*: Without navigation function
INFORMATION
● If a disc contains CD-DA files and MP3/WMA/AAC files, only the CD-DA files can be
played back.
● If a CD-TEXT disc is inserted, the title of the disc and track will be displayed. Up to 32
characters can be displayed.
● If the disc contains no CD-TEXT, only the track number would be displayed on the
screen.
Page 98 of 294
98
3. MEDIA OPERATION
COROLLA_14CY_Navi_U
2. USB MEMORY
■CONTROL SCREEN
■CONTROL PANEL
OVERVIEW
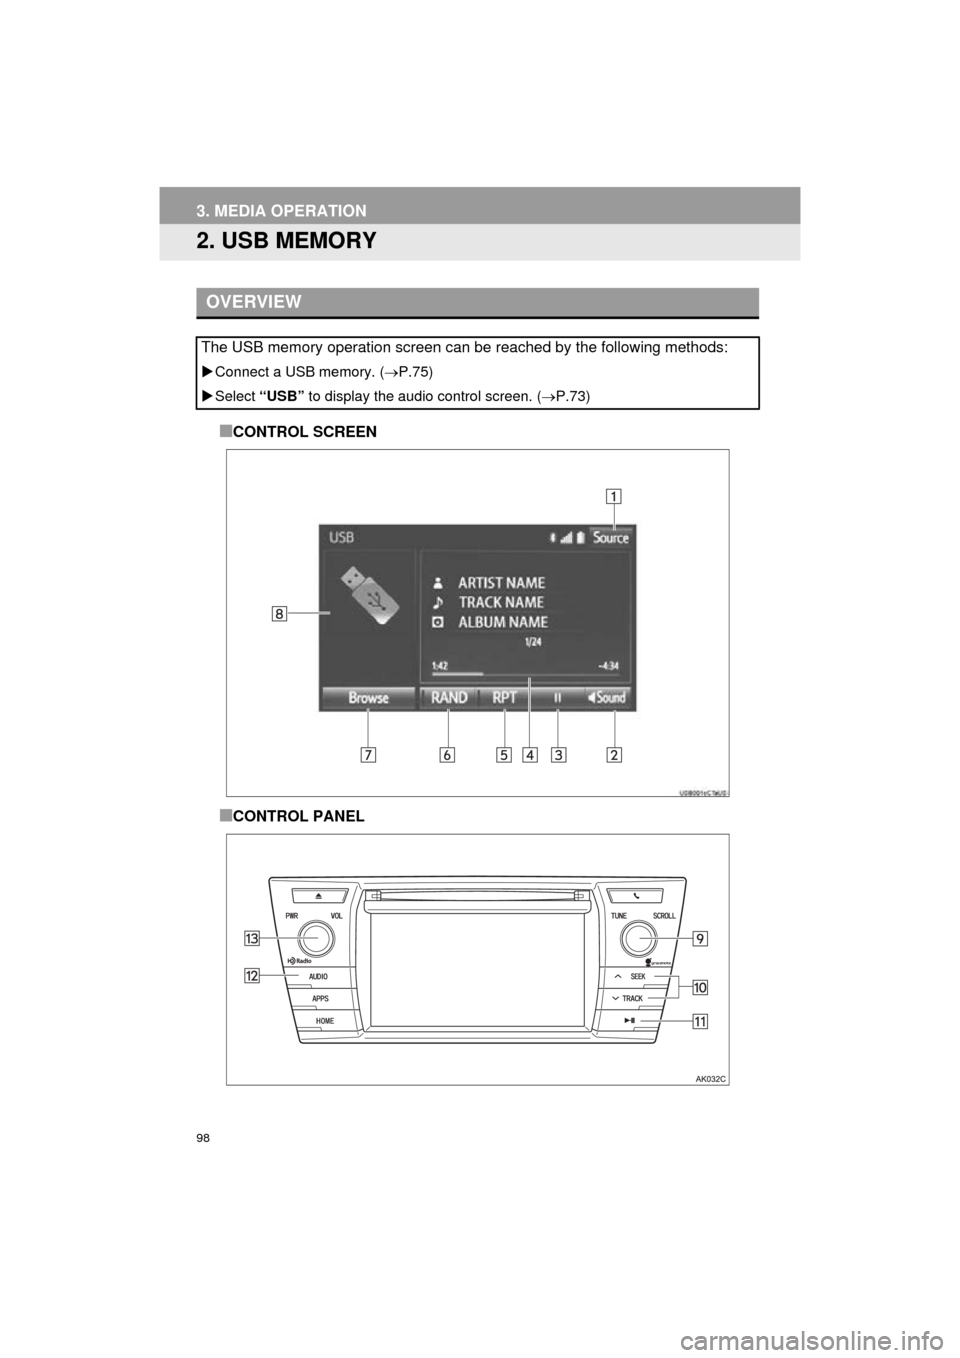
The USB memory operation screen can be reached by the following methods:
Connect a USB memory. ( P.75)
Select “USB” to display the audi o control screen. (P.73)
Page 99 of 294
99
3. MEDIA OPERATION
COROLLA_14CY_Navi_U
AUDIO SYSTEM
3
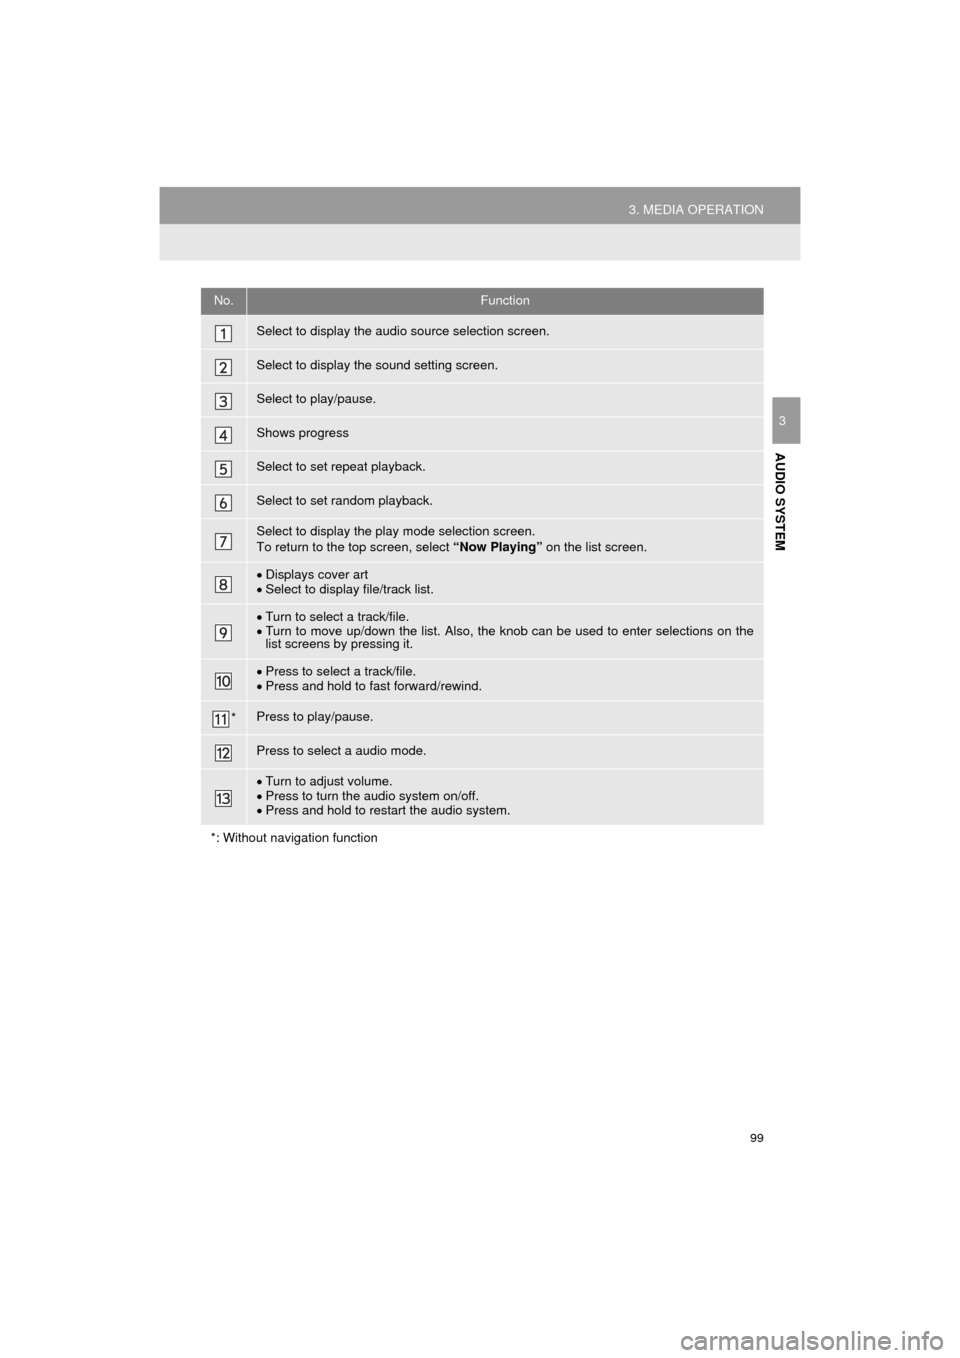
No.Function
Select to display the audio source selection screen.
Select to display the sound setting screen.
Select to play/pause.
Shows progress
Select to set repeat playback.
Select to set random playback.
Select to display the play mode selection screen.
To return to the top screen, select “Now Playing” on the list screen.
Displays cover art
Select to display file/track list.
Turn to select a track/file.
Turn to move up/down the list. Also, the knob can be used to enter selections on the
list screens by pressing it.
Press to select a track/file.
Press and hold to fast forward/rewind.
*Press to play/pause.
Press to select a audio mode.
Turn to adjust volume.
Press to turn the audio system on/off.
Press and hold to restart the audio system.
*: Without navigation function
Page 102 of 294
102
3. MEDIA OPERATION
COROLLA_14CY_Navi_U
3. iPod
■CONTROL SCREEN
OVERVIEW
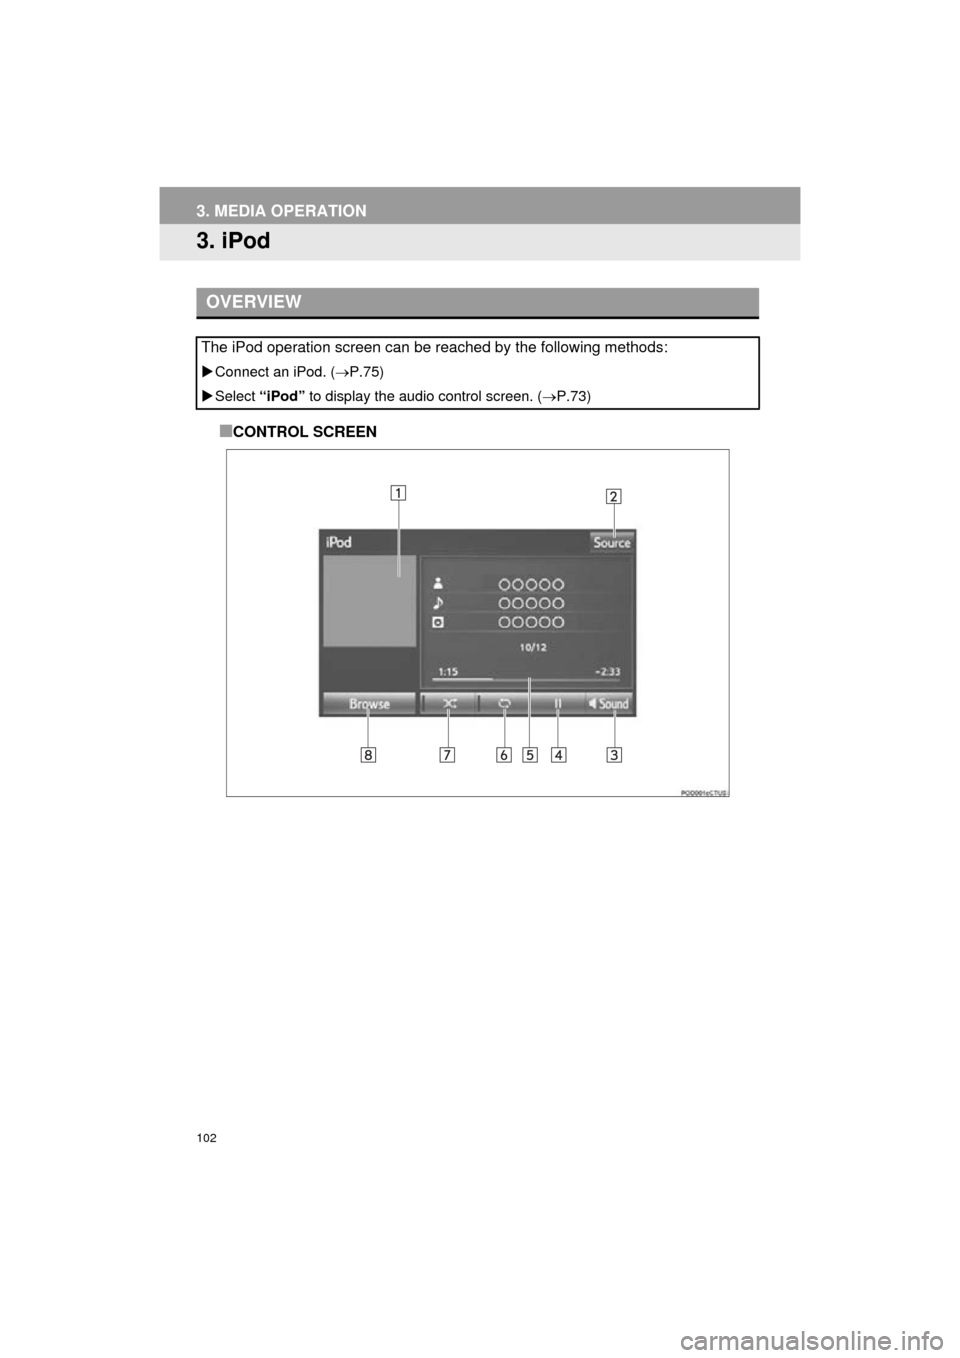
The iPod operation screen can be reached by the following methods:
Connect an iPod. ( P.75)
Select “iPod” to display the audio control screen. ( P.73)
Page 104 of 294
104
3. MEDIA OPERATION
COROLLA_14CY_Navi_U
No.Function
Displays cover art
Select to display a track list.
To return to the top screen, select “Now Playing” on the list screen.
Select to display the audio source selection screen.
Select to display the sound setting screen.
Select to play/pause.
Shows progress
Select to set repeat playback.
Select to set random playback.
Select to display the play mode selection screen.
To return to the top screen, select “Now Playing” on the list screen.
Turn to select a track.
Turn to move up/down the list. Also, the knob can be used to enter selections on the
list screens by pressing it.
Press to select a track.
Press and hold to fast forward/rewind.
*Press to play/pause.
Press to select a audio mode.
Turn to adjust volume.
Press to turn the audio system on/off.
Press and hold to restart the audio system.
*: Without navigation function
Page 105 of 294
105
3. MEDIA OPERATION
COROLLA_14CY_Navi_U
AUDIO SYSTEM
3
CAUTION
●Do not operate the player’s controls or connect the iPod while driving.
NOTICE
●Do not leave your portable player in the car. In particular, high temperatures inside the
vehicle may damage the portable player.
● Do not push down on or apply unnecessary pressure to the portable player while it is con-
nected as this may damage the portable player or its terminal.
● Do not insert foreign objects into the port as this may damage the portable player or its
terminal.
INFORMATION
●The system can only output the sound while driving.
● When an iPod is connected using a genuine iPod cable, the iPod starts charging its bat-
tery.
● Depending on the iPod, the video sound may not be able to be heard.
● Depending on the iPod and the songs in the iPod, iPod cover art may be displayed. This
function can be changed to on/off. ( P.118) It may take time to display iPod cover art,
and the iPod may not be operated while the cover art display is in process.
● When an iPod is connected and the audio source is changed to iPod mode, the iPod will
resume playing from the same point it was last used.
● Depending on the iPod that is connected to the system, certain functions may not be
available.
● Files/tracks selected by operating a connected iPod may not be recognized or displayed
properly.
● If an iPhone is connected via Bluetooth
® and USB at the same time, system operation
may become unstable. For known phone compatibility information, refer to
http://www.toyota.com/entune/
.
Page 107 of 294
107
3. MEDIA OPERATION
COROLLA_14CY_Navi_U
AUDIO SYSTEM
3
4. Bluetooth® AUDIO
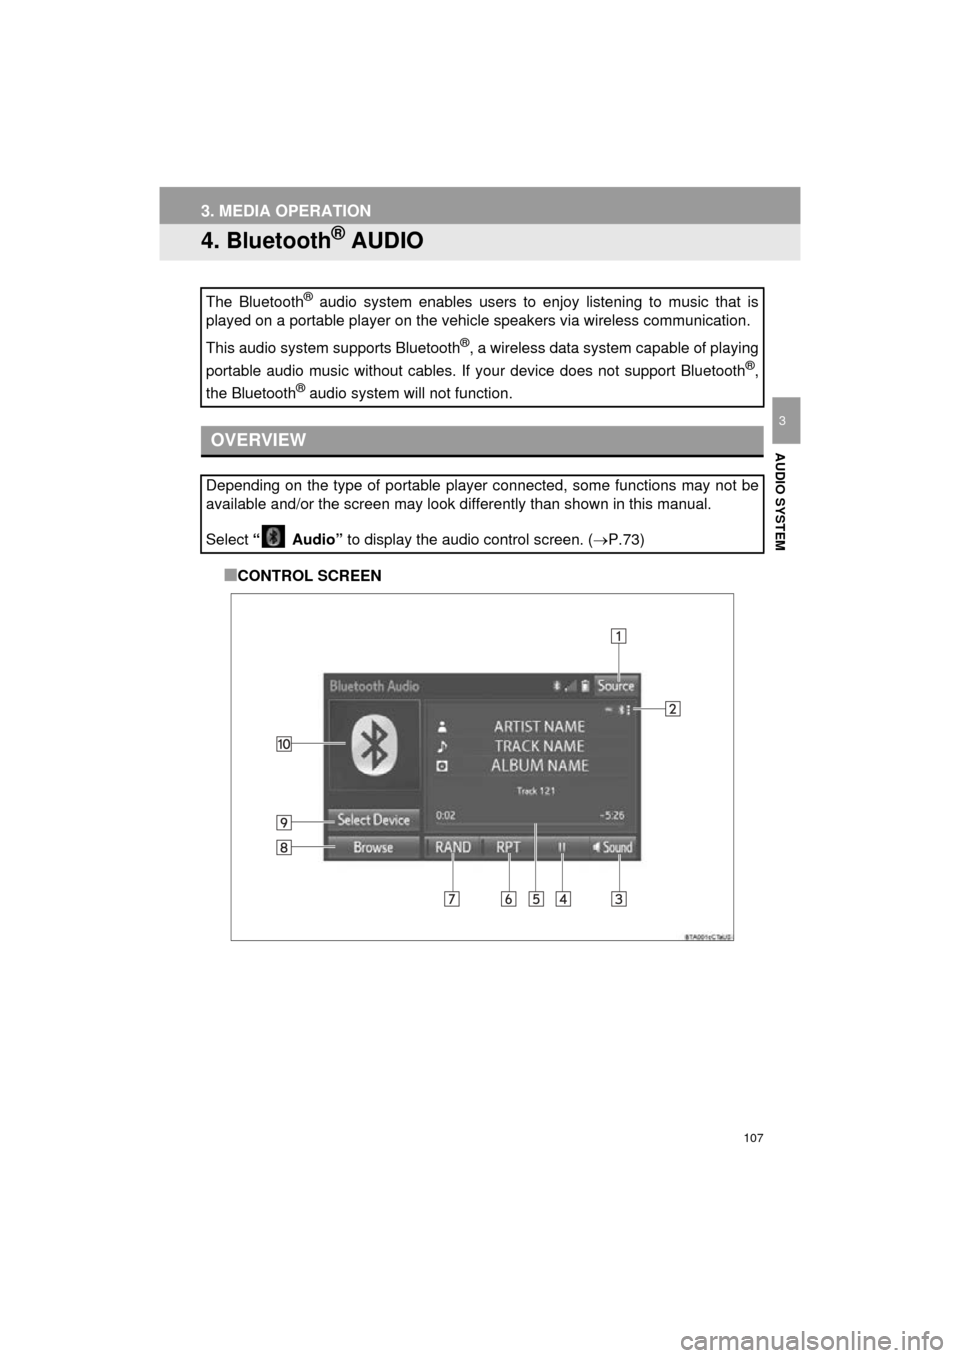
■CONTROL SCREEN
The Bluetooth
® audio system enables users to enjoy listening to music that is
played on a portable player on the vehicle speakers via wireless communi\
cation.
This audio system supports Bluetooth
®, a wireless data system capable of playing
portable audio music without cables. If your device does not support Bluetooth
®,
the Bluetooth
® audio system will not function.
OVERVIEW
Depending on the type of portable player connected, some functions may not be
available and/or the screen may look differently than shown in this manual.
Select “ Audio” to display the audio control screen.
( P.73)