ESP TOYOTA COROLLA 2022 (in English) Service Manual
[x] Cancel search | Manufacturer: TOYOTA, Model Year: 2022, Model line: COROLLA, Model: TOYOTA COROLLA 2022Pages: 678, PDF Size: 147.24 MB
Page 322 of 678
3204-5. Using the driving support systems
WA R N I N G
●Unlike the parking brake, hill-start
assist control is not intended to hold
the vehicle stationary for an extended period of time. Do not
attempt to use hill-start assist con-
trol to hold the vehicle on an incline, as doing so may lead to an acci-
dent.
■When the TRC/VSC is activated
The slip indicator light flashes. Always
drive carefully. Reckless driving may
cause an accident. Exercise particular care when the indicator light flashes.
■When the TRC/VSC systems are turned off
Be especially careful and drive at a
speed appropriate to the road condi- tions. As these are the systems to
help ensure vehicle stability and driv-
ing force, do not turn the TRC/VSC systems off unless necessary.
■Replacing tires
Make sure that all tires are of the
specified size, brand, tread pattern
and total load capacity. In addition, make sure that the tires are inflated to
the recommended tire inflation pres-
sure level. The ABS, TRC and VSC systems will
not function correctly if different tires
are installed on the vehicle. Contact any authorized Toyota retailer
or Toyota authorized repairer, or any
reliable repairer for further information when replacing tires or wheels.
■Handling of tires and the suspen-sion
Using tires with any kind of problem
or modifying the suspension will affect the driving assist systems, and may
cause a system to malfunction.
If you make no extreme correction
with the steering or brakes, your vehi-
cle and trailer should stabilize. (P.153)
■Secondary Collision Brake (if equipped)
Do not rely solely upon the Secondary
Collision Brake. This system is designed to help reduce the possibil-
ity of further damage due to a second-
ary collision, however, that effect changes according to various condi-
tions. Overly relying on the system
may result in death or serious injury.
Page 328 of 678
3265-1. Basic Operations
5-1.Basic Operations
*: If equipped
Vehicles with navigation/multimedia system
Refer to the “Navigation and multim edia system Owner's manual” or “Multi-
media Owner’s Manual”.
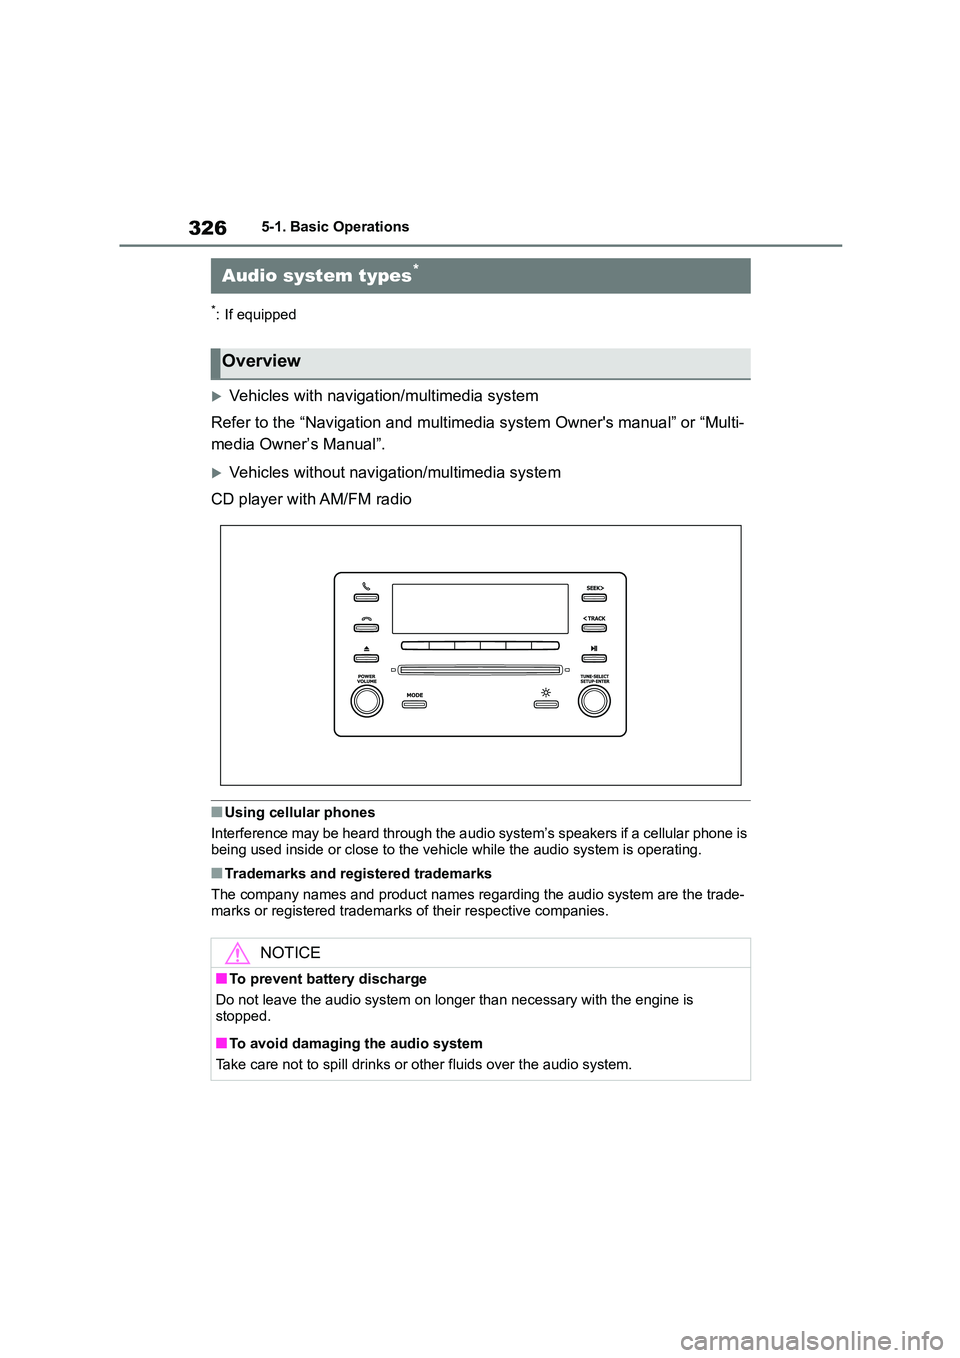
Vehicles without navigation/multimedia system
CD player with AM/FM radio
■Using cellular phones
Interference may be heard through the a udio system’s speakers if a cellular phone is
being used inside or close to the vehi cle while the audio system is operating.
■Trademarks and registered trademarks
The company names and product names regarding the audio system are the trade-
marks or registered trademarks of their respective companies.
Audio system types*
Overview
NOTICE
■To prevent battery discharge
Do not leave the audio system on longer than necessary with the engine is stopped.
■To avoid damaging the audio system
Take care not to spill drinks or other fluids over the audio system.
Page 331 of 678
329
5
5-2. Using the audio system
Audio system
5-2.Using the audio system
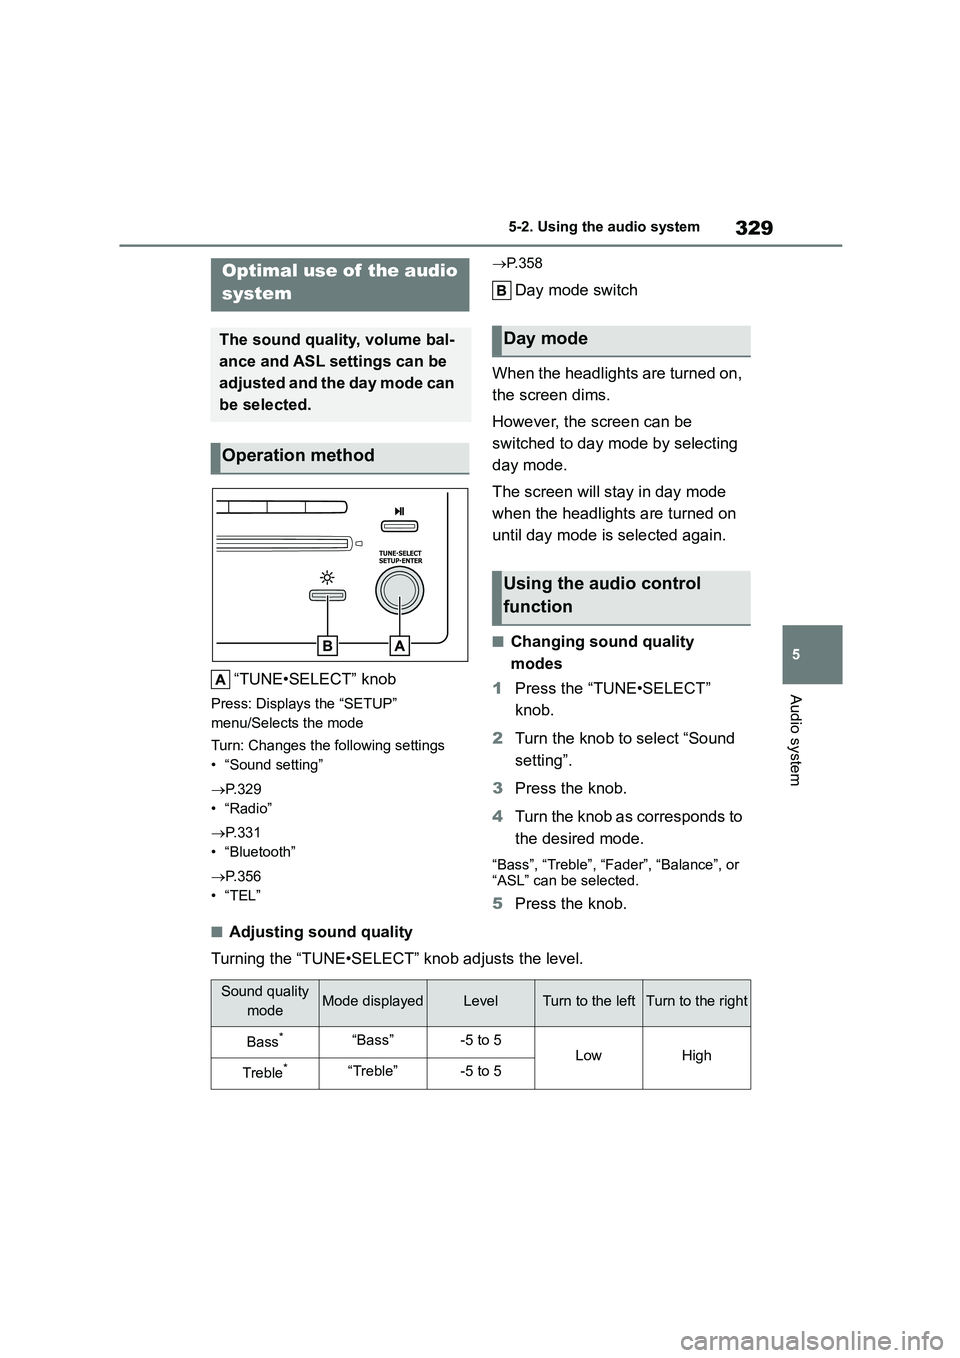
“TUNE•SELECT” knob
Press: Displays the “SETUP”
menu/Selects the mode
Turn: Changes the following settings
• “Sound setting”
P.329
•“Radio”
P.331
• “Bluetooth”
P.356
•“TEL”
P. 3 5 8
Day mode switch
When the headlights are turned on,
the screen dims.
However, the screen can be
switched to day mode by selecting
day mode.
The screen will stay in day mode
when the headlights are turned on
until day mode is selected again.
■Changing sound quality
modes
1 Press the “TUNE•SELECT”
knob.
2 Turn the knob to select “Sound
setting”.
3 Press the knob.
4 Turn the knob as corresponds to
the desired mode.
“Bass”, “Treble”, “Fader”, “Balance”, or
“ASL” can be selected.
5 Press the knob.
■Adjusting sound quality
Turning the “TUNE•SELECT” knob adjusts the level.
Optimal use of the audio
system
The sound quality, volume bal-
ance and ASL settings can be
adjusted and the day mode can
be selected.
Operation method
Day mode
Using the audio control
function
Sound quality
modeMode displayedLevelTurn to the leftTurn to the right
Bass*“Bass”-5 to 5LowHigh
Treble*“Treble”-5 to 5
Page 343 of 678
341
5
5-5. Using an external device
Audio system
1 Press (List).
The song list will be displayed.
2Turn the “TUNE•SELECT” knob
to select a song.
3 Press the knob to play the song.
To return to the previous display, press
(Back).
Press and hold the “SEEK >” or “<
TRACK” button until you hear a
beep.
Pressing (RPT) changes modes
in the following order: Track
repeat Album repeat*Off
*: Album repeat mode may not be avail-
able depending on the iPod devices
you have.
Pressing (RDM) changes
modes in the following order: Track
shuffle Album shuffleOff
Press the (Text) to display or
hide the album title.
If there are continuing texts, is dis-
played.
Press and hold (Text) until you hear
a beep to display the remaining texts.
■About iPod
●Use of the Made for Apple badge
means that an accessory has been
designed to connect specifically to the
Apple product(s) identified in the badge, and has been certified by the
developer to meet Apple performance
standards. Apple is not responsible for the operation of this device or its com-
pliance with safety and regulatory
standards. Please note that the use of this accessory with an Apple product
may affect wireless performance.
●iPhone, iPod, iPod classic, iPod nano,
iPod shuffle, and iPod touch are
trademarks of Apple Inc., registered in the U.S. and other countries.
■iPod functions
●When an iPod is connected and the audio source is changed to iPod
mode, the iPod will resume play from
the same point in which it was last used.
●Depending on the iPod that is con-nected to the system, certain func-
tions may not be available.
Disconnecting the device and recon- necting it once again may resolve
some malfunctions.
●While connected to the system, the
iPod cannot be operated with its own
controls. It is necessary to use the controls of the vehicle’s audio system
Selecting a song from the
song list
Fast-forwarding and rewind-
ing songs
Repeat play
Random play
Switching the display
Page 348 of 678
3465-5. Using an external device
■USB memory
●Compatible devices
USB memory that can be used for MP3,
WMA and AAC playback
●Compatible device formats
The following device formats can be
used:
• USB communication formats: USB2.0 FS (12mbps)
• File formats: FAT16/32 (Windows)
• Correspondence class: Mass storage class
MP3, WMA and AAC files written in any
format other than those listed above
may not play correctly, and their file
names and folder names may not be
displayed correctly.
Items related to standards and limita-
tions are as follows:
• Maximum directory hierarchy: 8 levels
(including the root) • Maximum number of folders in a
device: 3000
• Maximum number of files in a device: 9999
• Maximum number of files per folder:
255
●MP3, WMA and AAC files
MP3 (MPEG Audio LAYER3) is a stan-
dard audio compression format.
Files can be compressed to approxi-
mately 1/10 of their original size by
using MP3 compression.
WMA (Windows Media Audio) is a
Microsoft audio compression format.
This format compresses audio data to a
size smaller than that of the MP3 format.
AAC is short for Advanced Audio Cod-
ing and refers to an audio compression
technology standard used with MPEG2
and MPEG4.
There is a limit to the MP3, WMA and
AAC file standards and to the media/for-
mats recorded by them that can be
used.
●MP3 file compatibility
• Compatible standards
MP3 (MPEG1 LAYER3, MPEG2 LSF LAYER3)
• Compatible sampling frequencies
MPEG1 LAYER3: 32, 44.1, 48 (kHz)
MPEG2 LSF LAYER3: 16, 22.05, 24 (kHz)
• Compatible bit rates (compatible with
VBR) MPEG1 LAYER3: 32-320 (kbps)
MPEG2 LSF LAYER3: 8-160 (kbps)
• Compatible channel modes: stereo, joint stereo, dual channel and monau-
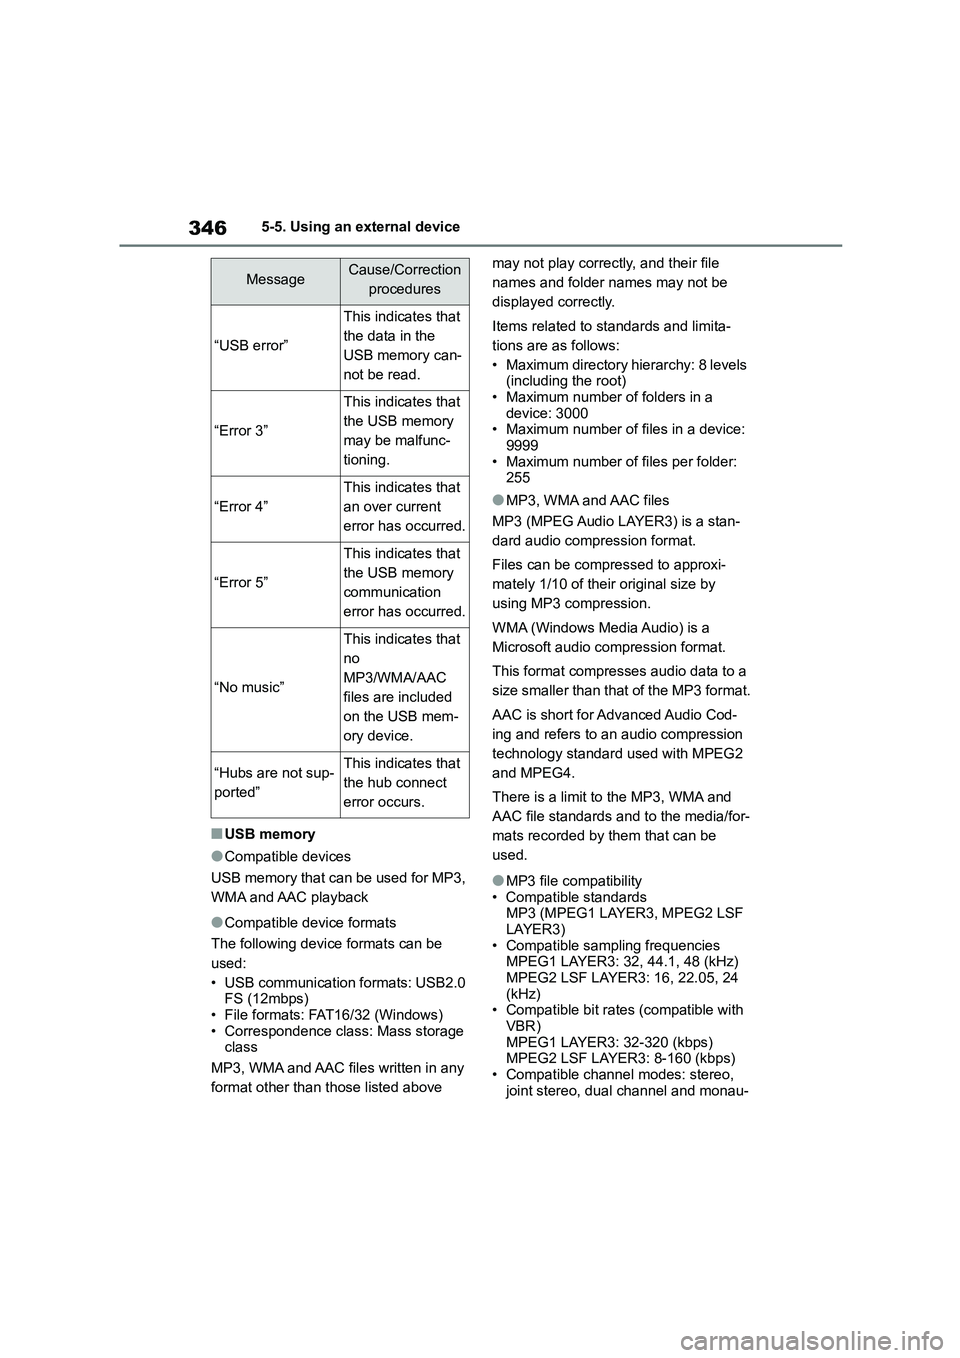
MessageCause/Correction
procedures
“USB error”
This indicates that
the data in the
USB memory can-
not be read.
“Error 3”
This indicates that
the USB memory
may be malfunc-
tioning.
“Error 4”
This indicates that
an over current
error has occurred.
“Error 5”
This indicates that
the USB memory
communication
error has occurred.
“No music”
This indicates that
no
MP3/WMA/AAC
files are included
on the USB mem-
ory device.
“Hubs are not sup-
ported”
This indicates that
the hub connect
error occurs.
Page 415 of 678
413
7
7-1. Maintenance and care
Maintenance and care
Remove dirt and dust using a
vacuum cleaner. Wipe dirty sur-
faces with a cloth dampened with
lukewarm water.
If dirt cannot be removed, wipe it
off with a soft cloth dampened
with neutral detergent diluted to
approximately 1%.
Wring out any excess water from
the cloth and thoroughly wipe off
remaining traces of detergent
and water.
■Shampooing the carpets
There are several commercial foam-
ing-type cleaners available. Use a
sponge or brush to apply the foam. Rub in overlapping circles. Do not use water.
Wipe dirty surfaces and let them dry.
Excellent results are obtained by keep- ing the carpet as dry as possible.
■Handling the seat belts
Clean with mild soap and lukewarm
water using a cloth or sponge. Also check the belts peri odically for exces-
sive wear, fraying or cuts.
Cleaning and protecting
the vehicle interior
Perform cleaning in a manner
appropriate to each compo-
nent and its material.
Protecting the vehicle inte-
rior
WA R N I N G
■Water in the vehicle
●Do not splash or spill liquid in the
vehicle. Doing so may cause electrical com-
ponents, etc. to malfunction or
catch fire.
●Do not get any of the SRS compo-
nents or wiring in the vehicle interior
wet. ( P. 3 5 )
An electrical malfunction may
cause the airbags to deploy or not function properly, resulting in death
or serious injury.
●Vehicles with wireless charger:
Do not let the wireless charger
( P.402) get wet. Failure to do so may cause the charger to become
hot and cause burns or could cause
electric shock resulting in death or serious injury.
■Cleaning the interior (especially instrument panel)
Do not use polish wax or polish
cleaner. The instrument panel may reflect off the windshield, obstructing
the driver’s view and leading to an
accident, resulting in death or serious injury.
NOTICE
■Cleaning detergents
●Do not use the following types of detergent, as they may discolor the
vehicle interior or cause streaks or
damage to painted surfaces:
• Non-seat portions: Organic sub-
stances such as benzene or gaso-
line, alkaline or acidic solutions, dye, and bleach
• Seats: Alkaline or acidic solutions, such as thinner, benzene, and alco-
hol
Page 416 of 678
4147-1. Maintenance and care
Remove dirt using a
water-dampened soft cloth or
synthetic chamois.
Wipe the surface with a dry, soft
cloth to remove any remaining
moisture.
■Cleaning the areas with satin-finish
metal accents
The metal areas use a layer of real
metal for the surface. It is necessary to
clean them regularly. If dirty areas are
left uncleaned for long periods of time, they may be difficult to clean.
Remove dirt and dust using a
vacuum cleaner.
Wipe off any excess dirt and dust
with a soft cloth dampened with
diluted detergent.
Use a diluted water solution of approxi-
mately 5% neutral wool detergent.
Wring out any excess water from
NOTICE
●Do not use polish wax or polish
cleaner. The instrument panel’s or
other interior part’s painted surface may be damaged.
■Preventing damage to leather surfaces
Observe the following precautions to
avoid damage to and deterioration of
leather surfaces:
●Remove any dust or dirt from
leather surfaces immediately.
●Do not expose the vehicle to direct
sunlight for extended periods of
time. Park the vehicle in the shade, especially during summer.
●Do not place items made of vinyl, plastic, or containing wax on the
upholstery, as they may stick to the
leather surface if the vehicle interior heats up significantly.
■Water on the floor
Do not wash the vehicle floor with
water.
Vehicle systems such as the audio system may be damaged if water
comes into contact with electrical
components such as the audio sys- tem above or under the floor of the
vehicle. Water may also cause the
body to rust.
■When cleaning the inside of the
windshield (vehicles with Toyota Safety Sense)
Do not allow glass cleaner to contact
the lens. Also, do not touch the lens. (P.190)
■Cleaning the inside of the rear window
●Do not use glass cleaner to clean
the rear window, as this may cause damage to the rear window defog-
ger heater wires or antenna. Use a
cloth dampened with lukewarm water to gently wipe the window
clean. Wipe the window in strokes
running parallel to the heater wires or antenna.
●Be careful not to scratch or damage the heater wires or antenna.
Cleaning the areas with
satin-finish metal accents
Cleaning the leather areas
Page 499 of 678

497
8
8-2. Steps to take in an emergency
When trouble arises
WA R N I N G
●To avoid risk of burst or severe
leakage, do not drop or damage the
bottle. Visually inspect the bottle before use. Do not use a bottle with
shock, crack, scratch, leakage or
any other damage. In such case, immediately replace.
■Driving to spread the liquid seal-
ant evenly
Observe the following precautions to
reduce the risk of accidents.
Failing to do so may result in a loss of vehicle control and cause death or
serious injury.
●Drive the vehicle carefully at a low
speed. Be especially careful when
turning and cornering.
●If the vehicle does not drive straight
or you feel a pull through the steer- ing wheel, stop the vehicle and
check the following.
• Tire condition. The tire may have separated from the wheel.
• Tire inflation pressure. If the tire inflation pressure is 130 kPa (1.3
kgf/cm2 or bar, 19 psi) or less, the
tire may be severely damaged.
NOTICE
■When performing an emergency repair
●A tire should only be repaired with
the emergency tire puncture repair kit if the damage is caused by a
sharp object such as nail or screw
passing through the tire tread. Do not remove the sharp object
from the tire. Removing the object
may widen the opening and disenable emergency repair with
the repair kit.
●The repair kit is not waterproof. Make sure that the repair kit is not
exposed to water, such as when it
is being used in the rain.
●Do not put the repair kit directly
onto dusty ground such as sand at the side of the road. If the repair kit
vacuums up dust etc., a malfunc-
tion may occur.
●Do not turn the bottle upside down
when using it, as doing so may cause damage to the compressor.
■Precautions for the emergency tire puncture repair kit
●The repair kit power source should
be 12 V DC suitable for vehicle use. Do not connect the repair kit to any
other source.
●If fuel splatters on the repair kit, the
repair kit may deteriorate. Take
care not to allow fuel to contact it.
●Place the repair kit in a storage to
prevent it from being exposed to dirt or water.
●Store the repair kit in the tool tray under the deck mat out of reach of
children.
●Do not disassemble or modify the
repair kit. Do not subject parts such
as the air pressure indicator to impacts. This may cause a malfunc-
tion.
Page 519 of 678
517
8
8-2. Steps to take in an emergency
When trouble arises
●The engine switch mode is memo-
rized by the vehicle. When the battery is reconnected, the system will return
to the mode it was in before the bat-
tery was discharged. Before discon- necting the battery, turn the engine
switch off.
If you are unsure what mode the engine switch was in before the bat-
tery discharged, be especially careful
when reconnecting the battery.
■When replacing the battery
●Use a battery that conforms to Euro-
pean regulations.
●Use a battery with the same case size
as the previous battery and an equiva- lent 20 hour rate capacity (20HR) or
greater.
• If the sizes differ, the battery cannot be properly secured.
• If the 20 hour rate capacity is low,
even if the time period where the vehi- cle is not used is a short time, the bat-
tery may discharge and the engine
may not be able to start.
●For details, consult any authorized
Toyota retailer or Toyota authorized repairer, or any reliable repairer.
WA R N I N G
■When removing the battery ter-
minals
Always remove the negative (-) termi- nal first. If the positive (+) terminal
contacts any metal in the surrounding
area when the positive (+) terminal is removed, a spark may occur, leading
to a fire in addition to electrical shocks
and death or serious injury.
■Avoiding battery fires or explo-
sions
Observe the following precautions to
prevent accidentally igniting the flam-
mable gas that may be emitted from the battery:
●Make sure each jumper cable is connected to the correct terminal
and that it is not unintentionally in
contact with any other than the intended terminal.
●Do not allow the other end of the jumper cable connected to the “+”
terminal to come into contact with
any other parts or metal surfaces in the area, such as brackets or
unpainted metal.
●Do not allow the + and - clamps of
the jumper cables to come into con-
tact with each other.
●Do not smoke, use matches, ciga-
rette lighters or allow open flame near the battery.
■Battery precautions
The battery contains poisonous and
corrosive acidic electrolyte, while
related parts contain lead and lead compounds. Observe the following
precautions when handling the bat-
tery:
●When working with the battery,
always wear safety glasses and take care not to allow any battery
fluids (acid) to come into contact
with skin, clothing or the vehicle body.
●Do not lean over the battery.
●In the event that battery fluid comes
into contact with the skin or eyes, immediately wash the affected area
with water and seek medical atten-
tion. Place a wet sponge or cloth over the affected area until medical
attention can be received.
●Always wash your hands after han- dling the battery support, terminals,
and other battery-related parts.
●Do not allow children near the bat-
tery.
Page 522 of 678
5208-2. Steps to take in an emergency
1Stop the engine. Set the parking
brake and shift the shift lever to
P (Multidrive) or N (manual
transmission).
2 Remove the mud, snow or sand
from around the front wheels.
3 Place wood, stones or some
other material under the front
wheels to help provide traction.
4 Restart the engine.
5 Shift the shift lever to D or R
(Multidrive) or 1 or R (manual
transmission) and release the
parking brake. Then, while exer-
cising caution, depress the
accelerator pedal.
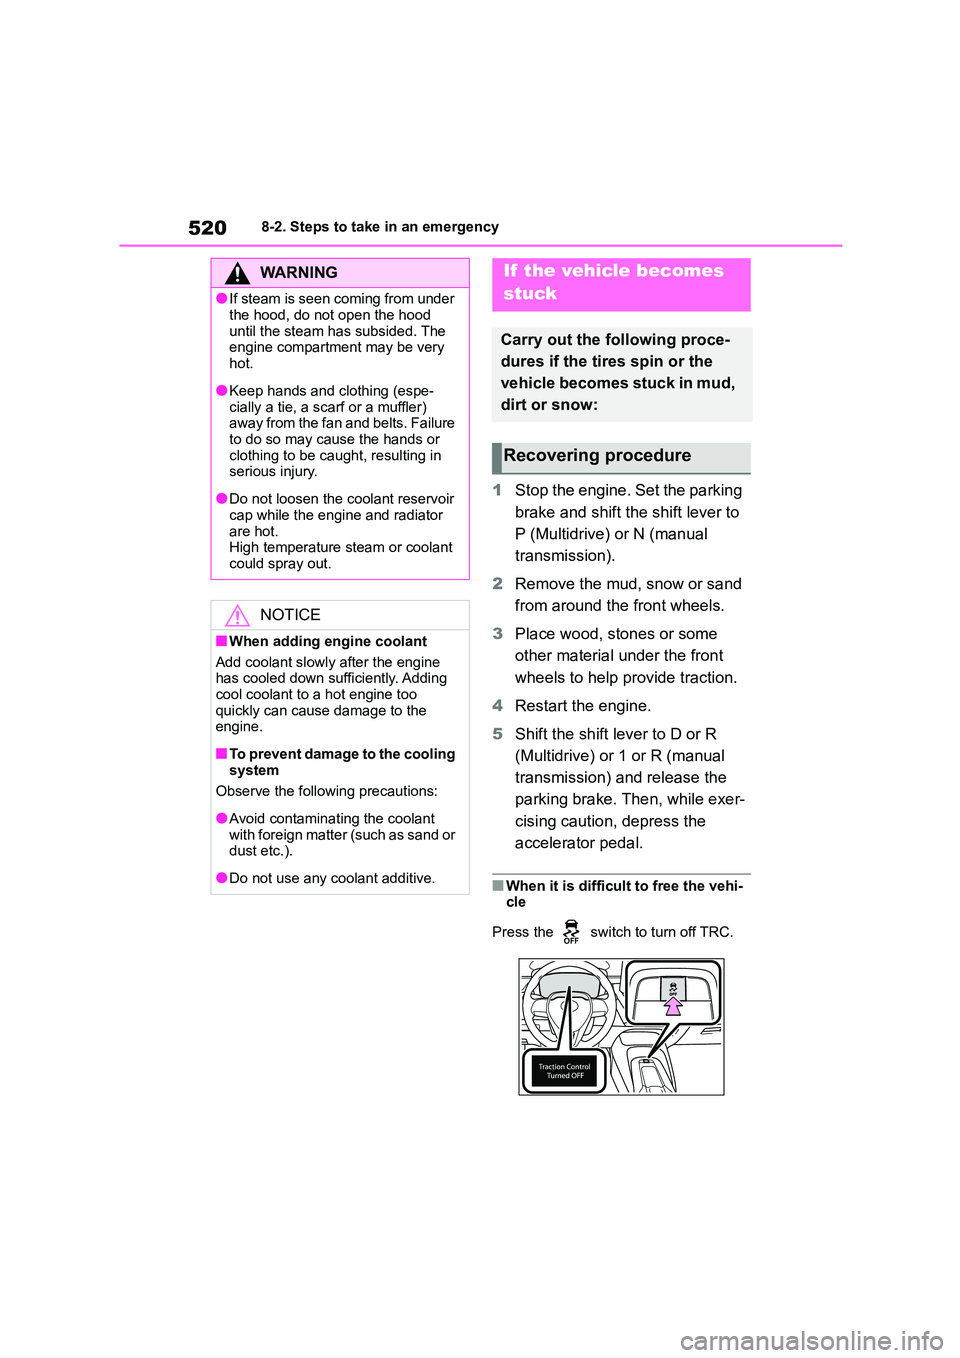
■When it is difficult to free the vehi- cle
Press the switch to turn off TRC.
WA R N I N G
●If steam is seen coming from under
the hood, do not open the hood
until the steam has subsided. The engine compartment may be very
hot.
●Keep hands and clothing (espe-
cially a tie, a scarf or a muffler)
away from the fan and belts. Failure
to do so may cause the hands or clothing to be caught, resulting in
serious injury.
●Do not loosen the coolant reservoir
cap while the engine and radiator
are hot. High temperature steam or coolant
could spray out.
NOTICE
■When adding engine coolant
Add coolant slowly after the engine
has cooled down sufficiently. Adding
cool coolant to a hot engine too
quickly can cause damage to the engine.
■To prevent damage to the cooling system
Observe the following precautions:
●Avoid contaminating the coolant
with foreign matter (such as sand or
dust etc.).
●Do not use any coolant additive.
If the vehicle becomes
stuck
Carry out the following proce-
dures if the tires spin or the
vehicle becomes stuck in mud,
dirt or snow:
Recovering procedure