change time TOYOTA COROLLA HATCHBACK 2020 (in English) Service Manual
[x] Cancel search | Manufacturer: TOYOTA, Model Year: 2020, Model line: COROLLA HATCHBACK, Model: TOYOTA COROLLA HATCHBACK 2020Pages: 572, PDF Size: 13.8 MB
Page 354 of 572
3545-13. Phone operation (Hands-free system for cellular phones)
COROLLA H/B_U
current call is placed on hold.
When there is no current call,
but there is a call on hold:
“Activate” is displayed. When
selected, the system switches
to the call that was on hold.
When there is another call on
hold during a call: “Swap
Calls” is displayed. When
selected, the current call is
placed on hold, and the sys-
tem switches to the call that
was on hold.
●This function may not be available
depending on the type of cellular
phone.
When a call is interrupted by a
third party while talking, the
incoming screen is displayed.
1 Select “Answer” or press the
switch on the steering
wheel to start talking with the
other party.
To refuse to receive the call:
Select “Decline”.
Each time “Swap Calls” is
selected, the party who is on
hold will be switched.
●This function may not be available
depending on the type of Blue-
tooth
® phone.
1 Display the phone top
screen. ( P.343)
2 Select “Message”.
A confirmation message
appears when the “Automatic
Message Transfer” function is
set to off ( P.367), select
“Yes”.
3 Check that the message
screen is displayed.
“Phone”: Select to change to phone
mode.
The account name is dis-
played on the left side of
Incoming call waiting
Bluetooth® phone
message function
Received messages can be
forwarded from the con-
nected Bluetooth
® phone,
enabling checking and
replying using the system.
Depending on the type of
Bluetooth
® phone con-
nected, received messages
may not be transferred to
the system.
If the phone does not sup-
port the message function,
this function cannot be
used. Even when the sup-
ported phone is used, reply
function may not be used.
Displaying the message
screen
Page 367 of 572
3675-14. Phone settings
COROLLA H/B_U
5
Audio
■Deleting the voice tag
1 Select “Delete”.
2 Select the desired contact
and select “Delete”.
3 Select “Yes” when the confir-
mation screen appears.
●Multiple data can be selected and
deleted at the same time.
●Voice tags are deleted when the
set language of the system is
changed. ( P.290)
1 Display the phone settings
screen. ( P.359)
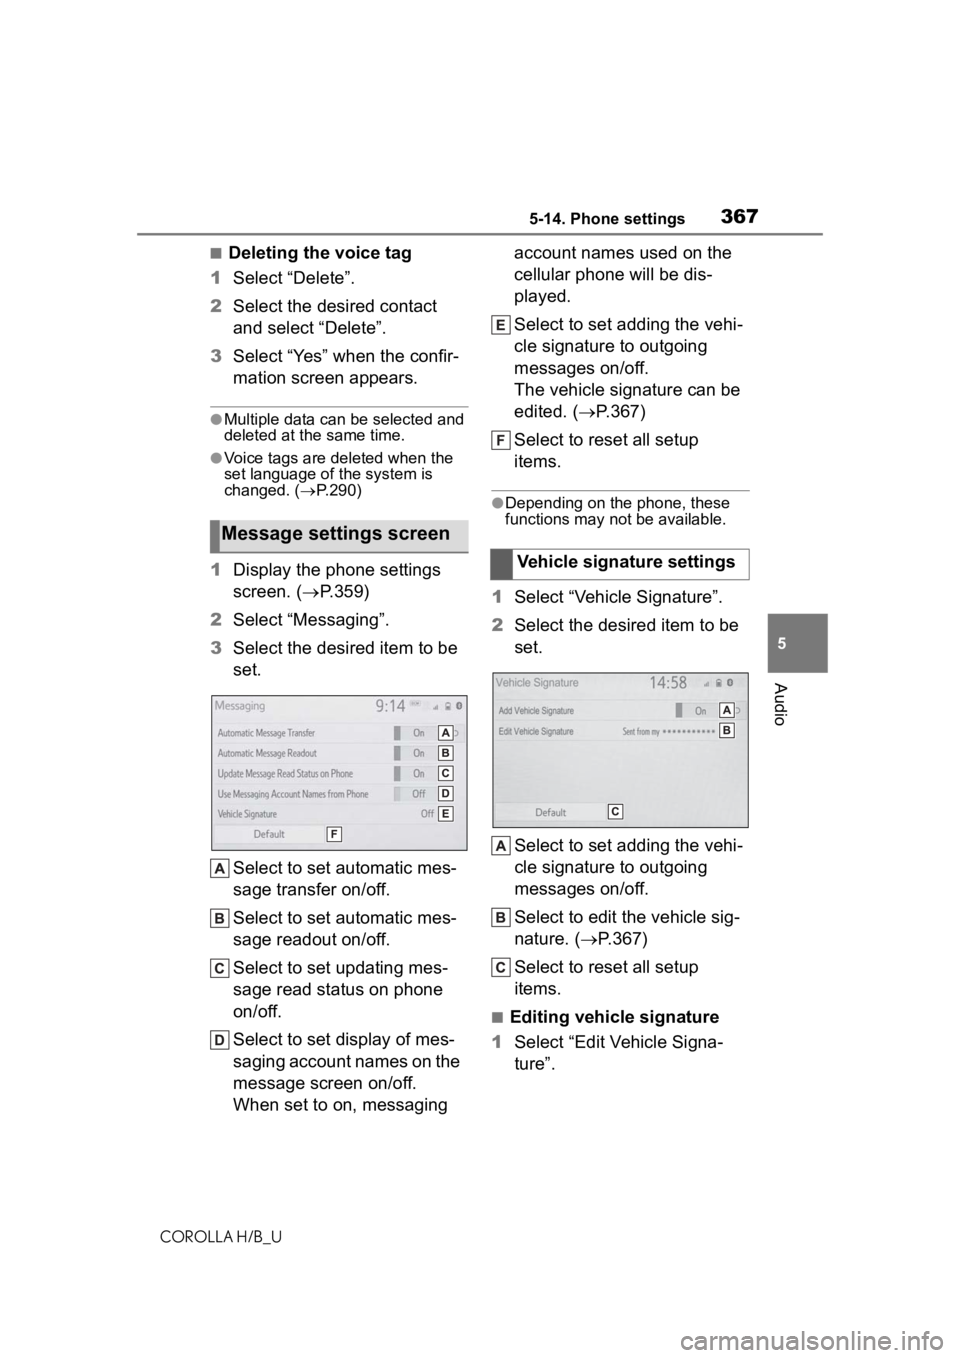
2 Select “Messaging”.
3 Select the desired item to be
set.
Select to set automatic mes-
sage transfer on/off.
Select to set automatic mes-
sage readout on/off.
Select to set updating mes-
sage read status on phone
on/off.
Select to set display of mes-
saging account names on the
message screen on/off.
When set to on, messaging account names used on the
cellular phone will be dis-
played.
Select to set adding the vehi-
cle signature to outgoing
messages on/off.
The vehicle signature can be
edited. (
P.367)
Select to reset all setup
items.
●Depending on the phone, these
functions may not be available.
1 Select “Vehicle Signature”.
2 Select the desired item to be
set.
Select to set adding the vehi-
cle signature to outgoing
messages on/off.
Select to edit the vehicle sig-
nature. ( P.367)
Select to reset all setup
items.
■Editing vehicle signature
1 Select “Edit Vehicle Signa-
ture”.
Message settings screen
Vehicle signature settings
Page 372 of 572
3725-15. What to do if... (Bluetooth®)
COROLLA H/B_U
■Notification of
SMS/MMS/E-mail reception
on this system is set to off.
Set notification of
SMS/MMS/E-mail reception on
this system to on. ( P.360)
■Automatic message trans-
fer function is not enabled
on the cellular phone.
Enable automatic transfer func-
tion on the cellular phone.
■Connection confirmation
display on this system is
set to on.
To turn off the display, set con-
nection confirmation display on
this system to off. ( P.276)
*: The engine switch is in ACC or
ON mode.
■The cellular phone is not
close enough to this sys-
tem.
Bring the cellular phone closer
to this system.
■Radio interference has
occurred.
Turn off Wi-Fi
® devices or other
devices that may emit radio
waves.
■The cellular phone is the
most likely cause of the
symptom.
Turn the cellular phone off,
remove and reinstall the battery
pack, and then restart the cellu-
lar phone.
Enable the cellular phone’s
Bluetooth
® connection.
Disable the Wi-Fi
® connection of
the cellular phone.
Stop the cellular phone’s secu-
rity software and close all appli-
cations.
Before using an application
installed on the cellular phone,
carefully check its source and
how its operation might affect
this system.
●For details, refer to the owner’s
manual that came with the cellular
phone.
New message notifications
are not displayed.
In other situations
The Bluetooth
® connection
status is displayed at the top
of the screen each time the
system is activated
*.
Even though all conceivable
measures have been taken,
the symptom status does not
change.
Page 388 of 572
3886-1. Using the air conditioning system and defogger
COROLLA H/B_UThe temperature for the driver’s
and front passenger’s side can be
adjusted separately.
■Setting the fan speed
Vehicles without DUAL mode
air conditioning system
To adjust the fan speed, turn the
fan speed control switch clock-
wise (increase) or counterclock-
wise (decrease).
Pressing the off switch to turns off
the fan.
Vehicles with DUAL mode air
conditioning system
Operate the fan speed
increases switch to increase the
fan speed and the fan speed
decrease switch to decrease the
fan speed.
Pressing the off switch to turns off
the fan.
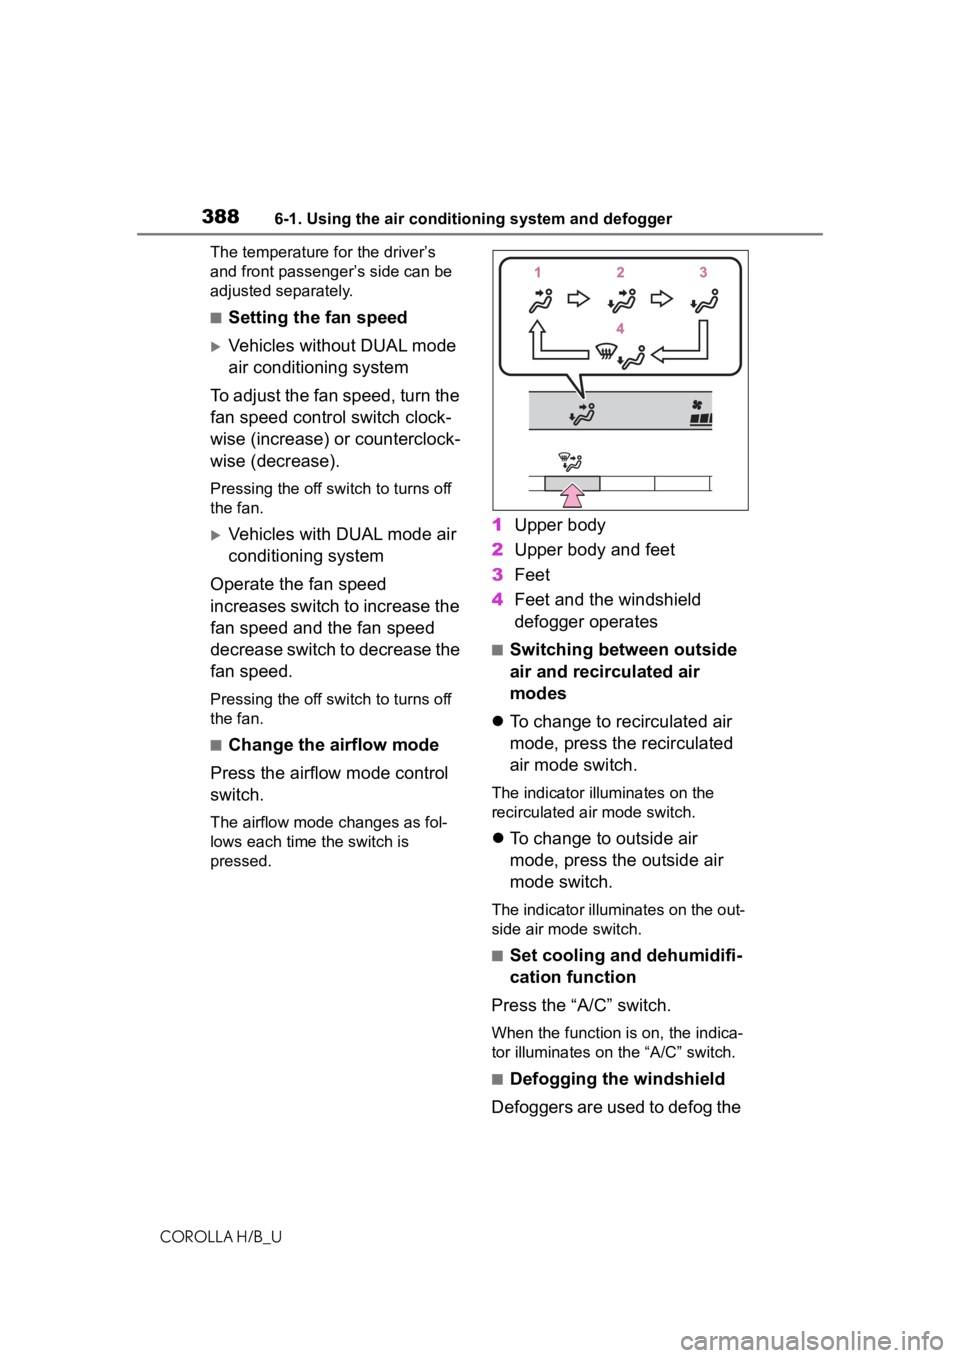
■Change the airflow mode
Press the airflow mode control
switch.
The airflow mode changes as fol-
lows each time the switch is
pressed.
1 Upper body
2 Upper body and feet
3 Feet
4 Feet and the windshield
defogger operates
■Switching between outside
air and recirculated air
modes
To change to recirculated air
mode, press the recirculated
air mode switch.
The indicator illuminates on the
recirculated air mode switch.
To change to outside air
mode, press the outside air
mode switch.
The indicator illuminates on the out-
side air mode switch.
■Set cooling and dehumidifi-
cation function
Press the “A/C” switch.
When the function is on, the indica-
tor illuminates on the “A/C” switch.
■Defogging the windshield
Defoggers are used to defog the
Page 406 of 572
4066-4. Other interior features
COROLLA H/B_U
■If a cover or accessory is
attached to the portable device
Do not charge a portable device if a
cover or accessory which is not Qi
compatible is attached. Depending
on the type of cover and/or acces-
sory attached, it may not be possi-
ble to charge the portable device. If
the portable device is placed on the
charging area and does not charge,
remove the cover and/or accesso-
ries.
■If interference is heard in AM
radio broadcasts while
charging
Turn off the wireless charger and
check if the noise is reduced. If
noise is reduced, press and hold the
power supply switch of the wireless
charger for 2 seconds. The fre-
quency of the wireless charger is
changed and noise may be
reduced. When the frequency is
changed, the operation indicator
light will blink (o range) 2 times.
■Charging precautions
●If the electronic key cannot be
detected in the cabin, charging
cannot be performed. When a
door is opened and closed,
charging may be temporarily sus-
pended.
●While charging, the wireless char-
ger and the portable device will
become warm.
This is not a malfunction.If a porta-
ble device becomes warm while
charging and charging stops due
to the protection f unction of the
portable device, wait until the por-
table device cools down and
charge it again.
■Sound generated during opera-
tion
When the power supply switch is
turned on or while a portable device
is being identified, operation sounds
may be heard. This is not a malfunc-
tion.
■Cleaning the wireless charger
P.417
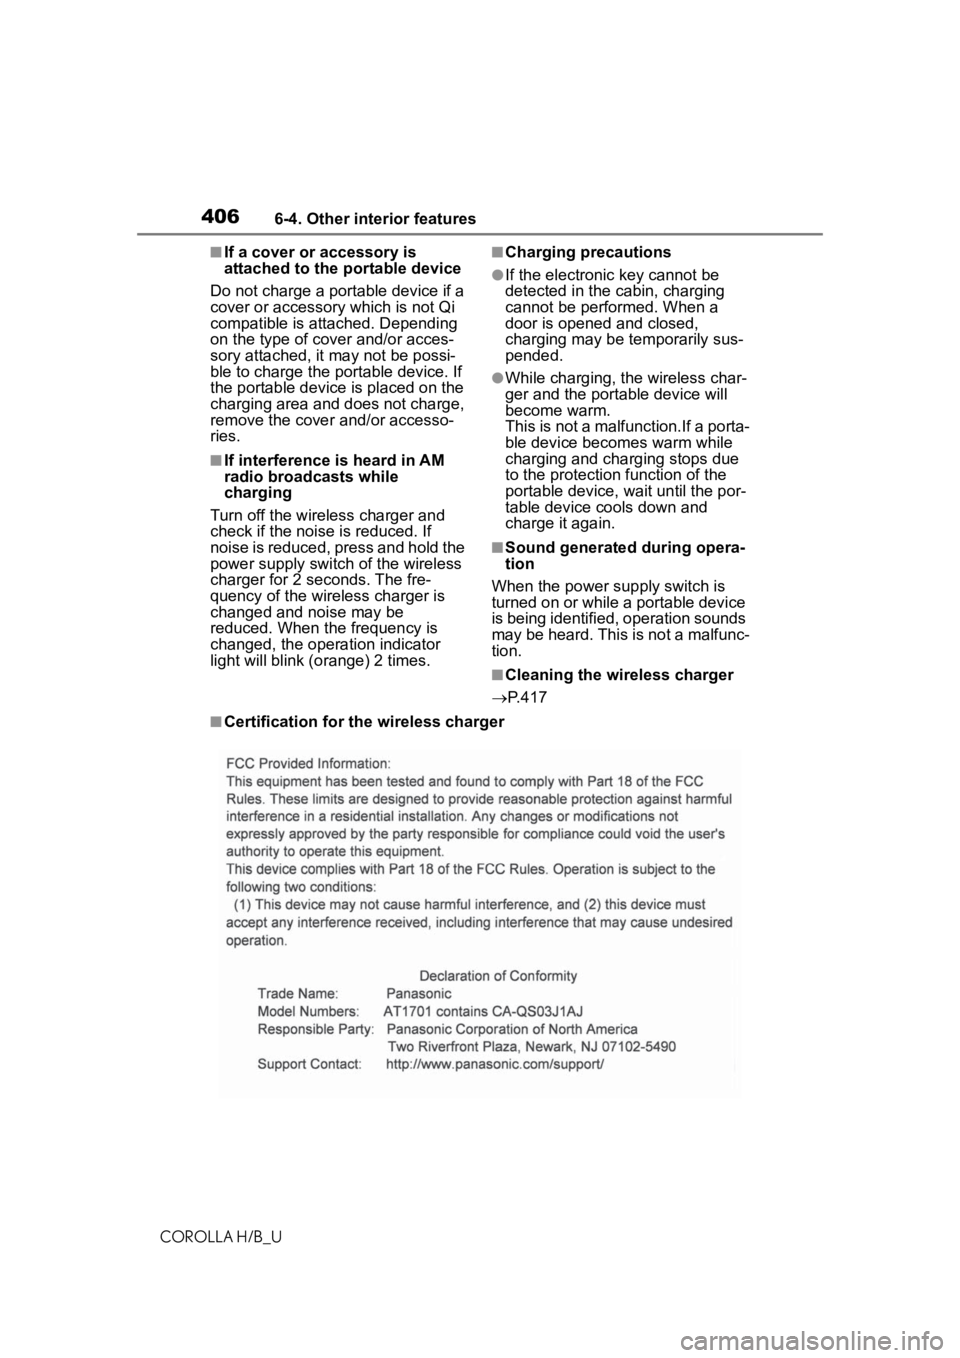
■Certification for the wireless charger
Page 444 of 572
4447-3. Do-it-yourself maintenance
COROLLA H/B_U
■Operating conditions for
the function
This function will perform the
change of wheel set only if a
second wheel set has been
registered. If no second wheel
set has been registered, no
change will be made when
selecting this function in the
menu.
Only a change between both
registered wheel set is possi-
ble, mixing between these
wheel sets is not supported.
■How to change between
wheel sets
1 Have the vehicle fitted with
the preferred wheel set.
2 Press or of the meter
control switch to select .
3 Press or to select
“Vehicle Settings” and then
press .
4 Press or to select
“TPWS” and then press .
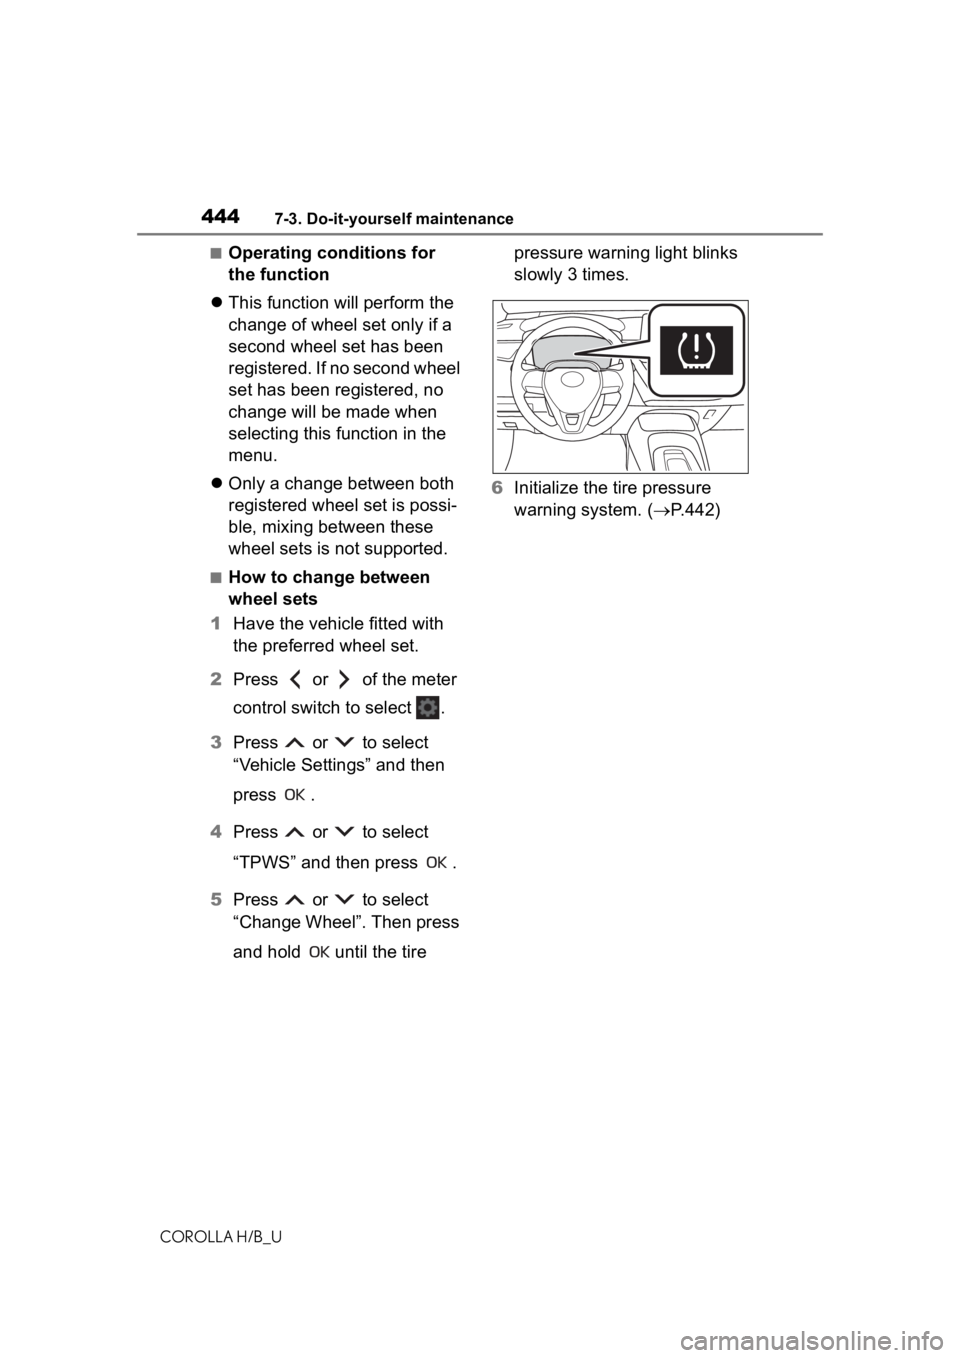
5 Press or to select
“Change Wheel”. Then press
and hold until the tire pressure warning light blinks
slowly 3 times.
6 Initialize the tire pressure
warning system. ( P.442)
Page 496 of 572

4968-2. Steps to take in an emergency
COROLLA H/B_Uthe disc wheel seat .
3
Lower the vehicle.
4 Firmly tighten each wheel nut
two or three times in the
order shown in the illustra-
tion.
Tightening torque:
76 ft•lbf (103 N•m, 10.5 kgf•m)
5Stow the flat tire, tire jack and
all tools.
■The compact spare tire
●The compact spare tire is identi-
fied by the label “TEMPORARY USE ONLY” on the tire sidewall.
Use the compact spare tire tempo-
rarily, and only in an emergency.
●Make sure to check the tire infla-
tion pressure of the compact
spare tire. (
P.515)
■When the compact spare tire is
equipped
The vehicle becomes lower when
driving with the compact spare tire
compared to when driving with stan-
dard tires.
■After completing the tire
change
The tire pressure warning system
must be reset. ( P.442)
■When using the compact spare
tire
As the compact spare tire is not
equipped with a tire pressure warn-
ing valve and transm itter, low infla-
tion pressure of t he spare tire will
not be indicated by the tire pressure
warning system. Also , if you replace
the compact spare ti re after the tire
pressure warning light comes on,
the light remains on.
■If you have a flat front tire on a
road covered wit h snow or ice
(vehicles with a compact spare
tire)
Install the compact spare tire on one
of the rear wheels of the vehicle.
Perform the following steps and fit
tire chains to the front tires:
1 Replace a rear tire with the com-
pact spare tire.
2 Replace the flat front tire with the
tire removed from the rear of the
vehicle.
3 Fit tire chains to the front tires.
■When reinstalling the wheel
ornament (steel wheels except
compact spare tire)
Align the cutout of the wheel orna-
ment with the valve stem as shown
in the illustration.
Page 531 of 572
5319-2. Customization
COROLLA H/B_U
9
Vehicle specifications
9-2.Customization
■Changing by using the navi-
gation/multimedia system
1 Press the “MENU” button.
2 Select “Setup” on the “Menu”
screen.
3 Select “General” or “Vehicle”
on the “Setup” screen.
Various setting can be changed.
Refer to the list o f settings that can
be changed for details.
■Changing by using the
meter control switches
1 Press or of the meter
control switch to select . 2
Press or of the meter
control switch to select the
desired item to be custom-
ized.
3 Press or press and hold .
The available settings will differ
depending on if is pressed or
pressed and held. Follow the
instructions on the display.
Some function settings are changed simultaneously with other fu nc-
tions being customized. Contact y our Toyota dealer for further
details.
Settings that can be changed using the navigation or multimedia
system screen (vehicles with a nav igation or multimedia system)
Customizable features
Your vehicle includes a vari-
ety of electronic features
that can be personalized to
suit your preferences. The
settings of these features
can be changed using the
multi-information display,
the navigation/multimedia
system, or at your Toyota
dealer.
Customizing vehicle fea-
tures
WARNING
■During customization
As the engine needs to be run-
ning during customization, ensure
that the vehicle is parked in a
place with adequate ventilation. In
a closed area such as a garage,
exhaust gases in cluding harmful
carbon monoxide (CO) may col-
lect and enter the vehicle. This
may lead to death or a serious
health hazard.
NOTICE
■During customization
To prevent batte ry discharge,
ensure that the engine is running
while customizing features.
Customizable features
Page 532 of 572
5329-2. Customization
COROLLA H/B_U
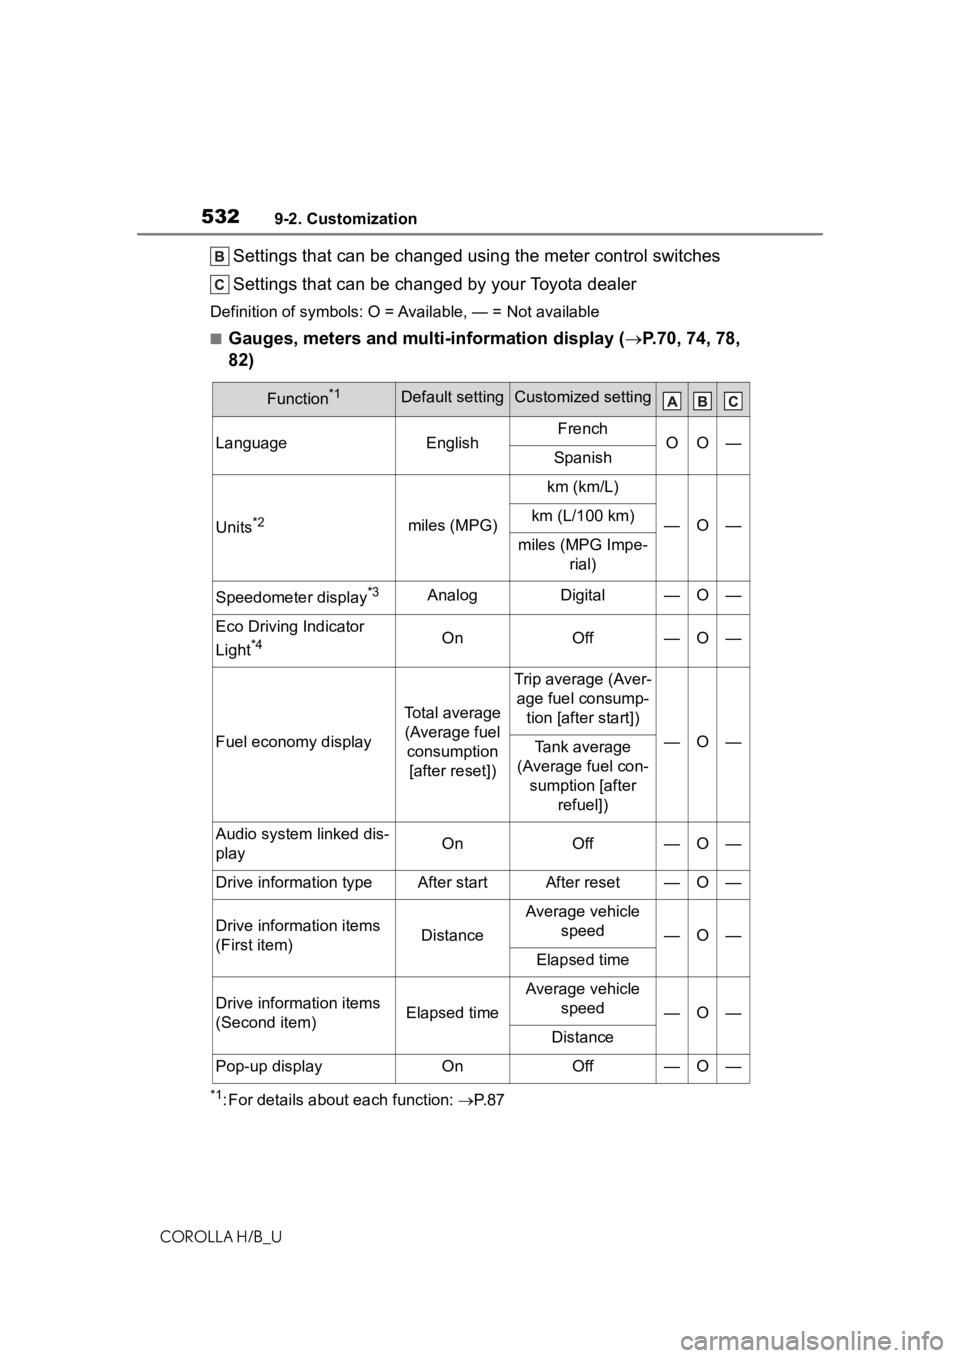
Settings that can be changed using the meter control switches
Settings that can be changed by your Toyota dealer
Definition of symbols: O = Available, — = Not available
■Gauges, meters and multi-information display ( P.70, 74, 78,
82)
*1: For details about each function: P. 8 7
Function*1Default settingCustomized setting
LanguageEnglishFrenchOO—Spanish
Units*2miles (MPG)
km (km/L)
—O—km (L/100 km)
miles (MPG Impe-
rial)
Speedometer display*3AnalogDigital—O—
Eco Driving Indicator
Light
*4OnOff—O—
Fuel economy display
Total average (Average fuel consumption [after reset])
Trip average (Aver- age fuel consump- tion [after start])
—O—Tank average
(Average fuel con- sumption [after refuel])
Audio system linked dis-
playOnOff—O—
Drive information typeAfter startAfter reset—O—
Drive information items
(First item)Distance
Average vehicle speed
—O—
Elapsed time
Drive information items
(Second item)Elapsed time
Average vehicle speed
—O—
Distance
Pop-up displayOnOff—O—
Page 557 of 572
557Alphabetical Index
COROLLA H/B_U
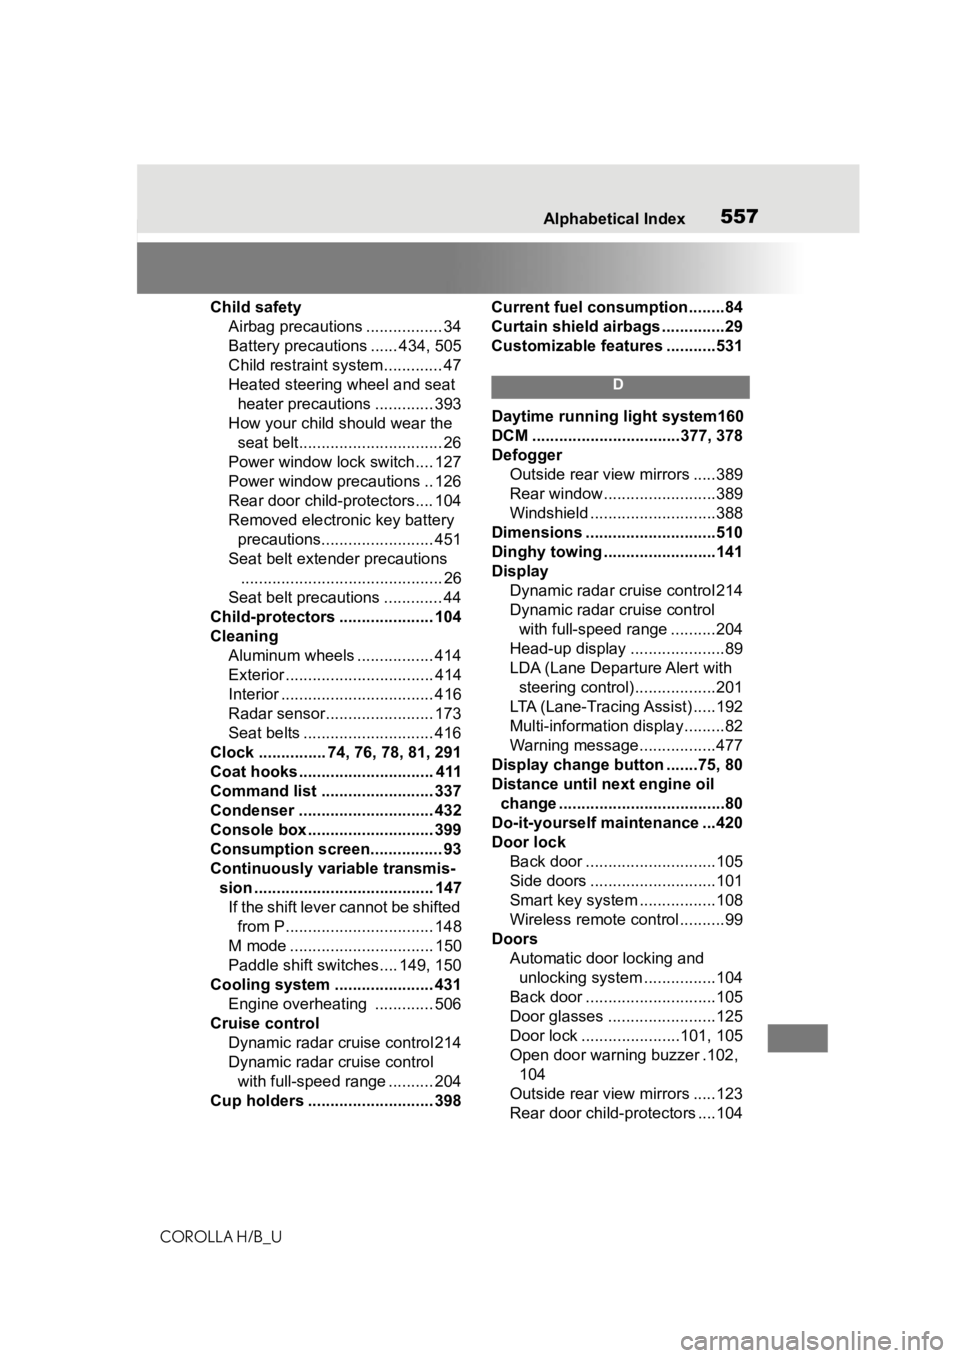
Child safety Airbag precautions ................. 34
Battery precautions ...... 434, 505
Child restraint system............. 47
Heated steering wheel and seat
heater precautions ............. 393
How your child should wear the seat belt................................ 26
Power window lock switch.... 127
Power window precautions .. 126
Rear door child-protectors.... 104
Removed electronic key battery precautions......................... 451
Seat belt extender precautions ............................................. 26
Seat belt precautions ............. 44
Child-protectors ..................... 104
Cleaning Aluminum wheels ................. 414
Exterior ................................. 414
Interior .................................. 416
Radar sensor........................ 173
Seat belts ............................. 416
Clock ............... 74, 76, 78, 81, 291
Coat hooks .............................. 411
Command list ......................... 337
Condenser .............................. 432
Console box ............................ 399
Consumption screen................ 93
Continuously variable transmis- sion ........................................ 147If the shift lever cannot be shifted from P................................. 148
M mode ................................ 150
Paddle shift switches.... 149, 150
Cooling system ...................... 431 Engine overheating ............. 506
Cruise control Dynamic radar cruise control 214
Dynamic radar cruise control with full-speed range .......... 204
Cup holders ............................ 398 Current fuel consumption........84
Curtain shield airbags ..............29
Customizable featu
res ...........531
D
Daytime running light system160
DCM .................................377, 378
Defogger
Outside rear view mirrors .....389
Rear window.........................389
Windshield ............................388
Dimensions .............................510
Dinghy towing .........................141
Display Dynamic radar cruise control 214
Dynamic radar cruise control with full-speed range ..........204
Head-up display .....................89
LDA (Lane Departure Alert with steering control)..................201
LTA (Lane-Tracing Assist) .....192
Multi-information display.........82
Warning message.................477
Display change button .......75, 80
Distance until next engine oil change .....................................80
Do-it-yourself maintenance ...420
Door lock Back door .............................105
Side doors ............................101
Smart key system .................108
Wireless remote control..........99
Doors Automatic door locking and unlocking system ................104
Back door .............................105
Door glasses ........................125
Door lock ......................101, 105
Open door warning buzzer .102, 104
Outside rear view mirrors .....123
Rear door child-protectors ....104