ECO mode TOYOTA HIGHLANDER 2012 XU40 / 2.G User Guide
[x] Cancel search | Manufacturer: TOYOTA, Model Year: 2012, Model line: HIGHLANDER, Model: TOYOTA HIGHLANDER 2012 XU40 / 2.GPages: 636, PDF Size: 11.24 MB
Page 173 of 636
173
2-1. Driving procedures
2
When driving
CAUTION
■
When starting the engine
Always start the engine while sitting in the driver's seat. Do not depress the
accelerator pedal while starting the engine under any circumstances.
Doing so may cause an accident resulting in death or serious injury.
■ Caution while driving
If the vehicle begins to slide due to engine failure or other circumstances, do
not lock or open the doors until the vehicle reaches a safe and complete
stop. Activation of the steering lock in this circumstance may lead to an acci-
dent, resulting in death or serious injury.
■ Stopping the engine in an emergency
If you want to stop the engine in an emergency while driving the vehicle,
press and hold the “ENGINE START STOP” switch for more than 3 seconds.
However, do not touch the “ENGINE START STOP” switch while driving
except in an emergency. Turning the engine off while driving will not cause
loss of steering or braking control, but the power assist to these systems will
be lost. This will make it more difficult to steer and brake, so you should pull
over and stop the vehicle as soon as it is safe to do so.
NOTICE
■To prevent battery discharge
Do not leave the “ENGINE START STOP” switch in ACCESSORY or IGNI-
TION ON mode for long periods without the engine running.
■ When starting the engine
●Do not race a cold engine.
● If the engine becomes difficult to start or stalls frequently, have the engine
checked immediately.
Page 178 of 636
178 2-1. Driving procedures
■Shift position uses
*1: Shifting to the D position allows the system to select a gear suitable
for the driving conditions. Setting the shift lever to the D position is
recommended for normal driving.
*2: Selecting shift ranges using S mode restricts the upper limit of thepossible gear ranges, controls engine braking forces, and prevents
unnecessary upshifting.
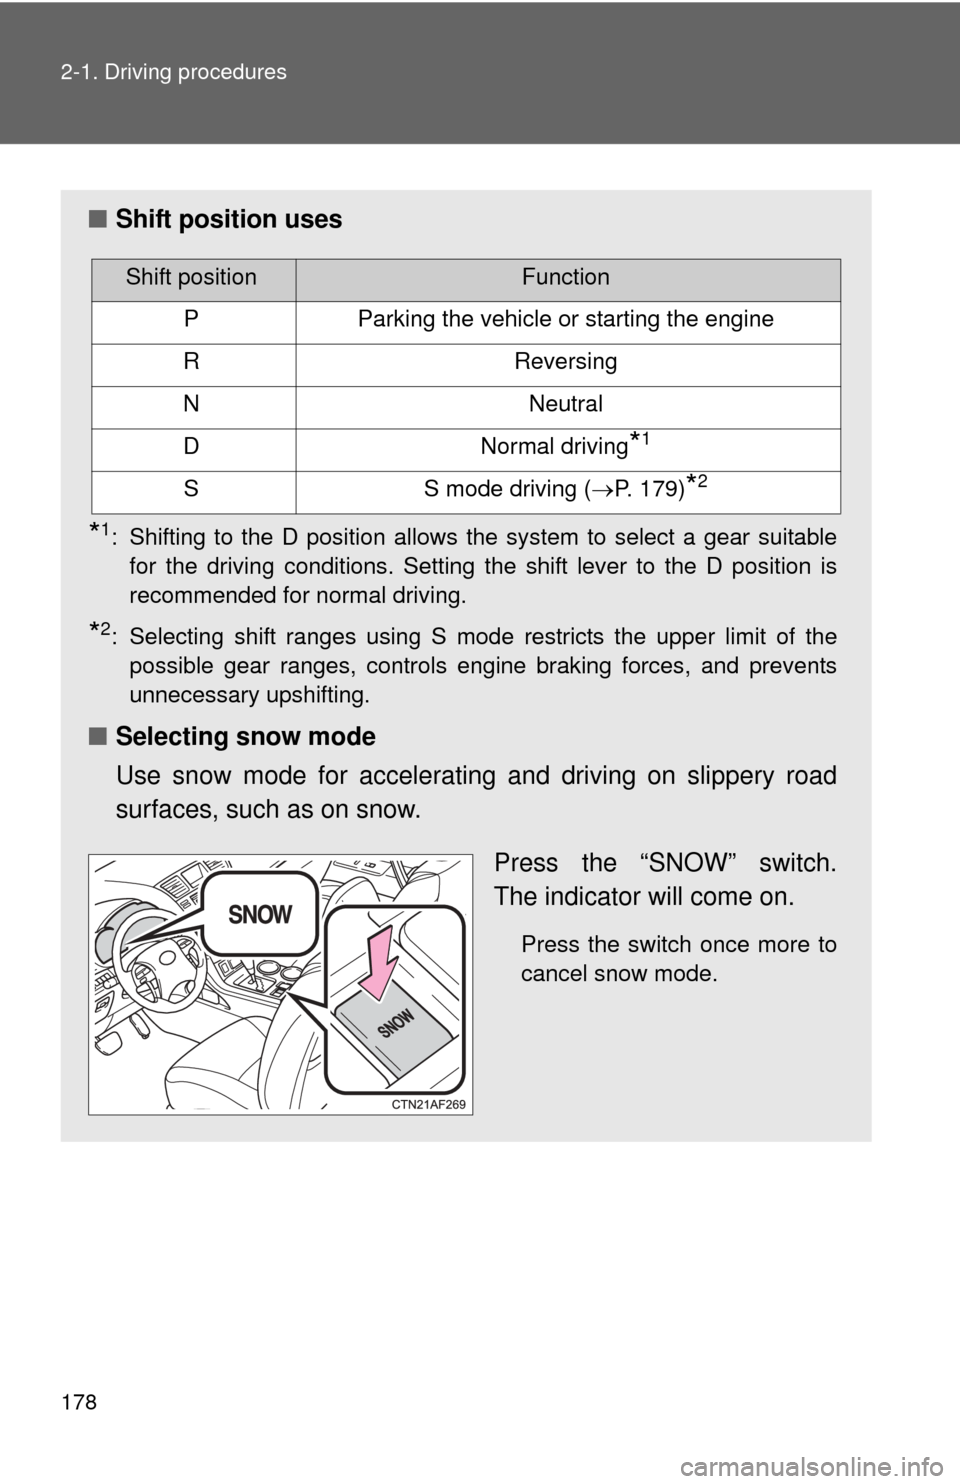
■ Selecting snow mode
Use snow mode for accelerating and driving on slippery road
surfaces, such as on snow.
Press the “SNOW” switch.
The indicator will come on.
Press the switch once more to
cancel snow mode.
Shift positionFunction
PParking the vehicle or starting the engine
RReversing
NNeutral
DNormal driving*1
SS mode driving (P. 179)*2
Page 181 of 636

181
2-1. Driving procedures
2
When driving
■
If the shift lever cannot be shifted from P
P. 556
■ If the S indicator does not come on even after shifting the shift lever to
S
This may indicate a malfunction in the automatic transmission system. Have
the vehicle inspected by your Toyota dealer immediately.
(In this situation, the vehicle will operate as if the shift lever is in D.)
■ Downshift restriction warning buzzer (S mode)
To help ensure safety and driving performance, downshifting operation may
sometimes be restricted. In some circumstances, downshifting may not be
possible even when the shift lever is operated. (A buzzer will sound twice.)
■ S mode
●2.7L 4-cylinder (1AR-FE) engine: when the shift range is “5” or lower,
holding the shift lever toward “+” sets the shift range to “6”.
● 3.5L V6 (2GR-FE) engine: when the shift range is “4” or lower, holding
the shift lever toward “+” sets the shift range to “5”.
● To prevent excessive engine speed, a function was adopted that auto-
matically selects a higher shift range before engine speed becomes too
high.
● To protect the automatic transmission, a function is adopted that auto-
matically selects a higher shift range when the fluid temperature is high.
■ AI-SHIFT
AI-SHIFT automatically selects the suitable gear according to driver perfor-
mance and driving conditions.
AI-SHIFT automatically operates when the shift lever is in the D position.
(Shifting the shift lever to the S mode driving position cancels the function.)
The engine speed may remain high after releasing the accelerator pedal.
This does not indicate a malfunction.
Page 189 of 636
189
2-2. Instrument cluster
2
When driving
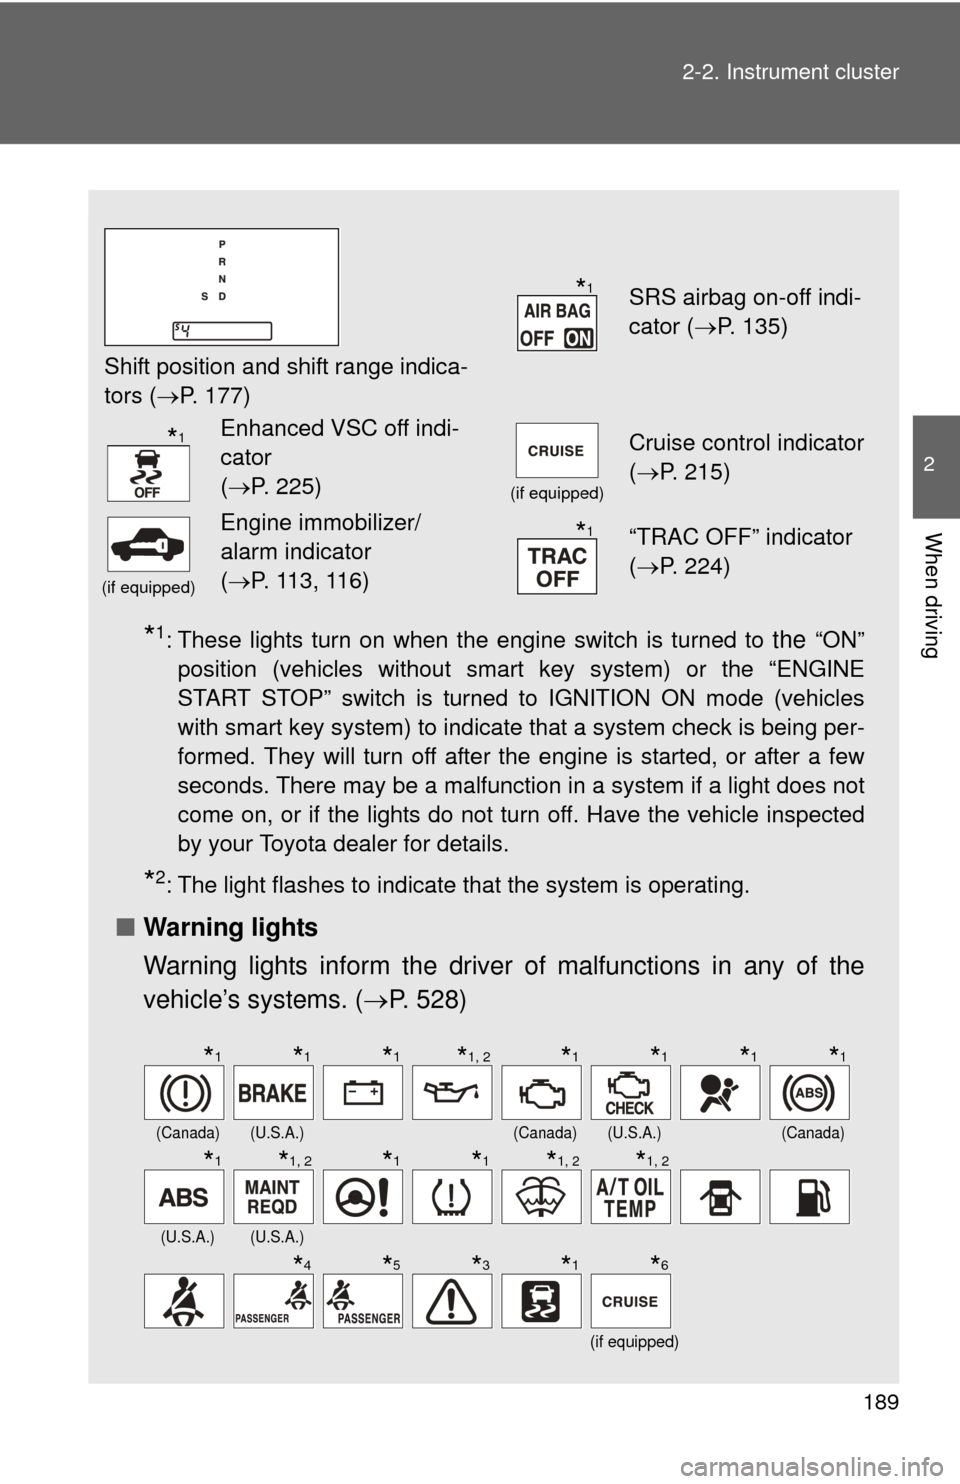
*1: These lights turn on when the engine switch is turned to the “ON”
position (vehicles without smart key system) or the “ENGINE
START STOP” switch is turned to IGNITION ON mode (vehicles
with smart key system) to indicate that a system check is being per-
formed. They will turn off after the engine is started, or after a few
seconds. There may be a malfunction in a system if a light does not
come on, or if the lights do not turn off. Have the vehicle inspected
by your Toyota dealer for details.
*2: The light flashes to indicate that the system is operating.
■ Warning lights
Warning lights inform the driver of malfunctions in any of the
vehicle’s systems. ( P. 528)
Shift position and shift range indica-
tors ( P. 177)
SRS airbag on-off indi-
cator (P. 135)
Enhanced VSC off indi-
cator
(P. 225)
(if equipped)
Cruise control indicator
( P. 215)
(if equipped)
Engine immobilizer/
alarm indicator
(P. 113, 116)“TRAC OFF” indicator
( P. 224)
(Canada)(U.S.A.)(Canada)(U.S.A.)(Canada)
(U.S.A.)(U.S.A.)
(if equipped)
*1
*1
*1
*1*1*1*1, 2*1*1*1*1
*1*1, 2*1*1*1, 2*1, 2
*4*5*3*1*6
Page 190 of 636
190 2-2. Instrument cluster
CAUTION
■If a safety system warning light does not come on
Should a safety system light such as the ABS and SRS airbag warning light
not come on when you start the engine, this could mean that these systems
are not available to help protect you in an accident, which could result in
death or serious injury. Have the vehicle inspected by your Toyota dealer
immediately if this occurs.
*1: These lights turn on when the engine switch is turned to the “ON”
position (vehicles without smart key system) or the “ENGINE
START STOP” switch is turned to IGNITION ON mode (vehicles
with smart key system) to indicate that a system check is being per-
formed. They will turn off after the engine is started, or after a few
seconds. There may be a malfunction in a system if a light does not
come on, or if the lights do not turn off. Have the vehicle inspected
by your Toyota dealer for details.
*2: Vehicles without multi-information display
*3: Vehicles with multi-information display
*4: Vehicles without navigation system
*5: Vehicles with navigation system
*6: The light flashes to indicate a malfunction.
Page 194 of 636
194 2-2. Instrument cluster
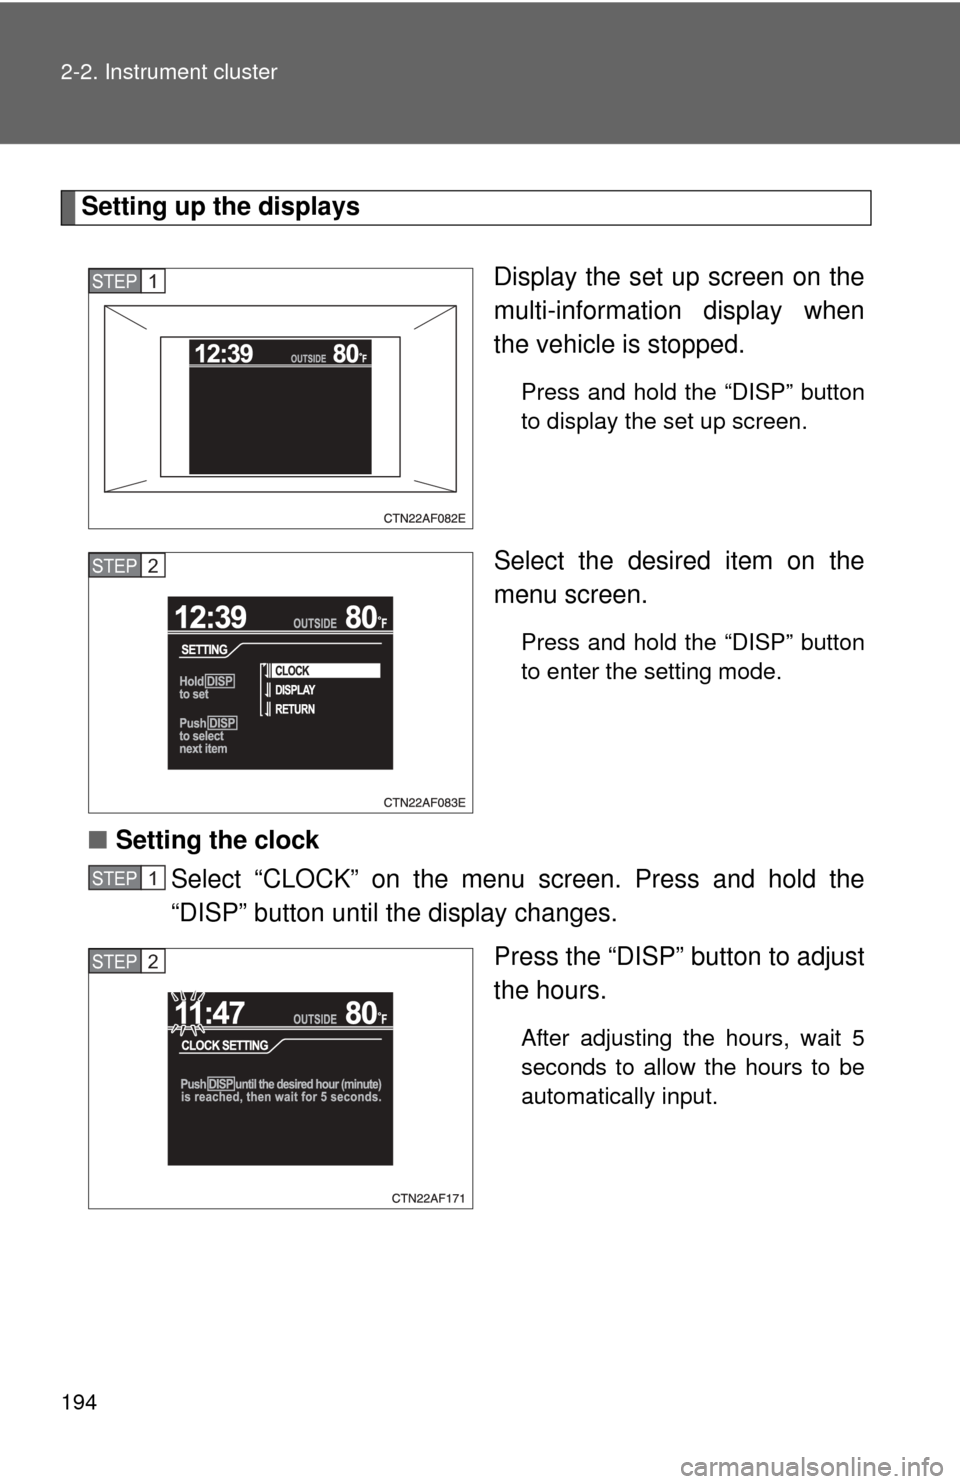
Setting up the displaysDisplay the set up screen on the
multi-information display when
the vehicle is stopped.
Press and hold the “DISP” button
to display the set up screen.
Select the desired item on the
menu screen.
Press and hold the “DISP” button
to enter the setting mode.
■Setting the clock
Select “CLOCK” on the menu screen. Press and hold the
“DISP” button until the display changes.
Press the “DISP” button to adjust
the hours.
After adjusting the hours, wait 5
seconds to allow the hours to be
automatically input.
STEP1
STEP2
STEP1
STEP2
Page 195 of 636
195
2-2. Instrument cluster
2
When driving
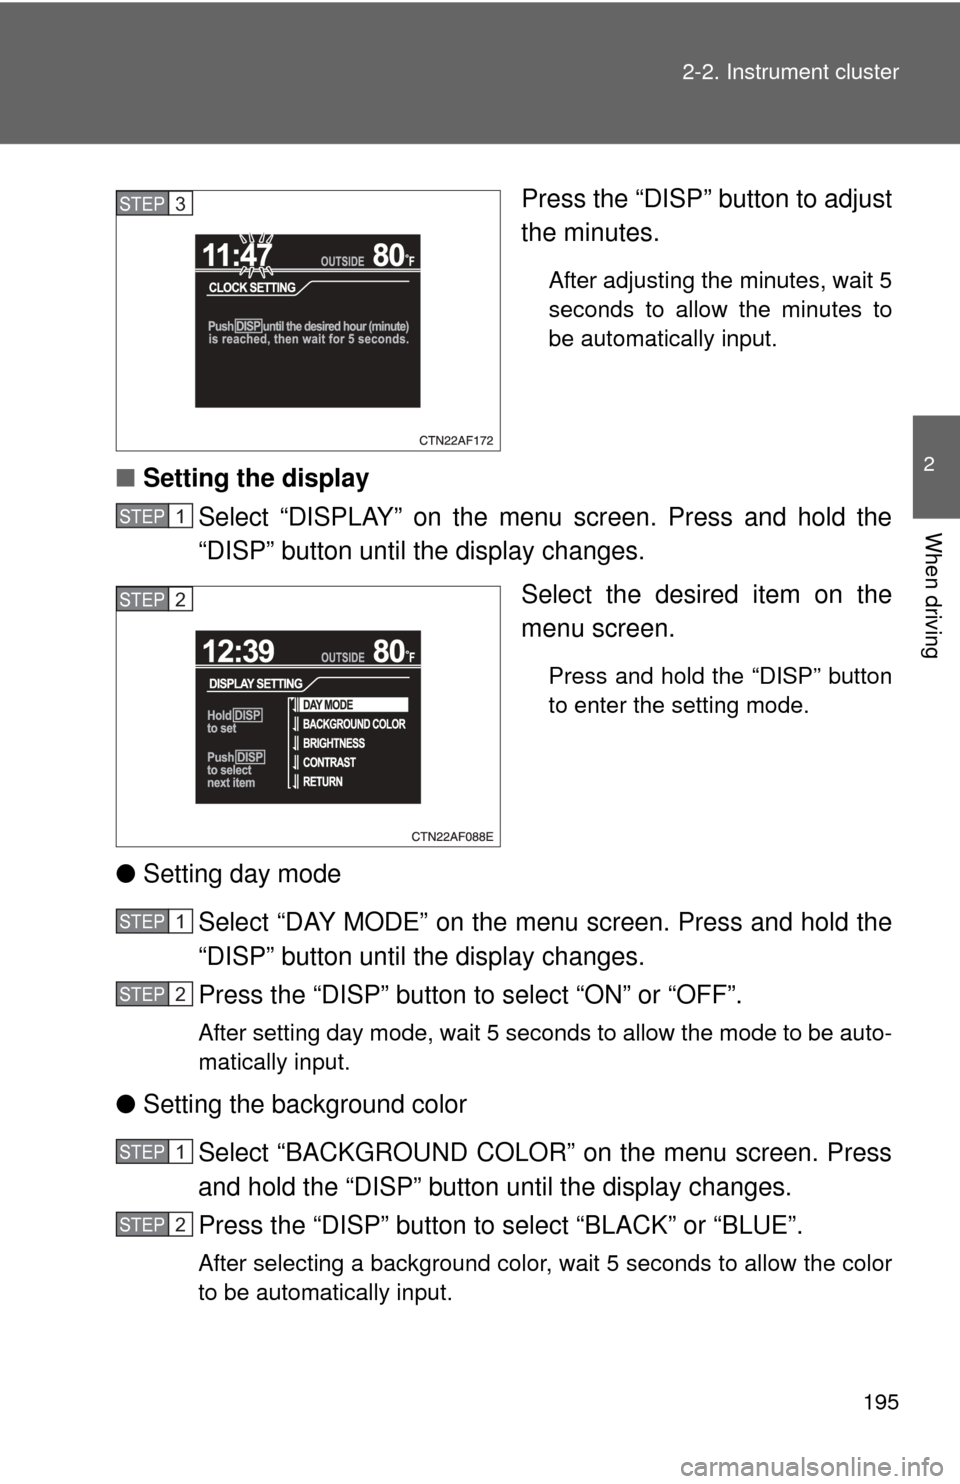
Press the “DISP” button to adjust
the minutes.
After adjusting the minutes, wait 5
seconds to allow the minutes to
be automatically input.
■
Setting the display
Select “DISPLAY” on the menu screen. Press and hold the
“DISP” button until the display changes.
Select the desired item on the
menu screen.
Press and hold the “DISP” button
to enter the setting mode.
●Setting day mode
Select “DAY MODE” on the menu screen. Press and hold the
“DISP” button until the display changes.
Press the “DISP” button to select “ON” or “OFF”.
After setting day mode, wait 5 seconds to allow the mode to be auto-
matically input.
●Setting the background color
Select “BACKGROUND COLOR” on the menu screen. Press
and hold the “DISP” button until the display changes.
Press the “DISP” button to select “BLACK” or “BLUE”.
After selecting a background color, wait 5 seconds to allow the color
to be automatically input.
STEP3
STEP1
STEP2
STEP1
STEP2
STEP1
STEP2
Page 197 of 636
197
2-2. Instrument cluster
2
When driving
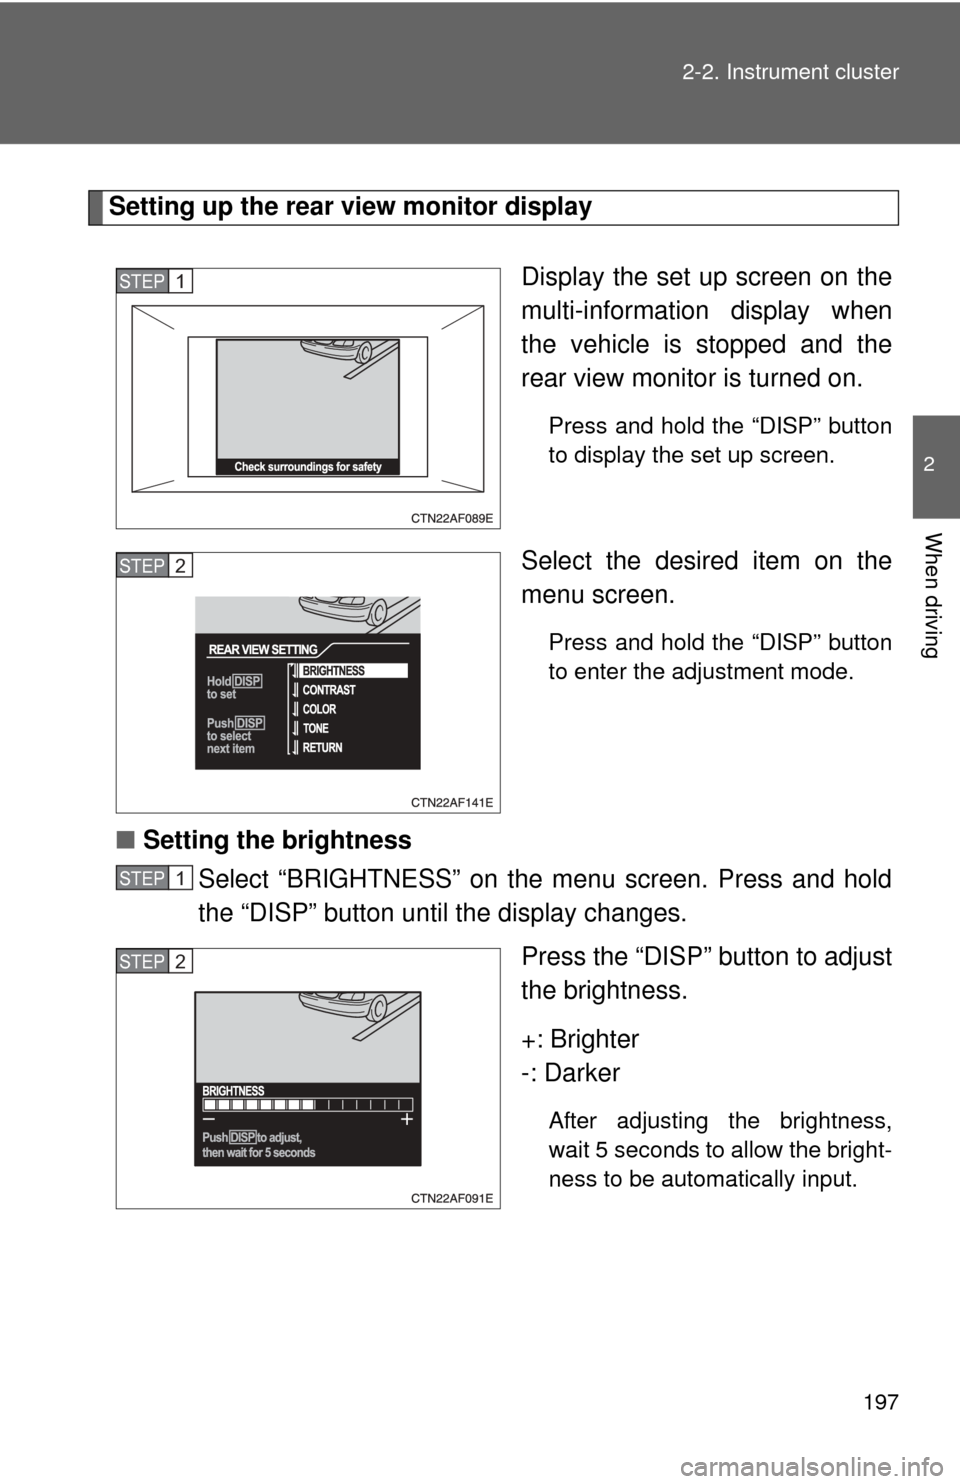
Setting up the rear view monitor display
Display the set up screen on the
multi-information display when
the vehicle is stopped and the
rear view monitor is turned on.
Press and hold the “DISP” button
to display the set up screen.
Select the desired item on the
menu screen.
Press and hold the “DISP” button
to enter the adjustment mode.
■Setting the brightness
Select “BRIGHTNESS” on the menu screen. Press and hold
the “DISP” button until the display changes.
Press the “DISP” button to adjust
the brightness.
+: Brighter
-: Darker
After adjusting the brightness,
wait 5 seconds to allow the bright-
ness to be automatically input.
STEP1
STEP2
STEP1
STEP2
Page 205 of 636
205
2-3. Operating the lights and wipers
2
When driving
■
Automatic light off system
Vehicles without smart key system
● When the headlights come on: The headlights and tail lights turn off 30
seconds after a door is opened and closed if the engine switch is turned
to the “ACC” or “LOCK” position. (The lights turn off immediately if
on the wireless remote control is pressed after all the doors are
locked.)
● When only the tail lights come on: The tail lights turn off automatically if
the engine switch is turned to the “ACC” or “LOCK” position and the
driver’s door is opened.
To turn the lights on again, turn the engine switch to the “ON” position, or
turn the light switch off and then back to or .
Vehicles with smart key system
● When the headlights come on: The headlights and tail lights turn off 30
seconds after a door is opened and closed if the “ENGINE START
STOP” switch is turned to ACCESSORY mode or turned off. (The lights
turn off immediately if on the key is pressed after all the doors are
locked.)
● When only the tail lights come on: The tail lights turn off automatically if
the “ENGINE START STOP” switch is turned to ACCESSORY mode or
turned off and the driver’s door is opened.
To turn the lights on again, turn the “ENGINE START STOP” switch to IGNI-
TION ON mode, or turn the light switch off and then back to or
.
■ Customization that can be co nfigured at Toyota dealer
Settings (e.g. daytime running light system) can be changed.
(Customizable features P. 602)
NOTICE
■To prevent battery discharge
Do not leave the lights on longer than necessary when the engine is not run-
ning.
Page 273 of 636
273
3-1. Using the air conditioning system
and defogger
3
Interior features
■Using the system in recirculated air mode
The windows will fog up more easily if the recirculated air mode is used for
an extended period.
■ Window defogger feature
In order to prevent the windows from fogging up, recirculated air mode may
automatically switch to outside air mode if the ambient temperature drops.
This feature can be canceled by pushing and holding the air intake mode
switch for longer than 2 seconds. The feature will be reactivated when the
engine switch is turned to the “ACC” or “LOCK” position.
■ When outside air temperature approaches 32°F (0°C)
The air conditioning system may not operate even when is pressed.
■ When the indicator light on flashes (2.7 L 4-cylinder [1AR-FE]
engine only)
Press
and turn off the air conditioning system before turning it on
once more. There may be a problem in the air conditioning system if the indi-
cator light continues to flash. Turn the air conditioning system off and have it
inspected by your Toyota dealer.
■ When
is selected for the air outlets used
For your driving comfort, air flowing to the feet may be warmer than air flow-
ing to the upper body depending on the position of the temperature adjust-
ment dial.
■ Air conditioning odors
●During use, various odors from inside and outside the vehicle may enter
into and accumulate in the air conditioning system. This may then cause
odor to be emitted from the vents.
● To reduce potential odors from occurring:
It is recommended that the air conditioning system be set to outside air
mode prior to turning the vehicle off.