fuse TOYOTA HIGHLANDER HYBRID 2022 Owners Manual
[x] Cancel search | Manufacturer: TOYOTA, Model Year: 2022, Model line: HIGHLANDER HYBRID, Model: TOYOTA HIGHLANDER HYBRID 2022Pages: 572, PDF Size: 14.5 MB
Page 4 of 572
4TABLE OF CONTENTS
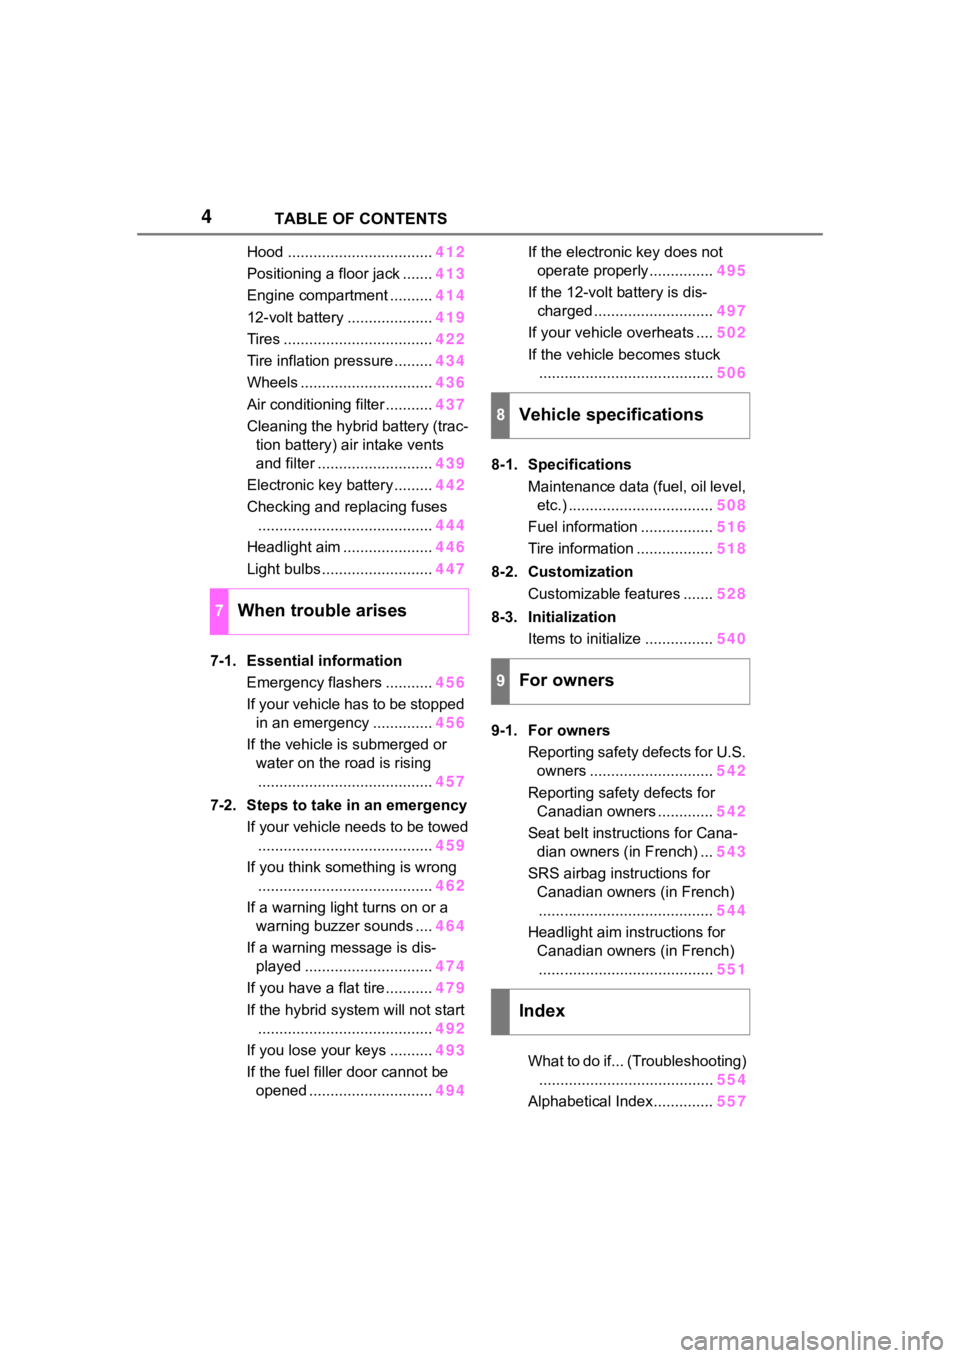
Hood ..................................412
Positioning a floor jack ....... 413
Engine compartment .......... 414
12-volt battery .................... 419
Tires ................................... 422
Tire inflation pressure......... 434
Wheels ............................... 436
Air conditioning filter ........... 437
Cleaning the hybrid battery (trac- tion battery) air intake vents
and filter ........................... 439
Electronic key battery ......... 442
Checking and replacing fuses ......................................... 444
Headlight aim ..................... 446
Light bulbs .......................... 447
7-1. Essential information Emergency flashers ........... 456
If your vehicle has to be stopped in an emergency .............. 456
If the vehicle is submerged or water on the road is rising
......................................... 457
7-2. Steps to take in an emergency If your vehicle needs to be towed......................................... 459
If you think something is wrong ......................................... 462
If a warning light turns on or a warning buzzer sounds .... 464
If a warning message is dis- played .............................. 474
If you have a flat tire ........... 479
If the hybrid system will not start ......................................... 492
If you lose your keys .......... 493
If the fuel filler door cannot be opened ............................. 494If the electronic key does not
operate properly............... 495
If the 12-volt battery is dis- charged ............................ 497
If your vehicle overheats .... 502
If the vehicle becomes stuck ......................................... 506
8-1. Specifications Maintenance data (fuel, oil level, etc.) .................................. 508
Fuel information ................. 516
Tire information .................. 518
8-2. Customization Customizable features ....... 528
8-3. Initialization Items to initialize ................ 540
9-1. For owners Reporting safety defects for U.S. owners ............................. 542
Reporting safety defects for Canadian owners ............. 542
Seat belt instructions for Cana- dian owners (in French) ... 543
SRS airbag instructions for Canadian owners (in French)......................................... 544
Headlight aim instructions for Canadian owners (in French)
........ ................................. 551
What
to do if... (Troubleshooting)
......................................... 554
Alphabetical Index.............. 557
7When trouble arises
8Vehicle specifications
9For owners
Index
Page 397 of 572
397
6
6
Maintenance and care
Maintenance and care
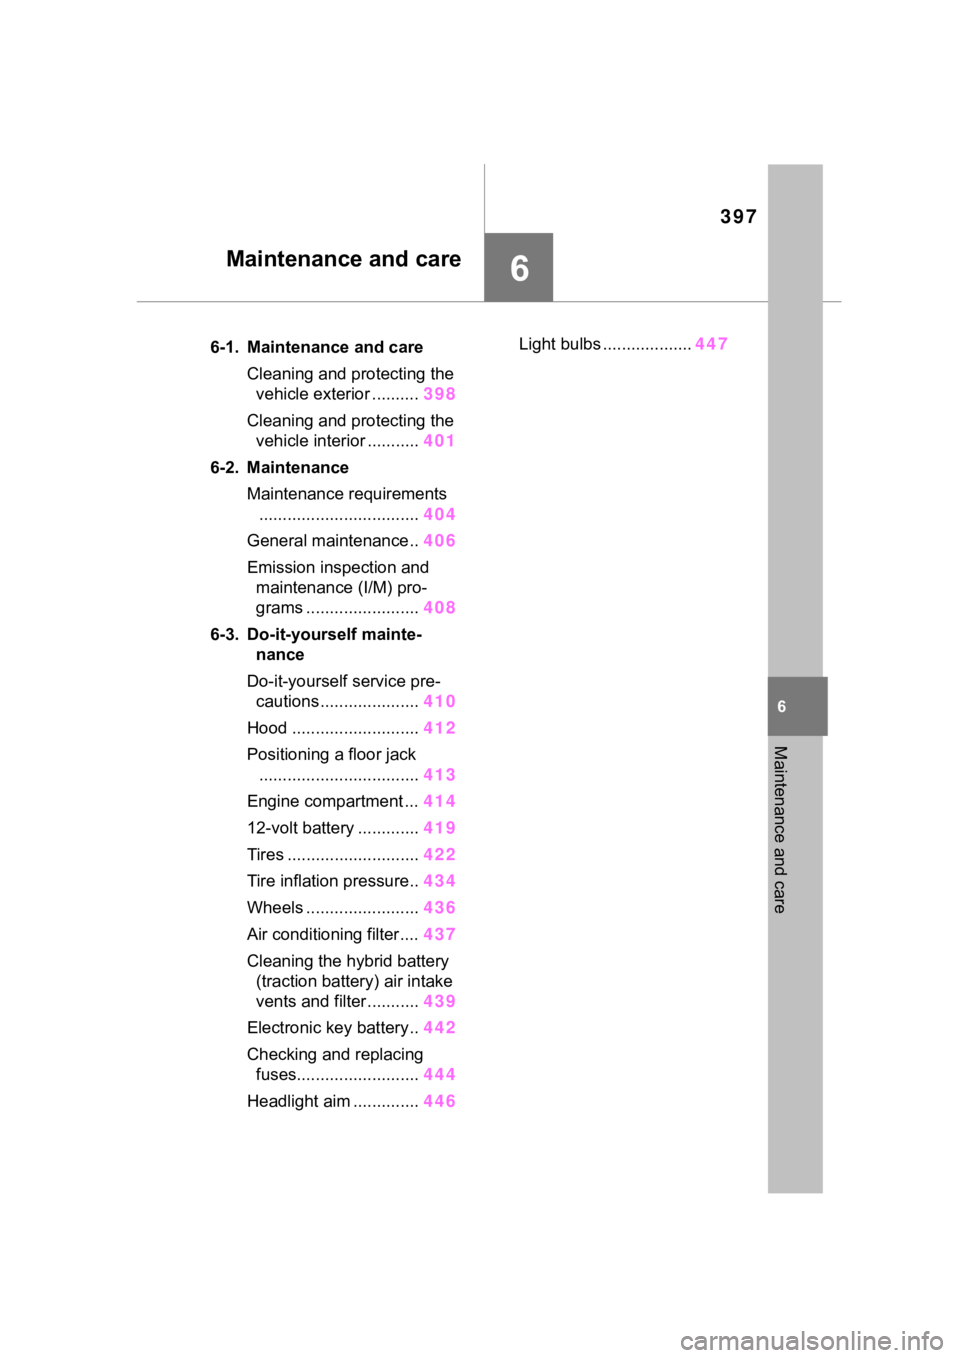
.6-1. Maintenance and careCleaning and protecting the vehicle exterior .......... 398
Cleaning and protecting the vehicle interior ........... 401
6-2. Maintenance Maintenance requirements.................................. 404
General maintenance.. 406
Emission inspection and maintenance (I/M) pro-
grams ........................ 408
6-3. Do-it-yourself mainte- nance
Do-it-yourself service pre- cautions ..................... 410
Hood ........................... 412
Positioning a floor jack .................................. 413
Engine compartment ... 414
12-volt battery ............. 419
Tires ............................ 422
Tire inflation pressure.. 434
Wheels ......... ...............436
Air conditioning filter .... 437
Cleaning the hybrid battery (traction battery) air intake
vents and filter ........... 439
Electronic key battery.. 442
Checking and replacing fuses.......................... 444
Headlight aim .............. 446Light bulbs ...................
447
Page 410 of 572
4106-3. Do-it-yourself maintenance
6-3.Do-it-yourself maintenance
Do-it-yourself ser vice
precautions
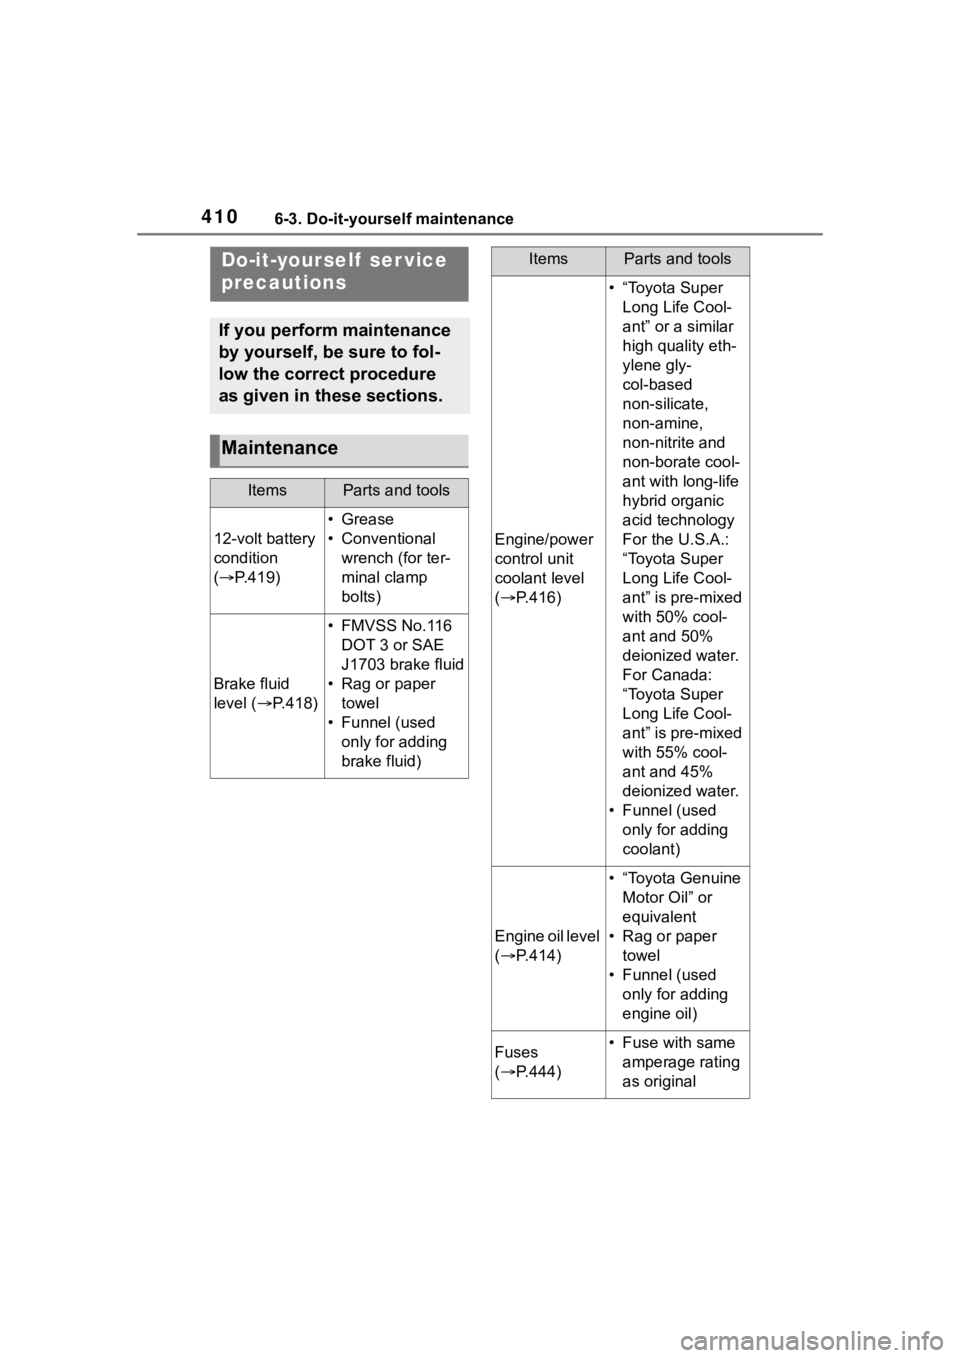
If you perform maintenance
by yourself, be sure to fol-
low the correct procedure
as given in these sections.
Maintenance
ItemsParts and tools
12-volt battery
condition
( P.419)
•Grease
• Conventional
wrench (for ter-
minal clamp
bolts)
Brake fluid
level ( P.418)
• FMVSS No.116
DOT 3 or SAE
J1703 brake fluid
• Rag or paper towel
• Funnel (used only for adding
brake fluid)
Engine/power
control unit
coolant level
( P.416)
• “Toyota Super
Long Life Cool-
ant” or a similar
high quality eth-
ylene gly-
col-based
non-silicate,
non-amine,
non-nitrite and
non-borate cool-
ant with long-life
hybrid organic
acid technology
For the U.S.A.:
“Toyota Super
Long Life Cool-
ant” is pre-mixed
with 50% cool-
ant and 50%
deionized water.
For Canada:
“Toyota Super
Long Life Cool-
ant” is pre-mixed
with 55% cool-
ant and 45%
deionized water.
• Funnel (used only for adding
coolant)
Engine oil level
( P.414)
• “Toyota Genuine
Motor Oil” or
equivalent
• Rag or paper towel
• Funnel (used only for adding
engine oil)
Fuses
( P.444)• Fuse with same
amperage rating
as original
ItemsParts and tools
Page 414 of 572
4146-3. Do-it-yourself maintenance
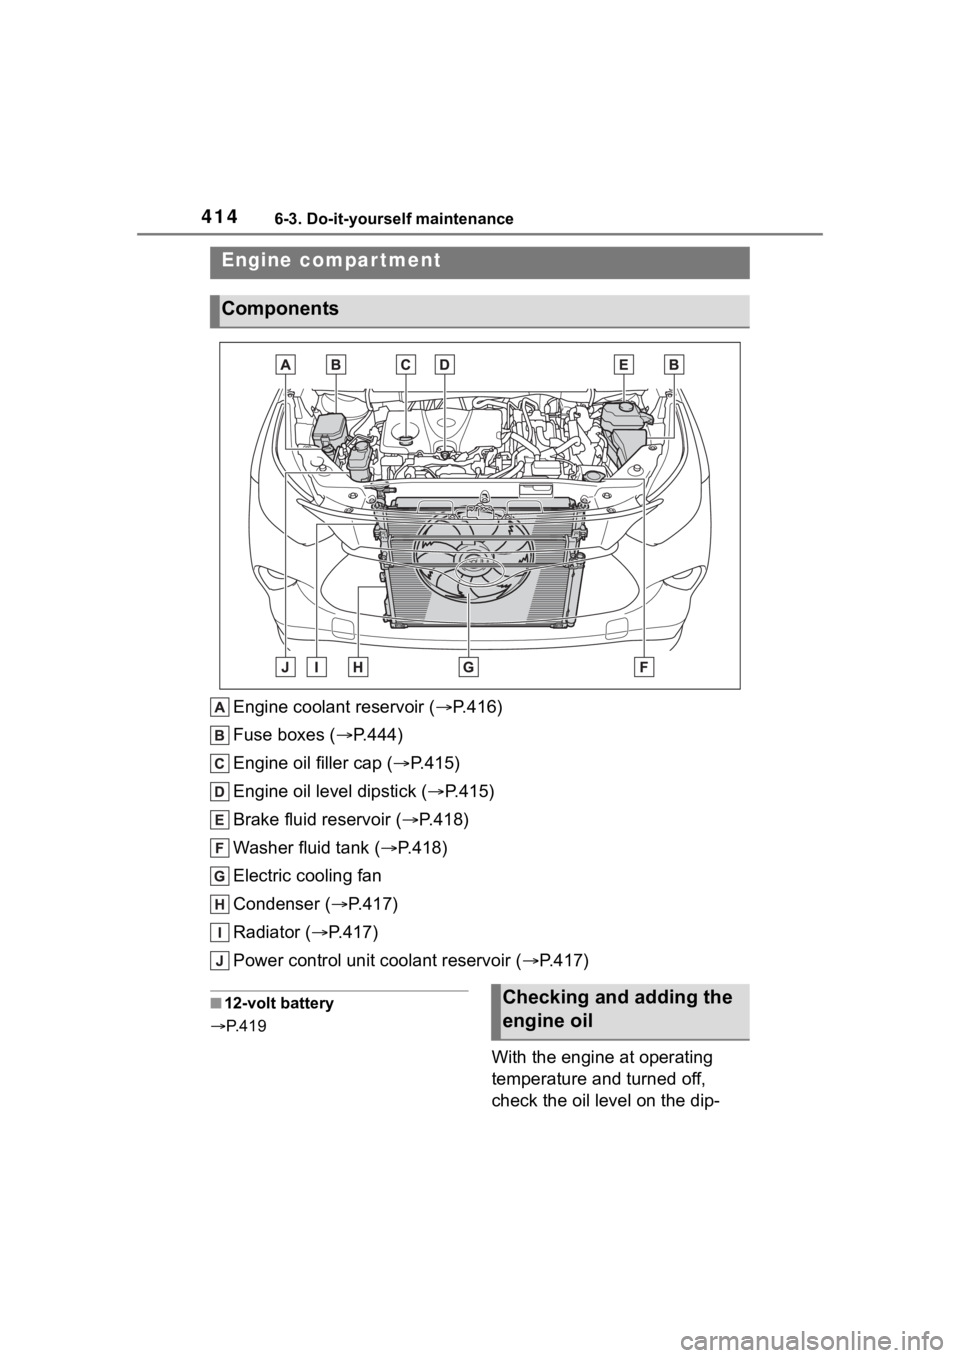
Engine coolant reservoir ( P.416)
Fuse boxes ( P.444)
Engine oil filler cap ( P.415)
Engine oil level dipstick ( P.415)
Brake fluid reservoir ( P.418)
Washer fluid tank ( P.418)
Electric cooling fan
Condenser ( P.417)
Radiator ( P.417)
Power control unit coolant reservoir ( P.417)
■12-volt battery
P. 4 1 9
With the engine at operating
temperature and turned off,
check the oil level on the dip-
Engine compar tment
Components
Checking and adding the
engine oil
Page 444 of 572
4446-3. Do-it-yourself maintenance
1Turn the power switch off.
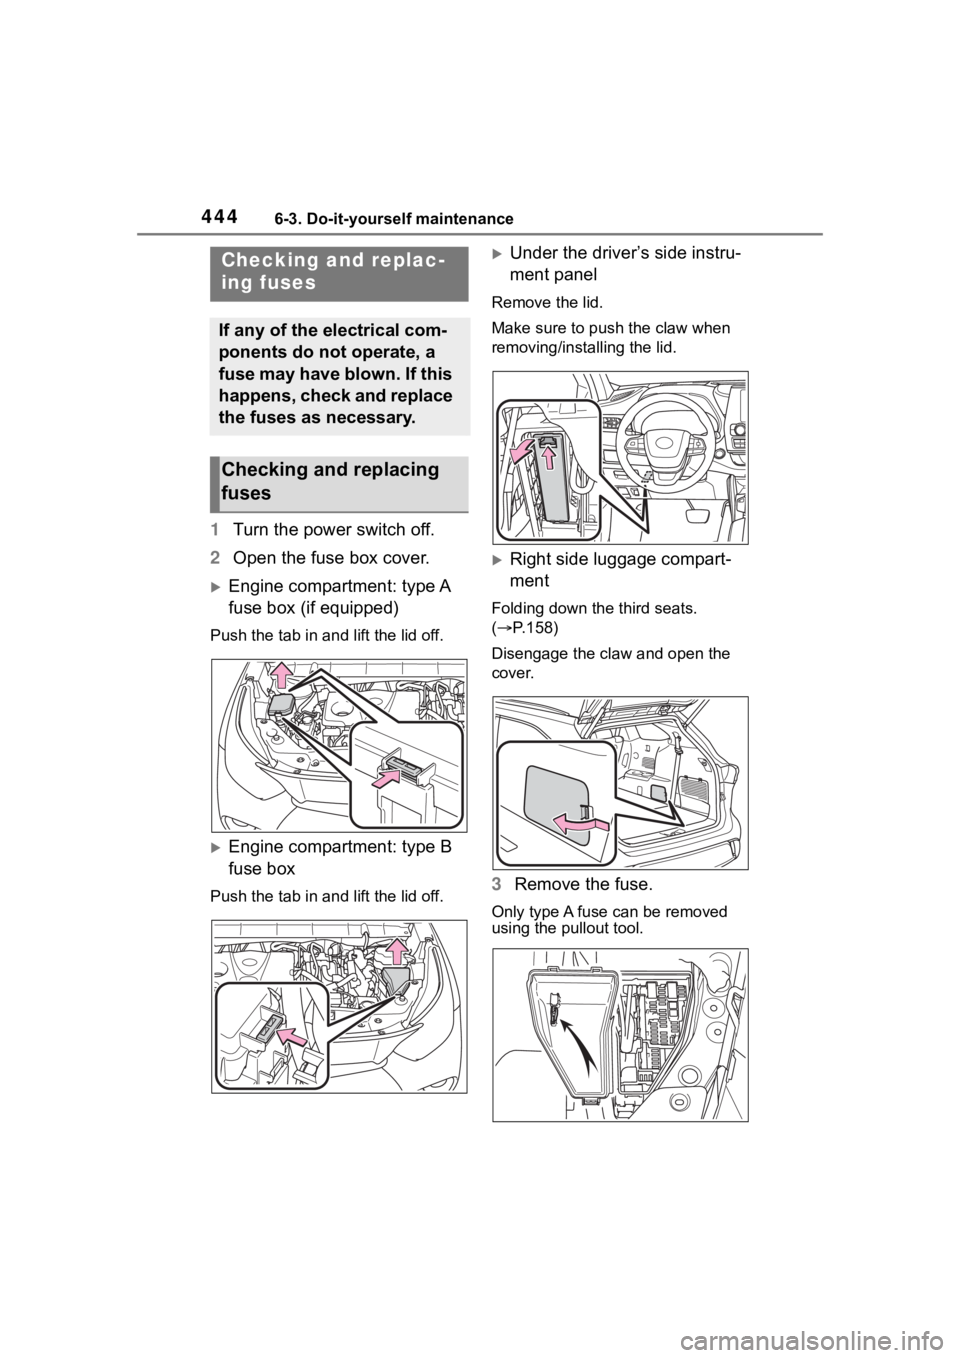
2 Open the fuse box cover.
Engine compartment: type A
fuse box (if equipped)
Push the tab in and lift the lid off.
Engine compartment: type B
fuse box
Push the tab in and lift the lid off.
Under the driver’s side instru-
ment panel
Remove the lid.
Make sure to push the claw when
removing/installing the lid.
Right side luggage compart-
ment
Folding down the third seats.
( P.158)
Disengage the claw and open the
cover.
3 Remove the fuse.
Only type A fuse can be removed
using the pullout tool.
Checking and replac-
ing fuses
If any of the electrical com-
ponents do not operate, a
fuse may have blown. If this
happens, check and replace
the fuses as necessary.
Checking and replacing
fuses
Page 445 of 572
4456-3. Do-it-yourself maintenance
6
Maintenance and care
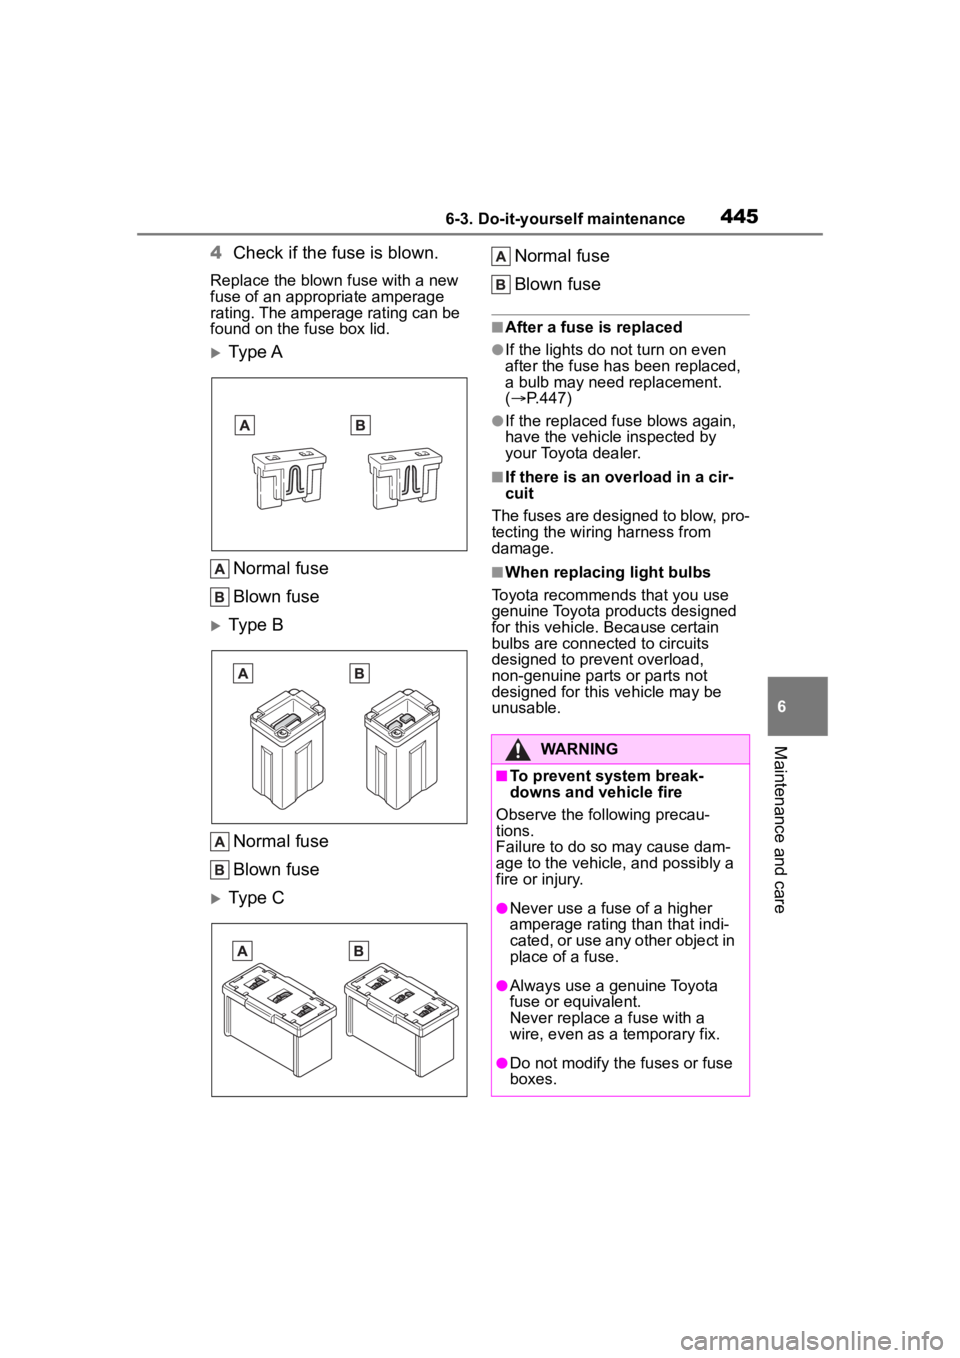
4Check if the fuse is blown.
Replace the blown fuse with a new
fuse of an appropriate amperage
rating. The amperage rating can be
found on the fuse box lid.
Ty p e A
Normal fuse
Blown fuse
Type B
Normal fuse
Blown fuse
Type C Normal fuse
Blown fuse
■After a fuse is replaced
●If the lights do not turn on even
after the fuse has been replaced,
a bulb may need replacement.
(
P.447)
●If the replaced fuse blows again,
have the vehicle inspected by
your Toyota dealer.
■If there is an ove rload in a cir-
cuit
The fuses are designed to blow, pro-
tecting the wiring harness from
damage.
■When replacing light bulbs
Toyota recommends that you use
genuine Toyota pr oducts designed
for this vehicle. Because certain
bulbs are connected to circuits
designed to prevent overload,
non-genuine parts or parts not
designed for this vehicle may be
unusable.
WARNING
■To prevent system break-
downs and vehicle fire
Observe the following precau-
tions.
Failure to do so may cause dam-
age to the vehicle, and possibly a
fire or injury.
●Never use a fuse of a higher
amperage rating than that indi-
cated, or use any other object in
place of a fuse.
●Always use a genuine Toyota
fuse or equivalent.
Never replace a fuse with a
wire, even as a temporary fix.
●Do not modify the fuses or fuse
boxes.
Page 446 of 572
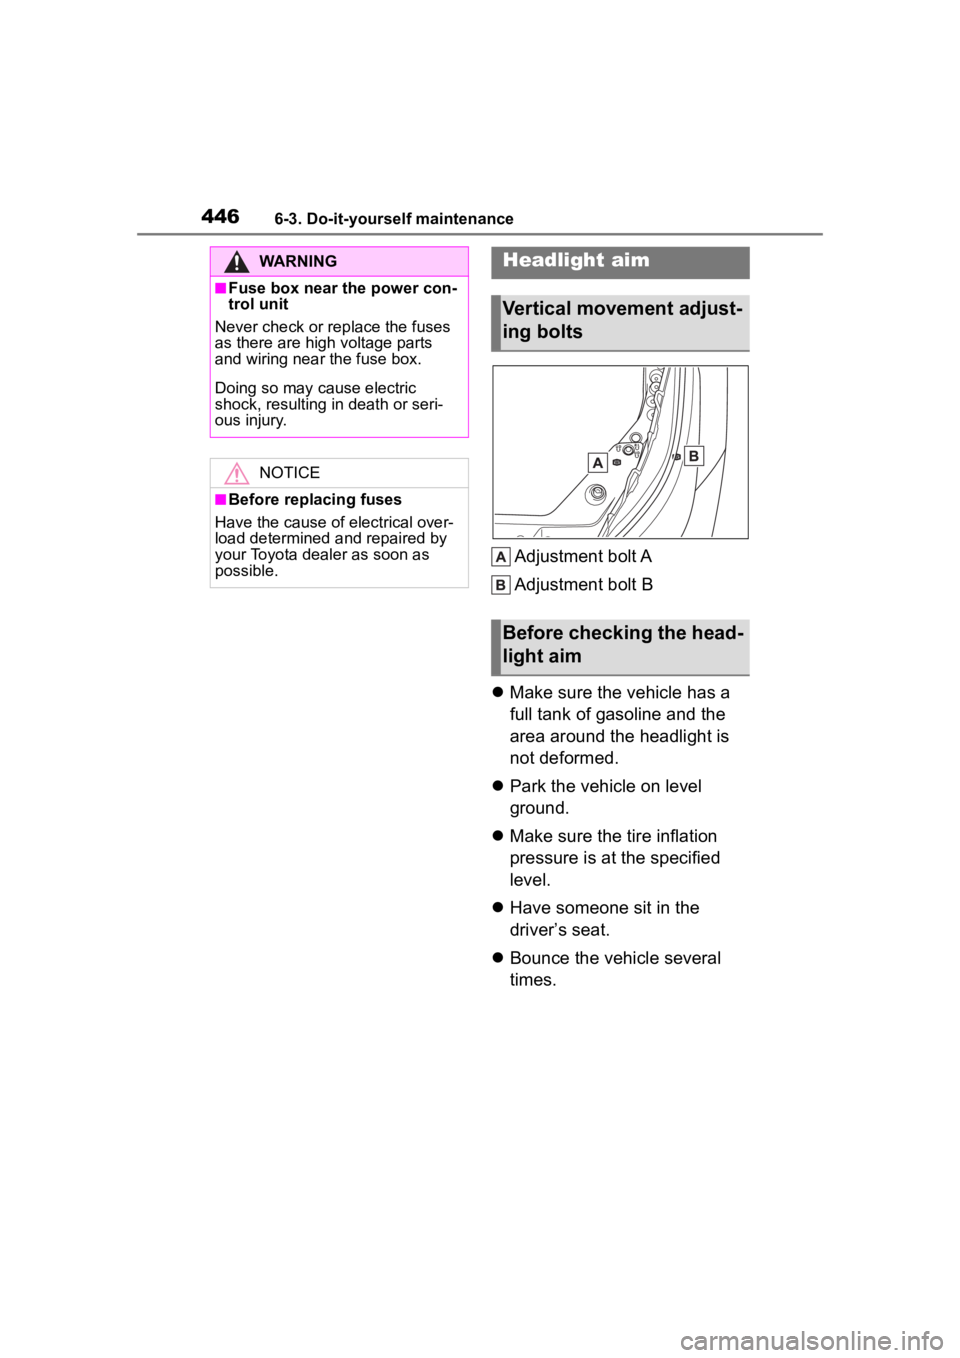
4466-3. Do-it-yourself maintenance
Adjustment bolt A
Adjustment bolt B
Make sure the vehicle has a
full tank of gasoline and the
area around the headlight is
not deformed.
Park the vehicle on level
ground.
Make sure the tire inflation
pressure is at the specified
level.
Have someone sit in the
driver’s seat.
Bounce the vehicle several
times.
WARNING
■Fuse box near the power con-
trol unit
Never check or replace the fuses
as there are high voltage parts
and wiring near the fuse box.
Doing so may cause electric
shock, resulting in death or seri-
ous injury.
NOTICE
■Before replacing fuses
Have the cause of electrical over-
load determined and repaired by
your Toyota dealer as soon as
possible.
Headlight aim
Vertical movement adjust-
ing bolts
Before checking the head-
light aim
Page 492 of 572
4927-2. Steps to take in an emergency
One of the following may be the
cause of the problem:
The electronic key may not be
functioning properly.
( P.495)
There may not be sufficient
fuel in the vehicle’s tank.
Refuel the vehicle.
There may be a malfunction
in the immobilizer system.
( P. 7 9 )
The hybrid system may be
malfunctioning due to an elec-
trical problem such as elec-
tronic key battery depletion or
a blown fuse. However,
depending on the type of mal-
function, an interim measure
is available to start the hybrid
system. ( P.492) One of the following may be the
cause of the problem:
The 12-volt battery may be
discharged. ( P.497)
The 12-volt battery terminal
connections may be loose or
corroded. ( P.419)
One of the following may be the
cause of the problem:
One or both of the 12-volt bat-
tery terminals may be discon-
nected. ( P.419)
The 12-volt battery may be
discharged. ( P.497)
Contact your Toyota dealer if the
problem cannot be repaired, or if
repair procedures are unknown.
When the hybrid system does
not start, the following steps can
be used as an interim measure
to start the hybrid system if the
power switch is functioning nor-
mally.
Do not use this starting proce-
If the hybrid system
will not start
Reasons for the hybrid sys-
tem not starting vary
depending on the situation.
Check the following and
perform the appropriate
procedure:
The hybrid system will not
start even though the cor-
rect starting procedure is
being followed. ( P.213)
The interior lights and
headlights are dim, or the
horn does not sound or
sounds at a low volume.
The interior lights and
headlights do not turn on,
or the horn does not
sound.
Starting the hybrid sys-
tem in an emergency
Page 497 of 572
4977-2. Steps to take in an emergency
7
When trouble arises
If you have a set of jumper (or
booster) cables and a second
vehicle with a 12-volt battery,
you can jump start your vehicle
by following the steps below.
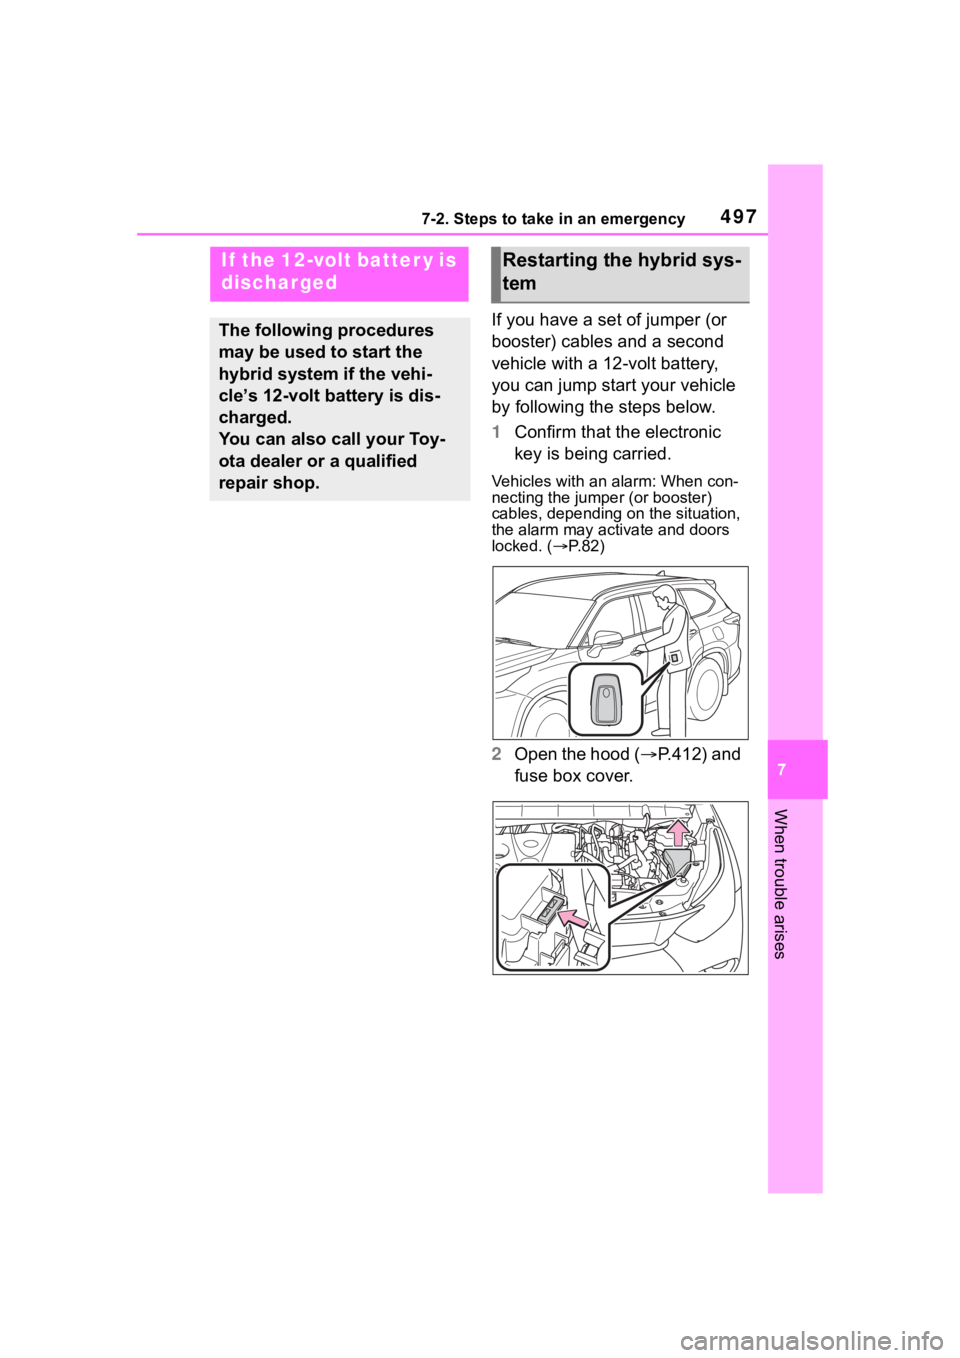
1Confirm that the electronic
key is being carried.
Vehicles with an alarm: When con-
necting the jumper (or booster)
cables, depending on the situation,
the alarm may activate and doors
locked. ( P. 8 2 )
2 Open the hood ( P.412) and
fuse box cover.
If the 12-volt batter y is
discharged
The following procedures
may be used to start the
hybrid system if the vehi-
cle’s 12-volt battery is dis-
charged.
You can also call your Toy-
ota dealer or a qualified
repair shop.
Restarting the hybrid sys-
tem
Page 499 of 572
4997-2. Steps to take in an emergency
7
When trouble arises
6Open and close any of the
doors of your vehicle with the
power switch OFF.
7 Maintain the engine speed of
the second vehicle and start
the hybrid system of your
vehicle by turning the power
switch to ON.
8 Make sure the “READY” indi-
cator comes on. If the indica-
tor light does not come on,
contact your Toyota dealer.
9 Once the hybrid system has
started, remove the jumper
cables in the exact reverse
order from which they were
connected.
10 Close the exclusive jump
starting terminal cover, and
reinstall the fuse box cover to
its original position.
Once the hybrid system starts,
have the vehicle inspected at
your Toyota dealer as soon as
possible.
■Starting the hybrid system
when the 12-volt battery is dis-
charged
The hybrid system cannot be started
by push-starting.
■To prevent 12-volt battery dis-
charge
●Turn off the headlights and the
audio system while the hybrid sys-
tem is off.
●Turn off any unnecessary electri-
cal components when the vehicle
is running at a low speed for an
extended period, such as in heavy
traffic.
■When the 12-volt battery is
removed or discharged
●Information stored in the ECU is
cleared. When the 12-volt battery
is depleted, have the vehicle
inspected at your Toyota dealer.
●Some systems may require initial-
ization. ( P.540)
■When removing the 12-volt bat-
tery terminals
When the 12-volt battery terminals
are removed, the information stored
in the ECU is cleared. Before
removing the 12-vo lt battery termi-
nals, contact you r Toyota dealer.
■Charging the 12-volt battery
The electricity stored in the 12-volt
battery will discha rge gradually even
when the vehicle i s not in use, due
to natural dischar ge and the drain-
ing effects of certain electrical appli-
ances. If the vehicle is left for a long
time, the 12-volt battery may dis-
charge, and the hybrid system may
be unable to start. (The 12-volt bat-
tery recharges automatically while
the hybrid system is operating.)
■When recharging or replacing
the 12-volt battery
●In some cases, it may not be pos-
sible to unlock the doors using the
smart key system when the
12-volt battery is discharged. Use
the wireless remote control or the
mechanical key to lock or unlock
the doors.
●The hybrid syste m may not start
on the first attempt after the
12-volt battery has recharged but
will start normally after the second
attempt. This is not a malfunction.
●The power switch mode is memo-
rized by the vehicle. When the
12-volt battery is reconnected, the
system will return to the mode it
was in before the 12-volt battery
was discharged. Before discon-
necting the 12-volt battery, turn
the power switch off.
If you are unsure what mode the