Front wheel TOYOTA PRIUS C 2012 NHP10 / 1.G User Guide
[x] Cancel search | Manufacturer: TOYOTA, Model Year: 2012, Model line: PRIUS C, Model: TOYOTA PRIUS C 2012 NHP10 / 1.GPages: 552, PDF Size: 8.27 MB
Page 123 of 552
123
1-8. Safety information
1
Before driving
●
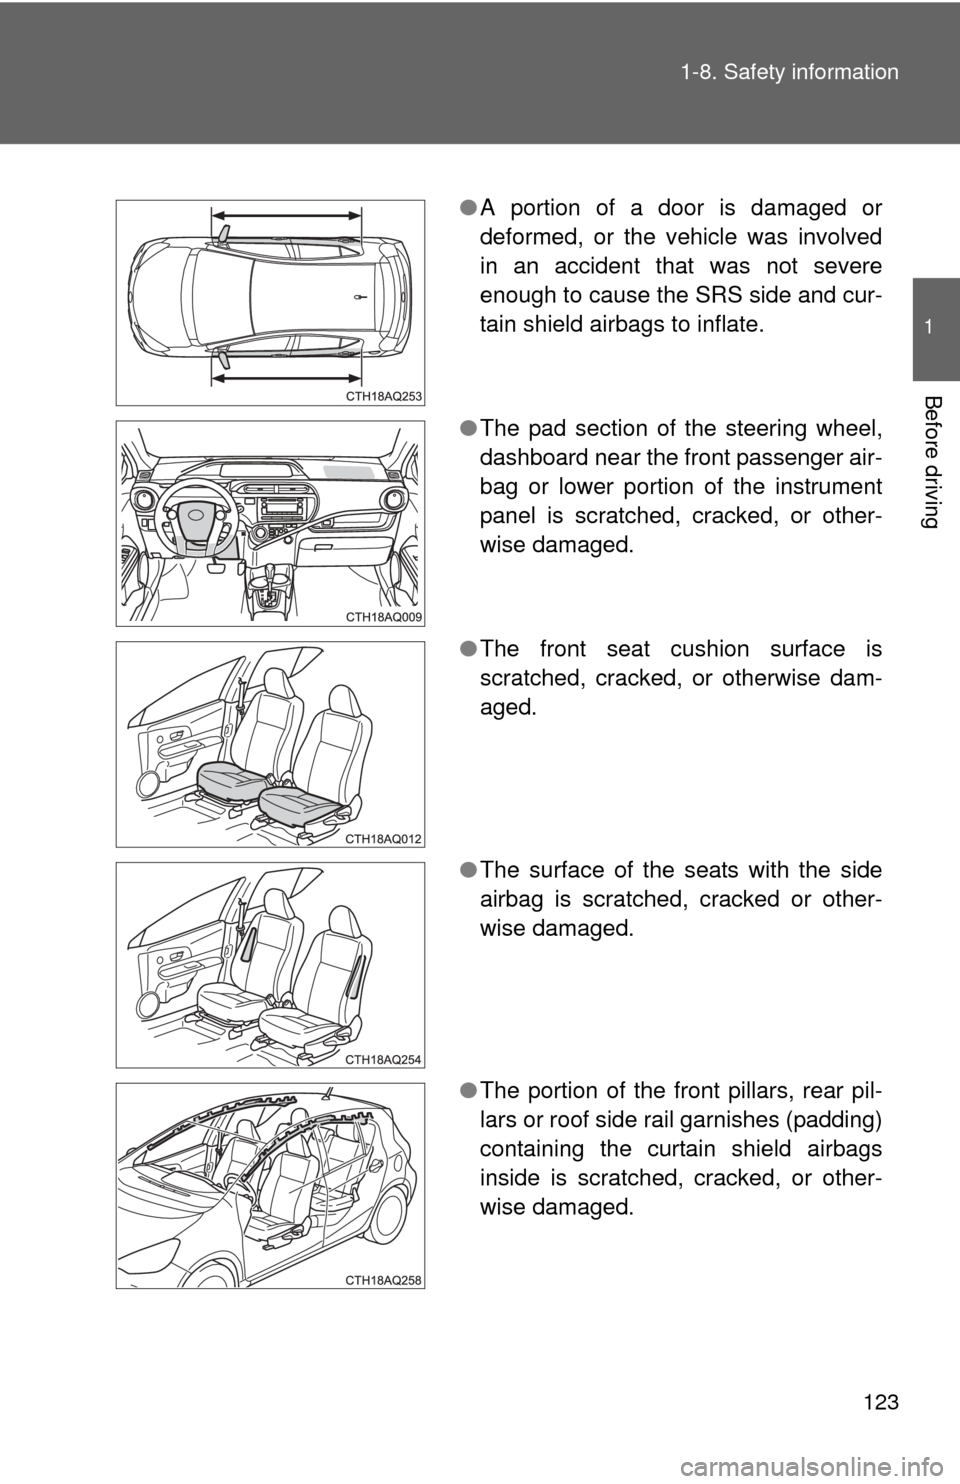
A portion of a door is damaged or
deformed, or the vehicle was involved
in an accident that was not severe
enough to cause the SRS side and cur-
tain shield airbags to inflate.
● The pad section of the steering wheel,
dashboard near the front passenger air-
bag or lower portion of the instrument
panel is scratched, cracked, or other-
wise damaged.
● The front seat cushion surface is
scratched, cracked, or otherwise dam-
aged.
● The surface of the seats with the side
airbag is scratched, cracked or other-
wise damaged.
● The portion of the front pillars, rear pil-
lars or roof side rail garnishes (padding)
containing the curtain shield airbags
inside is scratched, cracked, or other-
wise damaged.
Page 126 of 552
126 1-8. Safety information
CAUTION
■SRS airbag precautions
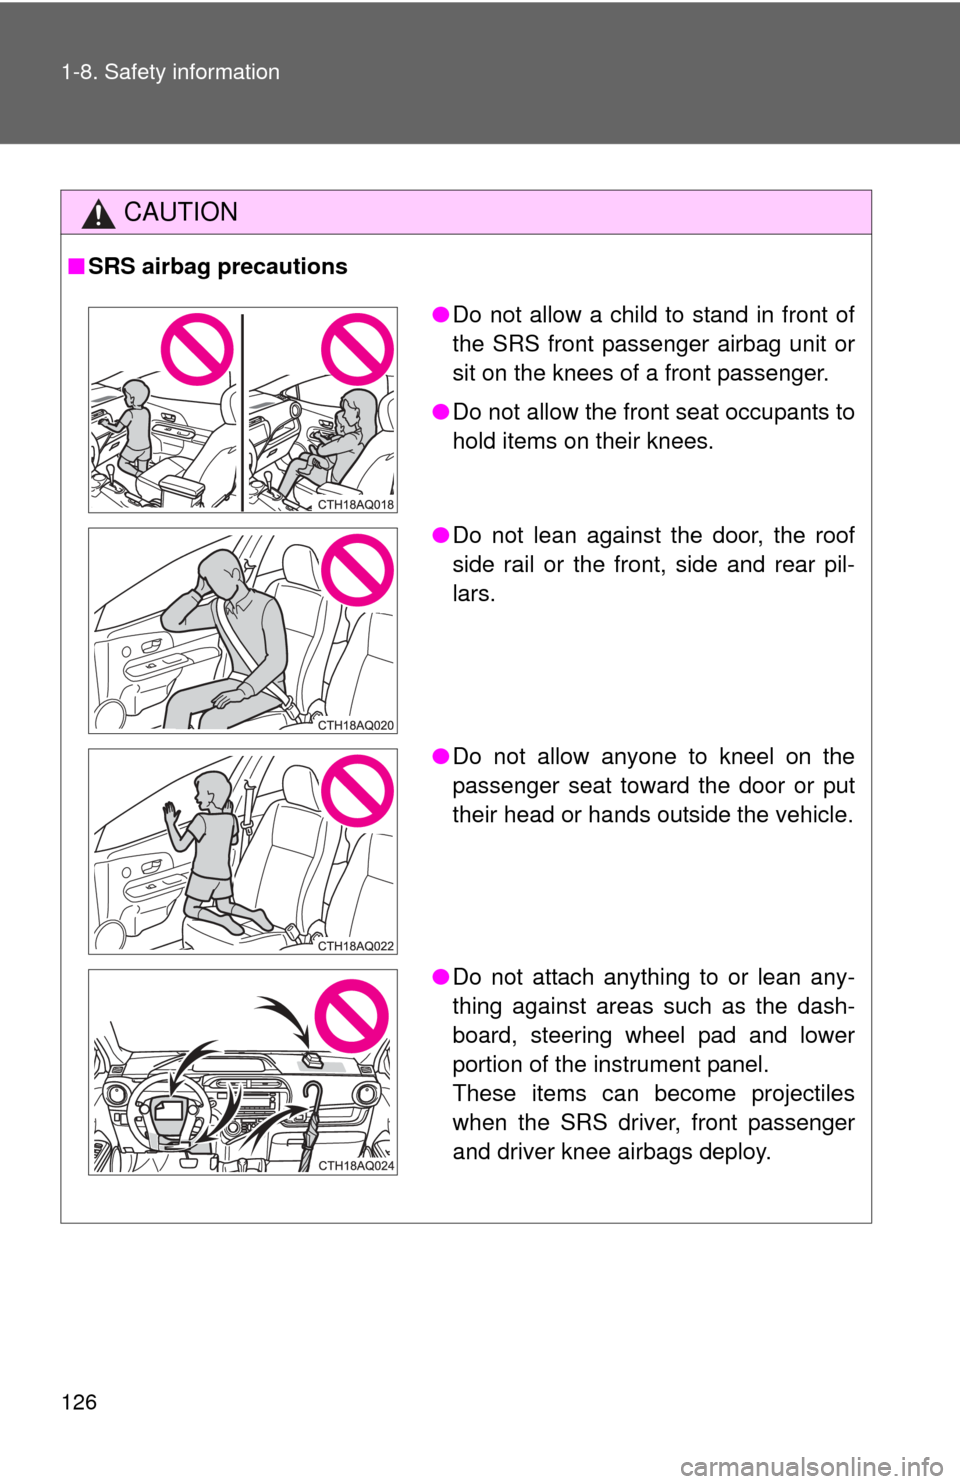
●Do not allow a child to stand in front of
the SRS front passenger airbag unit or
sit on the knees of a front passenger.
● Do not allow the front seat occupants to
hold items on their knees.
● Do not lean against the door, the roof
side rail or the front, side and rear pil-
lars.
● Do not allow anyone to kneel on the
passenger seat toward the door or put
their head or hands outside the vehicle.
● Do not attach anything to or lean any-
thing against areas such as the dash-
board, steering wheel pad and lower
portion of the instrument panel.
These items can become projectiles
when the SRS driver, front passenger
and driver knee airbags deploy.
Page 128 of 552

128 1-8. Safety information
CAUTION
■SRS airbag precautions
●If breathing becomes difficult after the SRS airbags have deployed, open a
door or window to allow fresh air in, or leave the vehicle if it is safe to do
so. Wash off any residue as soon as possible to prevent skin irritation.
● If the areas where the SRS airbags are stored, such as the steering wheel
pad and front and rear pillar garnishes, are damaged or cracked, have
them replaced by your Toyota dealer.
● Do not place anything, such as a cushion, on the front passenger’s seat.
Doing so will disperse the passenger’s weight, which prevents the sensor
from detecting the passenger’s weight properly. As a result, the SRS front
airbags for the front passenger may not deploy in the event of a collision.
■ Modification and disposal of SRS airbag system components
Do not dispose of your vehicle or perform any of the following modifications
without consulting your Toyota dealer. The SRS airbags may malfunction or
deploy (inflate) accidentally, causing death or serious injury.
● Installation, removal, disassembly and repair of the SRS airbags.
● Repairs, modifications, removal or replacement of the steering wheel,
instrument panel, dashboard, seats or seat upholstery, front, side and rear
pillars or roof side rails.
● Repairs or modifications of the front fender, front bumper, or side of the
occupant compartment.
● Installation of snow plows, winches, etc. to the front grille (bull bars or\
kan-
garoo bar etc.).
● Modifications to the vehicle’s suspension system.
● Installation of electronic devices such as mobile two-way radios and CD
players.
● Modifications to your vehicle for a person with a physical disability.
Page 221 of 552

221
2-4. Using other
driving systems
2
When driving
CAUTION
■The ABS does not opera te effectively when
● Tires with inadequate gripping ability are used (such as excessively worn
tires on a snow covered road).
● The vehicle hydroplanes while driving at high speed on wet or slick roads.
■ Stopping distance when the ABS is operating may exceed that of nor-
mal conditions
The ABS is not designed to shorten the vehicle’s stopping distance. Always
maintain a safe distance from the vehicle in front of you in the following situ-
ations:
● When driving on dirt, gravel or snow-covered roads
● When driving with tire chains
● When driving over bumps in the road
● When driving over roads with potholes or uneven surfaces
■ TRAC may not operate effectively when
Directional control and power may not be achievable while driving on slip-
pery road surfaces, even if the TRAC system is operating.
Do not drive the vehicle in conditions where stability and power may be lost.
■ When the TRAC/VSC/ABS are activated
The slip indicator light flashes. Always drive carefully. Reckless driving may
cause an accident. Exercise particular care when the indicator light flashes.
■ Replacing tires
Make sure that all tires are of the specified size, brand, tread pattern and
total load capacity. In addition, make sure that the tires are inflated to the
recommended tire inflation pressure level.
The ABS, TRAC and VSC systems will not function correctly if different tires
are installed on the vehicle.
Contact your Toyota dealer for further information when replacing tires or
wheels.
■ Handling of tires and the suspension
Using tires with any kind of problem or modifying the suspension will affect
the driving assist systems, and may cause a system to malfunction.
Page 231 of 552
231
2-5. Driving information
2
When driving
■
Tire chain installation
Observe the following precautions when installing and removing chains:
●Install and remove tire chains in a safe location.
● Install tire chains on the front tires only. Do not install tire chains on the
rear tires.
● Install tire chains on front tires as tightly as possible. Retighten chains
after driving 1/4 1/2 mile (0.5 1.0 km).
● Install tire chains following the instructions provided with the tire chains.
CAUTION
■Driving with snow tires
Observe the following precautions to reduce the risk of accidents.
Failure to do so may result in a loss of vehicle control and cause death or
serious injury.
●Use tires of the size specified.
● Maintain the recommended level of air pressure.
● Do not drive in excess of 75 mph (120 km/h), regardless of the type of
snow tires being used.
● Use snow tires on all, not just some wheels.
Page 342 of 552
342
4-1. Maintenance and care
Cleaning and protecting the vehicle exterior
■Automatic car washes
●Fold the mirrors and remove the antenna before washing the vehicle.
Start washing from the front of the vehicle. Make sure to re-install the
antenna and extend the mirrors before driving.
● Brushes used in automatic car washes may scratch the vehicle surface
and harm your vehicle’s paint.
● In certain automatic car washes, the rear spoiler may interfere with
machine operation. This may prevent the vehicle from being cleaned
properly or result in damage to the rear spoiler.
■ High pressure car washes
●Do not allow the nozzles of the car wash to come within close proximity
of the windows.
● Before using the car wash, check that the fuel filler door on your vehicle
is closed properly.
Perform the following to protect the vehicle and maintain it in prime
condition:
● Working from top to bottom, liber ally apply water to the vehicle
body, wheel wells and underside of the vehicle to remove any
dirt and dust.
● Wash the vehicle body using a sponge or soft cloth, such as a
chamois.
● For hard-to-remove marks, use car wash soap and rinse thor-
oughly with water.
● Wipe away any water.
● Wax the vehicle when the waterproof coating deteriorates.
If water does not bead on a clean surface, apply wax when the vehi-
cle body is cool.
Page 381 of 552

381
4-3. Do-it-yourself maintenance
4
Maintenance and care
Installing tire pressure warning valves and transmitters
When replacing tires or wheels, tire pressure warning valves and
transmitters must also be installed.
When new tire pressure warning valves and transmitters are
installed, new ID codes must be registered in the tire pressure warn-
ing computer and the tire pressure warning system must be initial-
ized. Have tire pressure warning valve and transmitter ID codes
registered by your Toyota dealer. ( P. 382)
■ The tire pressure warning system must be initialized in the fol-
lowing circumstances:
●When rotating front and rear tires which have different tire infla-
tion pressures
● When changing the tire size
When the tire pressure warning system is initialized, the current
tire inflation pressure is set as the benchmark pressure.
■ How to initialize the tire pressure warning system
Park the vehicle in a safe pl ace and turn the engine switch
(vehicles without a smart key system) or the “POWER” switch
(vehicles with a smart key system) off.
Initialization cannot be performed while the vehicle is moving.
Adjust the tire inflation pressure to the specified cold tire infla-
tion pressure level. ( P. 498)
Make sure to adjust the tire pressure to the specified cold tire
inflation pressure level. The ti re pressure warning system will
operate based on this pressure level.
STEP1
STEP2
Page 383 of 552
383
4-3. Do-it-yourself maintenance
4
Maintenance and care
■Replacing tires and wheels
If the ID code of the tire pressure warning valve and transmitter is not
registered, the tire pre
ssure warning system will not work properly. After
driving for about 20 minutes, the tire pressure warning light blinks for 1
minute and stays on to indicate a system malfunction.
■Tire life
Any tire over 6 years old must be checked by a qualified technician even
if it has seldom or never been used or damage is not obvious.
■Routine tire inflation pressure checks
The tire pressure warning system doe s not replace routine tire inflation
pressure checks. Make su re to check tire inflation pressure as part of
your routine of daily vehicle checks.
■Low profile tires (vehicles with P195/50R16 tires)
Generally, low profile tire s will wear more rapidly and tire grip perfor-
mance will be reduced on snowy and/or icy roads when compared to
standard tires. Be sure to use snow tires or tire chains on snowy and/or
icy roads and drive carefully at a speed appropriate for road and weather
conditions.
■Maximum load of tire
Check that the maximum load of the replacement tire is greater than 1/2
of the Gross Axle Weight Ratings (GAW R) of either the front axle or the
rear axle, whichever is greater.
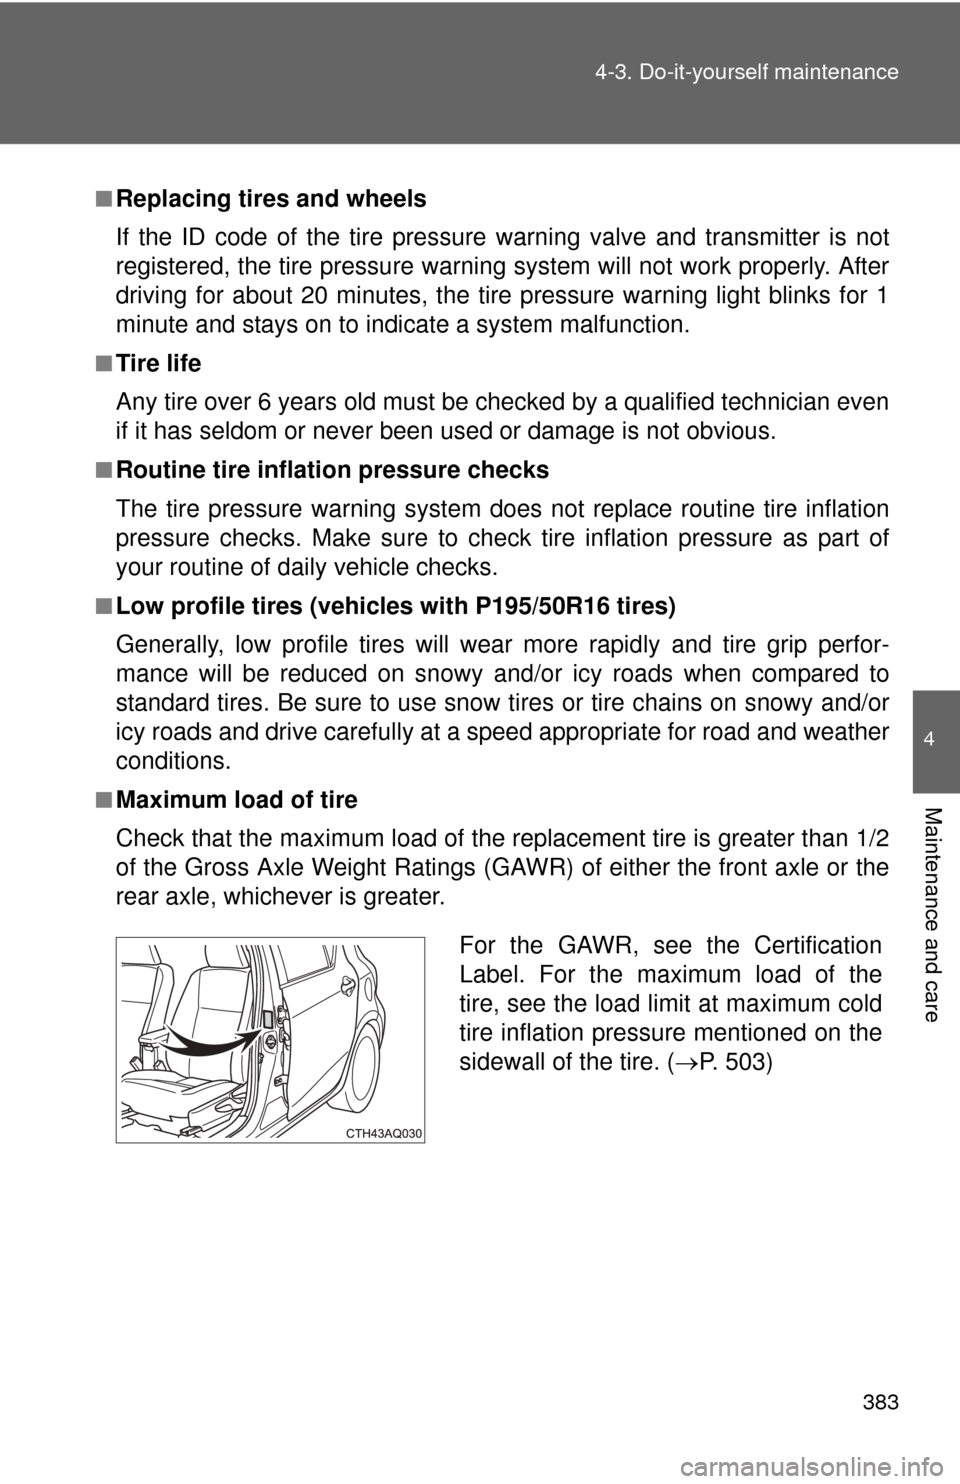
For the GAWR, see the Certification
Label. For the maximum load of the
tire, see the load limit at maximum cold
tire inflation pressure mentioned on the
sidewall of the tire. ( P. 503)
Page 413 of 552
413
4-3. Do-it-yourself maintenance
4
Maintenance and care
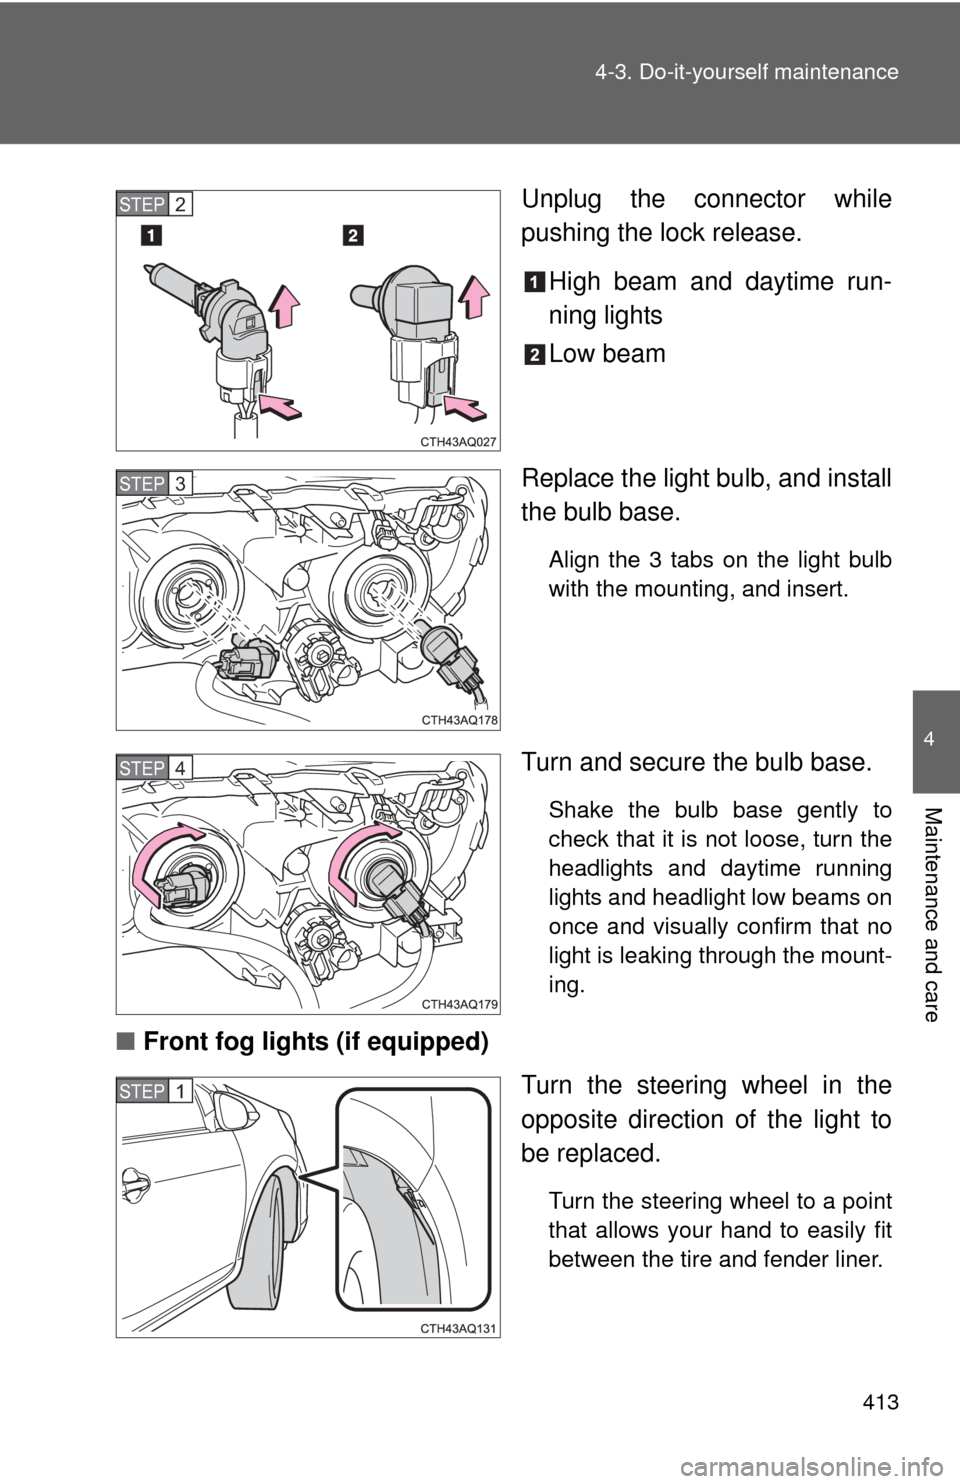
Unplug the connector while
pushing the lock release.
High beam and daytime run-
ning lights
Low beam
Replace the light bulb, and install
the bulb base.
Align the 3 tabs on the light bulb
with the mounting, and insert.
Turn and secure the bulb base.
Shake the bulb base gently to
check that it is not loose, turn the
headlights and daytime running
lights and headlight low beams on
once and visually confirm that no
light is leaking through the mount-
ing.
■ Front fog lights (if equipped)
Turn the steering wheel in the
opposite direction of the light to
be replaced.
Turn the steering wheel to a point
that allows your hand to easily fit
between the tire and fender liner.
STEP2
STEP3
STEP4
STEP1
Page 416 of 552
416 4-3. Do-it-yourself maintenance
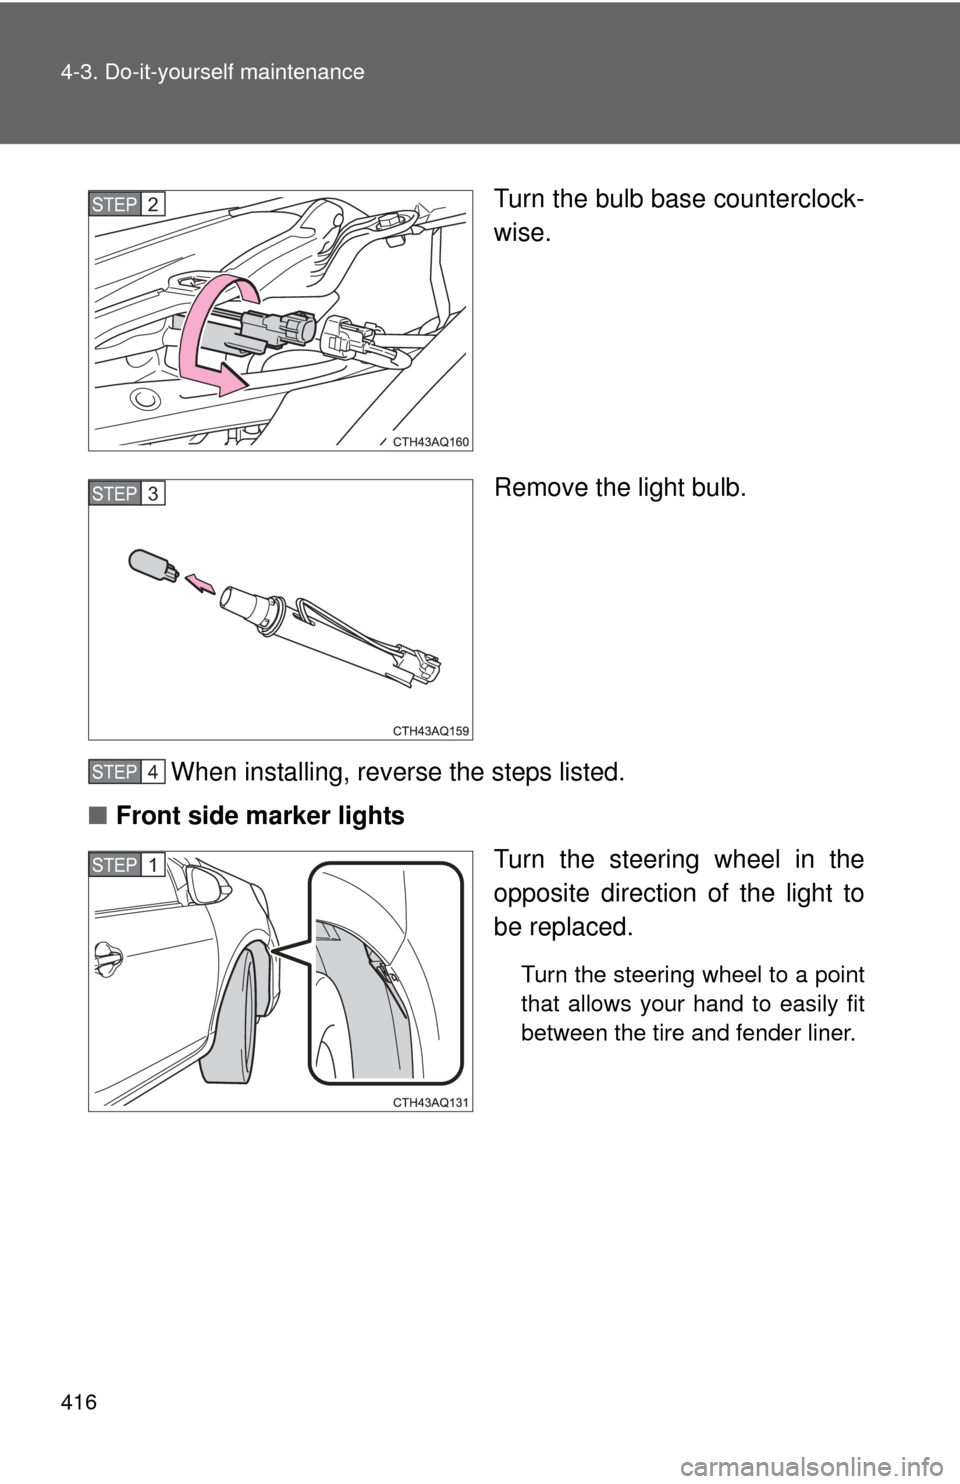
Turn the bulb base counterclock-
wise.
Remove the light bulb.
When installing, reverse the steps listed.
■ Front side marker lights
Turn the steering wheel in the
opposite direction of the light to
be replaced.
Turn the steering wheel to a point
that allows your hand to easily fit
between the tire and fender liner.
STEP2
STEP3
STEP4
STEP1