display TOYOTA PROACE CITY 2020 Repair Manual
[x] Cancel search | Manufacturer: TOYOTA, Model Year: 2020, Model line: PROACE CITY, Model: TOYOTA PROACE CITY 2020Pages: 272, PDF Size: 61.18 MB
Page 140 of 272
140
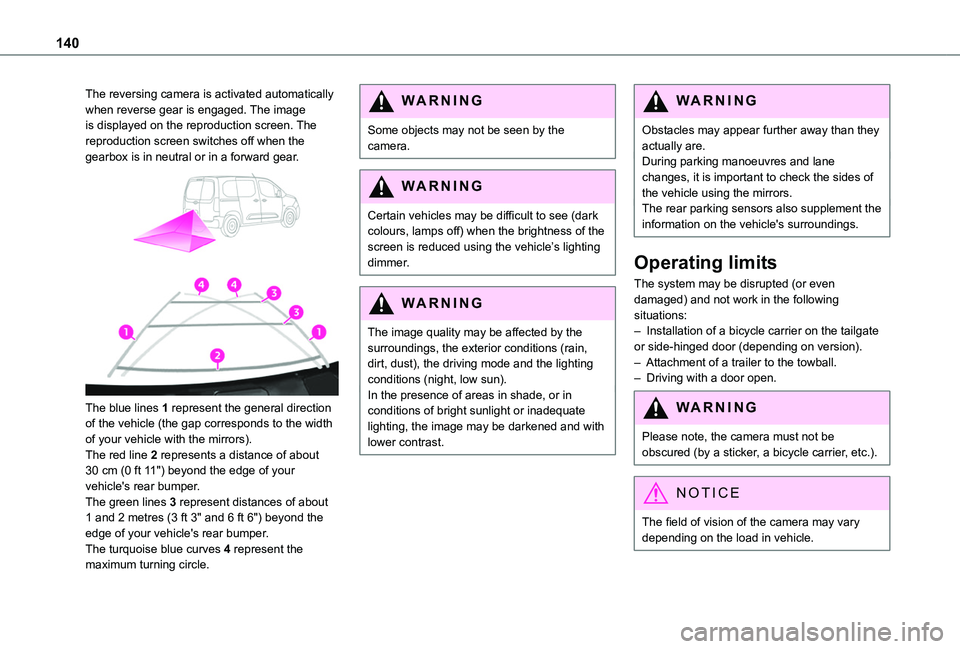
The reversing camera is activated automatically when reverse gear is engaged. The image is displayed on the reproduction screen. The reproduction screen switches off when the gearbox is in neutral or in a forward gear.
The blue lines 1 represent the general direction of the vehicle (the gap corresponds to the width of your vehicle with the mirrors).The red line 2 represents a distance of about 30 cm (0 ft 11") beyond the edge of your vehicle's rear bumper.The green lines 3 represent distances of about 1 and 2 metres (3 ft 3" and 6 ft 6") beyond the edge of your vehicle's rear bumper.
The turquoise blue curves 4 represent the maximum turning circle.
WARNI NG
Some objects may not be seen by the camera.
WARNI NG
Certain vehicles may be difficult to see (dark colours, lamps off) when the brightness of the
screen is reduced using the vehicle’s lighting dimmer.
WARNI NG
The image quality may be affected by the surroundings, the exterior conditions (rain, dirt, dust), the driving mode and the lighting conditions (night, low sun).In the presence of areas in shade, or in conditions of bright sunlight or inadequate lighting, the image may be darkened and with lower contrast.
WARNI NG
Obstacles may appear further away than they actually are.During parking manoeuvres and lane changes, it is important to check the sides of the vehicle using the mirrors.The rear parking sensors also supplement the information on the vehicle's surroundings.
Operating limits
The system may be disrupted (or even damaged) and not work in the following situations:– Installation of a bicycle carrier on the tailgate or side-hinged door (depending on version).– Attachment of a trailer to the towball.– Driving with a door open.
WARNI NG
Please note, the camera must not be obscured (by a sticker, a bicycle carrier, etc.).
NOTIC E
The field of vision of the camera may vary depending on the load in vehicle.
Page 141 of 272
141
Driving
6
Maintenance
recommendations
In bad or wintry weather, ensure that the camera is not covered by mud, frost or snow.Check the cleanliness of the camera lens regularly.If necessary, clean the camera with a soft, dry cloth.When washing the vehicle using a high-pressure jet, keep the spray directed at least 30 cm (0 ft 11") away from the camera.
Surround Rear Vision
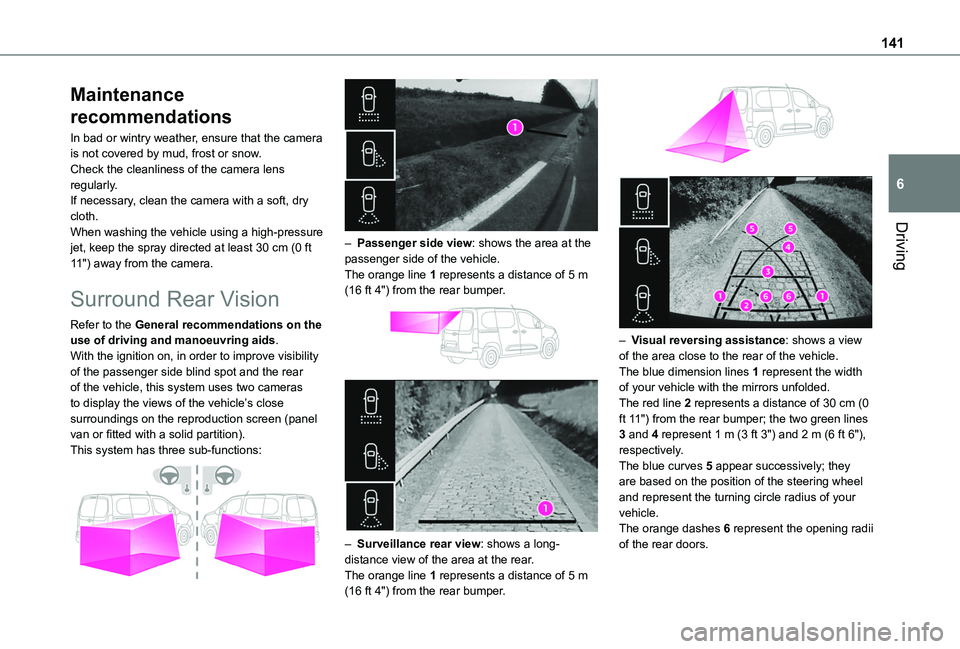
Refer to the General recommendations on the use of driving and manoeuvring aids.With the ignition on, in order to improve visibility of the passenger side blind spot and the rear of the vehicle, this system uses two cameras to display the views of the vehicle’s close surroundings on the reproduction screen (panel van or fitted with a solid partition).
This system has three sub-functions:
– Passenger side view: shows the area at the passenger side of the vehicle.The orange line 1 represents a distance of 5 m (16 ft 4") from the rear bumper.
– Surveillance rear view: shows a long-distance view of the area at the rear.The orange line 1 represents a distance of 5 m (16 ft 4") from the rear bumper.
– Visual reversing assistance: shows a view of the area close to the rear of the vehicle.The blue dimension lines 1 represent the width of your vehicle with the mirrors unfolded.The red line 2 represents a distance of 30 cm (0 ft 11") from the rear bumper; the two green lines 3 and 4 represent 1 m (3 ft 3") and 2 m (6 ft 6"), respectively.The blue curves 5 appear successively; they are based on the position of the steering wheel and represent the turning circle radius of your vehicle.The orange dashes 6 represent the opening radii of the rear doors.
Page 142 of 272
142
WARNI NG
Please routinely check your exterior mirrors while driving and during manoeuvres.
WARNI NG
Some items may not be seen by the rear camera.
WARNI NG
Certain vehicles may be difficult to see (dark colours, lamps off) when the brightness of the screen is reduced using the vehicle’s lighting dimmer.
WARNI NG
The image quality may be affected by the environment, the exterior conditions (rain, dirt, dust), the driving mode and the lighting conditions (night, low sun).In the presence of areas in shade, or in conditions of bright sunlight or inadequate lighting, the image may be darkened and with lower contrast.
WARNI NG
Obstacles may appear further away than they actually are.During parking manoeuvres and lane changes, it is important to check the sides of the vehicle using the mirrors.The rear parking sensors also supplement the information on the vehicle's surroundings.
Activation / Deactivation
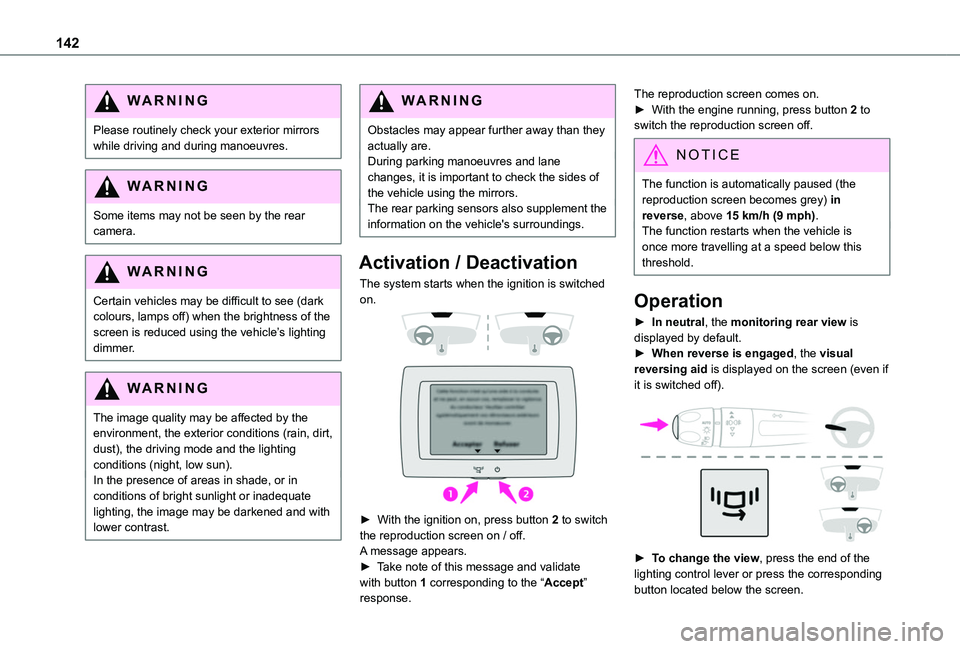
The system starts when the ignition is switched on.
► With the ignition on, press button 2 to switch the reproduction screen on / off.
A message appears.► Take note of this message and validate with button 1 corresponding to the “Accept” response.
The reproduction screen comes on.► With the engine running, press button 2 to switch the reproduction screen off.
NOTIC E
The function is automatically paused (the reproduction screen becomes grey) in reverse, above 15 km/h (9 mph).The function restarts when the vehicle is
once more travelling at a speed below this threshold.
Operation
► In neutral, the monitoring rear view is displayed by default.► When reverse is engaged, the visual reversing aid is displayed on the screen (even if it is switched off).
► To change the view, press the end of the lighting control lever or press the corresponding button located below the screen.
Page 149 of 272
149
Practical information
7
Overload indicator
The overload indicator is a driving aid and informs you that the maximum authorised weight has been exceeded; this may be either the gross vehicle weight (GVW) or the maximum authorised weight on either axle (front and rear) (GAWR).
WARNI NG
The indicator does not relieve the user from their responsibility.
NOTIC E
Even if you correctly measure the weight of the vehicle's load, any factor that may vary this weight (driver/additional passengers seated or taking on additional fuel) after the measurement may put the vehicle into the overload condition.
WARNI NG
The load includes the weight of the items stored in the loading area (including any fittings such as shelves), but also the weight of all persons on board the vehicle, the amount of fuel and various equipment fitted on the vehicle.For optimal performance, the vehicle must be parked and loaded on level ground (avoid the following conditions: parking on a slope or straddling a pavement).
WARNI NG
Attaching a trailer to your vehicle may affect the operation of the system.
Operation
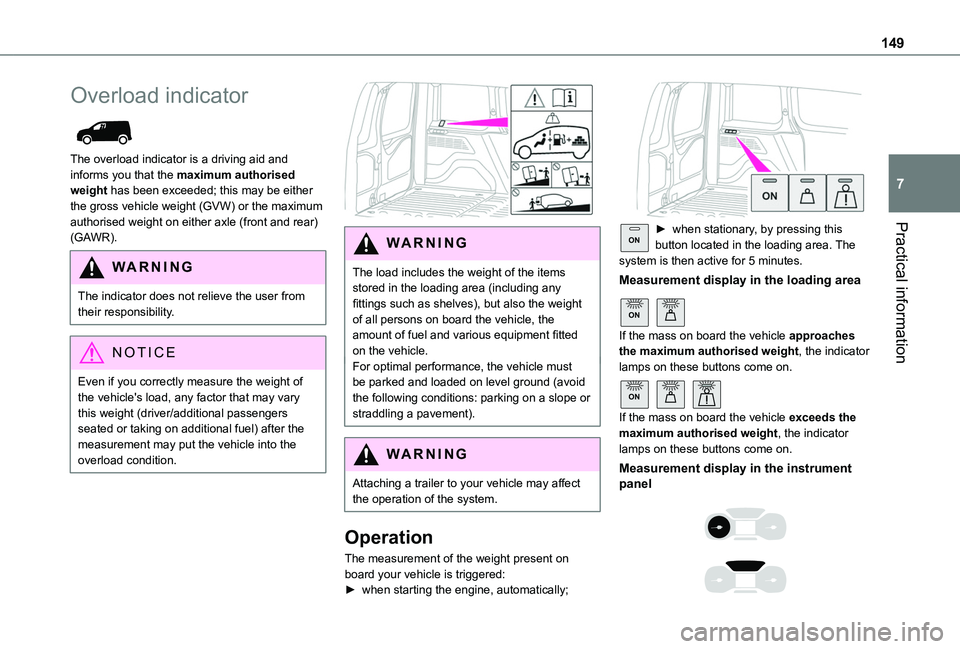
The measurement of the weight present on board your vehicle is triggered:► when starting the engine, automatically;
ON► when stationary, by pressing this button located in the loading area. The system is then active for 5 minutes.
Measurement display in the loading area
ON
If the mass on board the vehicle approaches the maximum authorised weight, the indicator lamps on these buttons come on.
ON
If the mass on board the vehicle exceeds the maximum authorised weight, the indicator
lamps on these buttons come on.
Measurement display in the instrument panel
Page 150 of 272
150
If the mass on board the vehicle exceeds the maximum authorised weight, this indicator lamp comes on.
Malfunction
Display of the malfunction in the loading area
After the measurement is triggered from the loading area, the LEDs of the 3 buttons flash simultaneously for about 3 seconds and then go out.Contact a TOYOTA dealer or a qualified workshop.
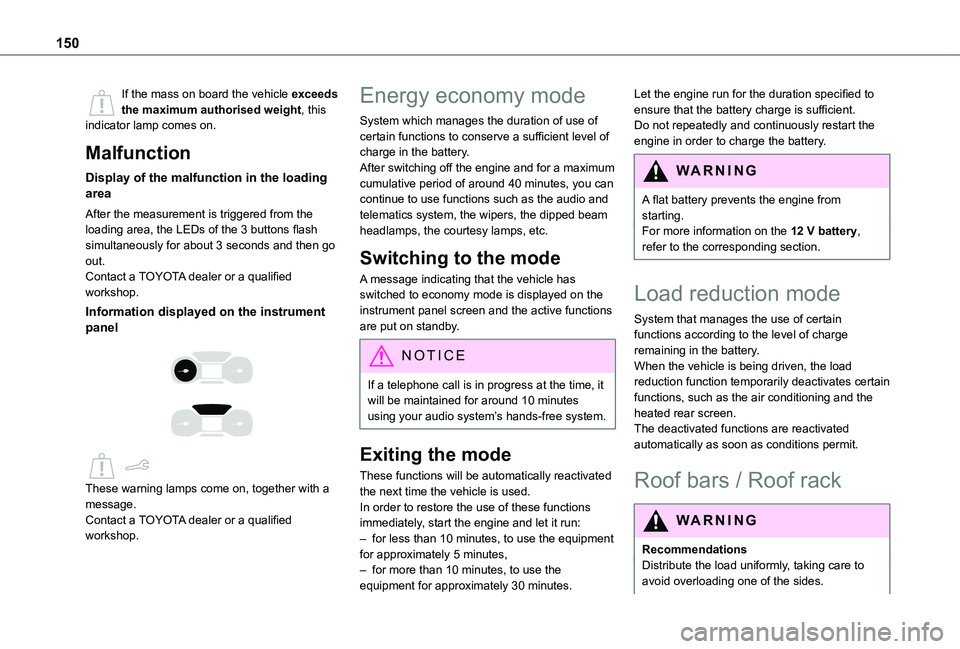
Information displayed on the instrument panel
These warning lamps come on, together with a message.Contact a TOYOTA dealer or a qualified workshop.
Energy economy mode
System which manages the duration of use of certain functions to conserve a sufficient level of charge in the battery.After switching off the engine and for a maximum cumulative period of around 40 minutes, you can continue to use functions such as the audio and telematics system, the wipers, the dipped beam headlamps, the courtesy lamps, etc.
Switching to the mode
A message indicating that the vehicle has switched to economy mode is displayed on the instrument panel screen and the active functions are put on standby.
NOTIC E
If a telephone call is in progress at the time, it will be maintained for around 10 minutes using your audio system’s hands-free system.
Exiting the mode
These functions will be automatically reactivated the next time the vehicle is used.In order to restore the use of these functions immediately, start the engine and let it run:– for less than 10 minutes, to use the equipment for approximately 5 minutes,– for more than 10 minutes, to use the equipment for approximately 30 minutes.
Let the engine run for the duration specified to ensure that the battery charge is sufficient.Do not repeatedly and continuously restart the engine in order to charge the battery.
WARNI NG
A flat battery prevents the engine from starting.For more information on the 12 V battery,
refer to the corresponding section.
Load reduction mode
System that manages the use of certain functions according to the level of charge remaining in the battery.When the vehicle is being driven, the load reduction function temporarily deactivates certain functions, such as the air conditioning and the heated rear screen.The deactivated functions are reactivated automatically as soon as conditions permit.
Roof bars / Roof rack
WARNI NG
RecommendationsDistribute the load uniformly, taking care to avoid overloading one of the sides.
Page 176 of 272
176
Fuse No.Rating (A)Functions
F110Wireless smartphone charger, interior electrochrome rear view mirror.
F415Horn.
F620Screenwash pump.
F71012 V socket (rear).
F1030Electric locks module.
F1310Telematics and radio controls.
F145Alarm, overload indicator, advanced telematic unit.
F193Trailer interface unit.
F223Surround Rear Vision display screen.
F235Generic trailer interface unit.
Fuse No.Rating (A)Functions
F275Additional heating.
F2920Audio system, touch screen.
F321512 V socket (front).
F345Mirror control.
F365USB socket.
Engine compartment fuses
The fusebox is placed in the engine compartment near the battery.
Access to the fuses
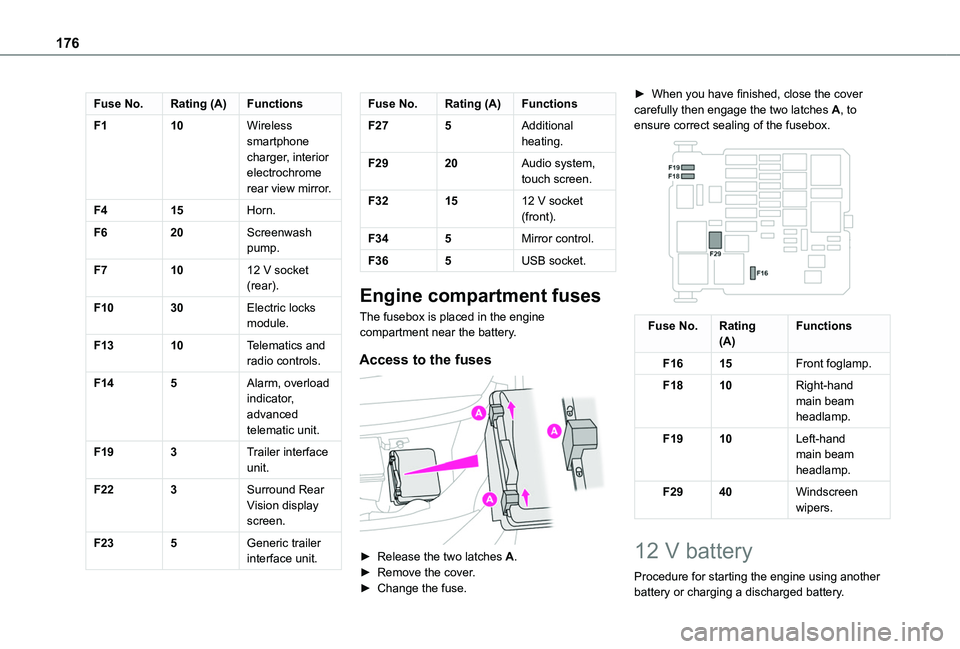
► Release the two latches A.► Remove the cover.► Change the fuse.
► When you have finished, close the cover carefully then engage the two latches A, to ensure correct sealing of the fusebox.
Fuse No.Rating(A)Functions
F1615Front foglamp.
F1810Right-hand main beam headlamp.
F1910Left-hand main beam headlamp.
F2940Windscreen wipers.
12 V battery
Procedure for starting the engine using another battery or charging a discharged battery.
Page 191 of 272
191
Bluetooth® audio system
10
Bluetooth® audio system
NOTIC E
The different functions and settings described vary according to the version and configuration of your vehicle.
WARNI NG
As a safety measure and because it requires sustained attention by the driver, the pairing
of a Bluetooth mobile telephone with the Bluetooth hands-free system of your audio system must be done with the vehicle stationary and the ignition on.
WARNI NG
Your audio system is coded in such a way that it will only operate in your vehicle.All work on the system must be carried out exclusively by a dealer or qualified workshop, to avoid any risk of electrocution, fire or mechanical faults.
NOTIC E
To avoid discharging the battery, the audio system may switch off after a few minutes if the engine is not running.
First steps
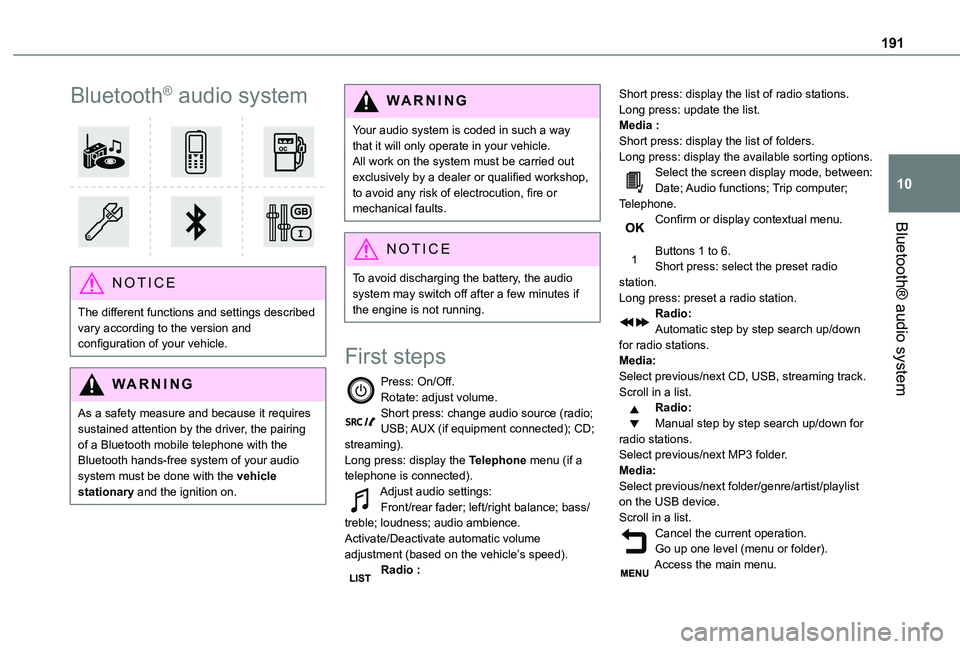
Press: On/Off.Rotate: adjust volume.Short press: change audio source (radio; USB; AUX (if equipment connected); CD; streaming).Long press: display the Telephone menu (if a telephone is connected).Adjust audio settings:Front/rear fader; left/right balance; bass/treble; loudness; audio ambience.Activate/Deactivate automatic volume adjustment (based on the vehicle’s speed).Radio :
Short press: display the list of radio stations.Long press: update the list.Media :Short press: display the list of folders.Long press: display the available sorting options.Select the screen display mode, between:Date; Audio functions; Trip computer; Telephone.Confirm or display contextual menu.
Buttons 1 to 6.Short press: select the preset radio station.Long press: preset a radio station.Radio:Automatic step by step search up/down for radio stations.Media:Select previous/next CD, USB, streaming track.Scroll in a list.Radio:Manual step by step search up/down for radio stations.
Select previous/next MP3 folder.Media:Select previous/next folder/genre/artist/playlist on the USB device.Scroll in a list.Cancel the current operation.Go up one level (menu or folder).Access the main menu.
Page 192 of 272
192
Activate/Deactivate TA function (traffic announcements).Long press: select type of announcement.Selection of FM/DAB/AM wavebands.
Steering mounted controls
Steering mounted controls -
Type 1
Radio:Select the previous / next preset radio station.Select the previous / next item in a menu or a list.Media:Select the previous / next track.Select the previous / next item in a menu or a list.
Radio:Short press: display the list of radio stations.Long press: update the list.Media:Short press: display the list of folders.Long press: display the available sorting options.Other than telephone call:Short press: changing audio source (radio; USB; AUX (if equipment connected); CD;
streaming), confirmation if the "Telephone" menu is open.Long press: open the "Telephone" menu.In the event of a telephone call:Short press: accept the call.Long press: reject the call.During a telephone call:Short press: open the contextual telephone menu.Long press: end the call.Confirm a selection.
Increase volume.
Decrease volume.
Mute / Restore sound by simultaneously pressing the increase and decrease volume buttons.
Steering mounted controls -
Type 2
Access to the main menu.
Increase volume.
Mute / Restore the sound.
Decrease volume.
Other than telephone call:Short press: changing audio source (radio; USB; AUX (if equipment connected); CD; streaming), confirmation if the "Telephone" menu is open.Long press: open the "Telephone" menu.In the event of a telephone call:Short press: accept the call.Long press: reject the call.During a telephone call:Short press: open the contextual telephone menu.Long press: end the call.Start voice recognition on your smartphone via the system.Radio:Short press: display the list of radio stations.Long press: update the list.Media:Short press: display the list of folders.Long press: display the available sorting options.Radio:
Select the previous / next preset radio station.Select the previous / next item in a menu or a list.Media:Select the previous / next track.Select the previous / next item in a menu or a list.Press the thumbwheel: confirm.
Page 193 of 272
193
Bluetooth® audio system
10
Menus
Depending on version."Multimedia": Media settings, Radio settings."Telephone": Call, Directory management, Telephone management, Hang up."Trip computer".
"Maintenance": Diagnosis, Warning log, etc."Connections": Manage connections, search for devices."Personalisation-configuration": Define the vehicle parameters, Choice of language, Display configuration, Choice of units, Date and time adjustment.Press the "MENU" button.
Move from one menu to another.
Enter a menu.
Radio
Selecting a station
Press the SOURCE button repeatedly and select the radio.Press this button to select a waveband (FM / AM / DAB).
Press one of the buttons for an automatic search for radio stations.Press one of the buttons to carry out a manual search up / down for radio frequencies.Press this button to display the list of stations received locally.To update this list, press for more than two seconds. The sound is cut while updating.
RDS
NOTIC E
The external environment (hills, buildings, tunnels, basement car parks, etc.) may block reception, including in RDS mode. This is a normal effect of the way in which radio waves are transmitted and does not indicate any failure of the audio equipment.
NOTIC E
If RDS is not available, the RDS symbol appears struck out in the screen.
WARNI NG
The RDS, if activated, enables you to continue listening to the same station by automatic retuning to alternative frequencies. However, in certain conditions, coverage of
an RDS station may not be assured throughout the entire country as radio stations do not cover 100% of the territory. This explains the loss of reception of the station during a journey.
Short procedure
In "Radio" mode, press the OK button to activate or deactivate RDS directly.
Long procedure
Press the MENU button.
Select "Audio functions".
Press OK.
Select the "FM waveband preferences" function.Press OK.
Select "Frequency tracking (RDS)".
Press OK, RDS is displayed on the screen.
Play TA messages
WARNI NG
The TA (Traffic Announcement) function gives priority to TA alert messages. To operate, this
Page 194 of 272
194
function needs good reception of a radio station that carries this type of message. When a traffic report is transmitted, the current audio source (Radio, CD, etc.) is interrupted automatically to play the TA message. Normal play of the media previously playing is resumed at the end of the message.
WARNI NG
Take care when increasing the volume while listening to TA messages. The volume may prove too high on return to the original audio source.
Press the TA button to activate or deactivate traffic messages.
Receiving INFO messages
NOTIC E
The INFO function gives priority to TA alert messages. To be active, this function needs good reception of a radio station that transmits this type of message. When a message is transmitted, the current audio source (Radio, CD, USB, etc.) is interrupted
automatically to receive the INFO message. Normal play of the media previously playing is resumed at the end of the message.
Make a long press on this button to display the list of categories.Select or deselect categories.
Activate or deactivate the reception of the corresponding messages.
Display TEXT INFOS
NOTIC E
Radio text is information transmitted by the radio station related to the station's current programme or song.
When the radio station is displayed in the screen, press OK to display the contextual menu.Select "RadioText (TXT) display" and confirm OK to save.
DAB (Digital Audio
Broadcasting) radio
Digital Radio
Depending on version
NOTIC E
If the current DAB radio station is not available on FM, "DAB FM" is struck out.
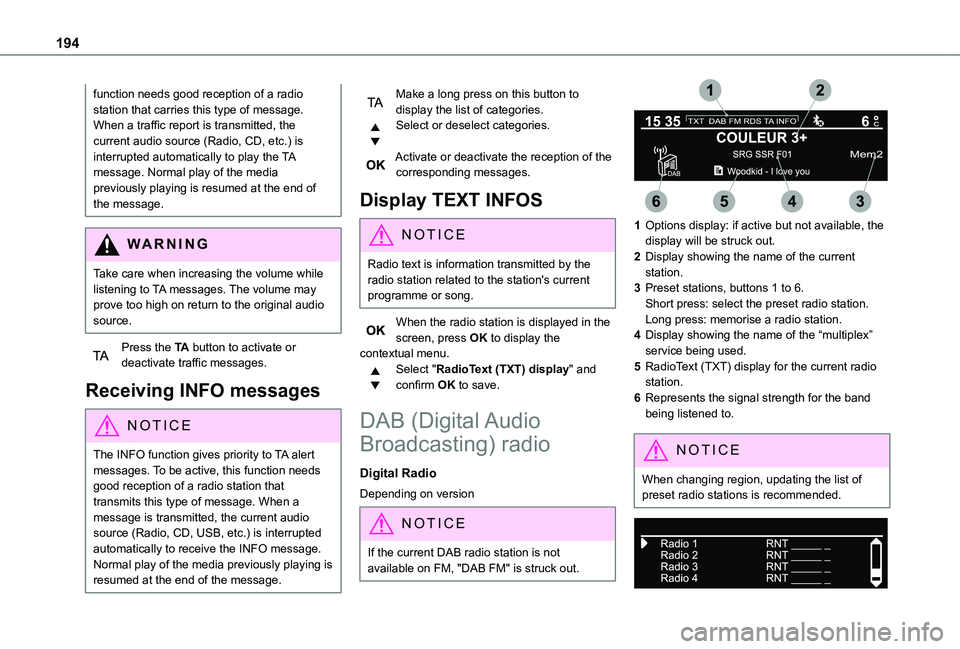
1Options display: if active but not available, the display will be struck out.
2Display showing the name of the current station.
3Preset stations, buttons 1 to 6.Short press: select the preset radio station.Long press: memorise a radio station.
4Display showing the name of the “multiplex” service being used.
5RadioText (TXT) display for the current radio station.
6Represents the signal strength for the band being listened to.
NOTIC E
When changing region, updating the list of preset radio stations is recommended.